1
A MERICA N
OWNED
A MERICA N
M A DE
OUTDOOR POWER EQUIPMENT
I
IMPORTANT!
Record
the exacl
Model
NO.
and Serial No. which appear or, the u per portion of
rear frame of your unit in _he space be_w, YOU must
have
Ihese
numbers,
along
with
1he date
of
purchase, Jr3order to receive warranty or service
MEETS
MODEL NO
ANSI
SAFETY
13E_6LLL_
STANDARDS
SERIAL
FIIIIIIIII]I
WARNING:
This unh IS equipped
with an
unimproved
forest covered, brush-covered
with a spark arrestor
meeting
applicable
q18_nlainec in effective worki'lg order by the
NO.
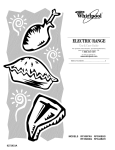
TRANSMATIC
FRONT ENGINE
LAWN TRACTORS
Model 600 Series
Lawn Tractors
internal combustion
engine and should not he used on or near any
or g_ase-coveJ_d
land unless the engine s exhausl system is equipped
local or state laws _il any), I! a spark arrestor
is used, il should be
operator.
In the State o_ California
the above is required by lew (Section 4442 of the CMifornia Public Resources
Code)¸
Olher s_ate$ may have similar law5 Federal laws apply on federal lands
A spsrk arrestor for the muffler is avail
able through your nearest engine authorized
_ervice dealer or con[aCl the semice department,
P.O Box 368022,
Cleveland, Ohio 44136-9722¸
MTD PRODUCTS
PRINTED
IN U.S.A.
INC • P.O. BOX 368022 • CLEVELAND,
OHIO 44136-9722
FORM
NO.
770-8637L
iMPORTANT SA EOPE.A.,O.P
_THI$
AL SAFETY AND/0R PROPERTY OF YOURSELF AND OTHERS. READ AND FOLLOW ALL iNSTRUCTIONS IN THIS MANUAL
SYMBOLPOINTSOUT IMPORTANT SAFETYINSTRUCTIONSWHICH, IF NOT FOLLOWED,DBULB ENDANGERTHE PERSONBEFOREA'FrEMPTJNGTO OPERATEYOUR UNIT•WHEN YOU SEETHIS SYMBOL-- _
HEEDITS WARNING.
Your lawn mower was built to be operated accorthngto the rules for safe operation in this manor!, As
wgh any lype of power equipment, earalessnesz or error on the parJ of the operator can result In thjuxy.
DANGER;
t•
2
3.
4.
51
Thfs lawn mower is capable of amputhfing hands and fee sod brow ng objects. Fagare o observe be
fellowthg safely instrucOonsooul_ result in serious thiui_ or death.
the operator may be struck or pulled from the unD, which
could result in serious injury.
20. D]sBngage al_ attachment clutches, tdoroughlg depress the
brake pedal, and _dift into neutral before attempting to sfad
engine.
21. Your mower is designed to CutnormsI resigonDal grass of a
height no more than 10' Do not attempt to mow through
unusually tall, dry grass (eIg., pasture) or piles of dry leaves.
Debris may build up on the mowor deck or contact the engJne
exhaust gresendng a doteMial fire haTard
Head, understand,and fogew MPirlsttuctJonsin the manual and
on the machine before starting Keep this manual in a safe
piece Ior future and regular reference and for ordering replacement pads
Only allow responsible individualsfamiliar with the Insttuctions
to operate the machine. Know controls and how to step the
machine quickly
Do not put hands or feet under curing deck er near rotating
parts
Clear the area of objectssuch _s rocks, toys, wire. etc., v,fticd
_lli
_LOPE OPER_J_J_J
could be picked up _nd thrown by the blade• A sma4 odium
Slopes are a malor factor related to loss of control and Np-ove_
may have been overlooked and could be accidentally thTown by
accidents which can result in severe injury or death. All ElOpes
the mower ina_y girection and cause injury to you or a
req#ire extra caution If you cannot back up the slope or if you feel
bystander To help avoid a thrown ogieetsinjury, keep
uneasy on it, do not rgow I!
children, bystanders and heJpers at least 75 feet from the
For
your safety, use the slope gauge included as part cf this manual
mower whge it is in operaNon Always wear safety glasses or
to measure slopes before operatatg this unit on a sloped or hilly
eBfety goggles earing operatatn or while performing an
area [l the slope Jsgreater than 15° as shown on th._ eJogegauge,
adjustment or repair, to protect eyes from foreign objects Slop
do not operate this unit on that areaor serious injJry gould resuit.
the blade(s) whencrossnggraveldrives, walksor roads•
DO:
Be sure tile area iS CJaBrOf Other 9eople before mowing Stop
machine
d anyone enters the ar_a
Remove obstacles such as rocks, limbs, eta
Watch for holes, ruts or bemp_. Uneven terrain couJd overturn the
machine¸ Nail press can hig_ obstacles.
Use Mow speed. Shoos8 a low enough gear so that you will not
have to stop or shift wMb on the elope Always keep machine rn
gear when going gown elopes to take advantage ot engine braking
aaron.
Fol]ow the mamftasiurer's r_eommendations for wheel weights or
oeunterweigl'ts to improve sthbigty
Use extra care with grass catchers or other atthohmenls These can
change the stability of the mash!no
Keep all movement on _he slopes slow and gradual, Do nat make
sudden changes In speed or ddeclion R_pid engagement or braking could cause the front of the m_ehlne to liH and rapidly flip over
6 Naver s_rrypassengers
7 Disengage glade(s) Pefore shifting into reverseand baok:ng up
8 Be aware cl the mower and a:taehmext discharge direction and
go not poinl g at anyone, Oo not _gerate the mower wthoat
g
Slow down gefore turning
Operate the machine
Avoid erratic operation _o excessive speed
smoothly
blade(s) place transmission JR neutral, Eel perk brake
end;hound remove key before dismoungng
stop
12. Stop elgine and wait until bJade(s) comae to a complete stop
before Ja) removing gra_s catcher or unclogging chute, el Jb)
making any repairs, adju_Nng or re qaovinp any gr_s or debris¸
13. Mow only in d_ylig th or good artificial righr.
14. Do no_ operate the machine whil_ under the inNuenoe of
_lcahol or erode.
lg
Avod stuN[no or stopping on a slope If tires lose ftaetion, disengage the gladeJ_j and proceed slowly straight down the slop_
DO NOT:
Be not turn on slopes unless necessary; then¸ tuln elow;y and
Use extra care when Ioaoing or unload ng th_ machine into
trailer or truck. This and should t70t be dover, Up or down a
ramp oxto a trairer or truck under aower, because the unit
could tip over, causing serio{ts personal hjury The unil muat
17 Never make a cutting he[gLt adjustment
white engine is
iunoing g operMer must dismount to go so
1g Wear sturdy, rough-soled work shoes and closeNithng slacks
and shirts. Do not w_ar Joose fN'lg clothes o 'oval g They
can be _ught in moving perth. Neve_ operate _. unit in bare
feel sandals, or sneakerS¸
lg Cheek overhead clearance e_rMugy before driving under power
lines, wires, aridges or low hanging tree branoaes, bMore
entering or leaving buildings, or in any other situetion where
Do not mow near drop ofts, ditches or embankment_ The mower
00LPdsuddenly turn over if a whe_l is over th_ edge of a cliff or
De nol mow on wet grass Reduced tractioneouidcausesridMg
Do not try to stabilize the machine by putting your toot on the
ground¸
DO nDI Use grass c_leger on steep slopes.
_lq,
T_agir. aeeiden_s _n ooeu_ g _he operator is not alert _o _he gres _
_nce oI ohgd_en_ ohgg_
a_ uftan attracted _o _de machine and
_h_ mowing activity, N_v_r assume tba_ ghgdren will rerrlain wdere
you las_ saw them_
,
D
1. Keepchildren out ot the mowing area and in watcntW care of
2.
3
4
5
6
7
an adult other than the operator.
Be &left and turn machine off if children enter the area¸
Before _ng when hackints look behind and d_n for sm_ll chil[lron.
Never carry children They may fall off and be seriously injured
or interfere whh the safe machine operation.
Neverallow childrenunder14 years old to opertse the machine
Children 14 years and over shouldotsy operate machine under
close parental supervision and proper Instruetfem
Use extra care when approaching bgnd corners,shrubs, trees
or other objects that may obscure your vision of a child or
otherhazard.
Remove key when machine is unattended to prevent
unauthorized operation
t
Lisa extreme care in handgng gasagne and other fuefe. They
are extremely flammable and the vapors are exptssive
a. Use only an approved container.
b Never remove tool cap or add fuel with the engirm r_ccfng.
Allow engineto coal ts leas_two minutes before refueling.
e, Replace fuel cap securely and wipe off any spilled fuel
before slatting the engine as it may ozuse a fire or
e×pJosion.
d Extinguish arl cigarst_es, cigars, pipes and other sources of
ignition.
e Never refuel the mash[n-_ indoors because fuel vapors wig
accumulate in the area
f Never store the fuelcontainer or machine inside whereth_re
is an open flame or spark, s_ch as a gas go! water heater,
space heater or furnace.
2 Never run a machine inside a closed area.
3 TO redue_ fire hazard, keepthemaetsne freeotgrass leaves or
4
g Check the blade an(/ engine mounting
bolts at frequent
intervals lor proper Nghtnees Also, visua]ly inspect blade for
damage {e.g,. _xcessJVe wenT, bent, cracked)¸ Replace with
blade which meet_ original equipment _peciflcatlons
6. Keep all nuts. bolts and _sr_w_ tight to be 8are the equipment
is in sate working condition
7. Never tamper with safety devices Check their proper operstion
regularly. Use all guards as iastr_ctsd in this manual.
8. After striking a foreign object, stop the engine, remove the wire
from the spark pJ_g Bad thoroughly inspect the mower for any
damage¸ Repair the damage before restargng and opertslng the
m0w_r,
g. gras_ cat_her components _re subiest to w_r, damage and
dsteNorstion,
which eourd expose moving parts or agow
objests to be thrown, For your satsty protection, frequently
check components
end r_grace with m_nuf_nturer's
recommended gaffs when necessary.
10. Mower blades are sharp and can cut. Wrap the blade/s) or
wez.r groves and use extra _atsion when servicing blad_J£J.
11, Check brake operation frequently
Adjust and service as
requPed.
f2. Muffler. engine B_d belt 0u_rds become hol dating operafioc
and aa_ Cause a burn. Allow to cool down _efore touching,
lg
14
DO not change th_ engin_ governor setdnps or overspeed the
aapts,. E×cessive engfe_ sgeed5 are dangerous.
Observe proper disposal laws and regurtsiong, improper P[saos_l of fluids and r-afedals ca_ harm to_ environment and the
ecology.
a Prior to disposal de!ermine the aroper me_hod to dispose
of w_sts from your Io_al Environmental Pra_ctle_ Agency.
Recycling centsrs ar_ estabgshed to gingerly dispose of
materials iF1an environ men_al!y safe tsShion
b. USe proper containers when braining fluids¸ De nst use
t_od or h@verag8 containers that map mislead $_meone
inlo drinking from ihem. Proper_y dispose of th_ containers
m_chine to cool at I=.ast 5 minutes Before storing
Before cleaning, i_pairing or lnspetsing, make certain the blade
and all moving par4 have stopped. DiscoNne_ the spark plug
wire and keep _he wire away _rom the spark plug to pre,/ent
accidental starting.
c
DO NOT pour oil or other fluids into the graune, down a
drai_ or into a sNea11, p_od. lake or other body of w_fer
Observe Environmental
Prstec_ion Agelcy regul_Pons
when disposing cl oil fuel, coolant, brake i]Lid filters,
haft cries, tires and other harmful w_sts
SAFETYLABEL
WARNING--YOURRE$PDNS]BILITY
Restrict the use of this power machine to persons who read,
understand and follow the warnings and instrJelions
in this
manual and On the m_chine.
UNPACKING
TO REMOVE UNIT FROM CRATE
1 Remove all screws from the top of the crate using
a 1/4" hex head socket or a flat blade screwdriver.
2 To remove ends, grasp top board on the end, and
purl towards you in _ downward motion.
3. Sel panel aside to avoid tire punctures.
and discard
plastic
bag which
Loose parts (may include the owner's guide,
steering wheel, b_ttery fluid, chute deflector,
optional mulching kib etc.) are on the seat and
wrapped in plastic. Carelully cut and remove the
plastic wrap. Remove loose pans from the seat.
7
Make certain brake is released.
Raise the deck
and push the unit off the skid.
4. Repeat procedure for e_ch side of the crate.
5. Remove
unit.
6
covers
N. If your unit has a two piece s;eering £h_ff, the
upper s_eedng shaft is tied to the steering wheel
tor shipping. Cut and remove the cable tie.
ASSEMBLY
INSTRUCTIONS
BATTERYINFORMATION
IMPORTANT:
After assembly,
service engine
with gasoline, and check og level as instructed
in the separate engine manual packed with
your unit.
WARNING
A, Battery acid must be bandied with great care as
contact with it can burn and blister the skin. It is also
advisable to wear protective clothing (goggles, rubber gloves and apron) when working with it,*
B, Should battery acid accidentally splatter into the
eyes or onto the face, rinse the affected
area
immediately with clean cold water, If there [s any
further discomfort, seek prompt medical attention
C. If acid sg[tls on clothing, first dilute it with clean
water, then neutralize with a solution of ammonia/
water or baking soda/water.
D. Since battery acid is corrosive, do not pour it into
any sink or drain. Before discarding empty electrolyte containers,
rinse them wkh a neutralizing
solution
E. NEVER connect or disconnect charger clips to battery while charger is turned on _s it can cause
sparks.
Keep all lighted materials
(cigarettes= matches.
Jighters) away from the battery as the hydrogen
gas generated
during charging
can be combustible,
G, As a further precaution,
a weir-ventilated
area.
*Always
when
only charge
shield eyes, protect
working near batteries.
the battery
skin and clothing
in
NOTE:
Reference
to right
unit is observed
ward,
from
ACTIVATING
AND CHARGING
for-
THE SATTERY
Do not activate battery (fgr with battery acid) until
battery is actually placed in service. Be certain to
read previous warn}ngs
before acNvat[ng
the
battery.
1. Pivot the seat forward. Unhook the strap which
secures the battery (hook is on rear frame, uqder
fender). Disconnect the positive cabJe from the
positive
terminal.
Save the hardware
for
reassembly.
2, Remove the battery from the lawn tractor, paying
attention to how tbe battery is ptaeed in the unit,
and how the drain tube (adached to 1he batlery) is
routed
the battery
brochure
NOTE;
white
as ir'structed
inetuded
Read instructions
Since batteries produce explosive gases, keep
all lighted
materials
(cigarettes,
lighters,
matches,
etc.) away. Be sure to charge battery
only in well-venflJated areas Make certain venting
,ath of battery (drain tube) is always open.
KEEP BATTERIES
OUT OF THE REACH OF CHILDREN!
seat, facing
*If your steedng wheel cap is square, you must have
a socket wrench in order to install the steering wheel
Star1"
Battery contains sulfuric acid. Refer to warning
above. Antidote: EXTERNAL--Flush
with water,
INTERNAL--Drink
large quantities
of water or
milk. Follow with milk of magnesia, beaten eggs or
vegetable oil, Call physician [mmediatery. EYES:
FJush with cool water for at leas115 minutes, then
get prompt medical attention.
the driver's
side of the
TOOLS REQUIRED FOR ASSEMBLY
(1) 1/4" socket wrench or flat blade screwdriver
(1) 1/2" wrench or sccket wrench*
(1) 9/16" wrench or socket wrench
(2) 7/16' wrenches or sockel wrenches
3. Activate
DANGER
or left hand
the
battery
is standing
assembling
the lawn tractor
for 30 minutes
with acid), and later while you are charging
IMPORTANT:
your
use,
battery,
CHARGE
To
obtain
it MUST
fluid,
carefully.
You can continue
battery
with
in the 'Quick
the
maximum
BE CHARGED
THE BA'FFERY
(after
ftging
tile battery.
llfe
from
prior to initial
after the 30 minute stand
ing period. Use a 12-volt automotive
type battery
charger to charge the battery at 6 AMPS for one hour
before installation.
NOTE: If you charge the bafte,'y at a Iower AMP rate,
use a hydrometer
to make sure the battery
is
completely
charged.
The hydrometer
should read
1.260 minimum DO NOT CHARGE AT MORE THAN
6AMPS.
Steering
ATTACHINGTHE STEERINSWHEEL
HexLock.
Bolt
Cupped
Washer
Steering
• Bellow
FIGURE 1,
Screws
t. Models with two-piece steering shaft; Raise
the hood on the lawn tractor and remove the hex
bolt and lock nut from the lower steering sheft.
Inseh end of upper shaft through the hole in dash
panel, and into the lower steering shaft. Align the
holes in the upper and lower steering shafts, and
8ecLJre with hex bert and lock nut just removed.
See figure 1, inset.
2. The hardware for attaching the steering wheel
has been packed {nsJde the steerlng
wheel,
Carefully
pry off the steering wheel cap and
rernave the hardware
3. Remove the steering bellow from the lift lever on
the right hand side of lawn tractor. Place steering
bellow over the steering shall extending through
the dash
NOTE: If the openings on each end of tile steering
bellow are two different sizes, the smaller end goes
dow,1 against the dash of the fawn tractor.
4 With the wheels
of the tractor
pointing
straight forward, place the steering wheel over
the steedng shaft positioning steering wheeJ as
desired.
5. Piece the washer with the cupped side down over
the steering shaft. Secure with hex lock belt
NOTE: If your steering w,hee! cap is square, you must
use
a socket
wrench,
6. Place the steering wheel cap over the center of
the steering wheel end seat Jtwith your hand.
_--ATTACHIHG THE SEAT
Remove the four screws which secure the seat to gqe
seat pivot bracket Turn the seat around and prace Jn
\
FIGURE
2.
\
posi ion against the seat pivot bracket, lining up the
slotted holes in the pivot bracket with the holes in the
seat. Select desired position for the seal, and secure
wilh the four screws, See figure 2,
Hex Nuts
ATTACHING THE CHUTE DEFLECTOR
Cupped
Washers
The chute deflector must be attached 1o the right side
o! the deck so that if covers the chute opening. (For
30" decks, refer fo the separate deck manuar.)
4_
Sorews
_=_
F)GURE
_._
3.
__
_w_'1
unless
the chute
deflector
WARNING:
Do not operate
proper]y installed.
has
your
been
unit
1. Make certain deck is raised ta its highest position
(lift lever pulled all the way back)
2. Remove the truss machine screws,
cupped
washers and hex jam nuts which are attached to
the deck nexttothe
chute opening.
3. Place the chute deflector in position as shown in
-_------- figure 3. Secure with hardware just removed.
Cupped sides of washers go aga;nsl the chute
deflector.
i/
Deck Hange_
Channel
0
Adjustable!
• Lift Link
TIRE PRESSURE
The tires on your unit may be over-inflated far shipping purposes. Reduce the tire pressure before operating the ur_it Recommended operating tire pressure
is approximately 12 p.s.L
any circumstances is 30 p.s.i. Equal tire
WARNING: Maximum tire pressure under
p_ssure should be maintained on all tires.
-,,,_-LEVELING THE DEDK
With unit on hard, level surface, measure the distance
from the bottom edge of the center of the left side of
deck to the ground, Measure the same distance on
the center of the right side of the deck (just behind the
chute area on side discharge
units). Or, place the
blades in a straight li_e, and measure the distance
from the outside edge of the blade tips to the ground.
If adjustment is needed, preoeed as follows.
1. Remove the hairpin clip and flat washer from the
bottom of the adjustable lift link on the left side of
the deck. jHairpin clip and flat washer are on the
inside of the lift link.)
2. Pull the adjustable lift rink out of the deck hanger
channel. See figure 4. Turn the adJustable I],ff link
up or down as necessary
to level the deck.
Usually only one or two turns are needed,
3. Insert the end of the adjustable lift [ink into the hole
in the deck hanger channel. Recheck the adjustment Readjust if necessary.
4. When deck is level, secure end of adjustable lift
link with flat washer and hairpin clip.
FIGURE 4.
Positive Terminal
(Inside Rubber Root)
Ij
/
Negative
Cable
FIGURE
Ea_ery
Opening
5.
Slotin
F]GURE
Neged
Terminal
6.
Cable
Tie
Drain Tube
INSTALLING THE BATTERY
1, Lift the seal.
2, Make certain both the negative (black) cable and
the positive (red) cable are routed up through the
battery opening as shown in figure 5.
3 Replace the battery nto the battery opening in
the same position as it was before (positive ferminat is toward the front of the unit},
4 Attach the positive (red) c&ble to the positive terminal of the battery. Secure with hex bolt and nut
previously removed, Slide rubber hoof down over
the positive terminal.
5. Remove the hex bolt and nut from the negative
(black) cable. Attach negative cable to the negative terminal with this bolt and nut,
6. Secure battery by hookir_g battery strap into slot
in rear frame, under the fender. See figure 6.
7, Insert the dra_n tube through the hole in the
transaxle bracket or through the cable tie (if so
equipped) which is attached to the tr£nsaxle reinforcement bracket on the rfgh_ side of the unit.
_See
figure 6. Be certain drain tube is routed away
from timewheel rim.
B. RuJJcab/e tie (Jr _o equipped) to secure the drain
tube, but do not overtighten or the tube could cop
lapse. Trim excess end of cable tie,
9, Trim excess end of drain tube if necessary (&bout
4" should extend past the bracket [_r cable tie).
ILLU$T T£D
AMERICAN
M A DE
PARTS
AMERICAN
OWNED
OUTDOOR POWER EQUIPMENT
Transmatic Lawn Tractors
660 thru 679 Series
MTD PRODUCTS
INC • P.O. BOX 368022
• CLEVELAND,
OHIO 44136-9722
FOIRM NO. 77(]-96-3D
r¸