1
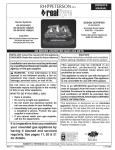
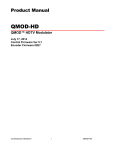
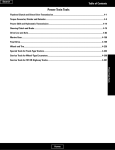
MP-FOL9
USER’S MANUAL
www.mpmaneurope.com
Function Overview
.
● Support various audio formats
Such as MP3, WMA, WMV, ASF, WAV.
● FM Stereo Radio
Strong auto searching or manual searching function, 40 local channels with different frequency
may be saved (20 channels for one system), to enable you to enjoy the programs comfortably.
● Text Browser
To read books at the same time when listening to the music.
● USB function, no driver needed
This device is automatically recognized by your PC when using WIN2000 or above.
When using WIN98, a software (CDROM) installation is still needed.
● REC
Record your voice with the microphone and save it in .WAV or .ACT formats.
● Seven tones equalizer
Normal, Rock, Pop, Classic, Soft, Jazz and DBB
● Multiple Play Modes
Normal, Repeat One, Folder, Folder Repeat, Repeat All, Shuffle and Introduce
● Auto Power Off
There are two modes including Sleep Mode and Energy-Saving Mode
● Animated Menu
With visual animated menu and related letters, operate it at your pleasure!
1
Statement
○Firstly, thank you for using mpman© MP3 digital player!
To enable you to operate the player correctly and skillfully, please read this manual carefully
before using.
○The contents in this manual might be changed for improvement.
And these contents with respect to performance and function shall be subject to change
without any further notice.
In case the actual setup or operating method is inconsistent to the provision in this manual,
you are advised to visit our website for the related information of the latest product.
www.mpmaneurope.com
Inside the Box
(1) MP3 player
(2) Stereo earphone
(3) Installation disk for WIN98 users
(4) User’s manual
(5) USB cable
one
one pair
one
one
one
System requirements
(1)
(2)
(3)
(4)
(5)
(6)
Pentium 166 MHz or faster
Windows 98/2000/ ME/XP
USB port
4 X CD- ROM driver or higher
20MB of free space on hard disk
64 MB system memory
2
Contents
Functions Overview····································································1
Statement····················································································2
Description ·················································································4
Figure and keys·······························································5
Display ···········································································5
Battery ············································································5
Basic functions ···········································································5
Enter menu ·····································································5
Browse operation ····························································5
Enter function modes ······················································6
Keys Operation···········································································7
Music mode and Play mode ············································7
REC mode ······································································7
FM mode ······································································8
Play music ··················································································9
Simple Operation····························································9
EQ mode ········································································9
Lyric synchronous display (karaoke function) ··············10
Voice Recording ······································································· 10
Recording in REC mode··············································· 10
Select REC style ··························································· 10
Playback voice recordings ························································ 11
Convert the ACT recording files into WAV format ··················· 11
Use FM radio············································································ 12
Text reader················································································ 13
System setting ·········································································· 14
How to enter? ····························································· 14
The parameters ····························································· 14
Detailed instructions ····················································· 14
USB disk ·················································································· 16
Create a folder (or directory) ···················································· 16
Other settings ··········································································· 16
Select different directories (stop the submenu) ················· 16
Delete files (stop the submenu)········································· 17
Play mode (play the submenu)·········································· 17
3
Play speed (play the submenu) ················································· 18
Repeat mode (play the submenu) ······································ 18
Repeat time (play the submenu)········································ 19
Repeat intervals (play the submenu) ································· 19
Install driver for Win98 users ·················································19
Special recommendations ·······················································20
Safe removal····································································· 20
Reset················································································· 21
Troubleshooting········································································21
Technical specifications····························································22
4
Description of keys
Figure & Keys
1) REC,
2) Menu,
3) F.FWD / Next,
4) Vol -,
5) F.REV / Previous,
6) Play/Pause,
7) Vol+,
8) LCD,
9) Earphone,
10) USB Port,
11) Cord Hole,
12) Mic,
13) Power ON/OFF,
5
Display
Battery
The screen shows a battery indicator with nine levels.
The battery indicator is full when the battery voltage 1.5V.
The battery indicator will be empty when the battery is used up. At that time, the player
should be charged with an external charger(optional) or with the USB connection on your PC.
Basic Functions
Enter Menu
Press Menu button to enter the menu:
Main menu (long press to enter during Stop mode),
Submenu during playback mode (short press to enter)
Submenu in Stop mode (short press to enter).
Browse Operation
Select the song to be introduced and enter menu option.
Press PREV key to select forward and NEXT key to select backward.
Skip backwards or forward when playing music.
Press PREV key to fast reverse and NEXT key to fast forward.
Enter function modes
Select different submenus in the main menu.
Short press Menu button to enter
Main menu :
Music mode :
6
Record mode :
Voice mode :
FM mode:
System function:
Enter USB mode via the PC connection:
7
Key operations
Music Mode and Voice Mode
Press-keys
Action
Stop mode
Play mode
Play submenu
Stop submenu
Play
Long press
Power off
Power off
Power off
Power off
Short press
Play
Stop
Exit menu
Exit menu
Long press
Enter main
menu
Enter Stop
submenu
Enter main
menu
Enter Play
submenu
Push
Next
Next and play
Enter main
menu
Confirm the
option or enter
submenu
Move submenu
Enter main
menu
Confirm the
option or enter
submenu
Move submenu
Press and hold
Go forward
successively
Previous
F.FWD
Go forward
successively
Move submenu
Go forward
successively
Move submenu
Go backward
successively
×
Go backward
successively
×
×
×
×
×
×
×
Menu
Short press
Next
Prev
Push
Press and hold
Vol+
Short press
Press and hold
Vol-
Short press
Press and hold
Previous and
play
F.REV
Go backward
successively t
Increase volume
step by step
Increase volume
Increase volume
step by step
Increase volume
Decrease
volume step by
step
Decrease
volume
Decrease
volume step by
step
Decrease
volume
REC mode
Press-keys
Action
Stop state
REC state
Play
Long press
Power off
Stop recording
Short press
Start recording
Pause recording
Long press
Enter the main menu
×
Short press
Enter the REC submenu
×
REC
Menu
8
FM mode
Press-keys
Action
In Tuning state
FM submenu
Play
Long press
Power off
Power off
Short press
Exit the menu
Long press
If there is channel
saved: next channel;
If there is no
channel saved: ×
Enter main menu
Short press
Enter the submenu
Push
Increase 100KHz by
one step, or stop to
search
Increase 100KHz
successively to
search
Decrease 100KHz
by one step, or stop
to search
Decrease 100KHz
successively to
search
Increase volume
step by step
Increase volume
successively
Decrease volume
step by step
Decrease volume
successively
Confirm the option
or enter further level
Move the submenu
Mode
Next
Press and hold
Push
Prev
Press and hold
Vol+
Short press
Press and hold
Vol-
Short press
Press and hold
Enter main menu
Go forward
successively
Move the submenu
Go backward
successively
×
×
×
×
Play Music
Simple operation
2. Switch the ON/OFF button (8) to the right. Select
1.Connect earphone
Music mode. Press menu button to enter.
Insert the earphone plug into the earphone
jack
4. Volume adjustment
3. Select music
Prev button (2): select the previous song
VOL+ (5): increases volume
Next button (2): select the next song
VOL-(5): decreases volume
Note:
9
The player will power off automatically at the
specified time by “System setting/power off
setting/Save mode” except during playback or
recording.
EQ mode
1.
During playback
2.Push Menu button to enter the Play submenu.
3.Push Next button to select “EQ mode” option.
4.Push Menu button to enter “EQ mode” menu.
5.Push Next button to select and push Menu
6.EQ modes:
button to confirm.
(Natural)
(Rock)
(Pop)
(Classical)
(Soft)
(Jazz)
(DBB)
Lyric Synchronous Display (Karaoke Function)
The player supports “*.LRC” lyric files, to achieve the synchronous play of lyric and sound.
How to use the lyric file?
The name of lyric file should be consistent with the name of the song file.
For example:
The song file name is: A-Do—Night.mp3
The lyric file name must be: A-Do—Night.lrc
How to know whether the song has a lyric file?
If the current song has a lyric file, the icon “
” at the top left corner of Music Mode will become “
10
”
Voice recording
The player can store up to 99 REC files in each directory!
Recording in REC Mode
2 . Push Next button to select REC mode
1. Enter Main Menu
Music mode
REC mode
4.Push REC button to start recording.
3.Push Menu button to enter REC mode.
5.Push Play button to pause/continue recording.
The recorded voice is saved in the current directory that is set in “REC Stop Submenu/main directory.
If the screen displays “Space Full”, it means that there is no space available to record new files. Delete
other files to release space.
If the screen displays “Directory Full”, it means that there are 99 recording files in the directory. Select
another directory.
Select REC style
1. Select record mode. No recording
2. Push Menu button to enter the REC submenu.
Local Folder
3. Push Next button to select “REC Style”
4. Push Menu button to enter the submenu:
submenu:
REC style
SP REC
5. Push Next button to select the desired REC
6. Push Mode button to confirm the selected style
style.
7. Push Play button to start recording.
8. REC style:
SP recording, wav format and good quality
LP recording, act format and average quality
SP voice-control, wav format (voice-control REC:
recording is paused if there is no sound)
:LP voice-control and act format
11
Playback voice recordings
2. Push Next button to select “Voice mode” REC mode:
1.Enter Main Menu
Music mode
Voice mode
3.Push Mode button to enter Voice mode
4.Select REC file:
Prev key: select previous REC file
Next key: select next REC file
5.Press Play button again to start to play
6.Volume adjustment:
VOL+ : increase volume
VOL-: decrease volume
Convert the ACT voice recordings into Wav format
When you want to listen to your voice recordings on your computer you need first to convert
it into Wav format.
The converter is inside the CDROM supplied with your player.
Put it in your PC and open the “act to wav CONVERTOR” folder. Double click on the
application to install it.
Go to Programs and choose “USB Flash disk Utilities” and then “Sound Convert” (see image
below)
This will launch the converter that will allow you to convert voice recordings into wav or
mp3 files.
12
Use FM Radio
1. Enter Main Menu.
2. Push Next button to select “FM mode”.
FM mode
3. Push Menu button to enter “FM
mode”.
4. Auto search
Push and hold Pre/Next button for two seconds.
The device will select automatically the next
available station.
5. Manual search:
Push Pre/Next to
manually
6. Store selected radio station:
Push Menu button to enter the FM submenu.
search
channels
save stations
Push Menu button to store the selected channel.
7. Stored channels can be selected by
pushing shortly on the Play button
8. Volume adjustment:
VOL+: volume increase
VOL-: volume decrease
Note:
If the current channel is a stereo broadcast,
the screen will display “ ”.
9.Recording from the radio
Select the desired radio station. Push
Menu button to enter FM submenu and
select the REC mode (Fine or Long).
13
System Settings
How to enter?
2. Press Next button to select “System
settings”.
1. Enter Main Menu.
Music mode
System settings
3. Push Mode button to enter “System
settings”
REC time
The parameters
REC time
Setting of the date and time for recordings
Screensaver time
Select the time (s) before the display enters into Screensaver mode
Screensaver picture
Select picture
Dancing pictures
Select picture during playback
Language Setting
Select different languages
Power off setting
Select a time (min). After this time period the player automatically
switches off
Replay mode
Auto/manual replay
Contrast Adjustment
Set contrast of display
Memory Info
Available and total memory size
Firmware Version
Displays the firmware version of the player
Exit
Exit the interface
14
Detailed instructions
○Setting of “REC time”
1.Select REC time in System settings
2.Push Menu button to Enter the interface of
REC time.
REC time
REC time
3.Push VOL+ button to select YEAR
The YEAR number will flash:
4. Push Next/Prev button to increase/decrease
REC time
REC time
5 . Push VOL+
MONTH……..
○
button
to
select
6.Push Menu button to confirm and exit.
“Screensaver Time”setting
1. Select “Screensaver Time”
2. Push Next/PREV button to adjust the time.
3. Press Menu button to exit when the
adjustment is done
○
○
“Screensaver picture” setting
Similar to the setting of “EQ mode”.
“Dancing picture” setting
Similar to the setting of “EQ mode”.
“Language selection”
Similar to the setting of “EQ mode”.
“Power off” setting
Similar to the setting of “Screensaver time”
: “Power-saving mode”: Device will switch off after preset time if no
button is pushed ( not during playback and recording)
“Sleeping mode”: ”: Device will switch off after preset time
Note: Sleeping mode is has to be reset every time you want to use this
function.
○
Repeat setting
○
○
Similar to the setting of “EQ Mode”.
○
Contrast adjustment
Similar to the setting of “Screensaver time”
15
○
“Memory info”
The number here indicates the total capacity of the disk and the percentage indicates the used part.
○
“Firmware version”
The current version of the firmware used for the player can be checked.
USB disk
This player has the standard functions of a USB disk, supports the systems above Windows98
(WIN98 needs driver).
The player supports USB power supply so that it can be played without battery.
How to connect with PC? Power on the player and insert into USB port.
When connected with PC, the player has three modes
1. Standby state
2.Downloading state
3. Uploading state
Create a folder (or directory)
You can put up to 99 songs per folder (or directory).
If you want to copy more than 99 songs into your MP3 player, you have to create a new folder (or
directory).
Just go to “my computer” and open the external hard drive that represents your MP3 player.
To create a new folder (or directory) just right-click any blank area and select New, Folder from
the resulting menu.
You can create up to 10 folders (including root folder) and up to 99 songs per folder
Other Settings
Select different directories (stop sub-menu)
Users can put different files into different directories.
1.Stop interface (The example is in Music
mode. The directories can be selected in
recording and playing mode)
2 . Press Menu button to enter the Stop
Submenu.
Main disk directory
3.Press the Menu button again to Enter
4 Push Next or PREV button to select the
directory
16
5. Press Mode key to confirm the selected
directory.
A-Do
Richard Ren
Deleting files (Stop sub-menu)
In the Music mode and Voice mode , the corresponding files and can be deleted.
1.stop mode
2. Push Mode button to Enter the
submenu
Main disk
directory
3.Push Next button or Pre button
to select “Delete files” or “Delete
all files”
4.Push Menu button to Enter
Delete file?
Night A-Do 9skymusic
Delete file?
6, Push Menu button to confirm
5, Push Next button to change
“NO” into “YES”.
deleting…
deleting…
Night A-Do 9SKY MUSIC
Night A-Do 9SKY MUSIC
The function of “Delete all files” will delete all the files of the current mode in the current
directory (for example, deleting all files in the Music mode is just deleting all the music files and
the recording files will not be deleted)
17
Play mode
When reproducing music or recorded files, the user may select different play modes (repeat,
shuffle)
○ REPEAT
After the songs in the current directory have been
(Normal)
played, the player will play the music in the next
directory untill all files are played and then it will stop.
(Repeat One)
Repeats playing a single song.
(Folder)
Plays all the music in the selected folder.
(Repeat Folder)
(Repeat All)
Repeatedly plays all the music in the folder.
Repeatedly plays all the music.
○ SHUFFLE
(Random)
Plays the music at random in the current folder.
○ INTRO
(Intro)
Plays the first 10s of each song in the current folder.
Play speed (play submenu)
When playing the music (only applicable for MP3 files), the user can select different play speeds
(either fast or slow), but the sound will not be changed.
2.Push Menu button to Enter the play submenu
1.During the playing of music
3.Push Next button to select the item of
“Play speed”.
4.Push Menu button to Enter “Play speed”
Play speed
5.Push Next/prev button to change speed
18
Repeat mode (play the submenu)
○A-B repeat
1.Music play or record play.
2 . Push Menu button to Enter the play
submenu.
3. Push Next button to select the “Repeat
mode” in the menu.
4. Push Menu button to Enter “Repeat mode”.
Letter “A” in repeat icon
will flash to wait
for confirming the first point A.
5. Push NEXT button to confirm the
second point B.
Letter “B” in repeat icon
6. Push NEXT button to confirm point B.
is fixed. The player
Repeat icon
repeats between A and B untill it reaches the set
times and exit from the repeat mode. During
this mode, the user can push PRE button to
reset point A.
will flash
○ Follow function (the playback mode doesn’t have this function)
1.The section of A-B is being repeated.
2.Push Next button to enter Follow mode.
3.The repeat icon“ ”is changed into
the follow icon “ ” The player will
record the voice of the user. The time
length is the same as the A-B repeat.
4.The player will play the original voice and
the icon will be changed into“ ”, Then the
user can press Next button to enter the contrast
function.
In this state, press PRE button to return to the state of “A-B repeat”.
○Contrast function (playback mode doesn’t have this function)
1.After entering the contrast function, the
repeat icon will be changed to“ ”, the
player starts playing the original voice.
2.After the original voice has been
reproduced, the icon will be
changed to“
In this state, short pr to return to the state of “Follow function”.
In above three states, push Menu to exit from the repeat mode.
Repeating time (play submenu)
Similar to the setting of “Screensaver time”.
The repeat time will determine how many times A-B section is repeated.
19
”,
Repeat intervals (play submenu)
Similar to the setting of “Screensaver time”.
The repeat interval determines the time length to be paused between two sections
Install driver for Win98 users
Please note that you don’t need any driver if you use Win Me / Win2000 / Win XP!
But, if you use Win98, you need to install a driver before using your MP3 player.
The driver is inside the CDROM which is in the box.
1/ Unplug the MP3 player
2/ Put the CDROM in the PC and open the “DRIVER FOR WIN98 USERS” folder.
3/ Launch the installation by clicking on “WIN98 DRIVER.EXE”
4/ When the installation is complete, restart the computer
5/ After restart, you can now plug your MP3 player, it will be recognized automatically by
the PC.
Special recommendations
Safe removal hardware procedure
Always follow this procedure to avoid trouble with your player!
Never unplug your player without using this procedure!
Before unplugging your device
1/ Double click “the Safe Remove Hardware” icon on the task bar (see image 1) :
Image 1
2/ From the “Safely Remove Hardware” window, select “USB mass storage device” and
click the “Stop” button (see image 2). The “Stop a Hardware device” window will pop up
as shown (see image 3)
20
Å Image 2
Image 3
3/ Click “OK. A safe to Remove Hardware” window will pop up. Now, it is safe to
remove the USB cable and the player from the computer (see image 4)
Image 4
Reset
If for any reason your player is blocked and cannot operate anymore, you have the
possibility to reset the internal firmware.
You just have to switch it off and then on, Reset is automatic at startup.
21
Troubleshooting
The
player
cannot
be
turned on.
Please make sure the battery is installed correctly. Check
if the player is powered on or not
Please make sure the Volume button is not at the Zero
position and the earphone is properly connected.
No voice can be heard
Please make sure the earphone is clean
from the earphone.
The damaged MP3 may create noises at different levels
and even it cannot play the music. Please keep the intact
files.
Words
on
display
are
Please make sure that you have selected the correct
deformed.
language.
FM does not have good
Adjust the position between the earphone and the player.
receiving performance.
Turn off the electric devices nearby.
The
Player
is
totally
blocked
The
player
download
properly.
the
cannot
music
Reset the firmware as explained on page 22
Check to see if the USB wire is damaged and if it is
properly connected.
Check to see if the driver is properly installed.
Check to see if there are any blank memories.
22
Technical specifications
Dimensions
31mm×80mm×12mm
Weight
25g (excluding battery)
Display
Lattice (128*64) OLED
USB speed
High speed:USB2.0(Read 1033K Byte/s,write 955K Byte/s)
EMS memory
Flash memory:128/256/512MB,1GB
Power Supply
Rechargeable Lithium battery
Record
Sampling rate
8KHz
Record format
WAV(32K bps)、ACT(8K bps)
Record time
35hours(ACT,128M Flash)
Max. earphone output
(L)10mW+(R)10mW(32Ohm)
MP3 bit ratio
8K bps – 320K bps
Bit ratio of WMA 、
MP3、WMA、WMV、 WMV、ASF
ASF
Responding
frequency
Range
SNR
5K bps – 384K bps
20Hz to 20KHz
85dB
Degree of distortion
Receiving
Frequency
Range
FM Radio
76MHz – 96MHz / 87MHz – 108MHz
Storing radio stations
20+20
Max. earphone output
(L)10mW+(R)10mW(32Ohm)
SNR
45dB
Music format
MP1、MP2、MP3、WMA、WMV、ASF、WAV
Ambient temperature
-5 to 40℃
Several Language
ENG / FR / ITAL / GER / ESP / SWED / CZE / NL
Supporting
operating
system
Windows98/SE/ME/2K/XP
Note: The design and specification of the product will be subject to change without any
further notice.
DISCLAIMER:
Rechargeable batteries have a limited number of charge cycles and may eventually need to be replaced.
Battery life and number of charge cycles vary by use and settings. Your battery has a one year warranty.
For more information you can visit our website www.mpmaneurope.com
23