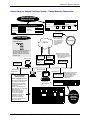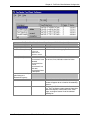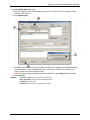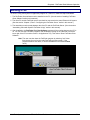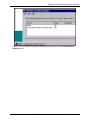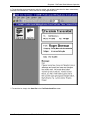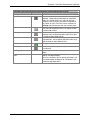
1
ADMINISTRATOR USER GUIDE
FaxFinder™ FF110
V.34 Fax Server
Administrator User Guide
FaxFinderTM Administrator User Guide
Model FF110
PN S000330C, Version C
Copyright
This publication may not be reproduced, in whole or in part, without prior expressed written permission
from Multi-Tech Systems, Inc. All rights reserved.
Copyright © 2006, by Multi-Tech Systems, Inc.
Multi-Tech Systems, Inc. makes no representations or warranties with respect to the contents hereof and
specifically disclaims any implied warranties of merchantability or fitness for any particular purpose.
Furthermore, Multi-Tech Systems, Inc. reserves the right to revise this publication and to make changes
from time to time in the content hereof without obligation of Multi-Tech Systems, Inc. to notify any person
or organization of such revisions or changes.
Revisions
Revision Level
A
B
C
Date
03/08/04
01/28/05
Description
Initial release.
Updated tiff viewer drawings, added FaxFinder/CallFinder Manager
program info, added quick fax-sending procedure, and revised
Troubleshooting section.
05/13/06
Describes 1.05.08 FF Client SW & 1.05.08 Dev Mgr SW and
minor incremental releases beyond.
Patents
This device covered by the following patent: 5,673,268
Trademarks
Multi-Tech Trademarks: FaxFinder, Multi-Tech, and the Multi-Tech logo.
All other products and technologies are the trademarks or registered trademarks of their respective
holders.
World Headquarters
Multi-Tech Systems, Inc.
2205 Woodale Drive
Mounds View, Minnesota 55112
Phone: 763-785-3500 or 800-328-9717
Fax: 763-785-9874
Technical Support
Country
France:
India:
Europe, Asia, Africa:
U.S., Canada, &
rest of the World:
By Email
[email protected]
[email protected]
[email protected]
By Phone
(33) 1-64 61 09 81
91 (124) 2340780
(44) 118 959 7774
[email protected]
(800) 972-2439
(763) 717-5863
Internet Address: http://www.multitech.com
Table of Contents
CHAPTER 1 – PRODUCT DESCRIPTION AND SPECIFICATIONS ................................................................6
PRODUCT DESCRIPTION ..............................................................................................................................................6
PRODUCT FEATURES ..................................................................................................................................................6
PREREQUISITE: ORDERING THE DID LINE .................................................................................................................7
SAFETY WARNINGS ....................................................................................................................................................7
TECHNICAL SPECIFICATIONS ......................................................................................................................................8
RELATED MANUALS ...................................................................................................................................................8
DISTRIBUTING DOCUMENTS TO CLIENT USERS ..........................................................................................................8
CHAPTER 2 – SYSTEM OVERVIEW.....................................................................................................................9
Our Sample System ................................................................................................................................................9
Server Setup for Sample FaxFinder System – Rocky Mountain Construction.....................................................10
Receiving a Fax, Server Perspective – RMC Gets a Fax.....................................................................................11
Receiving a Fax, Client Perspective – RMC President Gets a Tax Notice ..........................................................12
Sending a Fax, Server Perspective – RMC Sends a Fax......................................................................................13
Sample Client Setup – Gus, the RMC Controller.................................................................................................14
Sending a Fax, Client Perspective – RMC Controller Faxes Tax Complaint......................................................15
Fax Message Components ...................................................................................................................................16
CHAPTER 3 – SERVER INSTALLATION ...........................................................................................................17
PREREQUISITE: ORDERING THE DID LINE ...............................................................................................................17
WE SUPPLY ..............................................................................................................................................................17
YOU SUPPLY ............................................................................................................................................................18
PART A: CABLING -- CONNECTING THE FAXFINDER TO POWER OUTLET, PHONE LINES, AND ETHERNET ................18
1. Connect FaxFinder to AC Outlet.....................................................................................................................18
2. Connect FaxFinder to DID Line......................................................................................................................18
3. Connect FaxFinder to POTS Line ...................................................................................................................18
4. Connect FaxFinder to Ethernet Network.........................................................................................................19
5. Do Power-On Test ...........................................................................................................................................19
PART B: CONFIGURING THE FAXFINDER SERVER .....................................................................................................20
Summary of Configuration Data..........................................................................................................................20
1. Setting Admin PC to Startup IP Address .........................................................................................................21
2. Logging In (I)...................................................................................................................................................22
3. Setting FaxFinder IP Addresses ......................................................................................................................23
4. Resetting Admin PC to Its Regular IP Address................................................................................................24
5. Logging In (II) .................................................................................................................................................24
6. Setting Administrative Functions.....................................................................................................................24
7. Setting Up the Mail Server...............................................................................................................................26
8. Configuring the FaxFinder’s Inbound DID Modem........................................................................................26
9. Configuring the FaxFinder’s POTS Modem....................................................................................................27
10. Changing Admin’s Server Password .............................................................................................................30
11. Specifying Admin’s Client Password .............................................................................................................30
12. Sending Test Fax from Fax Machine to FaxFinder .......................................................................................31
13. Assigning DID Numbers to Network Clients .................................................................................................32
CHAPTER 4 – FAXFINDER SERVER SOFTWARE SCREENS .......................................................................34
Home Screen........................................................................................................................................................34
Login Screen ........................................................................................................................................................35
Fax Log Screen....................................................................................................................................................36
Fax Details Screen...............................................................................................................................................38
Current Status Screen ..........................................................................................................................................40
Logout Option......................................................................................................................................................43
Help Screen..........................................................................................................................................................43
Administration Screen .........................................................................................................................................44
Multi-Tech Systems, Inc.
FF110 FaxFinder Fax Server Admin User Guide
3
Phone Book Screen ..............................................................................................................................................48
Modem Configuration Screen – DID Modem ......................................................................................................50
Modem Configuration Screen – POTS Modem....................................................................................................52
Password Administration Screen.........................................................................................................................54
CHAPTER 5 – FAXFINDER CLIENT SOFTWARE CONFIGURATION........................................................55
INSTALLING FAXFINDER CLIENT SOFTWARE ...........................................................................................................55
ASSOCIATING CLIENT WITH SPECIFIC FAXFINDER UNIT(S)......................................................................................60
DIS-ASSOCIATING THE CLIENT FROM A SPECIFIC FAXFINDER UNIT ........................................................................62
DISABLING AND RE-ENABLING A CLIENT’S FAXFINDER SERVICE ...........................................................................63
SENDING TEST FAX ..................................................................................................................................................63
FAXFINDER FAX CLIENT SOFTWARE MENU COMMAND DEFINITIONS .....................................................................64
CHAPTER 6: FAXFINDER CLIENT SOFTWARE OPERATION ....................................................................72
SENDING A FAX (QUICK VERSION)...........................................................................................................................72
SENDING A FAX ........................................................................................................................................................74
SCHEDULING FAX TRANSMISSIONS ..........................................................................................................................80
RE-SENDING A FAILED FAX .....................................................................................................................................81
PUTTING PENDING FAXES ON HOLD AND RESCINDING THE HOLD............................................................................82
CANCELING A FAX ...................................................................................................................................................85
SETTING FAX RETRY NUMBER AND INTERVAL ........................................................................................................86
SENDING ONE FAX CONTAINING MULTIPLE DOCUMENTS........................................................................................87
FORWARDING A FAX ................................................................................................................................................89
RECEIVING A FAX .....................................................................................................................................................91
USING THE MULTI-TECH TIFF VIEWER.....................................................................................................................93
Frequently Used Commands – Toolbar Icons .....................................................................................................93
Importing Fax Images into Other Application Programs....................................................................................98
SETTING UP YOUR ADDRESS BOOK MANUALLY ......................................................................................................99
SETTING UP YOUR ADDRESS BOOK BY SYNCHRONIZING WITH OUTLOOK .............................................................101
What Synchronization Means ............................................................................................................................101
Synchronization Procedure ...............................................................................................................................101
USING STOCK COVER PAGES ..................................................................................................................................104
CREATING OR MODIFYING COVER PAGE STYLES ...................................................................................................110
Creating New Cover Page Templates................................................................................................................110
Modifying Existing Cover Page Templates........................................................................................................118
COVER PAGE GENERATOR MENU/ICON COMMAND DESCRIPTIONS........................................................................124
File Menu...........................................................................................................................................................124
Edit Menu ..........................................................................................................................................................125
Insert Menu........................................................................................................................................................125
View Menu .........................................................................................................................................................127
Settings Menu ....................................................................................................................................................128
REPORTING FAILED FAXES TO THE ADMINISTRATOR .............................................................................................129
CHAPTER 7 – SERVER OPERATION ...............................................................................................................130
FAX LOG EMAIL MESSAGES ...................................................................................................................................130
FRONT PANEL LEDS ..............................................................................................................................................131
DEALING WITH FAILED FAX REPORTS ....................................................................................................................132
Failure Analysis: Factors to Consider .............................................................................................................132
Possible Solutions to Fax Failure Problems .....................................................................................................132
CHAPTER 8 - DEVICE MANAGER INSTALLATION & OPERATION .......................................................133
Installing Device Manager Software .................................................................................................................133
Operation: Applicability of Device Manager ...................................................................................................134
Access to Commands .........................................................................................................................................134
Device Manager Command Summary ...............................................................................................................134
Opening the Device Manager Software.............................................................................................................136
Device Manager Main Screen ...........................................................................................................................137
Device Manager “Edit” Menu ..........................................................................................................................139
Multi-Tech Systems, Inc.
FF110 FaxFinder Fax Server Admin User Guide
4
Right-Click Menu for Selected FaxFinder Device.............................................................................................143
FIRMWARE UPDATING PROCESS - DETAILED ..........................................................................................................149
FaxFinder Modem Firmware Update................................................................................................................149
FaxFinder Server Firmware Update .................................................................................................................153
Uninstalling or Reinstalling the Device Manager Software ..............................................................................156
CHAPTER 9 – TROUBLESHOOTING................................................................................................................159
1. What if I can't see the web page for my FaxFinder ? ....................................................................................159
2. What if I don't get an email when I set the mail server address ? .................................................................159
3. What if the modem doesn't answer a call on the DID line?...........................................................................161
4. What if I don't get the email to me of the test fax that I sent? ........................................................................161
CHAPTER 10 – REGULATORY INFORMATION............................................................................................162
47 CFR PART 68 TELECOM ....................................................................................................................................162
47 CFR PART 15 REGULATION ...............................................................................................................................163
FAX BRANDING STATEMENT ..................................................................................................................................163
CANADIAN LIMITATIONS NOTICE ...........................................................................................................................164
INDUSTRY CANADA ................................................................................................................................................164
WEEE STATEMENT ................................................................................................................................................165
CHAPTER 11: WARRANTY, SERVICE, & REPAIR .......................................................................................166
Multi-Tech Systems, Inc.
FF110 FaxFinder Fax Server Admin User Guide
5
Chapter 1: Product Description and Specifications
Chapter 1 – Product Description and
Specifications
Product Description
The FF110 V.34 FaxFinder unit is a complete, economical, easy-to-use network fax server. With it, you
can receive faxes as emails and send faxes from any application that can print. To deploy the FaxFinder
server, you need a DID trunk line, an ordinary POTS phone line, and an Ethernet connection to your LAN.
For each client, you must assign a separate DID directory number to the client’s email and install the
FaxFinder Client Software on the client PC. Clients can then send faxes from their PCs by printing from
application programs to the FaxFinder which routes them to the public phone system over the POTS line.
Clients receive faxes in their email inboxes from senders who have faxed to that client’s DID phone
number. From the fax sender’s perspective, DID phone numbers are functionally identical to ordinary fax
phone lines. Faxes can be both sent and received from the client’s PC privately and without walking to a
common fax machine.
Multi-Tech’s FF110 FaxFinderTM V.34 Fax Server
The FaxFinder product consists of the hardware unit, server software pre-installed on the hardware unit, a
management program for the administrator, and a suite of client software programs (the main fax-sending
program, a viewer for TIFF files, and a program for creating and modifying fax cover pages).
Product Features
•
•
•
•
•
•
•
•
•
•
•
•
•
•
•
•
Faxes routed via DID numbers to email
Faxes converted to TIFF or PDF files
One Direct Inward Dial (DID) port for inbound faxing
One loop-start POTS port for outbound/inbound faxing
Super G3 V.34/33.6K fax communication
Compression in MH, MR, and MMR modes
Error Correction Mode (ECM) for fast and reliable faxing
Web server interface for system configuration and management
Email notification of failed outbound fax transmissions
Supports wink-start, immediate-start, and delay-dial service types
V.92/56K data mode
Tone and pulse dialing
Connects to 10/100BaseT Ethernet
Flash memory for easy software updates
Small desktop-size external chassis
Two-year warranty
Multi-Tech Systems, Inc.
FF110 FaxFinder Fax Server Admin User Guide
6
Chapter 1: Product Description and Specifications
Prerequisite: Ordering the DID Line
To operate the FaxFinder system, you will need a DID (Direct Inward Dial) line in your office. You must
order the DID line from your local telephone operating company (telco). A DID line allows one phone line
to be associated with multiple directory numbers. However, only one call can occur on this line at any
given time.
DID lines are sold in groups. For example, a telco in New York City might offer a DID line with a set of 20
directory numbers in the range of 212-555-4101 through 212-555-4120.
When ordering your DID line, ask the telco representative for these details about the DID service. These
details will be important when setting up your FF110 Fax Server.
Parameter
Value Required by
Telco
Number of digits used
to designate the DID extension
(usually 3, 4, 6, or 7)
Type of “DID Start” used
(wink, immediate, or delay dial)
You will need this information to configure your FaxFinder Server (see Chapter 3: Server Installation).
Safety Warnings
•
Use this product only with UL- and CUL-listed computers (US).
•
Never install phone wiring during a lightning storm.
•
Never install a phone jack in a wet location unless the jack is specifically designed for wet locations.
•
Never touch uninsulated phone wires or terminals unless the phone line has been disconnected at the
network interface.
•
Use caution when installing or modifying phone lines.
•
Avoid using a phone during an electrical storm; there is a risk of electrical shock from lightning.
•
Do not use a phone in the vicinity of a gas leak.
•
To reduce the risk of fire, use only 26 AWG or larger telephone line cord.
Multi-Tech Systems, Inc.
FF110 FaxFinder Fax Server Admin User Guide
7
Chapter 1: Product Description and Specifications
Technical Specifications
The FF110 FaxFinder meets the following specifications:
Connectors
RJ11-Line Jack, RJ12-DID line,
RJ45 - Ethernet Jack
Size
4.25”w, 1.15”h, 5.8”d
10.8 cm x 2.9 cm x 14.8 cm
Weight
224 g 8oz
Power Consumption
Typical 5.5W (1.10A @5v DC)
Maximum 6.0W (1.20A @5.25v DC)
Operating
Environment
32-120 degrees F (0-50 degrees C)
relative humidity 20 to 90% noncondensing
EMC Approvals
FCC Part 15 Class B, Canada Class B, EN
55022 Class B, EN55024,
Safety Approvals
UL, cUL, UL60950, CSA 950, EN60950,
AS3260, CCIB (China)
Telecom Approvals
FCC Part 68, CS03
Related Manuals
The FF110 FaxFinder unit comes with 4 manuals that serve different purposes:
Title
Format
Purpose
Administrator User Guide
(this manual)
on CD
Presents comprehensive info about FaxFinder
unit, server software, & client software.
Client User Guide
on CD
Comprehensive user info for FaxFinder clients.
Client Operation Primer
on CD
Brief instructions for sending and receiving
faxes via the FaxFinder system. Multi-Tech
recommends that you give a copy of this
document to each client user.
Quick Start Guide
in print
FaxFinder Administrator should use this
manual to configure the FaxFinder unit, the
server software, and software for each client.
Multi-Tech manuals and other resources are available on the Multi-Tech Web page at
http://www.multitech.com.
Distributing Documents to Client Users
The person acting as FaxFinder Administrator should see to it that client users get copies of the Client
Operation Primer (the file name is S000407_.PDF) and the Client User Guide (the file name is
S000406_.PDF). You could distribute this information either by printing out and/or photocopying hard
copies of these manuals for client users or else by supplying them with the electronic PDF files for these
documents either as email attachments or via some memory storage medium (CD, diskette, etc.). Client
users will need this information to take advantage of the capabilities of the FaxFinder system.
Multi-Tech Systems, Inc.
FF110 FaxFinder Fax Server Admin User Guide
8
Chapter 2: System Overview
Chapter 2 – System Overview
Our Sample System
The FaxFinder system handles faxes in a non-conventional way. A regular fax machine is a centralized
resource. The FaxFinder system decentralizes fax functions throughout a network of PCs served by the
FaxFinder unit and by an email server in a common Ethernet network. In this chapter, we will give you
the big picture of how the FaxFinder FF110 Server unit and the FaxFinder Client software can deliver this
convenient functionality.
To show what you must do to implement FaxFinder functionality, we use a fictitious company, “Rocky
Mountain Construction, Inc.,” a housing developer, as an ongoing example throughout the FaxFinder
documentation. We show, in this small sample system, the parameters that must be set in any FaxFinder
system, both for the server and for clients.
A regular fax machine typically operates in a common office area and is shared by multiple parties.
Usually no individual’s fax traffic is heavy enough to justify a dedicated personal fax machine. Commonly,
many parties go to the same fax machine to send and receive on a single ordinary phone line.
Compared to the centralized and non-private nature of faxing with an ordinary fax machine, the FaxFinder
system offers fax users decentralized functionality, autonomy, and privacy. For outgoing faxes, the
conversion of documents into electronic fax files is now done by FaxFinder Client software (that resides
on the PC of each user) working with the print output of any application program. Faxes can be sent to
multiple parties with one mouse click. Outgoing faxes can consist of multiple documents and come from
different application programs (word processors, graphics programs, spreadsheets, etc.).
For incoming faxes, each client on the FaxFinder network has a private phone number for receiving faxes.
A Direct Inward Dial line allows each FaxFinder unit to serve numerous clients from a single incoming
phone line. Each received fax arrives in the client users’ email inbox as an attached TIFF file that can be
stored and forwarded as well as being viewed and printed.
In the remainder of this chapter, we introduce our fictitious sample Faxfinder system. First, we show the
server software parameters that must be set for this simple system. Next we show two pairs of
illustrations about fax reception and fax transmission. In the first pair, we show what happens in the
FaxFinder system when a fax is received, from both server and client perspectives. In the second pair,
we show what happens when a fax is sent. The server perspective comes first. We then show sending
from the client perspective along with a setup for that client. We briefly explain each step of the process.
Finally, we show how the FaxFinder assembles the components of the fax message for the convenience
of the user.
These illustrations explain how the FaxFinder system fits into your Ethernet network and what client users
will encounter when they begin to use the FaxFinder Client software.
Multi-Tech Systems, Inc.
FF110 FaxFinder Fax Server Admin User Guide
9
Chapter 2: System Overview
Server Setup for Sample FaxFinder System – Rocky Mountain Construction
FaxFinder Server
Software Setup
Administration: Time Configuration
Administration: IP Configuration
Subnet Mask
time.nist.gov
Time Zone
(GMT-06:00) Mountain Time (US & Canada)
Request Interval
192.168.4.89
IP Address
Time Server
Default Gateway 192.168.4.1
255.255.255.0
Secondary
Name Server
Name Server 192.168.4.251
Days 0
Hours 24
Minutes 0
update
time.nist.gov
update
Time Server
A time server provides current time
to the FaxFinder
upon request. The
time server uses
Simple Network
Time Protocol
(SNTP).
Telco Setup
Company in example has
5 DID extensions:
PSTN
All are connected to the DID input
of the FF110 FaxFinder Server.
FF110’s POTS fax modem has
separate, ordinary phone line at
720-985-7302.
DID Ext 2427
DID Ext 2430
unassigned
FF110
FaxFinder
Server
Email:jschli
@rmc83
.com
A Domain Name Server
(DNS) resolves domain
names (www.rmc83.com)
into actual IP addresses
(192.168.4.200).
POTS
Modem
DID Modem
Internet
Ethernet Port
Name Server
192.168.4.251
192.168.4.89
faxfinder.rmc83.com
Ethernet LAN
DID Ext 2426
Hank Gregory
Admin
PC of FaxFinder
Administrator
Email: [email protected]
All incoming faxes are labeled
as coming from the admin.
Admin is typically recipient
of all faxes received on the
POTS Line.
Admin is typically recipient
of all faxes sent to unassigned
DID extensions
(the “Dead Letter Box”).
Admin uses FaxFinder
Phone Book to assign
DID extensions to email
addresses of clients.
Admin receives fax log
report as email attachment
after every nth fax.
Email:grs
@rmc83
.com
Roger Sherman
President
mail.rmc83.com
411 Main St., 3rd Floor
Wiltonsbury, Colorado
970-555-2918
970-555-2919 fax
August 18, 2003
THIS IS NOT A TAX BILL.
Mail Server
DID Ext 2429
DID Ext 2428
Email: roger
@rmc83.com
Administration: SMTP Configuration
SMTP Server Address mail.rmc83.com
update
Phone Book
Name
User ID Email Address Ext
Hank Gregory -- Admin
admin
POTS Line
[email protected]
Dead Letter Box
Function
update
update
update
[email protected]
[email protected]
Hank Gregory
hank
[email protected]
2426
John Schlief
johns
[email protected]
2427
Roger Sherman
roger
[email protected]
2428
Gus Schmidt
grs
[email protected]
2429
update
update
update
update
delete
delete
delete
delete
add
Multi-Tech Systems, Inc.
Mail Server must support
Simple Mail Transport
Protocol (SMTP), which
FaxFinder uses for
outputting faxes in
email form.
FF110 FaxFinder Fax Server Admin User Guide
FaxFinder
Server
Software
Setup
10
Chapter 2: System Overview
Receiving a Fax, Server Perspective – RMC Gets a Fax
1
9
County Clerk faxes tax
report to head of
construction contracting
company.
FaxFinder Server fax log ( )
indicates successful fax reception.
Fax Log
Uses contractor’s DID
fax number:
9707852428
Time
Name
Remote ID
Send
Result Receive
08/18/2003 11:20:31 AM
Roger Sherman
9705552919
pass
receive
08/18/2003 10:48:46 AM
Hank Gregory
7175782
pass
send
08/18/2003 10:32:06 AM
John Schlief
3033258763
pass
send
08/18/2003 09:49:39 AM
Hank Gregory
9857979
pass
send
08/18/2003 09:39:31 AM
Roger Sherman
pass
receive
08/18/2003 09:20:02 AM
John Schlief
08/18/2003 08:07:26 AM
John Schlief
08/18/2003 07:33:19 AM
Gus Schmidt
2123670278
8017920194
pass
send
pass
receive
pass
send
County Clerk’s
Office
2
PSTN
Fax message traverses
public phone network.
Rocky Mountain Construction Office
DID Modem
3
Fax message reaches
DID fax modem within
FF110 FaxFinder Server.
FF110
FaxFinder
Server
POTS
Modem
Ethernet Port
John Schlief
Sales
Email:jschli
@rmc83
.com
DID Ext 2430
unassigned
DID Ext 2428
Roger Sherman
President
DID Ext 2427
DID Ext 2429
Gus Schmidt
Controller
DID Ext 2426
Hank Gregory
Admin
Multi-Tech Systems, Inc.
Email:hgg
@rmc83
.com
7
411 Main St., 3rd Floor
Wiltonsbury, Colorado
970-555-2918
970-555-2919 fax
August 18, 2003
THIS IS NOT A TAX BILL.
Tax report message
arrives as attachment
(TIF file) in company
president’s email inbox:
[email protected].
Email:grs
@rmc83
.com
8
FF110 FaxFinder Fax Server Admin User Guide
Company president
opens TIF file of
tax report message
into Multi-Tech Tiff
Viewer program.
11
Chapter 2: System Overview
Receiving a Fax, Client Perspective – RMC President Gets a Tax Notice
Multi-Tech Systems, Inc.
FF110 FaxFinder Fax Server Admin User Guide
12
Chapter 2: System Overview
Sending a Fax, Server Perspective – RMC Sends a Fax
FaxFinder Server fax log ( )
indicates successful fax transmission.
7
6
County Clerk receives
Gus Schmidt’s FAX
message requesting
taxation delay.
Fax Log
Time
Name
08/20/2003 10:23:36 AM
Gus Schmidt
Roger Sherman
08/20/2003 09:56:46 AM
Remote ID
Send
Result Receive
9705552919
pass
send
pass
receive
send
08/20/2003 09:53:23 AM
John Schlief
9857979
pass
08/20/2003 09:48:37 AM
Hank Gregory
3039187171
pass
send
08/20/2003 09:40:57 AM
Hank Gregory
pass
receive
08/20/2003 09:25:14 AM
Gus Schmidt
Gus Schmidt
8017920194
pass
pass
receive
08/20/2003 09:08:20 AM
08/20/2003 08:53:11 AM
John Schlief
7175854
pass
send
receive
County Clerk’s
Office
5
PSTN
Fax message traverses
public phone network.
4
Rocky Mountain Construction Office
DID Modem
FF110
FaxFinder
Server
3
John Schlief
Sales
Email:jschli
@rmc83
.com
POTS
Modem
Ethernet Port
Gus Schmidt’s FaxFinder
Client SW communicates
with the FF110 over
RMC’s Ethernet network.
DID Ext 2430
unassigned
DID Ext 2428
Roger Sherman
President
DID Ext 2427
Email:roger
@rmc83
.com
DID Ext 2429
Gus Schmidt
Controller
DID Ext 2426
Hank Gregory
Admin
Email:grs
@rmc83
.com
Email:hgg
@rmc83
.com
1
2
Multi-Tech Systems, Inc.
POTS modem sends
Gus Schmidt’s fax message.
Company controller prints
to FaxFinder to fax a request
that taxation on housing
development be delayed.
FaxFinder client SW captures
word processor output and
assembles outgoing message
from FF Client screens and
cover page.
FF110 FaxFinder Fax Server Admin User Guide
13
Chapter 2: System Overview
Sample Client Setup – Gus, the RMC Controller
Multi-Tech Systems, Inc.
FF110 FaxFinder Fax Server Admin User Guide
14
Chapter 2: System Overview
Sending a Fax, Client Perspective – RMC Controller Faxes Tax Complaint
Multi-Tech Systems, Inc.
FF110 FaxFinder Fax Server Admin User Guide
15
Chapter 2: System Overview
Fax Message Components
How the FaxFinder’s outgoing fax
comes together.
Sender
Info
Recipient
Info
FROM
FF Fax Client
Software
Options screen
FROM
FFAddress Book
Contact screen
OR
FF Send Fax screen
Cover Page
From:
To:
Subject :
Comment :
Main Body
of
Fax Message
FROM
file of application program.
For example,
word processor
or
graphics program.
D ear Mr Jo nes:
Fax Stamp
Info
FROM
FF Send Fax screen
FROM
FF Server Software
screens
The ti me h as c ome for a ll good
pe rso ns to come to the aid of their
res pe ctive cou ntri es .
We w e re p le ased at y our inquiry
a bo ut o ur h ou sin g to b e o ffe re d
a t th e Mu rki e Po nd ho us in g
d evelo pme nt. We e xp ec t the
p roj ec t to ta ke off wi thi n the ne xt
several mon ths . Our forec asts
fo r h o usi ng ne ed s show a hi gh
d em an d i n the com ing ye ars .
Th is is a ch an ce fo r y ou to ge t i n
o n the gro u nd fl oo r of wh a t coul d
b ecome a g rea t o p po rtun ity.
Bl ah , bl ah , b la h, blah, bl ah.
Subject,
Comment
...
We w e re p le ased at y our inquiry
a bo ut o ur h ou sin g to b e o ffe re d
a t th e Mu rki e Po nd ho us in g
d evelo pme nt. We e xp ec t the
p roj ec t to ta ke off wi thi n the ne xt
several mon ths . Our forec asts
fo r h o usi ng ne ed s show a hi gh
d em an d i n the com ing ye ars .
Th is is a ch an ce fo r y ou to ge t i n
.
Outgoing Fax Transmission
Multi-Tech Systems, Inc.
FF110 FaxFinder Fax Server Admin User Guide
16
Chapter 3: Server Installation
Chapter 3 – Server Installation
This chapter shows you how to set up your Multi-Tech Model FF110 FaxFinder.
The setup process includes both cabling of the FF110 unit and configuration of the FaxFinder server
software. The FaxFinder server software resides on the FaxFinder unit and does not need to be installed.
Prerequisite: Ordering the DID Line
To operate the FaxFinder system, you will need a DID (Direct Inward Dial) line in your office. You must
order the DID line from your local telephone operating company (telco). A DID line allows one phone line
to be associated with multiple directory numbers. However, only one call can occur on this line at any
given time.
DID lines are sold in groups. For example, a telco in New York City might offer a DID line with a set of 20
directory numbers in the range of 212-555-4101 through 212-555-4120.
When ordering your DID line, ask the telco representative for these details about the DID service. These
details will be important when setting up your FF110 Fax Server.
Parameter
Value Required by
Telco
Number of digits used
to designate the DID extension
(usually 3, 4, 6, or 7)
Type of “DID Start” used
(wink, immediate, or delay dial)
You will need this information to configure your FaxFinder Server (see step 8 on page 25).
We Supply
•
An FF110 FaxFinder with factory-installed software
•
A set of four self-adhesive plastic feet
•
A power supply
•
One common telephone cable (RJ-11 at both ends)
•
One DID telephone cable (RJ-11 at one end; RJ12 at other end)
•
A fax software program for client PCs
•
This printed Quick Start Guide
Multi-Tech Systems, Inc.
FF110 FaxFinder Fax Server Admin User Guide
17
Chapter 3: Server Installation
You Supply
• A nearby AC power outlet
• A nearby phone line jack
• A connection to your Ethernet LAN
• A nearby analog DID trunk line with a block of associated DID telephone numbers
• A common subscriber phone line (POTS)
• A PC (using Windows NT, Windows 2000, or Windows XP as operating system) from which to
configure the FaxFinder unit
• Client PCs with email and printing applications. Client PCs on your network will receive faxes in
their email inboxes. They will send faxes by printing to the FaxFinder server from application
programs while running the FaxFinder client software.
Part A: Cabling -- Connecting the FaxFinder to Power Outlet,
Phone Lines, and Ethernet
Summary: Turn off your computer. Place the FaxFinder in a convenient location, and then connect it to
your AC power outlet, DID line, POTS line, and Ethernet.
1. Connect FaxFinder to AC Outlet
Make sure the FaxFinder’s power switch is OFF. Plug the DC power transformer into a power outlet or
power strip. Plug the other end into the PWR jack on your FaxFinder. The DC power transformer is
included with your FaxFinder.
Caution: Use only the DC power transformer supplied with the FaxFinder. Use of any other
transformer voids the warranty and can damage the FaxFinder.
2. Connect FaxFinder to DID Line
Plug one end of the phone cable into the FaxFinder’s DID jack and the other end into an analog DID trunk
line jack. The DID Line cable is included with your FaxFinder.
Caution: The DID Line cable has an RJ11 connector on one end (this is the larger of the two
connectors; it goes to the telephone wall receptacle). The DID Line cable has an RJ12
connector on the other end (this is the smaller connector; it goes to the DID Port on the
FaxFinder unit).
Never plug the DID connector into a standard POTS Line. This may damage the
FaxFinder or the central office equipment. Use only an analog DID Line.
3. Connect FaxFinder to POTS Line
Plug one end of the phone cable into the FaxFinder’s POTS jack and the other end into your standard
telephone line jack. The POTS Line cable is included with your FaxFinder.
Multi-Tech Systems, Inc.
FF110 FaxFinder Fax Server Admin User Guide
18
Chapter 3: Server Installation
4. Connect FaxFinder to Ethernet Network.
Plug one end of your RJ45 ethernet cable into the FaxFinder’s ethernet jack and the other end into your
network ethernet hub. This ethernet cable is not included with your FaxFinder unit.
Caution: Before connecting to the Ethernet Network, make sure that the network to which you
are connecting the FaxFinder is not a 192.168.2.x subnet.
If it is a 192.168.2.x subnet, connect from the Admin PC to the FaxFinder using an
RJ45 crossover cable until the FaxFinder’s IP address has been configured.
Thereafter, connect the FaxFinder into the network with an ordinary RJ45 cable.
5. Do Power-On Test
Test your FaxFinder by turning it on (an on-off switch is located on the back panel). When you apply
power, the FaxFinder performs a diagnostic self-test. The Status indicator flashes when the test is
complete and the unit is ready. If this does not happen, check that the power switch is on, the power
supply is solidly connected, and the AC outlet is live.
Multi-Tech Systems, Inc.
FF110 FaxFinder Fax Server Admin User Guide
19
Chapter 3: Server Installation
Part B: Configuring the FaxFinder Server
Summary of Configuration Data
The table below lists the information you will need to fill in on the various FaxFinder Server screen.
Gathering this information in advance will expedite the FaxFinder configuration process.
Server Parameters
(for Server Admin screen)
Values for this FaxFinder
IP Address (of FaxFinder unit)
Subnet Mask
(Domain) Name Server
Secondary Name Server (optional)
Default Gateway
Time Server (typically time.nist.gov)
SMTP (Mail) Server Address
User Parameters
(for Server Phonebook, Client Options, & Client Add FaxFinder screens)
Name
User ID/
Username
Multi-Tech Systems, Inc.
Email Address
DID Extension
FF110 FaxFinder Fax Server Admin User Guide
Password
20
Chapter 3: Server Installation
1. Setting Admin PC to Startup IP Address
a. Connect a pc to your network.
b. Set the pc IP address to 192.168.2.x subnet (using any address excluding 192.168.2.1).
Windows XP
a. From the Windows desktop,
right-click on “My Network Places,”
and select “Properties.”
b. In the Network Connection
screen, right-click on “Local Area
Connection.”
c. In the Local Area Connection
Properties screen, on the
“General” tab, scroll to the “Internet
Protocol (TCP/IP)” entry and select
it. Click “Properties.”
d. In the Internet Protocol
(TCP/IP) Properties screen, record
the existing IP address. Then reset
the IP address to 192.168.2.2.
Windows 2000
a. From the Windows desktop, rightclick on “My Network Places,” and
select “Properties.”
b. In the Network and Dialup
Connections screen, right-click on
“Local Area Connection” and select
“Properties.”
c. In the Local Area Connection
Properties screen, select the
“Internet Protocol (TCP/IP)” entry.
Click “Properties.”
d. In the Internet Protocol (TCP/IP)
Properties screen, record the
existing IP address. Then reset the
IP address to 192.168.2.2.
Windows NT
a. From the Windows desktop, right-click on “Network Neighborhood,” and
select “Properties.”
b. In the Network screen, on the “Protocols” tab, select “TCP/IP Protocol” in
the list of Network Protocols. Click “Properties.”
c. In the Microsoft Internet Protocol (TCP/IP) Properties screen, record
the existing IP address. Then reset the IP address to 192.168.2.2.
Multi-Tech Systems, Inc.
FF110 FaxFinder Fax Server Admin User Guide
21
Chapter 3: Server Installation
2. Logging In (I)
a. Bring up a Web browser on your pc. At the browser’s address line, type the default Gateway address:
http://192.168.2.1 and press Enter.
b. The Login screen will appear.
At this point you can be assured that the FaxFinder is connected to the network.
If the Login screen does not appear, see item #1, “What if I can’t see the web page for my
FaxFinder?” in Chapter 10: Troubleshooting.
c. At the Login screen, enter admin (all lower case) in the User Name field.
d. Enter admin (all lower case) in the Password field.
Multi-Tech Systems, Inc.
FF110 FaxFinder Fax Server Admin User Guide
22
Chapter 3: Server Installation
e. Click the Login button. The Web Management Home screen will appear. From this screen, you can
access all of the FaxFinder Server software screens.
3. Setting FaxFinder IP Addresses
a. In the FaxFinder Administration screen, go to the IP Configuration fields.
Administration: IP Configuration
IP Address
192.168.4.89
Subnet Mask
255.255.255.0
Name Server 192.168.11.251
Default Gateway
192.168.4.1
Secondary
Name Server
update
b. Fill in the IP information that applies to your FF110 FaxFinder Server unit. The fields for “IP Address,”
“Subnet Mask,” “Default Gateway” and “Name Server” are required. A “Secondary Name Server”
may be considered optional.
c. Click Update.
Multi-Tech Systems, Inc.
FF110 FaxFinder Fax Server Admin User Guide
23
Chapter 3: Server Installation
4. Resetting Admin PC to Its Regular IP Address
In step #1 above, you recorded the original IP address of the administrator’s PC and then reset it to the IP
address required to allow communication with the FaxFinder unit. You must now set the IP address of
the administrator’s PC back to its original value.
5. Logging In (II)
Having reset the IP address of the administrator’s PC, you must log into the FaxFinder Server software
again. Go to the Login screen, enter admin as User Name and admin as Password.
6. Setting Administrative Functions
Go to the FaxFinder Phone Book screen.
Phone Book
Name
User ID Email Address Ext
Ad mini strator
a dmin
Function
update
update
update
update
update
update
update
POTS Li ne
D ead L etter Box
delete
delete
delete
delete
add
a. General Admin Email Address & DID
i. In the “admin” row of the Phone Book screen, enter the name and user ID to be used for
the FaxFinder administrator. All incoming faxes will be marked as coming from this
administrator. Then enter the email address of the party who will act as the FaxFinder
administrator.
ii. Click on Update in the “admin” row. At this point, a Login screen will appear and you will
be asked to log in again. Log in using the administrator’s User ID (as listed in the “User
ID” column) and the administrator’s current password (at this point, it should be admin).
The message “Success: [name] was updated” will appear above the Phone Book list.
Phone Book
Name
User ID Email Address Ext
H ank Gre gory -- Admi n
a dmin
hg [email protected]
POTS Li ne
D ead Le tter Box
Function
update
update
update
update
update
update
update
delete
delete
delete
delete
add
Multi-Tech Systems, Inc.
FF110 FaxFinder Fax Server Admin User Guide
24
Chapter 3: Server Installation
b. Destination Email Address for POTS Line Fax
i. In the “POTS Line” row of the Phone Book screen, enter the email address of the person
whom you want to receive all inbound faxes received on the POTS line. (The POTS line is
primarily for sending faxes but can receive faxes, as well. Typically, faxes coming in on
the POTS Line are sent to the FaxFinder Administrator.)
ii. Click on Update in the “POTS Line” row. The message “Success: POTS Line was
updated” will appear above the Phone Book list.
Phone Book
Name
User ID Email Address Ext
H ank Gre gory -- Admi n
a dmin
POTS Li ne
D ead Le tter Box
hg [email protected]
hg [email protected]
Function
update
update
update
update
update
update
update
delete
delete
delete
delete
add
c. Destination Email Address for Unassigned DID Numbers
i. In the “Dead Letter Box” row of the Phone Book screen, enter the email address of the
person whom you want to receive all inbound faxes sent to unassigned DID phone
numbers. (For example, a company might obtain a group of 20 DID phone numbers but
only use 17, retaining 3 for future use. Any faxes sent to the three unused DID numbers
would go to the Dead Letter Box. Typically, Dead Letter Box items are sent to the
FaxFinder Administrator.)
ii. Click on Update in the “Dead Letter Box” row. The message “Success: Dead Letter Box
was updated” will appear above the Phone Book list.
Phone Book
Name
Ha nk Greg ory -- Admin
User ID Email Address Ex t
ad min
hgg @rmc8 3.com
POTS Lin e
hgg @rmc8 3.com
De ad Letter Box
hgg @rmc83.com
Function
update
update
update
update
update
update
update
delete
delete
delete
delete
add
d. Personal Email Address for Admin
i. Just below the “Dead Letter Box” row of the Phone Book screen, enter the name and
user ID to be used to receive the FaxFinder administrator’s individual inbound faxes.
(Generally, the administrator should have an additional phonebook entry for receiving
ordinary fax traffic for his/her own use that is separate from the administrator function.)
Then enter the email address at which the FaxFinder administrator will receive such fax
traffic.
ii. Click on Update for this row. The message “Success: [name] was updated” will appear
above the Phone Book list.
Multi-Tech Systems, Inc.
FF110 FaxFinder Fax Server Admin User Guide
25
Chapter 3: Server Installation
7. Setting Up the Mail Server
The FaxFinder uses a mail server to send, by email, call log reports to the administrator. An email is also
sent to the administrator each time the FaxFinder is powered up. In all cases, you must specify the
address of the mail server and the email address of the administrator. Some email servers require
authentication before allowing the FaxFinder access. In these cases, the FaxFinder unit must be
assigned a Server User Name and a password. If the mail server does not require authentication, the
bottom row of SMTP Configuration fields (“Server User ID,” “Password,” and “Retype Password”) must
be left blank.
a. In the FaxFinder Administration screen, go to the SMTP Configuration fields.
b. Fill in the network IP address or domain name of your mail server.
c. At this point you should receive an email from your FaxFinder saying that the mail server address has
been updated. If you do not receive such an email, see item #2 “What if I don’t get an email when I
set the mail server address?” in Chapter 10: Troubleshooting.
8. Configuring the FaxFinder’s Inbound DID Modem
The FaxFinder’s DID Modem directs inbound faxes to client email addresses.
a. In the FaxFinder Server software, go to the Modem Configuration screen.
b. Under Modem Configuration: Modem 1 (DID Modem), enter the values that match the
characteristics of your DID phone line in the fields provided. (See the section “Prerequisite: Ordering
the DID Line” on page 17.)
Multi-Tech Systems, Inc.
FF110 FaxFinder Fax Server Admin User Guide
26
Chapter 3: Server Installation
c. Note that the value entered in the “Fax ID” field (typically the DID phone number and, sometimes, an
organizational identifier) will appear in the fax log printed by the sender’s fax machine.
d. Click Update.
e. Open the FaxFinder Server Home screen. Click on Current Status. Watch the Current Status: DID
Modem portion of the screen. The “State” of the DID Modem (see Current Status: DID Modem
screen) should be “Waiting for Ring.”
f. From an ordinary POTS phone, dial one of the DID phone numbers that is active in the system. Dial
the DID phone number as you would from an outside line (it will not work to dial the number as if it
were an ordinary 3- or 4-digit extension).
g. In the Current Status: DID Modem screen, the "State" field should change to "Waiting for Connect."
On the phone, you should hear modem dialup/negotiation tones.
h. If you observe both the "Waiting for Connect" state and hear the tones, then the FaxFinder's DID
Modem has been configured properly.
If either of these is absent, see item #3 “What if the modem doesn’t answer a call on the DID line?” in
Chapter 8: Troubleshooting.
9. Configuring the FaxFinder’s POTS Modem
The FaxFinder’s Modem directs inbound faxes to client email addresses. This POTS modem can also
receive faxes but that is a secondary function. All faxes coming in on the POTS modem must go to the
same email address to be specified in the Phone Book screen.
a. In the FaxFinder Server software, go to the Modem Configuration screen.
b. In the Modem Configuration: POTS Modem 1, screen, enter the modem characteristics needed in
your FaxFinder system. The default values have been designed to work well in many situations.
Multi-Tech Systems, Inc.
FF110 FaxFinder Fax Server Admin User Guide
27
Chapter 3: Server Installation
c. Specify a Country Code that fits your location.
d. Use the Routing field to set the FaxFinder’s operating mode.
For POTS Mode, set the Routing field to “POTS Line.”
For PBX Routing Mode, set the Routing field to “DTMF Digits,” or, if a mode code for your PBX is
listed in the drop-down box, select that mode code.
The "Avaya Mode Code" setting applies to Avaya PBXs in which a centralized voice-mail system (like Merlin
Messaging or Intuity Audix) has been installed. FaxFinder supports such Avaya PBXs as Magix, Definity,
S8500, and other models.
The "Siemens HiCom Mode Code" setting applies to the model 300H and other Siemens PBXs in which a
centralized voice-mail system has been installed.
The "Alcatel Mode Code" setting applies to the Alcatel model Omni-PCX4400 PBX equipped with an inband
DTMF protocol for connecting to voice-mail.
e. Set the Max DTMF Digits field per the requirements of the PBX with which the FaxFinder will
interface (if applicable).
f. Fax ID. The value entered in the “Fax ID” field will appear in the fax log printed by the sender’s fax
machine and, typically, will be printed at the top of each page of the transmitted fax.
In PBX Routing Mode (where the Routing field is set to “DTMF Digits” or a ‘mode code’ option for a
particular PBX brand), the Fax ID is typically the PBX fax extension number of the FaxFinder
Administrator or the number of the phone line to which the FaxFinder is connected.
In POTS Mode (where the Routing field is set to “Pots Line”), the Fax ID is typically the number of
the phone line to which the FaxFinder is connected.
In either mode, an organizational identifier, like the company name, might be used as the Fax ID
instead of any fax number.
g. Smart Dial. When Smart Dial mode is ON, the FaxFinder will look for a dial tone before dialing. If,
under normal circumstances, no dial tone is presented to the FaxFinder, then set Smart Dial to OFF.
Multi-Tech Systems, Inc.
FF110 FaxFinder Fax Server Admin User Guide
28
Chapter 3: Server Installation
When Smart Dial is OFF, the FaxFinder modem will seize the phone line and dial after a 3-second
pause whether a dial tone is present or not.
Hint: If ‘no dial tone’ messages appear consistently,
set Smart Dial to OFF.
h. Dial Prefix (or ‘access digit’). When the FaxFinder is attached to an extension of a PBX or key phone
system, an access digit is often required to ‘get an outside line’ (that is, to make a connection to the
PSTN). Often a “9” or an “8” is used for this purpose. You can also add a comma (“,”) to insert a
pause that may be required to receive dial tone for the outside line.
If needed, enter the access digit and optional comma in the “Dial prefix” field. Inform FaxFinder client
users that they should not insert any access digits when entering fax numbers in the FaxFinder Send
Fax screen or in their FaxFinder Address Books. Instead, client users should enter fax numbers the
way they would dial the number from an ordinary residential phone line. Finally, avoid any access
digit combination that might predispose client users to make fax calls accidentally to 911 or any other
official/emergency phone number.
i. Click Update.
j. Click on Current Status. Watch the Current Status: POTS Modem 1 portion of the screen. The
“State” of the POTS Modem should be “Waiting for Ring.”
k1. Test Call - for PBX Routing Mode (where Routing field is set either to “DTMF Digits” or to the mode
code of a specified brand/model of PBX). From an ordinary POTS phone, dial one of the PBX phone
numbers used for incoming faxes in the FaxFinder system. Dial the PBX phone number as you
would from an outside line (it will not work to dial the number as if it were an ordinary 3- or 4-digit
extension).
k2. Test Call - for POTS Mode (where the Routing field is set to “Pots Line”). From a different POTS
phone, dial the number of the phone line to which the FaxFinder is attached.
l. In the Current Status: POTS Modem 1 screen, the "State" field should change to "Waiting for
Connect." On the phone, you should hear modem dialup/negotiation tones.
m. If you both observe the "Waiting for Connect" state and hear the tones, then the FaxFinder's Modem
has been configured properly.
If either of these is absent, see item #3 “What if the FaxFinder doesn’t answer a fax call?” in the
“Chapter 8: Troubleshooting.”
Multi-Tech Systems, Inc.
FF110 FaxFinder Fax Server Admin User Guide
29
Chapter 3: Server Installation
10. Changing Admin’s Server Password
a. In the Password Administration screen, enter a new User ID and Password for the FaxFinder
Administrator (something other than “admin” and “admin”). This User ID and password are to be
used in that person’s capacity as administrator. Then re-enter the password in the “Confirm
Password” field. Passwords can be as short as 4 characters, as long as 12 characters, and are casesensitive. Use a password that is non-obvious and that cannot be guessed easily.
b. Click on Update for this row. The Login screen will appear.
Passw ord Administration
Name
User ID Password
Han k Grego ry - Admin
a dmin-h ank
Han k Grego ry
h ank
*** **
Confirm
Password Function
* *** *
update
update
11. Specifying Admin’s Client Password
a. In the Password Administration screen, enter a new User ID and Password for the FaxFinder
Administrator to be used in that person’s capacity as client/user of the FaxFinder system. Then reenter the password in the “Confirm Password” field. Passwords must be at least 4 characters in
length, can be as long as 12 characters, and are case-sensitive. Use a password that is non-obvious
and that cannot be guessed easily by others.
NOTE: The password that a client uses in the Add FaxFinder screen of the FaxFinder Fax Client
Software must match the password for that client in the Password Administration screen of
the FaxFinder Server Software. Because these passwords must match, the client’s
password must be divulged to the FaxFinder administrator who must arrange the match.
Otherwise, the administrator can establish the password and inform the client.
Multi-Tech Systems, Inc.
FF110 FaxFinder Fax Server Admin User Guide
30
Chapter 3: Server Installation
b. Click on Update for this row.
Passw ord Administration
Name
User ID Password
Han k Grego ry - Admin
Han k Grego ry
a dmin-h ank
h ank
*** **
Confirm
Password Function
* *** *
update
update
12. Sending Test Fax from Fax Machine to FaxFinder
a. Using a conventional fax machine, send a fax to the DID fax number established for the FaxFinder
Administrator.
Multi-Tech Systems, Inc.
FF110 FaxFinder Fax Server Admin User Guide
31
Chapter 3: Server Installation
b. Verify that the fax message sent reaches the email inbox of the administrator.
Allow time for the fax to arrive as an email message. Arrival time will depend on your circumstances
(the page count of the message, how often email is delivered, etc.). If the email does not appear
within a reasonable period of time, see item #4 “What if I don’t get the email to me of the test fax that
I sent?” in in Chapter 10: Troubleshooting.
c. Verify also that you can open the fax in the Multi-Tech Tiff Viewer program. In your email program,
double-click on the file attached to the email message. The Multi-Tech Tiff Viewer program will come
up automatically displaying the tiff file of the fax.
13. Assigning DID Numbers to Network Clients
a. In the Phone Book screen just below the entries for the FaxFinder administrator, make phonebook
entries for the other persons in your office to whom DID fax numbers have been assigned.
For each such FaxFinder client/user, enter the name, user ID, email address, and DID extension in
the appropriate fields.
Multi-Tech Systems, Inc.
FF110 FaxFinder Fax Server Admin User Guide
32
Chapter 3: Server Installation
b. Click on Add for this row. The message “Success: [name] was updated” will appear above the
Phone Book list.
Phone Book
Name
User ID Email Address Ext
H ank Gre gory -- Admi n
a dmin
hg [email protected]
POTS Li ne
hg [email protected]
D ead L etter Box
hg [email protected]
H ank Gre gory
h ank
hg [email protected]
242 6
Jo hn Schli ef
j ohns
jsch [email protected]
242 7
R oge r She rman
ro ger
rog [email protected]
242 8
Gus Schmi dt
g rs
grs@rmc83 .com
242 9
Function
update
update
update
update
update
update
update
delete
delete
delete
delete
add
Multi-Tech Systems, Inc.
FF110 FaxFinder Fax Server Admin User Guide
33
Chapter 4: FaxFinder Server Software Screens
Chapter 4 – FaxFinder Server
Software Screens
In this chapter, we present the screens of the FaxFinder server software. We describe each field in each
screen and some of the command buttons. (We do not describe command buttons that have functions
that would be readily understood by users of Windows software. Examples of such self-evident functions
include buttons like “OK,” “Cancel,” “Next,” etc.)
Home Screen
The FaxFinder Home screen offers access to all other FaxFinder software screens.
Multi-Tech Systems, Inc.
FF110 FaxFinder Fax Server Admin User Guide
34
Chapter 4: FaxFinder Server Software Screens
Login Screen
The FaxFinder Server Login screen is the primary security device for the Server software.
The FaxFinder has a default setting that allows use of “admin” as both the User Name and the Password
at initial startup. After you have begun configuring your FaxFinder fax server system, you should change
the password in the Password Administration screen described later in this chapter.
Multi-Tech Systems, Inc.
FF110 FaxFinder Fax Server Admin User Guide
35
Chapter 4: FaxFinder Server Software Screens
Fax Log Screen
Sorting Function. You can sort the entries of this screen by doing a mouse-over on the name/identifier
of any column that has variable entries. After you click on the column name, the entries will be re-sorted
by that column’s parameter in ascending alphabetical or numerical order.
Fax Log Screen Field Definitions
Values
Description
Email Log Threshold
Log Parameters
numeric
Log History
numeric
The total number of sent and received faxes
required to cause a log report to be sent to the
FaxFinder Administrator. Log reports are sent to
the administrator (or other designated recipient) by
email.
The total number of fax transmissions (including
faxes sent and received) listed in a log report. The
number of fax transmissions described in the fax log
can differ from the number that triggers the sending
of the log report (that is, the Email Log Threshold).
Command Buttons
Save Changes
Send Log Now
Delete Log
Multi-Tech Systems, Inc.
--
Description
If you change the values of the “Email Log
Threshold” field and/or the “Log History” field, you
must click on this button to make those changes
take effect.
Clicking on this button will cause a fax log to be
emailed immediately to the FaxFinder administrator
(or other designated recipient).
Clicking on this button will remove all fax
transmission entries from the Fax Log screen.
FF110 FaxFinder Fax Server Admin User Guide
36
Chapter 4: FaxFinder Server Software Screens
Fax Log Screen Field Definitions
Column
Time
Name
Remote ID
Result
Send/Receive
Pages
Details (button)
Multi-Tech Systems, Inc.
Values
mm/dd/yyyy
alphanumeric
phone number
pass/fail
send, receive
numeric
--
Description
Time that fax was sent or received.
Client party sending or receiving fax.
Fax number of remote party involved in fax
transmission (this could be sender or receiver).
Indicates whether fax transmission passed or
failed.
Indicates whether the FaxFinder client is the
sender or receiver of the fax.
Indicates number of pages in fax transmission.
Click to access the “Fax Details” screen.
FF110 FaxFinder Fax Server Admin User Guide
37
Chapter 4: FaxFinder Server Software Screens
Fax Details Screen
The Fax Details screen is a secondary screen accessible from the Fax Log screen. It presents detailed
technical information about a fax selected in the Fax Log screen.
Fax Details Screen Field Definitions
Field
Name
Values
alphanumeric
Fax Direction
send or receive
Fax Number
nnnn
Init Time
mm/dd/yyyy
hh:mm:ss
Resolution
standard, fine
Baud Rate
2400, 4800, 7200,
9600, 12000,
14400, 16800,
19200, 21600,
24000, 26400,
28800, 31200,
33600 bps
0, 5, 10, 20, 40
milliseconds
Scan Line Time
Remote ID
numeric (fax
number) or
alphanumeric
Number of Pages
Total Bytes
alphanumeric
numeric
Multi-Tech Systems, Inc.
Description
Name of local client participating in fax
transmission (sending or receiving).
Indicates which side of fax transmission the client
is on (sending or receiving).
Phone number at which client receives in fax
transmissions.
Time at which the FaxFinder modem was
initiated for this fax transmission (receive or
send).
Coarseness or fineness of the fax image.
Standard = 92x204 dpi. Fine = 196x204 dpi.
The data transmission speed in bits per second
at which the current fax transmission is
occurring.
The minimum duration of each line of the fax. For
non-error-corrected faxes, this prevents data loss
on the receiving fax machine by adding buffer
time at the end of lines.
0 means no extra data
Typically, this is the fax number of remote party
involved in the fax transmission (this could be fax
sender or recipient). Remote ID could also
simply be an alphanumeric string.
Number of pages included in fax transmission.
Number of bytes in fax transmission.
FF110 FaxFinder Fax Server Admin User Guide
38
Chapter 4: FaxFinder Server Software Screens
Field
Off-Hook Time
Width
Data Compression
Status
Elapsed time
Email Attachments
Connect Time
Height:
Error Correction:
init time
Fax Details Screen Field Definitions
Values
Description
mm/dd/yyyy
The time at which the modem went off-hook for
hh:mm:ss
the fax transmission.
numeric (in pixels) Width of fax. This is typically 1728 pixels.
mh, mr, mmr
Data Compression reduces the fax data stream
taking advantage of the fact that most documents
have commonly-used runs of black and white
horizontally and the fact that most documents
differ very little from one scanned line to the next.
MH is a one-dimensional compression along the
horizontal axis. MR is a combination of onedimensional compression and compression of
differences between lines (two-dimensional
compression). Error Correction is not required if
MH or MR compression is used. MMR is twodimensional compression only and requires error
correction.
MH = modified Huffman, MR = modified READ,
MMR = modified modified READ
Default = MH.
pass/fail
Indicates whether the current fax has been
transmitted successfully or not.
(in seconds)
Indicates the duration of the current fax
transmission.
numeric
Indicates the number of email attachments into
which an incoming fax was divided.
mm/dd/yyyy
Indicates the time at which the connection for the
hh:mm:ss
current fax began.
Letter, Legal,
Height of fax expressed in common page sizes
Variable
(Letter = 8.5” x 11”; Legal = 8.5” x 14”)
on, off
Indicates whether the function to detect and right
faulty data is on or off.
off-hook time
connect time
hang-up time
elapsed time
Multi-Tech Systems, Inc.
FF110 FaxFinder Fax Server Admin User Guide
39
Chapter 4: FaxFinder Server Software Screens
Current Status Screen
Current Status Screen Field Definitions
Field Name
Values
System fields group
Current Time
weekday, mo, dd
hh:mm:ss yyyy
Pending Msgs
numeric
Email To:
Subject:
Multi-Tech Systems, Inc.
[email protected]
alphanumeric
Description
The present time of day.
Emails that have arrived in the FaxFinder Server
that have not yet been conveyed to clients.
These include faxes received from remote
senders and administrative emails of several
kinds: fax log messages, debug log messages,
send-fax error messages, mail server change
notification message (relating to the “SMTP
Server Address” field of Administration screen),
reboot message indicating that FF110 is online.
Email recipient of latest fax message (either the
last message sent or, if a message is pending,
that pending message.
Subject line of email version of pending/last fax
message.
FF110 FaxFinder Fax Server Admin User Guide
40
Chapter 4: FaxFinder Server Software Screens
Current Status Screen Field Definitions (cont’d)
Field Name
Values
Description
System fields group
Time Server
Initializing,
The FaxFinder synchronizes its fax time stamps
Status
No Errors,
to an Internet source, usually a government
SNTP Error: type
standards site. It will attempt contact with the
standards web site 5 times in 20 seconds. If
contact fails, it will try 5 times again 5 minutes
later. If contact succeeds, the FaxFinder will
update its stamping time periodically per an
interval set in the Administration screen.
Up Time
x days yy hours: zz minutes Operation time since last reboot.
Email Status
No Errors,
Indicates whether the FaxFinder’s email
Bad MailServer Address,
transmissions, both faxes and administrative
Mail Server Connect Failed, messages, are proceeding with or without errors.
SMTP Invalid Response,
SMTP Client Timeout
DID Modem fields group
State
Waiting for Ring,
Indicates the modem’s current operating
Initializing Modem,
condition.
Waiting for Connect,
Negotiating, Receiving
Page, Postpage Processing,
Processing, Busied Out
Baud Rate
2400, 4800, 7200, 9600,
The data transmission speed in bits per second
12000, 14400, 16800,
at which the current fax transmission is
19200, 21600, 24000,
occurring.
26400, 28800, 31200, 33600
bps
Connect Time
mm/dd/yyyy,
For the current fax, the date and time at which
hh:mm:ss
the connection began.
Phone Number numeric
For inbound faxes received through the DID
modem, this is the number that the remote fax
sender dialed when sending the fax.
Page
numeric
For the current fax, this indicates the page
number currently being received. “0” indicates
that no fax is currently being sent or received.
numeric, in pixels
Width
Width of received fax.
Elapsed Time
numeric
The duration of the current fax transmission in
seconds.
Name
alphanumeric
Name of person to whom the incoming fax will be
routed.
Vertical
standard, fine
Horizontal resolution is 204 bpi. Vertical
Resolution
resolution can be either 98 bpi (standard) or 196
bpi (fine).
Length
letter, legal, or variable
Length, in paper size, of the received fax.
Remote ID
numeric (phone number) or
The fax number or other identifier for the offalphanumeric
premises fax machine that sent this fax.
Initialize
Initializes the DID modem, clearing a busied-out
Modem
state. This can only be done by a user with
(button)
administrative rights.
Imposes a busied state on the DID modem. This can
Make Busy
only be done by a user with administrative rights.
(button)
Multi-Tech Systems, Inc.
FF110 FaxFinder Fax Server Admin User Guide
41
Chapter 4: FaxFinder Server Software Screens
The “Initialize Modem” and “Make Busy” button commands can be legitimately invoked only by a user with
administrative rights. If a non-administrator clicks on either of these buttons, that party will be logged out
of the FaxFinder Server program and the following error message will appear.
Current Status Screen Field Definitions (cont’d)
Field Name
Values
POTS Modem fields group
Send-Mode
Values are:
Initializing Modem,
Dialing,
Negotiating,
Sending Page,
Postpage
Processing,
Processing, Wait
for Page, FHNG
Error, No dial
tone, Busy
(involved in
sending), Modem
Busy (busied out
by admin), No
Carrier.
Baud Rate
2400, 4800, 7200,
9600, 12000,
14400, 16800,
19200, 21600,
24000, 26400,
28800, 31200,
33600 bps
State
Multi-Tech Systems, Inc.
Description
Indicates the modem’s current operating
condition.
Receive-Mode Values are:
Waiting for Ring,
Initializing Modem,
Waiting for Connect,
Negotiating,
Receiving Page,
Postpage Processing,
Processing,
Busied Out
The data transmission speed in bits per second
at which the current fax transmission is
occurring.
FF110 FaxFinder Fax Server Admin User Guide
42
Chapter 4: FaxFinder Server Software Screens
Current Status Screen Field Definitions (cont’d)
Field Name
Values
Description
POTS Modem fields group
Connect Time
mm/dd/yyyy,
For the current fax, the date and time at which
hh:mm:ss
the connection began.
Phone Number
numeric
For outbound faxes, this is the fax number of the
remote fax recipient.
For inbound faxes, this is the number that the
remote fax sender dialed when sending the fax.
Page
numeric
For the current fax, this indicates the page
number currently being received. “0” indicates
that no fax is currently being sent or received.
Width
numeric,
Width of received fax.
in pixels
Elapsed Time
numeric
The duration of the current fax transmission in
seconds.
Name
alphanumeric
Name of person to whom the incoming fax will be
routed.
Vertical Resolution
standard, fine
Horizontal resolution is 204 bpi. Vertical
resolution can be either 98 bpi (standard) or 196
bpi (fine).
Length
letter, legal, or
Length, in paper size, of the received fax.
variable
Remote ID
numeric (phone
The fax number or other identifier for the offnumber) or
premises fax machine (sender or receiver)
alphanumeric
involved with this fax transmission.
Initialize Modem (button)
-Initializes the POTS modem, clearing a busiedout state. This can only be done by a user with
administrative rights.
Make Busy (button)
-Imposes a busied state on the POTS modem.
This can only be done by a user with
administrative rights.
Logout Option
When you click on Logout in the FaxFinder Home screen, you will be logged out of the FaxFinder Server
software. The Login screen will appear to allow access to re-enter the program.
Help Screen
Online Help has not yet been implemented.
Multi-Tech Systems, Inc.
FF110 FaxFinder Fax Server Admin User Guide
43
Chapter 4: FaxFinder Server Software Screens
Administration Screen
Multi-Tech Systems, Inc.
FF110 FaxFinder Fax Server Admin User Guide
44
Chapter 4: FaxFinder Server Software Screens
Administration Screen Field Definitions
Field Name
Values
Description
IP Configuration Fields
IP Address
n.n.n.n
for n = 0-255
The IP address of the fax server.
Subnet Mask
n.n.n.n
for n = 0-255
This subnet mask is the subnet for the network to
which the fax server is connected. A subnet
mask is used in conjunction with the IP address
to determine if a data destination is on the same
immediate network or not (in the case of
networks made of hubs and ethernet cards). The
default value, often used, is 255.255.255.0.
The IP address of a local DNS server.
Name Server
Default Gateway Name
n.n.n.n
for n = 0-255
Address used to route data out of the immediate
network.
Secondary Name Server
n.n.n.n
for n = 0-255
The IP address of a backup DNS server, which is
typically at a separate location.
Update (button)
Multi-Tech Systems, Inc.
Click on this button to make changes to IP
Configuration fields take effect.
FF110 FaxFinder Fax Server Admin User Guide
45
Chapter 4: FaxFinder Server Software Screens
Administration Screen Field Definitions
Field Name
Values
Description
SMTP Configuration Fields
SMTP Server Address
n.n.n.n
for n = 0-255
Domain name or IP address for mail server
(SMTP must be supported on mail server).
SMTP Port
25 (default)
Range: 0 - 65535
The IP port on which the SMTP server is
listening.
SMTP Server User ID
alphanumeric
Identifier used by FaxFinder when interfacing
with mail server. FaxFinder uses mail server to
send call reports to administrator. Some email
servers require authentication when accessed for
this purpose. To satisfy this authentication
requirement (where needed), a User ID must be
specified for the FaxFinder unit. Leave this field
blank if authentication is not needed.
SMTP Password
alphanumeric
Password used by FaxFinder unit when
accessing mail server. Leave this field blank if
authentication is not needed.
Send Fax Email Receipt
Y/N
When selected, email confirmation notice is sent
attesting that the fax message sent by the
FaxFinder client user has been transmitted with
no errors to the remote fax machine.
Retype Password
alphanumeric
Reiteration of above password.
Click on this button to make changes to SMTP
Configuration take effect. Updating triggers the
sending of an email to the administrator.
Update (button)
Time Configuration Fields
Time Server
URL
Location of time-tracking computer that supports
SNTP. This server is the functional substitute for
a real-time clock in the FaxFinder unit. Clock
sources can be found on the Internet. In the
absence of an Internet connection, a time source
within the FaxFinder network must be
established. The clock is used for call logging.
Add Time Server
URL
Used to add a user-supplied time server.
This value (to be set by user) indicates how often
the FaxFinder will update its clock from the Time
Server.
Request Interval
Time Zone
Multi-Tech Systems, Inc.
alphanumeric
Indicates the time zone in which the FaxFinder
unit is located.
FF110 FaxFinder Fax Server Admin User Guide
46
Chapter 4: FaxFinder Server Software Screens
Administration Screen Field Definitions (continued)
Field Name
Values
Description
Time Configuration Fields (continued)
Click on this button to make changes to Time
Configuration settings take effect.
Update (button)
Date Format
Time Format
mm/dd/yyyy,
OR
dd/mm/yyyy,
OR
yyyy/mm/dd
12-hour or 24-hour
The date can be set to one of three orders, where
mm is the month, dd is the day of the month, and
yyyy is the year.
Indicates whether time is presented in a 12-hour
scheme with an am/pm designation or in a 24hour scheme.
Reset Unit Fields
Reset (button)
Multi-Tech Systems, Inc.
Click on this button to re-boot the server.
FF110 FaxFinder Fax Server Admin User Guide
47
Chapter 4: FaxFinder Server Software Screens
Phone Book Screen
The Phone Book screen maps the DID extension phone numbers of clients to their respective email
inbox addresses at which they will receive incoming faxes as viewable drawing files.
Sorting Function. You can sort the entries of this screen by doing a mouse-over on the name/identifier
of any column that has variable entries. After you click on the column name, the entries will be re-sorted
by that column’s parameter in ascending alphabetical or numerical order.
Phone Book Screen Field Definitions
Field Name
Values
Name column
alphanumeric
User ID column
alphanumeric
Email Address column
Ext column
Function column
Multi-Tech Systems, Inc.
alphanumeric in
email name format
numeric
Buttons for
Update, Delete,
and Add functions
Description
For each client entry, this column shows the
client’s name.
For each client entry, this column lists an
additional one-word identifier for each client that
is typically shorter than the client’s name. Often
this consists of initials, first name only, first initial
plus last name, etc.
For each client entry, this column shows the
client’s email address.
For each client entry, this column shows the
client’s DID extension phone number. This is the
directory number for incoming faxes only.
For each client entry, this column presents
functions that can be invoked upon the entry.
FF110 FaxFinder Fax Server Admin User Guide
48
Chapter 4: FaxFinder Server Software Screens
Phone Book Screen Field Definitions (cont’d)
Field Name
Values
Delete button
--
Admin row
--
POTS Line row
Dead Letter Box row
User Update button
Multi-Tech Systems, Inc.
Description
Use to remove a client user from the Phone
Book.
The party whose email address is entered here
has extensive special rights to configure the
FaxFinder client and server software.
The faxes in email form received by FaxFinder
client users will be shown as coming from the
party having the name and email address listed
in the Admin row. The FaxFinder administrator
also receives fax logs every n faxes (where n can
be set as needed).
The party whose email address is entered here
will receive, as email messages, faxes sent to
the POTS modem. (The POTS modem is
primarily used for sending faxes. Often, the
Administrator is chosen to receive any faxes
arriving on the POTS line. However, any party
could be chosen.)
The party whose email address is entered here
will receive, as email messages, faxes sent to
unassigned DID phone (fax) numbers.
You must click this button after changing values
on Phone Book entries in order to update the
Phone Book.
FF110 FaxFinder Fax Server Admin User Guide
49
Chapter 4: FaxFinder Server Software Screens
Modem Configuration Screen – DID Modem
“Modem Configuration: DID Modem” Screen Field Definitions
Field Name
Max DID Digits
FAX ID
Max Baud Rate
Polarity
Multi-Tech Systems, Inc.
Values
2-7
alphanumeric;
20 characters,
max.
2400 – 33,600 bps
A or B
Description
The number of digits that the telco supplies to the
DID line when an incoming call is received.
Default = 4.
The value in this field is usually the phone
number of the line to which the DID modem is
attached. However, any alphanumeric string up
to 20 characters is allowed. Sometimes
company names or abbreviations are included in
this string. This ID number will appear in the
sender’s fax log.
The value in this field determines the maximum
baud rate used for fax calls on the DID modem.
It is typically set at less than 33,600 bps only if
there are quality problems with the phone line.
Default = 33,600 bps
Orientation of DID battery voltage. DID lines are
polarity sensitive. The polarity of the battery
voltage on the DID line is very important for the
DID line to work properly. Since the line comes
from the telcom as an unmarked twisted pair, the
required polarity can only be determined through
trial and error. The modem is set by default to
Polarity A. If an immediate busy signal is
received when a DID number is dialed, or if the
call is dropped shortly after connecting, then the
battery polarity is probably wrong and the
opposite battery voltage polarity should be tried.
Default = A
FF110 FaxFinder Fax Server Admin User Guide
50
Chapter 4: FaxFinder Server Software Screens
“Modem Configuration: DID Modem” Screen Field Definitions (cont’d)
Field Name
Fax Debugging
Values
Description
on, off
This field allows you to turn on or off a fax
debugging feature. When Fax Debugging is on,
the FaxFinder produces detailed technical
reports on failed faxes. Generally, this feature is
for use by the user in conjunction with MultiTech
tech support personnel. This feature helps to
identify and clarify unusual or difficult problems
that may occur.
In this field, the administrator can enter AT
commands that the FaxFinder modem will
implement each time the modem is initialized
(between each fax call).
The “DID Start” value denotes the type of DID
line that the telco is providing. “Wink” is the most
common type of signaling for DID lines.
Default = wink.
By setting Error Correction to "on," you are
requesting that faxes be sent in an error-free
condition, which can be achieved only if the
remote fax machine with which you are
communicating also supports Error Correction
and has this feature enabled. The Error
Correction feature slows down fax transmissions.
If you are operating at speeds below 16,800 bps,
you can set Error Correction "off" to achieve
faster transmissions of faxes, although the
quality of the fax transmissions may be
compromised. However, if you have set the fax
baud rate to 16,800 bps or higher, then error
correction is automatically enabled.
Default = on.
If you have changed the values of any fields on
this screen, you must click Update to implement
those changes.
Extra Init String
DID Start
wink,
immediate,
delay dial
Error Correction
on, off
Update (button)
--
Multi-Tech Systems, Inc.
FF110 FaxFinder Fax Server Admin User Guide
51
Chapter 4: FaxFinder Server Software Screens
Modem Configuration Screen – POTS Modem
“Modem Configuration: POTS Modem” Screen Field Definitions
Field Name
Answer On
Max Baud Rate
Values
number of rings
2400 – 33,600 bps
Tone Dial
on, off
Dial Prefix
Numeric string,
5 characters, max.
Use of a comma is
optional. The
comma denotes a
brief delay to
establish dial tone
for an outside line.
Multi-Tech Systems, Inc.
Description
This setting determines the number of rings after
which an incoming fax call to the POTS modem
will be answered. Default = 2.
The value in this field determines the maximum
baud rate used for fax calls on the POTS
modem. It is typically set at less than 33,600 bps
only if there are quality problems with the phone
line.
Set this field to “on” if your POTS line supports
tone (DTMF) dialing. Set this field to “off” if the
POTS line supports rotary dialing only.
Default = on.
When the FaxFinder is used on a phone line in a
PBX or key system, this is the digit that must be
dialed to access an outside line (that is, a line on
the PSTN rather than extensions of the PBX or
key telephone system). The digit “9” is most
frequently used.
If “9” is specified in this field, clients will not need
to include the “9” in the individual entries in their
address books or when ‘Adding Recipients’ in the
FaxFinder Send Fax screen.
The FaxFinder administrator must inform clients
as to whether they must include or omit the “9”
when entering fax numbers.
FF110 FaxFinder Fax Server Admin User Guide
52
Chapter 4: FaxFinder Server Software Screens
“Modem Configuration: POTS Modem” Screen Field Definitions (cont’d)
Field Name
Values
Description
Fax Debugging
on, off
This field allows you to turn on or off a fax
debugging feature. When Fax Debugging is on,
the FaxFinder produces detailed technical
reports on failed faxes. Generally, this feature is
for use by the user in conjunction with MultiTech
tech support personnel. This feature helps to
identify and clarify unusual or difficult problems
that may occur.
Extra Init String
In this field, the administrator can enter AT
commands that the FaxFinder modem will
implement each time the modem is initialized
(between each fax call).
Fax ID
alphanumeric;
The value in this field will be printed at the top of
20 characters,
each page of the transmitted fax. The value in
max.
this field is usually the phone number of the line
to which the POTS modem is attached.
However, any alphanumeric string up to 20
characters is allowed. Sometimes company
names or abbreviations are included in this
string. Some governments may require that the
originating phone number be printed on each fax
page.
Error Correction
on, off
By setting Error Correction to "on," you are
requesting that faxes be sent in an error-free
condition, which can be achieved only if the
remote fax machine with which you are
communicating also supports Error Correction
and has this feature enabled. The Error
Correction feature slows down fax transmissions.
If you are operating at speeds below 16,800 bps,
you can set Error Correction "off" to achieve
faster transmissions of faxes, although the
quality of the fax transmissions may be
compromised. However, if you have set the fax
baud rate to 16,800 bps or higher, then error
correction is automatically enabled.
Default = on.
Smart Dial
on, off
If set to “on,” the POTS modem will detect dial
tones and busy signals. If ‘no dial tone’
messages appear consistently, the Smart Dial
feature may be having difficulty detecting PBX
dial tone. In such cases, set Smart Dial to “off.”
Default = on.
Multi-Tech Systems, Inc.
FF110 FaxFinder Fax Server Admin User Guide
53
Chapter 4: FaxFinder Server Software Screens
Password Administration Screen
Use the Password Administration screen to assign password to client users in the FaxFinder system.
In this screen, you specify each client’s name, user ID, and password. You must click “Update” to make
changes for any client permanent. The User ID, Password, and Confirm Password fields are casesensitive.
Sorting Function. You can sort the entries of this screen by doing a mouse-over on the name/identifier
of any column that has variable entries. After you click on the column name, the entries will be re-sorted
by that column’s parameter in ascending alphabetical or numerical order.
Column Name
Name
User ID
Password
“Password Administration” Screen Field Definitions
Values
Description
alphanumeric
Name of client user. This entry must match the
“Name” entry in the Phone Book.
alphanumeric
Identifier for client user. This entry must match
the “User ID” entry in the Phone Book.
alphanumeric
Security code for user. This allows the user to
send faxes using this server. It gives the user
access to the FaxFinder Server software but
without administrative rights. Passwords must be
at least 4 characters in length, can be as long as 12
characters, and are case-sensitive.
Confirm Password
Function
Multi-Tech Systems, Inc.
alphanumeric
Update (button)
After a password is entered in the Password
column, an exactly matching entry must be made
here to validate that password.
When you add or change a client password, you
must click on this button to make the change
permanent.
FF110 FaxFinder Fax Server Admin User Guide
54
Chapter 5: FaxFinder Client Software Configuration
Chapter 5 – FaxFinder Client Software
Configuration
To configure the FaxFinder Client Software, you must first install the software on a PC and then associate
that installed client software with one or more specific FaxFinder hardware units.
Installing FaxFinder Client Software
1. Insert the FaxFinder Product CD into the CD-ROM drive of the client PC. Launch the installation
program by clicking on the setup.exe file on the CD. Transient screens will appear.
Multi-Tech Systems, Inc.
FF110 FaxFinder Fax Server Admin User Guide
55
Chapter 5: FaxFinder Client Software Configuration
2. At the Welcome screen, click Next.
3. At the Choose Destination Location screen, designate the desired file location for the FaxFinder
client software. In most cases, the default file location is recommended.
Specify the desired file location and click Next.
Multi-Tech Systems, Inc.
FF110 FaxFinder Fax Server Admin User Guide
56
Chapter 5: FaxFinder Client Software Configuration
4. At the Select Program Folder screen, you can designate a program folder for the FaxFinder software.
Again, in most cases, the default is recommended unless you have other plans.
Designate a folder and click Next.
5. A transient screen will appear while files are being copied.
Multi-Tech Systems, Inc.
FF110 FaxFinder Fax Server Admin User Guide
57
Chapter 5: FaxFinder Client Software Configuration
6. You will be asked whether or not you want to associate TIF and CPG files with the Multi-Tech Tiff
Viewer. Click Yes (unless you prefer to use a different viewer program).
7. If a Question screen appears asking "Warning - the extension TIF is already registered, Overwrite?,”
you must respond. Click Yes if you wish to use the TIFF viewer installed with the FaxFinder Client
Software. Click No if you prefer to use a different software package for viewing TIF files.
8. Then the ‘completion’ screen will appear.
Click Finish.
Multi-Tech Systems, Inc.
FF110 FaxFinder Fax Server Admin User Guide
58
Chapter 5: FaxFinder Client Software Configuration
The FaxFinder Fax Client Software starts automatically when the installation is complete.
Icons for the FaxFinder software applications will appear in the Windows Start menu. After installation,
the Client Software starts up whenever the computer is booted. A FaxFinder icon appears in the tray area
at the lower-right corner of the screen. The FaxFinder Fax Client Software screen can be opened from
either the Start menu icon or the tray icon. (If the Client Software is shut down, it can be re-opened from
the Start menu or by double-clicking on the FF110.EXE file, which, following a typical, default installation,
would be located at C:\Program Files \ Multi-Tech Systems\FaxFinder Client Software\.)
Multi-Tech Systems, Inc.
FF110 FaxFinder Fax Server Admin User Guide
59
Chapter 5: FaxFinder Client Software Configuration
Associating Client with Specific FaxFinder Unit(s)
Sometimes more than one FaxFinder unit is connected to an Ethernet network. In some cases, certain
client users might be assigned to some FaxFinder units and not assigned to others. After the FaxFinder
client software is installed, you must associate it with one or more FaxFinder units. This procedure shows
you how to make this association so that faxes may be sent from a particular FaxFinder unit to the email
inbox of your PC. To do this procedure, you will need to know the IP address of the FaxFinder unit. Be
aware that an individual FaxFinder client user can be associated with more than one FaxFinder unit. This
could easily be the case in an office that is large and/or an office that has a great deal of fax traffic.
1. At the main screen of the FaxFinder Fax Client Software, click on Edit and select “Add Fax Server.”
2. At the Add Device Address screen, in the “Select Server” field, highlight “FaxFinder.”
In the “Enter Address” field, enter the IP address or domain name of the FaxFinder unit that the client
will use.
A client can be associated with more than one FaxFinder unit, but the associations must be
established one at a time.
3. Enter, in the appropriate fields, the Username and Password that the client will use when accessing
this FaxFinder unit. If the client is to be associated with multiple FaxFinder units, a different
Username and Password could be established for each. However, in most cases, it is advisable (for
Multi-Tech Systems, Inc.
FF110 FaxFinder Fax Server Admin User Guide
60
Chapter 5: FaxFinder Client Software Configuration
the sake of simplicity and convenience) to use the same Username and Password for all FaxFinder
units.
NOTE: The Username entered here must match the entry used in the “User ID” field of the Phone
Book screen in the FaxFinder Server Software. The password entered here must match
the password entered for this client in the Password Administration screen in the
FaxFinder Server software.
Click OK.
4. A new FaxFinder entry should appear on the “Device Status” tab of the FaxFinder Fax Client
Software screen.
The status of the newly registered FaxFinder unit should momentarily go from “Logging in” to “Idle.”
If it goes to Login Failure, then one of two things is wrong:
a. The IP address or domain name is wrong. If that is the case, delete that entry (by right-click
DELETE), and enter a new one; otherwise,
b. The Username/Password combination may be wrong. Verify that the Username/Password
combination in the client software screen matches the UserID/Password combination established
in the FaxFinder Server software screen.
Multi-Tech Systems, Inc.
FF110 FaxFinder Fax Server Admin User Guide
61
Chapter 5: FaxFinder Client Software Configuration
Dis-Associating the Client from a Specific FaxFinder Unit
In this procedure, you will un-do the procedure “Associating Client with a Specific FaxFinder Unit.” This
situation might occur when changes are being made in the network faxing system. In any event, this
procedure severs the tie between your PC and a specific FaxFinder unit so that you will no longer be
connected to it for sending fax messages. (Faxes can be received in email form from the FaxFinder
server, despite dis-associating from the FaxFinder server, as long as the receiving party is entered in the
FaxFinder Phone Book.) In cases where the client is currently associated with more than one FaxFinder
unit, you will need to know the IP address of the specific FaxFinder unit from which you want to
disconnect.
1. Open the FaxFinder Client Software program and go to the Device Status tab. Select the
FaxFinder unit from which you want to disconnect (you can identify the FaxFinder unit by its IP
address or domain name). Right-click on it and select delete.
2. Your FaxFinder Client Software will no longer be able to send faxes through this particular
FaxFinder unit.
Multi-Tech Systems, Inc.
FF110 FaxFinder Fax Server Admin User Guide
62
Chapter 5: FaxFinder Client Software Configuration
Disabling and Re-Enabling a Client’s FaxFinder Service
Disabling a FaxFinder’s service to a specific client is simply a temporary version of dis-associating
the client from that FaxFinder. When a client has disabled the FaxFinder’s service to that client, the
client/user cannot send faxes through the FaxFinder. (Faxes can be received in email form from the
FaxFinder server, despite this disabling, as long as the receiving party is entered in the FaxFinder
Phone Book.) The client can easily re-establish FaxFinder service by toggling the Disable command
(now shown with a “Ê” beside it), thus enabling service once again.
1. Open the FaxFinder Client Software program and go to the Device Status tab. Select the
FaxFinder unit from which you want to disconnect temporarily (you can identify the FaxFinder unit by
its IP address or domain name). Right-click on it and select disable.
2. When disabled, a check mark will appear beside the disable command.
3. To re-enable the FaxFinder unit for your use, that is to avail your PC of its service once again,
open the FaxFinder Client Software program and go to the Device Status tab. Select the FaxFinder
unit to which you want to re-connect. Right-click on it and select Ê disable. You will now be reconnected to service by this FaxFinder unit.
Sending Test Fax
To verify that the software installation has succeeded, you should use the FaxFinder client software to
send a fax to a regular fax machine (preferably a local fax machine). To do so, follow the instructions for
the “Sending a Fax” procedure in Chapter 6.
Multi-Tech Systems, Inc.
FF110 FaxFinder Fax Server Admin User Guide
63
Chapter 5: FaxFinder Client Software Configuration
FaxFinder Fax Client Software Menu Command Definitions
FaxFinder Fax Client Software Menu Command Definitions
Command Name
Values
Description
File menu commands
Send Fax
--
Pause Scheduler
--
Options
Exit
Multi-Tech Systems, Inc.
Brings up the FaxFinder Send Fax screen, the
first step in transmitting a fax message via the
FaxFinder system.
When you invoke the Pause Scheduler
command, any faxes currently pending will not
be sent and any fax transmissions attempted
while this command is in force will not be sent.
When the scheduler has been paused, you must
select Ê Pause Scheduler to rescind the
command. That is to say, this command toggles
on and off when selected repeatedly.
If the computer is rebooted, the FaxFinder Fax
Client Software will cancel the Pause Scheduler
command at startup. Any faxes that had been
paused and left unsent when the computer was
turned off will be sent immediately when the
computer is turned on again.
Brings up the Options screen. The Options
screen consists of the Identification tab where
info about the client user should be entered and
the Fax Retry tab where the client user can
specify, for faxes that were not successfully on
the first attempt, the number of subsequent
attempts to be made and the interval between
these attempts.
Closes the FaxFinder Fax Client Software
program.
FF110 FaxFinder Fax Server Admin User Guide
64
Chapter 5: FaxFinder Client Software Configuration
FaxFinder Fax Client Software Menu Command Definitions (cont’d)
Command Name
Values
Description
Edit menu commands
Add Fax Server
-Brings up the Add Device Address screen so
that a FaxFinder or HylaFax server on the
network can be associated with the client. A
client can be served by more than one FaxFinder
unit.
Add Contact
-Brings up the New Contact screen so that an
recipient can be added to the Address Book.
Once a recipient’s contact info has been entered
into the Address Book, faxes sent to that party
will have the destination fax number
automatically conveyed to the FaxFinder unit.
Info from recipient’s Address Book entry will also
be included in automated fields on fax cover
pages where applicable (for example, the voice
phone number, company name, and city of the
recipient might be two fields included on the
cover page).
Edit Cover Page
-Brings up the Cover Page Generator program so
Template
that fax cover pages can be created or modified.
Not currently supported. See User Guides.
Help menu commands
Multi-Tech Systems, Inc.
FF110 FaxFinder Fax Server Admin User Guide
65
Chapter 5: FaxFinder Client Software Configuration
FaxFinder Fax Client Software Menu Command Definitions (cont’d)
Field Name
Values
Description
Device Status tab
Device (column)
alphanumeric
Status (column)
Recipient (column)
Print Capture (row)
Multi-Tech Systems, Inc.
idle, negotiating,
preparing to
capture, capturing
page n, sending
fax page n,
receiving fax page
n, success,
unsuccessful- user
aborted,
unsuccessful-no
carrier,
unsuccessful- no
dial tone,
unsuccessful-error
<descriptor>
alphanumeric
idle,
preparing to
capture,
capturing page n
Shows FaxFinder or HylaFAX server units with
which the client is associated. Also shows Print
Capture function.
Shows the status of the FaxFinder or HylaFAX
fax server unit pertaining to its fax sending and
receiving capabilities and to its print/image
capturing capabilities.
Shows the name and fax number of recipient to
whom fax is currently being sent.
Indicates status of the FaxFinder’s Print
Capturing software module.
FF110 FaxFinder Fax Server Admin User Guide
66
Chapter 5: FaxFinder Client Software Configuration
FaxFinder Fax Client Software Menu Command Definitions (cont’d)
Command Name
Values
Description
Device Status tab (cont’d)
Commands accessed by
Right-Clicking on a
selected FaxFinder
Delete
Dis-associates the client from the selected
FaxFinder or HylaFAX unit so that the client can
no longer send faxes through that FaxFinder unit.
(The FaxFinder Server’s IP address is removed
from the Device Status list of the FaxFinder
Client Software.)
Disable
-Temporarily dis-associates the client from the
selected FaxFinder or HylaFAX unit so that the
client can no longer send faxes through that unit.
Abort
Abort and Pause
---
Properties
--
Multi-Tech Systems, Inc.
To restore the connection to the
FaxFinder/HylaFAX unit, select Ê Disable.
(Because the FaxFinder Server’s IP address
remains in Device Status list of the FaxFinder
Client Software, service can be restored by
toggling the Disable command, thus enabling the
association once again.)
Discontinues a fax transmission in progress.
Discontinues a fax transmission in progress and
puts all pending faxes on hold. After this
command has been invoked, no more faxes will
be sent from this client until
(a) the client PC is turned off and on again, or
(b) the command has been turned off by
selecting Ê Pause Scheduler in the File menu
of the FaxFinder Fax Client Software.
Brings up the FaxFinder <IP address><domain
name> screen. This screen simply shows the IP
address or domain name of the selected
FaxFinder unit.
FF110 FaxFinder Fax Server Admin User Guide
67
Chapter 5: FaxFinder Client Software Configuration
FaxFinder Fax Client Software Menu Command Definitions (cont’d)
Field/Command Name
Values
Description
Pending Faxes tab
Recipient (column)
--
Scheduled Time/Date
--
Pages (column)
Commands accessed by
right-clicking on a
selected pending fax
message
Delete
--
--
Reschedule
--
Properties
--
Multi-Tech Systems, Inc.
Identifies recipient of each fax for which
transmission is incomplete.
Identifies time at which a pending fax is set to be
transmitted.
Shows the number of pages of each fax.
Cancels the transmission of the selected pending
fax message.
Brings up the Fax Scheduling screen so that
transmission of a pending fax can be scheduled
for a different time.
Brings up the Fax Details screen for the selected
pending fax . The Fax Details screen presents
information about the recipient, transmission
status, cover page, and original source file of the
selected pending fax.
FF110 FaxFinder Fax Server Admin User Guide
68
Chapter 5: FaxFinder Client Software Configuration
FaxFinder Fax Client Software Menu Command Definitions (cont’d)
Field Name
Values
Description
Device (column)
Fax Ports tab
alphanumeric
Port (column)
ttys0, ttys1
ttys_0-3 for FF420
ttys_0-7 for FF820
Status (column)
Recipient (column)
idle, negotiating,
preparing to
capture, capturing
page n, sending
fax page n,
receiving fax page
n, success,
unsuccessful- user
aborted,
unsuccessful-no
carrier,
unsuccessful- no
dial tone,
unsuccessful-error
<descriptor>
alphanumeric
List All Fax Ports
Y/N
Multi-Tech Systems, Inc.
Shows FaxFinder units with which the client is
associated.
The fax modem (within) the FaxFinder server
unit, the status of which is being tracked.
ttys0 denotes POTS Modem 1 of the listed
faxfinder unit;
ttys1 denotes POTS Modem 2 of the listed
faxfinder unit, etc., for all modems in the FF420/820 unit.
Shows the status of the FaxFinder fax server unit
pertaining to its fax sending and receiving
capabilities and to its print/image capturing
capabilities.
Shows the name and fax number of recipient to
whom fax is currently being sent.
When selected, all fax ports are listed; when not
selected, only the current active fax port is listed.
FF110 FaxFinder Fax Server Admin User Guide
69
Chapter 5: FaxFinder Client Software Configuration
FaxFinder Fax Client Software Menu Command Definitions (cont’d)
Field/Command Name
Values
Description
Fax Log tab
Recipient (column)
Identifies recipient of each outgoing fax.
Time/Date Sent (column) day, date, time, zone Indicates when each outgoing fax was sent.
in the form
ddd mmm nn
hh:mm:ss zzzzzz
Pages (column)
Status (column)
integer
success,
unsuccessful- user
aborted,
unsuccessful-no
carrier,
unsuccessful- no
dial tone,
unsuccessful-error
<descriptor>
Shows the number of pages in each fax.
Indicates whether each fax was sent successfully
or not and, if not, indicates reason for failure.
Commands accessed by
right-clicking on a
selected fax log entry
delete
resend
---
properties
--
Cancels the selected fax log entry.
Resends the selected fax. The Fax Scheduling
screen will appear to set a time for the resending
to occur.
Brings up the Fax Details screen for the selected
fax. The Fax Details screen presents information
about the recipient, transmission status, cover
page, and original source file of the selected
pending fax.
Multi-Tech Systems, Inc.
FF110 FaxFinder Fax Server Admin User Guide
70
Chapter 5: FaxFinder Client Software Configuration
FaxFinder Fax Client Software Menu Command Definitions (cont’d)
Field/Command Name
Values
Description
Address Book tab
Name (column)
alphanumeric
Shows the name of the the selected Address
Book entry.
alphanumeric
Organization (column)
Shows the organizational affiliation of the the
selected Address Book entry.
Fax Number (column)
integers
Shows the fax number of the selected Address
Book entry.
Commands accessed by
right-clicking on a
selected address book
entry
delete
--
properties
--
Multi-Tech Systems, Inc.
Removes the selected entry from the Address
Book. A confirmation screen appears before the
deletion is executed.
Brings up the Contact <name> screen screen
for the selected address book entry. The
Contact screen shows user contact details
(name, company name, fax number, phone
numbers, and street address info).
FF110 FaxFinder Fax Server Admin User Guide
71
Chapter 6: FaxFinder Client Software Operation
Chapter 6: FaxFinder Client Software
Operation
This chapter describes the things that a client user can do with the FaxFinder system. Three software
programs are involved: the FaxFinder Client Software, the Multi-Tech Tiff Viewer, and the Multi-Tech
Cover Page Generator. The programs work together with the FaxFinder Client Software acting as the
hub of activity. The FaxFinder Client Software interfaces with the FaxFinder Server, has a user interface,
and calls upon the Cover Page Generator and Tiff Viewer for their special functions. When sending
faxes, the FaxFinder Client Software calls up the Multi-Tech Cover Page generator if cover pages are
requested. When previewing outgoing faxes or viewing received faxes, the FaxFinder Client Software
calls up the Multi-Tech Tiff Viewer to display TIF files. Note that client users can choose to display TIF
files on a different TIF viewing program (see Step 7 of “Installing FaxFinder Client Software” in Chapter
5).
Sending a Fax (Quick Version)
1. At the application program on which your source message has been written or drawn (typically in a
word processor or graphics program), print to FaxFinder.
Wait a few seconds for the FaxFinder Send Fax screen to appear.
Multi-Tech Systems, Inc.
FF110 FaxFinder Fax Server Admin User Guide
72
Chapter 6: FaxFinder Client Software Operation
2. At the FaxFinder Send Fax screen:
A. Enter the recipient’s name and faxing phone number in the “Name” and “Phone Number” fields.
(Add prefix 9 if needed.)
B. Click Add Recipient.
C. Click No when asked “Would you like to add the recipient to the address book?” No forestalls the
screens needed to make an Address Book entry. (Clicking Yes, however, will be useful if you
expect to send more faxes to that party later.)
NOTE: If you want to add a cover page and/or preview the fax, skip to Options before sending.
D. Click Send Fax.
Use Cover Page. Enter subject and cover page notes.
Options.
Cover Page Style. Choose style from drop-down menu.
View/Edit cover-page style.
Preview Fax to see entire message before sending.
Multi-Tech Systems, Inc.
FF110 FaxFinder Fax Server Admin User Guide
73
Chapter 6: FaxFinder Client Software Operation
Sending a Fax
To send a fax by printing from an application program on a client PC, follow the steps listed below.
1. The FaxFinder client software must be installed on the PC. (See the section “Installing FaxFinder
Client Software” earlier in this manual.)
2. The client PC and the FaxFinder server must both be connected to the same Ethernet LAN system.
(See the section “Chapter 3, Part C: Configuring the FaxFinder Server” earlier in this manual.)
3. The association must be made between the client PC and the FaxFinder Server. (See the section
“Associating Client with Specific FaxFinder Unit(s)” earlier in this manual).
4. After installation, the FaxFinder Fax Client Software program will be running whenever the PC is
on. You can view the FaxFinder program's main window by clicking on the FaxFinder icon at the
lower right of the PC’s monitor screen in its Application Tray. Then select “Show FaxFinder Client
Software.”
Note: The user can shut down the FaxFinder program by selecting "exit" either
from the tray icon or from the main FaxFinder program screen. If the
program has been shut down, it can be restarted from the Windows Start
menu.)
Multi-Tech Systems, Inc.
FF110 FaxFinder Fax Server Admin User Guide
74
Chapter 6: FaxFinder Client Software Operation
However, you can send faxes through the FaxFinder without bringing up the FaxFinder Client
Software screen.
Multi-Tech Systems, Inc.
FF110 FaxFinder Fax Server Admin User Guide
75
Chapter 6: FaxFinder Client Software Operation
5. At the application program (for example, a word processing program or drawing program), print to the
FaxFinder.
Setting the destination of the printing job varies from program to program. For the common Notepad
text editor program, for example, you must set the destination printer in the Page Setup screen. In
most cases, however, the destination printer can be set in a Print menu that appears when each
printing job is initiated.
Application programs may sometimes ‘complain’ about the image size not fitting on the fax page.
Although such messages can sometimes safely be ignored (in the illustration below, simply by
clicking “Yes” to proceed), you must confirm this with your own application programs.
Multi-Tech Systems, Inc.
FF110 FaxFinder Fax Server Admin User Guide
76
Chapter 6: FaxFinder Client Software Operation
To assign the FaxFinder as the default printer simultaneously for all application programs that print,
use the Windows Printers dialog box.
To adjust fax-specific parameters (like resolution and paper size), right-click on the Print dialog box
within the application and select “Properties.” The MULTI-TECH FAXFINDER Properties screen will
appear.
Multi-Tech Systems, Inc.
FF110 FaxFinder Fax Server Admin User Guide
77
Chapter 6: FaxFinder Client Software Operation
6. After the printing has been initiated by the application program, the FaxFinder Send Fax screen will
appear.
Click on Address Book. When the Address Book screen appears, click “Add.” At the New
Contact screen, enter the recipient’s name, fax number, and any other contact information you want
to retain.
The recipient’s fax number should be entered as you would dial it from a phone on the public phone
network (as from a residential phone). Click OK. At the Address Book screen, highlight the
recipient in the list and click “Select.” The party will appear in the “Recipients” list in the FaxFinder
Send Fax screen.
Additional recipients can be added. The same fax message will be sent to all recipients.
A recipient can also be specified directly in the FaxFinder SendFax screen by typing his/her name in
the “Name” field, typing his/her fax number in the “Phone Number” field, and then clicking on “Add
Recipient.” If the recipient is specified in this way, the user will be prompted about entering the
recipient in the Address Book but such recipients will not be added to the Address Book
automatically.
You can also access the Address Book directly to add and edit entries. At the FaxFinder Fax Client
Software screen, go to Edit | Add Contact.
7. If you want to include a cover page with your fax, click in the “Use Cover Page” checkbox. Enter
information as needed in the “Subject” and “Cover Page Notes” fields.
Automated fields, like sender information (individual name, company name, street address, phone
number, fax number, etc.) should be entered in the Address Book. The Address Book is accessible
in the “Options” menu of the FaxFinder Fax Client Software screen. For more information about
addresses and the automated fields used in cover pages, see the section “Setting Up Your Address
Book” later in this chapter.
Multi-Tech Systems, Inc.
FF110 FaxFinder Fax Server Admin User Guide
78
Chapter 6: FaxFinder Client Software Operation
The “Cover Page Style” chosen will determine how this information will appear on the fax cover page.
You can select a standard style from the “Cover Page Style” drop-down menu or create a style of
your own in the Template Editor. To access the Template Editor software, click on the “View/Edit”
button. (For more information, see the section “Creating or Modifying Cover Page Styles” later in this
chapter.)
Click on the “Preview Fax” button to check the fax before you send it. The Mult-Tech Tiff Viewer
program will appear.
In it, you can view both the cover page and the main fax page(s). (For more information on this, see
the section “Using the Multi-Tech Tiff Viewer” later in this chapter.) When satisfied with your fax,
close the Multi-Tech Tiff Viewer program and return to the FaxFinder Send Fax screen.
8. At the FaxFinder Send Fax screen, click on the “Send Fax Now” button to send the fax.
9. Confirmation of having sent the fax(es) successfully will appear in the “Fax Log” tab of the FaxFinder
Fax Client Software screen.
Multi-Tech Systems, Inc.
FF110 FaxFinder Fax Server Admin User Guide
79
Chapter 6: FaxFinder Client Software Operation
Scheduling Fax Transmissions
The FaxFinder allows you to send a fax immediately or delay its transmission until a later time. Perhaps
the most common motivations for delayed faxing are to enjoy the lower phone rates that may apply at
night and on weekends or to broadcast faxes after business hours to avoid tying up fax transmission
resources during the busiest weekday hours. In any case, it is easy to schedule faxing for a later time.
1. Send the fax via FaxFinder in the normal way (see the procedure “Sending a Fax” earlier in this
chapter).
2. When the FaxFinder Send Fax screen appears, enter a recipient for the fax either from the Address
Book or by entering Name and Phone Number (fax number) in the appropriate fields and clicking Add
Recipient.
3. In the FaxFinder Send Fax screen, the recipient’s name and fax number will appear in the “Recipients”
list and the “Schedule” pane will no longer be grayed out. Click Schedule. The Fax Scheduling screen
will appear.
4. Click to uncheck the “send immediately” checkbox.
5. Enter the date and time at which you want the fax to be sent.
6. Click OK in the Fax Scheduling screen and then click Send Fax in the FaxFinder Send Fax screen.
Multi-Tech Systems, Inc.
FF110 FaxFinder Fax Server Admin User Guide
80
Chapter 6: FaxFinder Client Software Operation
7. The fax will be sent at the scheduled time. You can view the event as it happens in the FaxFinder
client software Device Status screen or after the fact in the Fax Log screen.
Re-Sending a Failed Fax
Locate the failed fax in the Fax Log tab of the FaxFinder Fax Client Software. Select the failed fax and
right-click on it. In the menu that appears, select Resend.
Multi-Tech Systems, Inc.
FF110 FaxFinder Fax Server Admin User Guide
81
Chapter 6: FaxFinder Client Software Operation
Putting Pending Faxes on Hold and Rescinding the Hold
Suppose you have sent a fax to 10 recipients and, shortly after clicking on Send Fax, you realize that
there is something incorrect in the content of your fax (it may be something you want to add, delete, or
change). You can prevent any pending faxes from being sent by selecting “Pause Scheduler” in the File
menu of the FaxFinder Fax Client screen. Suppose that 2 faxes have already been transmitted
completely and a third fax is in progress when you click “Pause Scheduler.” The FaxFinder will finish the
third fax but will not fax to recipients 4-10. The pausing function allows you to see details about the fax,
to view the fax again, and to delete the fax if you so desire.
As long as “Pause Scheduler” is selected, no fax message will advance beyond “Pending” status and, so,
none will be sent.
To rescind or call off the hold on pending faxes, open the FaxFinder Fax Client Software. From the File
menu, select Ê Pause Scheduler. The scheduler will resume normal operation and faxes will be sent.
Consider this example.
1. A fax is sent by FaxFinder to three recipients.
2. While the fax is being sent to the second party, the client user realizes that there is something wrong
with the fax. She brings up the FaxFinder Fax Client Software screen, opens the File menu, and selects
“Pause Scheduler.”
Multi-Tech Systems, Inc.
FF110 FaxFinder Fax Server Admin User Guide
82
Chapter 6: FaxFinder Client Software Operation
At that point, the FaxFinder will complete the fax in progress that is being sent to the second recipient.
However, the fax to the third recipient is still listed as “Pending” in the Pending Faxes tab of the
FaxFinder Fax Client Software.
The client user can take one of several actions.
She could click on “Pause Scheduler” again to cancel that command. In that case, the pending fax would
become active and could not be stopped.
She could select the fax in the Pending Faxes screen and right-click on it to bring up a menu.
Multi-Tech Systems, Inc.
FF110 FaxFinder Fax Server Admin User Guide
83
Chapter 6: FaxFinder Client Software Operation
She could view the details of the fax and, at her option, view the fax again.
She could re-schedule the fax for a later time.
Multi-Tech Systems, Inc.
FF110 FaxFinder Fax Server Admin User Guide
84
Chapter 6: FaxFinder Client Software Operation
She could “delete” the fax, which means that that fax transmission would never be completed.
Pause is canceled on reboot. If she shuts down her computer for the day while leaving this fax in a
“pending” state, that fax will be sent shortly after booting up her computer again, that is shortly after the
FaxFinder client software is functioning again. So, any faxes put in the pending state by using the
‘Pause Scheduler’ command will be sent the next time the FaxFinder software is activated.
Canceling a Fax
If the fax is in progress … Open the FaxFinder Fax Client Software. On the Device Status tab, select
the FaxFinder unit that is in the process of sending your fax. In the list, right-click on that FaxFinder entry.
In the menu that appears, select Abort.
If the fax is pending … Open the FaxFinder Fax Client Software. On the Pending Faxes tab, select the
fax transmission that you want to cancel. In the list, right-click on that fax message entry (the recipient
will be shown). In the menu that appears, select Delete.
To cancel the current fax and simultaneously put a hold on sending any other faxes from your PC, select
Abort and Pause. To resume faxing, go to the File menu and cancel the pause by selecting
Ê Pause Scheduler. Any pause applied to a pending fax is cancelled when the computer is rebooted.
Any fax left pending with the FaxFinder Scheduler paused will be sent as soon as the FaxFinder client
program opens when the PC is turned on again.
Multi-Tech Systems, Inc.
FF110 FaxFinder Fax Server Admin User Guide
85
Chapter 6: FaxFinder Client Software Operation
Setting Fax Retry Number and Interval
You can set the FaxFinder client software to retry a fax transmission if it fails on the first attempt. You can
set both the number of additional attempts and the interval between each additional attempt. You can set
these parameters as follows.
1. In the FaxFinder Fax Client Software screen, open the File menu and select “Options.” When the
Options screen appears, click on the Fax Retry tab.
2. Set the number of retries and the interval between these repeated attempts and click OK.
Multi-Tech Systems, Inc.
FF110 FaxFinder Fax Server Admin User Guide
86
Chapter 6: FaxFinder Client Software Operation
Sending One Fax Containing Multiple Documents
The FaxFinder allows you to include multiple documents in a single fax transmission. Those multiple
documents could come from the same or different application programs.
1. Consider the example below where a text file and a drawing file are included in the same fax with a
single cover letter. Here’s how this multiple-document fax was sent.
a. The user printed the text file to the FaxFinder from the Notepad text editor program.
b. The FaxFinder Send Fax screen appeared. However rather than completing the fax
transmission, the user opened another application program.
c. The user printed the graphic file to the FaxFinder from the MacroMedia FreeHand drawing
program.
d. When the user returned to the FaxFinder Send Fax screen, both documents appeared in the
“Documents” list.
2. In the “Documents” pane of the FaxFinder Send Fax screen, you can add a cover page, re-arrange
the order of the files, or delete items from the list of files to be faxed.
Multi-Tech Systems, Inc.
FF110 FaxFinder Fax Server Admin User Guide
87
Chapter 6: FaxFinder Client Software Operation
3. You can also add to the list of files to be faxed out by including items that you have stored. In the
“Documents” pane of the FaxFinder Send Fax screen, click Add. You could then browse to find, for
example, a fax that you had received earlier, had stored as a TIF file, and now want to forward to another
party.
4. When all documents to be transmitted have been listed in the Documents list, click Send Fax. The
documents will be sent in the order listed.
Multi-Tech Systems, Inc.
FF110 FaxFinder Fax Server Admin User Guide
88
Chapter 6: FaxFinder Client Software Operation
Forwarding a Fax
Suppose you receive a fax using the FaxFinder system. Suppose that fax message is something you
want to pass along to another party in fax form at a later date (for example, Rocky Mountain Construction
Company receives tax information about lots on which it intends to build houses). In this case, you
should note the name of the TIF file in question. You can then browse to that TIF file and re-send it as a
fax message.
To forward a fax, follow these steps.
1. At the FaxFinder Fax Client Software screen, go to the File menu and select “Send Fax.” The
FaxFinder Send Fax screen will appear.
2. In the Documents pane, click “Add.” Then browse to the TIF file to be sent as a fax.
Click Open.
3. The selected file will appear in the “Documents” list in the FaxFinder Send Fax screen.
Multi-Tech Systems, Inc.
FF110 FaxFinder Fax Server Admin User Guide
89
Chapter 6: FaxFinder Client Software Operation
4. In the FaxFinder Send Fax screen, specify a recipient for the fax. The recipient could either come
from your Address Book or be entered by typing the Name and Phone Number in the appropriate
fields and clicking “Add Recipient.”
Then click Send Fax. The TIF file will be reconverted into a fax message that can be received by a fax
machine.
Multi-Tech Systems, Inc.
FF110 FaxFinder Fax Server Admin User Guide
90
Chapter 6: FaxFinder Client Software Operation
Receiving a Fax
The FaxFinder Server delivers incoming faxes to client PCs in their email inboxes.
1. A DID phone directory number must be assigned to the client PC at the FaxFinder Server.
2. The client PC and the FaxFinder server must both be connected to the same Ethernet LAN system.
(See the section “Part B: Configuring the FaxFinder Server” in Chapter 3.)
3. Some sender faxes a document to a FaxFinder client using that client’s DID phone number.
4. The incoming fax arrives in the client’s email inbox as a message with an attachment.
The email message is marked as being from the FaxFinder Administrator.
The sender’s “Remote ID” and the client’s name appear in the “Subject” line of the email message.
(The Remote ID comes from the sending fax machine and is typically the sender’s fax number or
name.)
Multi-Tech Systems, Inc.
FF110 FaxFinder Fax Server Admin User Guide
91
Chapter 6: FaxFinder Client Software Operation
5. The FaxFinder client opens the email message. The incoming fax message takes the form of a
graphic file attachment. The FaxFinder Server has assigned the file an automatic file name.
6. The FaxFinder client can open the file or save the file.
a. Opening the fax message graphic file. Incoming fax messages are TIFF files. These TIFF files
are automatically associated with the chosen TIFF viewer program. The client can open the fax email
attachment directly in the TIFF viewer program.
b. Saving the fax message graphic file. In some TIFF viewer programs, the client can do a ‘Save
As,’ renaming the TIFF file attachment with a meaningful name for subsequent viewing or forwarding.
7. The client views the fax message in the viewer program and/or prints a paper copy.
Multi-Tech Systems, Inc.
FF110 FaxFinder Fax Server Admin User Guide
92
Chapter 6: FaxFinder Client Software Operation
Using the Multi-Tech Tiff Viewer
The Multi-Tech Tiff Viewer program has a variety of features that enhance the viewing of fax messages in
graphic file form (thumbnails, zooming, spot magnification, scrolling, rotating, etc.). The program can also
manipulate and permanently alter the graphic files.
Frequently Used Commands – Toolbar Icons
The most commonly used functions are available as icons on the toolbar. In the next three diagrams, we
label and describe the functions of these icons.
Multi-Tech Systems, Inc.
FF110 FaxFinder Fax Server Admin User Guide
93
Chapter 6: FaxFinder Client Software Operation
Multi-Tech Systems, Inc.
FF110 FaxFinder Fax Server Admin User Guide
94
Chapter 6: FaxFinder Client Software Operation
While most of these features are common to many graphical programs, some warrant a bit of explanation.
Copy. The Copy function allows you to copy the fax file and insert it into a different application program.
See “Importing Fax Images into Other Application Programs” below.
Panning (Omni-Directional Scroll). The “hand” icon allows you to bring any desired portion of the image
into view.
Zoom to Selection. Click and drag with the mouse over the rectangular area you would like to view.
The Multi-Tech Tiff Viewer zooms in sufficiently to fill the screen with the selected area.
Multi-Tech Systems, Inc.
FF110 FaxFinder Fax Server Admin User Guide
95
Chapter 6: FaxFinder Client Software Operation
Spot Magnifying Glass. In this viewing mode, a magnifying glass icon (cursor) appears.
It can be used in one of three ways to magnify any portion of the image: (a) Click over Area, (b) Click-andHold Over Area, (c) Scan the Graphic.
Click over Area. A secondary window will appear that shows the ‘clicked-on’ area magnified. You can
adjust the size of the secondary window by dragging on its borders. You can re-locate the secondary
window by putting the cursor inside the window, clicking, holding, and dragging.
Multi-Tech Systems, Inc.
FF110 FaxFinder Fax Server Admin User Guide
96
Chapter 6: FaxFinder Client Software Operation
Click-and-Hold over Area. Two additional windows will appear. The cursor itself becomes a small
secondary window of fixed size. The same image also appears on a third window. You can adjust the
size of the secondary window by dragging on its borders. You can re-locate the secondary window by
putting the cursor inside the window, clicking and dragging.
Scan the Graphic. If you click, hold, and drag, you can scan the image in a magnified view. Two
magnifying windows will appear as in the “Click-and-Hold Over Area” description above.
Multi-Tech Systems, Inc.
FF110 FaxFinder Fax Server Admin User Guide
97
Chapter 6: FaxFinder Client Software Operation
Importing Fax Images into Other Application Programs
The Copy command in the Multi-Tech Tiff Viewer allows you to import the fax image into other application
programs. In the illustration below, a fax has been Copied from the Multi-Tech Tiff Viewer and Pasted
into a Microsoft Word document.
Multi-Tech Systems, Inc.
FF110 FaxFinder Fax Server Admin User Guide
98
Chapter 6: FaxFinder Client Software Operation
Setting Up Your Address Book Manually
The Address Book in the FaxFinder Client Software adds significant convenience to the system. When
recipient contact information has been entered in the Address Book, this information will appear
automatically in the corresponding fields of the fax cover page.
1. In the FaxFinder Fax Client Software screen, click on the “Address Book” tab.
2. In the Edit menu, select “Add Contact.”
3. In the appropriate fields of the New Contact screen, enter information about the fax recipient.
4. After an entry has been made in the Address Book, you can view and revise it. In the Address Book
list, right-click on the name of the contact about whom you wish to review address information and
select Properties.
Multi-Tech Systems, Inc.
FF110 FaxFinder Fax Server Admin User Guide
99
Chapter 6: FaxFinder Client Software Operation
5. A Contact – Recipient screen will appear presenting the contact info for this particular recipient.
6. When you click on “Address Book” at the FaxFinder Send Fax screen, this same contact list will
appear.
7. When you select an item from this list and select Use Cover Page, contact info will be added
automatically to the appropriate fields of the cover page.
8. To delete an entry from your Address Book, select the entry and right-click on it. In the menu that
appears, select delete.
Multi-Tech Systems, Inc.
FF110 FaxFinder Fax Server Admin User Guide
100
Chapter 6: FaxFinder Client Software Operation
Setting Up Your Address Book by Synchronizing with
Outlook
What Synchronization Means
During synchronization, entries from the FaxFinder Client Address Book and from the specified folder of
MS Outlook are merged into one list saved in both applications. When “Synchronize With Outlook”
command is invoked in the FaxFinder Client software, each list is updated with changes from the other.
Synchronization Procedure
1. In Microsoft Outlook, view the folder from which you want to be able to transfer fax numbers to the the
FaxFinder Client Address Book. Confirm that you want those entries in your FaxFinder Client
Address Book. If so, proceed. (For example, you might select the “Contacts” folder in Outlook as
your source of existing fax numbers).
2. In the FaxFinder Fax Client Software, go to File | Options |Advanced and click on “Enable Outlook Sync.”
Multi-Tech Systems, Inc.
FF110 FaxFinder Fax Server Admin User Guide
101
Chapter 6: FaxFinder Client Software Operation
3. Click on Browse. Select the desired folder from the Select Contact Folder (Outlook:) screen. Click
OK. If a confirmation screen appears, click OK.
At the Options screen, click OK.
4. In the FaxFinder Fax Client Software, go to the Device Status tab and select Outlook Synchronizer
in the “Device” list.
Multi-Tech Systems, Inc.
FF110 FaxFinder Fax Server Admin User Guide
102
Chapter 6: FaxFinder Client Software Operation
5. Right-click on Outlook Synchronizer and select Synchronize with Outlook.
The Outlook Contact information will be copied into the FaxFinder Address Book. Entries from the
FaxFinder Address Book (if any) will also be copied into the Outlook Contact list. A relationship will
be created between the corresponding entries for future synchronizations.
The Outlook Synchronizer feature has many options. For further details, see the Administrator User
Guide.
Multi-Tech Systems, Inc.
FF110 FaxFinder Fax Server Admin User Guide
103
Chapter 6: FaxFinder Client Software Operation
Using Stock Cover Pages
Faxes are often accompanied by a cover page that specifies from whom it was sent, to whom it was sent,
the date, and other details about the sending and receiving parties. The FaxFinder system offers several
ready-made (stock) cover pages that can be used for this purpose. These stock cover pages can also be
modified or customized to meet individual needs (see “Creating or Modifying Cover Page Styles” later in
this chapter).
In this section, we present an example of using a stock cover page.
1. We will send the fax from the Windows Notepad program. (In this program, one sets the printer by
going to File | Page Setup | Printer | Properties | Name and, in the drop-down list, set “Multi-Tech
FaxFinder” as the target printer, and click OK).
2. In Notepad, we select Print to send the file as a fax via the FaxFinder.
Multi-Tech Systems, Inc.
FF110 FaxFinder Fax Server Admin User Guide
104
Chapter 6: FaxFinder Client Software Operation
3. When the FaxFinder Send Fax screen appears, it will list the document we want to fax in its
“Documents” pane. Next we must specify a recipient.
The recipient could either be chosen from the Address Book or specified directly in the Name and Phone
Number fields using the Add Recipient command in the FaxFinder Send Fax screen.
In this example, we will choose the recipient from the Address Book by highlighting the entry and clicking
Select. Note the detailed address information about the recipient that had been stored when this party
was entered into the Address Book (you can view the details on any Address Book entry by clicking Edit
from the Address Book screen). Recipient contact info from the Address Book entry will appear later in
the automated fields of the cover page. Sender contact info from the Options menu will also appear on
the cover page. Which details are included in the cover page depends on the cover page style used.
The “fax stamp” at the top of each sheet of the fax (which includes sender, recipient, and time info) is
inserted automatically based on information from the FaxFinder server software and from the recipient fax
machine.
Multi-Tech Systems, Inc.
FF110 FaxFinder Fax Server Admin User Guide
105
Chapter 6: FaxFinder Client Software Operation
4. The FaxFinder Send Fax screen appears again but this time our recipient has been entered.
Multi-Tech Systems, Inc.
FF110 FaxFinder Fax Server Admin User Guide
106
Chapter 6: FaxFinder Client Software Operation
5. Since we intend to use a cover page, we click “Use Cover Page” and then select a stock cover page
from the “Cover Page Style” drop-down list. We can then type a subject for the fax message and type a
cover page note, each in the appropriate fields.
Multi-Tech Systems, Inc.
FF110 FaxFinder Fax Server Admin User Guide
107
Chapter 6: FaxFinder Client Software Operation
Suppose we choose the style called “BoldComplete.” We can view it by clicking “View/Edit” on the
FaxFinder Send Fax screen. The requested file will appear in the Template Editor screen.
Multi-Tech Systems, Inc.
FF110 FaxFinder Fax Server Admin User Guide
108
Chapter 6: FaxFinder Client Software Operation
6. To see how the cover page appears after the sender and recipient information has been automatically
inserted, click Preview Fax. This is how the fax cover page will be sent.
7. To send the fax, simply click Send Fax in the FaxFinder Send Fax screen.
Multi-Tech Systems, Inc.
FF110 FaxFinder Fax Server Admin User Guide
109
Chapter 6: FaxFinder Client Software Operation
Creating or Modifying Cover Page Styles
The Multi-Tech Cover Page Generator program allows you either to produce custom cover pages or to
use existing style templates. In this section, we will describe both processes, making a new template and
customizing an existing stock cover page style template.
Creating New Cover Page Templates
1. Open the Cover Page Generator program. Go to Start | Programs | FaxFinder Client Software |
Cover Page Generator. You can also open the Cover Page Generator program from the FaxFinder
Fax Client Software program by opening the Edit menu and selecting “Edit Cover Page Template.”
Multi-Tech Systems, Inc.
FF110 FaxFinder Fax Server Admin User Guide
110
Chapter 6: FaxFinder Client Software Operation
2. The main Template Editor screen will appear. Open it to full-screen size.
Multi-Tech Systems, Inc.
FF110 FaxFinder Fax Server Admin User Guide
111
Chapter 6: FaxFinder Client Software Operation
3. Several types of objects can be added to a cover page file. These are listed in the Insert pulldown
menu.
The commands to create these objects can be invoked either here or from buttons on the Tool Bar.
We will invoke various commands from these toolbar buttons throughout this procedure.
4. Decide on the categories for which you want automated fields on the fax cover page. Generally
speaking, you will want to include information about the Sender and the Recipient. For each type of
information, you will want a label in “Static Text” and an “Edit Box” (“Field Text”) into which the
automated information will go. Information about the sender will be automatically transferred from the
FaxFinder Client Software Options screen onto the cover page; information about the recipient will
come to the cover page from the FaxFinder Address Book’s Contact screen or from the FaxFinder
Send Fax screen (if the Add Recipient button is used to specify the fax recipient); and occasional
information will come from the FaxFinder Send Fax screen (for the subject of fax and the comment)
and from the client PC (for the date of the fax).
Multi-Tech Systems, Inc.
FF110 FaxFinder Fax Server Admin User Guide
112
Chapter 6: FaxFinder Client Software Operation
To insert an automated field, you must click on the “Edit Box” button and then drag open a box at the
desired place on the screen. Typically, one would place the label of the category using the Static
Text icon first and then locate the Edit Box beside it. (The “Edit Box” button invokes the same
function as the “Field Text” command in the Insert menu.)
Static Text Icon
Edit Box or
Field Text Icon
The FaxFinder supports the automated field types listed in the table below.
Field Type
Source of Info Placed in
Field
Description
T_FROMNAME
FF Client Options screen
Sender’s Name
T_FROMCOMP
FF Client Options screen
Sender’s Company Name
T_FROMPHONE
FF Client Options screen
Sender’s Voice Phone Number
T_FROMFAX
FF Client Options screen
Sender’s Fax Number
T_TONAME
FF Client Contact screen or
Send Fax screen
Recipient’s Name
T_TOCOMP
FF Client Contact screen
Recipient’s Company Name
T_TOPHONE
FF Client Contact screen
Recipient’s Voice Phone Number
T_TOFAX
FF Client Contact screen or
Send Fax screen
Recipient’s Fax Number
T_DATE
client’s PC
Date of Fax Transmission
T_SUBJ
FF Client Send Fax screen
Subject of Fax Message
T_COMM
FF Client Send Fax screen
Comment about Fax Message
T_TOADDR1
FF Client Contact screen
Recipient’s Street Address
T_TOCITY
FF Client Contact screen
Recipient’s City
TO_STATE
FF Client Contact screen
Recipient’s State/Province/County, etc.
T_TOZIP
FF Client Contact screen
Recipient’s ZIP code or postal code
5. Select the “Static Text” cursor labeled
N
and drag to open the desired field.
To have freedom to move the cursor in a continuous fashion leave the Grid button,
, in
the unselected position (its darker shade represents its unselected state). You can also turn the Grid
on and off in the Settings pull-down menu.
Multi-Tech Systems, Inc.
FF110 FaxFinder Fax Server Admin User Guide
113
Chapter 6: FaxFinder Client Software Operation
6. Enter the field label in the Static Text box. Be sure to allow enough room for the size of font you have
chosen. If the box is too small for the font size, the text will be cut off.
To select font, the font style, and font size, use the
cursor.
You can also access font settings from the Settings pulldown menu.
To align the text to the left edge, right edge, or center of the box, use the
cursor.
For example, you might create a static text item of the word “Date.” To move the box, click on it and
move it when the 4-direction cursor appears. To expand or contract the box, click on it and drag an
edge or a handle until the desired size/shape is achieved.
Multi-Tech Systems, Inc.
FF110 FaxFinder Fax Server Admin User Guide
114
Chapter 6: FaxFinder Client Software Operation
7. Select the “Edit Box” (or “Field Text”) cursor labeled ab
and drag to open the desired field.
Double-click on the box you have opened. The Item ID screen will appear. Scroll down the list and
highlight the field type (listed in the “Type” drop-down list) that you want on the cover page. There is
no need to use the “Title” field. Click OK.
You will not type anything in the Edit Box that appears on the screen. However, be sure to make the
Edit Box large enough for the font size you have chosen. If the box is too small for the font size, the
text will be cut off.
To follow our example, you would select “T_DATE” to insert a date field next to the “Date” label you
have previously placed on the page.
Multi-Tech Systems, Inc.
FF110 FaxFinder Fax Server Admin User Guide
115
Chapter 6: FaxFinder Client Software Operation
You might want the automated field value to be placed on a line or in a rectangle. If so, you could
use the line cursor to put a line beneath the edit box or use the rectangle cursor to place a rectangle
around the edit box. You can place lines, rectangles, and ellipses on the page for any purpose.
Rectangles and ellipses can have a solid fill or a shading (called “hilight”). These graphic functions
are described in the table below.
Shape Cursors:
A
B
C
D
E
A. Line
B. Rectangle
C. Ellipse
D. Hilight shape
E. Fill shape
Use to draw
Use to draw
rectangles.
Use to draw
ellipses.
Not supported.
When selected,
any rectangle or
ellipse made will
have a black fill.
To set the line width for lines, rectangles, and ellipses, use the drop-down box at the far-right of the
Template Editor’s tool bar. (You need to have the screen open widely enough to see its entirety.)
Multi-Tech Systems, Inc.
FF110 FaxFinder Fax Server Admin User Guide
116
Chapter 6: FaxFinder Client Software Operation
8. To add a graphic file to the cover page template, click on the Image icon
.
Then browse to the directory that contains the desired graphic file. Files of type bmp and tif can be
inserted into cover pages.
Insert graphics files into your cover page template as needed.
9. Save the file to the Cover Pages directory in your operating system. The .cpg file must be saved in
this location in order for it to be accessible to the FaxFinder client software. When saved to this
location, the file name of the customized cover page template you have created will appear in the
“Cover Page Style” drop-down list on the FaxFinder Send Fax screen.
In general, you should save to C:\ <windows install path> \ profiles \ <username> \ Application Data \
Fax Finder Client <Software> \ Cover Pages
If you used the default installation path for Windows NT or Windows 2000, save to
C:\winnt\Profiles\<user name>\Application Data\FaxFinder Client Software\Cover Pages.
If you used the default installation path for Windows XP, save to
C:\Documents And Settings\<username>\Application Data\Fax Finder Client\Cover Pages.
10. We advise previewing and printing your custom cover page template using the Multi-Tech Tiff Viewer
program rather than the Template Editor program.
The illustration below shows how the fields specified in the Template Editor program will be filled out
when the template is used at the FaxFinder Client Send Fax screen. The item ID tags for common
field types are specified.
Multi-Tech Systems, Inc.
FF110 FaxFinder Fax Server Admin User Guide
117
Chapter 6: FaxFinder Client Software Operation
Modifying Existing Cover Page Templates
Note: While all five stock cover page styles can be readily customized, the styles
“PlainComplete” and “PlainShort” are especially well suited to customization. In most
cases, one can start with these files and simply add one’s own company name in text or
insert one’s graphical company logo.
1. Open the Cover Page Generator program. Go to Start | Programs | FaxFinder Client Software |
Cover Page Generator. You can also open the Cover Page Generator program from the FaxFinder
Fax Client Software program by opening the Edit menu and selecting “Edit Cover Page Template.”
2. In the File menu, select “Open.” Browse to the directory into which the FaxFinder client software has
been installed. Typically, this will be C:\Program Files \ Multi-Tech Systems \ FaxFinder Client
Software \ Cover Pages. Select a cover page template from the list.
For our example, we will use the cover page template file FaxComplete.cpg.
3. In the File menu, select “Save As” and rename the file, saving it in the ‘Application Data’ directory for
the FaxFinder client software. This will vary for different Windows operating systems. (For Windows
NT4/2000, this will be C:\Winnt \ Profiles \ <username> \ Application Data\ FaxFinder Client Software
\ Cover Pages. For Windows XP, this will be C:\Documents And Settings\<username>\Application
Data\Fax Finder Client\Cover Pages.)
Multi-Tech Systems, Inc.
FF110 FaxFinder Fax Server Admin User Guide
118
Chapter 6: FaxFinder Client Software Operation
For our example, we will rename the file rmc1.cpg, for the purposes of our fictitious company, Rocky
Mountain Construction, Inc.
4. You can use the Tab key to skip from field to field in the template. Note, however, that any values
added to template fields will be overwritten by values specified in the Address Book (in “New Contact”
screens launched from Edit | Add Contact in the FaxFinder Fax Client Software program).
Multi-Tech Systems, Inc.
FF110 FaxFinder Fax Server Admin User Guide
119
Chapter 6: FaxFinder Client Software Operation
5. Add company logo at top of cover page.
For our example, we will add the graphic file “ff-rocky-mtn-logo1.bmp” to the cover page.
In the Insert menu of the Template Editor, select “Image.”
Browse to the location of the graphics file to be used. Click Open.
Move the + cursor to the desired location of the graphic. Then click and drag to size the graphic. Click
and drag on the cursor dots on the periphery of the image to resize it and set its vertical/horizontal aspect
ratio.
Multi-Tech Systems, Inc.
FF110 FaxFinder Fax Server Admin User Guide
120
Chapter 6: FaxFinder Client Software Operation
6. Add company slogan to bottom of template.
For the purposes of our fictitious company, Rocky Mountain Construction, Inc., we will use the slogan
“Building on New Horizons.”
Select the “Static Text” cursor labeled
and drag
N
to open a text box at the bottom of the template page.
Enter the slogan.
Multi-Tech Systems, Inc.
FF110 FaxFinder Fax Server Admin User Guide
121
Chapter 6: FaxFinder Client Software Operation
7. In the File menu, select “Save As” and overwrite the file using the same filename used in step 3,
saving it in the ‘Application Data’ directory for the FaxFinder client software. (For Windows
NT4/2000, this will be C:\Winnt \ Profiles \ <username> \ Application Data\ FaxFinder Client Software
\ Cover Pages. For Windows XP, this will be C:\Documents And Settings\<username>\Application
Data\Fax Finder Client\Cover Pages.)
For our example, we will overwrite the file using the file name rmc1.cpg, which befits the purposes of
our fictitious company, Rocky Mountain Construction, Inc.
8. To use your customized template when sending a fax, you must click “Use Cover Page” in the
FaxFinder Send Fax screen. Then scroll through the “Cover Page Style” list to find the file name of
the custom template you have created. In our example, it is rmc1.
Multi-Tech Systems, Inc.
FF110 FaxFinder Fax Server Admin User Guide
122
Chapter 6: FaxFinder Client Software Operation
9. When the fax is sent, the ‘automated’ fields on the cover page template will be filled in with
information from the Address Book (if the recipient is listed there). Click on “Preview Fax” in the
FaxFinder Send Fax screen to examine the fax with cover page.
Multi-Tech Systems, Inc.
FF110 FaxFinder Fax Server Admin User Guide
123
Chapter 6: FaxFinder Client Software Operation
Cover Page Generator Menu/Icon Command Descriptions
File Menu
FaxFinder Cover Page Generator Software Menu Command Definitions (cont’d)
ShortCommand Name
Icon
Description
cut
File Menu commands
New
Ctrl + N
Creates new cover page template file.
Open
Ctrl + O
Save
Ctrl + S
Opens an existing cover page template file for
viewing or editing.
Saves cover page cpg file at current path.
Save As
--
--
Print
Ctrl + P
Exit
--
Multi-Tech Systems, Inc.
Saves cover page cpg file at new path that user
specifies.
Prints the current cover page template.
Closes current cover page template file and
closes program. User is prompted to save.
FF110 FaxFinder Fax Server Admin User Guide
124
Chapter 6: FaxFinder Client Software Operation
Edit Menu
The Undo command (also accessible using the keyboard shortcut Ctrl + Z and the
button)
reverses the effect of the last command.
Insert Menu
FaxFinder Cover Page Generator Software Menu Command Definitions (cont’d)
Command Name
Icon
Description
Insert menu commands
Image
Use to insert a bmp or tif image into the cover page
template.
Field Text
Use to insert an automated field into the cover page
OR
template. The values inserted into automated fields
Edit Box
come from FaxFinder Address Book, FaxFinder Send
Fax screen, from client user’s PC, and from the
remote fax sender. When you create a new Edit Box,
you must select it and double-click on it to make the
Item ID screen appear. It is in the Item ID screen that
you specify which type of information will be placed in
this position on the fax cover page. Use icons to align
text to left, center, or right. Use “Font” icon or
command in Settings menu to alter font, font size,
and font style.
Multi-Tech Systems, Inc.
FF110 FaxFinder Fax Server Admin User Guide
125
Chapter 6: FaxFinder Client Software Operation
FaxFinder Cover Page Generator Software Menu Command Definitions (cont’d)
Command Name
Icon
Description
Insert menu commands
Static Text
Use to insert text objects needed in the cover page
template. These uses include labels for automated
fields (TO, FROM, DATE, etc.) and plain text like a
company name or slogan. Use icons to align text to
left, center, or right. Use “Font” icon or command in
Settings menu to alter font, font size, and font style.
Line
Use to insert line objects into the cover page template.
Use Line Size drop-down menu at far right of screen
to select width of lines.
Rectangle
Use to insert box objects into the cover page
template. Use Line Size drop-down menu at far right
of screen to select width of lines.
Ellipse
Use to insert circles or elliptical objects into the cover
page template. Use Line Size drop-down menu at far
right of screen to select width of lines.
Hilite
Not supported.
Filled Object
deleting objects
Line Size drop-down
menu
Multi-Tech Systems, Inc.
--
When selected, rectangles and ellipses created will
have black fill.
Use the keyboard Delete key to delete a selected
object.
Use to select line widths for line objects, rectangle
objects, and ellipse objects.
This icon is located at the far right on the screen. You
may need to open the program to “Full Screen” view
to see this drop-down menu.
FF110 FaxFinder Fax Server Admin User Guide
126
Chapter 6: FaxFinder Client Software Operation
View Menu
FaxFinder Cover Page Generator Software Menu Command Definitions (cont’d)
Command Name
Icon
Description
View Menu commands
Zoom In
Use to view a smaller area of the cover page
template file in greater magnification.
Zoom Out
Use to view a larger area of the cover page
template file in a lesser magnification.
Fit to Width
Use to get magnification of file such that its
-horizontal dimension fits proportionally into the
window.
Fit in Window
Use to get magnification of file such that the
-entire cover page template fits proportionally into
the window.
Toolbar
Use to show or hide toolbar of command icons.
--
Multi-Tech Systems, Inc.
FF110 FaxFinder Fax Server Admin User Guide
127
Chapter 6: FaxFinder Client Software Operation
Settings Menu
FaxFinder Cover Page Generator Software Menu Command Definitions (cont’d)
Command Name
Icon
Description
Settings Menu commands
Font
Brings up Font dialog box in which font, font size,
and font style can be set.
Grid
Use to turn grid on and off. If grid is off, objects
can be positioned in cover page in a continuous
fashion. If grid is on, objects can only be
positioned at discrete grid coordinates.
Multi-Tech Systems, Inc.
FF110 FaxFinder Fax Server Admin User Guide
128
Chapter 6: FaxFinder Client Software Operation
Reporting Failed Faxes to the Administrator
Occasionally clients will receive email messages from the FaxFinder that pertain to faxes that have failed
partially or entirely. That is, some or all of the intended pages of the fax may arrive in a form that cannot
be read. Here is the sequence of events you may encounter and the proper response.
1. The client user receives an email message from the FaxFinder about a partially or wholly failed fax sent
to him/her.
2. Advise the sender of the fax to re-send all or part of the fax.
3. If the fax was only partially a failure, then TIFF files for the successful pages will be attached. If any
pages of the fax failed, then an additional file will be attached to the email message. It will have a name
like modem0modem1_date-time.txt. This is the modem log file.
4. The modem log file contains information about the “conversation” between the sending modem and the
FaxFinder’s receiving modem. This information may be valuable to the FaxFinder administrator in
protecting the fax system and preventing future errors.
5. The client user should forward the modem log file to the FaxFinder administrator in an email message.
The FaxFinder administrator’s email address should be viewable in any fax you have received via the
FaxFinder.
Multi-Tech Systems, Inc.
FF110 FaxFinder Fax Server Admin User Guide
129
Chapter 7: Server Operation
Chapter 7 – Server Operation
Fax Log Email Messages
The FaxFinder administrator will receive an email after every user-specified n faxes have been handled
by the FaxFinder (n is the total of faxes sent and received). The subject of the email will be:
Subject: FaxFinder: Fax Log Text File From: 'FaxFinder ID' (a.b.c.d)
The actual log is a text file attached to the email. The fax log gives you a summary of events going on in
the system. Use it as a reference when considering modifications or expansions of your faxing system.
A sample log file is shown below.
Multi-Tech Systems, Inc.
FF110 FaxFinder Fax Server Admin User Guide
130
Chapter 7: Server Operation
Front Panel LEDs
Label
Name
Identifier
General LEDs
Power
Status
TD
RD
TR
DID
Description
On if unit is on.
Flashing Green = unit is functioning properly
Solid Red = unit is having its software updated. DO NOT
TURN OFF if Status LED is solid red.
Off = system is booting
DID Fax LEDs
Transmit Data
Receive Data
Terminal Ready
DID
TD
PSTN Fax LEDs
Transmit Data
RD
Receive Data
TR
Terminal Ready
CD
ACT
Carrier Detect
Ethernet LEDs
Activity
LINK
Data Link
SPEED
Data Rate
Multi-Tech Systems, Inc.
DID modem is transmitting data on phone line.
DID modem is receiving data on phone line.
When lit, DID modem is ready to receive a call.
Lit when DTR to DID modem is high.
The telco central office is drawing power from the DID line
which means that a call is in progress.
The TD LED flashes when the POTS modem is transmitting
data to another modem.
The RD LED flashes when the POTS modem is receiving
data from another modem.
When lit, POTS modem is ready to make calls.
Lit when DTR to POTS modem is high.
Carrier of remote modem is detected.
Lit when packets are being transmitted by any device on the
Ethernet network (not necessarily by the FaxFinder).
Lit when a physical link has been established with the
Ethernet network.
Indicates speed of Ethernet connection. If lit, data rate is 100
Mb/sec; if not lit, data rate is 10 Mb/sec.
FF110 FaxFinder Fax Server Admin User Guide
131
Chapter 7: Server Operation
Dealing with Failed Fax Reports
Occasionally clients will receive email messages from the FaxFinder that pertain to faxes that have failed
partially or entirely. That is, some or all of the intended pages of the fax may arrive in a form that cannot
be read. Each FaxFinder-generated email of a fax with any failed pages will have one additional file
attached: a modem log file with a name like modem0modem1_date-time.txt.
The modem log file contains information about the “conversation” between the sending modem and the
FaxFinder’s receiving modem. This information may be valuable to the FaxFinder administrator in
protecting the fax system and preventing future errors.
As FaxFinder administrator, you should instruct FaxFinder clients to forward the modem log file from any
failed messages directly back to you.
Failure Analysis: Factors to Consider
When analyzing the modem log files from failed faxes, you should consider these questions:
•
Is this failure a one-time event or is it part of a larger pattern? If it is a one-time event, it is
probably unimportant. If it seems to be part of a larger pattern, it will be valuable to determine
what kind of a pattern is involved.
•
Are many failures coming from a particular fax machine or from a particular brand or model of fax
machine? If so, then check the MultiTech web site for applicable firmware updates to the
FaxFinder (whether to either or both of its modems or to the unit’s non-modem firmware).
Possible Solutions to Fax Failure Problems
•
Lower the incoming baud rate for received faxes.
•
Turn off error correction for received faxes.
•
Check Mult-Tech web site for newer server software for FaxFinder and, if any is available,
upgrade the FaxFinder (see the section “Upgrading FaxFinder Server Software” in Chapter X:
FaxFinder Maintenance).
•
Call Mult-Tech Tech Support at 1-800-972-2439.
Multi-Tech Systems, Inc.
FF110 FaxFinder Fax Server Admin User Guide
132
Chapter 8: Device Manager
Chapter 8 - Device Manager
Installation & Operation
Installing Device Manager Software
The process of installing the Device Manager software is explained in the illustration below.
Multi-Tech Systems, Inc.
FF110 FaxFinder Fax Server Admin User Guide
133
Chapter 8: Device Manager
Operation: Applicability of Device Manager
To what devices does Device Manager pertain? The Device Manager software applies to FaxFinders,
CallFinders, and to the MA100 Multi-Access Dial-Up Ethernet Link unit. One of Device Manager’s main
functions, phonebook synchronization, does not apply fully to the MA100 Multi-Access device because it
has no phonebook as such, but rather has a “Users List” instead. For the MA100, the Device Manager’s
Synchronize Phonebooks command synchronizes this users list among all MA100 units connected to
the system.
Access to Commands
The commands of the Device Manager software are accessible in the program’s pulldown Edit menu,
and through a right-click menu that becomes available when a particular device (FaxFinder, CallFinder, or
Multi-Access unit) is selected in the program’s main screen.
Device Manager Command Summary
How to Access Command
Command Name
Summary
Synchronize Phonebooks
For FaxFinder and CallFinder, this
command copies entries of main
(primary) phonebook into the
phonebooks of other subordinate
units in the system. For MultiAccess units, this command copies
the entries of the main user list into
the user lists of other subordinate
units in the system.
Makes another device (FaxFinder,
CallFinder, or Multi-Access unit)
part of the system.
Edit Menu
Add Device
Delete Device
Save Configuration
Right-Click on listed device
Multi-Tech Systems, Inc.
Restore Configuration
Removes a device (FaxFinder,
CallFinder, or Multi-Access unit)
from the system.
Saves a group of telephony and IP
settings for a device (FaxFinder,
CallFinder, or Multi-Access unit).
Re-installs a previously saved
group of telephony & IP settings
into a device (FaxFinder, fax
server, CallFinder, or Multi-Access
unit).
FF110 FaxFinder Fax Server Admin User Guide
134
Chapter 8: Device Manager
How to Access Command
Command Name
Summary
Update [Firmware]
Updates “server” firmware and
channel firmware of a device
(FaxFinder, CallFinder, or MultiAccess unit).
Determines whether a device
(FaxFinder, CallFinder, or MultiAccess unit) in a system has the
main phonebook, receives a copy
of the phonebook, or operates
independently. For the MA100
Multi-Access, this command
determines whether the unit has
the main user list, receives a copy
of the user list from another unit, or
operates independently.
Shows IP address and Username
of the device (FaxFinder,
CallFinder, or Multi-Access unit).
Set Phonebook Sharing
Right-Click on listed device
[View] Properties
Multi-Tech Systems, Inc.
FF110 FaxFinder Fax Server Admin User Guide
135
Chapter 8: Device Manager
Opening the Device Manager Software
1. To launch the Device Manager program from the Windows desktop, go to Start | Programs | Device
Manager | Device Manager.
2. The Device Manager main screen will appear.
Multi-Tech Systems, Inc.
FF110 FaxFinder Fax Server Admin User Guide
136
Chapter 8: Device Manager
Device Manager Main Screen
The Device Manager’s main screen lists the devices (FaxFinders, CallFinders, or Multi-Access units) that
are working together as a system. In a FaxFinder system, for example, the system generally can consist
of one FaxFinder functioning as a master or server unit (designated as Primary) and one or more
FaxFinders functioning as client or slave units (designated as Copy). FaxFinder units functioning without
reliance on a server unit (designated as Independent) can also be part of the system. The Device
Manager is in contact with all the FaxFinder units of its system through the Ethernet network (Internet or
private IP network) to which all are connected.
Multi-Tech Systems, Inc.
FF110 FaxFinder Fax Server Admin User Guide
137
Chapter 8: Device Manager
Main Screen Menu or Column
Description
File menu
Contains the Exit command which closes
the Device Manager program.
Edit menu
Allows you to add a device (FaxFinder,
CallFinder, or Multi-Access unit) to the
system. Allows you to synchronize
phonebooks from Primary FaxFinder units
to Copy FaxFinder units within the system.
Lists of other devices (the phonebooks of
CallFinders and the user lists of MA100
Multi-Access units) can undergo
synchronization, as well.
Help menu
Online help is not currently supported.
See manuals.
Device column
Lists the devices in the system indicating
the IP address, model number, and
phonebook sharing status for each.
Status column
Indicates the current operating condition of
the Device Manager software with respect
to the device.
Possible states are:
not logged in: Device Mgr software is not
logged into device;
logging in: Device Mgr software is in
process of logging into device;
idle: status during normal device operation;
updating device [FaxFinder, CallFinder, or
Multi-Access]: new version of firmware
is being loaded onto the device;
updating modem: new version of firmware
is being loaded onto a modem in the
device;
login failure – device busy: appears when
the Device Manager software tries to
log into the device while it is handling a
call.
login failure – device not found: appears
when server cannot be contacted by
Device Manager.
Version column
Multi-Tech Systems, Inc.
Indicates the version of server software
operating on the device.
FF110 FaxFinder Fax Server Admin User Guide
138
Chapter 8: Device Manager
Device Manager “Edit” Menu
Edit Menu Command
Description
Synchronize Phonebooks
Transfers phonebook data from a Primary
FaxFinder unit to all FaxFinders designated
as Copy units. The phonebook sharing
statuses of the FaxFinders (Primary, Copy,
or Independent) involved must be set in
advance. That is, one FaxFinder must be
set as the Primary unit. One or more other
FaxFinders must be set as Copy units
designated to accept phonebook data from
that particular Primary FaxFinder.
Independent FaxFinders may be in the
system but they do not participate in
phonebook sharing. This synchronization
also applies to CallFinder phonebooks and
Multi-Access user lists.
During synchronization, administrative
phonebook parameters are not copied. In
this way, the Copy units retain their entries
for Unassigned Number, Administrator
Password, and other parameters that must
remain unique to each FaxFinder unit (or
other device).
When the Synchronize Phonebooks
command is invoked, the Primary unit
copies its phonebook data into each Copy
unit, one at a time, in sequence until all
Copy units have received the data. Control
screens appear before each Copy unit
receives its download and the download
can be canceled for any particular Copy
unit.
Add Device
Brings up the Add Device Address screen.
On this ‘Add’ screen, you enter the IP
address, User Name, and Password of
devices (FaxFinders, CallFinders, or MultiAccess units) to be included in your system.
Auto-Discover Devices
This command initiates a search for relevant
devices (FaxFinders, CallFinders, or MultiAccess units) on the network.o
Multi-Tech Systems, Inc.
FF110 FaxFinder Fax Server Admin User Guide
139
Chapter 8: Device Manager
Synchronizing Phonebooks
As noted earlier, this command applies to FaxFinders, CallFinders, and to MA100 Multi-Access units.
The steps of the procedure are described below using a FaxFinder as an example device.
When FaxFinder phonebooks are synchronized, all non-administrative listings match. One FaxFinder unit
(the Primary unit) holds the master list that is transmitted (using the Synchronize Phonebooks
command) to other FaxFinder units in the system (Copy units). FaxFinder units can operate in same
system but have independent phonebooks, in which case they are designated Independent.
Synchronizing phonebooks entails three steps:
1. Designating one FaxFinder as the master phone book. In the main Device Manager screen, right-click
on the unit to be designated as master, scroll to Set Phone Book Sharing, and select Primary.
2. Designating all other FaxFinder units participating in phonebook sharing as Copy units. In the main
Device Manager screen, right-click on each unit to share the master phonebook, and select Copy.
Multi-Tech Systems, Inc.
FF110 FaxFinder Fax Server Admin User Guide
140
Chapter 8: Device Manager
3. Invoking synchronization. In the main Device Manager screen, open the Edit menu and select
Synchronize Phonebooks. The Synchronize Phone Books screen will appear along with a series of
transient screens (denoting tftp data transfers) and confirmation screens (where you click OK to proceed).
After the master phonebook has been transferred to the first Copy FaxFinder unit and that unit has been
rebooted, the Device Manager will automatically begin synchronizing the additional Copy FaxFinder unit
in the system (if any) until all have been synchronized.
To see the newly synchronized phonebook list in each Copy FaxFinder unit, you must update the Phone
Book screen by clicking on the Phone Book button (to the right of Administration) in the list at the top of
the screen.
Multi-Tech Systems, Inc.
FF110 FaxFinder Fax Server Admin User Guide
141
Chapter 8: Device Manager
Adding Devices
Any FaxFinder/CallFinder/MultiAccess unit to be added to the system and come under the management
of the Device Manager software must be connected to the same IP network as the computer running the
Device Manager software.
To add a FaxFinder/CallFinder/MultiAccess unit to the system, start at the main Device Manager screen.
Open the Edit menu and select Add Device. When the Add Device screen appears, enter the IP
address, Username, and Password for the unit you are adding to the system. Then click OK.
Multi-Tech Systems, Inc.
FF110 FaxFinder Fax Server Admin User Guide
142
Chapter 8: Device Manager
Right-Click Menu for Selected FaxFinder Device
Right-Click Menu Command
Description
Delete
Dis-associates the selected device
(FaxFinder, CallFinder, or Multi-Access unit)
from the system of devices listed in the
Device Manager software Device column.
Save Configuration
Saves the settings of the device’s built-in
software, including the phonebook, on the
PC on which the Device Manager software
is running.
Restore Configuration
For the selected device, this command reimports a previously saved version of the
unit’s software settings (including
phonebook, for FaxFinders and CallFinders)
back into that unit.
Update [firmware]
Lets you install the latest firmware for the
device and/or its modems.
Set Phone Book Sharing
Lets you designate the selected unit
(FaxFinder, CallFinder, or Multi-Access unit)
as either “Independent,” “Primary,” or
“Copy.” The Primary phone book is the
source list that can be transferred to devices
in the system that have been designated as
Copy. Independent devices do not share
phone book information.
Default= Independent
Properties
Multi-Tech Systems, Inc.
Displays IP address, user name, and
password of selected device. (For the
password, only the number of characters is
shown.)
FF110 FaxFinder Fax Server Admin User Guide
143
Chapter 8: Device Manager
Deleting a Device
Invoking the Delete command removes the selected device (FaxFinder, CallFinder, or Multi-Access unit)
from the system. Once deleted, the device will no longer be under the management of the Device
Manager software. Click Yes at the ‘confirmation’ screen to complete the deletion command.
Multi-Tech Systems, Inc.
FF110 FaxFinder Fax Server Admin User Guide
144
Chapter 8: Device Manager
Saving a Configuration
Each type of device in the FaxFinder/CallFinder/MultiAccess family saves all of its settings (IP address,
password, modem parameters, DID channel parameters, phone book settings, etc.) internally. This group
of settings is its configuration. This same group of settings can be saved on the computer running the
Device Manager software. Once saved, the configuration can be retrieved from the computer and reinstalled onto the device using the Restore Configuration command.
To save the configuration for a particular devicet, select the unit in the main Device Manager screen,
right-click on it, and select Save Configuration. Choose the location at which the configuration file will be
stored and click OK. Then, at the ‘confirmation’ screen, click OK again.
Multi-Tech Systems, Inc.
FF110 FaxFinder Fax Server Admin User Guide
145
Chapter 8: Device Manager
Restoring a Configuration
To re-install on the device (FaxFinder, CallFinder, or MultiAccess unit) a group of settings (configuration)
previously saved on the computer running the Device Manager software, use the Restore
Configuration command. Device Manager will browse, by default, to an automatically determined
directory that contains a saved configuration.
Multi-Tech Systems, Inc.
FF110 FaxFinder Fax Server Admin User Guide
146
Chapter 8: Device Manager
Updating Firmware
When Update command is invoked, the Update [Device] N.N.N.N screen appears. From this screen you
specify which type of code (server, POTS modem, or, for FF110 or CF220, DID channel modems) to
update with which firmware file. From this screen, you can also identify the firmware versions currently
installed and initiate the update process.
Update FaxFinder/CallFinder/MultiAccess N.N.N.N Field
Description
Status
Identifies the current condition of the device
(FaxFinder, CallFinder, or MultiAccess unit)
or the current process underway.
Shows how far the current process is from
completion.
Lists name of firmware file to be used to
update the device (i.e., server firmware,
POTS modem firmware, or DID channel
modem firmware).
Use to locate firmware file to be installed.
Identifies which type of code (i.e., server
firmware, POTS modem firmware, or DID
channel modem firmware) to be updated in
the device.
Initiates flashing of firmware.
Press for listing of versions of firmware for
the device’s server and modems.
Presents status of the device (FaxFinder,
CallFinder, or MultiAccess unit) as well as
details of updating processes as they occur.
Progress Bar
File Name
Browse button
[Device] update select
Start Update button
Get Versions button
main pane of window
Multi-Tech Systems, Inc.
FF110 FaxFinder Fax Server Admin User Guide
147
Chapter 8: Device Manager
Setting Phone Book Sharing
The phonebook of a Primary FaxFinder unit is a source or central phonebook. Phone numbers should
be entered into this phonebook. The central phonebook list is downloaded (by use of Synchronize
Phonebooks command) from the Primary FaxFinder unit into the phonebook of each Copy FaxFinder
unit. If phone numbers are added to the phonebook of a Copy FaxFinder phonebook, they will be
overwritten and lost at the next Synchronize Phonebooks command.
Phonebooks of Independent FaxFinder units do not participate in phonebook sharing.
Viewing Properties
The Properties command brings up the FaxFinder/CallFinder – N.N.N.N screen on which you can view
the IP Address and Username of the FaxFinder and determine the number of characters in its Password.
Multi-Tech Systems, Inc.
FF110 FaxFinder Fax Server Admin User Guide
148
Chapter 8: Device Manager
Firmware Updating Process - Detailed
Over time, new versions of FaxFinder firmware will be issued. When these newer versions become
available, you will want to secure the firmware files (typically by downloading them from the MultiTech
web site) and install them in the FaxFinder.
There are three parts to a full firmware update:
(a) updating POTS Modem 1 firmware (with file name of the form dwqg<x><y>.hex; where x is a
number and y is a letter),
(b) updating firmware for POTS Modem 2, 3, 4, etc. (same file name as above), and
(c) updating FaxFinder server firmware (with file name of the form FF<w>-<x>-<yz>.bin).
NOTE: You must have the update files on your computer before beginning this procedure. The
latest version of these files will be available on the MultiTech web site. Put them in a
directory on a computer connected to the network on which the FaxFinder unit is running.
NOTE: Updating the FaxFinder unit will take it out of operation for a few minutes (allow 10
minutes for each update if you already have the new firmware in a directory on the host
computer). Do the update at a time that is not critical to your organization’s usage of the
FaxFinder fax service.
To update firmware, follow the steps shown below.
FaxFinder Modem Firmware Update
1. Bring up the Device Manager software main screen. In the Device column, identify the FaxFinder
unit on which the update is to be done. Be sure that the Status of that FaxFinder unit is idle before
continuing. (You cannot update the FaxFinder while it is handling a call.) Select that FaxFinder unit
and right-click on it. In the menu that appears, select Update.
Multi-Tech Systems, Inc.
FF110 FaxFinder Fax Server Admin User Guide
149
Chapter 8: Device Manager
2. The Update FaxFinder N.N.N.N screen will appear. The current firmware versions for the
FaxFinder’s POTS Modems (1 modem for FF100 and FF110; 2 modems for FF200; 4 modems for
FF420; 8 modems for FF820) will be listed in the main window.
In the bottom (and largest) pane of the Update FaxFinder n.n.n.n window, read the list and write
down the version of firmware currently in use for the two POTS modems. Compare these versions
with the update file that you plan to use. Make sure that the file to be installed really does supersede
the one currently installed.
In the FaxFinder Update Select field, select the POTS Modem (1, 2, 3, etc.) that you want to update.
Multi-Tech Systems, Inc.
FF110 FaxFinder Fax Server Admin User Guide
150
Chapter 8: Device Manager
3. Browse to the location of the most recent firmware file.
4. Click Start Update.
5. The FaxFinder – Confirm Update screen will appear. Click OK.
Multi-Tech Systems, Inc.
FF110 FaxFinder Fax Server Admin User Guide
151
Chapter 8: Device Manager
6. The updating process will take as long as a minute. During this time, several messages will
appear in the Update FaxFinder N.N.N.N window. A transient TFTP screen may appear briefly. If
the updating process has been successful, the final message line will say “Finished – The
FaxFinder/CallFinder is ready.”
7. Repeat steps 1-6 for the second modem of this FaxFinder unit. For consistency of operation,
update all POTS modems of all FaxFinder units in the system.
8. The updating process is now complete. Click the “X” in the upper-right corner to return to the main
Device Manager screen.
Multi-Tech Systems, Inc.
FF110 FaxFinder Fax Server Admin User Guide
152
Chapter 8: Device Manager
FaxFinder Server Firmware Update
1. Bring up the Device Manager software main screen. In the Device column, identify the FaxFinder
unit on which the update is to be done. Be sure that the Status of that FaxFinder unit is idle before
continuing. (You cannot update the FaxFinder while it is handling a call.) Select that FaxFinder unit
and right-click on it. In the menu that appears, select Update.
2. The Update FaxFinder N.N.N.N screen will appear. The current firmware versions for the FaxFinder
server, for POTS Modem 1, and for any of the unit’s additional POTS modems, will be listed in the
main window.
Multi-Tech Systems, Inc.
FF110 FaxFinder Fax Server Admin User Guide
153
Chapter 8: Device Manager
In the bottom (and largest) pane of the Update FaxFinder N.N.N.N window, read the list and write
down the version of firmware currently in use for the FaxFinder server and its POTS modems.
Compare these versions with the update files that you plan to use. Make sure that the files to be
installed really do supersede the ones currently installed on the FaxFinder.
In the FaxFinder Update Select field, select “FaxFinder firmware.”
3. Browse to the location of the most recent firmware file.
4. Click Start Update.
5. The FaxFinder – Confirm Update screen will appear. Click OK.
Multi-Tech Systems, Inc.
FF110 FaxFinder Fax Server Admin User Guide
154
Chapter 8: Device Manager
6. The updating process will take as long as a minute. During this time, several messages will
appear in the Update FaxFinder N.N.N.N window. A transient TFTP screen may appear briefly. If
the updating process has been successful, the final message line will say “Finished – The
FaxFinder/CallFinder is ready.”
7. Close the Update FaxFinder N.N.N.N window. In the main FFCF Manager window, the updated
version will be listed.
Multi-Tech Systems, Inc.
FF110 FaxFinder Fax Server Admin User Guide
155
Chapter 8: Device Manager
8. Repeat steps 1-7 for each FaxFinder unit in the system.
NOTE: For proper operation of the FaxFinder system, including the sharing of Phone Book
data, the server firmware version for all FaxFinder units must be the same.
9. The updating process is now complete.
Uninstalling or Reinstalling the Device Manager Software
1. Go to Start | Settings | Control Panel | Add or Remove Programs. (The menu director location of
the ‘Add/Remove Programs’ function varies for different types of Windows operating systems.)
2. Select the Device Manager program and click Remove.
Multi-Tech Systems, Inc.
FF110 FaxFinder Fax Server Admin User Guide
156
Chapter 8: Device Manager
3. A transient screen will appear while the ‘wizard’ program prepares to un-install the software.
4. At the ‘Welcome’ screen, select “Remove” to uninstall the FFCF Manager software or select “Repair”
(or “Modify”) as needed to re-install or alter the existing installation of the software.
Then click Next.
Multi-Tech Systems, Inc.
FF110 FaxFinder Fax Server Admin User Guide
157
Chapter 8: Device Manager
5. At the next screen, confirm your decision to uninstall the Device Manager software by clicking Yes.
6. A transient screen appears while files are being removed.
7. At the ‘completion’ screen, click Finish.
Multi-Tech Systems, Inc.
FF110 FaxFinder Fax Server Admin User Guide
158
Chapter 9: Troubleshooting
Chapter 9 – Troubleshooting
1. What if I can't see the web page for my FaxFinder ?
REMEDY: Is the status LED on the FaxFinder unit blinking? If not, then the unit is either malfunctioning or
not turned on. If the Status LED is blinking, then verify that the Admin PC is actually on the
same subnet as the FaxFinder and that it can be “pinged.”
Launch a Command Prompt.
(In WinNT, go to Start | Programs | Command Prompt.
In WinXP, go to Start | All Programs | Accessories | Command Prompt.
In Win2000, go to Start | Programs | Accessories | Command Prompt.)
Type ipconfig to verify that the Admin PC’s IP address is in the same network as the
FaxFinder’s IP address.
Then type ping 192.168.2.1 and press Return.
If the FaxFinder unit does reply to the ping and you are still unable to view the FaxFinder web
page, then call Multi-Tech Tech Support for more assistance (1-800-972-2439).
2. What if I don't get an email when I set the mail server address ?
This pertains to the procedure “Setting Up the Mail Server.”
The email may have failed due to one of four causes:
(A) the name server is unresolvable,
(B) there has been an error with the Server User ID/password,
(C) the mail server cannot be contacted; or
(D) the client PC running the mail software cannot connect to the mail server.
CAUSE A: During transmission, the name server’s address could not be resolved (that is, the FaxFinder
unit could not contact your name server).
RESPONSE A: Contact the FaxFinder unit using telnet and try to ping the name server.
telnet 192.168.x.x
user: admin
password: admin
# ping 192.168.y.y (where this is the address of the name server)
If the name server ping fails, you must determine why it failed.
The name server may not be contact-able because it is on a different subnet. The name
server ping could also fail because the default gateway has been set incorrectly.
If the name server ping succeeds, then try to ping the mail server using its domain
name.
# ping mail.ourcompany.com
Multi-Tech Systems, Inc.
FF110 FaxFinder Fax Server Admin User Guide
159
Chapter 9: Troubleshooting
No email message after mail server setup (cont’d)
If pinging the mail server by its domain name fails, then try pinging it by using its IP
address (if this can be determined). If you succeed in pinging the mail server by its IP
address but yet it cannot be pinged via its domain name, then the name server is not
functioning correctly.
If the mail server can be pinged neither by its domain name nor by its IP address, then
consider item C below.
CAUSE B:
There has been an error with the SMTP server ID/password. In the Administration:
SMTP Configuration screen of the FF110 Server software, the “Server User ID” and
“Password” fields must be set to fit your mail server (the Server User ID/Password fields
must be correctly specified if the mail server requires authentication; the Server User
ID/Password fields must be left blank if the mail server does not require authentication).
Furthermore, the mail server itself must be set for either “Plain” authentication or “Login”
authentication, which are the authentication types supported by the FaxFinder. This
“ServerUser ID” and Password allow authentication so that the FaxFinder can send
emails. If authentication is required and these fields are left blank, then the error “SMTP
Authentication Error” will appear on the Current Status screen in the “Email Status”
field. If authentication is not required and these fields are filled in, then an error will also
occur.
RESPONSE B: Determine whether your mail server requires authentication or not. If not, be sure that
the Server User ID and Password fields of the Administration: SMTP Configuration
screen are left blank. If your mail server does require authentication, be sure that its
authentication is of either the “Plain” or the “Login” type and that the correct values have
been entered in the Server User ID and Password fields of the Administration: SMTP
Configuration screen.
CAUSE C: The mail server is not running or cannot be contacted from the FaxFinder unit.
RESPONSE C: Verify that the mail server is running by sending an email to yourself using your email
software.
If you cannot send an email to yourself using your email software, then the mail server is
not running and you should find out why.
If you can send an email to yourself using the email software, then there is a problem
between your mail server and the FaxFinder unit. Call Multi-Tech Tech Support (1-800972-2439).
CAUSE D: The client PC running the mail software cannot connect to the mail server.
RESPONSE D: If you, as a client, cannot send yourself an email, then contact your administrator; there
may be a problem with your mail server.
Multi-Tech Systems, Inc.
FF110 FaxFinder Fax Server Admin User Guide
160
Chapter 9: Troubleshooting
3. What if the modem doesn't answer a call on the DID line?
REMEDY. Use this procedure if DID Modem Configuration cannot be confirmed (that is, if during a test
call to one of the system's DID phone numbers, you fail to see the "Waiting for Connect"
State in the Current Status: DID Modem screen and if you fail to hear modem
dialup/negotiation tones -- both the state and the sound must be observable).
A. Situate yourself in a place where you can see the FaxFinder unit and, simultaneously,
use a phone on a regular POTS line.
B. From that ordinary POTS phone, dial one of the DID phone numbers that is active in the
system.
C. As the call is completed, watch the LEDs on the front panel of the FaxFinder unit.
If the DID LED remains off, then there is probably a telephony problem. That is, the DID
phone line has not been activated or configured properly. Call the telephone company.
If the DID LED comes ON, then there is something wrong with the FaxFinder software.
Call MultiTech Tech Support (1-800-972-2439).
4. What if I don't get the email to me of the test fax that I sent?
REMEDY. Check the Current Status: DID Modem screen while the fax is in progress to see if it goes
through the following states: Waiting for Connect, Negotiating, Receive Page n, Post Page
Processing. If it does, then check the Fax Log screen to see what the FaxFinder thought had
happened. Also check the Pending Msgs status on the Current Status screen and Email
Status to see if it has No Errors. Based on these indications perhaps a solution can be found,
if not contact our tech support.
Multi-Tech Systems, Inc.
FF110 FaxFinder Fax Server Admin User Guide
161
Chapter 10: Regulatory Information
Chapter 10 – Regulatory Information
47 CFR Part 68 Telecom
1. This equipment complies with Part 68 of the 47 CFR rules and the requirements adopted by the ACTA.
Located on this equipment is a label that contains, among other information, the registration number and
ringer equivalence number (REN) for this equipment or a product identifier in the format:
For current products is US:AAAEQ##Txxxx.
For legacy products is AU7USA-xxxxx-xx-x.
If requested, this number must be provided to the telephone company.
2. A plug and jack used to connect this equipment to the premises wiring and telephone network must
comply with the applicable 47 CFR Part 68 rules and requirements adopted by the ACTA. It’s
designed to be connected to a compatible modular jack that is also compliant.
3. The ringer equivalence number (REN) is used to determine the number of devices that may be
connected to a telephone line. Excessive RENs on a telephone line may result in the devices not
ringing in response to an incoming call. In most but not all areas, the sum of RENs should not exceed
five (5.0). To be certain of the number of devices that may be connected to a line, as determined by
the total RENs, contact the local telephone company. For products approved after July 23, 2001, the
REN for this product is part of the product identifier that has the format US:AAAEQ##Txxxx. The
digits represented by ## are the REN without a decimal point (e.g., 03 is a REN of 0.3). For earlier
products, the REN is separately shown on the label.
4. If this equipment causes harm to the telephone network, the telephone company will notify you in
advance that temporary discontinuance of service may be required. But if advance notice isn't
practical, the telephone company will notify the customer as soon as possible. Also, you will be
advised of your right to file a complaint with the FCC if you believe it is necessary.
5. The telephone company may make changes in its facilities, equipment, operations or procedures that
could affect the operation of the equipment. If this happens, the telephone company will provide
advance notice in order for you to make necessary modifications to maintain uninterrupted service.
6. If trouble is experienced with this equipment, please contact Multi-Tech Systems, Inc. at the address
shown below for details of how to have the repairs made. If the equipment is causing harm to the
telephone network, the telephone company may request that you disconnect the equipment until the
problem is resolved.
7. Connection to party line service is subject to state tariffs. Contact the state public utility commission,
public service commission or corporation commission for information.
8. No repairs are to be made by you. Repairs are to be made only by Multi-Tech Systems or its
licensees. Unauthorized repairs void registration and warranty.
9. If your home has specially wired alarm equipment connected to the telephone line, ensure the
installation of this equipment does not disable your alarm equipment.
If you have questions about what will disable alarm equipment, consult your telephone company or a
qualified installer.
10. Connection to party line service is subject to state tariffs. Contact the state public utility commission,
public service commission or corporation commission for information.
11. This equipment is hearing aid compatible.
Multi-Tech Systems, Inc.
FF110 FaxFinder Fax Server Admin User Guide
162
Chapter 10: Regulatory Information
12. Manufacturing Information:
Manufacturer:
Multi-Tech Systems, Inc.
Trade Name:
FaxFinder
Model Number:
FF110
Registration No:
AU7USA-46014-MD-E
Ringer Equivalence:
0.4B
Modular Jack (USOC):
RJ11C or RJ11W (single line),
RJ12
Service Center in USA: Multi-Tech Systems, Inc.
2205 Woodale Drive
Mounds View, MN 55112 U.S.A.
(763) 785-3500
(763) 785-9874 Fax
47 CFR Part 15 Regulation
This equipment has been tested and found to comply with the limits for a Class B digital device, pursuant
to 47 CFR Part 15 regulations. The stated limits in this regulation are designed to provide reasonable
protection against harmful interference in a residential installation. This equipment generates, uses, and
can radiate radio frequency energy, and if not installed and used in accordance with the instructions, may
cause harmful interference to radio communications. However, there is no guarantee that interference will
not occur in a particular installation. If this equipment does cause harmful interference to radio or
television reception, which can be determined by turning the equipment off and on, the user is
encouraged to try to correct the interference by one or more of the following measures:
Reorient or relocate the receiving antenna.
Increase the separation between the equipment and receiver.
Plug the equipment into an outlet on a circuit different from that to which the receiver is connected.
Consult the dealer or an experienced radio/TV technician for help.
This device complies with Part 15 of the CFR 47 rules. Operation of this device is subject to the following
conditions: (1) This device may not cause harmful interference, and (2) this device must accept any
interference that may cause undesired operation.
Warning: Changes or modifications to this unit not expressly approved by the party responsible
for compliance could void the user’s authority to operate the equipment.
Fax Branding Statement
The Telephone Consumer Protection Act of 1991 makes it unlawful for any person to use a computer or
other electronic device, including fax machines, to send any message unless such message clearly
contains the following information:
• Date and time the message is sent
• Identification of the business or other entity, or other individual sending the message
• Telephone number of the sending machine or such business, other entity, or individual
This information is to appear in a margin at the top or bottom of each transmitted page or on the first page
of the transmission. (Adding this information in the margin is referred to as fax branding).
Any number of fax software packages can be used with this product. Refer to the fax software manual for
setup details. Typically, the fax branding information must be entered via the configuration menu of the
software.
Multi-Tech Systems, Inc.
FF110 FaxFinder Fax Server Admin User Guide
163
Chapter 10: Regulatory Information
Canadian Limitations Notice
Notice: The ringer equivalence number (REN) assigned to each terminal device provides an indication of
the maximum number of terminals allowed to be connected to a telephone interface. The termination on
an interface may consist of any combination of devices subject only to the requirement that the sum of the
ringer equivalence numbers of all the devices does not exceed 5.
Notice: The Industry Canada label identifies certified equipment. This certification means that the
equipment meets certain telecommunications network protective, operational, and safety requirements.
The Industry Canada label does not guarantee the equipment will operate to the user’s satisfaction.
Before installing this equipment, users should ensure that it is permissible to be connected to the facilities
of the local telecommunications company. The equipment must also be installed using an acceptable
method of connection. The customer should be aware that compliance with the above conditions may not
prevent degradation of service in some situations. Repairs to certified equipment should be made by an
authorized Canadian maintenance facility designated by the supplier. Any repairs or alterations made by
the user to this equipment or equipment malfunctions may give the telecommunications company cause
to request the user to disconnect the equipment.
Users should ensure for their own protection that the electrical ground connections of the power utility,
telephone lines and internal metallic water pipe system, if present, are connected together. This
precaution may be particularly important in rural areas.
Caution: Users should not attempt to make such connections themselves, but should contact the
appropriate electric inspection authority, or electrician, as appropriate.
Industry Canada
This Class B digital apparatus meets all requirements of the Canadian Interference-Causing Equipment
Regulations.
Cet appareil numérique de la classe B respecte toutes les exigences du Reglement Canadien sur le
matériel brouilleur.
Multi-Tech Systems, Inc.
FF110 FaxFinder Fax Server Admin User Guide
164
Chapter 10: Regulatory Information
WEEE Statement
(Waste Electrical and Electronic Equipment)
July, 2005
The WEEE directive places an obligation on EU-based manufacturers, distributors, retailers and importers
to take back electronics products at the end of their useful life. A sister Directive, ROHS (Restriction of
Hazardous Substances) complements the WEEE Directive by banning the presence of specific
hazardous substances in the products at the design phase. The WEEE Directive covers all Multi-Tech
products imported into the EU as of August 13, 2005. EU-based manufacturers, distributors, retailers and
importers are obliged to finance the costs of recovery from municipal collection points, reuse, and
recycling of specified percentages per the WEEE requirements.
Instructions for Disposal of WEEE by Users in the European Union
The symbol shown below is on the product or on its packaging, which indicates that this product must not
be disposed of with other waste. Instead, it is the user’s responsibility to dispose of their waste equipment
by handing it over to a designated collection point for the recycling of waste electrical and electronic
equipment. The separate collection and recycling of your waste equipment at the time of disposal will help
to conserve natural resources and ensure that it is recycled in a manner that protects human health and
the environment. For more information about where you can drop off your waste equipment for recycling,
please contact your local city office, your household waste disposal service or the vendor from whom you
purchased the product.
Multi-Tech Systems, Inc.
FF110 FaxFinder Fax Server Admin User Guide
165
Chapter 11: Warranty, Service, & Repair
Chapter 11: Warranty, Service, &
Repair
Multi-Tech Warranty Statement
Multi-Tech Systems, Inc., (hereafter “MTS”) warrants that its products will be free from defects in material
or workmanship for a period of two, five, or ten years (depending on model) from date of purchase, or if
proof of purchase is not provided, two, five, or ten years (depending on model) from date of shipment.
MTS MAKES NO OTHER WARRANTY, EXPRESS OR IMPLIED, AND ALL IMPLIED WARRANTIES OF
MERCHANTABILITY AND FITNESS FOR A PARTICULAR PURPOSE ARE HEREBY DISCLAIMED.
This warranty does not apply to any products which have been damaged by lightning storms, water, or
power surges or which have been neglected, altered, abused, used for a purpose other than the one for
which they were manufactured, repaired by Customer or any party without MTS’s written authorization, or
used in any manner inconsistent with MTS’s instructions.
MTS’s entire obligation under this warranty shall be limited (at MTS’s option) to repair or replacement of
any products which prove to be defective within the warranty period or, at MTS’s option, issuance of a
refund of the purchase price. Defective products must be returned by Customer to MTS’s factory —
transportation prepaid.
MTS WILL NOT BE LIABLE FOR CONSEQUENTIAL DAMAGES, AND UNDER NO CIRCUMSTANCES
WILL ITS LIABILITY EXCEED THE PRICE FOR DEFECTIVE PRODUCTS.
Repair Procedures for U.S. and Canadian Customers
In the event that service is required, products may be shipped, freight prepaid, to our Mounds View,
Minnesota factory:
Multi-Tech Systems, Inc.
2205 Woodale Drive
Mounds View, MN 55112
Attn: Repairs, Serial # ____________
A Returned Materials Authorization (RMA) is not required. Return shipping charges (surface) will be paid
by MTS to destinations in U.S. and Canada.
Please include, inside the shipping box, a description of the problem, a return shipping address (must
have street address, not P.O. Box), your telephone number, and if the product is out of warranty, a check
or purchase order for repair charges.
For out of warranty repair charges, go to www.multitech.com/DOCUMENTS/Company/warranty/
Extended two-year overnight replacement service agreements are available for selected products. Please
call MTS at (888) 288-5470, extension 5308 or visit our web site at
www.multitech.com/PARTNERS/Programs/orc/ for details on rates and coverage’s.
Please direct your questions regarding technical matters, product configuration, verification that the
product is defective, etc., to our Technical Support department at (800) 972-2439 or email
[email protected]. Please direct your questions regarding repair expediting, receiving, shipping,
billing, etc., to our Repair Accounting department at (800) 328-9717 or (763) 717-5631, or email
[email protected].
Repairs for damages caused by lightning storms, water, power surges, incorrect installation, physical
abuse, or user-caused damages are billed on a time-plus-materials basis.
Repair Procedures for International Customers (Outside U.S.A. and Canada)
Your original point of purchase Reseller may offer the quickest and most economical repair option for your
Multi-Tech product. You may also contact any Multi-Tech sales office for information about the nearest
distributor or other repair service for your Multi-Tech product. The Multi-Tech sales office directory is
available at www.multitech.com/PARTNERS/Channels/offices/
In the event that factory service is required, products may be shipped, freight prepaid to our Mounds
View, Minnesota factory. Recommended international shipment methods are via Federal Express, UPS or
Multi-Tech Systems, Inc.
FF110 FaxFinder Fax Server Admin User Guide
166
Chapter 11: Warranty, Service, & Repair
DHL courier services, or by airmail parcel post; shipments made by any other method will be refused. A
Returned Materials Authorization (RMA) is required for products shipped from outside the U.S.A. and
Canada. Please contact us for return authorization and shipping instructions on any International
shipments to the U.S.A. Please include, inside the shipping box, a description of the problem, a return
shipping address (must have street address, not P.O. Box), your telephone number, and if the product is
out of warranty, a check drawn on a U.S. bank or your company’s purchase order for repair charges.
Repaired units shall be shipped freight collect, unless other arrangements are made in advance.
Please direct your questions regarding technical matters, product configuration, verification that the
product is defective, etc., to our Technical Support department nearest you or email
[email protected]. When calling the U.S., please direct your questions regarding repair expediting,
receiving, shipping, billing, etc., to our Repair Accounting department at +(763) 717-5631 in the U.S.A., or
email [email protected].
Repairs for damages caused by lightning storms, water, power surges, incorrect installation, physical
abuse, or user-caused damages are billed on a time-plus-materials basis.
Repair Procedures for International Distributors
Distributors should contact Amex, Inc., for information about the repairs for your Multi-Tech product.
Amex, Inc.
2724 Summer Street NE
Minneapolis, MN 55413 U.S.A.
Tel: +(612) 331-3251
Fax: +(612) 331-3180
Email: [email protected]
Please direct your questions regarding technical matters, product configuration, verification that the
product is defective, etc., to our International Technical Support department at +(763)717-5863. When
calling the U.S., please direct your questions regarding repair expediting, receiving, shipping, billing, etc.,
to our Repair Accounting department at +(763) 717-5631 in the U.S.A. or email [email protected].
Repairs for damages caused by lightning storms, water, power surges, incorrect installation, physical
abuse, or user-caused damages are billed on a time-plus-materials basis.
Multi-Tech Systems, Inc.
FF110 FaxFinder Fax Server Admin User Guide
167