1
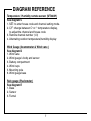
Wireless Weather Station
O WN E R ’ S MA N UA L
WS2 63 5
TABLE OF CONTENTS
Introduction ................................................................................................3
Diagram reference......................................................................................5
Transmitter setup........................................................................................8
Interference ................................................................................................10
Set channel.................................................................................................11
Receiver setup............................................................................................12
Synchronization..........................................................................................13
Installation ..................................................................................................14
Clock and date setting ...............................................................................15
Alarm clock setting.....................................................................................17
Altitude setting............................................................................................18
Moon phases..............................................................................................19
Temperature and humidity display.............................................................20
Temperature and humidity trend................................................................21
Temperature alarm .....................................................................................22
Wind speed and direction ..........................................................................22
Rain gauge display.....................................................................................26
Atmospheric pressure display ...................................................................27
Atmospheric pressure trend.......................................................................28
Weather forecasting ...................................................................................29
Troubleshooting .........................................................................................31
FCC compliance.........................................................................................32
Specifications .............................................................................................33
Maintenance ...............................................................................................34
Warranty .....................................................................................................34
2
INTRODUCTION
Congratulations on your purchase of this UPM Wireless Weather Station WS2635.
Please take the time to read and understand this manual, to enjoy the features
and convenience of this product.
What is a Weather Station?
A weather station is a device that measures the current weather conditions and
transmits these readings from outdoor sensors to an indoor receiver. Then, based
on these outdoor sensor readings, predicts the upcoming weather forecast for
the next 8-12 hours. The weather forecast is displayed on the receiver as weather
icons, such symbols of the sun, clouds, rain or snow.
Remote transmitters:
- Temperature transmitter (WT440H / Thermometer):
The outdoor temperature sensor transmits an updated wireless signal to the
receiver every minute. The current temperature is then displayed on the receiver,
in either Celsius or Fahrenheit. Additional temperature sensors may also be
placed other locations (such as your greenhouse or wine cellar) to monitor
temperature fluctuations in multiple locations. The receiver is compatible with up
to three remote temperature transmitters, but only one is included in this kit.
- Humidity transmitter (WT440H / Hygrometer):
The concentration of water vapor in the air, at the location of the transmitter, is
displayed as a relative humidity percentage ranging from 15% to 95%. The ideal
‘Comfort Zone’ for the human body ranges from 35 to 65% humidity, so long as
the temperature remains between 18° and 24°C.
3
INTRODUCTION
- Air Pressure (WS2635 / Barometer):
A barometric pressure sensor is located within the receiver unit itself. The
barometer monitors the atmospheric pressure, which is the amount of downward
force exerted by the weight of the air, and is measured in inches of mercury (Hg).
Air pressure fluctuations are an important factor in predicting changes in the
weather.
- Wind speed and direction gauge (WDS500 / Anemometer):
The wind speed and direction is measured by the anemometer sensor, and this
data is wirelessly transmitted to the receiver. The direction of the wind is
displayed on a digital compass and the speed is given in km/h or mph.
- Rain level gauge (RD700 / Pluviometer):
The rainfall is measured and recorded by the rain gauge; it can be displayed in
millimeters or in inches by the receiver. The rain gauge gathers precipitation until
its inner "tipping bucket" mechanism is full, then the bucket tips and the liquid is
released. Every minute, the rain gauge calculates the number of times the bucket
has tipped; then transmits this data to the receiver. The total accumulated rainfall
(for the last hour, the present day, or for the previous day) may be displayed.
4
DIAGRAM REFERENCE
Receiver layout - (refer to the diagram sheet)
See diagram A
1. MODE : to scroll through clock, alarm, altitude and temperature alarm
(high & low) setting modes.
2. HOUR/+ : to view the rainfall history; adjust clock, alarm, date, altitude, year
and temperature alarm values.
3. MINUTE/– : to view the rainfall & wind speed, adjust the clock, alarm,
date, altitude, year and temperature alarm values.
4. CHN : to scroll through - local or remote channels 1, 2 or 3 (in high & low
temperature alarm mode); to activate the learning procedure; to change the
weekday setting in alarm mode; to toggle between ºC and ºF temperature
display.
5.
: to activate the backlight (once activated, the backlight on will stay on for
6 seconds.); to show Min and Max records; toggle between 12 and 24 hour
format, to turn the alarm on and off; to disable (reset) high & low temperature
alarms; to snooze the alarm; to set the altitude unit.
6. Wall-mount holder
7. Tilted stand
5
DIAGRAM REFERENCE
Receiver LCD display - (refer to the diagram sheet)
See diagram B
1. Rain fall records in mm/inches
2. Wind speed in km/h or mph
3. Wind direction
4. Animated weather forecast symbols
5. Clock (HH:MM)
6. Alarm on icon
7. Radio controlled clock icon and time zone selection map
8. Moon phase display
9. Weekday
10. Pressure historical graph
11. Month/Day
12. Pressure reading
13. Pressure trend
14. Outdoor temperature and humidity reading
15. Outdoor temperature trend
16. Indoor temperature and humidity reading
17. Indoor temperature trend
6
DIAGRAM REFERENCE
Temperature / Humidity remote sensor (WT440H)
See diagram C
1. SET: to enter house code and channel setting mode.
2. C/F: change between Cº or Fº temperature display,
to adjust the channel and house code
3. Remote channel number (1-3)
4. Alternating outdoor temperature/humidity display
Wind Gauge (Anemometer & Wind vane )
See diagram D
1. Wind vane
2. Wind gauge’s body and sensor
3. Battery compartment
4. Wind cups
5. Mounting pole
6. Wind gauge base
Rain gauge (Pluviometer)
See diagram E
1. Base
2. Sensor
3. Funnel
7
TRANSMITTER SETUP
Before following the steps below, make sure you have the following items:
- Compass (not included)
- 9 x AA batteries (included)
- 10 screws (included)
Setting the wind gauge
The wind gauge is a sensor that transmits the wind speed and the direction to
the receiver.
1. To install, (see diagram F)
2. There are 3 methods to mount the wind gauge (See diagram H).
If you are installing the shaft in a horizontal position, remove the cap first.
Note: 4 plugs are provided to screw the wind gauge’s plate to a
concrete or brick surface.
Note: Before mounting, you must use a compass to align the “N”marking on
the plate of the wind gauge so that it is facing north (see diagram I).
To see the North marking, you must temporarily remove the wind gauge fin.
This step is necessary to indicate the correct wind direction.
3. Mounting the wind gauge (see diagram I)
Note: Mount the wind gauge in an open space, as high as possible and
without any nearby walls or obstacles, in the direct flow of the wind.
- attatch the cups to the wind sensor body with the 3mm x 8mm screws.
- make sure the top of the wind gauge is stable and level.
- To enure the most accurate readings, make sure that the wind cup and the fin
are freely mobile.
8
TRANSMITTER SETUP
- When the wind gauge's batteries are low, the following symbol will display on
the receiver, under the wind speed display:
Setting the rain gauge sensor
The rain gauge is an individual sensor that transmits rainfall to the receiver and
measures the total rainfall and precipitation history.
1. To insert batteries into the rain gauge(see diagram G)
2. To view possible locations to install the rain gauge. (See diagram H)
3. To fasten the rain gauge with 2 screws (see diagram J)
Note: The rain gauge gathers precipitation, until it's inner "tipping bucket"
mechanism is full, then the bucket tips and the liquid is released. So place
the unit in a location where the water can be safely released. To obtain
accurate precipitation readings, there should be no obstacles (walls, trees, etc...)
close to the rain gauge. When the rain gauge’s batteries are low, the following
indicator will display on the receiver under the rain fall display:
Setting the temperature / humidity remote sensor
1. Remove the detachable cover at the back of the unit.
2. Use a screwdriver to open the battery door, located at the back of the unit.
3. Insert 2 AA batteries according to the indicated polarity.
4. Close the battery compartment and re-insert the screw. The remote sensor
will now display the outdoor temperature and humidity alternatively.
5. To toggle between ºC/ºF temperature display, press the ºC/ºF key.
(Diagram C [2])
9
INTERFERENCE
Interference occurs when radio waves or electronic signals are blocked or
interrupted by consumer electronic products. In the case of a weather station,
the signal from the transmitter to the receiver may be interrupted by a wireless
telephone, or other electronic equipment. Additionally, if your next door neighbor
is operating a similar weather station, your receiver might pick up a signal from
their temperature sensor by mistake. The solution to undesired interference is to
set your temperature sensor(s) on a specific frequency (or house code) which
ranges from 1-15. (This house code setting may be applied to the temperature/
humidity transmitter (WT440H) only, not to the wind or rain gauges in this kit.)
Setting the House Code
The house code is the frequency signal sent by the remote sensor to the
receiver. If the receiver experiences signal interference, you will need to set the
remote sensor to a different house code (default setting = 1).
After inserting the batteries, the house code will flash for 8 seconds. Select a
house code (1-15) by pressing ºC/ºF (Diagram C [2]) and then press SET
(Diagram C [1]). The remote sensors for each receiver must be set to the
same house code.
10
SET CHANNEL
Set Channel for one or multiple sensors
The WS2635 comes with only one temperature/humidity transmitter (WT440H)
but it is compatible with up to three. If only one sensor is used the transmitter will
default to channel one. However, if you have purchased additional remote
temperature sensors, you must set each of them to a different channel (1, 2 or 3)
but be sure to select the same house code (1-15) on all temperature sensors.
After setting the house code, the channel will flash for 8 seconds.
Select a channel (1-3) by pressing ºC/ºF (Diagram C [2]) and then press
SET (Diagram C [1]). Channel 1 is the default, used for collecting temperature
and humidity data from the outdoors.
Low battery indication: if the batteries of the sensor are low, the indicator
will be displayed on the receiver below the outdoor temperature display.
Note: If the sensor is exposed to very low temperatures for an extended period
of time, the batteries may lose power, reducing the transmission range.
11
RECEIVER SETUP
Setting the receiver
Lift the battery door located at the back of the receiver and insert 3 AA batteries
according to the indicated polarity, then close the battery compartment.
The WS2635 is designed to automatically synchronize it’s calendar and clock
once it is brought within the reception range of a WWVB radio signal. The receiver
will display the outdoor temperature and humidity data transmitted from the sensor.
The receiver will also display the data collected from the wind and the rain gauge
sensors.
LOW BATTERY INDICATION: If the batteries of the receiver are low, the
following indicator
will be displayed on the screen of the receiver below
the inside temperature. When the receiver’s LCD display becomes dim that is
also an indication that the batteries are low and need to be changed.
12
SYNCHRONISATION
Automatic Learning Function
1. After batteries have been inserted into the temperature/humidity sensor,
wind gauge, rain gauge and receiver, the learning function will automatically
begin and runs for approximately 3 minutes.
2. Within these 3 minutes, the receiver will begin to read the temperature &
humidity signals and displays the readings.
Manual-Learning (Searching for Remote Signals)
If a new remote sensor is added, or if the signal is lost (WT440H is blinking),
the learning function must be completed again.
1. Press and hold CHN on the receiver (Diagram A [4]) for 3 seconds.
2. A beep sound indicates that the learning function has started.
3. The ‘OUTSIDE’ symbol will flash, and the unit will beep as each remote sensor
is detected.
4. Temperature & humidity readings of the remote sensor, wind direction, wind
speed and rainfall readings will be displayed on the receiver.
Note: The Auto/Manual Learn Function will not operate while the radio controlled
clock is receiving signals. (LCD radio antenna will be flashing)
13
INSTALLATION
Receiver installation (WS2635)
The receiver has an adjustable stand and a wall mount hole. To attach receiver
to the stand, simply click stand ball into the hole at the bottom of the receiver.
The receiver can then be placed onto any flat stable surface. To ensure reliable
signal transmission, the receiver should not be installed near a dense wall,
electronic devices or a large metal surface. To mount the receiver on a wall,
use a nail or hook to hang the unit.
Temperature/Humidity transmitter installation (WT440H)
The WT440H sensor has a detachable back cover, with both a wall mount hole
and an easel stand. To mount the remote sensor on a wall, use a nail or hook.
To place the remote sensor on a window sill or flat outdoor surface, tilt back the
easel stand and ensure the unit is stable.
Since the transmission range between the receiver and transmitter, can be
affected by the dense walls or electronic interference, place them as close
together as possible. Also, before choosing a final location for the remote
temperature sensor(s), test that the receiver is consistently displaying
readings from the transmitter(s).
Although remote temperature transmitters are weather resistant, it is highly
recommended to place them away from direct sunlight, rain or snow. An ideal
location would be on a window sill or under a deck. This will prevent weather
damage to the unit and maintain more accurate readings.
14
CLOCK AND DATE SETTING
RADIO CONTROLLED CLOCK (RCC)
The WS2635 is designed to automatically synchronize it’s calendar and clock,
if it is brought within the reception range of a radio signal. In most regions
of North America, this weather station will be able to receive a time signal from
Fort Collins, Colorado.
The clock will automatically start scanning for the radio signal approximately
7 minutes after new batteries are inserted in the receiver. When searching for
the radio signal the Radio Tower symbol, on the LCD screen, will start to blink.
A complete scan may take several hours, depending on the strength of the
radio signal. The radio signal may not be detectable in all regions of North
America, but the clock time may still be set manually.
If the radio clock scan does not begin automatically this function may also be
triggered manually by holding the MINUTE/- key for 3 seconds. When the
reception is complete, the Radio Tower symbol will stop blinking and remain
solid. The clock will automatically re-synchonize the time at 02:07 every day
to maintain accuracy. Note: During time signal scan, the receiver will no longer
update data received from the outdoor weather gauges.
TIME ZONE SETTING:
- Press and hold MODE for 3 seconds to enter clock setting mode.
- Press MODE again. (Day and month will flash)
- Press CHN to select the time zone (Eastern, Central, Mountain, Pacific)
and press SNOOZE to select DST (Daylight Savings Time) if applicable.
15
CLOCK AND DATE SETTING
Clock setting (See Diagram A)
1. Press and hold MODE [1] for 3 seconds to enter clock setting mode
(the time will flash).
2. Press HOUR/+ [2] to set the hour and MINUTE/- [3] to set the minutes.
3 .Press
[5] during the clock settings to alternate between the 12 and 24
hour display.
4. Once the clock is set, press MODE [1] to accept the time settings.
(Then the month and the date will flash.)
5. Press HOUR/+ [2] to set the month.
6. Press MINUTE/- [3] to set the date.
7. Press MODE [1] again (the year will flash)
Press HOUR/+ [2] to move the year forward or
Press MINUTE/- [3] to move the year backward.
Press MODE [1] to confirm all your settings.
Note:
- February will have either 28 or 29 days. Your weather station will display the
29th on leap years.
16
ALARM CLOCK SETTING
Alarm setting (See diagram A)
Scroll to alarm mode using MODE [1]. (Alarm bell symbol will appear )
1. Press HOUR/+ [2] to set the hour.
2. Press MINUTE/- [3] to set the minutes.
3. Press
key [5] to toggle alarm on ( is displayed) and off.
4. Press CHN [4] to scroll between the activation day(s)
(The alarm may be activated one weekday or for a series of weekdays.)
5. When the alarm is set ON, the bell symbol
will appear on the main screen.
When Alarm Sounds
a. The bell symbol will flash.
b. Press
[5] to repeat the alarm in 5 minutes. After
that the alarm will sound again.
c. Press ANY other key to turn the alarm sound off. If not manually interrupted,
the alarm sound will automatically stop after one minute
17
ALTITUDE SETTING
Setting the altitude (height from sea level) (See diagram A)
Once the synchronization process is complete and the time and date are set, you
must enter the height (in meters or feet) of the weather station from sea level.
1. Press MODE [1] repeatedly until the "Altitude" flashes.
2. Use the HOUR/+ [2] and MINUTE/- [3] keys to increase
or decrease the altitude setting.
3. Use the
[5] to select the altitude units (M=meters & Ft=feet)
4. Press MODE [1] to confirm.
Note: Since the default altitude setting is zero (sea level), you will need to
reset the altitude setting after changing the batteries.
18
MOON PHASES
The moon phase on your WS2635 is automatically updated according to the
year/month/day.
Moon Phase Display
1. New Moon
2. Young Crescent
3. First Quarter
4. Waxing Gibbous
5. Full Moon
6. Waning Gibbous
7. Last Quarter
8. Old Crescent
19
TEMPERATURE & HUMIDITY DISPLAY
Checking Outside Temperature & Humidity (See diagram A)
1. Press CHN [4] to toggle between the data of your temperature sensors:
Outside 1 (channel 1), Outside 2 (channel 2) and Outside 3 (channel 3).
Temperature and humidity readings will alternate on the receiver.
Note: If you do not have additional temperature sensors, disregard this function.
Min and Max Temperature & Humidity (See diagram A)
Press
[5} in clock mode to toggle between:
maximum wind speed, maximum temperature, minimum temperature,
maximum humidity record and minimum humidity recorded.
Display HI & LO
When “HI” or “LO” is displayed onscreen this means that the temperature or
humidity is above or below the range of specification.
Inside/Outside
Temperature
Humidity
Display
Inside
> +55°C
+131°F
>
95%
HI
Inside
<
-20°C
-4°F
<
15%
LO
Outside
> +70°C
+155°F
>
95%
HI
Outside
<
-22°F
<
15%
LO
-30°C
20
TEMPERATURE & HUMIDITY TREND
The trend arrow displays the temperature & humidity trend, determined by the
sensor in the past half hour interval.
Arrow Indicator
Trend
Steady
Rising
Falling
TEMPERATURE ALARM
You can set high or low temperature alarms for one local (indoor) channel and
for one remote (outdoor) channel.
Inside temperature alarm (See diagram A)
1. Scroll to the inside temperature alarm mode by pressing MODE [1] 3 times
2. The default value 14°C or the existing alarm preset will flash
3. Press HOUR/+ [2] or MINUTE/- [3] keys to set the temperature limit value.
4. Press the
[5] key to scroll and select the high temperature alarm,
low temperature alarm
or to disable the alarm function (blank).
5. Press MODE [1] to save your settings.
21
TEMPERATURE ALARM
Outside temperature alarm (See diagram A)
1. Scroll to the outside temperature alarm mode by pressing MODE [1] 4 times
repeatedly.
2. Press CHN [4] to select the channel (1-3) of a specific transmitter.
3. The default value 14°C or the existing alarm preset will flash.
4. Press HOUR/+ [2] or MINUTE/- [3] button to set the temperature limit value.
5. Press
[5] key to scroll and select the high temperature alarm,
low temperature alarm
or disable the alarm function (blank).
When the temperature alarm sounds
The siren symbol will display when the temperature has become higher or lower
than the preset temperature limit.
a. Press any key to stop temperature alarm.
b. If no key is pressed, the temperature alarm will automatically stop after
one minute.
WIND SPEED/DIRECTION DISPLAY
The WS2635 wind gauge indicates the wind speed and direction. The Beaufort
Wind Scale is the international standard to measure wind speed. The table on
the following pages illustrates the relationship between the Beaufort force and
wind speed.
22
WIND SPEED DISPLAY
Beaufort Force Wind Speed Wind Speed Terms used
(MPH)
in forecasts
(KmPH)
Indicators
0
0-2
0-1
Calm
Calm; smoke rises vertically.
The sea is mirror like.
1
2-5
1-3
Light
Smoke drift indicates wind
direction.
2
6-12
4-7
Light
Wind felt on face, leaves rustle
3
13-20
8-12
Gentle
Leaves and small twigs in
constant motion
4
21-29
13-18
Moderate
Raises dust, leaves and loose
paper; small branches move.
At sea, small waves 1-4ft (up to
(1.2m) take form.
5
30-39
19-24
Fresh
Small trees in leaf begin to
sway; crested wavelets form
on inland waters. At sea, 4-8ft
(1to 2.5m) waves
6
40-50
25-31
Strong
23
Large branches in motion;
Whistling heard in wires;
umbrellas used with difficulty.
At sea, 8-13ft (2.5-4m) waves
WIND SPEED DISPLAY
Beaufort Force Wind Speed Wind Speed Terms used
(MPH)
in forecasts
(KmPH)
Indicators
7
51-61
32-38
Strong
Whole trees in motion;
Inconvenience felt while
walking against the wind.
At sea, 13-20ft 4-6m waves.
8
62-74
39-46
Gale
Breaks twigs off trees;
generally impedes progress.
9
75-87
47-54
Gale
Slight structural damage,
roofing dislodged, large
branches break off. High waves
(20ft/6m), reduced visibility at
sea. Protect wind gauge.
10
88-101
55-63
Storm
Seldom experienced inland;
accompanied by widespread
damage. Exceptionally high
waves 30-45ft (9-14m).
11
102-116
64-72
Storm
12
117 or more
73 or more
Hurricane
Very rarely experienced inland;
accompanied by widespread
damage. Exceptionally high
waves 30-45ft (9-14m).
Very rarely experienced;
accompanied by widespread
damage. At sea, waves over
45/14m, visibility greatly
reduced.
24
WIND SPEED & DIRECTION
(See diagram B)
Wind direction [3]:
The long arrow in the LCD compass (with the arrow tip) indicates the current wind
direction. The short arrow indicates the previous wind direction.
Changing the wind speed to imperial or metric units:
The wind speed may be displayed in km/h or mph.
Press MINUTE/- [3] to toggle between imperial or metric units. For instance,
if the wind speed displays in mph, then the rain fall will be in inches; if the
wind speed display in km/h, then the rain fall will be in mm.
Note: Data on the wind direction and speed is transmitted to the receiver every
minute. However, the wind readings may be compromised in extreme weather
conditions, in which the wind direction is changing every few seconds. Be sure
to take measures to protect your outdoor sensors from damage if wind speed
exceeds 74KmPH or 46MPH.
25
RAIN GAUGE DISPLAY
The rain gauge is a device which collects and measures precipitation (rainfall or
melting snow). The precipitation can be displayed in metric or imperial units
(mm or inches). The rain gauge transmits the precipitation total, for the last hour,
for the present day, and for the previous day.
(See diagram A)
Change the display unit:
The rain level may be displayed in inches or mm.
Press MINUTE/- [3] to toggle between imperial or metric units. For instance,
if the wind speed displays in mph, then the rain fall will be in inches; if the
wind speed display in km/h, then the rain fall will be in mm.
Display the rainfall record:
To display the last hour, today and yesterday’s accumulated rainfall:
Press HOUR/+ [2] repeatedly to change the rainfall record.
Press
[5] during 3 seconds to set the accumulated
rainfall values back to 0.
26
ATMOSPHERIC PRESSURE DISPLAY
Your weather station displays the existing atmospheric pressure in inches of
mercury (inHg). It is commonly acknowledged that a value of 30 in Hg is the limit
between an anticyclone (good weather > 30 in Hg) and a low-pressure area (bad
weather < 30 in Hg).
Pressure Trend
The trend pointer displayed indicates the trend of the barometric pressure.
Indicates that the barometric pressure trend is increasing.
Indicates that the barometric pressure trend is steady.
Indicates that the barometric pressure trend is decreasing.
27
PRESSURE HISTORICAL BAR GRAPH
The bar graph lets you see the pressure trend over a period of 12 hours.
InHg
Pressure Trend
28
WEATHER FORECASTING
Sunny
Cloudy
Raining
Snowing
Freeze
Warning
Fl ash ing snow
Storm Alert
flash ing thu nde rst or m
and rai n toge ther
Animated weather forecast symbols
This weather station is capable of detecting barometric pressure changes, and
based on the data collected, can predict the weather for the next 8 to 12 hours.
The forecast range covers an area of 30 - 50km or 18 - 30m.
Storm Alert
* The storm symbol will flash to indicate a thunderstorm warning.
* Storm alert is activated when air pressure falls and the temperature drops.
Snow and Freeze Warning
* The snow symbol will flash to warn that a snowfall is possible.
* The snow or freeze warning will be activated when the temperature of
Channel 1 transmitter is between -1.9 °C & +2.9 °C.
* The snow symbol will appear solid when the temperature of channel 1 falls
below -1.9 °C
29
WEATHER FORECASTING
REMARKS:
* The temperature/humidity transmitter should be placed outdoors on channel 1,
since this is the default weather forecasting channel. The data from channel 1
is responsible for determining which weather forecast icons display on the
receiver's LCD screen (as well as the temperature and humidity trends).
* After installation is completed, allow 12-24 hours for the weather station to
operate at a steady state, as this will ensure a more accurate forecast.
* Common to weather forecasting, absolute accuracy cannot be guaranteed.
* If the temperature/humidity transmitter is moved from one location to
another, which is significantly different, or higher or lower, than its original
position (e.g from the ground floor to 1st floor of a house), remove the batteries
and then reinsert them after 30 seconds. Then re-synchronize the
temperature/humidity transmitter with the receiver. (see synchronization section)
A change in location may alter the transmitter's local temperature or humidity
readings.
* Ensure that the temperature/humidity transmitter is placed well away from
direct rain, direct sunlight, any sources of heat, or areas of your home with less
insulation, (such as ventilation outputs or single pane windows) because the
temperature/humidity may be affected by heat or humidity escaping from
your home.
30
TROUBLESHOOTING
Problem
Solution
The temperature readings
of the transmitter and receiver
do not match.
Wait for about 1-2 minutes to ensure the units are not in a
phase change. Otherwise, re-synchronize receiver by
holding the CHN "Channel" button for 3 seconds until a
beep is heard.
Transmitter temperature
readings seem to high.
Ensure the remote sensor is out of direct sunlight, and away
from other sources of heat.
The receiver stops receiving
remote data or the display
is incorrect.
- Repeat the learn procedures. (see synchronisation section)
- Temperature may be below -30°C.
- Batteries in transmitter may need changing.
- Move the transmitter closer to the receiver.
- Make sure transmitter is away from solid obstacles or
sources of electrical disturbance.
The wind gauge does not
display the correct wind
direction.
Make sure you have correctly aligned the north marking
underneath the wind gauge's cap, with a compass, as true
magnetic North.
31
FCC / Industry Canada COMPLIANCE
This device complies with Part 15 of the FCC Rules and with RSS-210 of Industry
Canada. Operation is subject to the following two conditions:
(1) this device may not cause harmful interference, and
(2) this device must accept any interference received, including interference
that may cause undesired operation.
This equipment has been tested and found to comply with the limits for a Class B digital device,
pursuant to Part 15 of the FCC Rules. These limits are designed to provide reasonable protection
against harmful interference in a residential installation. This equipment generates, uses and can
radiate radio frequency energy and, if not installed and used in accordance with the instructions,
may cause harmful interference to radio communications. However, there is no guarantee that
interference will not occur in a particular installation. If this equipment does cause harmful
interference to radio or television reception, which can be determined by turning the equipment
off and on, the user is encouraged to try to correct the interference by one or more of the
following measures: Reorient or relocate the receiving antenna. Increase the separation between
the equipment and receiver. Connect the equipment into an outlet on a circuit different from that
to which the receiver is connected. Consult the dealer or an experienced radio/TV technician
for help.
32
SPECIFICATIONS
Weather Station Receiver WS2635
Battery Type:
Temp Range:
Measurement Accuracy
Resolution:
Humidity Range:
Measurement Accuracy:
Resolution:
3 x1.5V AA batteries
-20°C to +55°C
+/- 1ºC (Within measuring range of 0 to 40ºC)
0.1ºC
15% to 95%
+/-5%
1%
Temperature Transmitter WT440H
Battery Type:
Temp Range:
Humidity Range:
Transmission Range:
2 x1.5V AA batteries
-30°C to +70°C
15% to 95%
Up to 30 meters in open area.
Rain gauge transmitter
Battery Type:
Rain Volume Resolution:
2 x1.5V AA batteries
0.2mm
Wind gauge transmitter
Battery Type:
Transmission Range:
Wind Speed Range:
Wind Speed Resolution:
2 x1.5V AA batteries
Up to 30 meters in open area.
0km/h - 127.5km/h
0.5 km/h
33
MAINTENANCE
To clean the exterior of the unit, use only a soft cloth moistened with water;
do not use soap or detergent. Do not dis-assemble the receiver or allow moisture
to drip inside the unit. Remove the batteries if the unit us not going to be used for
an extended period.
WARRANTY
This product carries a one (1) year warranty against defects in workmanship and
materials. If the product is defective, return it, with a dated proof of purchase, to
the retailer from which you purchased it. At their discretion, the retailer may
replace the unit within the stated warranty period, when returned with proof of
purchase. However, this product is not guaranteed against wear or breakage due
to misuse and or abuse. Shipping and handling is not included under this
warranty.
For more information on this product, please contact:
Customer Service
1-888-468-6876
www.upm-marketing.com
34