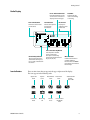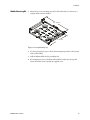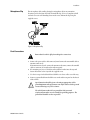
1
MICOM-H HF-SSB Transceiver Amateur Mobile/Base Radio Owner’s Guide Draft – October 2000 68MB000023 Mobat Communications Ltd. 2000 All rights reserved Table of Contents Acronyms . . . . . . . . . . . . . . . . . . . . . . . . . . . . . . . . . . . . . . . . . . . . . . . . . . . . . . . . . . . . . . . . . . . . . . . . . . . . . . . . . . . . . . v Technical Specifications . . . . . . . . . . . . . . . . . . . . . . . . . . . . . . . . . . . . . . . . . . . . . . . . . . . . . . . . . . . . . . . . . . vii General . . . . . . . . . . . . . . . . . . . . . . . . . . . . . . . . . . . . . . . . . . . . . . . . . . . . . . . . . . . . . . . . . . . . . . . . . . . . . . . . . . . vii Options . . . . . . . . . . . . . . . . . . . . . . . . . . . . . . . . . . . . . . . . . . . . . . . . . . . . . . . . . . . . . . . . . . . . . . . . . . . . . . . . . . . viii Accessories . . . . . . . . . . . . . . . . . . . . . . . . . . . . . . . . . . . . . . . . . . . . . . . . . . . . . . . . . . . . . . . . . . . . . . . . . . . . . . . viii Transmitter . . . . . . . . . . . . . . . . . . . . . . . . . . . . . . . . . . . . . . . . . . . . . . . . . . . . . . . . . . . . . . . . . . . . . . . . . . . . . . . . ix Receiver . . . . . . . . . . . . . . . . . . . . . . . . . . . . . . . . . . . . . . . . . . . . . . . . . . . . . . . . . . . . . . . . . . . . . . . . . . . . . . . . . . . .x Military and Industrial Standards . . . . . . . . . . . . . . . . . . . . . . . . . . . . . . . . . . . . . . . . . . . . . . . . . . . . . . . . . . xi FCC Information . . . . . . . . . . . . . . . . . . . . . . . . . . . . . . . . . . . . . . . . . . . . . . . . . . . . . . . . . . . . . . . . . . . . . . . . . . . xi Information for Safe, Efficient Operation . . . . . . . . . . . . . . . . . . . . . . . . . . . . . . . . . . . . . . . . . . . .xiii Exposure to Radio Frequency Energy . . . . . . . . . . . . . . . . . . . . . . . . . . . . . . . . . . . . . . . . . . . . . . . . . . . . . . xiii Guidelines and Warnings . . . . . . . . . . . . . . . . . . . . . . . . . . . . . . . . . . . . . . . . . . . . . . . . . . . . . . . . . . . . . . . . . . xiv Restrictions . . . . . . . . . . . . . . . . . . . . . . . . . . . . . . . . . . . . . . . . . . . . . . . . . . . . . . . . . . . . . . . . . . . . . . . . . . . . . xiv Before You Begin ............................................................................1 Overview . . . . . . . . . . . . . . . . . . . . . . . . . . . . . . . . . . . . . . . . . . . . . . . . . . . . . . . . . . . . . . . . . . . . . . . . . . . . . . . . . . . . . . . 3 The MICOM-H HF-SSB Radio . . . . . . . . . . . . . . . . . . . . . . . . . . . . . . . . . . . . . . . . . . . . . . . . . . . . . . . . . . . . . . . 3 Options and Accessories . . . . . . . . . . . . . . . . . . . . . . . . . . . . . . . . . . . . . . . . . . . . . . . . . . . . . . . . . . . . . . . . . . 4 Transmission . . . . . . . . . . . . . . . . . . . . . . . . . . . . . . . . . . . . . . . . . . . . . . . . . . . . . . . . . . . . . . . . . . . . . . . . . . . . 4 Reception . . . . . . . . . . . . . . . . . . . . . . . . . . . . . . . . . . . . . . . . . . . . . . . . . . . . . . . . . . . . . . . . . . . . . . . . . . . . . . . . 4 Frequency Sources. . . . . . . . . . . . . . . . . . . . . . . . . . . . . . . . . . . . . . . . . . . . . . . . . . . . . . . . . . . . . . . . . . . . . . . . 5 Power Sources . . . . . . . . . . . . . . . . . . . . . . . . . . . . . . . . . . . . . . . . . . . . . . . . . . . . . . . . . . . . . . . . . . . . . . . . . . . 5 CW Keying Operation . . . . . . . . . . . . . . . . . . . . . . . . . . . . . . . . . . . . . . . . . . . . . . . . . . . . . . . . . . . . . . . . . . . . . 5 Radio Programming . . . . . . . . . . . . . . . . . . . . . . . . . . . . . . . . . . . . . . . . . . . . . . . . . . . . . . . . . . . . . . . . . . . . . . 5 MICOM-H Owner’s Guide i Getting Started . . . . . . . . . . . . . . . . . . . . . . . . . . . . . . . . . . . . . . . . . . . . . . . . . . . . . . . . . . . . . . . . . . . . . . . . . . . . . . . 7 The Front Panel . . . . . . . . . . . . . . . . . . . . . . . . . . . . . . . . . . . . . . . . . . . . . . . . . . . . . . . . . . . . . . . . . . . . . . . . . . . . 7 LED Indicators . . . . . . . . . . . . . . . . . . . . . . . . . . . . . . . . . . . . . . . . . . . . . . . . . . . . . . . . . . . . . . . . . . . . . . . . . . . 7 Radio Display . . . . . . . . . . . . . . . . . . . . . . . . . . . . . . . . . . . . . . . . . . . . . . . . . . . . . . . . . . . . . . . . . . . . . . . . . . . . 8 Icon Indicators . . . . . . . . . . . . . . . . . . . . . . . . . . . . . . . . . . . . . . . . . . . . . . . . . . . . . . . . . . . . . . . . . . . . . . . . . . . 8 The Rear Panel . . . . . . . . . . . . . . . . . . . . . . . . . . . . . . . . . . . . . . . . . . . . . . . . . . . . . . . . . . . . . . . . . . . . . . . . . . . . . 9 Beeps . . . . . . . . . . . . . . . . . . . . . . . . . . . . . . . . . . . . . . . . . . . . . . . . . . . . . . . . . . . . . . . . . . . . . . . . . . . . . . . . . . . . . . 9 Basic Radio Operations . . . . . . . . . . . . . . . . . . . . . . . . . . . . . . . . . . . . . . . . . . . . . . . . . . . . . . . . . . . . . . . . . . . . 10 Function Keys . . . . . . . . . . . . . . . . . . . . . . . . . . . . . . . . . . . . . . . . . . . . . . . . . . . . . . . . . . . . . . . . . . . . . . . . . . . 10 Predetermined Numeric Value Mode . . . . . . . . . . . . . . . . . . . . . . . . . . . . . . . . . . . . . . . . . . . . . . . . . . . 10 Toggle Mode . . . . . . . . . . . . . . . . . . . . . . . . . . . . . . . . . . . . . . . . . . . . . . . . . . . . . . . . . . . . . . . . . . . . . . . . . 10 Up/Down Scroll Keys . . . . . . . . . . . . . . . . . . . . . . . . . . . . . . . . . . . . . . . . . . . . . . . . . . . . . . . . . . . . . . . . . . . . 10 Scanning Wheel . . . . . . . . . . . . . . . . . . . . . . . . . . . . . . . . . . . . . . . . . . . . . . . . . . . . . . . . . . . . . . . . . . . . . . . . . 10 Transmission/Reception Quality Aids . . . . . . . . . . . . . . . . . . . . . . . . . . . . . . . . . . . . . . . . . . . . . . . . . . . . . 11 Conventions in this Manual . . . . . . . . . . . . . . . . . . . . . . . . . . . . . . . . . . . . . . . . . . . . . . . . . . . . . . . . . . . . . . . 12 Procedures . . . . . . . . . . . . . . . . . . . . . . . . . . . . . . . . . . . . . . . . . . . . . . . . . . . . . . . . . . . . . . . . . . . . . . . . . . . . . . 12 Display Representation . . . . . . . . . . . . . . . . . . . . . . . . . . . . . . . . . . . . . . . . . . . . . . . . . . . . . . . . . . . . . . . . . . 12 Radio Operation . . . . . . . . . . . . . . . . . . . . . . . . . . . . . . . . . . . . . . . . . . . . . . . . . . . . . . . . . . . . . . . . . . . . . . . . . . . . . 13 Basic Radio Procedures . . . . . . . . . . . . . . . . . . . . . . . . . . . . . . . . . . . . . . . . . . . . . . . . . . . . . . . . . . . . . . . . . . . 13 PTT Types . . . . . . . . . . . . . . . . . . . . . . . . . . . . . . . . . . . . . . . . . . . . . . . . . . . . . . . . . . . . . . . . . . . . . . . . . . . . . . 14 Bandwidth Filters . . . . . . . . . . . . . . . . . . . . . . . . . . . . . . . . . . . . . . . . . . . . . . . . . . . . . . . . . . . . . . . . . . . . 15 Channel Mode. . . . . . . . . . . . . . . . . . . . . . . . . . . . . . . . . . . . . . . . . . . . . . . . . . . . . . . . . . . . . . . . . . . . . . . . . . . . . 16 Channel Mode Options . . . . . . . . . . . . . . . . . . . . . . . . . . . . . . . . . . . . . . . . . . . . . . . . . . . . . . . . . . . . . . . . . . . 17 Frequency Mode . . . . . . . . . . . . . . . . . . . . . . . . . . . . . . . . . . . . . . . . . . . . . . . . . . . . . . . . . . . . . . . . . . . . . . . . . . 18 VFO Operation . . . . . . . . . . . . . . . . . . . . . . . . . . . . . . . . . . . . . . . . . . . . . . . . . . . . . . . . . . . . . . . . . . . . . . . 20 Frequency Mode Options . . . . . . . . . . . . . . . . . . . . . . . . . . . . . . . . . . . . . . . . . . . . . . . . . . . . . . . . . . . . . . . . . 21 Storing Frequencies. . . . . . . . . . . . . . . . . . . . . . . . . . . . . . . . . . . . . . . . . . . . . . . . . . . . . . . . . . . . . . . . . . . . . . 22 Scan Mode . . . . . . . . . . . . . . . . . . . . . . . . . . . . . . . . . . . . . . . . . . . . . . . . . . . . . . . . . . . . . . . . . . . . . . . . . . . . . . . . 23 Scan Mode Options . . . . . . . . . . . . . . . . . . . . . . . . . . . . . . . . . . . . . . . . . . . . . . . . . . . . . . . . . . . . . . . . . . . . . . 24 Using the BITE (Built-In Test Equipment) . . . . . . . . . . . . . . . . . . . . . . . . . . . . . . . . . . . . . . . . . . . . . . . . . 26 Locking the Radio . . . . . . . . . . . . . . . . . . . . . . . . . . . . . . . . . . . . . . . . . . . . . . . . . . . . . . . . . . . . . . . . . . . . . . . . . 27 MICOM-H Owner’s Guide ii Display Brightness . . . . . . . . . . . . . . . . . . . . . . . . . . . . . . . . . . . . . . . . . . . . . . . . . . . . . . . . . . . . . . . . . . . . . . . . 29 Programming Mode . . . . . . . . . . . . . . . . . . . . . . . . . . . . . . . . . . . . . . . . . . . . . . . . . . . . . . . . . . . . . . . . . . . . . . . 30 Display Language . . . . . . . . . . . . . . . . . . . . . . . . . . . . . . . . . . . . . . . . . . . . . . . . . . . . . . . . . . . . . . . . . . . . . . . . 30 Radio Programming . . . . . . . . . . . . . . . . . . . . . . . . . . . . . . . . . . . . . . . . . . . . . . . . . . . . . . . . . . . . . . . . . . . . . . . . 31 Programming Channels . . . . . . . . . . . . . . . . . . . . . . . . . . . . . . . . . . . . . . . . . . . . . . . . . . . . . . . . . . . . . . . . . . . 32 Copying Channel Parameters . . . . . . . . . . . . . . . . . . . . . . . . . . . . . . . . . . . . . . . . . . . . . . . . . . . . . . . . . . . . . 33 Erasing a Channel . . . . . . . . . . . . . . . . . . . . . . . . . . . . . . . . . . . . . . . . . . . . . . . . . . . . . . . . . . . . . . . . . . . . . . . 34 Transmission Power Level. . . . . . . . . . . . . . . . . . . . . . . . . . . . . . . . . . . . . . . . . . . . . . . . . . . . . . . . . . . . . . . . 34 Channel Frequency . . . . . . . . . . . . . . . . . . . . . . . . . . . . . . . . . . . . . . . . . . . . . . . . . . . . . . . . . . . . . . . . . . . . . . 35 Band Types . . . . . . . . . . . . . . . . . . . . . . . . . . . . . . . . . . . . . . . . . . . . . . . . . . . . . . . . . . . . . . . . . . . . . . . . . . . . . 36 Operating Modes . . . . . . . . . . . . . . . . . . . . . . . . . . . . . . . . . . . . . . . . . . . . . . . . . . . . . . . . . . . . . . . . . . . . . . . . 36 Automatic Gain Control (AGC) . . . . . . . . . . . . . . . . . . . . . . . . . . . . . . . . . . . . . . . . . . . . . . . . . . . . . . . . . . . 37 Bandwidths . . . . . . . . . . . . . . . . . . . . . . . . . . . . . . . . . . . . . . . . . . . . . . . . . . . . . . . . . . . . . . . . . . . . . . . . . . . . . 38 Radio Parameters . . . . . . . . . . . . . . . . . . . . . . . . . . . . . . . . . . . . . . . . . . . . . . . . . . . . . . . . . . . . . . . . . . . . . . . . . 39 Baud Rate. . . . . . . . . . . . . . . . . . . . . . . . . . . . . . . . . . . . . . . . . . . . . . . . . . . . . . . . . . . . . . . . . . . . . . . . . . . . . . . 39 Data Power . . . . . . . . . . . . . . . . . . . . . . . . . . . . . . . . . . . . . . . . . . . . . . . . . . . . . . . . . . . . . . . . . . . . . . . . . . . . . 40 Microphone Side Tone . . . . . . . . . . . . . . . . . . . . . . . . . . . . . . . . . . . . . . . . . . . . . . . . . . . . . . . . . . . . . . . . . . . 40 Accessory Side Tone . . . . . . . . . . . . . . . . . . . . . . . . . . . . . . . . . . . . . . . . . . . . . . . . . . . . . . . . . . . . . . . . . . . . . 41 PTT Release Beep . . . . . . . . . . . . . . . . . . . . . . . . . . . . . . . . . . . . . . . . . . . . . . . . . . . . . . . . . . . . . . . . . . . . . . . . 41 Keyboard Beep . . . . . . . . . . . . . . . . . . . . . . . . . . . . . . . . . . . . . . . . . . . . . . . . . . . . . . . . . . . . . . . . . . . . . . . . . . 42 Tone Level . . . . . . . . . . . . . . . . . . . . . . . . . . . . . . . . . . . . . . . . . . . . . . . . . . . . . . . . . . . . . . . . . . . . . . . . . . . . . . 42 Alternate Display Time-out . . . . . . . . . . . . . . . . . . . . . . . . . . . . . . . . . . . . . . . . . . . . . . . . . . . . . . . . . . . . . . . 43 Attenuator . . . . . . . . . . . . . . . . . . . . . . . . . . . . . . . . . . . . . . . . . . . . . . . . . . . . . . . . . . . . . . . . . . . . . . . . . . . . . . 43 CW Operation . . . . . . . . . . . . . . . . . . . . . . . . . . . . . . . . . . . . . . . . . . . . . . . . . . . . . . . . . . . . . . . . . . . . . . . . . . . 44 Receive Level . . . . . . . . . . . . . . . . . . . . . . . . . . . . . . . . . . . . . . . . . . . . . . . . . . . . . . . . . . . . . . . . . . . . . . . . . . . . 44 Display Mode . . . . . . . . . . . . . . . . . . . . . . . . . . . . . . . . . . . . . . . . . . . . . . . . . . . . . . . . . . . . . . . . . . . . . . . . . . . 45 Setting the Radio Options . . . . . . . . . . . . . . . . . . . . . . . . . . . . . . . . . . . . . . . . . . . . . . . . . . . . . . . . . . . . . . . . . 46 Tuner . . . . . . . . . . . . . . . . . . . . . . . . . . . . . . . . . . . . . . . . . . . . . . . . . . . . . . . . . . . . . . . . . . . . . . . . . . . . . . . . . . 46 Accessory Settings . . . . . . . . . . . . . . . . . . . . . . . . . . . . . . . . . . . . . . . . . . . . . . . . . . . . . . . . . . . . . . . . . . . . . . . 46 MICOM-H Owner’s Guide iii Maintenance . . . . . . . . . . . . . . . . . . . . . . . . . . . . . . . . . . . . . . . . . . . . . . . . . . . . . . . . . . . . . . . . . . . . . . . . . . . . . . . . . 47 Preventative Maintenance . . . . . . . . . . . . . . . . . . . . . . . . . . . . . . . . . . . . . . . . . . . . . . . . . . . . . . . . . . . . . . . . . 47 System Integrity . . . . . . . . . . . . . . . . . . . . . . . . . . . . . . . . . . . . . . . . . . . . . . . . . . . . . . . . . . . . . . . . . . . . . . . . . 47 Periodic Calibration . . . . . . . . . . . . . . . . . . . . . . . . . . . . . . . . . . . . . . . . . . . . . . . . . . . . . . . . . . . . . . . . . . . . . 47 Using BITE . . . . . . . . . . . . . . . . . . . . . . . . . . . . . . . . . . . . . . . . . . . . . . . . . . . . . . . . . . . . . . . . . . . . . . . . . . . . . 47 Maintenance Error Messages . . . . . . . . . . . . . . . . . . . . . . . . . . . . . . . . . . . . . . . . . . . . . . . . . . . . . . . . . . 48 Troubleshooting . . . . . . . . . . . . . . . . . . . . . . . . . . . . . . . . . . . . . . . . . . . . . . . . . . . . . . . . . . . . . . . . . . . . . . . . . . 49 Service . . . . . . . . . . . . . . . . . . . . . . . . . . . . . . . . . . . . . . . . . . . . . . . . . . . . . . . . . . . . . . . . . . . . . . . . . . . . . . . . . . . . 51 Installation . . . . . . . . . . . . . . . . . . . . . . . . . . . . . . . . . . . . . . . . . . . . . . . . . . . . . . . . . . . . . . . . . . . . . . . . . . . . . . . . . . . 53 General . . . . . . . . . . . . . . . . . . . . . . . . . . . . . . . . . . . . . . . . . . . . . . . . . . . . . . . . . . . . . . . . . . . . . . . . . . . . . . . . . . . 53 Inspection . . . . . . . . . . . . . . . . . . . . . . . . . . . . . . . . . . . . . . . . . . . . . . . . . . . . . . . . . . . . . . . . . . . . . . . . . . . . . . 53 Planning the Installation of your Radio . . . . . . . . . . . . . . . . . . . . . . . . . . . . . . . . . . . . . . . . . . . . . . . . . . . . 53 Base Station Installation . . . . . . . . . . . . . . . . . . . . . . . . . . . . . . . . . . . . . . . . . . . . . . . . . . . . . . . . . . . . . . . . . . 54 Mobile Installation . . . . . . . . . . . . . . . . . . . . . . . . . . . . . . . . . . . . . . . . . . . . . . . . . . . . . . . . . . . . . . . . . . . . . . . . 55 Installation Procedures . . . . . . . . . . . . . . . . . . . . . . . . . . . . . . . . . . . . . . . . . . . . . . . . . . . . . . . . . . . . . . . . . . . 55 Mobile Mounting Kit. . . . . . . . . . . . . . . . . . . . . . . . . . . . . . . . . . . . . . . . . . . . . . . . . . . . . . . . . . . . . . . . . . . . . 56 DC Power Connection . . . . . . . . . . . . . . . . . . . . . . . . . . . . . . . . . . . . . . . . . . . . . . . . . . . . . . . . . . . . . . . . . . . . 57 Microphone Clip . . . . . . . . . . . . . . . . . . . . . . . . . . . . . . . . . . . . . . . . . . . . . . . . . . . . . . . . . . . . . . . . . . . . . . . . 58 Final Connections . . . . . . . . . . . . . . . . . . . . . . . . . . . . . . . . . . . . . . . . . . . . . . . . . . . . . . . . . . . . . . . . . . . . . . . 58 External Speaker Installation . . . . . . . . . . . . . . . . . . . . . . . . . . . . . . . . . . . . . . . . . . . . . . . . . . . . . . . . . . . . . 59 Operational Checks . . . . . . . . . . . . . . . . . . . . . . . . . . . . . . . . . . . . . . . . . . . . . . . . . . . . . . . . . . . . . . . . . . . . . . 59 Connectors. . . . . . . . . . . . . . . . . . . . . . . . . . . . . . . . . . . . . . . . . . . . . . . . . . . . . . . . . . . . . . . . . . . . . . . . . . . . . . . . 59 Microphone Connector J1 . . . . . . . . . . . . . . . . . . . . . . . . . . . . . . . . . . . . . . . . . . . . . . . . . . . . . . . . . . . . . . . . 59 Antenna Connector J2. . . . . . . . . . . . . . . . . . . . . . . . . . . . . . . . . . . . . . . . . . . . . . . . . . . . . . . . . . . . . . . . . . . . 59 Accessory Connector J3 . . . . . . . . . . . . . . . . . . . . . . . . . . . . . . . . . . . . . . . . . . . . . . . . . . . . . . . . . . . . . . . . . . 60 DC Connector J4 . . . . . . . . . . . . . . . . . . . . . . . . . . . . . . . . . . . . . . . . . . . . . . . . . . . . . . . . . . . . . . . . . . . . . . . . . 61 Reduction of Vehicular Noise . . . . . . . . . . . . . . . . . . . . . . . . . . . . . . . . . . . . . . . . . . . . . . . . . . . . . . . . . . . . . . 61 List of Procedures . . . . . . . . . . . . . . . . . . . . . . . . . . . . . . . . . . . . . . . . . . . . . . . . . . . . . . . . . . . . . . . . . . . . . . . . . . lxiii MICOM-H Owner’s Guide iv Acronyms MICOM-H Owner’s Guide AGC Automatic Gain Control AME Amplitude Modulation Equivalent ARQ Automatic Repeat Request BITE Built-In Test Equipment CW Continuous Wave DSP Digital Signal Processing DTCXO Digitally Temperature Controlled Crystal Oscillator FEC Forward Error Correction FSK Frequency Shift Keying GND Ground HF High Frequency HSM High Speed Modem LED Light Emitting Diode LSB Lower Side Band LSM Low Speed Modem MCW Modulated Continuous Wave OCXO Oven Controlled Crystal Oscillator PEP Peak Envelope Power PLL Phase Lock Loop PTT Push To Talk RGC Receiver Gain Control RSS Radio Service Software RTTY Radio Telex Teletype SINAD Signal to Signal Noise Distortion Ratio SSB Single Side Band ULQ Update Link Quality USB Upper Side Band VFO Variation Frequency Offset VSWR Voltage Standing Wave Ratio XMIT Transmit v Acronyms MICOM-H Owner’s Guide vi Technical Specifications General The general technical specifications of the MICOM-H are: Model Number M82AMN0KV5-K Frequency range Receiver: 100 kHz-30.000 MHz Transmit:1.800-1.999999 MHz 3.500-3.999999 MHz 7.000-7.300 MHz, 10.100-10.150 MHz 14.000-14.350 MHz, 18.068-18.168 MHz 21.000-21.450 MHz, 24.890-24.990 MHz 28.000-29.700 MHz Number of channels 200; user programmable; simplex or half duplex Scanning 5 groups with up to 100 channels per group Frequency stability 0.6 PPM (0.1 PPM optional) Frequency drift (aging) 1 PPM per year Synthesizer lock time 10 msec max. Frequency resolution 10 Hz Audio bandwidths @ -6dB Voice & Data: 350-2100 Hz, 350-2700 Hz, 350-3000 Hz, 350-3300 Hz CW: 775-1025 Hz, 650-1150 Hz, 500-1300 Hz Low speed data: 1450 to 1950 Hz Operating temperature range -30°C to +60°C Humidity 95% @ 50°C Operating voltage 13.8 V DC ± 20% Neg. Ground VFO VFO operation Current drain @ 13.8 VDC: Receive Key down Dimensions and weight MICOM-H Owner’s Guide Transmit Squelch Full Audio Voice 2 Tone 1 Tone 1.7A 2.5A 14A 23A Height Width mm/inch mm/inch Depth mm/inch Weight Kg/Lb. 92/3.7 270/10.7 5.7/12.5 302/11.9 28A vii Technical Specifications Options The following operational options can be added to the MICOM-H: High stability oscillator Enables frequency stability of 0.1 PPM. (Hardware option). Noise Blanker Helps to eliminate noise resulting from motor interference. Remote control Connection of the radio to a remote PC with radio controlled software. Accessory Stop Scan Enables stopping and resuming normal scanning from the accessory connector. RS232 remote control interface – Accessories MICOM-H Owner’s Guide Linear amplifier interface – Phone patch interface – Data/Fax modem interface – MicomNet-internet gateway – Interlink interface – 24 VDC operation – The following accessories can be added to the MICOM-H CW key and headphones – Phone patch – Interlink (FM-HF repeater) – Automatic Antenna Tuner – Continuous duty kit – AC power supply – Antennas and grounding kit – Data/fax modem – Mobile mounting kit – Desk Microhone – viii Technical Specifications Transmitter The MICOM-H transmits signals in accordance witht the following specifications: Output power 125W P.E.P. and average Reduced power levels 25W, 62W, 100W (RSS programmable) Audio bandwidth ripple 3 dB Intermodulation -31 dB/P.E.P (-35 dB/P.E.P Typical*) Harmonic emissions -64 dB/P.E.P (-70 dB/P.E.P Typical*) Spurious emissions -64 dB/P.E.P (-70 dB/P.E.P Typical*) Carrier suppression -50 dB/P.E.P Undesired sideband suppression -55 dB/P.E.P Audio distortion 2.5% 1/2 power microphone sensitivity 25 to 125 mV (RMS)/600 Ohms Hum & ripple -50 dB Inband noise -60 dB (30 Hz BW) Tx/Rx switching time 10 msec *. range. MICOM-H Owner’s Guide Values noted as “Typical” are valid over 90% or more of the frequency ix Technical Specifications Receiver The MICOM-H receives signals in accordance witht the following specifications: Sensitivity (SINAD) SSB (voice) 0.5 mV for 10 dB SINAD (0.35 mV Typical)* 0.1 - 1.6 MHz reduced performance 1/2 rated power sensitivity 1 mV for 2.5W audio @ speaker Selectivity -6 dB @ 350 to 2700 Hz -60 dB @ -1 kHz; +4 kHz Image rejection -80 dB IF rejection -85 dB Undesired sideband rejection -55 dB @ -1 kHz Spurious rejection -80 dB Cross modulation rejection -100 dB @ 100 kHz Desensitization -100 dB @ 100 kHz Reciprocal mixing -100 dB @ 100 kHz Audio power @ speaker 5W @ 2.5% distortion RGC range 5mV-1V (2 dB change in output level) RGC time constants Attack time 10 msec Release time 1500 msec CW/Data Attack time 10 msec Release time 10 msec Squelch Constant SINAD (digital) RIT variable range (Clarifier) ±200 Hz in 10 Hz steps Preselector sections Sub-octave (1.6 MHz to 30 MHz range) Maximum antenna input 20 kV maximum transient, 100V RMS for 2 minutes *. range. MICOM-H Owner’s Guide Voice Values noted as “Typical” are valid over 90% or more of the frequency x Technical Specifications Military and Industrial Standards The MICOM-H meets the following US military and industrial standard requirement for adverse environmental conditions (without the need of external shock mounts) Environmental Condition US Military STD 810C US Military STD 810D US Military STD 810E Vibration Method 514.2 Method 514.3 Method 514.4 Shock 516.2 516.3 516.4 Rain 506.1 506.2 506.3 Dust 510.1 510.2 510.3 Salt Fog 509.1 509.2 509.3 The MICOM-H also meets the EIA-RS152B for shock, vibration and applicable test procedures, US FCC for channel occupancy, spurious, interference and frequency tolerance. It is manufactured according to the demanding standards of ISO 9000 and EMC (Electromagnetic Compatibility). FCC Information MICOM-H Owner’s Guide The following FCC information is applicable for theMICOM-H: Emissions J3E, R3E, H3E, J2A, J2B FCC applicable parts of rules 15, 18, 90 FCC type acceptance number ABZ9QCC1635 With high stability option ABZ9QCC1634 xi Technical Specifications MICOM-H Owner’s Guide xii Information for Safe, Efficient Operation Exposure to Radio Frequency Energy In August 1996, the Federal Communications Commission (FCC) adopted updated RF energy exposure guidelines for wireless products regulated by the FCC. These guidelines are consistent with the safety standards previously set by both U.S. and international standards bodies. The design of your Motorola radio complies with the FCC guidelines and these standards: ■ American National Standards Institute (C95.1-1992) ■ National Council on Radiation Protection and Measurements NCRP-1986) ■ International Commission on Non-Ionizing Radiation Protection (ICNRP-1986). To assure optimal radio performance and to ensure that exposure to RF energy is within the guidelines in the above standards, install antennas correctly, following recommended installation procedures. MICOM-H Owner’s Guide xiii Information for Safe, Efficient Operation Guidelines and Warnings Symbols ! Warning ! The Warning symbol denotes a hazard. It calls attention to a procedure or practice that could result in personal injury, damage to the radio or loss of programmed information, if not performed correctly. The Important symbol denotes a procedure or practice to which a particular attention should be paid. Important The Note symbol calls your attention to additional information. Note Restrictions Because this radio contains a transmitter, federal law prohibits unauthorized, nonlicensed personnel from adjusting or maintaining it. If any operational difficulties should arise while using this product, report them to authorized service personnel as soon as possible. ! Do not attempt any unauthorized modification to the radio. Warning MICOM-H Owner’s Guide xiv Before You Begin This manual is designed to acquaint you with the features, care, and installation of your radio, to better serve your communication needs. The manual includes general descriptions as well as step-by-step procedures. Before you begin using the radio, we recommend that you read the following chapters: ■ Overview ■ Getting Started ■ Operating Instructions Theoretical explanations are included in Overview, and later sections of this manual assume familiarity with these functions. Basic aspects of radio use, for instance keypad functionality, are covered in detail in Getting Started. Later sections of this manual assume familiarity with such functions, and do not repeat instructions for common actions. MICOM-H Owner’s Guide 1 Before You Begin MICOM-H Owner’s Guide 2 Overview Overview Welcome to the Motorola HF-SSB radio family! Your choice of a MICOM-H radio means that you have selected the highest of standards in design, quality, and performance. The compact sized MICOM-H is an advanced ruggedized Digital Signal Processing (DSP) HF all-band transceiver intended for very wide area radio communications. It combines sophisticated voice, data, fax and e-mail solutions with a high signal quality and reliability, while remaining very simple to operate. The MICOM-H HF-SSB Radio MICOM-H Owner’s Guide Your radio includes the following features: ■ Scanning wheel ■ VFO operation ■ Ruggedized mobile/fixed transceiver ■ Adaptable internal configuration options ■ High MBTF ■ Security access code ■ Variable bandwidth for optimal signal processing ■ Multi-language Liquid Crystal Display (LCD) ■ Digital Signal Processing (DSP) ■ Built-In Test Equipment (BITE) ■ Selectable front-end attenuator ■ Enhanced voice quality ■ Excellent frequency stability ■ Selectable power output ■ Small size, light weight ■ Variable notch filter ■ Sub-octave pre-selector ■ Front panel programming ■ RF power indicator ■ Voice-activated digital squelch ■ Programmable channel scan ■ Priority and guard channels ■ Automatic IF shift ■ Digital noise blanking and clarifier ■ Excellent transmitter and receiver performance ■ 200-channel capacity, simplex or half-duplex ■ Conforms to MIL-STD 810 and EIA specifications ■ Complies with ISO 9001 requirements ■ Meets FCC and EMC standards 3 Overview Options and Accessories Transmission You can add the following operational options and/or accessories to your radio: ■ High frequency stability option ■ RS232 remote control interface ■ Linear amplifier interface ■ Phone patch interface ■ Data/fax modem interface ■ Interlink interface ■ RSS for PC ■ High (0.1 PPM) frequency stability ■ Phone patch ■ Interlink ■ Automatic antenna tuners ■ Continuous duty data trans. kit ■ AC power supply ■ 1 KW amplifier ■ Antennas and grounding ■ Data/fax modems ■ CW key and headphones ■ 24V Operation kit The maximum output power of the transmitter is 125W PEP (Peak Envelope Power), with an average transmission duty cycle of 1 to 4, thus enabling even the CW (Continues Wave) signal to be transmitted at the maximum available power. Output power can be preprogrammed to one of four possible levels: 25W, 62W, 100W and 125W. Accurate sensors are used to keep the output power within the nominal value. The radio includes mismatch protection. If the VSWR (Voltage Standing Wave Ratio) rises to more than 2:1, the transmitter is inhibited in order to avoid any damage and a relevant message is displayed. The transmitter is thermally protected. If the transmitter internal temperature exceeds the maximum permitted temperature, the output power is automatically reduced to avoid any fault due to excessive heat. Reception The radio utilizes Digital Signal Processing (DSP) to implement reception functions such as demodulation, narrow filtering, automatic gain control, noise blanking and squelch. The automatic digital noise blanker is activated whenever repetitive noise (e.g. ignition spikes) is encountered in the received signal. The digital syllabic (speech identifier) squelch is activated whenever speech is identified, thus opening the audio path. However, if speech is not received, the audio path is muted, thus preventing background noise from disturbing the operator. MICOM-H Owner’s Guide 4 Overview Frequency Sources Two types of frequency sources are available for the MICOM-H radio. The standard 0.6 PPM DTCXO frequency source which assures a frequency stability of better than ±18Hz. For frequencies lower than 10 MHz, it assures a frequency stability of better than ±6 Hz. When higher frequency stability is required, the G478 0.1 PPM OCXO frequency source can be ordered. It will assure a frequency stability of better than ±3 Hz at 30 MHz. Power Sources The radio is designed for 13.8 V±20% negative-ground operation and may be connected to a standard 12 V battery, or with the optional kit to a power supply of 24V±25%. CW Keying Operation When the CW key is pressed, the radio transmits a continuous wave (at the full programmed power) and stops transmission when the key is released. CW keying operation is enabled by connecting the Morse key between CW (pin #10) and ground (pin #18) at the accessory connector. If you wish to operate CW keying with external headphones, use the CW cable supplied with the radio. This will enable a standard PL55 headphone and standard PL99 Morse key to be connected to the accessories connector. Radio Programming The following radio features can be programmed: ■ Up to 200 simplex/half duplex channels at SSB (J3E), AME (H3E), or Pilot (R3E) modes of transmission. ■ Up to four levels of output power (up to 125W PEP and average). ■ Five scanning groups of up to 200 channels, each with a guard channel. Most radio functions can be programmed directly from the front panel of the radio as described in the Radio Programming chapter. MICOM-H Owner’s Guide 5 Overview MICOM-H Owner’s Guide 6 Getting Started The Front Panel The MICOM-H includes a 5W external speaker and a scanning wheel, as well as the following controls: ON/OFF Volume Knob Turns radio on and off and controls the speaker volume. External 5W Speaker Tx Indicator Lights up when radio is transmitting. Keyboard Lock Indicator Lights up when radio is controlled from a remote PC. Display Three-line LCD display showing alphanumeric data, and icons. Mode function keys MENU Displays the main menu. ESC Cancels the last action and reverts to the previous screen. ENTER Saves the selection and/or value. Up/Down Keys Used to scroll values Function Keys Keypad Activate different functions as displayed above A set of keys used to enter data. Microphone Connector More Key Connector for a PTT microphone Displays additional menu options when an arrow appears at the bottom right of the display. Figure 1: Radio Front Panel LED Indicators The LEDs, located on the left hand-side of the control head, indicate radio operating conditions (from left to right): Color LED Indicates Yellow Remote control Keyboard lock Orange Red MICOM-H Owner’s Guide (not used) Tx Transmission 7 Getting Started Radio Display Line 2: Information Field Tx/Rx Bar Provides information on the current action or mode and displays various messages. Indicates that the radio is transmitting or receiving. Line 1: Mode/Status Icon Indicators Rx/Tx Level Shows the current mode or radio status. Indicate active options for reception/ transmission. Displays the output/received power level. Line 3: Function Key Names Function Key Indicator These arrows indicate the available function keys (F1, F2, F3, or F4), located below the arrows . Icon Indicators MICOM-H Owner’s Guide A list of options available in the current mode. The option is selected by pressing the relevant function key (F1, F2, F3, F4). More Indicator Indicates that the menu includes additional functions. Press the MORE key to display the next four function keys. There are nine icons that can appear in the upper right area of the display. The icons appear in the following order: Upper Side Band Squelch active Noise Blanker active Lower Side Band Monitoring off Clarifier in use Notch Filter active Automatic Gain Control – Fast or Off Non-standard Bandwidth Filter 8 Getting Started The Rear Panel The rear panel of the MICOM-H includes the following connectors: Accessory Connector (J3) Antenna Socket Beeps 25-pin connector for external accessories such as PC’s, modems, Morse key devices, etc. Ground Screw DC Connector (J4) Used to ground the radio to the vehicle in a mobile installation. Power input connector. The MICOM-H can be set to beep when the keys on the front panel are pressed, indicating that the key press has been registered. A different beep can be heard when the PTT button of the remote radio is released, indicating that the other party to the call has completed transmission and that you can now transmit. You can enable or disable these beeps, and can set their volume (PTBP and KBBP functions in Radio Programming). MICOM-H Owner’s Guide 9 Getting Started Basic Radio Operations Function Keys The function keys (F1, F2, F3, F4) are used to select a wide variety of options, which depend on the current radio mode. An acronym or abbreviation denoting the current function is displayed in the bottom line of the display, above the relevant key. CHAN PAR A M E TE R S G ET F1 ST O R ER AS P WR F2 F3 F4 If a certain function key is not available (for instance if the radio is locked), the space above the key will remain blank, and the key will not function. Predetermined Numeric Value Mode When there is a parameter for which there are predetermined values, F1 enters the lowest possible value (minimum or OFF); F4 enters the highest possible value and F2 and F3 increment or decrement the value. PROG ADT - 3 SEC 1 10 You can not use the keypad to enter the value for this type of parameter. Toggle Mode When the function being set is a yes/no toggle, one function key will be YES and another NO. PROG T U N ER - N O YE S NO Up/Down Scroll Keys The UP /DOW N scroll keys are used to scroll between values that are already programmed into the radio. For example, in Channel mode you can view the programmed channels: A single keypress on the UP /DOW N scroll keys displays the next or previous channel respectively; pressing either key continuously browses among the channels, four channels per second. In Frequency mode the UP /DOW N scroll keys are used to change the frequency. When programming, you can use the UP /DOW N scroll keys to scroll between the different programmable parameters. Scanning Wheel MICOM-H Owner’s Guide The scanning wheel is used to scan the available frequencies. It can also be used instead of the UP /DOW N scroll keys to scroll between values that are already programmed into the radio. 10 Getting Started Transmission/ Reception Quality Aids The MICOM-H offers you a variety of aids which can be used in different circumstances to improve the quality of transmission/reception. When these options are activated, the appropriate icon appears in the icon display. Squelch When Squelch is activated, the radio switches the speaker on only when it identifies speech, silencing reception noise at all other times. Noise Blanker Reduces repetitive cyclic noise such as motor interference when the radio is working in a vehicle. Clarifier When there is a deviation in the frequency of the broadcasting radio, the receive frequency can be modified using the clarifier. Notch Filter When an undesired continuous tone is evident in reception, the Notch Filter can eliminate that specific tone, retaining all other tones. Non-Standard Bandwidth Filter Adapts the reception/transmission bandwidth in accordance with the type of signal received/transmitted. Automatic Gain Control Fast/Off The Fast AGC function can be used for receiving certain types of data in order to prevent data distortion. When receiving a voice message, the AGC should be set to slow (icon not displayed). MICOM-H Owner’s Guide 11 Getting Started Conventions in this Manual Procedures Procedures are step-by-step instructions that tell you how to operate specific aspects of the radio. Procedures in this manual have a bold-face heading beginning with the word “To...”. Steps are accompanied by a representation of the radio’s display, to the right of the step. These representations always reflect the state of the radio display after the relevant step has been made. When front panel keys are to be pressed to execute a step, the keys are highlighted in this manner: ENTER . When function keys are used, the function itself, as displayed on the screen, is highlighted, in this manner: CHAN (F1). When you can perform a step in more than one way, you will see the word “or” on its own line, and then an alternate method of performing the step. When a procedure begins with a series of steps common to all procedures in that section, the series of steps is represented in an abbreviated manner, with a > sign indicating the next step. For instance, the following string represents five key presses: MENU > MO RE > PROG (F 2 ) > RAD (F 1 ) > CHAN (F 1 ). Display Representation MICOM-H Owner’s Guide The display is presented in schematic form. The icons are enlarged in order to facilitate easy identification, so that they do not represent the actual position of the icon on the radio display. CH 1 BW 2.7 2 .1 2 .7 3 .0 3 .3 12 Radio Operation This chapter provides instructions on operation of the MICOM-H, and includes subjects such as turning the radio on, transmitting and receiving, channel mode, frequency mode, scan mode, built in test equipment, radio locking, display language and display brightness. Basic Radio Procedures To turn the radio on: Turn the ON/OFF/VOLUME knob clockwise until it clicks. The words SELF TEST are displayed for about three seconds. S EL F TE S T When the self-test procedure is completed, the display enters the last operating mode used: CH, SCAN, or FREQ. CH 1 F 2,000.00 If the self-test procedure fails, the first line indicates the error number. The second line blinks, with a short description of the error (see page 48 for a list of error messages). ERR01 D S P FA I L BA ND SQ D SP Use the UP/DOWN keys to scroll to additional messages, if any. MICOM-H Owner’s Guide 13 Radio Operation To Transmit: Before transmitting, ensure that the RF output of the radio is connected to a tuned antenna or to a dummy load. Note To transmit, press and hold down the Push-To-Talk (PTT) button on the side of the handset and speak slowly and clearly. This method of transmission is used regardless of the type of transmission (voice, data or Morse), and regardless of whether you are in Channel, Frequency or Scan mode. The Tx LED will remain lit until the PTT button is released to indicate that you are transmitting. When you press the PTT button, the RF power and Tx bar are displayed. Tx bar max forward power reverse power min To Receive: The default radio mode is Receive mode. You can program the radio to display an Rx bar similar to the Tx bar, see “Receive Level” (page 44). PTT Types The radio can receive and transmit four different types of PTT: Data PTT, Voice PTT, CW PTT or MIC PTT. The radio automatically identifies the transmitted PTT type according to the type of device connected to the accessory port, and identifies MIC if a microphone is connected to the front panel. When using CW PTT, the squelch should be set to OFF. Note MICOM-H Owner’s Guide 14 Radio Operation Bandwidth Filters Unless a particular filter is set for the current channel, the radio retains the previously used filter. When a new type of call is received or sent, the bandwidth filter changes automatically, depending on the PTT source (voice, data or CW), and the programmed bandwidth for the channel being used. Bandwidth set to: Filter changes after: LSM (data modem) first data PTT 2.1 K (voice + data) microphone or voice PTT 2.7 K (voice + data) microphone or voice PTT 3.0 K (voice + data) microphone or voice PTT 3.3 K (voice + data) microphone or voice PTT CW (Morse) first CW PTT When the bandwidth filter is set to CW, the following CW bandwidths can be set in the radio’s Programming mode, see “CW Operation” (page 44): MICOM-H Owner’s Guide ■ 0.25 K ■ 0.5 K ■ 0.8 K 15 Radio Operation Channel Mode Channel mode is used to select a channel which is already programmed in the radio, in order to transmit/receive calls on that channel. You can also operate a variety of functions and options to facilitate good transmission and reception. To choose a channel: Note In order to choose the priority channel, you must be in Channel mode. To enter channel mode, press MENU > CHAN (F1) and confirm by pressing ENTER. To access the priority channel preprogrammed by the RSS, press ESC momentarily. 1. If you are not in Channel mode, press MENU to display MENU the menu screen, and press CHAN (F1). C HAN FR EQ SC AN B IT The last active channel number is displayed, blinking. CH 1 2. If you wish to use the displayed channel, press ENTER. OR Select a channel by pressing the UP/DOWN keys until you reach the required channel, or use the keypad to enter the channel number. CH 2 BAC K CL R The channel number blinks, indicating that the selection has not yet been confirmed. Note If you enter a channel that is not programmed, a “NOT PROG” message appears. To program a new channel, see “Programming Channels” (page 32), or use the RSS software. 3. When the desired channel is displayed, press ENTER to confirm your choice. To transmit in Channel mode: 1. If you are not in Channel mode, press MENU to display MENU the menu screen, and press CHAN (F1). C HAN FR EQ SC AN B IT 2. Choose a channel (see above). 3. To initiate transmission, press the PTT button. MICOM-H Owner’s Guide 16 Radio Operation Channel Mode Options In Channel mode, you can operate functions and options to eliminate noise and assist reception and/or transmission. The icon display reflects the options selected. The change of channel options is temporary. When you next change the currently used channel, all current parameters will be lost. Note TXM (F1) enables you to view and listen to the channel transmit frequency (visible for duplex and Tx only channels). BAND (F2) toggles between upper side band (USB) and lower side band (LSB). CH 1 BAND LSB TXM SQ (F3) toggles the squelch (on/off). D SP CH 1 SQUELCH ON TXM DSP (F4) accesses the Digital Signal Processing menu, which includes: BA ND SQ BA ND SQ D SP CH 1 D S P PA R A M C LA R N F C L IP • CLAR (F1) clarifier (off/less/more) * not available for Tx Only channels CH 1 CLAR +100 • NF (F2) notch filter (off/less/more) * not available for CW or Tx Only channels CH 1 NF –– • CLIP (F3) clipper (on/off) CH 1 C L I P – O FF NB OFF –– OFF C LA R N F C L IP • NB (F4) noise blanker (on/off) * optional, to be purchased separately CH 1 • ATTN (MORE, F2) attenuator (on/off). CH 1 ATT E N – O FF NB NB – ON C LA R N F C L IP NB ATTN PWR (MORE, F1) power level selection (low, med, high or max). CH 1 POWER LOW LOW MODE (MORE, F2) operation mode selection (SSB, AME or PLT). (fast/slow/off). (2.1 K, 2.7 K, 3.0 K, 3.3 K, LSM or CW; CW includes bandwidths 0.25 K, 0.5 K and 0.8 K, see “CW Operation” (page 44)). RCLV (MORE, MORE, F1) displays the reception level when F1 is pressed. *If the reception is programmed as OFF, this option does not appear, see “Receive Level” (page 44). MICOM-H Owner’s Guide MA X AM E PLT CH 1 A G C FA ST PW R BW (MORE, F4) bandwidth selection H IG H CH 1 M O D E S SB SS B AGC (MORE, F3) automatic gain control ME D MODE AG C BW CH 1 BW 3.3 2 .1 2 .7 3 .0 3 .3 CH 1 F 10,000.00 R CLV 17 Radio Operation Frequency Mode Frequency mode is used to receive and transmit on a specific frequency. You can select the frequency type, change the frequency being used, and operate a variety of functions and options to facilitate good transmission and reception. You can also store the frequency in a channel of your choice. – Frequency mode is accessible only if the radio is not locked. Notes – When setting a new frequency, use the * key on the keypad as a decimal point. There are four frequency types: ■ SMPX (Simplex Frequency) – the same frequency is used for transmission and reception. The frequency can not be zero. ■ DPLX (Duplex Frequency) – transmits on one frequency and receives on a different frequency. The frequencies can not be zero. ■ RXO (Receiving Only Frequency) – defines a frequency for reception only. ■ TXO (Transmitting Only Frequency) – defines a frequency for transmission only. The available frequency ranges are: Reception: 100 kHz-30.000 MHz Transmision: 1.800-1.999999 MHz 3.500-3.999999 MHz 7.000-7.300 MHz, 10.100-10.150 MHz 14.000-14.350 MHz, 18.068-18.168 MHz 21.000-21.450 MHz, 24.890-24.990 MHz 28.000-29.700 MHz To enter frequency mode: 1. Press MENU to display the Menu screen. MENU C HAN FR EQ SC AN B IT 2. Press FREQ (F2). The last active frequency blinks, and the frequency type is displayed in the top line. SMPX F 10,000.00 SMP X D PL X R XO TX O The letter preceding the frequency in the second line of the display indicates whether the frequency is Transmission (T), Reception (R) or both transmission and reception (F). 3. If you wish to use the displayed frequency and frequency type, press ENTER. OR Change the frequency type and the frequency as required (see “To change the current frequency/frequencies” (page 19)). MICOM-H Owner’s Guide 18 Radio Operation To change the current frequency/frequencies: 1. If you are not in frequency mode, press MENU to access MENU the menu screen, and press FREQ (F2). C HAN FR EQ SC AN B IT The last active frequency blinks, and the frequency type is displayed in the top line. SMPX F 10,000.00 SMP X D PL X R XO TX O OR If you are already in frequency mode, press MORE until the T/R function appears above the F1 function key, and press T/R (F1). F R EQ R 15,000.00 The current frequency type is displayed in the top line, and the used frequencies are displayed. DPLX R 15,000.00 T/R BA ND SQ SMP X D PL X R XO D SP TX O 2. If necessary, change the frequency type by pressing the relevant function key: SMPX (F1), DPLX (F2), RXO (F3) or TXO (F4). Different frequency types may have default frequency setting which will appear automatically when that frequency type is selected. Note 3. If you are using SMPX, RXO or TXO frequency type, and you wish to use the displayed frequency, press ENTER. OR use the scanning wheel, keypad or UP/DOWN keys to enter a new frequency. The frequency number blinks, indicating that the selection has not yet been confirmed. Press ENTER to confirm your choice. SMPX F 12,345.67 4. If you are using DPLX frequency type, the frequency DPLX R 15,000.00 displayed first is the Rx frequency. If you want to use the displayed frequency, press ENTER. BA CK C L R SMP X D PL X R XO TX O OR use the scanning wheel, keypad or UP/DOWN keys to enter a new frequency. The frequency number blinks, indicating that the selection has not yet been confirmed Press ENTER to confirm your choice. DPLX R 3,568.20 After confirmation of the Rx frequency, the display blinks with the Tx frequency. If you want to use the displayed Tx frequency, press ENTER. DPLX T 14,000.00 BA CK C L R SMP X D PL X R XO TX O OR use the scanning wheel, keypad or UP/DOWN keys to enter a new frequency. The frequency number blinks, indicating that the selection has not yet been confirmed. Press ENTER to confirm your choice. DPLX T 21,468.13 5. Press ENTER to confirm the frequency type and the F R EQ R 30,000.00 frequencies you have set. BA CK C L R T/R MICOM-H Owner’s Guide BA ND SQ D SP 19 Radio Operation VFO Operation VFO (Variation Frequency Offset) is available in Simplex mode, and enables you to operate simultaneously on two different channels (A and B). Using the A/B function, you can “freeze” the frequency of channel A, switch to channel B and return to channel A again. Using the A=B option, you can copy the frequency in the current channel to the alternate channel. 1. If you are not in frequency mode, press MENU to access MENU the menu screen, and press FREQ (F2). C HAN FR EQ SC AN B IT The last active frequency blinks, and the frequency type is displayed in the top line. SMPX F 10,000.00 SMP X D PL X R XO TX O OR If you are already in frequency mode, press MORE until the T/R function appears above the F1 function key, and press T/R (F1). F R EQ R 15,000.00 The current frequency type is displayed in the top line, and the used frequencies are displayed. DPLX R 15,000.00 T/R BA ND SQ SMP X D PL X R XO D SP TX O 2. If necessary, change the frequency type to Simplex by pressing SMPX (F1). 3. If you wish to use the displayed frequency, press ENTER. OR use the scanning wheel, keypad or UP/DOWN keys to enter a new frequency. The frequency number blinks, indicating that the selection has not yet been confirmed. When the desired frequency is displayed, press ENTER to confirm your choice. 4. Press MORE until the A/B and A=B functions appear above the F1 and F2 function keys. SMPX F 12,345.67 BA CK C L R F R Q -A F 7,000.00 T/R Press A/B (F1) to alternate between the two channels. Press A=B (F2) to copy the frequency of the current channel to the alternate channel. Press <-- (F3) and --> (F4) to move the cursor backwards and forwards. BA ND SQ D SP F R Q -A F 7,000.00 A/ B A= B When these arrows are used in conjunction with the scaning wheel or the UP/ DOWN scroll keys, the frequency scrolls according to the location of the cursor, enabling you to change the frequency with greater ease. For instance, if the frequency is 7,500.54 and the cursor is F R EQ at the hundreds location (7,_00.54), pressing the scaning R 7 , _ 0 0 . 5 4 A/ B A= B wheel or the UP/DOWN scroll keys will scroll the hundreds values to 7,400.54; 7,600.54; 7,700.54 and so on. MICOM-H Owner’s Guide 20 Radio Operation Frequency Mode Options In Frequency mode, you can operate functions and options to eliminate noise and assist reception and/or transmission. The icon display reflects the options selected. T/R (F1) sets the transmit and receive frequencies and frequency type. F R EQ R 15,000.00 T/R BAND (F2) toggles between upper side band (USB) and lower side band (LSB). (on/off). BA ND SQ D SP F R EQ SQUELCH ON TXM DSP (F4) accesses the Digital Signal Processing menu, which includes: D SP F R EQ BAND LSB T/R SQ (F3) toggles the squelch BA ND SQ BA ND SQ D SP F R EQ D S P PA R A M C LA R N F C L IP • CLAR (F1) clarifier (off/less/more) * not available for Tx Only channels F R EQ CLAR +100 • NF (F2) notch filter (off/less/more) * not available for CW or Tx Only channels F R EQ NF –– • CLIP (F3) clipper (on/off) F R EQ CLIP – ON NB OFF –– OFF C LA R N F C L IP • NB (F4) noise blanker (on/off) * optional, to be purchased separately F R EQ • ATTN (MORE, F2) attenuator (on/off). F R EQ ATT E N – O FF NB NB – ON C LA R N F C L IP NB ATTN PWR (MORE, F1) power level selection (low, med, high or max). F R EQ POWER HIGH LOW MODE (MORE, F2) operation mode selection (SSB, AME or PLT). (fast/slow/off). H IG H AM E PLT F R EQ A G C FA ST PW R MODE AG C BW (MORE, F4) bandwidth selection (2.1 K, 2.7 K, 3.0 K, 3.3 K, LSM or CW; CW includes bandwidths 0.25 K, 0.5 K and 0.8 K, see “CW Operation” (page 44)). F R EQ BW 3.0 RCLV (MORE, MORE, F1) displays the reception level F R EQ F 10,000.00 when F1 is pressed. *If the reception is programmed as OFF, this option does not appear, see “Receive Level” (page 44). STOR (MORE, MORE, F2) stores the frequency parameters in the selected channel. MA X F R EQ MODE PILOT SS B AGC (MORE, F3) automatic gain control ME D 2 .1 2 .7 3 .0 BW 3 .3 R CLV STO R F R EQ R 15,000 R CLV STO R MICOM-H Owner’s Guide 21 Radio Operation Storing Frequencies You can store specific frequencies and frequency parameters in channels which you have programmed (see “Programming Channels” (page 32)). To store a frequency in a channel: 1. If you are not in Frequency mode, press MENU to display MENU the Menu screen. C HAN FR EQ SC AN B IT 2. Press FREQ (F2). The last active frequency blinks, and the frequency type is displayed in the top line. SMPX F 10,000.00 SMP X D PL X R XO TX O 3. If you wish to use the displayed frequency and frequency type, press ENTER. If the Frequency type is Duplex, press ENTER twice to accept both transmission and reception frequencies. OR Change the frequency type and the frequency as required (see “To change the current frequency/frequencies” (page 19)). 4. If necessary, set other parameters, using the MORE key and pressing the required function keys (see “Frequency Mode Options” (page 21)). 5. Press MORE twice, and press STOR (F2). F R EQ R 15,000.00 R CLV STO R 6. Select a channel using the scanning wheel, keypad or UP/DOWN keys until you reach the required channel, or use the keypad to enter the channel number. 7. When the desired channel is displayed, press ENTER to confirm your choice. F R EQ S TO R E C H 5 BA CK C L R F R EQ S TO R I N G The frequency parameters are stored in the selected channel. MICOM-H Owner’s Guide 22 Radio Operation Scan Mode In Scan mode, the radio scans the programmed scan channels. Up to five scan groups (A to E) can be created via the RSS, each containing up to 200 channels. When a guard channel is selected, it is monitored after every other scanned channel. To use scan mode: 1. Press MENU to display the menu screen. MENU C HAN FR EQ SC AN B IT 2. Press SCAN (F3). The last active group blinks (A). SCAN GROUP A B C D E If there are no defined groups, the message “NO GROUPS” appears in the display. Note 3. If you want to use the currently displayed scan group, press ENTER OR Press the function key beneath the group you want to choose and press ENTER to confirm your choice. 1 . In scan mode, one of the five groups is always selected, and the other four groups are displayed over the function keys. Notes 2 . MICOM-H Owner’s Guide If the selected group is not programmed, the message “GRP X EMPTY” appears in the display (X being the selected group). 23 Radio Operation Scan Mode Options In Scan mode various parameters and options can be set, using the function keys. The change of options is temporary. When you resume scanning, all changed parameters will be lost. Note To select scan mode options: STOP (F1) stops scanning. S TO P GROUP A 59 SC AN BA ND SQ SLOW (F2) decreases the scan speed. FAST (F3) increases the scan speed. Note The scan speed can be: 1 to 5 seconds, 1 second per step; or 150 to 950 milliseconds, 50 milliseconds per step. GRP (F4) enables selection of a scan group. SCAN R ATE 4 s e c STO P SLOW FAS T GRP SCAN R AT E 9 0 0 m s STO P SLOW FAS T GRP SCAN GROUP A B MICOM-H Owner’s Guide GRP C D E 24 Radio Operation When scanning has been stopped, you can use the following options: SCAN (F1) activates scanning. SCAN GROUP A 4 STO P SLOW FAS T BAND (F2) toggles between upper side band (USB) and lower side band (LSB). S TO P BAND LSB SC AN BA ND SQ SQ (F3) toggles the squelch (on/off). which includes: D SP S TO P SQUELCH ON SC AN BA ND SQ DSP (F4) accesses the Digital Signal Processing menu, GRP D SP S TO P D S P PA R A M C LA R N F C L IP • CLAR (F1) clarifier (off/less/more) * not available for Tx Only channels S TO P CLAR +100 • NF (F2) notch filter (off/less/more) * not available for CW or Tx Only channels S TO P NF –– • CLIP (F3) clipper (on/off) S TO P CLIP – ON NB OFF –– OFF C LA R N F C L IP • NB (F4) noise blanker (on/off) * optional, to be purchased separately S TO P • ATTN (MORE, F2) attenuator (on/off) S TO P ATT E N – O FF NB NB – ON C LA R N F C L IP NB ATTN PWR (MORE, F1) power level selection (low, med, high or max) S TO P POWER HIGH LOW MODE (MORE, F2) operation mode selection (SSB, AME or PLT) (2.1 K, 2.7 K, 3.0 K, 3.3 K, LSM or CW; CW includes bandwidths 0.25 K, 0.5 K and 0.8 K, see “CW Operation” (page 44)). MICOM-H Owner’s Guide MA X AM E PLT S TO P A G C FA ST PW R BW (MORE, F4) bandwidth selection H IG H S TO P M O D E P LT SS B AGC (MORE, F3) automatic gain control (fast/slow/off) ME D MODE AG C BW S TO P BW 3.3 2 .1 2 .7 3 .0 3 .3 25 Radio Operation Using the BITE (Built-In Test Equipment) BITE is a testing tool used for radio maintenance and troubleshooting. To run BITE: 1. Press MENU to display the menu screen. MENU C HAN FR EQ SC AN B IT 2. Press BIT (F4). In BITE mode, you can run the following tests: • FULL (F1) runs a full test of the hardware device • CHAN (F2) tests the device on the current channel frequencies • L.RF (F3) low RF; tests the low RF path. 3. While BITE is in progress, the message “IN TEST...” is displayed. The number of periods indicates the progress of the test. 4. If the test passes successfully, the name of the test and the word PASS are displayed. BITE FU LL BITE I N T E S T. . . BITE L . R F – PA S S FU LL 5. If BITE detects a malfunction, the error number is displayed in the first line of the display and a short description of the error appears in the second line. See page 48. C HAN L .R F C HAN L .R F ERR23 P R E SE L E C TO R EX IT 6. Press the UP/DOWN scroll keys to see if there are additional error messages. 7. Press EXIT (F1) to exit Error mode. MICOM-H Owner’s Guide 26 Radio Operation Locking the Radio Lock mode enables you to lock the radio using a password, so that programming and frequency modes are not accessible. The lock password is a number of up to six digits. The default factory-defined password is 123456. See “To change the password” (page 28) for details on defining a new password. If you enter the wrong password, the error message “WRONG PSW!” is displayed. Note To lock the radio: 1. Press MENU to display the menu screen. MENU C HAN FR EQ SC AN B IT 2. Press MORE to scroll to the second menu screen. MENU L O CK PROG PS W 3. Press LOCK (F1). LOCK P S W: 4. Enter the password to lock the radio. LOCK P S W : ** ** ** O .K . 5. Press O.K. (F1) or press the ENTER key to confirm. LOCK D IM CLR L O C KE D To unlock the radio: 1. Press MENU to display the menu screen. MENU C HAN SC AN B IT When the radio is locked, not all functions are available. For instance, the F2 key, which is usually used to access FREQ, is blank. Note 2. Press MORE to scroll to the second menu screen. MENU O PEN PS W 3. Press OPEN (F1). UNLCK P S W: 4. Enter the password number to unlock the radio. UNLCK P S W : ** ** ** O .K . 5. Press O.K. (F1) or press the ENTER key to confirm. MICOM-H Owner’s Guide D IM CLR UNLCK U N L O C KE D 27 Radio Operation To change the password: For security reasons, you may want to change your password, used to lock the radio. 1. Press MENU to display the menu screen. MENU C HAN FR EQ SC AN B IT 2. Press MORE to scroll to the second menu screen. MENU L O CK PROG PS W 3. Press PSW (F3). PSW OLD: 4. Enter the old password, using the keypad. PSW O L D : ** *** * O .K . D IM CLR – If you have not yet set a password, the radio has a factory-defined password which is 123456. Notes – When you enter the correct password, you are prompted to enter your new password. 5. Enter the new password, using the keypad. PSW N E W: ** ** ** O .K . 6. Press ENTER to confirm. MICOM-H Owner’s Guide CLR PSW P S W S AV E D 28 Radio Operation Display Brightness The DIM function can control the brightness of the display. There are four levels of brightness, ranging from 0 (dimmest) to 3 (brightest). Note You can only change the display brightness if the display is programmed to DIM. If the display is programmed as ALT (see “Display Mode” (page 45)), the display is normally turned off, and automatically turns on at a predetermined level when the radio detects any type of activity (scanning wheel, keypad, PTT, incoming call, etc.). To change the display brightness level: 1. Press MENU to display the menu screen. MENU C HAN FR EQ SC AN B IT 2. Press MORE to scroll to the second menu screen. MENU L O CK PROG PS W 3. Press DIM (F4) repeatedly until you reach the desired brightness level. MENU DIM LEVEL 3 L O CK PROG PS W MICOM-H Owner’s Guide D IM D IM 29 Radio Operation Programming Mode Most programmable parameters are accessible through programming mode. Display Language The radio display can be in the following languages: In programming mode you can set radio programmable parameters (see “Radio Programming” (page 31)) and the display language. ■ English ■ French ■ Spanish To change the radio language: 1. Press MENU to display the menu screen. MENU C HAN FR EQ SC AN B IT 2. Press MORE to scroll to the second menu screen. MENU L O CK PROG PS W 3. Press PROG (F2) to enter Program mode. PROG R AD 4. Press LANG (F3) to display the Language screen. D IM L AN G LANG ENGLISH FR NC SPAN 5. Press ENG (F1) for English. Press FRNC (F2) for French. Press SPAN (F3) for Spanish. 6. Press ENTER to confirm. MICOM-H Owner’s Guide 30 Radio Programming The MICOM-H is already configured for use at the time of purchase. However, you may wish to change the configuration to suit your own needs or to reflect changes in the environment or networks. The radio can be programmed through the front panel (if the radio is not locked), or using the appropriate RSS (Radio Service Software). ! Important If the message “NOT PROGRAM” is displayed after the self test, you cannot enter programming mode, and the radio must be programmed through the RSS. The following sections relate to programming of radio parameters using the front panel. After locating the required radio parameter in the programming menu, you can change it by pressing the function key under the parameter name OR you can press the UP /D O W N keys to scroll through the parameters. To enter Radio Programming mode: 1. Press MENU to display the menu screen. MENU C HAN FR EQ 2. Press MORE to scroll to the second menu screen. B IT MENU L O CK PROG PS W 3. Press PROG (F2) to enter Program mode. PROG R AD 4. Press RAD (F1) to enter Radio Programming mode. In this menu, you can program: ■ channels ■ radio parameters ■ radio options D IM L AN G R A DI O PROGRAMMING C HAN PR MT O PTS The following sections explain the programming procedures in detail. MICOM-H Owner’s Guide 31 Radio Programming Programming Channels When programming channels, you can use the following options: ■ GET – Retrieve preprogrammed channel parameters ■ STOR – Store channel parameters ■ ERAS – Erase programmed channel ■ PWR – Tx power level ■ FREQ – Frequency ■ BAND – Band type ■ MODE – Mode of operation ■ AGC – Automatic Gain Control ■ BW – Bandwidth The use of each option is explained in the following sections. When you enter Channel programming, the channel parameters have the following default values: ■ Rx Frequency – 15,000.00 kHz ■ Tx Frequency – 15,000.00 kHz ■ Band – USB ■ Bandwidth – 2.7 ■ Tx Power – Max ■ AGC Type – Slow ■ Mode – SSB When programming a new channel, you do not need to define all parameters – change only those for which the default values are not suitable. MICOM-H Owner’s Guide 32 Radio Programming Copying Channel Parameters GET and STOR are used to copy all channel parameters from one channel to another. To copy channel parameters: 1. Access the Channel Programming menu: MENU > MORE > PROG (F2) > RAD (F1) > CHAN (F1). CHAN PAR A M E TE R S G ET 2. Press GET (F1) to retrieve all parameters from an existing channel. The last active channel number is displayed, blinking. 3. With the keypad, enter the number of the channel whose parameters you want to copy. ST O R ER AS P WR PROG GET CHAN 1 PROG GET CHAN 13 BA CK C L R OR Use the scanning wheel or the UP/DOWN scroll keys to select the channel whose parameters you want to copy. 4. Press ENTER to confirm. CHAN PAR A M E TE R S G ET 5. Press STOR (F2) to store the retrieved channel parameters in a different channel. ST O R ER AS P WR PROG S TO R E C H 1 The last active channel number is displayed, blinking. 6. With the keypad, enter the number of the channel into which you wish to save the copied parameters. OR Use the scanning wheel or the UP/DOWN scroll keys to select the channel into which you wish to save the copied parameters. 7. Press ENTER to confirm. MICOM-H Owner’s Guide PROG S TO R I N G 33 Radio Programming Erasing a Channel ERAS is used to delete a channel from the radio. To erase a channel: 1. Access the Channel Programming menu: MENU > MORE > PROG (F2) > RAD (F1) > CHAN (F1). CHAN PAR A M E TE R S G ET 2. Press ERAS (F3). The last active channel number is displayed, blinking. 3. With the keypad, enter the channel number you want to delete. ST O R ER AS P WR PROG E R A SE C H 1 PROG E R A SE C H 3 1 BA CK C L R OR Use the scanning wheel or the UP/DOWN scroll keys to select the channel you wish to delete. 4. Press ENTER to confirm. PROG ERASING • If the channel is not programmed, you will receive a “NOT PROG” message. Notes Transmission Power Level In all these cases, the erase request is rejected by the radio. You can set one of four transmission power levels for a programmed channel: • LOW – 25W • MED – 62.5W (medium) • HIGH – 100W • MAX – 125W (maximum) To set the channel’s transmission power level: 1. Access the Channel Programming menu: MENU > MORE > PROG (F2) > RAD (F1) > CHAN (F1). CHAN PAR A M E TE R S G ET 2. Press PWR (F4) to access the power level options. ST O R ER AS P WR PROG POWER LOW LOW ME D H IG H MA X 3. Press the function key that appears below the power level of your choice: LOW (F1), MED (F2), HIGH (F3) or MAX (F4). 4. Press ENTER to confirm. MICOM-H Owner’s Guide 34 Radio Programming Channel Frequency The Channel Frequency setting enables you to determine the specific frequency for each channel, and the frequency type: Simplex Frequency (SMPX) – transmits and receives on the same frequency. Duplex Frequency (DPLX) – transmits on one frequency and receives on a different frequency. Receiving Only Frequency (RXO) – restricts a frequency for reception only. Transmitting Only Frequency (TXO) – restricts a frequency for transmission only. To set a channel’s frequency: 1. Access the Channel Programming menu: MENU > MORE > PROG (F2) > RAD (F1) > CHAN (F1). CHAN PAR A M E TE R S G ET 2. Press MORE to scroll to the second menu screen. ST O R ER AS P WR CHAN PAR A M E TE R S FR EQ BA ND MODE A GC 3. Press FREQ (F1) to access the frequency options. SMPX F 10,000.00 SMP X D PL X R XO TX O 4. Press the function key below the frequency type of your choice: SMPX (F1), DPLX (F2), RXO (F3) or TXO(F4). When the DPLX function is selected, the F2 key toggles between Rx and Tx frequencies. Note 5. Use the keypad to enter the frequency of your choice. Use the * key as a decimal point if you need to program the 100 Hz and 10 Hz digits after the decimal point. Note 6. Press ENTER twice to confirm. MICOM-H Owner’s Guide 35 Radio Programming Band Types MICOM-H has two band types: ■ USB – upper side band ■ LSB – lower side band. To set the channel band type: 1. Access the Channel Programming menu: MENU > MORE > PROG (F2) > RAD (F1) > CHAN (F1). CHAN PAR A M E TE R S G ET 2. Press MORE to scroll to the second menu screen. ST O R ER AS P WR CHAN PAR A M E TE R S FR EQ BA ND MODE A GC 3. Press BAND (F2) to access band type options. PROG BAND – LSB U SB L SB 4. Press the function key below the option of your choice (USB or LSB). 5. Press ENTER to confirm. Operating Modes The MICOM-H offers three operating mode options: ■ SSB – single side band ■ AME – amplitude modification equivalent ■ PLT – pilot mode. To set the operating mode: 1. Access the Channel Programming menu: MENU > MORE > PROG (F2) > RAD (F1) > CHAN (F1). CHAN PAR A M E TE R S G ET 2. Press MORE to scroll to the second menu screen. ST O R ER AS P WR CHAN PAR A M E TE R S FR EQ BA ND MODE A GC 3. Press MODE (F3) to access operation mode options. PROG M O D E S SB SS B AM E PLT 4. Press the function key below the operation mode of your choice: SSB (F1), AME (F2) or PLT(F3). 5. Press ENTER to confirm. MICOM-H Owner’s Guide 36 Radio Programming Automatic Gain Control (AGC) The MICOM-H supports two AGC speeds: slow and fast, or the AGC can be turned off. To set the AGC speed: 1. Access the Channel Programming menu: MENU > MORE > PROG (F2) >RAD (F1) > CHAN (F1). CHAN PAR A M E TE R S G ET 2. Press MORE to scroll to the second menu screen. ST O R ER AS P WR CHAN PAR A M E TE R S FR EQ BA ND MODE A GC 3. Press AGC (F4) to access AGC speed settings. PROG AGC – SLOW SLOW FAS T O FF 4. Press the function key below the AGC speed of your choice: SLOW (F1), FAST (F2) or OFF (F3). If you choose FAST, the AGC FAST icon will be visible. PROG A G C – FA S T SLOW FAS T OFF Note 5. Press ENTER to confirm. MICOM-H Owner’s Guide 37 Radio Programming Bandwidths The MICOM-H offers the following bandwidths: ■ 2.1 K ■ 2.7 K ■ 3.0 K ■ 3.3 K ■ LSM – Low Speed Modem ■ CW – Continuous Wave, including: – 0.25 K – 0.5 K – 0.8 K To set the channel bandwidth: 1. Access the Channel Programming menu: MENU > MORE > PROG (F2) > RAD (F1) > CHAN (F1). CHAN PAR A M E TE R S G ET 2. Press MORE twice to scroll to the third menu screen. ST O R ER AS P WR CHAN PAR A M E TE R S BW 3. Press BW (F1) to access the bandwidth options. PROG BW – 2.7 2 .1 2 .7 3 .0 3 .3 4. Press the function key below the bandwidth of your choice: 2.1 (F1), 2.7 (F2), 3.0 (F3) or 3.3 (F4). 5. If you want to set the radio to LSM or CW, press the PROG BW – 2.7 MORE key. Select LSW (F1) or CW (F2). L SM CW 6. Press ENTER to confirm. Note MICOM-H Owner’s Guide The standard bandwidth is 2. If you choose any other bandwidth, the NonStandard bandwidth icon will be visible. PROG BW – 3.3 2 .1 2 .7 3.0 3 .3 38 Radio Programming Radio Parameters You can program the following radio parameters: ■ BAUD – Baud rate ■ DPWR – Data power ■ MST – Microphone Side Tone ■ AST – Accessory Side Tone ■ PTBP – PTT Release Beep ■ KBBP – Keyboard Beep ■ TONE – Tone level ■ ADT ■ ATTN – Attenuator ■ CW ■ RCLV – Receive Level ■ DIM – Alternate Display Time-out – Continuous Wave – Dimming Mode The definition of each of the parameters is explained in the following sections. Baud Rate The MICOM-H provides four baud rates: ■ 1200 bps ■ 2400 bps ■ 4800 bps ■ 9600 bps. These baud rates are used when the radio is to communicate with external devices such as: RSS, E-mail and remote control. To set the baud rate: 1. Access the Radio Parameters Programming menu: MENU > MORE > PROG (F2) > RAD (F1) > PRMT (F2). R A DI O PAR A M E TE R S BA UD DPWR MS T 2. Press BAUD (F1) to access baud rate options. 3. Press the function key below the baud rate of your A ST PROG BAUD – 2400 1 .2 2 .4 4 .8 9 .6 4 .8 9 .6 choice: 1.2 (F1) - 1200 bps 2.4 (F2) - 2400 bps 4.8 (F3) - 4800 bps 9.6 (F4) - 9600 bps 4. Press ENTER to confirm. The message “WAIT...” appears on the display for a few seconds. PROG WA I T . . . 1 .2 MICOM-H Owner’s Guide 2 .4 39 Radio Programming Data Power The MICOM-H provides four data power levels: ■ LOW – 25W ■ MED – 62.5W (medium) ■ HIGH – 100W ■ MAX – 125W (maximum). When data PTT is used, the radio sets the transmitter power level to the minimum possible value between the determined data power value and the power level of the currently used channel. To set the data power level: 1. Access the Radio Parameters Programming menu: MENU > MORE > PROG (F2) > RAD (F1) > PRMT (F2). R A DI O PAR A M E TE R S BA UD DPWR MS T 2. Press DPWR (F2) to access the data power options. A ST PROG DT PWR – LOW LOW MED H IG H MA X 3. Press the function key below the power level of your choice: LOW (F1), MED (F2), HIGH (F3) or MAX(F4). 4. Press ENTER to confirm. Microphone Side Tone You can enable or disable the microphone side tone, which echoes the transmitted voice from the MIC PTT to the speaker. To enable/disable the Microphone Side Tone (MST): 1. Access the Radio Parameters Programming menu: MENU > MORE > PROG (F2) > RAD (F1) > PRMT (F2). R A DI O PAR A M E TE R S BA UD DPWR MS T 2. Press MST (F3) to access the Microphone Side Tone options. A ST PROG M I C S T- N O YE S NO 3. Press YES (F1) to enable or NO (F2) to disable the microphone sidetone. 4. Press ENTER to confirm. MICOM-H Owner’s Guide 40 Radio Programming Accessory Side Tone You can enable or disable the accessory side tone, which echoes the transmitted voice from the accessory entry to the speaker. To enable/disable the Accessory Side Tone (AST): 1. Access the Radio Parameters Programming menu: MENU > MORE > PROG (F2) > RAD (F1) > PRMT (F2). R A DI O PAR A M E TE R S BA UD DPWR MS T 2. Press AST (F4) to access the Accessory Side Tone options. A ST PROG A C C S T- N O YE S NO 3. Press YES (F1) to enable or NO (F2) to disable the accessory sidetone. 4. Press ENTER to confirm. PTT Release Beep You can enable or disable the transmission of a beep when the push-to-talk (PTT) button is released. The PTT release beep function is used to indicate to the remote station that the local radio has returned to receive mode, (i.e. that it can begin transmitting). To enable/disable the PTT Release Beep (PTBP): 1. Access the Radio Parameters Programming menu: MENU > MORE > PROG (F2) > RAD (F1) > PRMT (F2). R A DI O PAR A M E TE R S BA UD DPWR MS T 2. Press MORE for the second menu screen. A ST R A DI O PAR A M E TE R S PTBP KBBP TO N E A DT 3. Press PTBP (F1) to access the PTT Beep Release options. PROG PTT B P -N O YE S NO 4. Press YES (F1) to enable or NO (F2) to disable the beep. 5. Press ENTER to confirm. MICOM-H Owner’s Guide 41 Radio Programming Keyboard Beep You can enable or disable the keypad beep, which beeps every time a valid key is pressed. To enable/disable the Keyboard Beep (KBBP): 1. Access the Radio Parameters Programming menu: MENU > MORE > PROG (F2) > RAD (F1) > PRMT (F2). R A DI O PAR A M E TE R S BA UD DPWR MS T 2. Press MORE for the second menu screen. A ST R A DI O PAR A M E TE R S PTBP KBBP TO N E A DT 3. Press KBBP (F2) to access the Keyboard Beep options. PROG K Y B B P- N O YE S NO 4. Press YES (F1) to enable or NO (F2) to disable the keypad beep. 5. Press ENTER to confirm. Tone Level You can set the tone level (volume) to high or low. To set the tone level: 1. Access the Radio Parameters Programming menu: MENU > MORE > PROG (F2) > RAD (F1) > PRMT (F2). R A DI O PAR A M E TE R S BA UD DPWR MS T 2. Press MORE for the second menu screen. A ST R A DI O PAR A M E TE R S PTBP KBBP TO N E A DT 3. Press TONE (F3) to access the Tone options. PROG TO N E – H I G H LOW HIGH 4. Press LOW (F1) to set to low volume or HIGH (F2) to set to high volume. 5. Press ENTER to confirm. MICOM-H Owner’s Guide 42 Radio Programming Alternate Display Time-out You can define the number of seconds that elapse before the menu display returns to the previous screen. To set the display time-out: 1. Access the Radio Parameters Programming menu: MENU > MORE > PROG (F2) > RAD (F1) > PRMT (F2). R A DI O PAR A M E TE R S BA UD DPWR MS T 2. Press MORE to scroll to the second menu screen. A ST R A DI O PAR A M E TE R S PTBP KBBP TO N E A DT 3. Press ADT (F4) to access the time-out setting display. PROG ADT – 5 SEC 1 10 4. Press <-- (F2) to decrement the displayed value by 1. Press --> (F3) to increment the displayed value by 1. Press 1 (F1) to quick-set the value to 1. Press 10 (F4) to quick-set the value to 10. 5. Press ENTER to confirm. Attenuator You can enable or disable the attenuator. To enable/disable the attenuator: 1. Access the Radio Parameters Programming menu: MENU > MORE > PROG (F2) > RAD (F1) > PRMT (F2). R A DI O PAR A M E TE R S BA UD DPWR MS T 2. Press MORE twice to scroll to the third menu screen. R A DI O PAR A M E TE R S ATTN 3. Press ATTN (F1) to access the attenuator options. A ST CW R CLV D IM PROG ATT E N – N O YE S NO 4. Press YES (F1) to enable or NO (F2) to disable the attenuator. 5. Press ENTER to confirm. MICOM-H Owner’s Guide 43 Radio Programming CW Operation You can select one of three CW frequency filters: 0.25 K, 0.5 K or 0.8 K. To select a CW frequency filter: 1. Access the Radio Parameters Programming menu: MENU > MORE > PROG (F2) > RAD (F1) > PRMT (F2). R A DI O PAR A M E TE R S BA UD DPWR MS T 2. Press MORE twice to scroll to the third menu screen. R A DI O PAR A M E TE R S ATTN 3. Press CW (F2) to access the CW filters. A ST CW R CLV D IM PROG CW – 0.8 0 .2 5 0.5 0 .8 4. Press 0.25 (F1), 0.5 (F2) or 0.8 (F3) as required. 5. Press ENTER to confirm. Receive Level You can enable or disable the Receive Level (Rx) bar. To enable/disable the receive level bar: 1. Access the Radio Parameters Programming menu: MENU > MORE > PROG (F2) > RAD (F1) > PRMT (F2). R A DI O PAR A M E TE R S BA UD DPWR MS T 2. Press MORE twice to scroll to the third menu screen. R A DI O PAR A M E TE R S ATTN 3. Press RCLV (F3) to change the Rx bar status. A ST CW R CLV D IM PROG R x L E VE L – N O YE S NO 4. Press YES (F1) to enable or NO (F2) to disable the Rx bar. 5. Press ENTER to confirm. MICOM-H Owner’s Guide 44 Radio Programming Display Mode You can select one of two display modes: Dimming mode enables you to select one of four constant display light levels. In Alternate mode the display is normally turned off, and automatically turns on at a predetermined level when the radio detects any type of activity (scanning wheel, keypad, PTT, incoming call, etc.). To select the Dimming or Fixed display modes: 1. Access the Radio Parameters Programming menu: MENU > MORE > PROG (F2) > RAD (F1) > PRMT (F2). R A DI O PAR A M E TE R S BA UD DPWR MS T 2. Press MORE twice to scroll to the third menu screen. R A DI O PAR A M E TE R S ATTN 3. Press DIM (F4) to select the display mode. A ST CW R CLV D IM PROG D I S P L AY – ALT YE S NO 4. Press YES (F1) for Alternate mode or NO (F2) for Dimming mode. 5. Press ENTER to confirm. MICOM-H Owner’s Guide 45 Radio Programming Setting the Radio Options Tuner The MICOM-H offers the following programmable radio options: ■ TUNE – Tuner ■ ACC – Accessory The radio can be set to work with or without a tuner. If you are using a tuner, you must set this option to YES. To set the tuner on or off: 1. Access the Radio Options Programming menu: MENU > MORE > PROG (F2) > RAD (F1) > OPTS (F3). R A DI O O PT I O N S TU NE ACC 2. Press TUNE (F1) to access the tuner options. PROG T U N ER – N O YE S NO 3. Press YES (F1) to set the tuner option on or NO (F2) to set the tuner option off. 4. Press ENTER to confirm. Accessory Settings The radio can be set to work with or without a 400W/1KW amplifier. To set the amplifier option on or off: 1. Access the Radio Options Programming menu: MENU > MORE > PROG (F2) > RAD (F1) > OPTS (F3). R A DI O O PT I O N S TU NE ACC 2. Press ACC (F2) to access the accessory options. PROG ACC – NONE AMP ACC1 AC C 2 N O N 3. Press the function key below the option of your choice: AMP (F1), ACC1 (F2), ACC2 (F3). Press NON (F4) if there is no accessory being used. ACC1 (F2) and ACC2 (F3) are for future use. Selecting these options will have no effect. Note 4. Press ENTER to confirm. MICOM-H Owner’s Guide 46 Maintenance This section provides maintenance information for the MICOM-H. Correct installation and maintenance will ensure on-going operation of your radio set. If an internal problem is suspected, the BITE (Built In Test Equipment) will assist you in locating the source of the problem and in informing your service representative. Preventative Maintenance System Integrity Periodically check the integrity of your system, by examining the power source, cables, coaxes, connectors, antenna tuner (if used) and antenna. Carefully check that no damage has been caused to your cables, pay extra attention to runway through holes and bent cables. Periodic Calibration To maintain the frequency accuracy of your radio, the internal frequency source must be calibrated after 3, 6 and 12 months of operation in the first year, and once a year thereafter. Please ensure that your radio is calibrated on time. Using BITE Every time the radio is turned on, a self-test procedure is activated. If an internal malfunction is found, an error message will be displayed. Please contact your service representative and report the indicated malfunction or error. A list of possible error messages is given on page 48. MICOM-H Owner’s Guide 47 Maintenance Maintenance Error Messages MICOM-H Owner’s Guide No. Description 00 O.K. - no errors 01 DSP boot checksum fail (download) 02 DSP PLL unlock 03 DSP external RAM memory 04 (Not applicable) 05 DSP internal RAM memory 06 (Not applicable) 07 (Not applicable) 08 HC16 flash memory checksum 09 HC16 RAM memory 10 No 16.8 MHz clock 11 Battery low 12 Control head wake-up 13 Control head is not responding 14 Radio not programmed 15 Database fail 16 VCO 1 first injection 17 VCO 2 first injection 18 VCO 3 first injection 19 VCO second injection 20 Synthesizer unlock 21 Receiver failure 22 Preselector range 1 23 Preselector range 2 24 Preselector range 3 25 Preselector range 4 26 Preselector range 5 27 Preselector range 6 28 Preselector range 7 29 Preselector range 8 30 Exiter test 31 Antenna mismatch 32 Harmonic filter range 1 33 Harmonic filter range 2 34 Harmonic filter range 3 35 Harmonic filter range 4 36 Harmonic filter range 5 37 Harmonic filter range 6 38 Harmonic filter range 7 39 Power amplifier fail 48 Maintenance Troubleshooting If the radio is malfunctioning, try to solve the problem as follows: Problem Troubleshooting Blank Display Check whether: • DC power cable is connected properly to the radio and battery. • A 7.5A fuse is installed in the fuse holder located on the green wire of the DC power cable. Display present but weak or no receive signal or noise Check whether: • Connection of antenna to antenna tuner and antenna tuner to radio cables (loose or broken connections). • Correct programming of operating channel (frequency, mode of operation, etc.). Engine noise picked up by the antenna Determine by observing difference in the reception by turning the Engine ON/OFF. Verify that: • The ground leads are properly connected, all power wires and ground leads are as short as possible • The Noise Blanker (if installed) is enabled. If the problem persists: • Install noise reduction Kit TLN8845. Poor or no transmission Check whether: • A 30A fuse is installed in the fuse holder located on the red wire of the power cable. • Proper grounding cables are connected from the radio and from the antenna tuner to the vehicle chassis. • While speaking, check RF power bars for activity. The resulting RF power output is displayed in approximately 15 W increments (bars) being added from the bottom of the display upwards. • Three or more bars disappear from the RF power bar display. There may be a problem in the antenna system. If the antenna cabling or the antenna mast rigging position has changed since the antenna was last tuned, the antenna tuner will not be adjusted automatically. To retune the antenna tuner, press the ENTER key. If transmission is still poor, inspect the tuner, antenna and ground plane for loose connections or misplaced parts. If no loose connections are found, call your service representative for assistance. • There are no bars at the RF power bar graph. Indicates low transmitter power, which can be caused by a faulty microphone, faulty transmitter, overheating, or defective antenna system. MICOM-H Owner’s Guide 49 Maintenance In case of a failure during operation, one of the following messages may appear on the display: MICOM-H Owner’s Guide Message Troubleshooting NO CLOCK Check whether: • A 30A fuse is installed in the fuse holder on the red wire of the power cable. SYN FAIL Perform a built-in test (BITE) for more information. PW LATCH Perform a built-in test (BITE) for more information. OVER TMP Check whether: • There is any fan obstruction • Perform a built-in test (BITE) for more information. CU-LIMIT Check whether: • The radio is programmed to TUNER OFF if your antenna system is not equipped with an ATU • A short circuit occurred in the antenna’s coax • The ATU is in working condition. NOT PROG (This message appears if three is a failure in the DC power to the radio during RSS programming) Check whether: • The radio is not programmed and the baud rate is 1200 bit/sec. If necessary, program the radio parameters (from RSS). 50 Maintenance Service Proper repair and maintenance procedures will ensure efficient operation and long life for this product. A Motorola maintenance agreement will provide expert service to keep this and all other communication equipment in perfect operating condition. Through its maintenance and installation program, Motorola makes available the finest service to those desiring reliable, continuous communications on a contract basis. Motorola's Customer Service Division is the largest service organization specializing in mobile communications. It includes over 900 authorized or company-owned stations. In addition, our products are serviced throughout the world by a wide network of company or authorized independent distributor service organizations. For a contract service agreement, please contact your nearest Motorola service representative, or Motorola sales representative. If you suspect a radio problem, check the following items before requesting service. Phone line support: Motorola Radio Support Center 3761 S. Central Avenue Rockford, IL 61102 USA Phone: International: 847-725-4830 Domestic USA: 1-800-227-6772 For customers of the US Federal Market, phone line support is available at: Motorola USFG Depot 7940 Penn Randall Place Upper Marlboro, MD 20772 USA Phone: International: 301-736-4300 (Fax: 301-735-7414) Domestic USA: 1-800-969-6680 (Fax: 800-784-4133) MICOM-H Owner’s Guide 51 Maintenance MICOM-H Owner’s Guide 52 Installation General This section describes the installation of the radio. Inspection Carefully inspect the radio immediately upon receipt, and notify the shipper of any damage incurred in transit. Planning the Installation of your Radio Before installing the radio, familiarize yourself with the installation procedure detailed. Select the mounting location taking into account convenience of access to electrical connections and maintenance. The selected location should be clean, dry and well ventilated. Do not mount the unit in close proximity to strong electrical fields produced by brush motors and generators, welders, etc. The antenna, antenna tuner and associated cable kits are provided separately, and these should be installed before the radio itself is installed. Follow the instructions included with the units and kits. The radio may be placed on any sturdy, flat surface. An accessory mounting tray (included in the Mobile Mounting Kit, FLN2272) allows the radio to be mounted in any position. No preliminary internal wiring connections are required before installing the radio. MICOM-H Owner’s Guide 53 Installation Base Station Installation You can use either an AC power supply or a 12 V battery as the radio power supply . (It is possible to connect a backup battery to the battery terminals on the power supply). Power Supply model F2369 for 220 V AC, 50 Hz, field programmable for 110 VAC, 60 Hz should be used for this purpose. RED PO POW WEERR SUPPLY SUPPLY FF2369 2369 GRN R AD IO BAT+ GND-BLK GND- FKN5865 - + 12-V 12-VBACK BAC KUP UP BATT ERY BAT TERY Figure 2: Power Supply This power supply also serves as a charger for the external backup 12V battery, if connected. When AC power failure occurs, the battery functions as the main power source. When AC power is again available, the power supply charges the battery. The cable and connector supplied with the power supply enable connecting the supply directly to DC connector J4 at the radio rear panel. (The DC Power Cable supplied with the radio is not used in this installation). MICOM-H Owner’s Guide 54 Installation Mobile Installation Figure 3 illustrates the installation procedure, and shows the location of the installed components inside a vehicle. Radio ATU DC Power ca b le BAT A nten n a c ab le Figure 3: Front Model Installation The radio is installed on the dashboard of the vehicle inside the passenger compartment. The other components connect to the power source, the battery, and to the antenna, which enables the radio to transmit and receive. If the battery is located in the rear section of the vehicle, the power cable extends to the battery location in the rear. Installation Procedures MICOM-H Owner’s Guide Follow these procedures to install the radio in the desired location. If the accessory mounting tray is not used, ignore the steps pertaining to it. 55 Installation Mobile Mounting Kit 1. Mount the accessory mounting tray in the desired location. Use the tray as a template if holes must be drilled. 11 .8 ” (3 0 0 m m ) 8 .7 4 ” (2 2 2 m m ) Figure 4: Accessory Mounting Tray 2. Use the four supplied screws to fasten the mounting tray bracket to the bottom of the radio housing. 3. Drill an additional hole for the grounding bolt. 4. If a mounting tray is used, slide the radio with the bracket into the tray and fasten the bracket to the tray with the supplied screw. MICOM-H Owner’s Guide 56 Installation DC Power Connection To connect a 12V negative-ground vehicular battery. 1. Lead the power connector on the DC Power Cable to the DC connector on the radio, but do not attach it. Lead the three heavy wires (red, green and black) to the 12V battery, threading them through the access holes as required. The wires must be as short as possible. Cut off any excess wire. 2. Thread the red and green wires from the power connector through the two fuse holder caps; separate the fuse clips and solder or crimp them to the wires. 3. Install the 30A fuse in the fuse holder on the red wire, and the 7.5A fuse in the fuse holder on the green wire. 4. Crimp or solder the supplied lugs to the red, green, and black wires. 5. Connect the lugs on both red and green cables to the battery’s positive terminal. Then connect the lug on the black wire to the battery’s negative terminal. FUS E 30 A J3 POW ER RED (# 8) FUS E 7.5 A RADIO GRN (# 12) BLK (# 12) - * M OB ILE C H A S S IS + 12V BAT TERY Figure 5: DC Power Connection – Connect the grounding (black wire) to the vehicle chassis, as close as possible to the radio. Note – In front installation, add one ferrite (supplied with the installation radio kit) on the DC cable as close as possible to the radio. – In trunk mount installation, add one ferrite (supplied with installation kit) on the DC cable as close as possible to the radio and one ferrite on the control cable, halfway between the control head and the radio. No.14 X 3/4” self-tapping screw . Chassis cable and lug 1/4” lockwasher 3/16’ (187”) diameter hole Fl su oor rfa ce Figure 6: Wire Attachment to Chassis MICOM-H Owner’s Guide 57 Installation Microphone Clip The microphone cable enables placing the microphone clip in any convenient location up to five feet from the radio. To install the clip, use it as a template to drill two holes to receive self-threading sheet-metal screws. Mount the clip using the supplied screws. Figure 7: Microphone Clip Final Connections ! Ensure that the radio is off before making these connections. Warning 1. Connect the power cable to DC connector J4 and connect the antenna RF cable to antenna connector J2. If an antenna tuner is used, connect the antenna to the tuner, connect the tuner RF cable to connector J2, located on the radio rear panel. 2. If a mounting tray is used, slide the radio with the bracket into the tray and fasten the bracket to the tray with the supplied screw. 3. Use the tie straps included with the Cable Kit to tie loose cables out of the way. 4. Connect a ground lead from the GND screw on the radio rear panel to the chassis of the vehicle. ! Important Special attention should be given to locating an appropriate vehicle ground. Optimum radio performance can only be achieved with a ground connection having a very low resistance. The vehicle frame makes the best ground, but body structural reinforcement members are also suitable for grounding purposes. The ground lead should be as short as possible. MICOM-H Owner’s Guide 58 Installation External Speaker Installation An external speaker can be connected to the radio. Any speaker with an impedance greater than 8Ω can be used, and is connected through the accessory connector (pin 1,3). Operational Checks When installation is complete, carefully check all operating functions (refer to the Operation section). In case of malfunctioning, refer to the sections on Troubleshooting and Tuning the Antenna in this manual. Connectors Microphone Connector J1 The microphone connector is located on the lower part of the radio front panel. Table 1 lists the functions of the microphone connector pins. Table 1. Connector J1, Pin Connections Antenna Connector J2 MICOM-H Owner’s Guide No. Pin Name Description 1 SWA+ Microphone Power 2 RXD Serial communication 3 TXD Serial communication 4 GND Ground line 5 MIC AUDIO Input audio signals generated by the microphone (600Ω Ω impedance, 100 mV 1 KHz tone is required for full output power) 6 PTT MIC Activates transmission by short to ground 7 MONITOR Mutes the speaker before transmission is enabled (short momentary to ground to open speaker) 8 AUDIO OUT Receive audio 600Ω Ω (300 mVRMS) The “N type” antenna connector is located on the rear panel of the transceiver and is used to connect the antenna. 59 Installation Accessory Connector J3 Accessory connector J3 is a 25-pin D-type plug located on the rear panel of the radio. It is used with external accessories such as a modem, a linear amplifier, a phone patch, etc. If you wish to connect Morse key and headphones using their standard connectors, use interface cable FKN4403. To connect up to four devices simultaneously, use FLN2271. Table 2 lists the pin connections of Connector J3. Table 2. Connector J3, Pin Connections No. Pin Name Description 1 SPKR- Differential output to the external 8Ω, 5W speaker (Do not connect to GND) 2 OPTION Option dependent 3 SPKR+ Differential output to the external 8Ω, 5W speaker 4 RX AUDIO+ Differential output received audio signals (0 dBm; 600Ω; not controlled by volume) 5 RX AUDIO- Differential output received audio signals (0 dBm; 600Ω; not controlled by volume) (Do not connect to GND) MICOM-H Owner’s Guide 6 TX AUDIO+ Differential input received audio signals (600Ω input impedance, 0 dBm is required for full power) 7 TX AUDIO(Do not connect to GND) Differential input received audio signals (600Ω input impedance, 0 dBm required for full power) 8 PTT IN VOICE Xmit command (by short to ground) for voice signals 9 PTT IN DATA Xmit command (by short to ground) for data signals 10 PTT IN CW Xmit command (by short to ground) for CW (Morse) 11 SWA+ 13.8V (nominal) current limited 12 KW C C KW option channel change 13 KW ON/OFF KW option power ON/OFF 14 AGC FAST/SLOW AGC fast or slow release 15 RXD Point to point communication line to HOST/HLC 16 TXD Point to point communication line to HOST/HLC 17 RESET External RESET 18 GND Ground 19 KW PTT KW PTT 20 EXT ALARM External Alarm Operation (open collector –pulled to ground when external alarm is activated) 21 VPP Flash programming voltage 22 KW ALC KW ALC 23 SQ GATE Squelch Indication 24 FAN ON/OFF FAN ON/OFF 25 KW TUNE KW tune 60 Installation DC Connector J4 DC connector J4 is mounted on the rear panel of the radio. It is used to feed the radio with the required power from an AC to 13.8V power supply or from the battery. The following table lists the function of the DC connector lines. Table 3. Connector J4, Pin Connections Reduction of Vehicular Noise No. Pin Name Description 1 TX Power Used to deliver high currents (up to 28 Amp) to the radio, mainly for the transmitter circuitry 2 Ground Used as return line for receive and transmit lines 3 RX Power Used to deliver relatively low currents (up to 3 Amp) to the radio, mainly for the receiver circuitry Most vehicles are subject to several noise sources which greatly disturb a received signal. The most noisy sources are the high voltage ignition sparks that are produced at the vehicle's plugs. Alternator activity also generates significant noise. By following these insulation guidelines, and if necessary by adding certain damping components, it is usually possible to reduce vehicular noise: 1. Keep your antenna tuner and antenna as far as possible from the engine compartment. 2. Connect the primary power lead of the radio directly to the battery instead of the starter relay. The battery acts as a large capacitor (about one farad for 50 A-H capacity batteries) by passing the noise to ground. 3. If necessary, connect 0.01 - 0.1 mF capacitors across the primary leads of the coil and across the alternator output. 4. Keep your DC and RF cables as short as possible. 5. If your vehicle does not have a resistive ignition wire, it is recommended to replace it with such a wire. 6. The MOTOROLA RF noise reduction kit for alternator equipped vehicles (TLN8845) includes some useful accessories for noise reduction, including a resistive ignition coil suppressor cable. In severe noise conditions, you may find this kit helpful. MICOM-H Owner’s Guide 61 Installation MICOM-H Owner’s Guide 62 List of Procedures To turn the radio on . . . . . . . . . . . . . . . . . . . . . . . . . . . . . . . . . . . . . . . . . . . . .13 To Transmit . . . . . . . . . . . . . . . . . . . . . . . . . . . . . . . . . . . . . . . . . . . . . . . . . . . .14 To Receive Calls . . . . . . . . . . . . . . . . . . . . . . . . . . . . . . . . . . . . . . . . . . . . . . . . .14 To choose a channel . . . . . . . . . . . . . . . . . . . . . . . . . . . . . . . . . . . . . . . . . . . . .16 To transmit in Channel mode . . . . . . . . . . . . . . . . . . . . . . . . . . . . . . . . . . . .16 To enter frequency mode . . . . . . . . . . . . . . . . . . . . . . . . . . . . . . . . . . . . . . . .18 To change the current frequency/frequencies . . . . . . . . . . . . . . . . . . . . .19 To store a frequency in a channel . . . . . . . . . . . . . . . . . . . . . . . . . . . . . . . . .22 To use scan mode . . . . . . . . . . . . . . . . . . . . . . . . . . . . . . . . . . . . . . . . . . . . . . .23 To select scan mode options . . . . . . . . . . . . . . . . . . . . . . . . . . . . . . . . . . . . .24 To run BITE . . . . . . . . . . . . . . . . . . . . . . . . . . . . . . . . . . . . . . . . . . . . . . . . . . . .26 To lock the radio . . . . . . . . . . . . . . . . . . . . . . . . . . . . . . . . . . . . . . . . . . . . . . . .27 To unlock the radio . . . . . . . . . . . . . . . . . . . . . . . . . . . . . . . . . . . . . . . . . . . . . .27 To change the password . . . . . . . . . . . . . . . . . . . . . . . . . . . . . . . . . . . . . . . . .28 To change the display brightness level . . . . . . . . . . . . . . . . . . . . . . . . . . . .29 To change the radio language . . . . . . . . . . . . . . . . . . . . . . . . . . . . . . . . . . . .30 To enter Radio Programming mode . . . . . . . . . . . . . . . . . . . . . . . . . . . . . .31 To copy channel parameters . . . . . . . . . . . . . . . . . . . . . . . . . . . . . . . . . . . . .33 To erase a channel . . . . . . . . . . . . . . . . . . . . . . . . . . . . . . . . . . . . . . . . . . . . . . .34 To set the channel’s transmission power level . . . . . . . . . . . . . . . . . . . . .34 To set a channel’s frequency . . . . . . . . . . . . . . . . . . . . . . . . . . . . . . . . . . . . .35 To set the channel band type . . . . . . . . . . . . . . . . . . . . . . . . . . . . . . . . . . . . .36 To set the operating mode . . . . . . . . . . . . . . . . . . . . . . . . . . . . . . . . . . . . . . .36 To set the AGC speed . . . . . . . . . . . . . . . . . . . . . . . . . . . . . . . . . . . . . . . . . . . .37 To set the channel bandwidth . . . . . . . . . . . . . . . . . . . . . . . . . . . . . . . . . . . .38 To set the baud rate . . . . . . . . . . . . . . . . . . . . . . . . . . . . . . . . . . . . . . . . . . . . .39 To set the data power level . . . . . . . . . . . . . . . . . . . . . . . . . . . . . . . . . . . . . . .40 To enable/disable the Microphone Side Tone (MST) . . . . . . . . . . . . . . .40 To enable/disable the Accessory Side Tone (AST) . . . . . . . . . . . . . . . . . .41 To enable/disable the PTT Release Beep (PTBP) . . . . . . . . . . . . . . . . . . .41 To enable/disable the Keyboard Beep (KBBP) . . . . . . . . . . . . . . . . . . . . .42 To set the tone level . . . . . . . . . . . . . . . . . . . . . . . . . . . . . . . . . . . . . . . . . . . . .42 To set the display time-out . . . . . . . . . . . . . . . . . . . . . . . . . . . . . . . . . . . . . . .43 To enable/disable the attenuator . . . . . . . . . . . . . . . . . . . . . . . . . . . . . . . . .43 To select a CW frequency filter . . . . . . . . . . . . . . . . . . . . . . . . . . . . . . . . . . .44 To enable/disable the receive level bar . . . . . . . . . . . . . . . . . . . . . . . . . . . .44 To select the Dimming or Fixed display modes . . . . . . . . . . . . . . . . . . . .45 To set the tuner on or off . . . . . . . . . . . . . . . . . . . . . . . . . . . . . . . . . . . . . . . . .46 To set the amplifier option on or off . . . . . . . . . . . . . . . . . . . . . . . . . . . . . .46 To connect a 12V negative-ground vehicular battery. . . . . . . . . . . . . . .57 MICOM-H Owner’s Guide lxiii MICOM-H Owner’s Guide lxiv