1
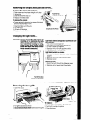
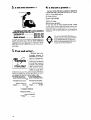
Install properly.. .
Remove sales labels.. .
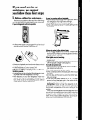
Remove the Consumer Buy Guide label, tape and
any inside labels before using the refrigerator
To remove any remaining
glue:
1. Rub briskly with thumb to make a ball then remove.
OR
2. Soak area with dishwashing detergent solution (1
teaspoon detergent in 1 quart warm water) before
removing glue as described in step 1.
DO NOT USE rubbing alcohol or flammable or
toxic solvents, such as acetone, gasoline, carbon tetmchloride,
etc. These can damage the
material.
NOTE: DO NOT REMOVE ANY PERMANENT INSTRUCTION LABELS INSIDE YOUR REFRIGERATOR.
Do not remove the Tech Sheet fastened under
the refrigerator at the front.
-wmmm”m,“&.C~*IIR*I
,r*-L*.I :,*1*:*=
* I. *+vI.?IyLW,I
Clean it.. .
Clean your refrigerator
before using it.
See cleaning instructions
on pagell,
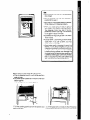
1. Allow % inch (1.25 cm) space on each side and at
the top of the refrigerator for ease of installation,
2. If the refrigerator is to be against a wall, you might
want to leave extra space so the door can be
opened wider
3. The refrigerator back can be flush against the wall.
m.wda
I
I .I-i ‘_ >.
‘< ,.
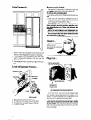
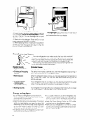
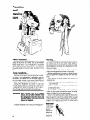
Level refrigerator-freezer..
3-prong
grounding
type wall receptacle,
.
Refrigerator
Power Cord
RECOMMENDED
Right to Raise;
Left to lower
I.
2.
3.
4.
4
Remove base grille [see page 7 ).
To raise front, turn each screw to the right.
To lower front, turn each screw to the left.
Check with level.
GROUNDING
METHOD
A 115 Volt, 60 Hz., AC only 15 or 20 ampere fused
and properly
grounded
electrical
supply is required. It is recommended
that a separate circuit
serving only this appliance
be provided.
Do not use an extension cord. Use a receptacle which cannot be turned off with a switch
or pull chain. See individual
electrical
requirements and grounding
ature package.
instruction
sheet in your liter-