1
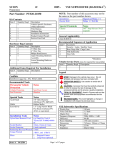
SCION
xB
BASS TUBE (BAZOOKA®)
2004 -
Preparation
NOTE: Part number of this accessory may not be
the same as the part number shown.
General Applicability
Part Number: PTS20-52040
Kit Contents
Item #
1
2
3
4
5
6
Quantity Reqd.
1
1
1
4
1
1
Description
Bazooka Tube Assembly
Wire Harness
Hardware Bag
Paper Drill Templates
Installation Instructions
Care Card
All SCION xB Grades
Recommended Sequence of Application
Item #
1
2
3
4
Accessory
Install Security/Audio
Install Bazooka Tube
Install Door Sills
Install Molded Dash
Hardware Bag Contents
Item #
1
2
3
4
5
6
7
Quantity Reqd.
10
10
4
2
2
2
2
*Mandatory
Description
7” Wire Ties
4” Wire Ties
M6 X 30mm Bolts
M6 X 25mm Bolts
Threaded Backing Plates
Top Mounting Plates
Bracket Mounting Knobs
Vehicle Service Parts (may be required for reassembly)
Item #
1
Quantity Reqd.
STOP: Damage to the vehicle may occur. Do not
proceed until process has been complied with.
OPERATOR SAFETY: Use caution to avoid risk of
injury.
CAUTION: A process that must be carefully observed
in order to reduce the risk of damage to the
accessory/vehicle and to ensure a quality installation.
TOOLS & EQUIPMENT: Used in Figures calls out the
specific tools and equipment recommended for this
process.
REVISION MARK: This mark highlights a change in
installation with respect to previous issue.
Description
Conflicts
None
Recommended Tools
Personal & Vehicle
Protection
Vehicle Protection
Part Protection
Notes
Seat/Floor Covers
Blankets
Special Tools
Notes
Arch Punch (For use with
Rear Cargo Mat only)
Mallet (For use with Rear
Cargo Mat only)
Marker
5/16” Hole Diameter
(McMaster PN: 3427A12)
Rubber Mallet
Installation Tools
Notes
Panel Removal Tool
Socket/Ratchet
Socket Extension
Torque Wrench
Nylon Removal Tool (NRT)
10mm & 12mm
6 inch (optional)
Pliers
Screwdriver
Electric Drill
Utility Knife
3 lbf·ft , and 10 lbf·ft
1. Diagonal Cutters
2. Long Nose (optional)
Magnetized Philips # 2
5/16” Drill Bit
Special Chemicals
Notes
Cleaner
3MTM Prep Solvent–70 (if
required)
Issue: A
08/16/04
Description
Legend
Additional Items Required For Installation
Item #
1
Quantity Reqd.
Bass Tube Specifications
Woofer Size
Voice Coil Size
Magnet Size
Frequency Response
Efficiency
Power Handling
Dimensions
Weight
Impedance
Page 1 of 15 pages
8”
1”high power/high
temp.
15 oz.
39 – 85 hz.
105dB
100 watts
18.125” x 8.5” x 10”
14 lbs.
2 ohms DVC
SCION
xB
BASS TUBE (BAZOOKA®)
2004 -
Procedure
Care must be taken when installing this accessory to ensure damage does not occur to the vehicle. The installation of this
accessory should follow approved guidelines to ensure a quality installation.
These guidelines can be found in the "Accessory Installation Practices" document.
This document covers such items as:• Vehicle Protection (use of covers and blankets, cleaning chemicals, etc.).
• Safety (eye protection, rechecking torque procedure, etc.).
• Vehicle Disassembly/Reassembly (panel removal, part storage, etc.).
• Electrical Component Disassembly/Reassembly (battery disconnection, connector removal, etc.).
Please see your Toyota dealer for a copy of this document.
1. Pre-installation Precautions
STOP
Fig. 2-1
(a) Use Seat & Floor Protectors and Fender
Covers/Blankets to avoid damage to surfaces.
Operator Safety Warning (if applicable.)
2. Battery Disconnect
STOP
(a) NOTE: Be sure to open the rear hatch,
PRIOR to disconnecting the battery.
(b) Remove the NEGATIVE (-) battery terminal
using a 10mm socket before any disassembly
starts. (Fig. 2-1).
Fig. 3-1
3. Disassemble Center Instrument Panel (IP)
(a) Starting with the center portion of the center
IP, pull out the three (3) climate control
knobs (Fig. 3-1)
(b) Using the #2 Philips Screwdriver, remove the
2 screws behind the right & left side climate
control knobs. (Fig. 3-2)
Fig. 3-2
STOP
(c) Carefully pull out the center IP and carefully
disconnect the connectors located behind.
(Fig. 3-3 & 3-4)
(1) A NRT may be used to remove difficult
connectors from center IP.
STOP
(2) Place center IP, Pillars (and all interior
panels) on a protected surface (i.e.
blanket)
Fig. 3-4
Issue: A 08/16/04
Page 2 of 15 pages
SCION
xB
BASS TUBE (BAZOOKA®)
2004 -
Procedure
4. Remove Radio
(a) With the center IP removed, use a #2 Philips
Screwdriver to remove the four (4) screws
from the radio bracket. (Fig. 4-1)
(b) Pull out the Radio and carefully disconnect
the connectors located behind.
Fig. 4-1
(1) A NRT may be used to release difficult
connectors from the radio.
STOP
Fig. 5-1
(2) Carefully place Radio on a protected
surface (i.e. blanket)
5. Disassemble Glove Compartment
(a) Open the glove compartment latch, and
remove the storage cup. (Fig. 5-1)
(b) Press the outside edges of the glove
compartment inwards, to release. (Fig. 5-2)
Fig. 5-2
STOP
(1) Place glove compartment and storage cup
on a protected surface (i.e. blanket)
6. Disassemble Passenger Front & Rear Scuff
Plates, Passenger Kick Panel, & B-Pillar
Panel
(a) Using a NRT, remove passenger front scuff
plate by carefully pulling upward. (Fig. 6-1)
Fig. 6-1
(b) Remove passenger kick panel by removing
the plastic screw (located near firewall) &
pulling out the kick panel. (Fig. 6-2)
(c) Using a NRT, release the bottom portion of
the B-Pillar panel and remove panel.
Fig. 6-2
(d) Using a NRT, remove rear passenger scuff
plate by carefully pulling upward. (Fig. 6-3)
STOP
(1) Place kick panel, and all scuff plates on a
protected surface (i.e. blanket)
Fig. 6-3
Issue: A 08/16/04
Page 3 of 15 pages
SCION
xB
BASS TUBE (BAZOOKA®)
2004 -
Procedure
7. Route Wire Harness
(a) Starting underneath the passenger foot-well,
route the T-Harness portion of the wire
harness through the opening above the center
reinforcement rod as shown in Figure 7-1.
(b) Reaching through the radio opening, pull the
T-Harness connector from the backside of
the dash, while advancing the wire harness
from underneath the passenger foot-well.
(Fig. 7-2)
Fig. 7-1
(c) Using one (1) 7” wire tie, secure the wire
harness behind radio, onto an existing
vehicle wire harness. (Fig. 7-3)
Fig. 7-2
(d) Using six (6) 7” wire ties, secure the wire
harness at the 6 highlighted points. (Fig. 7-4)
STOP
Fig. 7-3
(1) Be sure the wire tie locations are far from
moving parts or sharp edges. Ensure that
the wire harness is tied tight enough to
prevent it from moving or vibrating.
(2) Using the diagonal cutter pliers, clip the
seven (7) 7” wire ties.
(e) Route the wire harness towards the rear of
the vehicle, across the passenger front door
well, behind the B-Pillar and across the
passenger rear door well.
Fig. 7-4
(1) Using the vehicle accommodated clips,
secure the wire harness using the 4”wire
ties. Use the included wire ties when
vehicle clips are not present, to ensure
that the wire harness is not loose.
(f) Remove the rear bench seat by pulling
upwards on each corner, to release the two
(2) mounting clips. (Fig. 7-5)
Fig. 7-5
Issue: A 08/16/04
Page 4 of 15 pages
SCION
xB
BASS TUBE (BAZOOKA®)
2004 -
Procedure
STOP
Fig. 7-6
(g) The rear bench must be “de-looped” from
center safety loop and all seat belt latches
need to be pushed through their respective
slots. (Fig. 7-6 & 7-7)
(h) Route the wire harness underneath the rear
carpet as shown. (Fig. 7-8)
(i) Route the 14 Pin Molex connector,
underneath the rear seat pivot rod (under the
#2 passenger side clip, nearest the center),
and continue routing the wire harness to the
right. (Fig. 7-9)
Fig. 7-7
Fig. 7-8
(j) Using a 12mm socket, remove the center
Anchorage bolt located on the middle
mounting bracket and install the wire harness
ground ring underneath the bolt.
(1) Connect the ground ring to the hole just
prior to routing the wire harness through
the center pivot bracket. (Fig. 7-10)
(2) Torque bolt to 10 lbf·ft
(k) Collect any excess harness and wire-tie the
wire harness to the rear seat pivot rod using
three (3) 7” wire ties. (Fig. 7-11)
Fig. 7-9
(1) Using the diagonal cutter pliers, clip the
three (3) 7” wire ties.
(l) Route the 14 pin Molex connector behind the
drivers’ side rear seat, into the rear cargo
area.
Fig. 7-10
8. Mounting the Bazooka Tube
NOTE: Paper (cargo panel) drill templates are
included in every kit & are to be used for
customer/DIO installation. PPO (cargo panel)
drill templates have been supplied to the TLS
facilities.
Fig. 7-11
Issue: A 08/16/04
Page 5 of 15 pages
SCION
xB
BASS TUBE (BAZOOKA®)
2004 -
Procedure
STOP
(a) If vehicle is equipped with a rear cargo mat
(PN: PT206-52043-02) remove the cargo mat
at this time (Reference Step 9 (a))
(b) Remove the rear cargo panels from vehicle,
by unlocking the 3 locking knobs, and lifting
both panels out of the vehicle.
STOP
Fig. 8-1
(c) Place the rear left (drivers side) panel onto a
safe, & stable surface, where drilling is safe.
(d) Place the drill template onto the rear drivers’
side cargo panel, aligning it over to the far
right side profile of the panel. (Fig. 8-1)
M6x30mm
or
M6x25mm*
(e) Using the 5/16” drill bit, drill the 4 allotted
holes into the rear panel.
Top Mounting
Plate
(1) Make sure the holes are drilled straight.
Cargo Mat*
(2) Clean the cargo panel from any shavings
or drill debris.
Cargo Panel
Backing Plate
Fig. 8-2
STOP
(3) If vehicle is equipped with the rear cargo
mat, DO NOT PROCEED to the next
step. Proceed to Step 9 (a) at this time, to
prepare the rear cargo mat. If vehicle is
not equipped with rear cargo mat,
proceed to the next step (Step 8 (f))
(f) Starting on the 2 forward holes, place two (2)
M6 x 30mm bolts through the two outside
holes of the top mounting plate, (through the
pre-punched cargo mat, if equipped), through
the cargo panel, & into the threaded backing
plate, located underneath the panel. (Fig. 8-2)
Rear of Vehicle
Fig. 8-3
M6x30mm
Top Mounting
Plate
Cargo Mat*
Cargo Panel
STOP
(1) If the vehicle is NOT equipped with a
rear cargo mat, use the (2) M6 x 25mm
bolts on the 2 forward holes.
(2) Position the “curled” side of the top
mounting plate as shown in Fig. 8-3.
Backing Plate
Fig. 8-4
Issue: A 08/16/04
(g) On the rear 2 holes, place two (2) M6 x
30mm bolts through the two outside holes of
Page 6 of 15 pages
SCION
xB
BASS TUBE (BAZOOKA®)
2004 -
Procedure
the top mounting plate, (through the prepunched cargo mat – if equipped), through
the cargo panel and into the threaded backing
plate, located underneath the panel. (Fig. 8-4)
(1) Position the “curled” side of the top
mounting plate as shown in Fig. 8-3.
(h) Securely tighten the four (4) M6 x 30mm
Bolts using the 10 mm socket.
(i) Place the rear cargo panels back into the
vehicle – do not lock panels at this time.
Fig. 8-5
(j) Install the Bazooka Tube by aligning the
mounting brackets on the tube with the
mounting plates on the panel.
(1) The screen portion of the tube must be
facing the rear of the vehicle.
(k) Secure the Bazooka tube mounting brackets
to the mounting plates using the supplied
mounting bracket knobs. (Fig. 8-5)
Fig. 8-6
(l) Connect the Bazooka to the Wire Harness by
plugging the 14-pin Molex Connector
(routed behind the rear drivers’ side seat) into
the back of the Bazooka.
(1) Confirm that the rotary knob (gain
control) on the back of the unit is set
completely counter-clockwise (until it
can not be turned any further) & that the
slide switch (phase) is in the up position.
(Fig. 8-6)
(m) Re-Lock the cargo panel back into vehicle.
9. Preparing Rear Cargo Mat (if equipped)
NOTE: Paper (cargo mat) drill templates are
included in every kit and are to be used to
modify the rear cargo mat when used with the
Bazooka Subwoofer.
Issue: A 08/16/04
Page 7 of 15 pages
SCION
xB
BASS TUBE (BAZOOKA®)
2004 -
Procedure
(a) If vehicle is equipped with a rear cargo mat
(PN:PT206-52043-02), the mat must be
removed prior to drilling the rear cargo
panel.
STOP
Fig. 9-1
STOP
(1) The cargo mat must be placed onto a
safe, & stable surface, where punching is
safe.
(b) In order to prepare the rear cargo mat, the
cargo panels must be drilled (Step 8 (e))
(c) Once the cargo panel has been drilled place
the panel back into the vehicle (Step 8. (i));
place the paper (cargo mat) drill template on
top of the pre-drilled cargo panel. (Fig. 9-1)
(1) Ensure that the paper (cargo mat)
template sits within the same footprint as
the cargo area.
Fig. 9-2
(2) Mark the four (4) drilled holes of the
cargo panel, onto the paper template.
(Fig. 9-2)
(d) Once marked, remove the paper template,
and place it over the cargo mat. Place the
5/16” Arch Punch over each marked spot,
and punch four (4) holes (through the paper
template & mat) using the rubber mallet.
(Fig. 9-3)
Fig. 9-3
(e) Once the mat is punched, remove the panel
from vehicle, & revert back to Step 8 (f).
10. Reassemble Rear Seat
(a) Place rear seat back into vehicle, and “reloop” center safety loop onto bracket.
(b) Insert seat belt latches into their respective
slots and ensure that the center seat belt latch
is routed to its correct position. (Center latch
is identified with a “CENTER” marking)
Issue: A 08/16/04
Page 8 of 15 pages
SCION
xB
BASS TUBE (BAZOOKA®)
2004 -
Procedure
11. Reassemble Passenger Front & Rear Scuff
Plates, Passenger Kick Panel, & B-Pillar
Panel
(a) Referencing Step 6 (a), reassemble all panels
into their original locations, making sure that
all clips are securely fastened.
12. Reassemble Glove Compartment
(a) Referencing Step 5 (a), reassemble glove
compartment & storage cup to its original
location, making sure that all clips are
securely fastened.
13. Reassemble Radio
(a) Referencing Step 4 (a), reassemble the Radio
by connecting: 1) T-Harness into the back of
the Radio2) the Satellite harness (if
equipped) and 3) the radio antenna cable.
(Fig. 13-1)
Fig. 13-1
(b) Carefully insert Radio back into center IP
opening, by aligning mounting holes to the
radio bracket. Be sure the wire harness is not
pinched.
(1) Securely fasten (hand tight) the four (4)
mounting screws using the #2 Philips
Screwdriver. DO NOT OVERTIGHTEN
14. Reassemble Center Instrument Panel (IP)
(a) Referencing Step 3 (a), carefully reconnect
all the vehicle connectors back onto the
center IP.
(b) Insert the center IP back onto the dash
assembly by carefully inserting the top
alignment tabs of the center IP into the dash
assembly.
(c) Once tabs are secured, then apply pressure to
the perimeter of the center IP until it is flush
with the dash assembly.
Issue: A 08/16/04
Page 9 of 15 pages
SCION
xB
BASS TUBE (BAZOOKA®)
2004 -
Procedure
15. Reconnect Battery
(a) Using a 10 mm socket, reconnect the
NEGATIVE (-) battery terminal at a 45degree angle and torque to 36 lbf·in
16. Test and Set Up Procedures
(a) If system is installed correctly, the Bazooka
Tube will power up when the vehicle’s
ignition is turned on. (This can be confirmed
by the lighting of the POWER L.E.D. on the
back of the unit.) (Fig. 16-1)
POWER L.E.D.
STOP
Fig. 16-1
(b) Before proceeding, ensure that the Phase
Switch is in the “UP” Position. (Fig. 8-6)
(1) NOTE: Bazooka Tube will not function
if the Phase Switch is in the down
position.
(c) Using the tone controls on the radio, adjust
the balance left and right, to verify that
Bazooka Tube produces sound on both sides,
and that the sound is loudest when the
balance is set to the center. (Fig. 16-2)
Tone Control Button
Fig. 16-2
(d) Tune to a radio station or CD, and adjust
volume to a comfortable listening level. (If
the sound is distorted, adjust the gain control
knob counter-clockwise (-) until the Bazooka
Tube produces clean sound. If the unit
cannot be heard, adjust the gain control
clockwise (+) until sufficient output is
achieved.) (Fig. 16-3)
(e) Lowering the rear drivers’ seat allows easy
access to the gain control knob.
Fig. 16-3
Issue: A 08/16/04
Page 10 of 15 pages
SCION
xB
BASS TUBE (BAZOOKA®)
2004 -
Procedure
17. Clean Up
(a) If required, wipe down all applicable interior
surfaces with 3MTM Prep Solvent-70, to
remove fingerprints, etc.
(b) When cleaning with 3MTM Prep Solvent-70:
STOP
(1) Always use a clean (lint free, scratch
resistant) soft cloth (or wipe), and clean a
small area at a time ( ~ 3 ft. x 3 ft. max.).
(2) Shake Well.
STOP
(3) Apply 3MTM Prep Solvent-70 to cloth or
wipe. Do not spray cleaning solutions
directly to any vehicle surfaces.
(4) Clean surface thoroughly and wipe dry
immediately with a new clean cloth. Do
not allow cleaner to air dry.
(c) Place Care Card AND Installation
Instructions in Glove Compartment.
(d) Remove protective covers from vehicle
interior.
Issue: A 08/16/04
Page 11 of 15 pages
SCION
xB
2004 -
BASS TUBE (BAZOOKA®)
Checklist - these points MUST be checked to ensure a quality installation.
Check:
Look For:
Accessory Function Checks
Turn on Radio
Radio display turns on & sound is heard
Verify CD & Satellite Tuner (if equipped)
CD player functions & Satellite Tuner
stations are playing (if equipped)
Reception of AM/FM stations
Antenna is functioning
Bazooka Tube – Listen to Bazooka Tube to
Bazooka Tube operation
make sure it is functioning properly or by
feeling the Bazooka for vibration. Be sure
the Phase Switch is in the “UP” position.
Vehicle Function Checks
Hazard Button
Functioning Hazard Lights
HVAC
All HVAC controls function properly
Rear Window Defogger
Functioning Rear Window Defogger
Passenger Seat Belt Warning Light
Functioning Seat Belt Warning Light
Issue: A 08/16/04
Page 12 of 15 pages
SCION
xB
BASS TUBE (BAZOOKA®)
2004 -
Troubleshooting
Troubleshooting
Condition:
No sound from Bass Tube, however factory
speakers still play
Check For:
1. Is the green L.E.D. lit on the Bass Tube?
If not, check for 12 volts on pins of the Bass
Tube Connector with the ignition on. If
either pin doesn’t indicate 12 volts, check THarness connectors behind the radio.
2. Is the 14-pin Molex connector securely
connected to the Bass Tube?
3. Is the ground ring securely fastened to the
rear center Anchorage bolt?
Distorted Sound
1. Close the back hatch of the vehicle
2. Adjust the radio to a comfortable listening
level, and then turn the “gain control” knob
on the Bass Tube counter-clockwise until the
sound becomes clean.
Low Sound
1. Close the back hatch of the vehicle
2. Adjust the radio to a comfortable listening
level, and then turn the “gain control” knob
on the Bass Tube clockwise until the sound
becomes audible. Do not adjust the level too
high, as this will result in distorted sound.
Rattling Noises
Rattling will be evident in some panels at
extreme volume conditions, but make sure
you have performed the following to
minimize noise:
1. Securely tightened Mounting Hardware so
Bass Tube Bracket does not move.
Issue: A 08/16/04
Page 13 of 15 pages
SCION
xB
BASS TUBE (BAZOOKA®)
2004 -
Troubleshooting
Troubleshooting
Condition:
Check For:
Dimming Radio Lights
Dimming Radio Lights could occur when the
Bass Tube is played at high volumes.
Radio does not come on
Check to ensure that the main connector,
antenna connector, and auxiliary connector
have been correctly plugged back in.
No Sound at all
1. Is the fuse under the hood still
operational?
2. Is the battery ground reconnected?
3. Is the radio connector securely seated?
Bass Tube produces sound on the right or
the left, but not both.
Issue: A 08/16/04
Check T-Harness connections at the back of
the radio. All connectors must be securely
fastened to the correct wiring for both
channels to produce audio output.
Page 14 of 15 pages
SCION
xB
2004 -
BASS TUBE (BAZOOKA®)
Wire Harness & Radio Wiring Schematics
Wire Harness & Radio Wiring Schematics
WIRING CONNECTOR SCHEMATICS:
Harness Split
Pin No.
Wire Color
1
2
3
4
5
6
Red
White/Black
Gray/Black
Blue/White
White
Gray
Pin No.
Wire Color
1
2
3
4
5
6
7
8
9
10
11
12
13
14
Black
N/A
N/A
N/A
White
Grey
N/A
Red
Blue/White
N/A
N/A
White/Black
Grey/Black
N/A
Pin No.
Wire Color
Radio Connector
Subwoofer Connector
Harness Split Connector
Function
12 Volt Battery Connection (B+)
Left Front Speaker (-)
Right Front Speaker (-)
Remote Turn-On/Ignition (Switched+)
Left Front Speaker (+)
Right Front Speaker (+)
Subwoofer Connector
1
2
3
4
5
6
7
8
9
10
11
12
Issue: A 08/16/04
Function
Chassis Ground
N/A
N/A
N/A
Left Front Speaker (+)
Right Front Speaker (+)
N/A
12 Volt Battery Connection (B+)
Remote Turn-On/Ignition (Switched+)
N/A
N/A
Left Front Speaker (-)
Right Front Speaker (-)
N/A
Radio Connector (R4 GRAY)
Function
NO CONNECTION
NO CONNECTION
Right Front Speaker (+)
Left Front Speaker (+)
NO CONNECTION
NO CONNECTION
12 Volt Ignition Switched (B+)
12 Volt Battery Connection (B+)
Right Front Speaker (-)
Left Front Speaker (-)
Chassis Ground (B-)
Power Antenna Control (+)
Power Antenna Control (-)
Dimmer / Illumination Control (B+ variable)
Page 15 of 15 pages