1
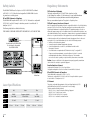
User Manual
Contents
4
9
9
10
11
11
12
12
13
13
14
15
16
16
16
17
17
17
17
18
18
19
19
20
21
21
21
21
21
21
21
Important Safety Information
Introduction
Package Contents
SHOWWX+™ HDMI Laser Pico Projector
Getting Started
Install Battery
Charge Battery
Power ON or OFF
Connect to a Video Source
How To Connect To An iPod, iPhone, or iPad
Connecting To HDMI Video Sources
Usage Guidelines
Advanced Controls
Menu Controls
Onscreen Menu
How To Adjust Brightness
How To Change Color Mode
How To Adjust Aspect Ratio
How To Adjust The Image Alignment
How To Adjust The Color Alignment
How To Reset Default Settings
How To Check Remaining Battery Life
How to Adjust The Green and Magenta Color
Troubleshooting
LED Status & Meaning
Customer Support
Register Your Product Online
Care & Maintenance
How To Clean The Window
How To Store & Transport
How To Use The Audio Jack
Important Safety Information
PLEASE REFER TO THE PRODUCT SAFETY INFORMATION GUIDE PROVIDED WITH YOUR
SHOWWX+ HDMI FOR IMPORTANT SAFETY INFORMATION.
Intended Use Statement
The SHOWWX+™ HDMI Laser Pico Projector is designed to operate with the MicroVision
specified battery and MicroVision battery charger in a normal office and home environment
within the following parameters:
» Operating Temperature: 10° - 30° C, ( 50° - 86° F)
» Storage Temperature: non-operating: - 20° - 60° C, (- 4° - 140° F) with battery
» Humidity: 10 - 85 % relative humidity (without condensation)
» Altitude: - 152 M - 4572 M (- 500 - 15,000 ft.)
Warning
Indicates a potentially hazardous situation, which
if not avoided, may result in death or serious injury
and/or property damage.
AS WITH ANY BRIGHT LIGHT SOURCE, DO NOT STARE INTO THE BEAM.
STARING INTO THE BEAM COULD CAUSE EYE DISCOMFORT AND IMPAIR VISION.
To avoid risks associated with fire and explosion:
»
»
»
»
»
»
»
»
»
Do not immerse the projector or battery in any liquid or allow either to get wet.
Use only AC adapter and battery provided by MicroVision.
Do not disassemble the battery or modify it in any way.
Do not attempt to short out the battery.
Do not expose the battery to temperatures under -20°C or above 60°C.
Do not crush the battery.
Do not overcharge or rapidly discharge the battery.
Do not dispose of the battery by incineration or fire.
Do not expose the projector or battery to direct sunlight in a closed space such
as a vehicle.
To avoid risks of other injuries:
» Do not handle a damaged or leaking battery pack.
» Do not handle a battery that has been handled in an inappropriate or dangerous manner.
To avoid risks associated with driver distraction in a moving vehicle:
» Do not use this projector in a moving vehicle in a manner that may distract the driver.
AS WITH ANY PRODUCT CONTAINING LASERS, DO NOT DISASSEMBLE THE PROJECTOR
FOR ANY REASON. DISSASSEMBLING THE PROJECTOR MAY RESULT IN HAZARDOUS LASER
RADIATION EXPOSURE.
caution
Indicates a potentially hazardous situation,
which if not avoided, may result in minor or moderate
injury and/or property damage.
EXCEPT FOR OPENING THE BATTERY DOOR AS DIRECTED IN THE USER GUIDE
TO REPLACE THE BATTERY, THERE ARE NO USER SERVICABLE PARTS INSIDE
THE PROJECTOR.
» Do not point the projected image at people, vehicles, or aircraft.
» Risk of explosion if battery is replaced by an incorrect type.
» Dispose of used batteries according to the instructions contained within this guide.
For service or repair the product must be returned to an authorized repair facility.
See Customer Support section within this Guide for details.
To avoid risks associated with environmental contamination:
To avoid risks associated with laser exposure:
To avoid risks associated with tripping and falling:
» Not recommended for use by children under 14 unless supervised by an adult.
The SHOWWX+ HDMI is not a toy.
» Position the charging cord and data cables so that they cannot be tripped over.
» Use of controls or adjustments or performance of procedures other than those
specified in this User Guide may result in hazardous laser radiation exposure.
A very small percentage of people may experience seizures or blackouts that are triggered
by exposure to light flashes or certain visual images including flashing lights or patterns
that may appear in video games or other video images. Even people who have no history
of seizures or blackouts could experience “photosensitive epileptic seizures” while watching
some video images.
Immediately stop watching projected video images and consult a physician if you experience
symptoms such as lightheadedness, altered vision, eye or face twitching, convulsions,
disorientation, confusion or momentary loss of awareness.
To avoid risks associated with hazardous voltage:
» Do not modify this product in any way.
Use only MicroVision approved replacement components.
» Do not use the AC adapter in a wet environment.
» Do not use with a damaged AC adapter. Replace damaged AC adapter prior to use.
» Dispose of all system components in accordance with applicable government regulations.
Photosensitive Seizure Warning
Taking the following precautions while watching video may help reduce
the risk of photosensitive epileptic seizures.
»
»
»
»
4
Avoid use while tired or fatigued.
Take frequent breaks.
Look away from the screen from time to time.
Sit further away from the projected image.
5
Safety Labels
Regulatory Statements
The SHOWWX+™ HDMI Laser Pico Projector is a CLASS 2 LASER PRODUCT as defined
in IEC 60825-1, 2007-03. MicroVision has designed the SHOWWX+ HDMI to be safe
for general use as a mobile projector.
FCC Declaration of Conformity
IEC and CDRH Statements of Compliance
The SHOWWX+ HDMI complies with IEC 60825-1, 2007-03. The device also complies with
21 CFR 1040.10 and 1040.11 except for deviations pursuant to Laser Notice No. 50
dated June 24, 2007.
The following safety labels are affixed at the factory.
These labels contain important safety information. Do not remove them.
Located inside the SHOWWX+ HDMI.
Do not attempt to disassemble
the SHOWWX+ HDMI.
This device complies with Part 15 of the FCC Rules. Operation is subject
to the following two conditions: (1) this device may not cause harmful interference
(2) this device must accept any interference received including interference
that may cause undesired operations. This applies to all product options.
FCC Radio Frequency Interference Statement
Note: This equipment has been tested and found to comply with the limits for a Class B digital device,
pursuant to Part 15 of the FCC Rules. These limits are designed to provide reasonable protection
against harmful interference in a residential installation. This equipment generates, uses and can
radiate radio frequency energy and, if not installed and used in accordance with the instructions, may
cause harmful interference to radio communications. However, there is no guarantee that interference
will not occur in a particular installation. If this equipment does cause harmful interference to radio
or television reception, which can be determined by turning the equipment off and on, the user is
encouraged to try to correct the interference by one or more of the following measures:
» Reorient or relocate the receiving antenna.
» Increase the separation between the equipment and receiver.
» Connect the equipment into an outlet on a circuit different from that to which
the receiver is connected.
» Consult the dealer or an experienced radio/TV technician for help. To comply with FCC
RF exposure compliance requirements, a separation distance of at least 20 cm must be
maintained between the antenna of this device and all persons. This transmitter must not be collocated or operating in conjunction with any other antenna or transmitter.
Caution: Changes or modifications to this equipment not expressly approved by manufacturer
could void the user’s authority to operate this equipment.
Canadian Compliance Statement
Complies with the Canadian ICES-003 Class B specifications.
Cet appareil numérique de la Classe B est conforme à la norme NMB-003 du Canada.
IEC and CDRH Statements of Compliance
Bottom View
CE Statement
Laser Specifications
Laser
Color
Red
Green
Blue
Laser
Type
AlGalnP
laser diode
Frequency doubled
IR laser diode
GaN
laser diode
120 mW
72 mW
50 mW
Max CW
Output
Wavelength
6
632 nm
650 nm
The SHOWWX+ HDMI complies with IEC 60825-1, 2007-03.
The device also complies with 21 CFR 1040.10 and 1040.11 except for deviations pursuant
to Laser Notice No. 50 dated June 24, 2007.
526 nm
537 nm
440 nm
This product complies with the requirements of the Low Voltage Directive 2006/95/EC
and the EMC Directive 2004/108/EC and carries the CE mark accordingly.
This device meets the following standards:
EN60950-1:2006 – Safety of Information Technology Equipment
EN60825-1:2007 – Safety of Laser Products
EN55024: 1998 +A1:2001+A2:2003 – Immunity
EN55022: 2006 – Radiated & Conducted Emissions
460 nm
7
Introduction
Regulatory Statements
Other Compliance
Some products may contain one or more of the following country marks on the Product Label,
which is located under the battery. Presence of the mark on the label indicates compliance with
the applicable regulations for that country.
Australia/New Zealand (C-tick)
Japan (PSC)
China (CCC)
Directions for recycling battery
Recycle battery in accordance with local laws. In the United States and Canada,
visit www.call2recycle.org or call 1-800-8-BATTERY (1-800-822-8837)
or 1-877-2-RECYCLE (1-877-273-2925) for the nearest recycling center.
Product Disposal
The SHOWWX+™ HDMI Laser Pico Projector should not be placed in household
waste bins. Please check local regulations for information about the disposal
of electronic products in your area.
Thank you for purchasing the MicroVision SHOWWX+™ HDMI
laser pico projector. The SHOWWX+ HDMI projects big, bright,
and colorful images that are always in focus, yet is small
enough to fit in your pocket. Connect the SHOWWX+ HDMI
to a video output-capable device to spontaneously share photos
and videos, presentations and more, in a big screen experience.
What is the PicoP® Display Engine?
The PicoP display engine is the world’s first ultra miniature
laser-based projector engine. It uses red, green and blue laser light
sources, electronics, optics, and a unique, tiny mirror-like device that
“paints” the image line-by-line on the projection surface.
Package Contents
Please make sure you have received all items included with the product.
For missing items contact customer support.
Made for iPod, iPhone, and iPad
“Made for iPod, iPhone, and iPad” mean that an electronic
accessory has been designed to connect specifically to iPod,
iPhone, or iPad, respectively, and has been certified by the
developer to meet Apple performance standards. Apple is not
responsible for the operation of this device or its compliance with safety and regulatory standards.
Please note that the use of this accessory with iPod, iPhone, or iPad may affect wireless performance.
Specifications subject to change without notice.
Copyright & Trademarks
SHOWWX+ HDMI
Rechargeable Battery
SHOWWX+ HDMI
Laser Pico Projector
©2011 MicroVision, Inc. All rights reserved. PicoP® and SHOWWX+™ are trademarks of MicroVision
Inc. iPhone, iPod, iPod classic, iPod nano, and iPod touch are trademarks of Apple Inc., registered
in the U.S. and other countries. iPad is a trademark of Apple Inc. HDMI is a registered trademark
of HDMI licensing LLC. Other trademarks are the property of their respective owners.
SHOWWX+ HDMI
Wall Charger
(US & Canada Only)
SHOWWX+ HDMI
USB Wall Charger
(EU & Other Countries)
Customer Support
To view the SHOWWX+ HDMI User Guide online go to http://www.microvision.com/showwx/hdmi/
support. For Technical Questions, service and support please visit us online at
http://www.microvision.com/showwx/hdmi/support. Please have your Serial Number and purchase
information available. You can find the Serial Number located under the battery.
Micro-USB Cable
SHOWWX+ HDMI
Cable for iPod,
iPhone, and iPad
SHOWWX+ HDMI
Micro-Micro
HDMI Cable
Register your Product Online
Registering your new MicroVision product online is quick and easy. Your registration will allow us to
serve you better over the lifetime of your product. Being a registered owner also keeps you informed
of important product notifications and helps us continue to design products that meet your needs.
Please have the Product Serial Number when you register.
http://www.microvision.com/showwx/hdmi/register
Storage Pouch
8
Quick Start Guide
Product Information Guide
(includes warranty card)
Wrist Strap
9
SHOWWX+™ HDMI Laser Pico Projector
Getting Started
Install Battery
1
2
Micro HDMI Input
Window
1
Down/Hot Key 2
Remove Battery Door
Up/Hot Key 1
1
2
2
2
Insert Battery
1
Power Button
Menu/Select Button
LED Indicators
Micro-USB/Power Input
Video Input
Wrist Strap Holder
10
3.5mm Audio Jack
3
Close Battery Door
» Make sure the projector is OFF and unplugged before replacing battery.
» Do not force the battery in. Make sure the battery + / - symbols are lined up.
11
Charge Battery
Connect to a Video Source
The SHOWWX+™ HDMI can connect to a variety of devices with video-out such as an iPad,
iPhone, iPod, tablet computer, laptop, cell phone, camera, and more. The following describes
the connectivity options available with the SHOWWX+ HDMI.
1
Plug Wall Charger Into Outlet
2
Connect To
Micro-USB/Power Input
Cable
Connect SHOWWX+ HDMI
Included
Sold Separately
SHOWWX+ HDMI
Component Cable for iPod,
iPhone, and iPad
iPod, iPhone, or iPad with
Component TV-out
Yes
Yes
SHOWWX+ HDMI MicroMicro or Micro-Standard
HDMI Cable
Any device with an HDMI
video out connection. Most
standard HDMI and Mini HDMI
to Micro cables can be used.
Yes
Micro-Micro
Yes
SHOWWX+ HDMI VGA Dock
Laptop and PC devices
No
Yes
To see compatible devices with the SHOWWX+ HDMI: http://www.microvision.com/showwx/hdmi/compatibility
3
How to Connect to an iPod, iPhone, or iPad
Orange LED: Battery charging
Green LED: Battery fully charged
Note:
» For the USB wall charger (EU & other countries) connect the USB cable to the charger
and follow the steps above.
» Allow for a minimum of 4 hours charging before first time use.
» The wall charger will not charge the battery while the SHOWWX+ HDMI is powered ON.
» The supplied battery is designed specifically for the SHOWWX+ HDMI and no other battery
should be used.
1
Power on the projector
2
Connect the cable to the projector
4
Wait to see “Ready To Use” alert
Power ON or OFF
Note: Do not have the SHOWWX+ HDMI connected to any video
device before turning ON.
Turning ON: Press and hold the
button.
The blue LED will come on and the image will appear
in about 5 seconds.
Turning OFF: Press the
3
Connect the cable to the iPod, iPhone,
or iPad (already on)
button.
Note:
Note:
» During startup the image will flash with a series of different colors. This is normal.
» A blinking Blue LED indicates the unit is starting up. A solid Blue LED indicates
the unit is ready for use.
12
5
Select Picture or Video content
and Press play on iPod, iPhone,
or iPad
» While connected to an iPod, iPhone, or iPad
the Audio Jack on the Apple device can also
be used.
» To see compatible devices with the SHOWWX+
HDMI visit http://www.microvision.com/showwx/
hdmi/compatibility
13
Connecting to HDMI Video Sources
Usage Guidelines
The SHOWWX+ HDMI can connect to a variety of devices that provide HDMI video-out.
A micro-to-micro HDMI cable is provided. HDMI-approved third party cables are available
supporting standard and mini to micro connectivity. SHOWWX+ HDMI is HDCP compliant
and as such can display rights managed (HDCP) content. To display content, if not automatic
make sure the source device has TV/Video-Out set to “On” or “Enabled”. To learn if your HDMI
video source devices is capable of TV/Video-Out and how to enable, refer to its User Guide.
To see compatible devices with SHOWWX+ HDMI visit http://www.microvision.com/showwx/
hdmi/compatibility
There are two main factors to consider when using
the SHOWWX+ HDMI.
Ambient light
» It is recommended to shut blinds, close curtains
and turn lights down to make the room dark
so the projected image looks the best.
Distance from screen
» The projector distance from the screen will impact
the appearance of the image brightness.
The closer to the screen the brighter the image will appear.
The following is a guideline of what image sizes are possible under
various lighting conditions:
1
Connect the HDMI cable to the
micro HDMI port on the projector
2
Connect the HDMI cable directly
into the HDMI output connector
on the Video-Out Device
Complete Darkness
Note: Depending on the host HDMI
connector type, may require standard,
mini or micro cable (micro provided).
Semi-Dark
Dimmed Lighting
Semi-Lit
Home / Office
3
Power on the projector
4
If not automatic, enable video
out from the source device
70”-100”
24”-36”
<12”
5
14
iPad 2 supports Video Mirroring via
optional Apple Digital Adapter (sold
separately by Apple). Connect the
SHOWWX+ HDMI using a standard
HDMI-to-Micro HDMI cable (sold
separately) to enable Video Mirroring
(what you see on the screen can be
displayed or projected) functionality.
Note:
Image diagonal is approximately equal to the distance from the projector to the screen.
15
Advanced Controls
How To Adjust Brightness
Menu Controls
The image brightness can be reduced for close distance viewing in darker environments.
The SHOWWX+ HDMI was designed as a plug-and-play device, however, some users may want
to make adjustments to the settings such as change colors, adjust aspect ratio, and adjust
brightness. The following information will help you understand how to fully operate
the SHOWWX+ HDMI.
Hot Keys
1
button to bring up the on screen menu.
Press the
2
Use the
3
Select the desired setting and press
or
buttons to navigate to BRIGHTNESS and press
The SHOWWX+ HDMI includes two hot keys to allow
the user to quickly adjust the image depending on
the type of content being shown.
How To Change Color Mode
Color Mode: Color mode can be changed without
Brilliant Colors:
button
going into the Menu screen by pressing the
button to
to change the color mode. Press the
cycle through the color modes.
Standard Colors: More accurate flesh tones and grey scales.
Gamma Mode: Gamma mode can be changed
The SHOWWX+ HDMI has 3 color modes.
Bright and vivid colors (default setting).
Inverted Colors: All colors are inverted. Useful for presentations with black text on white backgrounds.
without going into the Menu screen by pressing on
button. Press the
button to cycle through
the
the gamma modes.
1
Press the
2
Use the
Note: The Color Mode hot key also includes the
ability to invert the image. Inverting the image may
improve the readability of certain images. Also,
if the content background is predominately white,
then inverting the image (e.g., white becomes black) will extend battery life.
3
Select the desired setting and press
Onscreen Menu
The SHOWWX+ HDMI has an onscreen display to allow the user the ability to make advanced
changes to the projector. All settings changed by the user will remain even when powered off.
Brightness:
High (default) / Medium / Low
Color Mode:
Brilliant (default) / Standard / Inverted / Gamma
Aspect Ratio:
Widescreen (default) / Normal / Zoom
System:
Image Alignment / Color Alignment / Properties / Reset Defaults
button to bring up the on screen menu.
or
buttons to navigate to COLOR MODE and press
.
to accept.
How To Adjust Aspect Ratio
The image may appear cropped or skinny. The aspect ratio may be different
from the video source device.
1
Press the
2
Use the
3
Select the desired setting and press
button to bring up the on screen menu.
or
buttons to navigate to aspect ratio and press
.
to accept.
How To Adjust The Image Alignment
The image may appear to be slightly fuzzy. Adjustment of the image alignment
may be necessary.
1
16
.
to accept.
button to bring up the on screen menu.
Press the
2
Use the
3
Navigate to IMAGE ALIGNMENT and press
4
Press the
or
or
buttons to navigate to SYSTEM and press
.
.
buttons to adjust the image until all vertical lines appear sharp and clear.
17
How To Adjust The Color Alignment
How to Check Remaining Battery Life
Users can adjust horizontal or vertical alignment of each individual color
(red, green, and blue).
Follow these instructions to view how much battery life is remaining.
1
button to bring up the on screen menu.
Press the
1
Press the
2
Use the
or
buttons to navigate to SYSTEM and press
3
Use the
or
buttons to navigate to COLOR ALIGNMENT and press
4
An image of a vertical and horizontal crossed in the middle will appear
in the center of the screen.
5
or
buttons to select the desired color (Red Adjust, Green Adjust,
Use the
.
Blue Adjust) to adjust and press
The image may appear to have green shadows or a magenta color when it should be white.
Adjustment of the Green/Magenta color may be necessary
6
or
buttons to select either HORIZONTAL or VERTICAL ADJUSTMENT
Use the
.
and press
Auto Adjustment
7
or
buttons to move the selected color until a solid white line is visible
Use the
either vertically or horizontally.
button to bring up the on screen menu.
.
.
2
Use the
or
buttons to navigate to SYSTEM and press
3
Use the
or
buttons to navigate to PROPERTIES and press
4
Use the
or
buttons to navigate to BATTERY INFORMATION and press
.
.
How to Adjust The Green and Magenta Color
1
Turn on the projector and let it run for 5 minutes.
2
Press the
button to bring up the on-screen menu.
Note:
3
Use the
or
buttons to navigate to SYSTEM and press
» When adjusting colors HORIZONTALLY use the Vertical line (top-bottom) as the reference.
» When you exit the configuration menu after image alignment it will take 10 seconds
for the normal image to appear.
4
Use the
or
buttons to navigate to GREEN/MAGENTA BAL and press
5
Use the
or
buttons to navigate to AUTO and press
.
.
Vertical magenta lines will appear. The lines will automatically adjust to white.
Once adjustment is done, the splash screen will appear after about 10 seconds.
To reset all user selectable settings to factory defaults.
Manual Adjustment
1
Press the
2
Use the
or
buttons to navigate to SYSTEM and press
3
Use the
or
buttons to navigate to RESET DEFAULTS and press
4
Press the
button to bring up the on screen menu.
buttons to select YES and press
.
Note:
How To Reset Default Settings
or
.
.
.
1
Follow steps 1-4
2
or
buttons to navigate to MANUAL PATTERN or MANUAL VIDEO
Use the
.
and press
.
Manual Pattern: A grid image will appear. Manual Video: Requires content from a video
source device. Use of a photo when making adjustments is recommended.
18
3
or
buttons to adjust the grid pattern until all lines appear completely Use the
white. Or, adjust until all green shadows or magenta highlights are gone from the photo.
4
button to confirm. After 10 seconds of no activity, the splash screen
Press the
will reappear.
19
Troubleshooting
LED Status & Meaning
Problem
Cause
Solution
LED Status
Meaning
The projector does
not turn on.
Battery not inserted correctly.
Battery not charged.
Make sure the battery is correctly inserted.
Make sure the battery is fully charged.
Solid Blue
SHOWWX+ is powered on
Blinking Blue
SHOWWX+ is powering up
Solid Orange
Battery is charging
Solid Green
Battery is fully charged
Blinking Orange
Battery is low
Blinking Red
Temporary problem
Solid Red
System failure
The projector colors look
incorrect.
Different Color Mode may be
selected.
Change to preferred Color Mode.
The projector randomly turns
off but the Blue LED stays on.
The projector may be out of
the recommended operating
range.
Make sure the projector is well ventilated and
within the operating temperature range. Turn off
for 5 minutes and restart.
Not securely connected,
Make sure cable is securely connected at both
ends and a “Ready to Use” message appears
on the projector.
Not working with my iPod,
iPhone, or iPad
- OR –
No TV-out signal detected
Make sure you have pressed the play
button on the videos or picture controls.
Customer Support
The projector won’t turn off or
on and the Blue LED stays on.
System is frozen.
Press and hold the Power button for 20 seconds.
If this does not work, remove battery.
Then re-insert and turn on.
I can’t connect to my laptop.
SHOWWX+ HDMI VGA Dock
sold separately.
Purchase the SHOWWX+ HDMI VGA Dock.
The projector doesn’t work
with my cell phone.
Not all cell phones have
HDMI video out capabilities.
Ensure your cell phone has HDMI connectivity
and refer to your cell phone.
The image looks a little fuzzy.
Debris on Window,
Clean the Window,
- OR -
-OR-
Image is misaligned.
Adjust Image Alignment.
The green LED keeps blinking
while charging.
The battery is not correctly
inserted in the SHOWWX+
HDMI.
Make sure battery is correctly inserted
into the SHOWWX+.
The red LED is blinking.
Out of operating range.
Temporary problem.
Turn projector off. Remove battery. Re-insert
and power on.
Battery doesn’t charge.
Battery may not be capable
of holding a charge.
Install new battery.
The red LED is constantly on
even after trying to restart.
System failure.
Contact Customer Support.
Part of the image has a green
or magenta shadow.
Green or Magenta color out
of alignment.
Adjust the Green and Magenta color alignment.
I am not getting Audio
on my Playbook when
connected to the projector.
To enable audio you will need
to ensure audio settings
are correct.
On the Playbook home screen, tap on the gear
symbol (settings key) in top right corner. Select
HDMI key from side menu. Ensure the HDMI audio
key is set to Off.
Note: Do not attempt to use solvents or other harsh chemicals as it may damage the window.
My video is not showing all of
what I see on the Playbook.
Need to adjust the aspect
ratio.
On the Playbook home screen, tap on the gear
symbol (settings key) in top right corner. Select
HDMI and change aspect ratio to Fill.
How to Store & Transport
How to Use the Audio Jack
I am not getting audio on my
Android smart phone.
HDMI manager may require
adjusting or your device does
not support audio routing.
Check the HDMI manager on your device to ensure
HDMI audio is set correctly. May require use of
external speakers or headset (3.5mm jack),
or compatible Bluetooth speakers.
Proper care should be taken to safely store
and transport the projector. Please use the
included storage pouch. Do not drop the
SHOWWX+ HDMI or spill liquids on it.
The audio jack on the SHOWWX+ HDMI works
only when the Audio signal is combined with
the Video signal. The Audio Jack is for output
only.
20
For Technical Questions, service and support please visit us online at
http://www.microvision.com/showwx/hdmi/support Please have your Serial Number
and purchase information available. You can find the Serial Number located under the battery.
Register your Product Online
Registering your new MicroVision product online is quick and easy. Your registration will allow
us to serve you better over the lifetime of your product. Being a registered owner also keeps
you informed of important product notifications and helps us continue to design products that
meet your needs. Please have the Product Serial Number when you register.
http://www.microvision.com/showwx/hdmi/register
Care & Maintenance
How To Clean The Window
Fingerprints and other debris may impact the image quality.
Keep the window clean for best image quality.
1
Apply a non-abrasive camera lens cleaner to a soft, dry cloth.
2
Lightly wipe the cleaning cloth over the window until clean.
Make sure cleaning cloth is free of dust or debris to avoid scratching the window.
21
MicroVision Limited Warranty
MicroVision warrants that the following Products will be
free of defects in material and workmanship under normal
use for the period stated below beginning on the date
of purchase by the original purchaser (“Warranty Period”):
Product and Warranty Period
SHOWWX+ HDMI Laser Pico Projector
One (1) year
SHOWWX+ HDMI Accessories
(including battery, AC adapter, cables)
Ninety (90) days
If a valid warranty claim is received by MicroVision or its
authorized service representative during the Warranty
Period for a particular product MicroVision will, at its option,
either repair the Product, replace the Product or refund
the purchase price paid by purchaser for the defective
Product. Repaired or replaced parts or Product may include
new, reconditioned or re-manufactured parts and
equipment, at MicroVision’s option, that are functionally
equivalent to the original Product. Repair or replacement
of any parts or equipment does not extend the period
of warranty provided for herein. Such repair, replacement
or refund shall be purchaser’s sole remedy in the event
of MicroVision’s breach of this limited warranty.
Limitations and Exclusions: MicroVision does not warrant
that the Product or associated software will run error free
or without interruptions. MicroVision does not warrant that
the Product will work with any or all third party products.
MicroVision is not liable for loss of data, loss of profit,
cost to cover, indirect, incidental or consequential
damages. This limited warranty does not apply: (1) if any
non-conformance in the Product is caused in whole or
in part by; accident, immersion in water, neglect, misuse,
alteration, modification, or enhancement of the Products
(2) to cosmetic damages such as scratches (3) to operation
outside of the environmental parameters outlined in the
Product Information Guide or User Guide (4) to use of the
Product for other than the specific purpose for which it was
designed (5) to damage caused by service performed by
anyone other that an authorized MicroVision service provider
(6) to any use of the Product that is not in accordance with
the Product Information Guide or User Guide (7) to other
misuse or abuse of the Product. MicroVision will have
no obligations under this limited warranty for any
non-conformance of the Product as set forth above.
To take advantage of this warranty
or to find the nearest MicroVision
authorized service center go to
http://www.microvision.com/showwx/hdmi/support
TO THE EXTENT PERMITTED BY LAW, THIS WARRANTY AND
THE REMEDIES SET FORTH HEREIN ARE EXCLUSIVE AND
IN LIEU OF ALL OTHER WARRANTIES, REMEDIES AND
CONDITIONS, WHETHER ORAL OR WRITTEN, STATUTORY,
EXPRESS OR IMPLIED. AS PERMITTED BY APPLICABLE LAW,
MICROVISION SPECIFICALLY DISCLAIMS ANY AND ALL
STATUTORY OR IMPLIED WARRANTIES, INCLUDING, WITHOUT
LIMITATION, WARRANTIES OF MERCHANTABILITY OR FITNESS
FOR A PARTICULAR PURPOSE. IF MICROVISION CANNOT
LAWFULLY DISCLAIM STATUTORY OR IMPLIED WARRANTIES
THEN TO THE EXTENT PERMITTED BY LAW, ALL SUCH
WARRANTIES SHALL BE LIMITED IN DURATION TO THE
DURATION OF THE EXPRESS WARRANTY AND TO THE REPAIR
OR REPLACEMENT SERVICE AS DETERMINED BY MICROVISION
IN ITS SOLE DISCRETION.
FOR CONSUMERS, WHO ARE COVERED BY CONSUMER
PROTECTION LAWS OR REGULATIONS IN THEIR COUNTRY
OF PURCHASE OR, IF DIFFERENT, THEIR COUNTRY OF
RESIDENCE, THIS WARRANTY IS PROVIDED IN ADDITION
TO ALL RIGHTS AND REMEDIES PROVIDED BY SUCH
CONSUMER PROTECTION LAWS AND REGULATIONS. THIS
WARRANTY DOES NOT EXCLUDE, LIMIT OR SUSPEND ANY
RIGHTS OF CONSUMERS ARISING OUT OF NONCONFORMITY
WITH A SALES CONTRACT. SOME COUNTRIES, STATES AND
PROVINCES DO NOT ALLOW THE EXCLUSION OR LIMITATION
OF INCIDENTAL OR CONSEQUENTIAL DAMAGES OR ALLOW
LIMITATIONS ON HOW LONG AN IMPLIED WARRANTY OR
CONDITION MAY LAST, SO THE LIMITATIONS OR EXCLUSIONS
DESCRIBED HEREIN MAY NOT APPLY TO YOU. THIS WARRANTY
GIVES YOU SPECIFIC LEGAL RIGHTS, AND YOU MAY ALSO
HAVE OTHER RIGHTS THAT VARY BY COUNTRY, STATE OR
PROVINCE. THIS LIMITED WARRANTY IS GOVERNED BY AND
CONSTRUED UNDER THE LAWS OF THE COUNTRY IN WHICH
THE PRODUCT PURCHASE TOOK PLACE.
All costs associated with shipment to MicroVision for
warranty service, including but not limited to freight,
duties, insurance and customs fees are purchaser’s
responsibility. MicroVision will pay the freight costs
(duties, insurance, customs, taxes, VAT and any other
fees are purchaser’s responsibility) associated with the
return shipment to purchaser. The method of shipment
will be at MicroVision’s discretion.
For Technical Questions, Service and Support
please contact MicroVision at:
Phone: 1-866-333-3542
(Monday through Friday 6:00am PST – 5:00pm PST)
Email: [email protected]
6222 185th Avenue NE
Redmond, WA 98052 USA
microvision.com
Model Number: M-1612-A
Copyright & Trademarks
©2011 MicroVision, Inc. All rights reserved.
PicoP® and SHOWWX+™ are trademarks of MicroVision Inc.
iPhone, iPod, iPod classic, iPod nano, iPod touch and iPad are trademarks
of Apple Inc., registered in the U.S. and other countries.
HDMI is a registered trademark of HDMI licensing LLC.
DA0131291-001