1
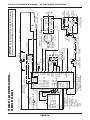
FOR SERVICE TECHNICIAN ONLY - DO NOT REMOVE OR DESTROY
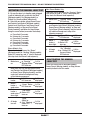
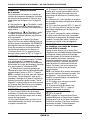
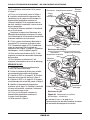
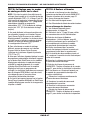
Main Winding:
Lt. Blue Wire in Back
and Bare Copper Wire
5 1
26 4 3
Start
Winding:
Lt. Blue
Wire in
Back
and Bare
Copper
Wire
Lt. Blue
Wires
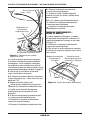
Belt Switch Pulley
5 1
26 4 3
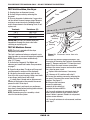
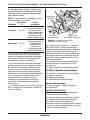
6. Remove the bare copper wire terminal from
pin 5 of black drive motor switch. See figure 8.
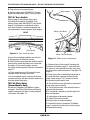
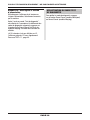
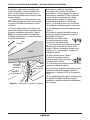
Belt Switch
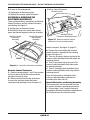
Figure 9. Checking the belt switch.
Figure 8. Main and start winding measure points.
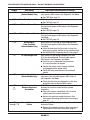
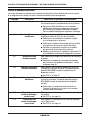
7. Using figure 8, check for the resistance values
of the motor’s Main and Start winding coils as
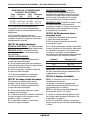
shown in the following table:
NOTE: Main and Start winding coils must be
checked at the motor.
Resistance
Contact Points
Winding
Ω
of Measurement
Lt. blue wire in back at
pin 4 and bare copper
MAIN
3.3–3.6 wire terminal removed
from pin 5 of black
drive motor switch
Lt. blue wire in back at
pin 4 and bare copper
START
2.7–3.0
wire terminal on
pin 3 of black drive
motor switch
If the resistance at the motor is correct, there
is an open circuit between the motor and machine
control electronics. Check for failed belt switch.
If the Start winding resistance is much
greater than 3 Ω, replace the motor.
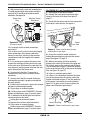
8. Check the belt switch by measuring resistance
between the two light blue wires, as shown in
figure 9, while pushing up the belt switch pulley.
If the resistance reading goes from infinity
to a few ohms as pulley arm closes the switch,
belt switch is OK. If not, replace the belt switch.
If belt switch is OK and there is still an open
circuit, check and repair the wiring harness.
9. Door Switch problems can be uncovered by
following procedure under DIAGNOSTIC: Door
Switch, page 3; however, if this was not done,
the following can be done without applying power
to the dryer. Connect an ohmmeter across P8-3
(neutral, white wire) and P8-4 (door, tan wire).
With the door properly closed, the ohmmeter
should indicate a closed circuit (0–2 Ω).
If not, replace the door switch assembly.
TEST #4 Heater
This test is performed when either of the
following situations occur:
✔ Dryer does not heat
✔ Heat will not shut off
Dryer does not heat:
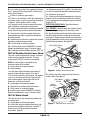
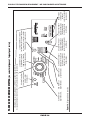
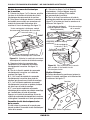
Locate the components using figure 10, page 15.
ELECTRIC DRYER:
1. Unplug dryer or disconnect power.
2. Remove the toe panel to access the thermal
components.
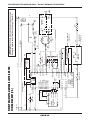
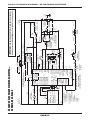
3. Using an ohmmeter and referring to the wiring
diagram, measure the resistance from the red
wire terminal at the thermal cut-off to the red
wire terminal at the heater.
If the resistance is about 10 Ω, go to step 5.
If an open circuit is detected, go to step 4.
4. Visually check the wire connections to the
thermal cut-off, high limit thermostat, and heater.
If connections look good, check for continuity
across each of these components.
PAGE 14