1
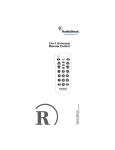
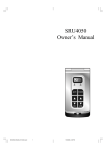
Thank you for purchasing a Philips Magnavox 3 device universal remote control. This universal remote control will operate
your Television,Video Cassette Recorder, and Cable Converter
Box. Before you can use your new remote control, you will
need to program it to operate the specific components you
wish to control. This remote features:
•
Channel Scan, a convenient way to "channel surf"
by scanning channels.
REM110
Universal Remote
•
Auto Scan code search to help program remote
control for a variety of components, including
older/discontinued models.
•
Built-in Sleep Timer.
•
Controls for basic functions, including Power,
Channel Selection,Volume, Play and Record.
KEYS AND FUNCTIONS
2
1
5
8
3
4
4
7
6
3
9
9
11
10
12
12
14
13
2
1 Red Indicator Light
9 Keypad
The Red Indicator Light blinks
to show that the remote control is working and also provides feed back during programming sequences.
Use the keypad (0-9) to
directly enter in channels (for
example, 09 or 31). The keypad is also used for all programming sequences, such as
entering in your programming
codes.
2 Component Keys
Press TV,VCR or CBL once
to select a home entertainment component to control.
10 SLEEP Key
Press SLEEP to activate your
TV’s internal sleep timer (not
available for all TVs) or to program timer.
3 CH Keys
Use CH+ (or CH-) to select
the next higher (or lower)
channel for the selected home
entertainment component.
11 ENTER
Use ENTER once after
entering channel numbers on
some TV models.
4 VOL Keys
Use VOL+ (or VOL-) to
raise (or lower) the sound
volume.
12 VCR Transport Keys
Use the VCR Transport Keys
to control your VCR. Press
REC twice to record a tape.
5 POWER Key
Press POWER once to turn
on or off the selected home
entertainment component.
13 TV/VCR
Press TV/VCR once to view
VCR playback or TV through
the VCR.
6 MUTE Key
Press MUTE once to turn
sound off or on.
14 SCAN Key
Press SCAN once to change
channels every 3 seconds.
Press it again to stop the scan.
7 LAST Key
Press LAST once to recall
the last channel.
8 SET Key
Use SET for all programming
sequences.
SETTING UP YOUR REMOTE CONTROL
Before using your new remote control, you will need to obtain and
install new batteries, as described on the next page. Then you’ll also
need to program the remote control with the correct code numbers
for your specific components. See instructions starting on page 4.
Replacement and Code Saver
When the batteries need replacing the remote control will stop working and will require two (2) new "AA" alkaline batteries for continued
operation. Once you remove the old batteries, program settings and
codes will be saved for 10 minutes, allowing adequate time to insert
new ones.
However, if you do not replace the batteries within the allotted time
(e.g., 10 minutes), you will have to reprogram the remote control.
PROGRAMMING YOUR REMOTE CONTROL
Philips/Magnavox Components
The remote control can control up to three different components and
is already pre-programmed for use with newer Philips/Magnavox
audio/video equipment. Unless you want to change a factory setting,
skip the programming instructions and simply start using your new
remote control.
Programming Other Components
To control component brands other than Philips/Magnavox, you’ll need
to perform the following steps to manually program the remote with
codes listed under Manufacturer’s Codes on pages 23 through 28. Or
as an alternative, you can use the Auto Scan feature, on page 5, to program your component codes.
The following chart lists the remote component keys and what type of
device each key will control:
Key
Programmed to Control
TV
TV
VCR
VCR
CBL
Cable Box
IMPORTANT: Please completely read and review the following
steps before proceeding. We recommend highlighting the codes (starting on page 23), for the brands you wish to program or writing them
down in the supplied chart.
Setup Codes for My components
TV
VCR
CBL
ABOUT BATTERIES
Note: The remote requires two (2) new "AA" alkaline batteries (not
supplied). Do not mix old and new batteries or mix alkaline with manganese-type batteries.
Installing Batteries
1. On the back of the remote control,
push the tab and lift the battery compartment cover off.
1
2. Match the + and – marks on the
batteries to the + and – marks in the
battery case and insert two (2) "AA"
alkaline batteries.
3. Press the battery cover back into
place. The tab should click when the
cover is locked.
3
___
___
___
___
___
___
___
___
___
To Manually Program the Remote Control:
1.
Manually turn on a component (e.g.,TV,VCR, etc.) and, if
applicable, insert media (e. g., cassette).
2.
On the remote control, press a component key once
(e.g., TV,VCR,CBL).
3.
Press and hold SET (approximately 5 seconds) until the
red light blinks twice, then release SET.
4.
Enter the first four-digit code for your brand of component. If performed correctly, the red light will blink
twice.
5.
Aim the remote control at the component and press
POWER ONCE. It should turn off. If it does not
respond, repeat steps 2 and 3, trying each code for your
brand until you find one that works. If it still does not
work, try using Auto Scan (see below) on how to program your component.
6.
Repeat steps 1 through 5 for each component you want
to program into the remote control.
2
4. Test the unit by pressing POWER
and any Component key (e.g., TV,
VCR, CBL). If the batteries are
inserted correctly the red indicator
light will blink once.
___
___
___
NOTES: Press each key within 10 seconds of the previous entry.
Otherwise, the remote control will exit the programming mode.
Battery Saver
The remote has a Time Out feature that will automatically deactivate
the remote control if a key is depressed for more than 30 seconds.
This feature will help conserve the battery life should your remote
control get stuck in a place where keys remain depressed (e.g.,
between the sofa cushions).
3
If you press SET at any time (except during step 3), the remote control will exit the programming mode without saving your entries. You
will have to start with step 1 to begin programming again.
4
Programming With Auto Scan
Punch Through
If your component does not respond to the remote control after trying all codes listed for your brand, or if your brand is not listed at all,
try searching for your code using Auto Scan. For example, to search
for a code for a TV:
1.
On the remote control, press TV once.
The VCR Transport keys (e.g., REW, PLAY, FFWD, REC, STOP,
AND PAUSE) are set at the factory to control the VCR even if TV or
CBL is the selected mode. In other words,VCR control "punches
through" regardless of what mode is on. Moreover, you do not have to
press VCR before pressing the mode key.
2.
Press and hold SET until the red light blinks twice, then
release SET.
Sleep Feature
3.
Aim the remote control at the TV and press SCAN. The
red light will blink twice.
4.
Continue aiming the remote control at the TV (which
may take up to 5 minutes) until it turns off. Immediately
press any key except VOL-, SCAN, or SET.
If SCAN is pressed again after any key stops Auto Scan, the remote
will continue Auto Scan of the next ID from where it stopped.
If you have passed by the code that turns off the TV, press VOL- one
or more times until the TV turns on again.
5.
To lock in the code and exit Auto Scan, press and release
SET the red light will blink twice.
6.
To search for codes of other components, repeat steps 2
through 5, but substitute the appropriate key (e.g.,VCR,
CBL) for the (VCR or Cable) component you are searching for.
NOTES: In the search mode, the remote will send IR (infrared)
codes from its library to the selected device, starting with the most
popular code first.
Checking the Auto Scan Codes
If you have set up the remote control using Auto Scan, you can now
find out which four-digit code is operating your component:
1.
On the remote control, press a component key once
(e.g., TV,VCR, CBL).
2.
Press and hold SET until the red light blinks twice, then
release SET.
3.
Enter 9-9-0. The red light will blink twice.
4.
To view the code for the first digit, press 1 once. Wait
3 seconds, count the red light blinks (e. g., 3 blinks = 3)
and write down the number.
NOTE: If a code digit is "0" , the red light will not blink.
5.
Repeat step 4 three more times for remaining digits. Use
2 for the second digit, 3 for the third digit and 4 for the
fourth digit.
6.
To find codes of other components, repeat steps 1
through 5, but substitute the appropriate key (e.g., VCR
or CBL) for the component you are checking. As
before, write down each four-digit code.
Press SLEEP key to activate your component’s internal sleep timer.
(May not be available for all components.) If the component does not
have a sleep function, the first press of the SLEEP key activates the
remote’s built-in sleep timer. Timer can be set to a maximum of 90
minutes.
To Set the Remote’s Built-in Timer
1.
Press SLEEP key once, 15 minute timer is set. Red light
blinks once.
2.
Additional key presses within 10 seconds will increase
the timer value in 15 minute increments up to a maximum of 90 minutes. For each press of the SLEEP key,
the red light will blink to indicate how many 15 minute
increments have been programmed, e.g., one blink for
first press, two blinks for the second press, etc. Sleep
timer activates 10 seconds after the last press of the
SLEEP key. The red light will blink once every 15 seconds to indicate that the timer is running.
NOTE: Once the sleep timer is running, the sleep timer is automatically canceled if any other key is pressed. The remote IR must be
pointed to the component to turn off component when timer ends.
To Activate Built-in Sleep Timer if component has
Sleep function
1.
On the remote control, press a component key once
(e.g., TV,VCR,CBL).
2.
Press and hold SET until the red light blinks twice, then
release SET.
3.
Enter 9-7-0. The red light will blink twice.
4.
Follow instructions above to Set Timer.
To reset to component Sleep function follow steps 1 through 3 above.
At the end of step three, the red light will blink four times to indicate
the remote is reset to component Sleep function.
ABOUT OTHER FEATURES
Volume Lock
The remote control is set at the factory to control the volume independently while in the TV,VCR, and CBL modes.
To control the volume from one mode (e. g., TV) while in another
mode (e.g., VCR or CBL), perform the instructions below to lock the
volume setting.
1.
On the remote control, press TV once.
2.
Press and hold SET until the red light blinks twice, then
release SET.
3.
Press VOL+. The red light will blink twice.
5
6
QUICK FEATURES SETUP GUIDE
TROUBLESHOOTING
This guide is provided here for your convenience as a quick reference for performing remote control sequences.
PROBLEM:
SOLUTION:
Red Indicator Light does not
blink when you press a key.
Replace the batteries with two
(2) "AA" alkaline batteries (see
Page 4).
The VOL+,VOL- and MUTE
keys are not functional.
Make sure that the volume control is locked to a component
that has volume capabilities and is
programmed into the remote
control.
Red Indicator Light blinks when
you press a key, but home entertainment component does not
respond.
Make sure you are aiming the
remote control at your home
entertainment component and
that you are within 15 feet of the
component you are trying to
control.
The remote control does not
control home entertainment
components or commands are
not working properly.
Try all listed codes for the component brand being set up. Make
sure all components can be operated with an infrared remote
control.
CH+, CH- and LAST do not
work for your RCA TV.
Due to an RCA design (19831987), only the original remote
control will operate these functions.
Changing channels does not
work properly.
If original remote control
required pressing ENTER to
change channels, to change channels, press ENTER on the
remote after entering a channel
number.
Tried Auto Scan and still could
not find a working code.
Try Auto Scan again after clearing
out the component key as follows: Press and hold SET until
Red Light blinks twice, then
release. Next enter 9-9-2. Then
press and release the component
key to be cleared twice.
Component Setup
# # # #
x2
x2
Turn on
component
(e.g., TV).
Press component
key once
(e.g., TV).
1
Press SET
until Red Light
blinks twice;
release SET.
2
Enter 4-digit code
for your brand;
Red Light blinks
twice after last #.
3
Press POWER
once; if no
response,
repeat steps
with next code.
4
5
Auto Scan
x2
Turn on
component
(e.g., TV).
x2
Press component
Press SET
key once
until Red Light
(e.g., TV).
blinks twice;
release SET.
* NOTE: Not VOL-, SCAN, or SET.
1
2
Aim remote at
Press SET
component; press until Red Light
SCAN once. When blinks twice;
off, press any
release SET
key* to stop.
to lock code.
3
4
5
Code Verification
x2
x2
Press component
key once
(e.g., TV).
1
Press SET
until Red Light
blinks twice;
release SET.
Enter 9-9-0;
the Red Light
will blink twice.
2
3
Press 1 once for 1st digit.
Wait 3 sec. and count blinks.
Number of blinks equals
value of code digit.
Repeat with 2, 3, and 4.
4
Volume Lock
x2
Press component*
key once (e.g., CBL).
* NOTE: Component must have
volume capabilities.
1
Press SET
until Red Light
blinks twice;
release SET.
2
Press VOL+ once.
Volume now controlled
through component
selected in step 1.
3
NOTE: To clear all set up codes and restore functions to Default,
press SET until red light blinks twice, release SET and enter 9-8-1.
Caution:When this clear feature is performed, please note that all of
your set up codes will be reset to the default codes and you will need
to reprogram components.
7
8
SETUP CODES FOR TELEVISION
CÓDIGOS DE PROGRAMACIÓN PARA TELEVISIÓN
CODES DE PROGRAMMATION DU TÉLÉVISEUR
AOC
Admiral
Aiko
Akai
Alaron
America Action
Anam
Audiovox
Baysonic
Belcor
Bell & Howel
Bradford
Brockwood
Broksonic
CXC
Candle
Carnivale
Carver
Celebrity
Cineral
Citizen
Concerto
Contec
Craig
Crosley
Crown
Curtis Mathes
0048, 0059
0122, 0492
0121
0059
0208
0209
0209
0121, 0209, 0480
0209
0048
0045, 0183
0209
0048
0265, 0492
0209
0059, 0085
0059
0083
0029
0121, 0480
0059, 0085, 0089, 0121
0085
0209
0209
0083
0209
0045, 0059, 0076, 0080, 0083,
0085, 0089, 0122, 0174, 0183,
0195, 0480
0048, 0121, 0480
0048
0174
0046, 0048
0029
0048, 0183, 0207, 0208, 0209,
0265, 0492
0059
0183
0208
0200, 0208, 0209
0209
0050, 0076, 0080, 0122, 0207,
0480
0046, 0048, 0059
0048, 0059, 0085, 0207
0082, 0085
0208, 0209
0207
0208
0083
0209
0045, 0085, 0174
0083
Daewoo
Daytron
Denon
Dumont
Electroband
Emerson
Envision
Fisher
Fujitsu
Funai
Futuretech
GE
Gibralter
GoldStar
Gradiente
Grunpy
Hallmark
Harley Davidson
Harman/Kardon
Harvard
Hitachi
Infinity
9
Inteq
JBL
JCB
JVC
KEC
KTV
Kenwood
LG
LXI
Logik
Luxman
MGA
MTC
Magnavox
Majestic
Marantz
Matsushita
Megatron
Memorex
Midland
Minutz
Mitsubishi
Motorola
Multitech
NAD
NEC
NTC
Nikko
Onwa
Optimus
Optonica
Orion
Panasonic
Penney
Philco
Philips
Pilot
Pioneer
Portland
Prism
Proscan
Proton
Pulsar
Quasar
RCA
Radio Shack
Realistic
Runco
SSS
Sampo
0046
0083
0029
0082
0209
0059, 0209
0048, 0059
0085
0076, 0083, 0183, 0185, 0207
0045
0085
0048, 0059, 0179, 0207
0048, 0059, 0085, 0089
0059, 0083*, 0208
0045
0059, 0083
0279
0174, 0207
0045, 0085, 0179, 0183, 0207,
0279, 0492
0046, 0076, 0080
0050
0048, 0122, 0179, 0207
0122
0209
0185, 0195, 0207
0048, 0059, 0085
0121
0059, 0121, 0207
0209
0183, 0195, 0279
0122
0208, 0265, 0492
0080, 0279
0048, 0050, 0059, 0076, 0080,
0085, 0089, 0185, 0207
0048, 0059, 0083, 0174, 0492
0083
0048, 0059
0195
0048, 0121
0080
0076
0207
0046, 0048
0080, 0279
0048, 0076, 0080, 0119, 0122,
1476
0048, 0059, 0076, 0085, 0183,
0207, 0209
0048, 0059, 0085, 0183, 0207,
0209
0046, 0059
0048, 0209
0059
* Default code
10
Samsung
Sansei
Sansui
Sanyo
Scimitsu
Scotch
Scott
Sears
Semivox
Semp
Sharp
Shogun
Signature
Sony
Soundesign
Squareview
Starlite
Supreme
Sylvania
Symphonic
TMK
Tandy
Technics
Technol Ace
Techwood
Teknika
Telefunken
Toshiba
Vector Research
Victor
Vidikron
Vidtech
Wards
White Westinghouse
Yamaha
Zenith
0048, 0059, 0085, 0089, 0207
0480
0492
0183
0048
0207
0048, 0207, 0208, 0209, 0265
0076, 0083, 0085, 0183, 0185,
0200, 0207, 0208
0209
0185
0122
0048
0045
0029
0207, 0208, 0209
0200
0209
0029
0059, 0083
0200
0085, 0207
0122
0080, 0279
0208
0080, 0085
0045, 0048, 0083, 0085, 0089,
0121, 0179, 0208, 0209
0085
0089, 0183, 0185
0059
0082
0083
0048, 0207
0045, 0048, 0050, 0059, 0083,
0085, 0207, 0208
0492
0048, 0059
0045, 0046, 0121, 0492
SETUP CODES FOR VCR
CÓDIGOS DE PROGRAMACIÓN PARA VIDEOCASETERA.
CODES DE PROGRAMMATION DU MAGNÉTOSCOPE.
Admira
Adventura
Aiko
Aiwa
America Action
American High
Asha
Audiovox
Beaumark
Bell & Howell
Broksonic
CCE
Calix
0077, 0238
0029
0307
0029, 0066
0307
0064
0269
0066
0269
0133
0031, 0150, 0213, 0238
0101, 0307
0066
11
Canon
Carver
Cineral
Citizen
Colt
Craig
Curtis Mathes
Cybernex
Daewoo
Denon
Dynatech
Electrohome
Electrophonic
Emerex
Emerson
Fisher
Fuji
Funai
GE
Garrard
GoldStar
Gradiente
HI-Q
Harley Davidson
Harman/Kardon
Harwood
Hitachi
Hughes Network Systems
JVC
KEC
KLH
Kenwood
Kodak
LXI
Lloyd’s
Logik
MEI
MGA
MGN Technology
MTC
Magnasonic
Magnavox
Magnin
Marantz
Marta
Matsushita
Memorex
Minolta
Mitsubishi
Motorola
Multitech
NEC
Nikko
* Default code
0064
0110
0307
0066, 0307
0101
0066, 0076, 0101, 0269, 0300
0064, 0089, 0191
0269
0074, 0307
0071
0029
0066
0066
0061
0029, 0031, 0066, 0072, 0150,
0213, 0238, 0307
0076, 0133
0064
0029
0064, 0077, 0089, 0269
0029
0066
0029
0076
0029
0110
0101
0029, 0071
0071
0096
0066, 0307
0101
0096
0064, 0066
0066
0029
0101
0064
0072, 0269
0269
0029, 0269
0307
0029, 0064, 0068, 0110*
0269
0064, 0110
0066
0064, 0191
0029, 0064, 0066, 0068, 0076,
0077, 0133, 0238, 0269, 1191
0071
0072, 0077, 0096
0064, 0077
0029, 0101
0096, 0133
0066
12
Noblex
Olympus
Optimus
Orion
Panasonic
Penney
Pentax
Philco
Philips
Pilot
Pioneer
Profitronic
Proscan
Protec
Pulsar
Quasar
RCA
Radio Shack
Radix
Randex
Realistic
Runco
STS
Samsung
Sanky
Sansui
Sanyo
Scott
Sears
Semp
Sharp
Shintom
Shogun
Singer
Sony
Sylvania
Symphonic
TMK
Teac
Technics
Teknika
Thomas
Toshiba
Totevision
Unitech
Vector
Video Concepts
Videosonic
Wards
White Westinghouse
XR-1000
Zenith
0269
0064
0066, 0077, 0133, 0191, 1191
0031, 0213, 0238
0064, 0191, 0254, 1191
0064, 0066, 0071, 0269
0071
0064, 0238
0064, 0110
0066
0096
0269
0089
0101
0068
0064, 0191, 1191
0064, 0071, 0077, 0089, 0269
0029
0066
0066
0029, 0064, 0066, 0076, 0077,
0133
0068
0071
0074, 0269
0068, 0077
0029, 0096, 0238, 0300
0076, 0133, 0269
0072, 0074, 0150, 0213
0029, 0064, 0066, 0071, 0076,
0133
0074
0077
0101
0269
0101
0029, 0061, 0064
0029, 0064, 0072, 0110
0029
0269
0029
0064, 0191
0029, 0064, 0066
0029
0072, 0074
0066, 0269
0269
0074
0074
0269
0029, 0064, 0071, 0076, 0077,
0089, 0101, 0110, 0269
0238, 0307
0029, 0064, 0101
0029, 0068, 0238
SETUP CODES FOR CABLE
CÓDIGOS DE PROGRAMACIÓN PARA CABLE
CODES DE PROGRAMMATION DU CÂBLORÉCEPTEUR
ABC
Americast
Archer
Bell & Howell
Bell South
Contec
Emerson
Everquest
Gemini
General Instrument
GoldStar
Goodmind
Hamlin
Hytex
Jasco
Jerrold
Magnavox
Memorex
Oak
Panasonic
Paragon
Philips
Pioneer
Pulsar
Quasar
Radio Shack
Regal
Runco
Samsung
Scientific Atlanta
Signal
Starcom
Stargate
Starquest
Tocom
Toshiba
Tusa
United Artists
Viewstar
Zenith
0032, 0036, 0037, 0043, 0046
0928
0826
0043
0928
0048
0826
0044
0044, 0826
0305, 0505, 0839
0173
0826
0049
0036
0044
0032*, 0041, 0043, 0044,
0305, 0505, 0839
0056
0029
0036, 0048
0029, 0136
0029
0056
0173, 0562, 0906
0029
0029
0044, 0826
0049
0029
0173
0037, 0046, 0506, 0906
0044
0032, 0044
0044, 0826
0044
0041
0029
0044
0036
0056
0029, 0554, 0928
* Default code
13
14