1
®
21 GALLON
CAST IRON VERTICAL
OIL-LUBRICATED
AIR COMPRESSOR
Heavy Duty 4 HP Peak Motor
Model 47065
OPERATING INSTRUCTIONS
®
3491 Mission Oaks Blvd., Camarillo, CA 93011
Visit our Web site at http://www.harborfreight.com
Copyright© 2002 by Harbor Freight Tools®. All rights reserved. No portion of this
manual or any artwork contained herein may be reproduced in any shape or form
without the express written consent of Harbor Freight Tools.
For technical questions, please call 1-800-444-3353.
REV 11/02; 11/04
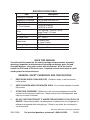
SPECIFICATIONS TABLE
Item
Working Air Pressure
Maximum Air Pressure
Air Tank Capacity
Air Flow Capacity
Motor
Pump Stage
Air Outlet Size
Accessories
Shipping Weight
Power Cord
Description
90 PSI
115 PSI with Auto Shut-Off
21 Gallons
3.5 SCFM at 90 PSI
8.8 SCFM at 40 PSI
3 HP Working / 120 Volt / 60 Hz
Single Phase / 12 Amps
Single
1/4” - 18 NPT
Air Intake Filter
Air Hose Coupler
152 Pounds
12 gauge x 20’
#233060
SAVE THIS MANUAL
You will need this manual for the safety warnings and precautions, assembly,
operating, inspection, maintenance and cleaning procedures, parts list and
assembly diagram. Keep your invoice with this manual. Write the invoice
number on the inside of the front cover. Keep this manual and invoice in a safe
and dry place for future reference.
GENERAL SAFETY WARNINGS AND PRECAUTIONS
1.
KEEP WORK AREA CLEAN AND DRY. Cluttered, damp, or wet work areas
invite injuries.
2.
KEEP CHILDREN AWAY FROM WORK AREA. Do not allow children to handle
this product.
3.
STORE IDLE EQUIPMENT. When not in use, tools and equipment should be
stored in a dry location to inhibit rust. Always lock up tools and equipment, and
keep out of reach of children.
4.
DO NOT USE THIS PRODUCT IF UNDER THE INFLUENCE OF ALCOHOL OR
DRUGS. Read warning labels on prescriptions to determine if your judgement or
reflexes are impaired while taking drugs. If there is any doubt, do not attempt to
use this product.
REV 11/02; 02/04; 08/04; 11/04; 01/05; 10/05; 02/06
SKU 47065
For technical questions, please call 1-800-444-3353.
PAGE 2
5.
USE EYE AND HAND PROTECTION. Wear ANSI approved safety impact
goggles and heavy-duty work gloves when using this product. ANSI approved
safety impact eyeglasses and heavy-duty work gloves are available from Harbor
Freight Tools.
6.
DRESS SAFELY. Do not wear loose clothing or jewelry, as they can become
caught in moving parts. Wear a protective hair covering to prevent long hair from
becoming caught in moving parts. If wearing a long-sleeve shirt, roll sleeves up
above elbows.
7.
DO NOT OVERREACH. Keep proper footing and balance at all times to prevent
tripping, falling, back injury, etcetera.
8.
INDUSTRIAL APPLICATIONS MUST FOLLOW OSHA REQUIREMENT.
9.
STAY ALERT. Watch what you are doing at all times. Use common sense. Do
not use this product when you are tired or distracted from the job at hand.
10.
CHECK FOR DAMAGED PARTS. Before using this product, carefully check that
it will operate properly and perform its intended function. Check for damaged
parts and any other conditions that may affect the operation of this product. Replace or repair damaged or worn parts immediately.
11.
REPLACEMENT PARTS AND ACCESSORIES: When servicing, use only
identical replacement parts. Only use accessories intended for use with this
product. Approved accessories are available from Harbor Freight Tools.
12.
MAINTAIN THIS PRODUCT WITH CARE. Keep this product clean and dry for
better and safer performance.
13.
MAINTENANCE: For your safety, service and maintenance should be performed
regularly by a qualified technician.
14.
USE THE RIGHT TOOL FOR THE JOB. Do not attempt to force a small tool or
attachment to do the work of a larger industrial tool. There are certain applications for which this tool was designed. It will do the job better and more safely at
the rate for which it was intended. Do not modify this tool, and do not use this tool
for a purpose for which it was not intended.
15.
WARNING: The warnings, precautions, and instructions discussed in this manual
cannot cover all possible conditions and situations that may occur. The operator
must understand that common sense and caution are factors, which cannot be
built into this product, but must be supplied by the operator.
SKU 47065
For technical questions, please call 1-800-444-3353.
PAGE 3
SPECIFIC PRODUCT WARNINGS AND PRECAUTIONS
1.
AVERTISSEMENT : Assurez-vous pour remplir le Compresseur Aérien d’une
qualité à prime, Le 30 poids, le pétrole de non-détersif avant chaque utilisation.
Le fait de faire marcher du Compresseur Aérien sans pétrole ou avec le pétrole
faible causera le dommage à l’équipement. Notez : le réservoir de pétrole a une
capacité optimale de 30 onces de pétrole.
2.
WHEN CHECKING THE OIL LEVEL: Make sure to unscrew (do not pull) the Dip
Stick (14B) out. (See Figure C, and Assy. Diagram B.)
3.
MAKE SURE ALL TOOLS AND EQUIPMENT USED WITH THE AIR COMPRESSOR ARE RATED TO THE APPROPRIATE CAPACITY. Do not use any
tool or equipment that does not operate from 0 to 115 PSI.
4.
DRAIN AIR COMPRESSOR EVERY DAY. Do not allow moisture to build up
inside the Air Compressor. (See “INSPECTION, MAINTENANCE, AND
CLEANING” section of this manual.)
5.
MAINTAIN A SAFE WORKING ENVIRONMENT. Keep the work area well lit.
Make sure there is adequate surrounding workspace. Always keep the work area
free of obstructions, grease, oil, trash, and other debris. Do not use the Air Compressor in areas near flammable chemicals, dusts, and vapors.
6.
AVOID INJURY: Never direct the Air Flow Valve (6A) at people or animals. (See
Assy. Diagram A.)
7.
DO NOT ALTER OR REMOVE THE FACTORY SEALED PRESSURE
RELEASE VALVE (5A). (See Assy. Diagram A.)
8.
DO NOT OPEN THE WATER DRAIN VALVE (10A) SO THAT MORE THAN
FOUR THREADS ARE SHOWING. (See Assy. Diagram A.)
9.
AN EXTENSION CORD MUST NEVER BE USED WITH THIS ITEM.
Connecting this item to an outlet through an extension cord MAY CAUSE
ELECTRICAL DAMAGE TO THE MOTOR and could present a FIRE HAZARD.
10.
THIS COMPRESSOR MAY REQUIRE A DEDICATED ELECTRICAL CIRCUIT
AS THE AMPERAGE DRAW UNDER FULL LOAD COMBINED WITH USE OF
ANY OTHER ITEM MAY OVERLOAD YOUR CIRCUIT.
11.
WARNING: This product contains or produces a chemical known to the State of
California to cause cancer and birth defects (or other reproductive harm).
(California Health & Safety Code § 25249.5, et seq.)
12.
WARNING: People with pacemakers should consult their physician(s) before
using this product. Operation of electrical equipment in close proximity to a heart
pacemaker could cause interference to or failure of the pacemaker.
REV 02/04, 08/04, 10/04
SKU 47065
For technical questions, please call 1-800-444-3353.
PAGE 4
TO EXTEND THE LIFE OF YOUR AIR TOOLS AND EQUIPMENT, it is recommended to install an oiler and water filter in series (available from Harbor Freight
Tools) with the Air Output Line of the Air Compressor. (See Figure B.)
AIR
COMPRESSOR
TO
TOOL
FIGURE B
UNPACKING
When unpacking, check to make sure all the parts shown on the Parts Lists on pages 10,
and 11 are included. If any parts are missing or broken, please call Harbor Freight Tools at
the number shown on the cover of this manual as soon as possible.
OPERATING INSTRUCTIONS
NOTE: For additional references to the parts listed below, refer to the Assembly
Diagrams on pages 10, and 11.
To Check The Oil Level:
1.
The Oil Window (20B) is used to determine if oil is needed. The oil level should
always be at the maximum level (red line on the Oil Window). (See Figure C, and
Assy. Diagram B.)
REV 02/04
SKU 47065
For technical questions, please call 1-800-444-3353.
PAGE 5
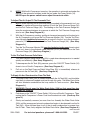
If necessary, add a premium quality, 30-weight, non-detergent oil into the Oil Fill
Hole until the level of oil reaches the maximum level as indicated on the Oil
Window (20B). The optimal capacity of the oil reservoir is 30 ounces. Do not
overfill. Then thread the Dip Stick back into the Oil Fill Hole, being careful not to
strip the plastic threads.
(See Figure C, and Assy. Diagram B.)
2.
Dip Stick (14B)
Front Cover (18B)
Oil Window (20B)
FIGURE C
To Turn The Air Compressor On:
1.
Check to make sure the Water Drain Valve (10A) is fully closed.
(See Assy. Diagram A.)
2.
Turn the Air Flow Valve (6A) to its “OFF” position. (See Assy. Diagram A.)
3.
Connect the air hose (not provided) to the Air Flow Valve (6A) of the Air Compressor. Then, connect the other end of the air hose to the pneumatic tool (not
provided) that is to be used. (See Assy. Diagram A.)
4.
Note: Always plug the Power Cord of the Air Compressor into a 115V electrical source (±10% maximum variation).
5.
Pull up on the “ON/OFF” Power Switch (1A) to turn the Air Compressor on.
(Push down on the “ON/OFF” Power Switch to turn the Air Compressor off.)
(See Assy. Diagram A.)
6.
Allow sufficient time for the Tank Pressure Gauge (4A) to indicate 80 PSI before
using the Air Compressor. (See Assy. Diagram A.)
7.
Turn the Air Flow Valve (6A) to its “ON” position to allow air to the pneumatic tool.
(See Assy. Diagram A.)
REV 11/04
SKU 47065
For technical questions, please call 1-800-444-3353.
PAGE 6
8.
NOTE: With the Air Compressor turned on, the operation is automatic and under the
control of the automatic switches inside the box under the Power Switch (1A).
NEVER open the power switch box or adjust the controls within.
To Adjust The Air Output To The Pneumatic Tool:
1.
NOTE: When adjusting the air pressure being forwarded to the pneumatic tool, you
will need to compare the pressure readings of both the Tank Pressure Gauge (3A)
and the Tool Pressure Gauge (4A). The reading on the Tank Pressure Gauge dictates the maximum/minimum air pressure at which the Tool Pressure Gauge may
also be set. (See Assy. Diagram A.)
2.
With the Air Compressor running, and the air hose and pneumatic tool hooked up to
the Air Compressor, pull up on the Tool Pressure Adjuster (2A). Turn the Tool Pressure Adjuster clockwise to increase the air output to the tool, up to the working air
pressure (115 PSI) as indicated on the Tank Pressure Gauge (3A). (See Assy.
Diagram A.)
3.
Turn the Tool Pressure Adjuster (2A) counterclockwise to decrease the air output
to the tool, down to the minimum rated pressure (0 PSI) as indicated on the Tank
Pressure Gauge (3A). (See Assy. Diagram.)
To Use The Tank Pressure Relief Valve:
1.
The Tank Pressure Relief Valve Ring (5A) is used when decompression is needed
quickly and efficiently. (See Assy. Diagram A.)
2.
To decompress the Air Tank (9A) pressure, press the “ON/OFF” Power Switch (1A)
down to turn off the Air Compressor. (See Assy. Diagram A.)
3.
Pull out on the Tank Pressure Relief Valve Ring (5A) to immediately release air
pressure in the Air Tank (9A). (See Assy. Diagram A.)
To Empty Air And Condensation From The Tank:
1.
The Water Drain Valve (10A) is located underneath the Air Tank (9A), and should be
used daily to release all trapped moisture through this valve. The Water Drain Valve
will also eliminate condensation that may cause Air Tank corrosion. (See Assy.
Diagram A.)
2.
WARNING: Do not open the Water Drain Valve (10A) so that more than four
threads are showing.
3.
Push down on the “ON/OFF” Power Switch (1A) to turn off the Air Compressor. Then,
unplug the Air Compressor’s Power Cord from the electrical outlet. (See Assy. Diagram A.)
4.
Slowly and carefully unscrew (no more than four threads) the Water Drain Valve
(10A) until the compressed air and condensation begins to be released from the Air
Tank (9A). Allow sufficient time for all of the air and condensation to escape from
the Air Tank. Then, firmly retighten the Water Drain Valve. (See Assy. Diagram A.)
REV 01/05; 08/05
SKU 47065
For technical questions, please call 1-800-444-3353.
PAGE 7
Reference: Overload Switch (#35B)
The overload breaker will trip if an over-current condition is sensed, stopping the
motor. If this occurs, shut off the pressure switch and wait at least 5 minutes.
Release the air pressure in the tank to ease restarting. Then press the breaker
button to reset it, and turn on the pressure switch.
INSPECTION, MAINTENANCE, AND CLEANING
1.
CAUTION: Always disconnect the Air Compressor from its electrical supply source
before performing any inspection, maintenance, or cleaning.
2.
BEFORE EACH USE, inspect the general condition of the Air Compressor. Check
all air fittings for leaks. Check for loose screws, misalignment or binding of moving
parts, cracked or broken parts, damaged power cord and plug, and any other condition that may affect the safe operation of this tool. If abnormal noise or vibration
occurs, immediately disconnect the Air Compressor from its electrical supply source
and have the problem corrected before further use.
Do not use damaged equipment.
3.
DAILY: Check the Air Compressor oil level. If necessary, fill with a premium quality,
30-weight, non-detergent oil. NOTE: When checking the oil level, make sure to
unscrew (do not pull) the Dip Stick (14B). (See Assy. Diagram B.)
4.
DAILY: Purge the Air Tank (9A) of all air and moisture to prevent corrosion. To do
so, slowly and carefully unscrew (no more than four threads) the Water Drain Valve
(10A) until the compressed air and condensation begins to be released from the Air
Tank. Allow sufficient time for all of the air and condensation to escape from the Air
Tank. Then, firmly retighten the Water Drain Valve. (See Assy. Diagram A.)
5.
EVERY 100 HOURS OF USE: Clean the Air Filter (7A) with a mild solvent. Then,
dry and reattach the Air Filter. NOTE: Replace the Air Filter if it is too dirty to
properly clean. (See Assy. Diagram A.)
6.
EVERY 500 HOURS OR 12 MONTHS: Replace the old oil with new, premium quality, 30-weight, non-detergent oil.
7.
TO CLEAN: wipe with a damp cloth, using a mild detergent or mild solvent.
8.
WHEN STORING: Keep the Air Compressor in a clean, dry location.
PLEASE READ THE FOLLOWING CAREFULLY
THE MANUFACTURER AND/OR DISTRIBUTOR HAS PROVIDED THE PARTS LIST AND ASSEMBLY DIAGRAM
IN THIS MANUAL AS A REFERENCE TOOL ONLY. NEITHER THE MANUFACTURER OR DISTRIBUTOR MAKES
ANY REPRESENTATION OR WARRANTY OF ANY KIND TO THE BUYER THAT HE OR SHE IS QUALIFIED TO
MAKE ANY REPAIRS TO THE PRODUCT, OR THAT HE OR SHE IS QUALIFIED TO REPLACE ANY PARTS OF
THE PRODUCT. IN FACT, THE MANUFACTURER AND/OR DISTRIBUTOR EXPRESSLY STATES THAT ALL
REPAIRS AND PARTS REPLACEMENTS SHOULD BE UNDERTAKEN BY CERTIFIED AND LICENSED TECHNICIANS, AND NOT BY THE BUYER. THE BUYER ASSUMES ALL RISK AND LIABILITY ARISING OUT OF HIS
OR HER REPAIRS TO THE ORIGINAL PRODUCT OR REPLACEMENT PARTS THERETO, OR ARISING OUT OF
HIS OR HER INSTALLATION OF REPLACEMENT PARTS THERETO.
REV 02/04; REV 03/05
SKU 47065
For technical questions, please call 1-800-444-3353.
PAGE 8
PARTS LIST A / ASSEMBLY DIAGRAM
Part
Description
Qty. Part
Description
Qty.
1A ON/OFF Power Switch
1
11A Quick Release Coupler
1
2A Tool Pressure Adjuster
1
12A Rubber Wheel
2
3A Tank Pressure Gauge
1
13A Washer
2
4A Tool Pressure Gauge
1
14A Nut
2
5A Pressure Release Valve
1
15A Fitting
1
6A Air Flow Valve
1
16A Oil Drain Plug with Gasket
1
7A Air Filter
1
17A Foot
2
8A Air Flow Lid
1
18A Unloader Valve
1
9A Air Tank
1
19A Polyurethane Unloader Tube
1
10A Water Drain Valve
1
20A Copper Air Tube
1
16A
(Rear View with motor cover removed.)
7A
1A
8A
5A
2A
3A
4A
20A
6A
18A
19A
15A
9A
11A
12A
10A
13A
14A
17A
REV 11/02; 05/04; 08/04; 11/04; 12/04
SKU 47065
For technical questions, please call 1-800-444-3353.
PAGE 9
PARTS LIST B / ASSEMBLY DIAGRAM B
Part
Description
Qty.
Part
Description
Qty.
1B
Bolt
4
19B Gasket
1
2B
Cylinder Case
1
20B
Oil Window
1
3B
Gasket
1
21B
Crankshaft Bolt
1
4B
Valve Seat
1
2 2B
Crankshaft
1
5B
Gasket
1
23B
Crankshaft Case
1
6B
Cylinder
1
24B* Stator
1
7B
Compression Ring
2
25B* Bearing
2
8B
Oil Scraping Ring
1
26B* Armature
9B
Piston
1
27B
Star t Capacitor, 70 µF±5% bMK
1
1
10B Gasket
1
28B Radiating Fan Wheel
1
11B Piston Pin
1
29B Retainer Ring
1
12B* End Cover
1
30B Bolt
4
13B Crankshaft Retainer
2
31B
2
14B Dip Stick
1
32B Radiating Cover
1
Screw
15B Connecting Rod
1
33B* Seal Washer
1
16B Gasket
1
34B Motor Assembly
1
17B Bolt
6
35B
18B Front Cover
1
36B Run Capacitor, 50 µF±5% bMK
Overload Switch
1
1
*Not available individually. Must be ordered as entire Motor Assembly (See par t #34B).
NOTE: Some parts are listed and shown for illustration purposes only, and are not
available individually as replacement parts.
REV 12/04
SKU 47065
For technical questions, please call 1-800-444-3353.
PAGE 10