Download V-MOTION PRO MANUAL
Transcript
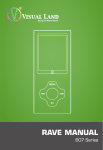
V-MOTION PRO MANUAL
904 Series
TABLE OF CONTENTS
Table Of Contents
Basic Features
System Requirements
Powering On/Off
Low Battery
Controls
Additional Controls
PC Connection
Charger Connection
File Storage
Music
Pictures
Videos
Camera
Video Recorder
Recordings
FM Radio
E-Book
Tools
Games
File Navigation
Settings
Troubleshooting
2
3
3
3
4
4
5
5
6
6
7
11
13
15
16
17
17
19
21
22
23
24
26
Copyright©2011 Visual Land Inc. www.visual-land.com
2
BASIC FEATURES
• 320 * 240 dot matrix 260,000-color full color
high speed TFT display screen
• Music support: MP3, WMA, WAV, AAC
• Video Player support: AVI, FLV, RM, RMVB, and
RV
• Picture support: JPEG, BMP, GIF
• Recording support: FM, MIC recording
• FM Radio support
• Support e-book reading
• Support NES GB / GBC 8-bit game emulator
• Support MicroSD card
• Built-in Camera for still, video and webcam
SYSTEM REQUIREMENTS
Operating System: Windows 98SE or higher / Linux9
or higher / Mac OS 10
CPU: at least Pentium-133MHz
Memory: At least 32MB
Free hard disk space: at least 100MB
Video Card: 640 * 480 or more models, at least
High Color (16 bit)
POWERING ON/OFF
• Hold the power switch (located at the top of the
player) to the right for 2-3 seconds to power on.
Copyright©2011 Visual Land Inc. www.visual-land.com
3
• Hold the power switch to the right for 2-3 seconds again to power off.
• Moving the power switch to the left will lock the
player and prevent accidental press of buttons/
functions.
• To soft power off the player, press and hold ►ll
while in the main menu.
• When the player is idle for a period of specified
time (this is adjusted in the settings section),
the player automatically shuts down.
Note: When the player is connected to a PC, this
feature is invalid.
LOW BATTERY
When the battery power is low, the low battery
screen will appear, and the player will automatically
shut down to sleep mode. Please charge first before
restarting the player.
CONTROLS
M: In each section it will bring up additional options
as a sub-menu interface.
◄: push once to switch to previous; press and hold
to rewind within the file.
►: push once to switch to next; press and hold to
fast-forward within the file.
MENU: (represented by a 4-Line Icon): Return to
Copyright©2011 Visual Land Inc. www.visual-land.com
4
previous menu; press and hold while playing back
media will bring up Volume control bar.
►ll: when playing media files, press to pause or
stop; press again to resume play; in the menu, press
to select and confirm.
A: Volume Down; game function
B: Volume Up; game function
ADDITIONAL CONTROLS
• In all menu screens, if no special instructions
are specified, ◄ / ► buttons functions as the
up and down selection, ►ll to confirm the selection, MENU return to the previous menu level.
• You can also adjust the volume for music, videos and radio by pressing the A / B buttons or
by pressing and holding down the MENU button.
It will pop up the volume adjust window, press
A / B or ◄ / ► buttons to adjust the volume.
Press►ll to accept the change and exit the
volume control window. If no button is pressed
for 5 seconds, the player will accept the change
and exit the volume window automatically.
PC CONNECTION
• Use the supplied USB cable to connect a PC
with the player. Select a mode to enter.
Copyright©2011 Visual Land Inc. www.visual-land.com
5
• Power & Data: Allows you to transfer files from
your PC to player while charging.
• Power & Play: Allows you to use the player while
power is taken from the computer rather than
battery.
• USB Charging: Will charge the player but you are
unable to use any of the player’s functions.
If the player is disconnected via USB or the hardware is removed from the PC, the system will enter
the player operating state. If the USB is not disconnected, the screen will continue to show charging
status.
CHARGER CONNECTION
Connect the player with a standard USB charger
(sold separately), you will be prompted to select one
of the modes described above. Select “Power &
Play” if you wish to use your player with an external
power source, otherwise select “USB Charging” to
charge your player.
FILE STORAGE
Different types of files should be stored in different directories, such as: music files to be placed
in the MUSIC directory, recorded audio files should
be placed in the RECORD directory, and so on, otherCopyright©2011 Visual Land Inc. www.visual-land.com
6
wise the application cannot find the corresponding
file.
MUSIC
In the main menu, select “music” option, and
press►ll to enter the music’s sub-menu:
• Now playing: List the song that was last played
and highlights it. If no file was played the previous time, no file will be displayed.
• All music: Players listed in the directory of the
built-in memory stores all the music files.
• Artist: Artist list, select an artist, then it will display a list of songs by this artist. Unknown Artist
category will store songs which the artists could
not be identified. Unknown Album and Unknown
Genre have the same feature.
• Album: Album list, select an album, the next
screen dispays a list of songs for this album.
• Genre: genre list, select a genre, the next next
screen dispays a list of songs of this genre.
• My music list: a total of five play lists, users
can change these playlists according to their
demand to classify songs.
• Dir listing: Built-in memory, external memory.
Built-in Memory displays music files stored
internally. External Memory displays music files
stored externally. If external card is connected,
Copyright©2011 Visual Land Inc. www.visual-land.com
7
the External Memory is not displayed.
• Record list: list of all recorded files.
• Star level: This feature lists the five-level list (1-5
stars), the list of the songs corresponds to the
star level. Degree of user preferences can be
carried out on each song in this rating system.
• Tags list: lists all music files with tags, up to 32
labels.
OPERATING SUB-MENUS
Press ►ll button, switch play and pause status.
Note: If lyrics are enabled and the player is set to
screen saver, the screen saver will exit upon songs
which utilize lyrics.
When the songs are in play or pause, press and hold
◄ / ► button to fast forward or rewind within the
song. Press ◄ / ► buttons to switch to the previous
song or the next song.
During music playback, press the M button to enter
sub-menu:
1. AB Repeat
Select “AB Repeat”, press ►ll buttons, when
the screen displays “A-”, the player is confirming A; press ►ll button again, when the screen
displays “-B”, the A-point is set, the player is
Copyright©2011 Visual Land Inc. www.visual-land.com
8
2.
3.
4.
5.
confirming B points; again, press the ►ll button,
then the icon becomes “A-B”, said the B-point is
set to start AB repeat; at this time if the ►ll is
pressed again, the AB repeat will be canceled.
Repeat
Sequence: Plays in order one time.
Repeat One: Repeats current song.
Repeat All: Repeats all songs.
Shuffle: Plays in random order one time.
Shuffle + Repeat: Plays in random order repeatedly.
Select EQ
Select equalizer type: Classic, Soft, Jazz, DBB,
User EQ (allows you to customize an equalizer
setting of your own), SRS WOW, SRS WOWHD,
SRS User Mode
Set Sound
“User EQ” allows you to create your own equalizer settings: press the M button to select the
different bars (Selected Bar is yellow), press◄ /
► buttons to change values.
“SRS User Mode” allows you create your own
SRS equalizer settings: adjust settings similar
to User EQ.
“FADEIN/FADEOUT” allows you to enable fading
between songs.
Replay times
Copyright©2011 Visual Land Inc. www.visual-land.com
9
Press ◄ / ► button to adjust the value of repetition frequency from 1 to 10 and infinite times.
6. Repeat intervals
Operation similar to “Repetition Frequency” with
range of 1-7 seconds.
7. Variable speed
Press ◄ / ► buttons to adjust playback speed
from -4 to 4.
8. Lyric display
Allows you to enable/disable lyrics display.
9. Set star level
Press ◄ / ► buttons to choose between the
different stars.
10. Add Tag
Choose “Add Tag”, press ►ll button will bookmark the current song playing and play time and
then return to play interface.
11. Add to MyList
Once entered select the appropriate list and
returned to the previous screen. At this point,
this song has been added to the playlist.
12. Delete the Files
Press ►ll to enter the interface to delete or
undelete.
13. Information
Displays any information related to the current
song.
Copyright©2011 Visual Land Inc. www.visual-land.com
10
MUSIC FORMAT COMPATIBILITY
The V-Motion Pro supports the following music
formats: MP3, WMA, AAC and WAV. Note: it does not
support protected WMA files.
PICTURES
In the main menu, select “pictures” option to enter
the picture’s sub-menu:
• Directory Listing: functions similar to the Directory function of the Music Menu.
• Play Mode: Set the mode which the image lists
are displayed: list mode or thumbnail mode.
In Thumbnail mode, press ◄ / ► buttons to move
left and right or press and hold ◄ / ► buttons to
move up and down.
Play, Stop: while playing pictures, press ►ll button
to automatic switch between manual playback and
auto playback, press the ◄ / ► buttons to show the
previous or next picture.
When manually browsing a particular image, press
the M button to enter sub-menu:
• Rotate: Select the desired rotation angle: 90,
180 or 270 degrees.
• Zoom: choose to zoom in or out. Press ◄ / ►
Copyright©2011 Visual Land Inc. www.visual-land.com
11
•
•
•
•
•
•
•
button to move left or right, press A button to
move down and B button to move up; press ►ll
to exit Zoom mode. (In Zoom mode, you cannot
select previous or next picture); press M button
to enter the Sub-Menu again.
Note: Zoom and Rotation is invalid with GIF
format images. Zoom function on less than 320
* 240 pixel image is invalid.
Slide gap: Select the picture playback interval,
1-10 seconds.
Slide effect: choose the type of transition effect
from Normal, Fly in, Chessboard, Cut, Erase and
Louver.
Set as startup: set the current picture as your
startup picture.
Set as Shutdown: set the current picture as your
shutdown picture.
Delete the File: deletes the current picture.
Information: displays the current picture’s file
information.
PICTURE COMPATIBILITY
The V-Motion Pro supports JPG, GIF and BMP files. Recommended settings are 320x240. Larger files
can be displayed however the larger the file, the
longer it will take to display.
Copyright©2011 Visual Land Inc. www.visual-land.com
12
VIDEOS
In the main menu, select “videos” option to enter
the video’s sub-menu:
• Now Playing: selects the file that was last played
and plays it.
• Dir list: lists available video files from “Internal
Memory” or “External Memory.”
• Tag List: lists all video files that are bookmarked, up to 32 files.
In the video playback interface, press any button to
bring up the black bars on the top and bottom of the
screen which display the current video’s information.
If no button is pressed after 3 seconds, the bars will
automatically disappear.
• In the playback interface, press the M button to
enter the sub-menu:
• Play, Pause: press ►ll button, switch between
play or pause.
• Note: This mode does not support multi-tasking
function.
• Fast forward, rewind: When the file is playing or
paused, press and hold ◄ / ► buttons to rewind or fast-forward within the current video file.
• File Switch
• When the file is playing or paused, press the ◄
/ ► buttons to switch to the next or previous
file.
Copyright©2011 Visual Land Inc. www.visual-land.com
13
OPERATING SUB-MENU
• Playback Mode
Sequence: plays all videos in order one time.
Repeat one: repeats current video.
Repeat all: plays all videos in order and repeats.
Shuffle: plays videos in random order.
• Add Tag: Choose “Add Tag”, press ►ll button
will bookmark the current video playing and play
time and then return to play interface.
• Information: displays information relating to the
current file.
VIDEO FORMAT COMPATIBILITY
AVI: 320x240, 25fps
RM/RMVB/RV: 320x240, 30fps
FLV: 320x240, 25fps
Note: These are the recommended settings for best
possible playback.
A majority of video files downloaded from the internet are playable on the V-Motion Pro without prior
conversion. However should you need to convert
videos for playback, you may download a conversion
program from our website:
http://www.visual-land.com/downloads/MP4Tools.
zip
Copyright©2011 Visual Land Inc. www.visual-land.com
14
CAMERA
In the main menu, select “camera” to enter the
shooting interface:
1. Press ►ll button to take photo.
2. Press M button to enter the camera sub-menu:
• Preview: Quick view of the photographs
taken.
• View parameter: Preview pictures related to
all parameters.
• White balance: Auto (default), Indoor and
Outdoor.
• Brightness: range from -3 to +3. The default
is 0.
• Exposure mode: Auto (default), Indoor and
Outdoor.
• Special effect: None (default), Black and
White, Retro, Negative.
• Save path: internal memory and external
memory (if there is no card, it is not shown).
• Resolution: 320 × 240, 640 × 480, 1024
× 768, 1280 × 960. The default is 1280 ×
960.
• Self-timer: off (default), 5 seconds, 10
seconds, 15 seconds, 20 seconds.
• Shutter sound: off, audio 1 (default), Sound
2, Sound 3.
• Date stamp: off (default), date, date and
Copyright©2011 Visual Land Inc. www.visual-land.com
15
time.
3. To adjust the focus: press ◄ button to zoom in,
press ► button to zoom out.
VIDEO RECORDER
In the main menu, select “video recorder” to enter
the shooting interface:
1. Press ►ll button to start recording, then press
it again to pause. After pressing MENU button to
exit, the system will first automatically save the
recorded file and then quit.
2. Press M button to enter the camera sub-menu:
• Preview: quick view of the recorded files.
• View parameter: preview of all video parameters.
• Switch to DC: switches to still camera mode.
• White Balance: Auto(default), indoor,
outdoor.
• Brightness: -3 ~ 3, the default is 0.
• Exposure mode: Automatic (default), indoor,
outdoor.
• Special effect: None (default), Black and
White, Retro, Negative.
• Save Path: internal memory and external
memory (if there is no card, it is not shown).
• Resolution: 320 × 240 (default), 224 × 176,
176 × 144.
Copyright©2011 Visual Land Inc. www.visual-land.com
16
• Record quality: High, Medium, Low, Auto.
RECORDINGS
In the main menu, select “recordings” into the
recording menu:
Press ►ll button to start recording. Press ►ll button again to pause. Press MENU button to pop-up
“Stop Recording” window. Select “OK” or “cancel”
and press ►ll to select and return to the recording
interface. File will be automatically saved to the
Audio -> Recording folder. When paused, press the
M button to save the current audio file
In the recording interface, when not recording, press
M button to enter sub-menu:
1. Recording Mode: Set audio file format.
2. Recording Quality: Set recording quality to low,
medium or high.
3. Recording Volume: adjust recording volume: 1-7.
FM RADIO
In the main menu, select “radio”, to enter the FM
Radio function.
Note: the player will enter the Radio Interface only
after it has detected headphones connected to the
player.
In the playback interface, press ►ll button to switch
Copyright©2011 Visual Land Inc. www.visual-land.com
17
between normal and default mode. If there are no
saved stations, it cannot be switched.
In the normal radio interface, press M button to
enter Sub-menu:
1. Listening to Radio
Select this to enter the FM main interface, it will
display the station from the previous play. If it’s
the first use, the default is 87.5MHz.
In normal mode, press ◄ / ► button to decrease or increase a frequency. In the default
mode, press to go to previous or next saved
radio station.
2. Radio Recording
Press ►ll button to enter the radio recording
interface, Radio Recording is similar to Audio
Recording. The recorded file will be automatically saved to the main menu of the audio file-FM
recording folder.
3. Recording Quality: similar to Audio Recording.
4. Save\Delete the Station: press ►ll button to
save the current station, the saved location can
be selected in the station list. After saving, the
current station can be deleted.
5. Scanning
• Manual Scanning: In normal mode, press ◄
/ ► buttons to search stations, long press
for Quick Search.
Copyright©2011 Visual Land Inc. www.visual-land.com
18
• Auto Scanning, in the sub-menu, select
“Auto Scanning”, the system began to automatically search stations. After the search
is completed, it will automatically save the
station found and play the first radio station, if no station is found, then it will stop
at the initial frequency. While searching,
press MENU button to exit, the system will
stopped at the last station.
6. Radio List: lists the stations saved; choose a
station and press ►ll to enter FM Interface
to listen. Each band can save up to 20 radio
stations.
7. Radio Frequency: Radio frequency bands, Europe/US and Japan.
8. Play/Mute: in the Sub-menu, select Play/Mute
to switch between these two modes.
Note: To stop the radio, press ►ll button while in
the radio function to pause the sound. Then exit the
radio function.
E-BOOK
In the Main Menu, select “e-book” to enter the Ebook function:
• Now reading: displays last file read.
• Dir list: lists all available e-book files in “Internal
Memory” or “External Memory.”
Copyright©2011 Visual Land Inc. www.visual-land.com
19
• Tag List: list of all bookmarked files.
In a text browser interface, press M button to enter
the sub-menu:
1. Play, Stop
In browsing mode, press ►ll button to switch
between automatic and manual modes. When
switching to manual mode, the text display will
stop, press ◄ / ► button up and down next
page.
2. View
Press ◄ / ► button to adjust the percentage, in
increments of 5%.
3. Automatic Reading Interval
Setup an automatic interval, press ◄ / ► button to change the value, range 3-15 seconds, 3
seconds a step, the default is 6 seconds.
4. Fonts
Change the font size to small, medium or large.
5. Bookmark
Press ►ll button will bookmark the current
page.
6. Delete Files
Deletes the current file.
Note: E-Book files must be in standard TXT format.
Copyright©2011 Visual Land Inc. www.visual-land.com
20
TOOLS
In the main menu, select “tools” to switch to the
Stopwatch, Calculator, Calendar or Webcam fuctions.
• Stopwatch
Press ►ll button Start / Pause / Resume.
Press ► to save the current time and start the
timer; after five timers, press ► button to start
from the first timer. While paused, press the M
button to clear the timer.
• Calculator
Use ◄ / ► buttons to move left and right,
press ►ll button to select. • Calendar
Press ►ll button to switch between Year/
Month/Date. Use ◄ / ► buttons to change
values.
• PC Camera
Run the program (Yahoo Messenger, AOL
Instant Messenger, MSN Messenger, etc.) you
wish to use your V-Motion as a webcam with on
your PC before connecting the player. Once the
program is running, connect your player to your
PC with the USB cable. Select “Power & Play”.
Go to your “Tools” then “PC Camera”. Selecting
“PC Camera” will automatically put it into webcam state and should be immediately useable
Copyright©2011 Visual Land Inc. www.visual-land.com
21
with your program. Should you need to adjust
contrast or other settings, do so within your
program you are using on your PC. Disconnecting the USB cable will automatically exit the PC
Camera function.
GAMES
In the main menu, select “games” to enter the
games function.
Note: This player supports only NES, GB and GBC
format games (however not all games are supported).
• Restart game: Start a new game.
• Load game progress: starts from the same
place where you exited from the previous time.
(Option only available when the previous game
was saved.)
• Setting: Press ◄ / ► button down to select the
appropriate option.
1. Volume: adjust the game volume,
2. Audio output: Select to turn on or off game
sound
3. Keyboard mapping: sets the functions of
each of the buttons for game play.
4. Display mode: set the normal display or full
screen display.
• Exit: Exits back to main menu.
Copyright©2011 Visual Land Inc. www.visual-land.com
22
Note: To exit from within a game, hold the power
switch to the right for 2-3 seconds. This will bring
you back to the “Games” main menu.
FILE NAVIGATION
In the Main Menu, select “File Navi” to enter this
option:
If no MicroSD card is currently present, the player
will automatically display the internal memory. If a
MicroSD card is present, you can choose between
“Internal Memory” (player’s internal memory) or
“External Memory” (MicroSD card).
Select a folder for file navigation, press ►ll button, it
will display a list of all the files in that folder. Select
the desired file. Press ►ll to open it. Press M button
to enter sub-menu:
“Move”, “Copy”: press ►ll button to move or copy a
document to another folder.
“Delete”: press ►ll button to delete the file, confirm
delete files.
Copyright©2011 Visual Land Inc. www.visual-land.com
23
SETTINGS
You can customize your player by adjusting various
settings here.
1. Effect setting: This will change the way menus
transition. Select between Normal, Cube, Zoom
or Push.
2. Date & Time:
• Date Adjustment
This is to set the system date. press M
button to switch between Year, Month and
Date. Press ◄ / ► buttons to change values. Press ►ll button to confirm and exit.
• Time Adjustment
Set the system time. Press the M button to
switch between hours, minutes and AM \
PM, press ◄ / ► to change values. Press
►ll button to confirm and exit.
3. Display:
Backlight Timer Options are: off, 5 seconds, 10
seconds, 20 seconds, 30 seconds, 1 minute, 5
minutes. If the backlight timer is off, the screen
will never turn off. If the backlight timer is set,
the player’s screen will turn off after the specific
set time.
4. Power Saving:
• Idle Time: Off, 10 seconds, 30 seconds, 1
minute, 3 minutes, 5 minutes, 10 minutes.
Copyright©2011 Visual Land Inc. www.visual-land.com
24
This will shut the player down after being
idle for the specified amount of time.
• Sleep Mode: Off, 10 minutes, 30 minutes,
1 hour, 2 hours, 3 hours, 4 hours, 5 hours.
This will shut the player down after the
specified time regardless of what it is currently doing.
5. Language: English, Simplified Chinese, Traditional Chinese, Japanese, Korean, French, German,
Italian, Dutch, Portuguese, Spanish, Swedish,
Czech, Danish, Polish, Russian, Turkish, Hebrew,
Thai, Hungarian, Romanian and Indonesian.
6. TV Out:
• Connect the player to a TV with the provided
A/V Cable prior to selecting this option.
• Press ◄ / ► to turn it off or to select a
format: PAL / NTSC.
• Select the desired file. Note: TV Out only
works for Video files.
7. Advanced:
• Player Information: Shows basic player
information: player name, firmware version,
internal storage, external card storage.
• Desktop Theme: Choose between multiple
desktop themes.
• Key Tone: Choose between multiple key
tones for button presses or turn off the key
Copyright©2011 Visual Land Inc. www.visual-land.com
25
tones.
• Format Memory: formats the internal
memory erasing all data. Warning: This will
erase all data on the device. Be sure you
have backup copies before selecting this.
• Format External Memory: if a MicroSD card
is present, this will format it erasing all
data. Warning: This will erase all data on
the memory card. Be sure you have backup
copies before selecting this.
• System check: will perform a self diagnostic.
• Reset: this will restore the player to its
default settings.
TROUBLESHOOTING
Player cannot power on
Check if the battery power is out. If it is, connect the
player via USB or wall charger, then try to power on.
No sound in earphones
Check if the volume has been set to 0.
Check if the earphones are fully plugged in.
Loud Noise
Check whether the earphone plug is clean, dirt can
cause noise.
Copyright©2011 Visual Land Inc. www.visual-land.com
26
Check whether the music file is damaged. Try playing another music file to determine if that is the
problem. If the file has been damaged, it can cause
serious noise.
FM reception is poor
Try to adjust the direction and location of player, try
stretching the headphone cable.
Check whether there are electronic devices near
that’s jamming the signal.
Screen display is garbled
Check that the correct language option has been
selected.
Buttons don’t work
Check whether the HOLD lock is on.
Cannot download files
Check whether the player is properly connected to
the computer.
Check whether the internal memory storage space
is full.
Check whether the USB cable is damaged.
Copyright©2011 Visual Land Inc. www.visual-land.com
27
FCC Part 15: This device complies with Part 15 of the FCC Rules.
Operation of this product is subject to the following two conditions:
(1) this device may not cause harmful interference, and (2) this
device must accept any interference received, including interference
that may cause undesired operation.
FCC Warning: Changes or modifications not expressly approved by
the party responsible to compliance with the FCC Rules could void
the user’s authority to operate this equipment.
DISCLAIMER
1. Without the company’s written permission, any form of reproduction, transmission, distribution and storage of any of the
contents of this manual is prohibited.
2. In the course of the preparation of this manual the contents are
accurate and complete, but we do not guarantee this manual is
without any errors or omissions.
3. The company is not responsible for errors or omissions.
4. We reserve the right to make changes to this manual without
prior notice.
5. In any case, we are not responsible for any losses or damages
caused by this manual.
NOTES
This manual is intended to inform users of the proper use of player
to ensure that the player’s in good condition, please read carefully
and follow.
• Do not severely impact (by dropping, hitting, etc.) the player.
• Do not clean player with benzene, thinner and other chemicals.
• Please do not put the player close to a strong magnetic field or
electric field.
• Please avoid direct light or heating appliances.
• Do not attempt to repair or modify the player.
• Do not attempt to replace the battery.
• Do not listen to the player using headphones at a high volume,
so as to avoid adverse effects on hearing.
Copyright©2011 Visual Land Inc. www.visual-land.com
28
•
Please dispose of packaging waste, batteries, old electronic
products according to its classification.
If you have a problem with your player please visit
our website and view our support pages.
http://www.visual-land.com
Copyright © 2011 Visual Land Inc.
Copyright©2011 Visual Land Inc. www.visual-land.com
29
www.visual-land.com
Copyright©2011 Visual Land Inc.


