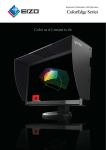
1
Important
Please read this User’s Manual carefully to
familiarize yourself with safe and effective
usage.
Please retain this manual for future
reference
About This Manual.............................................2
About ColorNavigator........................................3
Features..................................................................3
ColorNavigator Software.........................................4
1. Setting Up......................................................5
1-1. Macintosh.........................................................5
1-2. Windows...........................................................8
2. How to Adjust the Monitor............................12
The latest software and User's Manual
are available for download from our site:
http://www.eizo.com
2-1. Monitor Adjustment Procedure
(Selecting a Target)........................................12
2-2. Monitor Adjustment Procedure
(Creating a New Target).................................19
2-3. Procedure for Measuring Paper White...........31
2-4. Procedure for Measuring Ambient Light.........33
2-5. Periodic Monitor Adjustment .........................37
3. Advanced Settings
(Validation, Manual Adjustment)..................38
3-1. Monitor Validation...........................................38
3-2. Manual Adjustment........................................40
4. Using ColorNavigator in Multiple Monitor
Environment................................................42
5. Preferences.................................................43
5-1. Timer..............................................................43
5-2. Profile.............................................................44
5-3. Validation........................................................45
5-4. Measurement device......................................45
6. Error Message List.......................................46
About This Manual
About This Manual
This manual describes the features, installation and usage of ColorNavigator (monitor
adjustment software for LCD monitor).
The Mac OS X image capture is given as an example in this manual. In case of using this
software in Windows environment, you may find the image a little different.
Copyright©2003-2008 EIZO NANAO CORPORATION All rights reserved.
Windows is a registered trademark of Microsoft Corporation.
Apple , Macintosh , iMac, iBook , MacOS and ColorSync are registered trademarks of Apple Inc.
PowerPC is registered trademark of International Business Machines Corporation.
Eye-One Logo and colormunki are trademarks of X-Rite, Incorporated.
ColorEdge, ScreenManager and EIZO are registered trademarks of EIZO NANAO CORPORATION in Japan
and other countries.
ColorNavigator is a trademark of EIZO NANAO CORPORATION.
About ColorNavigator
About ColorNavigator
The ColorNavigator software for ColorEdge series monitor makes monitor adjustment both simple and
accurate. You can adjust the monitor settings easily.
*Please prepare the measurement device separately.
Features
•Precisely adjusting monitor characteristics on the ColorEdge series
-Preset adjustment targets for each of principal uses (Simple mode)
-Specify the brightness, white balance, black level and/or gamma of the monitor (Detailed mode)
-L* is available as the target of gamma
-Displays the measurement result with CIE-chromaticity diagram
-Generates ICC 2.0 profiles (for Windows XP) / ICC 4.2 profiles (for Windows Vista) / Apple
ColorSync profiles (for Macintosh) based on the measurement result
-6 Color adjustment function*1
-Manual adjustment function (white balance/brightness/black level/gamma)*1
-Measures ambient light*1
-Measures paper white*1
-Emulation of Monitor Display based on the profile
(CG220/CG221/CG222W/CG241W/CG301W)
*1 :
The function's availability depends on the monitor, the measurement device, or usage
•Profiling monitor validation
•Switching monitor display
-Switches monitor display based on the monitor adjustment result.
•Supporting monitor adjustment function with timer setting
•Supporting a multi monitor environment
•Showing Patterns
Tips
•�L* is a lightness value based on the CIELUV and CIELAB color spaces. CIELUV and CIELAB are color
spaces that describe the relationship between color and human vision, in which L* corresponds to
perceived brightness.
About ColorNavigator
ColorNavigator Software
ColorNavigator Software construction is as follows. Select an operation on the startup screen which is
displayed when the software is started.
[Next]:
Adjust the monitor based on the adjustment
target that is selected from the list.
2-1. Monitor Adjustment Procedure
(Selecting a target)
[Apply]:
Set the monitor to the adjustment target
selected from the list.
[Detail...]:
Display the details of the adjustment target
selected from the list. Manual adjustment and
monitor validation can be performed.
3. Advanced Settings (Validation, Manual
Adjustment)
[Remove…]:
Remove the adjustment target selected from the
list.
[Create a new target…]:
Specify the target and set a new adjustment
target.
:
Display the instruction of the window.
2-2. Monitor Adjustment Procedure
(Creating a New Target)
1. Setting Up
1. Setting Up
Set up the operating environment according to the following procedures. (Install ColorNavigator on the
computer and connect the measurement device with the monitor.)
1-1. Macintosh
The following is required for adjusting the monitors in the ColorEdge series with ColorNavigator.
System Requirements
•Macintosh: satisfy the OS requirement (except iMac(Power PC), iBook, iBook G4)
(Built-in USB)
-Operating System (OS): Mac OS X 10.3.9 or later
-16.7 million or more colors
-1024 x 768 or higher (recommended)
-USB ports (at least 2 free ports required)
•EIZO USB Cable (MD-C93)
•Measurement Device
-EIZO ColorEdge CX1
-X-Rite Eye-One series
-X-Rite colormunki
-ColorVision Spyder2
-ColorVision Spyder3
-MonacoOPTIXXR/DTP94/X-RiteOPTIXXR2/DTP94B
Note
•You cannot use ColorNavigator in the Classic environment in Mac OS X
•USB Hub may be required if adjusting several monitors in a multiple monitor environment. Also, USB
cables are required for monitor adjustment.
•This product does not contain measurement device.
•Refer to the user's manual of the measurement device for the system requirements and usage.
Installing ColorNavigator
Note
•To install ColorNavigator, a user account with the following authority is required.
-"Administrator"
•Please consult your system administrator for your account.
•If the previous version ColorNavigator is already installed to the system, uninstall it before the new
version installation.
1. Setting Up
How to Install
To install the software from the EIZO LCD Utility Disk (CD-ROM)
1
Insert the" EIZO LCD Utility Disk" to the CD-ROM drive
The "EIZO LCD Utility Disk" icon appears on the desktop. Double click the icon to open the
window.
2
Double click "Start Menu" icon on the window
The start menu opens. Click "Install ColorNavigator" on the start menu.
The ColorNavigator installer starts up. Go to Step 3.
* Displyed window depends on your monitor.
To download and install the software from our website
1
Double click the downloaded file
The "ColorNavigator for Mac OSX" icon appears on the desktop. Double click the icon to open
the window.
2
Double click "ColorNavigator.pkg" icon on the window
The ColorNavigator installer starts up. Go to Step 3.
3
Install the software
Follow the instructions to install the software.
Confirming the Software Version
The software version can be confirmed through "Application menu" - "About ColorNavigator...".
1. Setting Up
Connecting the Measurement Device
1
Connect the upstream port of monitor and the USB downstream port of computer
with the EIZO USB Cable (MD-C93)
To Computer
To Monitor
Upstream Port
2
MD-C93
EIZO USB Cable
Downstream Port
Connect the measurement device to the downstream port of computer, USB
keyboard or the monitor
Downstream Port
To monitor
or PC
Measurement
Device
Note
•Some measurement devices require a self-powered USB hub. For details, refer to the user's
manual of the measurement device.
•If the measurement device is connected after starting up ColorNavigator, it cannot be detected.
Be sure to connect the measurement device before starting up the ColorNavigator.
Starting Up ColorNavigator
Double click "ColorNavigator" icon in "Application" - "Utilities".
1. Setting Up
1-2. Windows
The following is required for adjusting the monitors in the ColorEdge series with ColorNavigator.
System Requirements
•Pentium-compatible Processor 1 GHz or more (recommended)
-Physical RAM: Windows XP Series: 128 MB (256 MB for 64 bit)
Windows Vista Series: 1 GB
-PC/AT compatible machine with built-in USB
-Operating System (OS): Windows XP Series / Windows Vista Series
-Colors: 24 bit or more
-Resolution: 1024 x 768 or higher (recommended)
-USB ports (at least 2 free ports required)
•EIZO USB Cable (MD-C93)
•Measurement Device
-EIZO ColorEdge CX1
-X-Rite Eye-One series
-X-Rite colormunki
-ColorVision Spyder2
-ColorVision Spyder3
-MonacoOPTIXXR/DTP94 /X-RiteOPTIXXR2/DTP94B
Note
•If your OS is Windows Vista, the following settings are required in a multiple monitor environment.
1.Select [Control Panel] - [Appearance and Personalization] - [Personalization] [Adjust screen resolution].
2.[Display Settings] dialog appears.
3.Check the [Extend the desktop onto this monitor] check box for all monitors.
•USB Hub may be required if adjusting several monitors in a multiple monitor environment. Also, USB
cables are required for multiple monitor adjustment.
•This product does not contain measurement device.
•Refer to the user's manual of the measurement device about system requirements and usage.
Installing ColorNavigator
Note
•To install ColorNavigator, a user account with the following authority is required.
- "Administrator"
•Please consult your system administrator for your account.
•If the previous version ColorNavigator is already installed to the system, uninstall it before the new
version installation.
1. Setting Up
How to Install
To install the software from the EIZO LCD Utility Disk (CD-ROM)
1
Insert the" EIZO LCD Utility Disk" to the CD-ROM drive
The start menu opens. Click "Install ColorNavigator" on the start menu. The ColorNavigator
installer starts up. Go to Step 2.
* Displyed window depends on your monitor.
Note
•Double click the "Launcher.exe" icon if the menu does not open automatically.
To download and install the software from our website
1
After unzip the downloaded file, click "setup.exe"
The ColorNavigator installer starts up. Go to Step 2.
2
Install the software
Follow the instructions to install the software.
Tips
•If your OS is Windows Vista, the "User Account Control" dialog may appear when you double
click Launcher.exe.*1
Click [Continue] to open the menu.
*1: Whether the "User Account Control" dialog appears or not depends on operating
system settings.
1. Setting Up
Confirming the Software Version
The software version can be confirmed through "About ColorNavigator..." by clicking the
ColorNavigator icon on the title bar.
Connecting the Measurement Device
1
Connect the USB upstream of monitor and the USB downstream port of
computer with the EIZO USB Cable (MD-C93)
To Computer
To Monitor
Upstream Port
MD-C93
Downstream Port
EIZO USB Cable
2
Connect the measurement device to downstream port of computer, USB keyboard
or the monitor
Downstream Port
To monitor
or PC
Measurement
Device
10
1. Setting Up
Note
•Some measurement devices require a self-powered USB hub. For details, refer to the user's
manual of the measurement device.
•If the measurement device is connected after starting up ColorNavigator, it cannot be detected.
Be sure to connect the measurement device before starting up the ColorNavigator.
•The measurement device driver is automatically installed with ColorNavigator. It is not
necessary to install the measurement device supplied with the device.
Tips
•The following dialog may appear several times when you install the driver software.
Click [Continue Anyway](Windows XP) / [Install this driver software anyway](Windows Vista)
to install the driver software.
(Windows XP)
(Windows Vista)
Starting Up ColorNavigator
Double click the "Shortcut to ColorNavigator" icon on the desktop.
11
2. How to Adjust the Monitor
2. How to Adjust the Monitor
This section describes adjustment procedures when one monitor is connected to computer. To adjust
several monitors in a multiple monitor environment, refer to "4. Using ColorNavigator in Multiple
Monitor Environment".
2-1. Monitor Adjustment Procedure (Selecting a Target)
Select an Adjustment Target from the List to Adjust the Monitor
Flow Diagram
Note
•The suitable modes for the display image are available on the monitor (fine contrast mode).
When you perform the monitor adjustment with ColorNavigator, the monitor automatically switches
to CAL mode/EMU mode (i.e. Calibration mode/Emulation mode). The monitor adjustment result is
only registered in CAL mode. (The result is not registered in other modes.)
Start up ColorNavigator
Select the measurement device
Show the startup window
Select a monitor
Select targets
* The message shows with multiple monitor
environment.
* Select a target from the list.
for Printing
for Photo & Design
Initialize the measurement device
Adjust the monitor
・Gamma
・Brightness
・Gain
・Gamut*1
・Black Level*2
Show the result
* The software adjusts the monitor automatically.
* Show after the monitor adjustment is complete.
Generate the Profile * Save the monitor adjustment result and generate the profile.
Quit ColorNavigator
Adjust the monitor
periodically
12
*1: Gamut is available for CG220/CG221/CG222W/CG241W/CG301W
*2: Black level is available for digital input in CE series.
2. How to Adjust the Monitor
Setup ColorNavigator
1
Turn on both the monitor and the computer 30 minutes before monitor
adjustment (= warming up)
Disable the power management function of them so they will not be in the power save mode.
Quit other applications before starting up the ColorNavigator. Disable the screen saver so that it
will not be activated during adjustment or measurement.
Note
•To obtain precise monitor adjustment results, the monitor and computer must be sufficiently
warmed-up. Once the monitor goes into the power-save mode, it takes a while for the brightness
and color conditions to re-stabilize.
2
Set the display resolution and colors
Set the monitor color at 16.7 million (24 bit) or more.
It is recommended that the resolution is 1024 x 768 or higher.
How to Adjust a Monitor
1
Startup ColorNavigator
Macintosh
Double click "ColorNavigator" icon in "Application" - "Utilities".
Windows
Double click "Shortcut to ColorNavigator" icon on the desktop.
Note
•Do not disconnect USB cables of the monitor or measurement device while running
ColorNavigator. Doing so may result in system freeze or software malfunction.
2
Select a measurement device
Select the proper measurement device for using ColorNavigator then click [OK].
Check box
Shows this dialog box when the
software starts next time, even if
there is only one measurement
device connecting to the PC.
If the box is unchecked, this dialog is
not shown unless the measurement
device cannot be found.
13
2. How to Adjust the Monitor
3
Startup window appears. Select an adjustment target from the list, and then click
[Next].
For general printing, select "Setting for Printing". For photos and designs, select "Setting for
Photo & Design".
About Marks
The adjustment target set to the monitor. (monitor using time is less than the timer setting
threshold, or no threshold)
The adjustment target set to the monitor. (monitor using time is more than the timer setting
threshold)
The adjustment target not set to the monitor. (monitor using time is less than the timer
setting threshold, or no threshold)
The adjustment target not set to the monitor. (monitor using time is more than the timer
setting threshold)
Blank Unadjusted status.
Tips
•When you readjust the monitor, previous adjustment results can be selected as a target. Click
[Apply] to set the monitor based on the previous adjustment result.
ColorNavigator compares the configuration with the existing profile and automatically revises
the profile if its parameter differs from the adjustment result.
•File names can be modified by double clicking the adjustment target in the list.
4
Proceed "Auto Adjust" button (for analog input only)
Follow the instructions and click the monitor auto adjust function.
14
2. How to Adjust the Monitor
5
Initialize the measurement device
Initialize the measurement device according to the instructions.
When colormunki is connected to the computer, turn the rotary disk to initialization mode.
Initialization takes a few seconds.
colormunki
Note
•Be sure that light does not seep through to the sensor of the measurement device during
initialization. Precise adjustment results cannot be obtained if light is detected during the
initialization process.
•When ColorVision Spyder2 or Spyder3 is connected to the computer, this window will be
skipped.
15
2. How to Adjust the Monitor
6
Proceed monitor adjustment
The measurement window appears on the screen.
When colormunki is connected to the computer, turn the rotary disk to monitor measurement
mode.
Tilt the LCD panel up slightly and attach the measurement device to the measurement window.
(Refer to the user’s manual of the measurement device)
Proceed with adjustment in accordance with the instruction on the message window.
ColorNavigator sequentially shows some patterns for adjusting the monitor. Monitor adjustment
takes approximately 3 minutes.
colormunki
Note
•When you perform the monitor adjustment, the monitor automatically switches to CAL mode/
EMU mode (i.e. Calibration mode/Emulation mode). The monitor adjustment result is only
registered in CAL mode/EMU mode. (The result is not registered in other modes.)
•The figure displayed in this window, depends on the type of measurement device connected to
the computer.
16
2. How to Adjust the Monitor
Progress bars are displayed on the right-bottom corner while adjustment is in progress.
Message display area:
Instructions or any software
messages will be displayed
while the adjustment is in
progress.
Progress chart:
The chart shows the status
of adjustment.
Level display chart :
The present adjustment
status is plotted in the
chart.The red cross line
means the target and the
black cross line indicates
the present status.
Brightness bar:
The present brightness level
is shown in the brightness
bar. The target brightness
level is marked in red.
17
2. How to Adjust the Monitor
7
Confirm the result
When the monitor adjustment has been finished, the result window will appear. Confirm the
result.
About monitor validation,
refer to "3-1.Monitor
Validation".
Store the adjustment
result and generate a
monitor profile.
Note
•If the black level became to minus value and the adjustment failed, an error message is displayed.
Follow the indication displayed in the window and adjust the monitor from the beginning again.
It's because the measurement device could not have been attached to the monitor closely or light
could have seeped through to the sensor of the measurement device during initialization.
8
Save a profile
Click [Save] and then the message "The adjustment of the monitor is completed." is displayed.
Click [Quit]. (Mac OS)
Click [Exit]. (Windows)
The monitor adjustment is finished.
Note
•The suitable modes for the display image are available on the monitor (fine contrast mode).
When you perform the monitor adjustment with ColorNavigator, the monitor automatically
switches to CAL mode/EMU mode (i.e. Calibration mode/Emulation mode). The monitor
adjustment result is only registered in CAL mode. (The result is not registered in other modes.)
•Once the monitor is adjusted by ColorNavigator, avoid adjusting the monitor image to no
purpose. If the monitor image is adjusted after monitor adjustment, the adjustment result will
be lost.
•Do not select the color profile on your OS after the profile is saved, or color management cannot
be conducted properly.
18
2. How to Adjust the Monitor
2-2. Monitor Adjustment Procedure (Creating a New
Target)
Create a Target to Adjust the Monitor
It is possible to set the adjustment target by specifying each value of brightness, white point and gamma.
Flow Diagram
Note
•When you perform the monitor adjustment, the monitor automatically switches to CAL mode/
EMU mode (i.e. Calibration mode/Emulation mode). The monitor adjustment result is only
registered in CAL mode/EMU mode. (The result is not registered in other modes.)
•When you adjust 6 colors on CG18, CG19, CG21 monitors, the monitor adjustment result is
registered to the Custom mode.
Start up ColorNavigator
Select the measurement device
Show the startup window
初期画面表示
Select a monitor
* The message shows in multiple monitor
environment.
Create a new target
Set
the target details * It is possible to set each target for brightness,
モニター選択
white point, gamma and black level.
Measure the target
* Some measurement devices can set the
target by measuring ambient light or
paper white.
Initialize the measurement device
Adjust the monitor
・Gamma
・Brightness
・Gain
・Gamut*1
・Black Level*2
Show the result
Generate the Profile
* The software adjusts the monitor automatically.
* Show after the monitor adjusting is complete.
* Save the monitor adjustment result and generate the profile.
Quit ColorNavigator
Adjust the monitor
periodically
*1: Gamut is available on CG220/CG221/CG222W/CG241W/CG301W
*2: Black level is available for digital input in CE series.
19
2. How to Adjust the Monitor
Setup ColorNavigator
1
Turn on both the monitor and the computer 30 minutes before monitor
adjustment (= warming up)
Disable the power managing function of them so they will not be in the power save mode.
Quit other applications before starting up the ColorNavigator. Disable the screen saver so that it
will not be activated during adjustment or measurement.
Note
•To obtain precise adjustment results, the monitor and computer must be sufficiently warmed-up.
Once the monitor goes into the power-save mode, it takes a while for the brightness and color
conditions to re-stabilize.
2
Set the display resolution and colors
Set the monitor color at 16.7 million (24 bit) or more.
It is recommended that the resolution is 1024 x 768 or higher.
How to Adjust a Monitor
1
Startup ColorNavigator
Macintosh
Double click "ColorNavigator" icon in "Application" - "Utilities".
Windows
Double click "Shortcut to ColorNavigator" icon on the desktop.
Note
•Do not disconnect USB cables of the monitor or measurement device while running
ColorNavigator. Doing so may result in system freeze or software malfunction.
2
Select a measurement device
Select the proper measurement device for using ColorNavigator then click [OK].
If "Show this dialog box when ColorNavigator starts up" box is unchecked, this dialog is not
shown unless the measurement device is cannot be found.
20
2. How to Adjust the Monitor
3
Startup window appears. Click [Create a new target...]
4
If the monitor is CG18, CG19 or CG21, the following window will appear
If adjusting the 6 Colors after monitor adjustment, click the radio button "Yes" in "Do you wish
to adjust hues and saturations of RGBCMY?".
21
2. How to Adjust the Monitor
5
Set the targets
Make a new target window will appear. Set values for following items, and then click [Next].
Gamut: (for CG220, CG221, CG222W, CG241W, CG301W)
Monitor displaying status can be emulated by selecting a profile from the list.
Recommended: Select "Monitor native" when no emulation is performed. (Recommended)
Select a profile for the emulation target.
Values for Gamut and
White point can be
specified with x-coordinate
and y-coordinate.
After setting, click [Next].
Note
• When you set the target white point by color coordinates, assign the target between 0.24 and 0.45
for x-coordinate and y-coordinate.
• When the target white point or RGB Gamut has been changed, the status displayed in the
profile is changed to "manually".
22
2. How to Adjust the Monitor
Brightness / White Point:
Set the Brightness (brightness) and White Point (white balance) for the monitor.
Recommended : Brightness 80cd/m2, White Point 6500K (default settings).
Some measurement device can set the target by measuring ambient light or paper white.
When selecting "Manual"
Specify the targets for brightness and white point manually.
Set the monitor brightness
while white color is
displayed over the screen.
Extend the setting range
of the target brightness.
Set the color temperature.
The white point can be set
with numerical input.
After setting, click [Next].
When selecting "Paper white"
Set the target coordinates of a white point and target brightness by measuring white point and the
brightness of the paper (paper white).
About the measuring procedure, refer to "2-3. Procedure for Measuring Paper White" (p. 31).
After setting, click [Next].
23
2. How to Adjust the Monitor
When selecting "Ambient light"
Set the target coordinates of a white point by measuring ambient light.
About the measuring procedure, refer to "2-4. Procedure for Ambient Light" (p. 33).
After setting, click [Next].
Note
•When you set the target white point by color coordinates, assign the target between 0.24 and 0.45
for x-coordinate and y-coordinate.
24
2. How to Adjust the Monitor
Black Level:
Set the brightness of black (black level).
Black level adjustment function enables you to reproduce the light black with higher bright level.
It is effective to set black level higher when the contrast is too apparent.
Recommended: OFF [Minimum] (default setting)
After setting, click [Next].
Note
•The black level adjustment does not function when you adjust 6 colors with CG18, CG19, and
CG21.
25
2. How to Adjust the Monitor
Gamma:
Set the gamma. About L*, the selectable gamma value, refer to "About ColorNavigator".
Specify whether to put the priority on Gray balance in "Priority". ("Priority" item is not displayed
for CG18, CG19, CG21 monitors)
Recommended : Gamma 2.2, Priority Gray balance. (default setting)
Specify whether to set
Red, Green and Blue
Gamma individually or
with the same vale.
Specify whether to put the
priority on "Gray balance"
in "Priority".
After setting, click [Finish].
Note
About gray balance
The monitor adjustment with the priority on gray balance does the adjustment that brings all
points on the grayscale closer to the target white point.
Select priority on gray balance to correct RGB color balance of the grayscale in the middle tone.
However, the following restrictions exist when the monitor adjustment with the priory on gray
balance is done.
•The gamma and the black level adjustment are not available in the manual adjustment.
•The contrast might decrease.
•The color space is different from that of the monitor adjustment without priority on gray
balance.
•In the state to raise the contrast by using "Contrast emphasis" function (part of the universal
access function), the gray balance cannot be adjusted on Mac OS X. Please turn off the contrast
emphasis.
•The gray balance cannot be adjusted with ColorVision Spyder2/ColorVision Spyder3.
26
2. How to Adjust the Monitor
6
Set a target name
Click [OK].
7
Save a profile
The above window will appear. Click [Do adjust].
Tips
•Name the profile within 63 characters.
•Profile name cannot contain any of the following characters:
Windows: \ / : * ? " < > |
Mac: / :
The name beginning with "."
•Generating a profile allows ColorNavigator to switch the monitor color settings based on the
adjustment result (Select an adjustment result from the list, and click [Apply] in the startup
window).
Note
•The suitable modes for the display image are available on the monitor (fine contrast mode).
When you perform the monitor adjustment with ColorNavigator, the monitor automatically
switches to CAL mode/EMU mode (i.e. Calibration mode/Emulation mode). The monitor
adjustment result is only registered in CAL mode/EMU mode. (The result is not registered in
other modes.) Use CAL mode/EMU mode for the monitor.
•When you adjust 6 colors on CG18, CG19, CG21 monitors, the monitor adjustment result is
registered to the Custom mode.
•Once the monitor is adjusted by ColorNavigator, avoid adjusting the monitor image on no
purpose. If the monitor is adjusted again, the previous adjustment result will be lost.
•Do not select the color profile on your OS after saving the profile, or color management cannot
work properly.
8
Proceed "Auto Adjust" button (analog input only)
Follow the software instructions and click the monitor auto adjust button.
27
2. How to Adjust the Monitor
9
Initialize the measurement device
Initialize the measurement device according to the instructions.
When colormunki is connected to the computer, turn the rotary disk to initialization mode.
Initialization takes a few seconds.
colormunki
Note
•Be sure that light does not seep through to the sensor of the measurement device during
initialization. Precise monitor adjustment results cannot be obtained if light is detected during
the initialization process.
•When ColorVision Spyder2 or Spyder3 is connected to the computer, this window will not
appear.
28
2. How to Adjust the Monitor
10 Proceed monitor adjustment
When colormunki is connected to the computer, turn the rotary disk to monitor measurement
mode.
Tilt the LCD panel up slightly and attach the measurement device to the measurement window.
(Refer to the user’s manual of the measurement device)
Proceed with adjustment in accordance with the instruction on the message window.
ColorNavigator sequentially shows some patterns for adjusting the monitor. Monitor adjustment
takes approximately 3 minutes.
colormunki
Note
•When you perform the monitor adjustment, the monitor automatically switches to CAL mode/
EMU mode (i.e. Calibration mode/Emulation mode). The monitor adjustment result is only
registered in CAL mode/EMU mode. (The result is not registered in other modes.)
•The figure displayed in this window depends on the type of measurement device connected to
the computer.
29
2. How to Adjust the Monitor
Progress bars are displayed on the right-bottom corner while adjustment is in progress.
Message display area:
Instructions or any software
messages will be displayed
while the adjustment is in
progress.
Progress chart:
The chart shows the status
of adjustment.
Level display chart :
The present adjustment
status is plotted in the
chart.The red cross line
means the target and the
black cross line indicates
the present status.
Brightness bar:
The present brightness level
is shown in the brightness
bar. The target brightness
level is marked in red.
11 Confirm the result
After completing the monitor adjustment, confirm the result in the displayed result window.
About monitor validation,
refer to "3-1. Monitor
Validation".
* Depending on the setting
[Validation Result...]. is
displayed.
Store the adjustment
result and generate a
monitor profile.
Note
•If the black level became to minus value and the adjustment failed, an error message is displayed.
Follow the indication displayed in the window and adjust the monitor from the beginning again.
The measurement device may not have been attached to the monitor closely or light may have
seeped through to the sensor of the measurement device during initialization.
30
2. How to Adjust the Monitor
2-3. Procedure for Measuring Paper White
The target value of a white point and the target brightness can be set by measuring the light that is
reflected from the paper.
1
Select "Paper white" in the new target creation window
2
Select "EPSON Photo Paper" or "Photo Paper" and click [Measure the target...]
3
Initialize the measurement device
The initialization window of the measurement device will open.
When colormunki is connected to the computer, turn the rotary disk to initialization mode.
Click [Initialize]. Initialize the measurement device according to the instructions.
Initialization takes a few seconds. The paper white measurement window will open.
Note
•Be sure that light does not seep through to the sensor of the measurement device during
initialization. Precise adjustment results cannot be obtained if light is detected during the
initialization process.
•When ColorVision Spyder2 or Spyder3 is connected to the computer, this window will not
appear.
31
2. How to Adjust the Monitor
4
Measure the paper white
When colormunki is connected to the computer, turn the rotary disk to monitor measurement
mode.
Hold the measurement device as below, with the sensor facing the paper.
Move it approximately 25 cm away from the paper and maintain it parallel to the paper.
The use of the photo stands is recommended so that the paper will not move.
Approx. 25cm
Click [Measure] on the paper white measurement window.
colormunki
After the measurement, click [OK]. The measured values are set as the target brightness and white
of the configuration window. Click [OK].
Next, proceed to p.28 "9. Initialize the measurement device" and the further procedures.
Note
•In the paper white measurement, not only white point but also brightness is measured and
reflected in the target value.
•The target value of brightness is set by 5cd/m2, based on the rounded-up measurement value.
ex.) measured brightness : 80.1 cd/m2 -> 85 cd/m2
•If the measurement value of brightness is under 25 cd/m2, the target value of brightness is
automatically set to minimum value.
32
2. How to Adjust the Monitor
2-4. Procedure for Measuring Ambient Light
Note
•The following measurement devices enable ambient light measurement.
-X-Rite Eye-One Pro
-X-Rite Eye-One Display2
-X-Rite colormunki
Eye-One Pro/Eye-One Display2
1
Select "Ambient light" in the Make a new target window
2
Click [Measure the target...]
3
Initialize the measurement device
The initialization window of the measurement device will open. Click [Initialize]. Initialize the
measurement device according to the instructions.
Initialization takes a few seconds. The ambient light measurement window will open.
Note
•Be sure that light does not seep through to the sensor of the measurement device during
initialization. Precise adjustment results cannot be obtained if light is detected during the
initialization process.
4
Attach the ambient light head to the measurement device
About attaching, refer to the user's manual of the measurement device.
33
2. How to Adjust the Monitor
5
Measure the ambient light
Hold the measurement device as below, with the ambient light head side facing front.
Move it under the ambient light to be measured.
Ambient light head side
Click [Measure] on the ambient light measurement window.
After the measurement, click [OK]. The measured values are set as the target white point of the
configuration window. Click [OK].
Next, proceed to p.28 "9. Initialize the measurement device" and the further procedures.
34
2. How to Adjust the Monitor
colormunki
1
Select "Ambient light" in the Make a new target window
2
Click [Measure the target...]
3
Initialize the measurement device
The initialization window of the measurement device will open.
Turn the rotary disk to initialization mode.
Click [Initialize]. Initialize the measurement device according to the instructions.
Initialization takes a few seconds. The ambient light measurement window will open.
Note
•Be sure that light does not seep through to the sensor of the measurement device during
initialization. Precise adjustment results cannot be obtained if light is detected during the
initialization process.
35
2. How to Adjust the Monitor
4
Measure the ambient light
Turn the rotary disk to ambient light measurement mode.
Hold the measurement device as below.
Move it under the ambient light to be measured.
Click [Measure] on the ambient light measurement window.
After the measurement, click [OK]. The measured values are set as the target white point of the
configuration window. Click [OK].
Next, proceed to p.28 "9. Initialize the measurement device" and the further procedures.
36
2. How to Adjust the Monitor
2-5. Periodic Monitor Adjustment
Periodic Readjustment
The monitor brightness and color gradually alter. To compensate for changes, adjusting once every 2-4
weeks is recommended. It can be performed with the timer.
The monitor should be readjusted if the system configuration changes as below.
•Changing the computer or graphics board
•Changing the connector on the monitor (ex. from SIGNAL1 to SIGNAL2) to the computer or
graphics board
•Changing the monitor resolution or color
•Adjusting the monitor screen
Timer
Setting a timer displays messages on the screen a few hours after the monitor adjustment.
Refer to "5-1. Timer" (p. 43).
37
3. Advanced Settings (Validation, Manual Adjusment)
3. Advanced Settings (Validation, Manual Adjustment)
3-1. Monitor Validation
Verifies the adjustment status and adjustment target (profile) of the monitor.
1
Select a target and click [Detail...] in the startup window
Tips
•When you select "Start validation after calibration has completed.", validation is automatically
performed after adjusting monitor. Refer to "5-3. Validation (p. 45)"
•Validation can be performed in the adjustment result window.
2
Click [Start Validation...]
3
Initialize the measurement device
The initialization window of the measurement device will open. Click [Initialize]. Initialize the
measurement device according to the instructions.
Initialization takes a few seconds.
38
3. Advanced Settings (Validation, Manual Adjusment)
4
Confirm the result After validation, the number of the measured color batch, the color batch, the RGB values, the
measurement results, the calculated value derived from the profile, and the color difference (delta-E)
between the profile and the measurement results are shown on the result window.
Select the method of
calculation.
Display the delta-E graph.
Select the color
coordinates to display the
results.
Save the validation results
and generates a monitor
profile.
5
Save a profile
Click [Save] and then the message "The measurement result is saved." is displayed. Click [Quit].
The validation is completed.
39
3. Advanced Settings (Validation, Manual Adjusment)
3-2. Manual Adjustment
After completing adjustment, the white point, brightness, gamma, the hue and saturation of those 6
colors (red/green/blue/cyan/magenta/yellow) can be adjusted manually.
Note
However, note the following when adjusting the 6 Colors.
•Adjusting the 6 Colors makes difference in the color between images and print less noticeable and does
not correct the colors. The color management settings of each device may not be appropriate when the
color of the monitor image is noticeably different from that of the print.
•The results of any adjustment to the 6 Colors will be saved in the ColorNavigator as adjustment data.
The result of the 6 colors adjustment does not reflect the profile made after adjustment.
Procedure
1
Open the manual adjustment palette
Click [Adjust manually...] on the detail window.
The manual adjustment palette will open. Each tab of the manual adjustment palette will be
changed and adjusted. [All] includes all adjustment items.
Adjust the gain of Red/Green/Blue to adjust
the white balance.
+/- button:
click the button to either increase or decrease
each gain.
Coordinate specification:
Specify the coordinate by dragging the "O"
mark that indicates the current white point,
and each gain will be calculated.
Correct the brightness.
Correct the black level.
Set the monitor gamma. About L*, the
selectable gamma value, refer to "About
ColorNavigator"
Change the hue and saturation of 6 colors
Adjust the hue of red, green, blue, cyan,
magenta and yellow.
As the slide bar moves to the left, the
saturation goes low. As the slide bar moves to
the right, the saturation goes high
Adjust the hue of red, green, blue, cyan,
magenta and yellow.
The hue changes as the slide bar moves. See
the next page.
Go back to the stage before it was adjusted
manually
Show pattern display screen.
40
3. Advanced Settings (Validation, Manual Adjusment)
Color
Slide bar to the left
Slide bar to the right
R
G
B
C
M
Y
to magenta
to yellow
to cyan
to green
to blue
to red
to yellow
to cyan
to magenta
to blue
to red
to green
Tips
•The manual adjustment palette can move and be adjusted with the image.
•The values displayed on the left of the functions, such as white point, brightness, black level, 6
colors adjustment are reference values.
Note
•The monitor gamma adjustment varies depending on the monitor.
•The profile does not reflect the result of the 6 colors adjustment.
•If 6 colors adjustment is performed on CG18, CG19 or CG21, select "Yes" in the 6 color
adjustment window before performing.
2
Measure the monitor
After adjusting manually, click [OK] of the manual adjustment palette.
The manual adjustment palette will close and the measurement window will appear.
Follow the window instructions to measure the monitor.
3
Confirm the result and generate a profile
When the measurement has completed, the adjustment result window will appear. Confirm the
measurement result and click [Save] to generate a profile.
Profile can be edited.
Click [OK].
Note
•If the black level became to minus value and the adjustment failed, an error message is displayed.
Follow the indication displayed in the window and adjust the monitor from the beginning again.
It's because the measurement device could not have been attached to the monitor closely or light
could have seeped through to the sensor of the measurement device during initialization.
4
Save a profile
The above window will appear. Click [Quit].
41
4. Using ColorNavigator in Multiple Monitor Environment
4. Using ColorNavigator in Multiple Monitor Environment
If you use ColorNavigator in a multiple monitor environment, select a monitor to run the software after
starting up ColorNavigator.
Note
•If your OS is Windows Vista, the following settings are required in a multiple monitor environment.
1.Select [Control Panel] - [Appearance and Personalization] - [Personalization] [Adjust screen resolution].
2.[Display Settings] dialog appears.
3.Check the [Extend the desktop onto this monitor] check box for all monitors.
Startup ColorNavigator in Multiple Monitor Environment
1
Select a monitor
The software shows the following window after starting ColorNavigator.
Move the software window to the screen of the monitor you want to adjust and go on to the next
step.
2
Select a function
Select a function on the startup window. The process for each function is the same as that in a
single monitor environment.
3
Run ColorNavigator on the second monitor
When calibration is completed, a completion message will appear.
Press [Return to the start up window] and repeat the process for the second monitor.
42
5. Preferences
5. Preferences
Macintosh
Click [ColorNavigator] - [Preferences...] to open the timer setup window.
Windows
Click the [Preferences] button in the startup window to open the timer setup window
5-1. Timer
Setting a timer displays messages on the screen a few hours after the monitor adjustment.
Enable the check box to activate timer.
Disable the check box and set the timer 100
hours. Also, return the setting of the profile
and validation to the defult settings.
The timer can be set between 50 and 1,000 hours. The setup varies depending on the time.
Time
Setup
50-100 hrs
100-200 hrs
200-500 hrs
500-1000 hrs
every 10 hr
every 20 hr
every 50 hr
every 100 hr
Click [OK] after setting the time.
43
5. Preferences
5-2. Profile
Macintosh
Specify a folder with the attribute to save a profile.
Local domain
Usable folders for all accounts which
registered in PC. (Administrator authority is
required)
User domain
User’s personal folder
Windows
Select a folder to save a profile.
System Profile folder (Recommended)
Usable folders for all accounts which
registered in PC. (Administrator authority is
required)
User specified folder
Folder specified by user.
Note
When you select "User specified folder"
•The profile needs to be set to the system manually.
About the setting, refer to "About Color Profiles" in EIZO LCD Utility Disk.
•If you have no access right to the folder, an error message will appear.
44
5. Preferences
5-3. Validation
Specify the number of color patches that is used for validation. Default setting is 32.
Simple: 32 colors
Detail: 145 colors
Default setting is "Detail".
When the box is checked, validation is
performed automatically after the monitor
adjustment. Default setting is OFF.
5-4. Measurement device
When the box is checked, the measurement
device selecting window appears during
ColorNavigator startup.
If the box is unchecked, this dialog is not
shown unless the measurement device
cannot be found.
Select the method to compensate the
measurement value.
Color Management (Recommended)
For accurate color management workflow.
Suitable for single monitor using.
Multiple Monitor Matching
For color matching among various monitors.
No compensation
For other company’s monitor validation tool.
The sensor measurement value is used as it
is.
Adobe RGB-compliant monitor may not
be measured correctly depending on your
sensor.
45
6. Error Message List
6. Error Message List
Find the following description if a message appears while running Color Navigator.
Problems
Initialization Error:
<Macintosh>
•Mac OS X 10.3.9 or later is required for starting up
Points to check / Description
[] Check the system requirements of ColorNavigator. Refer
to "1. Setting Up".
ColorNavigator.
•Set monitor color to 16.7 million colors or more to start up
ColorNavigator.
<Windows>
•Windows XP or later is required for starting up
ColorNavigator.
•Set monitor color to 24 bit or more to start up
ColorNavigator.
[] Confirm that all the devices, that are necessary to start up
•Failed to detect monitor and measurement device. Quit
ColorNavigator, are detected by Device Manager.
(Macintosh) / Exit (Windows) the software, reconnect
USB cable to both monitor and measurement device, then [] Check the USB connection of the monitor and
measurement device.
restart the software.
•The adjustment capable monitor cannot be found. The
[] Check whether the ColorEdge series monitor is connected.
monitor cannot be adjusted with the current status.
•Turn the rotary disk to initialization mode then click
[Initialize].
•Check the measurement device is placed on the white
ceramic tile of base plate firmly then click [Initialize].
[] Check whether the rotary disk is turned to initialization
mode when colormunki is connected to the computer.
[] Check whether the measurement device is placed on the
base plate.
•Check the measurement device is placed on the flat and
opaque surface then click [Initialize].
Measurement Error / Adjustment Error / File Error:
•Select another white point, or retry [Proceed].
•Check the measurement device firmly attached to the
measurement window, then click [Proceed].
•Avoid operating any function of the monitor while
measuring monitor. Retry measurement.
[] Check whether the target of white point is set between 0.24
and 0.45 for x-coordinate and y-coordinate.
[] Attach the measurement device to the measurement
window firmly.
[] If the monitor is operated while ColorNavigator is in
active, the software operation may end in failure.
•Avoid operating any function of the monitor while running
ColorNavigator. Retry Adjustment.
•Avoid operating any function of the monitor while the
adjustment result selection window is displayed. Start the
operation over again.
[] It cannot generate a profile if the file name includes "/".
•Failed to generate a profile. Retry [Save].
Rename and retry save.
Communication Error:
•Restart the software and retry operation.
46
[] Check whether the USB cable of the monitor and
measurement device is connected. Avoid disconnecting the
USB cable while adjusting the monitor.
EIZO NANAO CORPORATION
http://www.eizo.com
7th Edition-July, 2008
03V22065G1
(U.M-E C.N)