1
Radio / CD
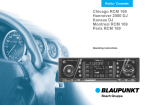
Alabama DJ
Seattle RDM 169
Tokyo RDM 169
Operating instructions
Alab/Seatt/Tokyo d 95%®
1
08.05.2002, 10:23 Uhr
2
1
3
12
13
4
5
10
11
9
8
7
6
19
14
18
21
1
3
17
16
2
Alab/Seatt/Tokyo d 95%®
2
Tokyo RDM 169
Option / Optional /
Tilval / Optie /
Opcional / Opção:
2
15
08.05.2002, 10:23 Uhr
20 Alabama DJ
Seattle RDM 169
Table of contents
Quick Reference ........................... 41
RC 08 remote control unit ........... 48
Important notes ............................ 49
What you need to know ........................ 49
Traffic safety ......................................... 49
Installation ............................................. 49
Telephone mute .................................... 49
Accessories .......................................... 49
Guarantee ............................................. 49
International telephone information ...... 49
KeyCard theft protection system 50
Putting the unit into operation .............. 50
Removing the KeyCard ........................ 50
“Training” a second KeyCard/
Replacing a KeyCard ............................ 50
Displaying the radio pass data ............. 51
Short Additional Memory (S.A.M.) ........ 51
Turn On Message (T.O.M.) .................. 51
Optical display as theft protection ........ 51
Care of your KeyCard ........................... 52
Lost or damaged KeyCard ................... 52
Training the new KeyCard .................... 52
Making mistakes in the entry ................ 52
Selecting the operating mode ..... 53
Optimising display legibility ....... 53
Radio operation with RDS ........... 54
AF - Alternative frequency .................... 54
REG - regional program ....................... 54
Selecting a waveband .......................... 55
Station tuning ........................................ 55
Scrolling through the broadcasting
networks (FM only) ............................... 55
Changing the memory bank (FM) ........ 56
Storing stations ..................................... 56
Automatically storing the strongest
stations with Travelstore ....................... 56
Recalling stored stations ...................... 56
Scanning stored stations with
Preset Scan .......................................... 57
Scanning stations with Radio Scan ...... 57
Changing the scan time ........................ 57
Selecting the seek tuning sensitivity .... 57
Switching from stereo to mono (FM) .... 58
Automatic bandwidth adjustment
(SHARX) ............................................... 58
PTY - Program Type ............................. 58
Program type ........................................ 58
Traffic information station
reception with RDS-EON ............. 61
Traffic announcement priority on/off .... 61
Warning beep ....................................... 61
Automatic seek tuning start .................. 61
Adjusting the volume for traffic
announcements and the warning beep . 61
Selecting the display mode .................. 63
Selecting CDs and titles ....................... 63
Repeating tracks/CDs ........................... 63
TPM (Track Program Memory) ............. 63
MIX ........................................................ 64
SCAN .................................................... 65
Entering CD names .............................. 65
Deleting CD names/TPM with
DSC UPDATE ....................................... 65
Clock - Time .................................. 66
Setting the clock ................................... 66
Displaying the clock .............................. 66
Correcting the clock after the power
has been disconnected ......................... 66
Deactivating the hour correction
function ................................................. 66
Setting the equaliser .................... 67
Notes on making the settings ............... 67
Setting recommendations on the
Internet .................................................. 67
Assistance in setting your equaliser ..... 68
DSC programming ....................... 69
Overview of the DSC factory settings .. 72
Specifications ............................... 72
CD operation / CD changer
operation ....................................... 62
Glossary Technical Terminology ................ 73
Inserting a CD ....................................... 62
Removing a CD .................................... 62
Switching on CD operation ................... 62
Switching on CD changer operation ..... 62
Index .............................................. 75
Installation and
connection instructions ............ 304
40
Alab/Seatt/Tokyo gb 95%®
40
08.05.2002, 10:34 Uhr
2
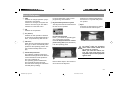
The viewing angle of the display can
be adjusted individually to ensure optimum legibility. If necessary, refer to
the section on “Optimising the display
legibility”.
1
3
Switching the sound on/off:
Press ON briefly. When the sound has
been switched off, “MUTE” will appear
in the display.
The sound can be switched on again
by turning the volume knob 3.
Switching the unit on with the ignition switched off:
After you have switched off the ignition
(KeyCard is inserted in the unit), you
can continue to operate the unit as follows:
After the double beep press ON.
The unit will switch on.
After the unit has played for an hour it
will switch off automatically to prevent
the car battery from running down.
DEUTSCH
ENGLISH
FRANÇAIS
PORTUGUÊS
For safety’s sake, the operating
panel must remain locked when
the vehicle is in motion.
When you leave the vehicle, unlock the panel and remove the
KeyCard to protect the equipment
against theft.
Switching the unit on/off with the
ignition:
If the unit has been connected accordingly, it can be switched on and off
with the car ignition.
After you switch off the ignition, a double beep will sound to remind you to
remove the KeyCard and take it with
you.
ITALIANO
To switch off the unit:
Press ON for approx. 1 second.
Switching the unit on/off with the
KeyCard:
The unit switches on or off when the
KeyCard is inserted or removed.
Refer to section @ in the Quick Reference on the KeyCard theft protection
system.
NEDERLANDS
2 ON
Switching the unit on:
With the KeyCard inserted, press ON
briefly.
The unit will begin to play in the operating mode selected last at the pre-set
volume.
SVENSKA
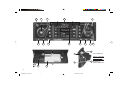
1 Unlocking the fold-down operating
panel
It is possible to insert or remove the
KeyCard and the CD when the operating panel is unlocked.
To unlock the panel press 1, the operating panel will fold down. The operating panel cannot be removed. Do not
use the panel as a rest or shelf.
To lock the panel, push it back into its
starting position (arrow 3).
ESPAÑOL
Quick Reference
41
Alab/Seatt/Tokyo gb 95%®
41
08.05.2002, 10:34 Uhr
Quick Reference
3 Adjusting the volume
Turn the knob to adjust the volume as
desired.
The volume level selected will appear
in the display. When the unit is
switched on, it will automatically play
at the pre-set volume (ON VOL).
It is possible to adjust the ON VOL (refer to “DSC programming - ON VOL”).
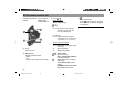
4 Softkeys / Display
Softkey = key with different functions
The functions which appear in the display can be selected.
Radio operation
While listening to the radio you can
press TU to switch between menu level 1 and menu level 2.
The unit will return to menu level 1 automatically 8 seconds after the last key
is pressed.
Menu level 1
Station keys and memory levels
Menu level 2
Adjusting the radio functions
NEXT - FM
Switches between the memory levels
for FM I, FM II, FM T.
NEXT - AM (MW, LW)
Switches between the MW and LW
wavebands.
NEXT - FM
Switches between the memory levels
for FM I, FM II, FM T.
NEXT - AM (MW, LW)
Switches between the MW and LW
wavebands.
ST1 - ST6
On this memory level it is possible to
store radio stations on the FM levels I, II
and “T” on the keys marked ST1 to ST6.
6 stations each can be stored for the
MW and LW wavebands.
Storing a radio station - Press one of
the station keys from ST1 to ST6 until
it is possible to hear the program again
(beep).
Recalling a radio station - Select the
desired waveband. For FM press
NEXT to select the memory level required and press the corresponding
station key briefly.
BND
Selects the waveband and memory
level (FM I, FM II, FM T, MW, LW).
SCA - Scan
a) PTY is switched off
(lettering is lit normally, not highlighted
in the display)
Press SCA briefly (Radio Scan) “SCAN” will flash in the display alternately with the abbreviation for the station being scanned. All of the radio
stations within reception range will be
scanned.
42
Alab/Seatt/Tokyo gb 95%®
42
08.05.2002, 10:34 Uhr
PTY
(Program Type)
With PTY the station keys become program type keys.
“PTY” must be highlighted in the display (press PTY if necessary).
Now it is possible to select a program
type such as NEWS, SPORT, POP,
and store it on one of the station keys.
AF (Alternative Frequency for RDS
operation)
If “AF” is highlighted in the display, the
radio will automatically search for a
Use the corresponding softkeys to select MIX, SCAN, RPT (Repeat) and
TPM in CD and changer operation.
MIX
CD tracks will be played in random order.
Press the MIX key to select the following functions:
43
Alab/Seatt/Tokyo gb 95%®
43
DEUTSCH
Press SCA the stations broadcasting the programs for the PTY program type selected will be scanned.
CD and changer operation
ENGLISH
TS (Travelstore)
If you press TS, the radio will switch to
FMT from any other waveband. The
six stations with the strongest reception will be stored automatically. After
the stations have been stored, the radio will tune into the station with the
best reception and begin to play.
FRANÇAIS
b) PTY is switched on
(lettering is highlighted in the display)
NEDERLANDS
ENT (Enter)
Press this key briefly to accept or store
an adjustment.
REG (Regional function)
This function is active when “REG” is
highlighted in the display.
REG on/off: Press TU to select menu
level 2 and press REG briefly.
If necessary, refer to the section on
REG - Regional in the more detailed
instructions.
SVENSKA
Stopping Radio Scan / Preset Scan:
Press SCA or the rocker switch once
again.
EXIT
Press this key briefly to end or cancel
an adjustment.
Press << >> to activate the PTY program types and press the station keys
to store them (press the key for approx. 2 seconds, until you hear a
beep).
08.05.2002, 10:34 Uhr
ESPAÑOL
frequency with better reception for the
station you are tuned into.
AF on/off: Press TU to select menu
level 2 and press AF briefly.
PORTUGUÊS
Press SCA for approx. 1 second
(Preset Scan) You will hear a beep and “SCAN” will
flash in the display alternately with the
abbreviation for the station being
scanned. The radio stations which
have been stored on the station keys
and which are currently within reception range will be scanned.
ITALIANO
Quick Reference
Quick Reference
- MIX CD = the tracks on the CD will
be played in random order.
If you are using a CD changer, the
CDs will be selected in numerical order and the tracks in random order.
- MIX MAG (for changer operation
only) = all of the tracks on all of the
CDs in the magazine will be played
in random order.
- MIX OFF = switches the function off.
SCA - Scan
Scans the tracks (the tracks of all the
CDs for changer operation).
Start Scan:
Press SCA. The tracks will be scanned
in ascending order one after the other.
The scan time can be adjusted (see
“DSC programming - SCANTIME”).
Stop Scan:
Press SCA. The track scanned last will
begin to play.
RPT - Repeat
CD tracks or CDs in the CD changer
can be repeated as often as desired.
Press the RPT key to select one of the
following functions:
- REP TRCK = Repeat track
- REP CD = Repeat CD (for changer
operation only)
- RPT OFF = switches the function off
TPM - Track Program Memory
To store and play your favourite tracks
in CD or changer operation. Up to 30
CDs for the CD drive and up to 99 CDs
in the CD changer can be stored in the
system with a maximum of 40 tracks
each. (See the section on “TPM - Programming”)
CLR
To clear the TPM memory. (See the
section on “TPM - Deleting the memory”)
5 TA (Traffic Announcement = priority
for traffic information)
“TP” will appear in the display when
the radio is tuned into a traffic information station.
“TA” will appear in the display when
the priority for traffic information has
been activated.
The radio will then play traffic information radio stations only.
Priority on/off: Press TA.
Interrupt an announcement: Press TA
or EXIT.
6 Rocker switch
Radio operation
If you press the rocker switch when the
unit is on menu level 2, it will automatically return to menu level 1.
/
<< / >> down/up in short intervals
(for FM only when AF and PTY are
switched off)
For FM only:
<< / >> Pages through the station chain
with AF on and PTY off
e.g.: NDR 1, 2, 3, 4, N-JOY, ...
44
Alab/Seatt/Tokyo gb 95%®
44
Station seek tuning
up
down
08.05.2002, 10:34 Uhr
Additional functions for the rocker
switch:
Other adjustments are possible with
AUD
8
DSC-MODE 7
PTY
as long as the corresponding function
is activated.
How to make the settings:
Select the operating mode.
Press AUD once, “BASS” and the level
currently selected will appear in the
display.
Additional feature
Switching the equaliser on/off (DPE
ON/OFF):
Press AUD for approx. 2 seconds.
“DPE ON” or “DPE OFF” will appear
briefly in the display.
For more information on the equaliser:
Refer to “Setting the equaliser”.
45
Alab/Seatt/Tokyo gb 95%®
45
DEUTSCH
FRANÇAIS
Switching off AUD:
Press EXIT.
If you do not alter any of the settings,
AUD will switch off automatically after
8 seconds.
ITALIANO
Alabama DJ, Tokyo RDM 169:
For FM, AM, CD, AUX and TA it is
possible to store different treble, bass
and loudness settings.
NEDERLANDS
Select track
up: Press briefly
CUE - fast forward (audible):
Hold pressed down
down: Press twice or repeatedly
briefly
To restart the track: Press briefly
REVIEW - fast reverse (audible):
Hold pressed down
Special Loudness feature:
Press / to select the setting from
LOUD 6 to LOUD OFF.
SVENSKA
/
8 AUD
Adjusts treble, bass, balance (left/
right), fader (front/rear) and Loudness.
Loudness = Boosts low frequency for
more bass and a better adjustment to
the human ear.
Use << / >> to select the different
modes.
Use / to make the corresponding
settings.
The settings selected will appear in the
display. The setting selected last will
be stored automatically.
ESPAÑOL
<< / >> Select CD (for changer operation
only)
>>
up: Press briefly
<<
down: Press briefly
7 DSC (Direct Software Control)
Using DSC it is possible to adjust the
programmable basic settings.
Further information: “DSC programming”.
PORTUGUÊS
CD and changer operation
ENGLISH
Quick Reference
08.05.2002, 10:34 Uhr
Quick Reference
9 DIS
Selects different display modes.
Radio operation
Press DIS briefly:
- Name of the current radio station
- Current frequency
- PTY code
This will not work properly unless the
radio is able to receive an RDS station
in adequate reception quality.
Changer operation
Press DIS briefly:
- CD number, track number, clock
- CD number, track number, time
played
- CD name, track number
: Display
NDR2
FM
I, II, T
Press DIS for approx. 2 seconds:
Display will alternate between the
clock and the waveband (incl. the
memory level for FM).
TP, TA
PTY
AF
CD operation
Press DIS briefly:
- Track number, clock
- Track number, time played
- CD name, track number
lo
EQ
DISC-IN
- station name
- waveband
- memory level I, II or Travelstore
- TP = Traffic Program
- TA = Priority for traffic information is activated
- Program type is activated
- Alternative frequency for
RDS
- Seek tuning sensitivity adjustable with DSC
- Equaliser is switched on
- CD is inserted in the unit
TRACK 13 - CD track number
or
VIVALDI - CD name
or
CD 5 T 2 - CD number and track number
(changer operation)
MIX
- CD tracks can be played in
random order
SCA
- CD tracks are being scanned
RPT
- Repeat function for CD/
changer operation
TPM
- Store and play favourite CD
tracks
CLR
- Delete TPM memory
FM I, II, T
or
MW, LW
or
00:20
or
12:50
46
Alab/Seatt/Tokyo gb 95%®
46
08.05.2002, 10:34 Uhr
- FM memory level
- Waveband
- Time played
- Clock
? Visual theft protection
The following conditions must be fulfilled before the light diode will flash as
a visual indication of theft protection:
The unit is switched off;
The operating panel is folded down;
The KeyCard has been removed;
The DSC menu settings is switched to
LED ON (factory setting).
ITALIANO
1
3
Perform these steps in the reverse order to remove the KeyCard.
47
Alab/Seatt/Tokyo gb 95%®
47
NEDERLANDS
For safety’s sake, the operating
panel must remain locked when
the vehicle is in motion.
When you leave the vehicle, unlock the panel and remove the
KeyCard to protect the equipment
against theft.
ESPAÑOL
> CD insert
When the CD is inserted with the label
facing up, it will be automatically transported into the operating position. The
unit will automatically switch to CD
play.
Inserting the KeyCard
Press 1 to unlock the operating panel; it will fold down forwards.
Insert the KeyCard with the contact
points facing down (see illustration).
Lock the operating panel.
2
= TU (TUNER)
Switches to radio operation. Switches
to the memory levels/wavebands FM I,
FM II, TS (Travelstore), MW and LW.
KeyCard
SVENSKA
< CD
Switches to CD operation
A Eject
Press the CD eject button for approx.
2 seconds and the CD will eject.
FRANÇAIS
@ KeyCard theft protection system
The KeyCard must be inserted before
the unit can be operated.
Make sure to read the information in
the section on “KeyCard theft protection system”.
DEUTSCH
For more information, refer to “DSC
programming, LED ON/OFF”.
PORTUGUÊS
; CDC
Switches to changer operation (only if
a changer is connected).
If there is no changer, the system will
switch to AUX as long as AUX ON is
switched on in the DSC menu.
ENGLISH
Quick Reference
08.05.2002, 10:34 Uhr
RC 08 remote control unit
Included with package: Tokyo RDM 169
Optional:
Alabama DJ
Seattle RDM 169
D << / >>,
E
/
Sound mute on/off:
briefly. When the sound has
Press
been switched off “MUTE” will appear
in the display.
Radio operation
Station seek tuning
up
down
18
<< / >> down/up in short intervals
(for FM only when AF and
PTY are switched off)
21
For FM only:
<< / >> Pages through the station
chain with AF on and PTY off
e.g.: NDR 1, 2, 3, 4, N-JOY, ...
19
20
CD and changer operation
<< / >> Select CD (for changer operation only)
>>
up: Press briefly
<<
down: Press briefly
B V- / V+
Volume control
C SRC (Source)
Switches operating modes
- Radio
- CD
- Changer (if a changer is connected)
/
Select track
up: Press briefly
CUE - fast forward (audible):
Hold pressed down
down: Press twice or repeatedly briefly
To restart the track: Press
briefly
REVIEW - fast reverse (audible): Hold pressed down
48
Alab/Seatt/Tokyo gb 95%®
48
08.05.2002, 10:34 Uhr
Accessories
Guarantee
Use only Blaupunkt-approved accessories
and spare parts.
You can use the following Blaupunkt products with this unit:
The scope of the guarantee is determined
by the laws in the country where the unit
was purchased.
Regardless of the legal guarantee regulations, Blaupunkt affords a 12-month guarantee.
If you have any questions about the guarantee, please contact your dealer. Your cash
register receipt is a valid guarantee coupon.
Should the traffic situation become particularly demanding, we advise you not to use
the audio system.
Always make sure that you are still able to
hear any warning signals coming from outside the vehicle, such as police or fire engine
sirens, so that you can react accordingly.
Consequently, you should always select a
moderate volume for playing your car audio
system while you are driving.
Installation
If you would like to install your new car stereo yourself or add other audio components
to existing ones, then please read the enclosed instructions on installation and connection carefully.
RC 08 remote control unit
The RC 08 infrared remote
control unit allows you to
conveniently operate the
most important functions
from the steering wheel.
This remote control unit is
included with the Tokyo
RDM 169 and can be ordered optionally for the other units.
International telephone information
Have you got any questions on the operation of this equipment or do you require more
information?
Give us a call!
You will find the international telephone and
fax number on the last page of this manual.
49
Alab/Seatt/Tokyo gb 95%®
49
08.05.2002, 10:34 Uhr
ENGLISH
Please keep in mind that you travel a distance of 14 m per second at a speed of only
50 km/h.
FRANÇAIS
Traffic announcements continue to have
priority if you have activated TA. You can
interrupt traffic messages by pressing TA.
Traffic safety
ITALIANO
As the driver of a motor vehicle, it is your
responsibility to pay attention to the traffic
situation at all times. Never use your car audio system in a way that could distract you.
CD changers
The following CD changers can be connected directly: CDC A 06, A 072, A 08.
The A 05 and the A 071 can be connected
with the adapter cable 7 607 889 093.
The CDC-A 08 is included with the Alabama
DJ.
NEDERLANDS
If you have installed a car telephone in your
vehicle, it is possible to automatically mute
the radio or CD playback when you use the
telephone (telephone mute). “PHONE” will
then appear in the display.
SVENSKA
Before using your new car audio system,
please read through the following information carefully.
Amplifiers
All Blaupunkt amplifiers
ESPAÑOL
Telephone mute
PORTUGUÊS
What you need to know
DEUTSCH
Important notes
KeyCard theft protection system
This car radio comes equipped with one
KeyCard, but it can also be operated with a
second card.
•
Insert the KeyCard with the contacts
facing down as shown in the illustration (arrow 1).
If you have lost your KeyCard or if it was
damaged, you can buy a new one from your
specialised dealer.
Preset button assignments, bass, treble,
balance and fader settings, Loudness, TA
(traffic announcement volume), beep volume, LOW-EQ, HIGH-EQ.
In addition, the settings activated before the
radio is switched off, such as the waveband,
station, TA priority, AF, REG ON/OFF,
SCANTIME, seek tuning sensitivity, ON VOL
and SHARX will also remained stored.
This ensures that you will find your basic
settings re-adjusted automatically as soon
as you have inserted your KeyCard.
Putting the unit into operation
• Turn on the set with ON.
To insert the KeyCard, unlock the operating
panel by
• pressing 1, the operating panel will
fold down.
2
If you use two KeyCards, the settings stored
on the first card will be transmitted to the
second. However, you can individually store
the following functions:
Removing the KeyCard
To unlock the operating panel:
•
Press 1, the operating panel will fold
down forwards.
•
Push the card in to the right as far as
possible and remove it to the front.
•
Push the operating panel back into position.
1
For safety’s sake, the operating
panel must remain locked when
the vehicle is in motion.
When you leave the vehicle, unlock the panel and remove the
KeyCard to protect the equipment
against theft.
3
•
Push the card in the direction of the arrow (2) and lock the operating panel
back into position (arrow 3).
The car radio is now ready for operation.
If a wrong KeyCard is inserted, then “CARD
ERR” will appear in the display.
The system will switch off after approximately ten seconds.
If another card type is inserted (e.g. phone
or credit card), the display will show
“WRONG KC” for approximately two seconds.
“Training” a second KeyCard/
Replacing a KeyCard
When the unit is in operation with the first
KeyCard, you can “train” a second one to
be also used with the set.
Remove the wrong card and insert the correct KeyCard.
If you want to “train” a second KeyCard:
• Insert the first KeyCard and turn on the
set.
•
•
Press ON to turn on the set.
Press the DSC button and press
to select “LEARN KC”.
• Press << or >>.
The display will switch to “CHANGE”.
50
Alab/Seatt/Tokyo gb 95%®
50
08.05.2002, 10:34 Uhr
/
The freely selectable text with a maximum
of 162 characters can be programmed by
any dealer who has the required equipment
available.
Turn On Message (T.O.M.)
Displaying the radio pass data
You can use the KeyCard supplied with your
set to display the radio pass data such as
the model name, product number (7 6 ...)
and serial number.
Please refer to the section on “DSC programming - READ KC”.
The second KeyCard available from your
specialised dealer also allows you to display a special turn-on message each time
the radio is switched on.
The freely selectable text with a maximum
of 48 characters can be programmed by any
dealer who has the required equipment
available.
When the vehicle is stationary and the KeyCard has been removed, the light diode can
be switched to flash for extra anti-theft security.
For this it is necessary that the positive power supply line and the permanent +12 V lead
are connected such as described in the installation instructions.
Make sure that the unit is switched off; the
operating panel is unlocked; the KeyCard
has been removed; “LED ON” has been
selected in the DSC mode (factory setting).
If necessary, please refer to the section on
“DSC programming - LED”.
Switching off the flashing light
The flashing light can be switched off by
selecting “LED OFF” in the DSC menu.
ENGLISH
Flashing light diode ?
FRANÇAIS
The second KeyCard available from your
specialised dealer allows you to read out
short information, which will run through the
display, such as, for example, the phone
number of your car dealer or the emergency call number of your automobile association.
ITALIANO
If you attempt “train” a third one, the access
authorisation for the KeyCard not used for
the “training” process will be deleted automatically.
Optical display as theft protection
NEDERLANDS
A maximum of two cards can be used with
the set.
Short Additional Memory
(S.A.M.)
SVENSKA
Remove the first KeyCard and insert
the new one while “CHANGE” still appears in the display.
After the display indicates “READY” or
“LEARN KC”,
• press DSC.
Now you can also use the new KeyCard for
operating your unit.
ESPAÑOL
•
DEUTSCH
KeyCard theft protection system
PORTUGUÊS
Each time you turn on your system with the
second KeyCard, the programmed text will
appear in the display.
51
Alab/Seatt/Tokyo gb 95%®
51
08.05.2002, 10:34 Uhr
KeyCard theft protection system
Care of your KeyCard
Training the new KeyCard
To ensure that the KeyCard will function
properly it is important that the contacts are
free from any foreign particles. Avoid direct
skin contact.
•
Insert the new KeyCard into the unit
and lock the operating panel into position.
•
Press ON.
If necessary, clean the KeyCard contacts
using a cotton swab soaked in rubbing alcohol.
•
Within the next 5 seconds, press TU
and ST1. “0000” will appear in the display.
Lost or damaged KeyCard
•
Now use the rocker switch to enter the
four-digit master code in the radio
pass:
/
- Enter digits (press as often
as required)
<< / >> - Select the entry position.
If the KeyCard for your unit is lost or damaged you can train a new KeyCard.
You can purchase the new KeyCard from
any authorised dealer. You will also require
the master code for the unit, which you will
find in the radio pass.
Always keep the radio pass in a safe
place. Do not leave it in your vehicle.
•
Press ENT after you have entered the
correct master code.
The new KeyCard has been accepted when
the unit switches to play.
Making mistakes in the entry
If you enter the wrong code, “CODE-ERR”
will appear in the display. If you enter the
wrong code three times, “WAIT 1h” will appear in the display. The unit will switch to a
standby mode for one hour.
• Switch the unit off and on again.
Repeat the steps to train the new KeyCard,
but be sure to enter the correct master code.
52
Alab/Seatt/Tokyo gb 95%®
52
08.05.2002, 10:34 Uhr
Optimising display
legibility
You can select from among the following
operating modes: radio (TU), CD and CDC
(changer).
The viewing angle of the display can be altered to allow optimum legibility.
• Press DSC.
CD cannot be selected unless a CD is inserted in the drive.
CDC cannot be selected unless one of the
Blaupunkt changers, the A 06, the A 072,
the A 08, the A 05, or the A 071 has been
connected and there is at least one CD in
the magazine.
•
ENGLISH
ITALIANO
FRANÇAIS
Press the lower part of the rocker
switch until “ANGLE” appears in the
display.
Press << / >> to set the best viewing
angle for your position.
When you have completed the setting
• press DSC.
NEDERLANDS
•
PORTUGUÊS
ESPAÑOL
SVENSKA
To switch the operating mode:
• press TU, CD or CDC.
If you press TU again, the unit will switch to
menu level 2. On this level it is possible to
adjust the functions for radio operation. The
unit will switch back to menu level 1 automatically approx. eight seconds after the last
adjustment was made.
DEUTSCH
Selecting the operating
mode
53
Alab/Seatt/Tokyo gb 95%®
53
08.05.2002, 10:34 Uhr
Radio operation with RDS (Radio Data System)
REG - regional program
The Radio Data System offers you more
convenience when you listen to FM radio
stations.
More and more radio stations have begun
to broadcast RDS information alongside
their programs.
As soon as a program has been identified,
the station name including a regional identifier, if available, will appear in the display,
for example, NDR1 NDS (regional program
in Lower Saxony, Germany).
When RDS is activated, the preset buttons
become program buttons. You now know
exactly which program you have tuned into,
making it easy to find the desired station
quickly.
But RDS offers you further advantages:
AF - Alternative frequency
The AF (Alternative Frequency) function
makes sure that the strongest frequency of
the currently selected program is always
tuned in automatically.
Switching AF on/off:
For radio operation
• Press TU, menu level 2 will appear.
• Press the AF button briefly.
The function is activated when “AF” lights
up in the display.
“AF” is highlighted for the corresponding
softkey.
While searching for the strongest reception
signal, the radio may switch to mute briefly.
If “SEARCH” appears in the display when
you switch on the radio or recall one of the
stored frequencies, this indicates that the
unit is automatically searching for an alternative frequency.
“SEARCH” will disappear from the display
when the alternative frequency has been
found or after the frequency band has been
run through completely.
If the reception quality of the selected program deteriorates beyond a certain point:
• Tune into another station.
Certain radio programs are split up at times
into regional programs offering local information. The 1st program broadcast by NDR,
for example, offers programs with different
contents in the northern states of Germany
Schleswig-Holstein, Hamburg and Lower
Saxony at certain times of the day.
If you are listening to a program and want
to continue to listen to that program, it is advisable to switch to REG ON.
If you leave the service area of the regional
program you are tuned into, or if you would
like to take advantage of the full RDS service, switch to “REG OFF”.
To switch REG on/off:
• Press TU, menu level 2 will appear.
Menu level 2
•
Press the key marked REG, you can
switch to “REG ON” or “REG OFF”.
54
Alab/Seatt/Tokyo gb 95%®
54
08.05.2002, 10:34 Uhr
Press / ; the car radio will automatically search for the next station.
If you hold / on the rocker switch pressed
up or down, seek tuning will speed up in upwards or downwards direction.
•
Press << >>; the frequency will change
in short intervals downwards or upwards.
If you hold the right or left part of the rocker
switch pressed down, the frequency scan
will accelerate.
Scrolling through the broadcasting networks (FM only)
Seek tuning
Up
Down
<< Down in short intervals
(for FM only; “AF” must be switched off)
>> Up in short intervals
(for FM only; “AF” must be switched off)
Manual tuning with << >>
You can use the << >> buttons to tune into
stations in your reception area.
If it is possible to receive several programs
in the same broadcasting network, you can
scroll through them forwards by pressing >>,
or backwards by pressing <<, e.g. NDR 1,
2, 3, 4, ... . Start Travelstore:
•
Menu level 2
You can also tune into a station manually.
•
In this case:
AF and PTY must be switched off (i.e. the
symbols do not light up in the display).
Press TU; menu level 2 will appear in
the display.
If “AF” does not light up,
• press AF in menu level 2.
DEUTSCH
PORTUGUÊS
Press BND (as often as required) to
select the waveband.
The radio will switch through the wavebands
as follows: FM I, FM II, FMT, MW, LW.
Manual tuning:
ENGLISH
•
FRANÇAIS
FM 87.5 - 108 MHz
MW 531 - 1602 kHz
LW 153 - 279 kHz
• Select the desired waveband by pressing TU, menu level 2 will appear in the
display.
/
ITALIANO
With this car radio you can select between
the following wavebands:
Automatic tuning
If necessary, deactivate these functions in
menu level 2.
NEDERLANDS
Selecting a waveband
Station tuning
SVENSKA
The setting selected will appear briefly in the
display. When the regional function has
been activated, the corresponding key will
be highlighted in the display.
ESPAÑOL
Radio operation with RDS (Radio Data System)
55
Alab/Seatt/Tokyo gb 95%®
55
08.05.2002, 10:35 Uhr
Radio operation with RDS (Radio Data System)
Changing the memory bank (FM) •
You can shift between the memory banks I,
II and T in order to store stations and recall
them later. The currently selected memory
bank is indicated in the display.
•
Press NEXT as often as necessary until the desired memory bank lights up
in the display.
Press the desired preset button until
the radio resumes play after the muting (takes approximately 2 seconds,
confirmed by a beep).
Now the station has been stored.
has been completed, the radio will play the
station with the strongest reception (ST 1).
Note:
Should you tune into a station which has
already been stored before on another memory bank, the corresponding preset button
and the memory bank will flash briefly in the
display.
Recalling stored stations
Automatically storing the
strongest stations with Travelstore
Storing stations
On FM, you can store six stations on the
preset buttons ST1 - ST6 for each of the
memory banks I, II and T.
On MW/LW, you can also store six stations
each.
• Press TU, menu level 2 will appear in
the display.
•
Press BND to select the waveband.
•
Use the rocker switch to tune into a
station (either automatically / or
manually << >>).
You can automatically store the six most
powerful FM stations in your current reception area sorted according to their signal
strength. This function is particularly convenient on longer trips.
• Press TU, menu level 2 will appear in
the display.
If desired, stations can also be stored manually on the Travelstore bank (see “Storing
stations”).
You can recall any stored station at the touch
of a button.
FM
Recall the stations on the waveband selected directly:
• by pressing ST1 - ST6.
To select a station on a different waveband:
• Press NEXT as often as necessary until the desired memory bank appears
and then select the station by pressing
ST1 - ST6.
• Press TS briefly.
“T-STORE” will flash in the display.
The six strongest FM stations will be automatically stored on the memory bank T
(Travelstore). If it is not possible to receive
six stations, the remaining presets will be
marked by four dashes. When this process
MW, LW
You can select the stations stored for the
selected waveband directly:
56
Alab/Seatt/Tokyo gb 95%®
56
08.05.2002, 10:35 Uhr
Preset Scan cannot be started unless PTY
is switched off (“PTY” is not highlighted in
the display).
If necessary, switch off PTY on menu level
2. To do so
• press TU and switch off the function by
pressing the corresponding key.
To start Preset Scan:
• Press SCA for approx. 1 second.
All of the stored stations on the waveband
selected and within reception range will be
scanned one after the other. “SCAN” and
the station name or frequency will flash alternately in the display.
You can also scan all of the stations within
reception range.
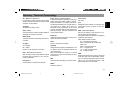
Radio Scan cannot be started unless PTY
is switched off (“PTY” is not highlighted in
the display).
The scan time can be set from between five
to a maximum of 30 seconds.
Please refer to the section on “DSC programming - SCANTIME”.
Selecting the seek tuning sensiIf necessary, switch off PTY on menu level tivity
2. To do so
• press TU and switch off the function by
pressing the corresponding key.
To start the Scan function:
• Press SCA briefly.
All of the stations on the waveband selected and within reception range will be
scanned one after the other. “SCAN” and
the station name or frequency will flash alternately in the display.
You can alter the automatic seek tuning
sensitivity.
If “lo” is displayed, the radio will only pick up
strong, local stations (low sensitivity).
If “lo” does not light up, the radio will also
pick up weaker, more distant stations (high
sensitivity).
If you want to alter the sensitivity level,
please refer to the section on “DSC programming - LO/DX”).
57
Alab/Seatt/Tokyo gb 95%®
57
08.05.2002, 10:35 Uhr
DEUTSCH
ENGLISH
Changing the scan time
FRANÇAIS
You can have all of the stored stations briefly
scanned on all wavebands and in the selected FM memory bank.
ITALIANO
Scanning stations with Radio
Scan
Scanning stored stations with
Preset Scan
NEDERLANDS
To select a scanned station and switch
off the Radio Scan function:
• Press SCA or the rocker switch briefly.
If you do not select a station, the scan function will automatically switch off after the frequency band has been run through completely. The unit will tune into the station you
were listening to before you started the scan
function.
SVENSKA
To select a scanned station and switch
off Preset Scan:
• Press SCA or the rocker switch briefly.
ESPAÑOL
• by pressing ST1 - ST6.
To select a station on a different waveband:
• Press NEXT as often as necessary until the desired memory bank appears
and then select the station by pressing
ST1 - ST6.
PORTUGUÊS
Radio operation with RDS (Radio Data System)
Radio operation with RDS (Radio Data System)
Switching from stereo to mono
(FM)
If reception is poor, you may get better
sound quality by switching from stereo to
mono in the DSC menu. Each time the radio is switched on, stereo playback is activated automatically.
The unit will automatically switch to mono if
the signal received is not strong enough for
stereo playback.
If you would like to switch to mono, refer to
“DSC programming - STEREO/MONO”.
The mode selected is indicated briefly in the
display.
Automatic bandwidth adjustment (SHARX)
PTY - Program Type
PTY is an RDS service which an increasing
number of broadcasting stations have begun to offer. This feature allows you to select FM stations according to their program
type. After you have chosen the PTY of your
preference, the corresponding stations can
be selected either by seek tuning or using
the scan function.
Switching PTY on/off
• Press PTY.
When the function is active, the program
type selected last will briefly appear in the
display, e.g. “SPORT”. As long as PTY is
active, “PTY” will appear permanently in the
display.
In the DSC menu, you can use the SHARX
function to adjust the bandwidth in the FM
frequency range. This can be a great advantage when there are a large number of
stations within your current reception range.
Interference with strong adjacent stations
can be reduced to an absolute minimum if
you activate SHARX ON (factory setting).
If necessary, refer to the section on “DSC
programming – SHARX”.
Program type
Use << >> to have the last selected program type displayed and to choose a new
one.
You can select any one of the stored types
with the preset buttons ST1 - ST6.
Requirement: PTY must be active.
You can use DSC to select German, English or French as the language used in the
display (refer to the section on “DSC programming – PTY LANG”).
The following list indicates all of the program
types which are currently available.
The letters printed in bold are identical to
the abbreviation which appears briefly in the
display.
NEWS
CURRENT AFFAIRS
INFORMATION
SPORT
EDUCATE
DRAMA
CULTURE
SCIENCE
VARIED
POP MUSIC
ROCK MUSIC
EASY MUSIC
LIGHT MUSIC
CLASSICS
OTHER MUSIC
WEATHER
FINANCE
CHILDREN’S PROGRAMS
58
Alab/Seatt/Tokyo gb 95%®
58
08.05.2002, 10:35 Uhr
If you would like to listen to a station
with the selected PTY,
• Press one of the presets ST1 - ST6.
The selected program type will be displayed for 2 seconds.
If you would like to listen to a station
with this PTY,
On menu level 2
• Press PTY for approx. 2 seconds.
After the beep tone the display will show the
program type offered by the station currently playing.
If “NONE” appears in the display, the current station has no PTY code.
You can assign different program types to
each preset position. Please refer to the next
section on “Storing program types”.
Displaying the selected program type
• Press << or >>.
The program type selected last will be displayed briefly.
b) Using the << >> buttons on the rocker
switch
When PTY is switched on, you can select a program type using buttons
<< >>.
• Press << or >>; the program type selected last will be displayed for 3
seconds.
• press / to start the seek tuning
function.
If the radio is unable to find a station offering the selected program type, the display
will show “NO PTY” and a beep tone will be
emitted. The radio will select the station
which was tuned into before seek tuning was
activated.
Storing program types
Each of the preset buttons ST1 - ST6 has
been assigned one program type at the factory.
If desired, you can also replace these with
other available program types.
To do so, make sure that “PTY” lights up in
the display.
• If necessary, press the PTY button to
switch on the function.
•
Select a program type using buttons
<< >> and
•
hold down the desired preset button
(ST1-ST6) until you hear a beep.
59
Alab/Seatt/Tokyo gb 95%®
59
08.05.2002, 10:35 Uhr
DEUTSCH
ENGLISH
• Press << or >> as many times as required.
FRANÇAIS
When PTY is switched on, you can use
the preset buttons ST1 - ST6 to select
the program types stored at the factory.
ITALIANO
• press / to start the seek tuning
function.
If the radio is unable to find a station offering the selected program type, the display
will show “NO PTY” and a beep tone will be
emitted. The radio will select the station
which was tuned into before seek tuning was
activated.
a) Using the preset buttons
NEDERLANDS
Checking the program type of the station
• During this period press >> (forwards) or << (backwards) to select
the desired type.
SVENSKA
Selecting a program type
PORTUGUÊS
SOCIAL AFFAIRS
RELIGION
PHONE IN
TRAVEL
LEISURE
JAZZ MUSIC
COUNTRY MUSIC
NATIONAL MUSIC
OLDIES MUSIC
FOLK MUSIC
DOCUMENT
ESPAÑOL
Radio operation with RDS (Radio Data System)
Radio operation with RDS (Radio Data System)
Now the selected program type can be recalled by pressing this preset when PTY has
been activated. (“PTY” appears in the display.)
As soon as it is possible to receive a program in the broadcasting network with the
PTY selected, the radio will switch over to
the corresponding station for the duration
of the program.
Note:
As already mentioned, these functions are
not supported by all of the RDS stations at
the present time.
Scanning stations with PTY SCAN
Requirement: “PTY” must appear in the display.
• Press the SCA button.
All of the stations in your current reception
area offering the selected program type will
be scanned.
To switch off PTY-SCAN:
• Press SCA or the seek-tuning rocker
switch once again.
After the entire waveband has been
scanned, the PTY-SCAN function will be
turned off automatically.
PTY priority
Situation:
PTY is switched on and lights up in the display.
No station offering the selected program
type can be found currently in your reception range (with seek tuning or scan).
The set will switch back to the station previously tuned into.
Example: German broadcasting network
NDR:
-
Station playing: NDR3.
-
“PTY” lights up in the display.
-
Program type “POP” selected.
-
Seek tuning is started.
-
No station with “PTY-POP” can be
found.
-
The display shows “NO PTY” and
-
automatically switches back to NDR3.
-
NDR2 airs a “PTY-POP” program.
-
The radio will switch to the linked station NDR2 for the duration of the
“POP” program.
During CD operation, the set will also switch
to the program offering the selected PTY
within the broadcasting network.
After the PTY program has ended the system will switch back to the previous mode
(radio or CD).
60
Alab/Seatt/Tokyo gb 95%®
60
08.05.2002, 10:35 Uhr
If you want to have the priority for traffic announcements activated while listening to
one of these stations (e.g. NDR3), “TA” must
appear on the display panel.
If you leave the reception area of the traffic
information station you are currently tuned
into, you will hear a warning beep at intervals of approx. 30 seconds.
If a traffic announcement is broadcast, the
radio will automatically switch to the linked
traffic program station (in this case, NDR2)
for the duration of the message and return
to the original program (NDR3) afterwards.
This warning beep will also be emitted if you
press a preset button for a station which
does not send the traffic information signal.
Warning beep
Switching the warning beep off
a) Tune into another station offering traffic information:
ENGLISH
If you leave the reception area for the traffic
information station you have tuned into while
you are listening to a CD, the system will
automatically start searching for a new TA
station. If no such station is found within
approximately 30 seconds, a warning beep
will sound every 30 seconds. To switch the
warning beep off, proceed as described
above.
Adjusting the volume for traffic
announcements and the warning
beep
This volume was preset at the factory, but
you can use the DSC function to alter the
setting as desired (see “DSC programming
- TA VOL”).
• Press the rocker switch or
61
Alab/Seatt/Tokyo gb 95%®
61
08.05.2002, 10:35 Uhr
FRANÇAIS
Automatic seek tuning start
(CD operation)
ITALIANO
Please note that several buttons have no
function while a traffic announcement is
broadcast.
• Press TA.
“TA” will disappear from the display.
NEDERLANDS
In addition to these, there are also stations
which do not actually transmit traffic information themselves, but by using RDS-EON
it is possible for them to forward the traffic
messages broadcast by another traffic information station in the same radio network.
Or:
b) Switch off the priority for traffic announcements:
SVENSKA
Along with their programs, all traffic information stations transmit a special carrier
signal, which is decoded by your car radio.
If this signal is identified, “TP” will appear in
the display (Traffic program).
If the priority for traffic announcement programmes is activated, “TA” will light up in
the display.
To switch the priority on or off:
• Press the TA button.
If you press TA while a message is being
broadcast, this message will be interrupted.
The unit will then switch back to the previous mode. The priority for other traffic messages remains active.
• press a preset button which has a
traffic information station allocated to
it.
ESPAÑOL
Many FM radio stations provide their service area with traffic messages at regular intervals.
Traffic announcement priority
on/off
PORTUGUÊS
The abbreviation “EON” stands for Enhanced Other Networks, which means that
information is exchanged within a radio network.
DEUTSCH
Traffic information station reception with RDS-EON
CD operation / CD changer operation
You can play CD on this unit. In addition,
CDs can be played on the Blaupunkt CD
changers, CDC A 06, A 072, A 08 or A 071.
These changers can be purchased at any
authorised retail outlet.
The Alabama DJ comes complete with a CD
changer.
The CD will be transported to its playing
position automatically. CD playback will
start.
• Push the operating panel up on the
left-hand side and lock it into position.
Switching on CD operation
Make sure that a disc is inserted, “DISC-IN”
will appear in the display.
• Press CD, the CD functions will appear
in the display (track number, name/
playback time).
Note:
Use only standard circular CDs measuring
12 cm in diameter!
CDs measuring 8 cm in diameter or CDs in
different shapes such as a butterfly or beer
mug are not suitable for playback using this
equipment.
This is very likely to result in the destruction
of the CD or the CD drive.
We assume no liability for damage to the
equipment caused by playing unsuitable
CDs.
Removing a CD
CD operation
To protect the CD mechanism, do not impair or try to help the automatic insertion and
ejection of the disc in any way.
Inserting a CD
Switch on the unit and press 1 to unlock the operating panel.
The operating panel will fold down forward.
•
•
Insert a CD (with the label facing up).
Never use force.
Changer operation
•
Fold down the operating panel and
press the Eject button (arrow) for approx. 1 second.
The CD will be ejected.
If the CD is not removed from the drive within
approximately 30 seconds, it will be re-inserted automatically.
Switching on CD changer operation
Make sure that at least one CD has been
inserted into the magazine.
• Press CDC, the CDC functions will appear in the display (track number,
name/playback time).
For safety’s sake, the operating
panel must remain locked when
the vehicle is in motion.
62
Alab/Seatt/Tokyo gb 95%®
62
08.05.2002, 10:35 Uhr
You can repeat a track or a CD (in changer
operation) as often as desired. Use the RPT
key to select the following functions:
- REP TRCK = Repeat track
- REP CD = Repeat CD (changer operation only)
- RPT OFF = Repeat function off
•
•
Press DIS as often as necessary until
you have selected the desired display
mode.
“CD 10”
– The CD number (for
changer operation only).
“TRACK 13” – Track number
“14:34”
– Clock
“00:20”
– The elapsed playback time
“VIVALDI”
– CD name
The CD name will not be displayed unless it
has already been entered.
/
Track selection
Upwards: Press briefly.
CUE - fast advance (audible): Hold
pressed down.
Downwards: Press twice or as many
times as required.
To re-start a title: Press briefly.
REVIEW - fast reverse (audible):
Hold pressed down.
The rocker switch acts as a sequence switch
so that you can skip over several CDs or
tracks if you press it repeatedly.
TPM
(Track Program Memory)
Use this feature to program and play your
favourite CD tracks in CD and changer operation. Up to 30 CDs can be managed in
the CD mode, up to 99 discs in the CDC
mode, with a maximum of 40 tracks each.
TPM can only be used in the mode it was
stored in (CD or changer operation).
PORTUGUÊS
Please refer to the section on “Entering CD
names”.
<< / >> CD selection (changer operation only)
>>
Up: Press briefly
<<
Down: Press briefly
Press RPT as many times as necessary until you have selected the desired setting.
The CD or the track will repeat until you
press RPT to switch off the function with
“RPT OFF”.
a
o
m
P
g
ru
m
n
e
g
ri
mit
D
S
C
Alab/Seatt/Tokyo gb 95%®
FRANÇAIS
You can use the rocker switch to conveniently select CDs, tracks or passages. You
cannot select CDs unless a CD changer has
been connected.
ITALIANO
You can select the desired display mode for
CD and CD changer operation:
NEDERLANDS
Repeating tracks/CDs
SVENSKA
Selecting CDs and titles
ESPAÑOL
Selecting the display mode
ENGLISH
DEUTSCH
CD operation / CD changer operation
63
63
08.05.2002, 10:35 Uhr
CD operation / CD changer operation
Storing tracks with TPM
Deleting the TPM
MIX
A track can only be stored while it is playing.
You can delete the tracks stored with TPM.
TPM tracks can be deleted with CLR only
when they are playing.
• Switch on TPM.
“TPM” will be highlighted in the display.
In this case, “CLR” will appear below
TPM.
If you would like to delete the track playing
•
press CLR for approx. 2 seconds,
“TRCK CLR” will flash briefly in the display.
If you would like to delete all of the tracks
on the CD playing
•
press CLR for approx. 5 seconds,
“DISC CLR” will flash briefly in the display.
If you would like to delete all of the tracks
on all of the CDs in the magazine in changer operation
•
press CLR for approx. 8 seconds,
“ALL CLR” will flash briefly in the display.
If you would like to delete the TPM and the
CD names at the same time, refer to the
section on “Deleting CD names/TPM with
DSC UPDATE”.
You can have the CD tracks played in random order. The MIX function is active when
“MIX” is highlighted in the display.
To store a track
• press TPM for approx. 1 second, “TPM
PROG” will appear in the display.
This track has been stored.
Switching TPM playback on/off
•
Press TPM briefly. The mode selected
will appear briefly in the display (TPM
ON/OFF).
If “TPM” is highlighted in the display, this
means that TPM playback is active. All of
the tracks on the CD stored in this operating mode will be played. If you activate SCA
(scan) as well, these tracks will be scanned.
TPM playback cannot be activated unless
you have already stored tracks with the TPM
function.
You can choose the following MIX functions:
MIX CD
The tracks on the selected CD will be played
in random order. The next disc will be selected in numerical order. MIX (random order) applies to the playback of the tracks.
MIX MAG (for changer operation only)
CDC A 08: All tracks on the CDs in the magazine will be played in random order.
CDC A 06 / 072: The CDs in the magazine
are selected at random and then the tracks
on the CD selected are played in random
order.
MIX OFF
The Mix function is deactivated. Discs and
titles will be selected in numerical order.
To alter the setting:
•
Press MIX briefly, the function selected
will appear briefly in the display.
64
Alab/Seatt/Tokyo gb 95%®
64
08.05.2002, 10:35 Uhr
SCAN will also stop if you press the rocker
switch, MIX, RPT, DSC, AUD, TU or CDC.
Entering CD names
You can enter names for up to 30 discs and
in changer operation for up to 99 discs.
The specified name (e.g. VIVALDI) will appear in the display if you have selected the
corresponding display mode with DIS.
To start the entry:
• Press the DSC button and press /
as often as necessary until “CDNAME” appears in the display.
• Press << >>.
The position for the first character will begin
to flash.
Once you have completed the name as desired:
• Press ENT in order to store it.
To quit the naming mode,
• leave the DSC menu by pressing DSC.
If you would like to name another CD,
• insert a new disc for CD operation
•
Press / as many times as required
until “CD UPDATE” appears in the display.
•
Press >> to select “CLR DISC” if you
want to delete the name and TPM of
that CD,
or
•
Or
•
press << / >> for changer operation
•
and press / to select another CD in
the magazine.
You can change any existing name by entering and storing a new one (overwriting).
Deleting CD names/TPM with
DSC UPDATE
Press << to select “CLR ALL” to delete
the names and TPM stored for all of
the CDs.
•
Press ENT for approx. 1 second.
“DELETING” will appear briefly in the
display.
The deletion process is complete.
To return to “CD UPDATE” in the DSC menu
without deleting the CD names and TPM:
• Press ENT.
Use the DSC UPD (update) feature to delete the CD names and the TPM at the same
time.
65
Alab/Seatt/Tokyo gb 95%®
65
08.05.2002, 10:35 Uhr
DEUTSCH
ENGLISH
Insert the CD for which you want to delete
the name into the CD drive.
• Press DSC.
FRANÇAIS
To stop the Scan function:
• Press SCA once again briefly.
The track currently scanned will continue to
play.
Use “CLR ALL” to delete the names and
TPM for all of the CDs.
ITALIANO
To start the Scan function:
• Press SCA briefly, the display will indicate “SCAN”.
The titles will be scanned one after the other in ascending order.
You can delete the name stored for the CD
in the CD drive and its TPM with “CLR
DISC”.
NEDERLANDS
Use this function to scan all of the CD tracks.
Use the rocker switch / to select the
first character.
The capital letters A to Z, the numbers 0 to
9 and special characters will be listed one
after the other.
• Use the rocker switch << >> to move
to the next position and select a character.
You can select up to eight characters in this
way.
SVENSKA
•
PORTUGUÊS
SCAN
ESPAÑOL
CD operation / CD changer operation
Clock - Time
This car stereo is equipped with a built-in
clock which automatically takes advantage
of RDS to ensure highly accurate time-keeping (hours, minutes).
Displaying the clock
For the clock to function properly with RDS,
an RDS station with the CT function (CT –
clock time) must be received.
Radio mode:
The automatic correction of the time can be
switched off.
You can set the clock to permanent display
in both the radio and CD modes.
You can switch between clock display and
waveband (incl. memory bank for FM). To
do so
• press DIS for approx. 2 seconds.
CD mode:
Setting the clock
You can select from among three different
display modes:
a) automatically
The clock is set automatically when the
radio is tuned into an RDS station
which has the “CT” function (clock
time).
- Track number, clock
- Track number, playback time elapsed
- CD name, track number
• Press << >> to set the hours/minutes. You can move to a different position by pressing / .
• After you have set the clock, press
ENT briefly to store the new setting.
If you want to set the time manually, refer to
the section on “DSC programming - CLOCKSET”.
Deactivating the hour correction
function
In the DSC menu it is possible to switch off
the hour correction function with “CLK MAN/
CLK AUTO”. An automatic correction for
minutes will continue to take place.
This is useful if you would like to display the
time for a different time zone, for example.
If necessary,
• Press DSC briefly and
To switch between the modes
• press DIS briefly.
•
b) manually with DSC-CLOCKSET
• Press DSC briefly, “CLOCKSET” will
appear in the display.
You need only set the time manually if it is
not possible to receive an RDS station with
CT (clock time).
Correcting the clock after the
power has been disconnected
If the radio has been disconnected from its
power source for a longer period of time,
“0:00” will appear in the display when it is
re-connected.
Press / as often as required until
“CLK MAN/CLK AUTO” appears in the
display.
To deactivate the hour correction function
press << >> to select “CLK MAN”.
The time will be set automatically by RDSCT, but can also be adjusted manually if
desired.
66
Alab/Seatt/Tokyo gb 95%®
66
08.05.2002, 10:35 Uhr
As a result, the bass sounds may be lost or
reverberate, the mid-range tones sound too
overpowering and music instruments or
voices may be distorted or the total sound
quality may be completely lifeless.
The overall sound quality can be greatly
enhanced if certain frequencies are suppressed or boosted.
This car stereo is equipped with 2 parametric filters. The first filter “LOW EQ” can be
set from 32 to 500 Hz, the second filter
“HIGH EQ” from 630 to 10000 Hz. In this
context, parametric means that it is possible to set the frequency and either boost or
reduce it (+10 to –20 dB) individually for
each of these filters.
These parametric filters can be adjusted to
very exact settings even without the help of
measuring instruments.
Before you set the equaliser, set bass, treble, balance and fader to “0”.
This setting is described in the Quick Reference under 8 AUD.
Now listen to the CD you have selected.
Press << or >> once and
•
Set the level in the following table by
pressing / .
•
Press << >> to switch the frequency
range.
• Press ENT to store your settings.
You can switch the equaliser on and off by
pressing AUD for approx. 2 seconds.
Now you can compare the sound produced
by your car stereo with and without the
equaliser.
Setting recommendations on the
Internet
Evaluate the sound according to your own
personal preferences.
Refer to our home page on the Internet
Now refer to “Sound impression/problem” in
the table and you will find suggestions to
eliminate any problems under “What to do”.
to find setting recommendations for new
vehicles on the market.
http://www.blaupunkt.de
Make the settings for bass and the lower
mid-range tones with the LOW EQ filter,
select HIGH EQ for treble and mid-range
tones.
67
Alab/Seatt/Tokyo gb 95%®
67
08.05.2002, 10:35 Uhr
DEUTSCH
FRANÇAIS
We recommend that you use a music CD
you are familiar with to make the settings.
The CD should include tracks with different
instruments and vocals. Purely electronic
music is not well suited to serve as a basis
for making the settings because the original sounds cannot be determined.
•
PORTUGUÊS
Even the sound produced by well selected
and installed speakers can be affected negatively by resonance frequencies in the vehicle interior.
The following notes are intended as recommendations only. They do not necessarily
reflect your own personal sound preferences.
Press DSC.
Press / as often as necessary until
“HIGH EQ” or “LOW EQ” appears in
the display.
ITALIANO
Notes on making the settings
•
•
NEDERLANDS
Position, installation and the rear volumes
of, for example, the door or rear window
shelf all play an important role.
The “HIGH EQ” and “LOW EQ” filters can
be set in the DSC menu:
SVENSKA
The individual steps you have to take to
make these settings are described in the
table.
ESPAÑOL
The acoustic characteristics of the car interior affect the quality of the sound reproduced in your vehicle to a much greater extent than the speakers.
ENGLISH
Setting the equaliser
Setting the equaliser
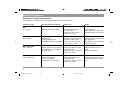
Assistance in setting your equaliser
Start to make your settings in the mid-range/treble and end it with the bass range.
Frequency range
Sound impression/problem
What to do
Notes
Bass
30 – 100 Hz
Bass reproduction too weak
Boost the bass with the
“LOW EQ” filter
Frequency: 50 to 100 Hz
Level: +4 to +6 dB
Avoid distortion.
Boost the level carefully if the
speaker diameter is too small.
Unclear bass
Playback reverberates
Unpleasant pressure on the ears
Reduce the lower mid-range
with the “LOW EQ” filter
Frequency: 125 to 400 Hz
Level: approx. –4 dB
The tone may become too lean
and aggressive.
Pay attention to the underlying
tone of the music.
Sound appears to be too much in
the foreground, very aggressive,
no stereo effect
Reduce the mid-range with
“HIGH EQ” filter
Frequency: 1000 to 2500 Hz
Level: -4 to –6 dB
Playback should not be too
quiet.
Tone too powerless.
Lifeless reproduction
Lack of transparency
Instruments do not sparkle
Boost treble range with
“HIGH EQ” filter
Frequency: approx. 10 kHz
Level: +2 to +4 dB
Avoid a piercing type of tone.
Strong hissing sound unpleasant.
Lower mid-range
100 – 400 Hz
Mid-range sound
400 – 4000 Hz
Treble
4000 to 20000 Hz
68
Alab/Seatt/Tokyo gb 95%®
68
08.05.2002, 10:35 Uhr
To adjust the traffic announcement and warning
beep volume from between
0 to 66.
The message will then come
through at this volume, if the
standard volume is lower.
If the standard volume is set
higher than the TA VOL level, then the traffic report will
be played at the standard
volume.
HICUT
Interference-related cut in
the treble sound. Cuts the
treble when interference occurs. Can be adjusted from
NO HICUT (OFF) to HICUT
3 (highest setting). Which
setting is the most pleasant
is a matter of personal preference.
ENGLISH
Switches the bandwidth in
the FM frequency range.
When there are a large
number of stations within
your current reception
range, use << >> to switch
to SHARX ON which will
prevent most interference
from adjacent radio stations.
This function has been set
to “SHARX ON” at the factory.
FRANÇAIS
TA VOL
SHARX
ITALIANO
Equaliser setting:
To activate the frequencies
and set the level for the upper frequency range.
Refer to the detailed instructions in the section on
“Equaliser setting”.
Only available during CD
playback.
Use this function to name
your CDs. (See “Entering
CD names”)
NEDERLANDS
HIGH EQ
CD NAME
SVENSKA
Select function
Adjust/recall value
Equaliser setting:
To activate the frequencies
and set the level for the lower frequency range.
Refer to the detailed instructions in the section on
“Equaliser setting”.
PORTUGUÊS
/
<< / >>
LOW EQ
ESPAÑOL
The car stereo has been equipped with DSC
(Direct Software Control) to allow you to
customise certain programmable, basic settings to suit your personal needs and preferences and then store them.
The basic settings for this audio equipment
were made at the factory.
In the following you can find an overview of
these settings, so that you can always reset
to them if desired.
If you wish to alter any of the programming,
• press DSC.
Use the rocker switch and the ENT button
to select and adjust the functions de-scribed
in the following. The display will show you
the setting you have selected.
DEUTSCH
DSC programming
69
Alab/Seatt/Tokyo gb 95%®
69
08.05.2002, 10:35 Uhr
DSC programming
LO/DX
To adjust the seek tuning
sensitivity.
“LO” stands for local reception.
“DX” stands for distant reception.
Select “LO 3” if you want to
receive strong stations in
the local area, select “DX 1”
if you want to tune into
weaker stations which are
further away.
STEREO/MONO
Switch modes by pressing
<< >>.
The mode selected will appear briefly in the display.
The radio will begin with
STEREO playback each
time it is switched on.
CLOCKSET To set the clock manually.
Press << >> to set the
hours/minutes. Move to the
next flashing position by
pressing / . To store the
setting selected, press ENT
briefly.
Also refer to the section on
“CLOCK”.
CLK AUTO/MAN
Switches the hour correction
function on/off. Read the information in the section on
“Clock, Deactivating the
hour correction function”.
12/24H MODE
Select the clock display
(12 or 24-hour display)
The volume can be adjusted
from between 0 to 9.
(0 = off)
DIM DAY
Use this function to select
the display brightness for
the daytime (from 1 to 9).
DIM NIGHT
Use this function to select
the display brightness for
the night-time (from 1 to 9).
CLK ON/OFF The clock display will appear when the ignition is
switched on, but the car
stereo is switched off. In this
case, set CLK ON.
ON VOL
BEEP
Use this function to select
the volume at which the radio is set when it is switched
on.
Adjust the desired volume
level with << >>.
When adjusted to “LAST
VOL”, the system will come
on at the volume selected
before it was switched off.
The brightness changes accordingly when the car
headlights are switched
on/off.
ANGLE
Adjusts the display to the individual viewing angle.
SCANTIME
Use this function to set the
scan time for the radio or
CD player from 5 to 30 seconds.
PTY LANG
To select the language used
to indicate the program type:
German, English or French
Acknowledgement tone for
all functions which require a
button to be pressed for
more than one second.
70
Alab/Seatt/Tokyo gb 95%®
70
08.05.2002, 10:35 Uhr
To read out the KeyCard
data.
The card supplied with the
radio is used to display the
model name, type number
(7 6 …) and the serial
number.
With the extra card it is possible to display data entered
by your specialised dealer.
NEDERLANDS
PEAK ON/OFF
Switches the dynamic level
display for the volume on/
off.
TOM ON/OFFIf you have a second KeyCard with a Turn-On Message, you can switch off this
information with “TOM
OFF”. The factory setting is
“TOM ON”.
For more information refer
to “ KeyCard theft protection
system” - “Turn ON Message (T.O.M.)”.
71
Alab/Seatt/Tokyo gb 95%®
71
08.05.2002, 10:35 Uhr
DEUTSCH
ITALIANO
To quit the DSC programming mode and
store the adjustment:
• Press DSC.
ENGLISH
Use this function to delete
CD names during CD and
changer operation to make
more storage capacity available for new discs. (See
“Deleting CD names with
DSC-UPDATE”).
SVENSKA
READ KC
To “train” a second KeyCard.
Please read the information
in the section on “KeyCard
theft protection system” “Training a second KeyCard”.
LED ON/OFF Here you can choose between LED ON or LED OFF.
With LED ON, the “ON”
knob will flash for extra antitheft protection when the
unit has been switched off
and the KeyCard removed.
UPDATE
ESPAÑOL
LEARN KC
(See the section on “Short
Additional Memory S.A.M.”).
If you remove the KeyCard
during the reading process,
“READ KC” will appear on
the display panel.
PORTUGUÊS
AUX ON/OFF (for Alabama DJ, Tokyo
RDM 169)
This menu item will not appear unless a CD changer
has been connected to the
system. The factory setting
is “OFF”.
If another system component is connected to AUX,
this setting must be altered
to “AUX ON”.
FRANÇAIS
DSC programming
DSC programming
Specifications
Overview of the DSC factory settings
Amplifier
LOW EQ
HIGH EQ
TA VOL
CD NAME
SHARX
HICUT
LO / DX
STEREO/MONO
CLOCKSET
CLK AUTO / MAN
12/24H MODE
CLK ON/OFF
ON VOL
BEEP
DIM DAY
DIM NIGHT
ANGLE
SCANTIME
PTY LANG
AUX
LEARN KC
READ KC
LED
PEAK ON/OFF
TOM ON/OFF
UPDATE
0 dB/40 Hz
0 dB/630 Hz
35
SHARX ON
HICUT 2
DIST 1
STEREO
0:00
CLK AUTO
24H MODE
CLK OFF
LAST VOL
3
9
9
0
10 sec.
DEUTSCH
OFF
ON
ON
ON
-
Output power:
4 x 25 W RMS power
acc. to DIN 45324 at
14.4 V
4 x 40 W max. power
Tuner
Wavebands:
FM
:
MW
:
LW
:
FM sensitivity:
87.5 - 108 MHz
531 - 1602 kHz
153 - 279 kHz
0.7 µV at 26 dB
signal-to-noise ratio
FM frequency response:
20 - 16000 Hz
CD player
Frequency
response:
20 - 20000 Hz
Subject to modifications!
72
Alab/Seatt/Tokyo gb 95%®
72
08.05.2002, 10:35 Uhr
Sound settings for bass and treble, balance
(left/right) and fader (front/rear).
BND (Band)
Switches between wavebands and memory banks.
Changer
Equalizer
Adjusts the frequencies to the acoustic conditions and personal tastes.
EXIT
Press to end/cancel a setting.
CD changer
KeyCard
CL – Clear
Returns to the previous menu item.
DSC – Direct Software Control
With the help of DSC it is possible to adjust
the basic factory settings to your own personal preferences.
Theft protection system from Blaupunkt. The
car stereo cannot be operated without the
correct KeyCard.
SIM cards (telephone cards) or a second
KeyCard can only be trained using the original KeyCard.
MIX
CDs/CD tracks are played in random order.
Press briefly to accept/store settings.
MUTE
RDS – Radio Data System
Service provided by radio stations to enhance radio listening pleasure.
The station name, for example, is displayed
instead of the frequency.
Other RDS functions include:
AF – Alternative Frequency
EON – Enhanced Other Networks
Radio text
REG – Regional program
PTY – Program type
TA – Traffic Announcement
TP – Traffic Program
REG
Regional programs have priority. REG ON
stops the radio from automatically switching to a different regional program broadcast by the same station because it has
better reception. Also see RDS.
Switches audio off
73
Alab/Seatt/Tokyo gb 95%®
73
ENGLISH
PORTUGUÊS
ENT (Enter)
Designed for the selection of a specific type
of program in FM (e.g. sports, news). Also
see RDS.
FRANÇAIS
AUD – Audio
PTY
ITALIANO
Amplifies the output power.
See Scan
NEDERLANDS
Amplifier
Preset Scan
SVENSKA
In RDS this function ensures that the radio
always tunes into the frequency with the best
reception for the station.
EON – Enhanced Other Network
In RDS, EON makes it possible to exchange
station information within a station network.
Traffic information, for example, can be forwarded automatically from a traffic information station to a station which does not
broadcast traffic information in the same
network. After the traffic announcement has
been put through, the radio switches back
to the original station.
ESPAÑOL
AF - Alternative Frequency
DEUTSCH
Glossary - Technical Terminology
08.05.2002, 10:35 Uhr
Glossary - Technical Terminology
RPT (Repeat)
TPM – Track Program Memory
Repeats CD tracks. In changer operation
you can repeat single tracks or complete
CDs.
Stores and plays your favourite tracks in CD
or changer mode.
SCAN
Automatically stores the stations with the
best reception on the station preset buttons.
Very useful during trips.
Briefly plays the radio stations in your current reception range or the tracks on a CD
in CD mode. Using Preset Scan you can
scan the radio stations stored on the preset
buttons.
TS – Travelstore
Softkey (Software key)
Key with varying functions
SRC - Source
Source switch between radio and CD changer.
TA - Traffic Announcement (priority for traffic information)
“TA” in the display indicates that the priority
for traffic announcements has been
switched on. Also see RDS.
TP - Traffic Program
“TP” in the display indicates that the radio is
tuned into a station which broadcasts traffic
information. Also see RDS.
74
Alab/Seatt/Tokyo gb 95%®
74
08.05.2002, 10:35 Uhr
Manual tuning 55
Menu level 42
MIX 64
Mono 58
MUTE 41
F
O
Factory settings 72
B
G
Operating mode 53
Operating panel is unlocked 41
Optimising display 53
Glossary 73
Guarantee 49
P
Care of your KeyCard 52
CD changer operation 62
CD operation 62
Changing the memory bank 56
Clock 66
CODE-ERR 52
HICUT 69
D
K
Damaged KeyCard 52
Deleting CD names 65
Deleting TPM 65
DIS 46
Display 42, 46
Display brightness daytime/night-time 70
Displaying the radio pass data 51
KeyCard
Preset Scan 57
Program type 58
PTY 58
PTY priority 60
PTY SCAN 60
I
Installation 49
International telephone information 49
50
L
LO/DX 57
Lost KeyCard 52
Loudness 45
NEDERLANDS
H
R
SVENSKA
C
Radio Data System 54
Radio operation with RDS 54
Radio Scan 57
RDS-EON 61
Regional programs 54
Remote control unit 48
Repeat 44
Repeating CDs 63
Repeating tracks 63
ESPAÑOL
58
PORTUGUÊS
Bandwidth adjustment
BND 42
ENGLISH
M
ENT 43
Entering CD names 65
EON 61
Equaliser 67
EXIT 43
FRANÇAIS
E
Accessories 49
Adjusting the volume for traffic
announcements 61
Adjusts the display 70
Alternative frequency 54
Assistance in setting your equaliser 68
Automatic bandwidth adjustment 58
Automatic tuning 55
ITALIANO
A
DEUTSCH
Index
75
Alab/Seatt/Tokyo gb 95%®
75
08.05.2002, 10:35 Uhr
Index
S
T
SCAN (CD) 65
Scan time 57
Scrolling through the broadcasting
networks 55
Seek tuning sensitivity 57
Selecting the display mode (CD) 63
Setting recommendations on the
Internet 67
SHARX 58
Short Additional Memory (S.A.M.) 51
Softkeys 42
Station tuning 55
Stereo 58
Storing stations 56
Switching the sound on/off 41
Switching the unit on with the ignition
switched off 41
Technical Terminology 73
Telephone information 49
Telephone mute 49
Theft protection 51
Theft protection system 50
Time 66
TPM 63
Traffic information station reception 61
Traffic safety 49
Training the new KeyCard 52
Travelstore 56
Turn On Message (T.O.M.) 51
U
UPDATE
65
V
Visual theft protection 47
Volume 42
W
WAIT 1h 52
Warning beep 61
Waveband 55
76
Alab/Seatt/Tokyo gb 95%®
76
08.05.2002, 10:35 Uhr
Service-Nummern / Service numbers / Numéros du service après-vente / Numeri del servizio di assistenza / Servicenummers / Telefonnummer för service / Números de servicio / Número de serviço
Deutschland
Belgique
France
Nederland
Great Britain
Danmark
Swerige
Suomi
Österreich
Greece
âeská republika
USA
Singapore
Slovensko
Tel.:
Fax:
018 050 002 25
025 255 444
014 010 70 07
023 565 63 48
018 958 383 66
044 898 360
087 501 500
094 359 91
045 989 90 28
015 762 241
026 130 04 41
800-266 25 28
006 535 054 47
042 175 873 212
051 214 940 02
025 255 448
014 010 73 20
023 565 63 31
018 958 383 94
044 898 644
087 501 810
094 359 92 36
016 103 93 91
015 769 473
026 130 05 14
708-681 71 88
006 535 053 12
042 175 873 229
Blaupunkt-Werke GmbH
Bosch Gruppe
11/98 Pf
Alab/Seatt/Tokyo d 95%®
K7/VKD 8 622 401 835
40
08.05.2002, 10:25 Uhr