1
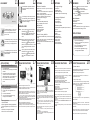
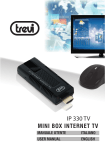
Android Dongle
User Manual
Model:D11
!SECURITY INFORMATION
2
Before operating the unit, please
read through this manual.
The manual contains important
security information and tutorials
about the product.
3
!SAFETY WARNING
PLACEMENT
●● Do not place the unit on an unstable
cart, stand, tripod, bracket, table, or
shelf.
●● Do not expose the unit to direct sunlight and other sources of heat.
●● Do not handle liquids near or on the
unit.
●● Never spill liquid of any kind into the
unit
●● Do not put the unit near appliances
that create magnetic fields.
●● Do not put heavy objects on top of
the unit.
POWER SUPPLY
●● Make sure the USB power supply
can offer 5V/1A.If not, please use a
5V/1A output AC adapter instead.
●● Please unplug power supply and
aerial plug when the weather is
thunder-storm or lightning.
●● Please unplug power supply, when
there is nobody at home or didn’t
use over a long period of time.
●● Please keep power cord from physical or mechanical damage.
●● Please use exclusive power cord,
don’t modify or lengthen it.
●● Please check and ensure AC source
is connected with the ground.
QUICK INSTALL GUIDE
6 INTERFACE
7 REMOTE OPERATING
5V/1A
Remote signal receiver
miniUSB for power
supply
•Normal Condition
Insert D11 into TV's HDMI input interface.
Connect D11's miniUSB port to TV's USB port via
USB supply line for power supply.
(*ATTENTION:Make sure the USB power supply
can offer 5V/1A.If not, please use a 5V/1A output
AC adapter instead!)
USB2.0 input
Micro SD card
slot
HDMI extended line
•Special Condition(NO ENOUGH ROOM FOR D11
AROUND THE TV'S HDMI INPUT INTERFACE):
Connect D11 to TV's input interface through
HDMI extended line.
Power supply as above.
Features
Power
Page up
Page down
Mouse/keypad
Number
Features
Remote signal receiver
Power supply(Must be 5V/1A)
Signal light(Red light during
running,no light when shut down)
USB2.0 input
Micro SD card slot(up to 32GB)
Home button
Directions &
Confirm
Call out menu
Notification
Bar
Back
Next
Play/Pause
Previous
4
TEMPERATURE
●● Do not place the unit near or over a
radiator or a heater register.
●● If your unit is suddenly moved from
a cold to a warm place, unplug the
power cord for at least two hours so
that moisture that may have formed
inside the unit can dry completely.
HUMIDITY
●● Do not expose machine in rain,
damp or place near water.
●● Ensure the indoor drying, cool.
5
FEATURES
Android Dongle is a brand new product
that based on Android OS.
You can use it:
• Surf the Internet via Wi-Fi
• Communicate with your friends via
SNS applications
• Enjoy movies, music and photos via
media player
PRODUCT & ACCESSORIES
VENTILATION
●● Keep the ventilation openings clear.
●● Ensure that the unit has enough
space for ventilation around.
BATTERY
●● Accurate transaction and recal l
scrap battery after using.
●● Please don’t let kid touch battery,
in case of dangerous don’t throw
battery into fire.
8 INSTALLING WIZARD
Search
Signal light
!SAFETY WARNING
•WELCOME PAGE
9
D11
Remote Signal
Receiver
Mini Remote
Controler
User Manual
*Back Cover
USB Supply
Line
10
When the Android Dongle D11 is first powered
up, Welcome Page will be shown. It will help you
to configure the device
•INSTALLING WIZARD
You can set your D11 in order:
Choose your language;
Choose your Wi-Fi network access point;
Configuration Result;
Adjust screen size, using the arrow buttons
on remote control:
The specification and software
version involved in this manual is for
reference only.
Change will not be announced.
*sketch map
11 UI ELEMENT
UI ELEMENT
12 SETTINGS
The Notification expend the notification bar for checking if there is any
notification
The Settings screen contains most of
the customizing and configuration options, such as language, aspect ratio
and network settings
*skech map
The Browser allows you enjoy your
time on surfing Internet. You can
search for information and watch
online TV etc.
The Media Player lets you enjoy all of
your videos, music and pictures from
system memory or storage devices
The AppManager lets you launch selected applications, such as Weather,
Calendar ,News
APPLICATIONS
Download & install from Browser
MEDIA PLAYER
•Video You can play the media on the U-disk,
SD-Card etc.Use to control Play/
Pause; Use
to change Next/Prev
video; Use arrow buttons to control
menu.
•Picture You can play the media on the U-disk,
SD-Card etc.Use to control Play/
Pause; Use
to change Next/Prev
picture; Use Up/Dowm buttons to control
menu, Use Right/Left buttons to zoom
in/out.
•Music You can play the media on the U-disk,
SD-Card etc.Use to control Play/
Pause; Use
to change Next/Prev
video; Use arrow buttons to control
menu.
13 SETTINGS
•Wireless & networks
Check to turn on Wi-Fi so you can connect to
Wi-Fi networks
Check to receive an alert when an open Wi-Fi
network becomes available
Opens a dialog where you can add a Wi-Fi
network by entering its SSID (the name it
broadcasts) and security type
•Display
Output mode:1080p;1080i;720p
Set your display overscan ratio
•Applications
Compatibility Mode
Manage applications
Running services
Storage use
•Reset to factory defaults
This will erase all data from your device’s internal
storage
To also clear music, pictures, and other data, the
SD card needs to be erased
(*Warning!:Erase SD card will delete all the user’s
information)
14 BROWSER
•Storage settings
Total space
Available space
Erase USB storage
Available space of internal storage
•Language & Keyboard
Select language
User dictionary
Android keyboard
•System updates
Update system via update.zip from U-disk or
SD card
•About module
Status
Model number
Android version
Baseband version
Kernel version
Build number
Wi-Fi IP address
Wi-Fi MAC address
15
•Menu Key :Call out the menu of browser
•Back key :Back to the last page
•Search Key
:Call out the search bar to
search or input web address
•Page +/- Key
:Help you page up/down
with just one click
Menu of Browser
• Set a new window
• Bookmarks
• Refresh the Current Sheet
• Forward
• More:Add bokmark; Find on page; Select text;
Page info; Downloads; Settings; Close
APPLICATIONS
Install from U-Disk/SD card
1. Open the“File Manager”
2. Choose your U-disk or any other mass
storage’s folder
3. Find you application, and press it
4. Press the install button
5. You can find the application in“App
manager”after installation
16 ADVANCED FEATURES 17 ADVANCED FEATURES 18 ADVANCED FEATURES 19 EXCEPTION HANDLING 20
•DLNA
•Mobile Remote
1. Open the Browser.
2. Press search key and input your website
address
3. Download the APK file which you like
if there is a link for download this file
(Before download, you must make sure
that your SD card in the card slot)
4. You will find the file in your SD card
folder
Install from ApkInstaller
1. Open the ApkInstaller
2. Find the icon of the application, and
enter it
3. Press the install button
4. You can find the application in “App
manager” after installation
Remove Applications
1. Enter SETTINGS
2. Enter "Applications--Manage applications"
3. Find the application you want to remove in
tab "All"
4. Enter the icon and press "Uninstall"
5. Press "OK" to confirm uninstall
•VPN
*Before action, make sure the product is connected to a
Wi-Fi hotspot. VPN function cannot run via Ethernet!
1.Enter the APP MediaSharing. You will see a list of
devices that support DLNA on the left.
2.Choose the right device on the left, you will see a list
of media files that the device shared.
3.Choose and press the media file you want to play. It
will take a little longer for video files. Music and picture
play screenshots are as followed:
1) You can drag the progress bar during playing
music or video. You can also have basic functions like
forward/rewind and prev/next
2) Picture player can zoom in/out and rotate the picture
as you like, it also provide filmslide function
4.Manu of MediaSharing.Operating tips:
1) Refresh: Refresh the list of supported devices
2) Settings: Turn on/off the function of sharing, turn on/
off run service when boot up and set TV’s device name
1.Search and download the APP GTV Remote as below,
install into your mobile phone:
2.Make our product and your mobile phone connected to
the same Wi-Fi connection. Open the GTV Remote, it will
search for our product automatically
Operation:
•If you haven’t found our product at first time, press “Wait”
•If you haven’t found our product after several times of
trying, please press “Cancel” and insert IP of our product
manually
•Choose “Connect” if ID of the product is shown.
Or you may choose “Add other device” to user other
device
•Waiting for pairing code after clicking “Connect”
3.Insert the pairing code of our product on your mobile
phone to connect.
Tips:You can search for other products that can be
controlled by:
1)Press "Menu" on your mobile phone;
2)Choose "Switch BOX" to search other products in the
same Wi-Fi situation.
• System restore
If the Android Dongle D11 can not start successfully, please proceed as follows:
1.Choose Settings-VPNs and press Add VPN.
*Please read carefully before operation!
2.There are several connections according to different
ways of implementing. Such as:
PPTP(Point to Point Tunneling Protocol),
L2TP(Layer 2 Tunneling Protocol),
L2TP/IPSec PSK(Pre-Shared Key based),
L2TP/IPSec CRT(Certificate based )
The following operation example is based on PPTP:
1. Unplug your storage devices, such as: SD card, U
disk, mobile HDD and etc.
1) Setting Process:
•Set VPN name.
•Set VPN server.
•Enable encryption or not.( Enable by Default)
•Set DNS search domains
•Return to launcher after setting complete
2) Enter Settings-VPNs and choose the VPN you
added last step. Input the Username and Password to
connect.
(*Please ask your VPN supplier for the user name and
password.
TIPS:You can tick off REMEMBER USERNAME in case
of forgetting)
3) When connecting success, you can surf the Internet
via VPN
2. Unplug the power supply
3. Press the RECOVERY button(as the figure below),
then plug in the power, release the RECOVERY button
until you see the screen as follow
4. Use Up/Down buttons to choose “wipe data/factory
reset” and enter it
5.Use Up/Down buttons to choose “Yes -- delete all user
data” and enter it
(*Warning!: It will delete all of user’s information after
confirmation)
6.Use Up/Down buttons to choose “reboot system now”
and enter it, the product will reboot after confirmation
7. The product will enter the system successfully