1
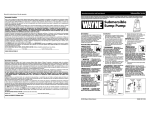
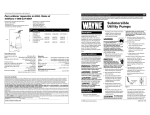
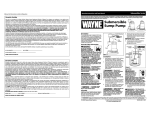
Operating Instructions and Parts Manual Installation 1. A ground fault circuit interrupter (GFCI) is required. 2. This pump is for use on 120 Volt (single phase), 60 hz, 15 amp service and is equipped with a 3 conductor cord and a 3 prong grounding plug. 3. Install pump in a sump pit with minimum size as shown (See Figure 1). Construct sump pit of tile, concrete, steel or plastic. 4. Locate unit on a solid, level foundation. Do not place pump directly on clay, earth, gravel or sandy surface. These surfaces contain small stones, gravel, sand, etc. that may clog or damage the pump and cause pump failure (See Figure 1). 5. (Optional) Thread check valve (not included) into pump body carefully to avoid stripping or cross threading. Do not use pipe joint sealant. 6. Connect 1-1/4” rigid pipe to rubber boot on check valve. Reverse boot for 1-1/2” diameter pipe. Tighten hose clamps. IMPORTANT: Make sure there is adequate room for float switch to move freely during operation. 7. Protect electrical cord from sharp objects, hot surfaces, oil and chemicals. Avoid kinking the cord and replace damaged cords immediately. 8. A sump pit cover must be installed to prevent debris from clogging or damaging the pump. Risk of electrical shock! This pump is supplied with a grounding conductor and grounding type attachment plug. Use a grounded GFCI receptacle to reduce the risk of fatal electrical shock. Never cut off the round grounding prong. Cutting the cord or plug will void the warranty and make the pump inoperable. 9. Insert the float switch cord plug directly into a 120 volt outlet (See Figure 2). Grounded GFCI Grounding Outlet Blade Support pump and piping when assembling and after installation. Failure to do so could cause piping to break, pump to fail, etc. which could result in property damage and/or personal injury. Flood risk. If flexible discharge hose is used, make sure pump is secured in sump pit to prevent movement. Failure to secure pump could allow pump movement and switch interference and prevent pump from starting or stopping. TEST RESET Power Cord Figure 2 so that the pump switches on with approximately 14” of water in the sump. 3. While the pump is draining the pit, verify that the discharge piping is carrying the water to a point several feet away from the foundation. 4. If the pump discharge line is exposed to freezing temperature, the exposed line must be pitched to drain. Trapped water will freeze and damage the pump. Maintenance Always disconnect the electrical supply before attempting to install, service, relocate or perform any maintenance. If the power source is out of sight, lock and tag in the open (off) position to prevent unexpected power application. Failure to do so could result in fatal electrical shock. Only qualified electricians should repair this unit. Improper repair could result in fatal electrical shock. 1. Disassembly of the motor prior to expiration of warranty will void the warranty. If repairs are required, see troubleshooting chart. 2. Keep pump inlet clean and free of all foreign objects and inspect annually. A clogged inlet will damage pump. 3. Check pump monthly for proper operation. Adjust and Test 1. Fill sump with water. NOTE: A pump that has a tripped thermal protector may start suddenly! 2. Adjust rubber grommet into a permanent position on float rod Troubleshooting Chart Symptom Possible Cause(s) Corrective Action Pump will not start or run 1.Blown fuse 2.Low line voltage 3. Defective motor 4.Defective switch 5.Impeller 6.Float obstructed 1.If blown, replace with proper sized fuse or reset breaker 2.If voltage is under 108 volts, check wiring size - DO NOT USE AN EXTENSION CORD 3.Replace motor or pump 4.Replace switch 5.If impeller will not turn, remove housing and remove blockage 6.Make sure float moves freely up and down Pump start and stops too often 1.Back flow of water from piping 2.Float out of adjustment 1.Install or replace check valve (Wayne check valve kit #66005-WYN1) 2.Adjust grommet Pump will not shut off or thermal protector turns off 1.Defective switch 2.Obstacle in piping 3.Float obstructed 1.Replace switch 2.Remove pump and clean pump and piping 3.Make sure float moves freely up and down Pump operates but delivers little or no water 1.Low line voltage 1.If voltage is under 108 volts, check wiring size - DO NOT USE AN EXTENSION CORD 2.Clean out impeller 2.Plugged impeller www.waynepumps.com 2