1
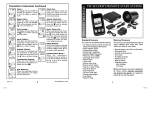
FS-99 2-Way Touch Screen Remote Paging Alarm & Engine Starting System OPERATION INSTRUCTIONS INTRODUCTION CONGRATULATIONS on your choice of the 2-Way Touch Screen Remote Paging Alarm & Remote Engine Starting System by Crimestopper Security Products Inc. The FS-99 features an animated color LCD Touch Screen remote control with Smart Phone Integration Port. It includes voice confirmation of all Alarm and Remote Start functions in both English and Spanish. The remote uses a rechargeable Lithium Ion battery and includes both a car and AC charging adaptor. The system includes Carjack and Panic protection. You can operate 4 vehicles with a Pin Code. There are 7 zones of protection with trigger history of date and time of violation. The remote control includes a Parking Meter, Alarm Clock, and vehicle temperature and battery voltage checks. Remote Start features include, Daily Starting and built in Turbo Timer. A special protective cover is included to protect the Touch Screen remote. There is a built in Photo Cell to sense bright sun light. This changes the icons to black and white for easier viewing. This device complies with FCC Rules part 15. Operation is CONTACT INFORMATION: TECHNICAL SUPPORT (800)-998-6880 Monday - Friday 8:00am - 4:30pm Pacific subject to the following two conditions: 1) This device may not cause interference, and (2) this device must accept any interference that may be received, including interference that may cause undesired operation. Website: www.crimestopper.com The manufacturer is not responsible for any radio or TV interference caused by CRIMESTOPPER SECURITY PRODUCTS INC. unauthorized modification to this equipment. Such modification 1770 S. TAPO STREET could void the user's authority to operate the equipment. SIMI VALLEY, CA. 93063 REV. 12.2012 1 TABLE OF CONTENTS Operation Cautions & Warnings……………….....…………..…..………………….…………..2 The Remote Controls……………….....…………..…………..…………………………………..3 Clock Display….……………….....…………..……………………………………..………………4 Charging Battery in 2-Way Remote..…………………………………………………………….4 Menu Flow Chart…………………...……………….....…………..………………………………..5 Alarm Operation…………………...……………….....…………..…………………………….6-10 Panic Mode………………………………………………………………………………………….10 Remote Channels 4~6 (requires programming)……………………………………………..10 Car Selection / Car Name / Car Logo……………….....…………..…………………………...11 Parking Timer / Park Area Location…………………….…...………………………………....11 Carjack Protection……………………………………………………………………………..12-13 Remote Engine Starting – Automatic Transmission…………….…………..…….………..13 Remote Start Diagnostics…………………….………………………………………………….14 Count Down Start / Daily Start / Temperature Start…………………………………..….15-16 Manual Transmission………….....…………..…………………………………..…………...…16 Pin Code……………….....…………..………..........................................................................17 System Settings…………………….………………....…………………………………………...18 IR Remote Programming…..……………………………….……………….....…………………19 Name Transmitter for Find Feature….………………………………………………………….19 Transmitter Find / Locate Feature…………………………………………………………..20-21 Optional Garage Door Opener…………………………………………………………………..21 Transmitting Programming……………..…………………………………………………...…..22 OPERATION CAUTIONS & WARNINGS CRIMESTOPPER SECURITY PRODUCTS, INC. and its VENDORS shall not be liable for any accident resulting from the use of this equipment. This system is designed to be professionally installed into a car or vehicle in good running order. Items, such as parking brake, door switches, and all engine safety features, must be in perfect working condition. DAMAGE resulting from misuse or negligence is NOT covered under warranty and will be subject to repair and / or replacement charges. IT IS ABSOLUTELY THE OWNER’S SOLE RESPONSIBILITY TO: A) Understand the operation of this system and its safety features. B) Check for proper operation of these safety features prior to accepting delivery of the vehicle from the installation facility. C) Check and maintain the condition of the vehicle and all items relative to the proper operation of this system and its safety features. DO NOT remote start the vehicle in a closed garage. Make sure that the vehicle is outdoors, a garage door is open, or there is adequate exhaust ventilation. Failure to observe this rule could result in injury or death from poisonous Carbon Monoxide fumes. This is especially important when using the Timed Self-Start feature of the unit 2 THE REMOTE CONTROLS 1-WAY - SIDEKICK REMOTE: The 1-Way sidekick remote adds flexibility to your system. You can have the convenience of operating your system without needing to carry the larger pager remote. The Sidekick remote has less range and offers all of the same operation features except for page-back confirmation. The 1-Way Sidekick Remote uses two CR-2025 Lithium 3 Volt Batteries. 2-WAY - TOUCH SCREEN PAGER / REMOTE CONTROL: The 2-Way Touch Screen pager remote control is used to send and receive information to and from the vehicle. The vehicle will confirm remote commands by transmitting High Frequency FM signals to your pager over long distances. Your range will vary depending on location, terrain, and local RF noise/interference. This system is not guaranteed to page you if you are behind concrete walls, underground, in a large structure, or in an area with high levels of electronic interference. Handle the pager/remote with care. The LCD display and/or the electronics may be damaged if subjected to abuse. The Touch Screen remote control will confirm everything on the display along with voice and vibration. The voice and vibration can be turned ON or OFF thru the menu choices. • Press Side Screen Activation button to display Touch Screen • • Press anywhere on front screen area to display Button Menu Pressing Side button will stop animation display, sound and voice • • Press Side Lock/Unlock buttons to Arm/Disarm without using front screen The Touch Screen remote can operate up to 4 vehicles 3 Press Side Button Twice to Display Clock To change clock color - Press one of the 4 colored Buttons in corner Charging Battery: There is a battery Icon on top of display showing battery condition. To charge battery, plug in USB charger to plug at bottom of remote control. The battery Icon on remote will show battery charging. The system comes with a 12 volt car charger and AC wall charger. The AC adaptor has a dual colored LED to show charge. Red LED = Battery charging. Green LED = Battery fully charged. The battery life depends on screen brightness and display time setting. A fully charged battery will last about 2 - 3 weeks in normal use. 4 Menu Flow Chart • Pressing side button once activates main menu screen. • Press UP or DN Arrow • Pressing UP Arrow once goes to CAR selection screen. • Pressing DN Arrow once goes to Aux CH screen. to scroll thru all menus. The Icon turns the Power OFF. All memory functions will be lost. You will have to reset the Date and Clock after turning remote back on. The Touch Screen Remote will not receive signals from vehicle until the side button is pressed. Battery life will be about 3 months in this mode. The Enter Icon saves the selection. To cancel Count Down: To cancel Alarm Clock: Set Count Down = 00:00 Set Alarm Time = 00:00 5 or Arming / Locking: Press the Lock Icon on the front screen or the side Lock button on the remote control. The System will arm and confirm with one siren and horn chirp, one park lights flash, and the LED will begin to flash slowly. Power locks will lock (if equipped). The starter disable circuit will turn on. The 2-Way LCD Pager will give voice confirmation “System Armed” while displaying a Lock Icon on front. After a short delay, the system will be completely armed. NOTE: The siren and horn chirps are programmable ON or OFF (option # 4). Open Door Alert / Bypass: Upon arming, the system will warn you if a door, hood or trunk is left open. The remote will show the open Door, Hood or Truck along with a voice alert. The system will also chirp and flash the parking lights 4 times to warn you of a problem. The system will wait up to 45 seconds (programmable 0, 15, 30, 45 seconds) for the dome light to turn off. The open zone will automatically be bypassed until closed. The alarm will continue to protect all other zones. or Car Finder Mode: When the alarm system is armed, press the Lock Icon or button. The siren, horn and lights will flash 6 times. This is useful in a large parking lot to help find your car. or Disarming / Unlocking: Press the Unlock Icon on the front screen or the side Unlock button on the remote control. The System will disarm and confirm with two chirps, two light flashes, and the LED will turn off. Power locks will unlock and Interior Dome light will turn on (if installed with these optional features). The 2-Way LCD Pager will confirm with “System Disarmed” while displaying an Unlock Icon on front. Driver’s Door Priority Unlock: Optional connection required This option separates unlock of the driver’s door from the passenger doors with the remote control. There are 2 choices of operation. • Default = Press and hold the Unlock Icon for 2 seconds to unlock all doors. • Press the Unlock Icon 2 times to unlock all doors. This is Remote Channel 2 output (Option # 10). This output can also be programmed for other auxiliary functions, consult your installer. 6 Silent Arming: To Arm without chirps, press the Silent Arm Icon. The 2-Way LCD Pager will confirm with “System Armed”. Silent Disarming: To Disarm without chirps, press the Silent Disarm Icon. The 2-Way LCD Pager will confirm with “System Disarmed”. Silent Mode: To Arm the alarm with silent monitoring of vehicle, press the Silent Mode Icon. When the alarm is triggered, the pager will notify you of an alarm trigger without the siren, horn honk or flashing lights. Only the Starter Kill circuit is active. Arm without Shock Sensor Zone: nd This FS-99 system has 2 Sensor inputs. The 2 sensor is optional for adding a Micro-Wave or Glass sensor. You can selectively bypass each sensor zone or both sensor zones. To arm the system without the shock sensor zone, press the NO SHOCK Icon shown above. The 2-Way LCD Pager will confirm with “System Armed”. Arm with Sensor 1 bypassed Arm with Sensor 2 bypassed Arm with NO Sensors (All bypassed) Manual Arming Mode: The alarm system can be Manually Armed and Disarmed without the remote control. The door entry will change to a 20 second delay to allow disarm without sounding alarm. This is useful if you don’t have a remote control or go swimming. To Activate Manual Mode: 1. Turn Ignition Key off. 2. Press Valet Override Button 3 times and exit vehicle. 3. The system will arm 10 seconds after closing the door. 4. Disarm by Ignition On and press Valet Override button 4 seconds. 7 Valet Mode: Valet Mode is disables the Alarm and Remote Engine Starting for vehicle servicing. The alarm system must be disarmed to enter Valet Mode. To Activate Valet Mode Manually: Turn the ignition on and press the Valet / Override button [about 5-6 seconds] until the LED turns on solid. Repeat the process to exit VALET Mode (you hear (2) siren chirps). To Activate Valet with the remote, press the remote’s Valet Icon. Repeat this step to exit Valet Mode with the remote control. Emergency Override (Disarm without Remote) If you have lost the transmitter or it stops working for any reason and the Alarm is armed, you will have to disarm the system manually. Open the door with the key [alarm will sound], turn the ignition on, and press the Valet / Override button for about 5 seconds. The Alarm will disarm and allow you to use the vehicle until you can repair / replace the remote. Ignition Controlled Door Locks: (Option # 2) The doors will automatically lock when the ignition is turned on and will unlock when the ignition is turned off. This feature can be programmed on, off, to lock the doors only or unlock the doors only. Doors will not lock if they are open to prevent locking the keys in. Passive Arming Mode: (Option # 6-3) Passive (automatic) Arming occurs 30 seconds after the ignition is turned off and the last door is closed. Upon closing the last door, the LED will be flashing rapidly to confirm passive countdown. If a door is reopened within the 30-second period, the LED will turn OFF as countdown stops and begin flashing again when the door is closed. Passive arming provides failsafe protection in case you forget to arm the system. Passive Locking: (Option # 6-2) The system can be programmed to passively lock the doors when the system passively arms. The default setting is OFF because passive locking increases the risk of locking the keys in the vehicle when the system arms/locks passively, without pressing the remote. Arming Reminder: (Option # 6-1 = ON, # 6-4 = OFF) If Passive Arming is turned off, there is a reminder to arm the system 15 seconds after closing the last door. The system will chirp 4 times to remind you to arm the alarm. Auto Rearm: Failsafe Protection (Option # 5-2 with Lock, #5-3 without Lock) After disarming system and opening and closing a door to get a package, the alarm will rearm automatically unless the ignition is turned on. The system can be programmed to passively lock the doors with Auto Rearm. 8 Active Rearm: (Option # 5-4) Active Rearming means that the system will re-arm itself 30 seconds after being disarmed with the transmitter if a door has not yet been opened. This is handy if the vehicle is accidentally disarmed (via the transmitter in your pocket) without you knowing it. This feature can also be turned off in programming. Pre-Warning Shock Protection: The Pre-Warning (Warn-A-Way) feature will activate when a low-level Light Shock or vibration is detected by the system’s shock sensor. The alarm will chirp the siren 6 times to help deter any further tampering with the vehicle. You will receive a paging signal that will display an icon of a hammer hitting the vehicle. The 2-Way LCD Pager will also vibrate and give voice confirmation of “Sensor Warning” to notify you the vehicle has been tampered with. The Pre-Warning is Bypassed after 5 cycles and reinstated after 10 minutes with no activity. There is 2nd Sensor circuit with Pre-Warning and full alarm trigger. This is for an optional microwave (radar) or glass break sensor. Both sensor zones are independently monitored. Alarm Triggers: If there is an intrusion into the vehicle, a hard impact to the body or the ignition is turned on; the alarm will sound and flash the lights for 30 seconds. If you are within range, you will receive a paging signal that will display an icon of what caused the zone violation. The 2-Way LCD Pager will also vibrate and give voice confirmation of “Door, Hood, Trunk, Ignition or Sensor Trigger” to notify you the vehicle has been tampered with. If a door is left open after an intrusion then the system will cycle once and bypass the door. If any individual zone is triggered 5 times in one arming period, it will be bypassed. The system will continue to protect the other un-tampered or unopened zones. Prior intrusion Alert: This system will notify you if the alarm was triggered while you were away. Upon disarming, there will be four siren chirps instead of the two normal disarm chirps. Check your vehicle for any signs of a break in or tampering. The Blue Status LED will flash the trigger zone number as follows: 2 LED Flashes = Sensor # 1 3 LED Flashes = Sensor # 2 4 LED Flashes = Trunk The Sensor Trigger is Bypassed after 4 cycles and reinstated after 1 hour. 5 LED Flashes = Door 6 LED Flashes = Hood 7 LED Flashes = Ignition Diagnostics will reset when the Ignition is turned on or when the system is re-armed. 9 Alarm Trigger History: The LCD remote will keep a detailed record of the trigger zone, time and date and vehicle number. The Touch Screen shows the CAR # on the bottom of display. Press the Icon to change the Trigger History Display from CAR 1, 2, 3 or 4. Trunk / Hatch Pop - Remote Channel 1 (Option # 10 and 16) This feature is designed to interface with existing Factory power trunk or power hatch release systems and may require additional parts and/or labor charges. To activate, press and hold the Trunk Icon for 3 seconds. The 2-Way LCD remote will confirm activation with a trunk icon. If the system is armed, it will automatically bypass the trunk and shock sensor trigger zones until 10 seconds after closing. The system can also be programmed to disarm with Trunk Pop (option # 16). Note: This output can also be programmed to operate other accessories or devices, consult your installer. or Panic Mode: To sound the alarm in an emergency situation or to draw attention to your vehicle, press and hold the Lock Icon until the siren / horn sounds. The alarm will sound for 30 seconds. Press the Lock or Unlock Icon to reset panic mode. Remote Channels 2, 3, 4, 5, and 6 (Optional, Requires special programming) These outputs are programmable for a variety of functions. The default settings are for standard features like dome light, horn honk and remote starting. These outputs are programmable for momentary, latched, or timed. These outputs can only be programmed for 1 function. Consult your installer for available options. The 1-Way Sidekick Remote uses buttons: Channel 2 = then ………….. Option # 11 Channel 3 = then ………….. Option # 12 Channel 4 = then ………… Option # 13 Channel 5 = plus ……….. Option # 14 Channel 6 = plus ……….. Option # 15 10 CAR Selection: You can operate up to 4 vehicles with this remote. Simply press the Car Icon you wish to operate. The display will show the main menu screen for the car. CAR Name: The car name can be changed by pressing the CAR NAME Icon. The display will show the CAR # with a keypad to change the name. Type in the name for car you wish to use. Press to save selection. CAR Logo: To change the vehicle display Logo, press the LOGO Icon. Press the Down Arrow to scroll thru the choices. To save the selection, press the ENTER Key. Vehicle Status Check: To check the Status of your vehicle, press the STATUS Icon. It will show Arm, Disarm, Remote Start Run Time, Door, Hood or Trunk Open. Battery Voltage: To check the vehicle battery voltage, press the VOLT Icon. The 2-Way remote will display the voltage on the top of LCD display. Vehicle Temperature: To check the vehicle temperature, press the Temp Icon. The 2-Way LCD remote will display the temperature on the top of LCD display. The vehicle temperature is selectable in °F and °C in system setting menu. 11 Vibration and Melody: To change the sounds, voice, vibration or power off remote, press the MELODY Icon. A new menu screen will appear as shown on right. • Tone ON/OFF - Controls the beeps when a key is pressed on remote control. • Vibration ON/OFF. • Melody - Controls Voice confirmation. • Power off function Parking Timer: This is a parking meter alarm reminder. Enter the amount of time needed and press Enter Key. The remote will display an Icon on front. To cancel parking meter time press clear. Park Area Location: This allows you to enter the location of your parked vehicle in a parking lot or parking garage. Press for Demo of remote control display functions. Count Down Timer: This is a countdown alarm reminder. To set timer, press the CNT DN. TIMER Icon. Enter hours and minutes (up to 99 hours and 99 minutes). Press the Enter Icon to save selection. The remote will display an Icon on front. To cancel Count Down Timer, Set Time = 00:00 Carjack Protection: 2 Modes of Operation (Option #27) Carjack Mode is designed to protect you in a Hold-Up situation. There are 2-ways of activating Carjack, passively thru the doors and actively thru the remote. When Carjack triggers, it will start a 30 second countdown. After countdown, the siren, horn and lights will flash for 3 minutes. Carjack will trigger again when the ignition is turned off and on. The vehicle will not start until Carjack is deactivated. Carjack is 12 programmable ON or OFF. Passive Carjack using the Valet Button: While driving your vehicle, press the Valet / Override button once. The Carjack Mode is now ready to protect you. When any door is open and closed, the 30 second Carjack countdown starts. The Parking Lights will flash once the LED will begin to flash rapidly during countdown. • To Deactivate Carjack during 30 second countdown: With the Ignition ON, press the Unlock Icon (LED stops flashing). After the 30 second countdown, the alarm will • trigger and the remote control can’t deactivate Carjack. To Deactivate Carjack while triggered: With the Ignition ON, press and hold the Valet Override button (6 seconds) until alarm turns off. Active Carjack using the Remote: While driving vehicle, press the Carjack Icon on the 2-Way LCD remote control. The 30 second Carjack countdown starts instantly (LED starts flashing rapidly). After 30 seconds countdown, the alarm will trigger and the remote control can’t deactivate. The countdown will continue with the ignition turned off. Note: For Carjack on 1-Way Sidekick remote, press the Plus Buttons at the same time. Remote Engine Starting: nd Press and hold the Remote Start Icon until the remote control beeps a 2 time. 1) Parking lights flash twice and the system will chirp 3 times for audible confirmation. The 2-Way LCD Pager will give voice confirmation “Engine ON”. 2) After the Ignition and Accessory circuits turn for a few seconds, the Starter Motor engages. 3) After Engine Starts and Runs, the Parking Lights flash 3 times. The 2-Way LCD Pager will display an animated car running with voice confirmation “Car Started”. 4) The Touch Screen will show the Engine RUN Time Countdown every minute. 5) Engine will remain running for programmed run time until reset with Brake pedal. The system will chirp 4 times with Brake Reset. If needed, the engine can be turned off with remote transmitter. The 2-Way Pager will give voice confirmation “Engine OFF”. Notes: • • The remote will display an Icon while vehicle is running. The Chirps with Remote Start can be programmed ON or OFF. • • The Door Locks are programmable ON or OFF with Remote Start. If vehicle doesn’t remote start, the system has onboard LED Diagnostics. 13 REMOTE START RUN TIME ADJUSTMENT During remote start, you can increase the engine-run timer by 10 minute increments up to 120 minutes. To increase run time just press the Run Time Icon. Remote Start Diagnostics: If the system doesn’t remote start, the Status LED flashes an error code to identify the problem area. • SOLID LED = Valet Service Mode. The system is in Valet Mode. To exit Valet Mode, turn the Ignition on, press and hold Valet Button for about 5 seconds until LED goes • out. Unit is now out of Valet Mode and should perform a remote start. 2 LED Flashes = Problem with Hood Switch. Make sure hood is closed. • 3 LED Flashes = Problem with Brake Switch. There could be a bad brake light. Many dual filament light bulbs connect the brake and park lights together when bulb • • goes bad. Check to make sure all brake lights work properly. If using hand brake, but sure the hand brake is set. 4 LED Flashes = Low Battery Voltage. The Battery voltage is below 11.5 volts. 5 LED Flashes = Ignition On before Remote Start. • 6 LED Flashes = Tach Problem. The Tach source may need to be reprogrammed, • contact your installer. 7 LED Flashes = Manual Transmission Error. • • 8 LED Flashes = Diesel Wait to Start Time Out (120 seconds). 9 LED Flashes = Remote Start Failed 4 Times. Contact your installer to have system checked out. Idle Down Mode: (Take Over Operation) This mode allows the remote starter to take over operation of your vehicle while it is parked and idling. The vehicle is put into a remote started condition before you exit and it will remain running for the programmed run time, until you step on brake, or until the Remote Start Icon is pressed. Idle Down is programmable for 15, 30, 45 minutes or Infinity run Example: You pull up to a convenience store for a quick stop, "Idle Down" mode keeps engine running when you exit the vehicle, (with keys in hand) remote lock/arm alarm. When you return, unlock/disarm alarm, turn ignition ON and drive away. 14 Idle Down Mode: Exiting the Vehicle 1) With engine running, press the IDLE DOWN Icon on 2-Way remote control. The Lights will flash once for confirmation. On the 1-Way Sidekick, press Lock + Start for Idle down. 2) Turn OFF Ignition and remove key. 3) Parking Lights will turn ON. 4) Engine should remain running. 5) Exit vehicle and remote lock doors if desired. 6) Engine will remain running for programmed run time, until you step on brake, or press the remote start Icon. Turbo Timer: (Option# 23) The optional Turbo Timer mode allows the Remote Starter to keep a Turbo or Turbo Diesel vehicle running for 1 to 6 minutes (selectively) after you remove the key and exit the vehicle. This is handy for turbo cool-down without the need for expensive turbo timers. To activate the Turbo Timer requires pressing remote start button before turning off ignition key. The 2-Way LCD Pager will confirm with TURBO on top of display. The run time options are 1, 3 and 6 minutes. To abort Turbo timer, step on brake or press the remote start Icon. The Turbo Timer is programmable ON or OFF. Count Down Start: This is a countdown timer to start your vehicle. To set timer, press the COUNT DOWN START Icon. Enter the hours and minutes (up to 99 hours and 99 minutes). Press the Enter Icon to save selection. The Icon on front. remote will display an To cancel Count Down Start, Set Time = 00:00 Daily Start: There are 2 Daily Start choices. This allows you to have vehicle automatically start to same time every day or individual days. To set up, press the DAILY START Icon 1 or 2. The keyboard menu will appear. After selecting time press enter for Start Days, press enter to save. The remote will display an Icon on front. You must be within range of vehicle to program. 15 Temperature Start: This allows you to have vehicle automatically start at any temperature from -20°F to +120°F in 1 to 4 hour increments. To set up, press the TEMP START Icon. Press 1 for every hour, 2 for every 2 hours, etc. Press enter to go to next Temperature screen shown. Press Up or DN arrow to turn On/Off then enter temperature. Press enter go to save selection. The remote will display an Icon on front. You must be within range of vehicle to program this feature. Press Clear to cancel Temp start. MANUAL TRANSMISSION EXIT PROCEDURE (Option #26-2 and 26-3) This system features a Manual Transmission Mode. When exiting the vehicle, there is safety check out procedure required for the manual transmission mode to work. There are 2 choices of operation, 1. Option 26-2: With engine running and vehicle in neutral, set parking brake, then press “Idle Down” Icon or remote start on transmitter. The remote starter will turn on and take over operation of the vehicle. 2. Option 26-3: With engine running and vehicle in neutral, set parking brake. The remote starter will turn on and take over operation of the vehicle. 3. Remove key, exit vehicle (remote starter unit must “SEE” door opened, then closed with engine running). 4. Press Lock button within 10 seconds of closing door to Arm system with “Idle Down” (engine stays running). Press Lock a 2nd time to cancel “Idle Down” (engine turns off) and set up Manual Transmission Mode. 5. Press Lock button after 10 seconds of closing door to Arm system, lock the doors and shut down the engine. From this point, the system will remote start the engine unless a door is opened or the alarm is triggered (either function will cancel the remote start sequence). 6. Option 26-4: With engine running and vehicle in neutral, set parking brake, the remote starter will turn on and take over operation of the vehicle. Remove Key and exit vehicle. When the last door of vehicle is closed, the engine will turn off in 2 seconds and set up Manual Transmission Mode. You can arm the alarm system to lock doors and protect vehicle Turbo Timer in Manual Transmission Mode: For Turbo Timer, set parking brake and press the Remote Start Icon (requires Turbo Timer Option # 23). After exiting vehicle, arm the alarm to set Manual Transmission Mode. The engine will remain running for the Turbo Time setting (1, 3 or 6 minutes). ERROR CODE CHIRPS: • 3 Chirps = Hand Brake not set when entering Manual Transmission Exit Procedure. • 4 Chirps = Problem with Remote Start, check LED flashes for diagnostic code. • 5 Chirps = Engine not running when entering Manual Transmission Exit Procedure. 16 PIN Code ON and PIN Code OFF: To activate the PIN Code feature scroll up to the PIN Code Menu and press the PIN ON Icon. The Keyboard will come up for you to enter the correct code (default = 000000). The display will confirm PIN Code ON in top right corner with P: ON. The Touch Screen will now be locked when the display turns off. To turn OFF PIN Code feature, simply press the PIN Code OFF Icon. NOTE: A PIN Code must be set to use this feature, see Set PIN Code in System Menu below. This is to enter the setting page. You can change the following settings below: Date Time Mode: 24H / 12H Language Set Time Back Light Light Delay Alert Time (Alarm Clock) Alert Switch: ON / OFF Temperature Unit: ℃/℉ Power Save: ON / OFF Melody: ON /OFF Key beep: ON / OFF Vibrate: ON / OFF Power OFF: No / Yes Compass Reset: No / Yes Pin Code Switch: ON/OFF Pin Code Change Press to scroll up or down option. Press can switch On/Off Press to go to next screen save or exit 17 Set PIN Code: For added security, you can program in a 2 to 6 digit PIN code to Disarm and unlock the doors. The default PIN code is 000000. To set PIN code: 1. Press PIN SET Icon in Sub Menu. The PIN CODE keyboard will show up with PIN CODE. 2. Enter old PIN code (default = 000000) and press Enter Key. 3. The keyboard will show PIN CODE ٭٭٭1ST. 4. Enter new 2 to 6 digit PIN code and press “Enter Key”. The PIN CODE keyboard will show up with ٭٭٭2ND. 5. Enter same PIN code and press “Enter Key”. The display will show SAVE. 6. The display will show ERROR if same PIN isn’t entered twice correctly. Repeat steps 1 thru 4 to set PIN code. Power Save Mode: This turns off all paging functions. Scroll up or down to “Power Save screen. Press right or left arrow to change On or Off. Press enter to save. This will extend battery life to about 6 weeks without having to reprogram the date or clock. Pressing Lock, Unlock, Start or Trunk will display the Power Save Icon. The Touch Screen Remote will not receive signals from vehicle until the Power Save is turned OFF. Back Light: This changes the brightness of the display. The display back lighting can be changed to suit your needs. There are 5 choices. Press ENTER Key to save selection. Light Delay Time: This adjusts the amount of time the display stays illuminated. You can increase or decrease the time in 1 second increments. The display will show the number of seconds in the top right corner of screen. Press ENTER Key Icon to save selection. Language Select: Select the System Set Icon to the Language page. Press and press the to get to switch from English to Spanish. Press enter to set language. 18 Infrared Remote Control Programming The FS-99 remote can learn 4 different infrared remote controls Learning method: 1. First choose item 2. Press and the upper left corner will display Learn, then press the button function you want to learn. EX: To learn power button of TV remote. First press (display shows Learn on top left), then press ST . The power icon will turn red and the remote will display 1 on the top 3. Place the TV remote in front of FS-99 remote with IR of both remotes facing each other. 4. Press the corresponding function button of TV remote control. The top of FS-99 will display 2ST and beep a sound. 5. Then press once the corresponding function button of the TV remote control again. The FS-99 remote will beep and learning successful. The FS-99 remote will display FALL if learning fail. NOTE: Every different button function will need to be learned once. Register the Name for your selected transmitter: Locate the Find page and press to enter the Locate/Find page. Select the Transmitter: button to select different Press Touch-Screen Transmitter you want to name and register. Register the name for your selected transmitter: Press the name name button to register each Locate/Find transmitter For example: Select TAG1 to name the 1st transmitter. Change uppercase/lowercase Change number/words ENTER 19 LOCATE / FIND Transmitter CODE-LEARNING: Press button to select different Touch-Screen Transmitter you want to learn. For Example: If you want to learn 2 Touch Screen Transmitters, Please mark 1 & 2 on st nd the 1 & 2 transmitter to be programmed to each other. We will label Touch Screen #1 as TS1. • On TS1 select Then press • then press (TS2 you want to program). Code Learning button. On TS2 select then press (TS1 you want to program). Then press Code Learning button. The TS1 & TS2 will automatic to do the LOCATE/FIND code-learning each other within 30 seconds. If learning successful, will display “OK” on the top-right side of the screen also a confirm melody. Please refer the above example to do the LOCATE/FIND code-learning for TS1/TS3, TS2/TS3, TS1/TS4, TS2/TS4, TS3/TS4. SIDEKICK 1-Way Transmitter LOCATE Code-Learning: Press the Touch Screen transmitter Sidekick 1-Way transmitter buttons + code-learning button. Within 30 seconds, press together at the same time. If learning successful, the Touch-Screen Transmitter will display “OK” on the top-right side of the screen along with a confirm melody. LOCATE FUNCTION: Using the 2-Way remote, select the transmitter LOCATE. Then press the button you want to to LOCATE. If lost remote is within range receiving from the lost transmitter, will display OK on the top-right side of the handset. If failed, will display LOST. The lost Touch Screen Transmitter will keep beeping and LCD flashing for 60 seconds and also display the name of the call transmitter on the screen. • Using Sidekick 1-way transmitter to LOCATE Touch-Screen transmitter. Press the +* buttons together to locate the lost remote. The lost Touch Screen Transmitter will keep beeping and LCD flashing for 60 seconds and also display the name of the 1-way transmitter on the screen. 20 FIND FUNCTION: Using the 2-Way remote, select the transmitter you want to FIND. Then press the button to FIND lost transmitter The Touch Screen transmitter will beep and display the distance of lost transmitter as below: • Distance Signals: 2 Beeps = Far 3 Beeps = Middle 4 Beeps = Near You can see the distance message (FAR / Middle / Near) showed on the display to know whether you are getting closer to the lost transmitter or not. The lost Touch Screen Transmitter will keep beeping and LCD flashing for 60 seconds and also display the name of the call transmitter on the screen. If the lost transmitter is out of the receive range or have no returned signals from the searched transmitter, system will show “NO FIND” on the display. Optional Garage Door Opener: or The FS-99 can operate your garage door with an optional FS-GDM module. There are 2 types of garage door openers: 1. A single button garage door opener. Press the same button to open or close the garage door. The FS-99 can control 2 of these garage doors. 2. A separate button for opening and closing the garage door. The FS-99 can control one of these garage doors. 21 TRANSMITTER PROGRAMMING Note: All transmitter codes must be learned at time of programming! learns up to 4 different transmitter codes. This system 1. Turn ignition key to the ON position. 2. Press Programming button 4 times, then after a few seconds the unit flashes the parking lights 4 times. 3. Press button #1 of the first transmitter. You should get 1 light flash confirming the remote is coded, then press button #1 of a second transmitter, the unit will flash 2 times confirming the remote is coded and so on. If all 4 codes are learned, the unit will automatically exit code learning mode, otherwise turn key off. See diagram below. IGN OFF WAIT FOR 4 FLASHES PRESS 4X's IGN OFF FLASH 2, 3, or 4 X's COMPLETE PRESS LOCK A Division of: Crimestopper Security Products Inc. 1770 S. Tapo Street Simi Valley, CA 93063 (800) 998-6880 www.crimestopper.com ©2012 Crimestopper Security Products 22