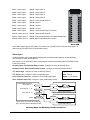
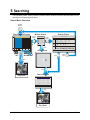
1
Fn
1
2
3
4
5
6
7
A
B
R
8
M
E
N
T
E
R
9
10
11
12
13
14
15
16
T
Vista Columbus System Triplex
©
Digital Video Multiplexer/Recorder
User Manual
WARNING!
To prevent fire and electric shock, do not expose this product to rain or moisture.
!
The lightning flash with the arrowhead symbol,
within an equilateral triangle, is intended to alert
the user to the presence of uninsulated
"dangerous voltage" within the products enclosure
that maybe of sufficient magnitude to constitute a
risk of electric shock to persons.
The exclamation point, within an equilateral
triangle, is intended to alert the user to the
presence of important operating and maintenance
(servicing) instructions in the literature
accompanying the product.
CAUTION!
To prevent electric shock, do not remove cover.
No user serviceable components inside. Refer
servicing to qualified service personnel.
!
CAUTION! Lithium Battery
ATTENTION
Danger of explosion if battery is
incorrectly replaced. Replace only
with the same or equivalent type
recommended by the
manufacturer.
This product contains a recyclable lithium battery.
It may be illegal to dispose of this battery
improperly under local, state, or federal laws.
Check with your local waste management officials
for disposal and recycling options.
CAUTION!
Electrostatic-Sensitive Device!
Use proper CMOS and MOSFET handing precautions, including approved
grounded wrists straps, etc., to avoid damage to this unit or its internal
components, from electric discharge.
WARNING!
This equipment generates, uses and can radiate radio frequency energy, and if not installed and used
in accordance with the instructions in this manual, may cause interference to radio communications. It
has been tested and found to comply with the limits for a Class A computing device pursuant to subpart
J of part 15 of FCC rules which are designed to provide reasonable protection against such
interference when operated in a commercial environment. This equipment has also been tested and
found to comply with the requirements for a CE Class A device and TUV safety standards.
Operation of this equipment in a residential area may cause interference, in which case the user is
required to take all measures that are necessary, at the user's expense, to correct the interference.
0150-0201C
2
Vista Columbus System Triplex
Contents
1
Vista Columbus System Triplex Overview .......................................................... 6
1.1
1.2
1.3
1.4
1.5
1.6
1.7
1.8
1.9
2
Columbus System Triplex Basic Operations................................................................ 16
2.1
2.2
2.3
2.4
2.5
2.6
2.7
2.8
2.9
2.10
2.11
3
Products Featured In This Manual ................................................................................... 6
Product Description.......................................................................................................... 6
Passwords......................................................................................................................... 6
Unpacking ......................................................................................................................... 7
Installation Environment .................................................................................................. 7
Associated Equipment...................................................................................................... 8
The Back Panel ................................................................................................................. 8
Power-Up......................................................................................................................... 14
Minimum Recommended Menu Setup ........................................................................... 14
Principal Operating Modes ............................................................................................. 16
The Front Panel............................................................................................................... 16
Live Viewing .................................................................................................................... 17
Playback.......................................................................................................................... 18
Recording........................................................................................................................ 20
Display Options............................................................................................................... 22
Active Cameos ................................................................................................................ 22
Sequencing ..................................................................................................................... 23
On-screen Indicators ...................................................................................................... 24
Triplex Mode ................................................................................................................... 26
The Print Image Feature ................................................................................................. 28
Menu System Overview....................................................................................... 29
3.1
3.2
3.3
3.4
3.5
3.6
3.7
3.8
3.9
3.10
3.11
3.12
3.13
3.14
3.15
3.16
0150-0201C
Menu Notation In This Manual........................................................................................ 29
Accessing The Menu System ......................................................................................... 29
Available Menus.............................................................................................................. 29
Menus In This Manual..................................................................................................... 30
Navigating The Menu System......................................................................................... 30
Menu Shortcuts............................................................................................................... 30
The Main Menu................................................................................................................ 31
Time/Date ........................................................................................................................ 31
Sequencing ..................................................................................................................... 33
Record............................................................................................................................. 34
Alarms ............................................................................................................................. 40
Macro .............................................................................................................................. 45
Motion Detection............................................................................................................. 47
Camera Setup ................................................................................................................. 50
Archive Setup ................................................................................................................. 53
Audio Setup .................................................................................................................... 54
3
Vista Columbus System Triplex
3.17
3.18
3.19
3.20
3.21
3.22
3.23
3.24
4
Alarms .................................................................................................................. 65
4.1
4.2
4.3
4.4
4.5
4.6
4.7
5
Disk Analysis Screen...................................................................................................... 69
Quick Archive to CD ....................................................................................................... 69
Motion Search ................................................................................................................. 70
Search Filters .................................................................................................................. 71
Search Results................................................................................................................ 72
Telemetry Controls.............................................................................................. 73
6.1
7
Alarm Input...................................................................................................................... 65
Alarm Output................................................................................................................... 65
Alarm Acknowledge........................................................................................................ 65
On-screen Displays During Alarms................................................................................ 65
Alarm Operations During Playback................................................................................ 66
Alarm History Box........................................................................................................... 67
Searching For Recorded Alarms .................................................................................... 67
Searching ............................................................................................................. 68
5.1
5.2
5.3
5.4
5.5
6
Telemetry ........................................................................................................................ 54
Communications............................................................................................................. 56
Front Panel Lock............................................................................................................. 58
Factory Settings.............................................................................................................. 59
Passwords ...................................................................................................................... 59
The QuickInstall Menu.................................................................................................... 60
The Operator Menu......................................................................................................... 60
The SystemView Menu ................................................................................................... 61
The Telemetry Buttons ................................................................................................... 73
Web Interface ....................................................................................................... 76
7.1
WaveBrowser .................................................................................................................. 77
8
Technical Specifications..................................................................................... 80
9
RS232 Event Generation/Text Insertion Protocol ............................................. 82
9.1
9.2
9.3
Message Structure.......................................................................................................... 82
Message Type ................................................................................................................. 82
Event Field ...................................................................................................................... 82
10RS232 Remote Control Protocol ........................................................................ 84
10.1
10.2
0150-0201C
Front Panel Button Emulation........................................................................................ 84
Configuration and Status ............................................................................................... 85
4
Vista Columbus System Triplex
11Macro Tables........................................................................................................ 86
11.1
11.2
Macro Functions Table................................................................................................... 86
Scheduled Macro Table.................................................................................................. 87
12Warranty and Service.......................................................................................... 88
12.1
12.2
0150-0201C
Factory Service............................................................................................................... 88
Warranty.......................................................................................................................... 89
5
Vista Columbus System Triplex
1 Vista Columbus System Triplex Overview
1.1 Products Featured In This Manual
VC10STe: Digital Video Multiplexer/Recorder (DVR), Ten-Channel, Colour, Triplex.
VC16STe: Digital Video Multiplexer/Recorder (DVR), Sixteen-Channel, Colour, Triplex.
1.2 Product Description
The Columbus System Triplex is a video multiplexer capable of recording from multiple cameras to an
internal hard drive while simultaneously providing playback. Unlike outdated time-lapse VCRs, the
Columbus System Triplex records high-resolution pictures. Digital recording improves playback quality
over VCRs, and eliminates the hassle of cleaning heads, changing tapes or servicing motors. The unit
can also be programmed to record continuously by overwriting the oldest recorded data. Depending
on the setup, the Columbus System Triplex can store from a few hours to more than 3 years of colour
images.
Programmable search features eliminate time consuming Fast Forwarding or Rewinding of tapes,
searching for critical data. Search for recorded images or events by alarm, time, date, motion, video
loss, camera number and ASCII cash register or ATM text.
Caution! This products primary purpose is to furnish video multiplexing and recording.
Although the unit has alarm handling and motion detection functions, they are considered
secondary features. This unit should not be the only alarm device on site.
Features
•
•
•
•
•
•
•
•
•
•
•
•
•
•
•
•
•
Multiplexer functionality with built-in digital recording.
Triplex simultaneous recording, playback, and live multiscreen viewing.
Remote programming and control through the RS232, RS485 and Ethernet ports.
View live or recorded images remotely using WaveReader software.
Dual multiscreen monitor displays.
Video motion detection (intrusion and activity).
Motion search.
Record speed selectable per camera.
Displays include full screen, sequenced, picture-in-picture, and multiscreens.
Alarm Handling with History Log. Pre- and post alarm recording.
Archive onto Vista VAIDe Disk Array, or RAID, DAT, AIT, or CD-R’s.
PTZ control via ethernet or POTS, or via RS485 with the NPX/RKB remote keyboard.
Covert camera recording (recording without display).
Auto-Daylight savings time change function.
Alarm Notification via email and/or TCP/IP notification.
Integrated WaveBrowser Software.
One-touch image printing directly from the Triplex.
1.3 Passwords
Passwords are provided to limit access to menus and certain functions. Two levels of password
security are provided:
•
Operator: Limited menu access, only Operator and System View menus are available.
•
Installer: Complete menu access.
0150-0201C
6
Vista Columbus System Triplex
As a security measure, it is recommended that the Operator and Installer passwords be changed after
installation is complete (see section 3.21). Store the passwords in the administrator’s secure files.
Default Passwords
Password
Type
Access
Level
Changeable
by user?
Default
Password
Operator
Operator
Provides access to the Operator
and SystemView menus.
Yes
Press ‘ENTER’
3 Times
Installer
Installer
Provides access to all on-screen
menus.
Yes
347
Factory
Defaults
Installer
Resets the multiplexer to the
factory defaults.
No
811
Language
Installer
Provides access to the On-screen
Language menu.
No
541
Installer
Deactivates the ethernet
password, so that any PC
equipped with WaveReader may
access the unit.
No
111
Ethernet
Access
Reset
Function
1.4 Unpacking
Check the package and contents for visible damage. If any components are damaged or missing, do
not attempt to use the unit, contact the supplier immediately. If the unit must be returned, it must be
shipped in the original packing box.
Package Contents
•
The Columbus System Triplex unit.
•
The Alarm Interface Circuit Board.
•
Accessory PCB. Audio equipped models only.
•
The User Manual.
•
A WaveReader Software CD.
•
The WaveReader Software Manual.
•
The Archiving Addendum.
•
Rack Mount Adapters.
•
WaveWatch User Manual.
•
Power Supply.
•
Power Cord.
1.5 Installation Environment
Power: Ensure that the installation site’s AC power is stable and within the rated voltage of the 12
Volt DC power supply. If the site’s AC power is likely to have spikes or power dips, use power line
conditioning or an Uninterruptable Power Supply (UPS).
0150-0201C
7
Vista Columbus System Triplex
Ventilation: Ensure that the location planned for the installation of the unit is well ventilated. Take
note of the locations of the cooling vents in the unit’s enclosure, and ensure that they are not
obstructed.
Temperature: Consider the unit’s operating temperature (0 to 40 °C) and non-condensing humidity
specifications (10% to 80%) before choosing an installation location. Extremes of heat or cold beyond
the specified operating temperature limits may cause the unit to fail. Do not install the unit on top of
other hot equipment. Leave space between rack mounted units.
Moisture: Do not expose the unit to rain or moisture. Moisture can damage the internal components.
Do not install the unit near sources of water.
Chassis: Other equipment may be placed on top of the unit if it weighs less than 35 pounds (16
kilograms).
1.6 Associated Equipment
Associated equipment in a typical security system could contain the following items:
• Two monitors
• A Keyboard (NPX/RKB).
• Video cameras: Composite video, 1 volt peak-to-peak.
• Alarm input devices: Pressure sensors, motion detectors, etc.
• Alarm output devices: Buzzers, Sirens, Flashing Lights, etc.
• A PC connected via ethernet cable.
• An external archive device, such as a VAIDe, RAID, CD-R, DAT, or AIT drive.
For instructions regarding the connection of the associated security equipment in your system, please
consult the instruction manual of the associated equipment.
1.7 The Back Panel
1
2
3
4
5
6
AUX
7
8
RS-485/1
ETHERNET
10/100
RS-485/2
RS-232/2
12V DC
1
2
3
4
5
6
7
8
9
10
11
12
13
14
15
16
SVHS
SCSI
B
RS-232/1
B
9
10
11
12
13
14
1. Camera Inputs: BNC connector, looping. Auto Terminating.
2. Composite Monitor-A Output: Composite video output with BNC style connector.
3. Y/C Monitor-A Output: Y/C video output with 4-pin mini-DIN style connector.
4. Alarm I/O: For connecting alarm inputs, and alarm output relays.
5. Power Input: For connecting the power supply.
6. Aux Port: For connecting the Accessory PCB for Audio inputs and outputs.
7. RS485 Port 1 Connector: For connecting to keyboard and other RS485 devices.
8. 10/100 Ethernet Port: For connecting to remote PC via ethernet network.
9. Composite Monitor-B Output: Composite video output with BNC style connector.
10. Y/C Monitor-B Output: Not used.
11. SCSI Port: For connecting SCSI compatible archive devices.
12. RS232 Port 1: For modem connection and external control of the unit.
13. RS485 Port 2 Connector: For connecting to keyboard and other RS485 devices.
14. RS232 Port 2: For Event Generation and ASCII Text insertion.
0150-0201C
8
Vista Columbus System Triplex
Camera Inputs
There are two BNC jacks for each camera. Either
jack can receive a camera signal. The signal is
looped (directly connected to the other jack), making
the camera signal available to other equipment.
Cable: 75-Ohm Coaxial
The camera input connectors are Auto Terminating.
Passive Looping: Yes
Connectors: BNC
Auto Terminating: Yes
This means that the input signal will automatically be terminated with 75-Ohms unless a 2nd cable is
connected to the 2nd BNC connector of the same camera input. Make sure there is 75-Ohm
termination at the end of the video line if the signal is looped through the Columbus System Triplex.
Time base correction is performed during digital capture. As a result, cameras do not require
synchronization.
See section 3.14 for information about disabling unused camera jacks in the menu system.
Composite Monitor Output
When connecting directly from the Columbus System
Triplex to the monitor, select the 75-Ohm impedance
setting on the monitor.
Cable: 75-Ohm Coaxial
Connectors: BNC
If an additional device is connected to the monitor’s looping output, set the termination of the additional
device as 75-Ohm, and set the termination of the monitor as Hi-Z (High Impedance).
Y/C Monitor Output
Y/C video output has a 4-pin mini-DIN style
connector. This style of connection is also referred to
as SVHS and S-Video.
Cable: 75-Ohm Coaxial
Connectors: BNC
Alarm I/O Port
The back panel of the unit is equipped with an Alarm
Port (DB-25 style connector).
Do not attempt to wire directly to the DB-25
connector on the back panel.
DB-25 Connector on Back Panel
Connect the Alarm PCB (supplied with the unit) to the Alarm Port. Wire all alarm inputs to the Alarm
PCB per the pin out specifications shown below.
0150-0201C
9
Vista Columbus System Triplex
Pin 14: Alarm Input 14.
Pin 3: Alarm Input 3.
Pin 15: Alarm Input 15.
Pin 4: Alarm Input 4.
Pin 16: Alarm Input 16.
Pin 5: Alarm Input 5.
Pin 17: Alarm Output Relay #1.
Pin 6: Alarm Input 6.
Pin 18: Ground.
Pin 7: Alarm Input 7.
Pin 19: Ground.
Pin 8: Alarm Input 8.
Pin 20: Ground.
Pin 9: Alarm Input 9.
Pin 21: Alarm Output Relay #1 Common.
Pin 10: Alarm Input 10.
Pin 22: Alarm Output Relay #2.
Pin 11: Alarm Input 11.
Pin 23: External Alarm Silence and Acknowledge Input.
Pin 12: Alarm Input 12.
Pin 25: Alarm Output Relay #2 Common.
14
A14
2
A2
15
A15
3
A3
16
A16
4
17
A4 NO1
5
18
6
19
7
A5 GND A6 GND A7
A9 COM1 A8 GND GND
9
21
8
20
20
Pin 2: Alarm Input 2.
Signal A13 COM2 A12 Vext A11 ACK A10 NO2
PIN 13
25
12
24
11
23
10
22
Pin 13: Alarm Input 13.
PIN
1
Signal A1
Pin 1: Alarm Input 1.
Alarm PCB
Active alarm inputs vary by DVR model. 10 channel units (VC10STe) have 10 active alarm inputs. 16
channel units (VC16STe) have 16 active alarm inputs.
Alarm Input
An alarm condition can be activated by devices such as pressure pads, passive infrared detectors,
door switches, or other similar devices.
See section 3.11 for information about configuring the contacts as Normally Open or Normally Closed
in the menu system.
Normally Open, Zero Potential Relay Contact: Configure in menu as Normally Open.
Normally Closed, Zero Potential Relay Contact: Configure in menu as Normally Closed
TTL Active High: Configure in menu as Normally Closed.
High: 5V (12V Tolerant)
TTL Active Low: Configure in menu as Normally Open.
Low: Ground
Open Collector Active On: Configure in menu as Normally Open.
Inputs: 1 per channel.
Open Collector Active Off: Configure in menu as Normally Closed.
Triplex DB25 Connector
Alarm Input No. 1
Alarm Input No. 2 - 15
pin 1
Normally Open
(Closes During Alarm)
pins 2-15
Typical Alarm Device
Alarm Input No. 16
Ground
pin 16
Refer to each alarm device's manual for specific wiring details.
pins 18-20
Normally Closed
(Opens During Alarm)
Typical wiring for Alarm #1 as Normally
Open and Alarm #16 as Normally Closed.
Typical Alarm Device
Normally Open and Normally Closed Connections
0150-0201C
10
Vista Columbus System Triplex
Alarm Relay Output
The alarm relay output is activated when an alarm condition
exists. The alarm output is only active for the duration of the
alarm.
Output: Zero potential relay contacts,
programmable in menu system as
Normally Open or Normally Closed.
Alarm relays can be programmed in the menu system to
respond to macros, and video loss. See section 3.11 for
information about configuring the alarms in the menu system.
Voltage: 30V (Max)
Current: 500mA (Max)
Typical wiring for Alarm Relays. Relays may be
programmed Normally Open or Normally Closed.
pin 17
Alarm
Device
Output Relay No. 1
Power
Source
pin 21
pin 22
Output Relay No. 2
Power
Source
Controlled
Device
pin 25
Triplex DB25 Connector
External Alarm Acknowledge Input
Connect a switch or similar device to ground this pin in order
to acknowledge an alarm condition, and silence associated
buzzers and relays. Connect from pin 23 to either pin 18, 19,
or 20 (ground pins).
NOTE
External Device: Normally Open
Zero potential relay contact.
All specifications subject to change without notice. Norbain believes all specifications to be
correct at time of printing, but no liability is assumed for omissions or errors.
AUX Port
The back panel of the unit is equipped with an Aux Port
(DB-9 style connector).
Do not attempt to wire directly to the DB-9
connector on the back panel.
1
6
5
9
DB-9 Connector on Back Panel
Connect the Accessory PCB (supplied with the unit) to the AUX port to access the Audio features.
Wire the audio input and output to the Accessory PCB per the pin out specifications shown below.
0150-0201C
11
Vista Columbus System Triplex
Pin 1: Not Used.
Pin 2: Audio Out.
Pin 3: Ground.
Pin 4: Audio In.
Pin 5: Ground.
Pin 6: Not Used.
Pin 7: Ground.
Pin 8: Not Used.
1
6
2
7
3
8
4
9
5 GND
Pin 9: Ground.
Accessory PCB
GND: Ground.
RS485 Connector
Shields are grounded at one end, preferably at the
Columbus System Triplex.
Wire Type: #24 AWG, twisted pair with shield
(2-wire)
See section 3.18 for information about configuring
the RS485 network address settings in the menu
system.
Connector Type: RJ-45
Max. Cable Length: 3200 feet / 1000 meters
RJ-45 Pin Configuration For RS485 Port
Pin
Use
Pin
Use
1
Ground (Shield)
5
Not Connected
2
+12V DC (200mA)
6
Network -VE
3
Network +VE
7
Ground (Shield)
4
Not Connected
8
+12V DC (200mA)
1 2 3 4 5 6 7 8
RJ-45 socket on
back panel.
Ethernet Port
The cable connection configuration depends on your
network configuration:
•
•
Wire Type: Cat 5
Connector Type: RJ-45
For a Columbus System Triplex that connects
directly to a Hub or Switch, use a straight through
connection.
Max. Cable Length: 100 meters / 328 ft.
For a Columbus System Triplex that connects
directly to a PC, use a cross over connection.
Hub Wiring Configuration: Straight Through
Min. Cable Length: 6 feet / 1.8 meters
PC Wiring Configuration: Cross Over
Consult with your MIS personnel for the specific type
of configuration. See section 3.18 for information
about configuring the ethernet settings in the menu
system.
0150-0201C
12
Vista Columbus System Triplex
RJ-45 Pin Configuration For Ethernet Port
Pin
Use
Pin
Use
1
TX+
5
Not Connected
2
TX-
6
RX-
3
RX+
7
Not Connected
4
Not Connected
8
Not Connected
1 2 3 4 5 6 7 8
RJ-45 socket on
back panel.
SCSI Port
The unit is equipped with a SCSI port for
connecting external archive devices. The unit only
supports a single SCSI device. The SCSI ID of the
archive device must be set to 0.
Connector: 50 Pin, High Density SCSI-2.
Gender (on unit): Female
Compatible devices: VAIDe, RAID, DAT, AIT,
CD-R, CD-RW
The SCSI bus must be terminated, otherwise the
system will not operate properly.
SCSI ID: 0
Additional menu setup may be necessary to
configure archive device. See section 3.15.
RS232 Port 1
For a Modem connection or remote control of unit. See section 3.18 for information about configuring
the modem settings in the menu system. See section 8 for RS232 Remote Control Protocols.
DB-9 Pin Configuration For Port 1
1
Pin
Use
Pin
Use
Pin
Use
1
DCD
4
DTR
7
RTS
2
RX
5
Ground
8
CTS
3
TX
6
Not Connected
9
Not Connected
6
For Event Generation, ASCII Text Insertion, and proprietary dome control.
RJ-45 Pin Configuration For RS232 Port 2
Use
Pin
Use
1
Ground
5
TXD
2
Reserved
6
Not Connected
3
Not Connected
7
Ground
4
RXD
8
Reserved
0150-0201C
13
9
DB-9 on back panel.
RS232 Port 2
Pin
5
1 2 3 4 5 6 7 8
RJ-45 socket on
back panel.
Vista Columbus System Triplex
1.8 Power-Up
It is important that the power-up procedures be followed carefully. The unit uses its auto-detect
feature to detect camera signals during power-up, and configure itself automatically.
Power-up procedure
Once the system installation is complete, apply
power in the following order:
1. Energize the monitors and all of the cameras.
2. Energize the Columbus System Triplex.
Power Supply Input
Voltage: 12 Volt DC
Power: 60 Watt (5 Amp)
Connector: 2.1mm barrel, centre positive
Once power is applied to the unit, it will begin its power-up procedure. The unit will begin by displaying
the software version on Monitor-A, then the unit will begin recording automatically.
Check Video Input Quality
Check the picture quality by selecting each camera for full screen display. If the picture quality is poor,
check the following items:
•
The BNC connections.
•
The loop-through terminations.
•
The video levels of incoming signals.
•
The possibility of ground loops.
•
Consult the camera’s installation instructions for additional information about proper camera setup.
Check Record And Playback Quality
Record for at least three minutes at the default record rate. Then play back the recording, selecting
each camera for full screen display. Check the playback picture quality.
1.9 Minimum Recommended Menu Setup
After installation is complete, it is strongly recommended that, as a minimum, the items in the
QuickInstall menu be configured before the unit is used. All the features located in the QuickInstall
menu are also found in the Main menu. These items are provided in the separate QuickInstall menu
as a convenience for the installer.
For information about accessing and configuring the menu system, see Section 3.
To find detailed information in this manual about configuring each item in the QuickInstall menu, use
the following table to locate the main menu location of each item in the QuickInstall menu.
0150-0201C
14
Vista Columbus System Triplex
QuickInstall
Menu Item
Main Menu Location
Section in
Manual
Change the time
Main Menu → Time/Date → Set Time
3.8
Change the date
Main Menu → Time/Date → Set Date
3.8
Edit Camera
Titles
Main Menu → Camera Setup → Camera Titles → Edit Titles
3.14
Camera Disable
Main Menu → Camera Setup → Camera Disable
3.14
Telemetry
Enable
Main Menu → Telemetry → Telemetry Enable
3.17
Record Quality
Main Menu → Record → Record Quality
3.10
Installer
Password
Main Menu → Passwords → Installer Password
3.21
Auto Disable
Now
Main Menu → Camera Setup → Camera Disable → Auto
Disable Now
3.14
0150-0201C
15
Vista Columbus System Triplex
2 Columbus System Triplex Basic Operations
2.1 Principal Operating Modes
The Columbus System Triplex has three principal modes of operation:
• Live Viewing.
•
Playback.
• Recording.
All three of these modes can operate simultaneously. Each mode is discussed in detail later in this
section.
2.2 The Front Panel
4
1
3
2
Fn
1
2
3
4
5
6
7
8
A
R
8
10
M
9
10
E
N
T
E
R
B
7
6
5
11
12
11
12
13
14
15
16
T
13
14
9
1. Function Button: Used in conjunction with Camera Buttons to run macros. Also displays help
screens in certain modes.
2. Sequence Button: Sequences camera views.
3. Camera Selection Number Buttons: Camera numbers 1 through 8.
4. Arrow Button: Controls Playback speed and Menu selections.
5. Menu Button: Provides access to on-screen menus.
6. Camera Selection Number Buttons: Camera numbers 9 through 16.
7. Monitor Select Button: For selecting Monitor A or B.
8. Multiscreen Buttons: For selection of various multiscreen options.
9. Zoom Button: Provides a 2X digital zoom.
10. Alarm Button: Allows user to acknowledge and silence alarms.
11. VCR Control Buttons: Live/Stop, Record, Reverse Play, Freeze, Play Forward, and Search buttons.
12. Enter Button: Confirms selections in menus.
13. Telemetry Buttons: Focus, Iris, Telemetry Zoom, Preset Position, and Telemetry On/Off buttons.
14. Telemetry Camera Control Buttons: Camera Power, Lamps, Wash, Wipe, and Auto Pan buttons.
0150-0201C
16
Vista Columbus System Triplex
2.3 Live Viewing
Multiscreen Display
In Live Multiscreen mode, press one of the Multiscreen buttons to activate
the multiscreen display on Monitor-A or Monitor-B. Live Multiscreens are
displayed with grey borders. For detailed information about Multiscreen
displays, see section 2.6.
Multiscreen Buttons
Multiscreen Display With Sequencing
If a multiscreen display does not include all of the cameras, the remaining
cameras can be sequenced in the bottom right cameo. While in a multiscreen
display, press the Sequence button to begin sequencing. For detailed
information about sequencing, see section 2.8.
Sequence Button
Full Screen Display
Select any camera for Full Screen display by pressing the Number button of
the desired camera. Pressing the Camera number button again displays the
Status Display Box. Pressing the same button a third time displays any
associated ATM or cash register ASCII text, see section 2.9.
1
Number Button
Sequenced Full Screen Display
While in a Full Screen display, press the Sequence button to begin full
screen sequencing. The sequence list and dwell times are programmable.
For detailed information about programming the sequence list see section
2.8. For detailed information about configuring the dwell times in the menu
system, see section 3.9.
Sequence Button
Zooming
To activate the 2x digital zoom, select the full screen display of the camera
you wish to zoom, then press the Zoom button. Zooming will be indicated by
the LED located directly above the Zoom button. Zooming is also indicated
as ZOOM on the primary monitor. Zooming works with frozen and non-frozen
images. Zoomed images can also be frozen.
While Zoomed, use the Arrow Button to Pan and Tilt across the image.
Please note, the camera does not move during digital Pan/Tilt.
Zoom Button
with LED
Press the Zoom button again to cancel the Zoom operations.
NOTE
If the Zoom button is pressed while in a multiscreen display, the camera from the last active
cameo is selected for full screen display. Press the Zoom button again to activate the Zoom
operation.
Freezing
Pressing the Freeze button freezes all camera images on-screen. Full
Screen freezing is indicated as FRZ on-screen. Multiscreen freezing is
indicated as * (a flashing asterisk) in each frozen cameo.
Individual cameos can be frozen in Active Cameo mode (see section 2.7).
Freeze Button
Press the Freeze button again or any camera button to cancel Freeze
operations.
0150-0201C
17
Vista Columbus System Triplex
Selecting Monitor-B
To control Monitor-B, press the lower part of the Monitor button. The
Monitor-B LED will light to indicate that the number keypad now controls
Monitor-B. Press the upper part of the Monitor button again to return the
keypad control to Monitor-A.
A
B
Monitor Button
2.4 Playback
Playback always displays on Monitor A. Playback multiscreen borders are black, as opposed to the
grey borders of the live multiscreens. Monitor B continues to display full or multiscreen live images in
playback mode. To begin playback, press the Play Forward or Reverse Play button.
Play Forward
When the Play Forward button is pressed, the unit will play forward at the rate
the data was recorded. While in Playback mode, the user may change the
playback direction, playback speed, etc. To return to Play Forward operations,
press the Play Forward button. The left and right arrows on the Arrow Button
will also change the playback direction when in play mode.
Play Forward
Button
Reverse Play
To begin reverse playback, press the Reverse Play button.
Reverse Play
Button
Fast Forward
During playback, press the Up Arrow button. The unit will display images at a
higher than normal rate. There are 4 Fast Forward rates. Repeated pressing of
the Up Arrow button will increase the playback speed.
Up Arrow
Button
Rewind
During playback, press the Down Arrow button. The unit will display images (in
reverse) at a higher than normal rate. There are 4 Rewind rates. Repeated
pressing of the Left Arrow button will increase the rewind speed.
Down Arrow
Button
Pause/Freeze
During playback, press the Freeze button. This feature pauses all full screen and
multiscreen images. Pause is indicated by FRZ on the playback monitor.
Freeze Button
0150-0201C
18
Vista Columbus System Triplex
Single Frame Advance
While in Pause mode, press the Right Arrow button. The unit will advance a
single frame, then return to Pause mode.
Right Arrow
Button
Single Frame Rewind
While in Pause mode, press the Reverse Play button. The unit will rewind a
single frame, then return to Pause mode.
Left Arrow
Button
Stop Playback
To stop playback and return to Live Multiscreen mode on Monitor A, press the
Stop button.
Stop Button
Multiscreen Display
During Playback, press one of the Multiscreen buttons to activate a
multiscreen display. The 6-way and PIP multiscreen displays are not
available in Playback mode. For detailed information about Multiscreen
displays, see section 2.6.
Multiscreen Buttons
Multiscreen Display With Sequencing
If a multiscreen display does not include all of the cameras, the remaining
cameras can be sequenced in the bottom right cameo. While in a multiscreen
display, press the Sequence button to begin sequencing. For detailed
information about sequencing, see section 2.8.
Sequence Button
Full Screen Display
Select any camera for Full Screen display by pressing the Number button of
the desired camera. Pressing the Camera number button again displays the
Status Display Box. Pressing the same button a third time displays any
associated ATM or cash register ASCII text.
1
Number Button
Sequenced Full Screen Display
While in a Full Screen display, press the Sequence button to begin full
screen sequencing. The sequence list and dwell times are programmable.
For detailed information about programming the sequence list see section
2.8. For detailed information about configuring the dwell times in the menu
system, see section 3.9.
0150-0201C
19
Sequence Button
Vista Columbus System Triplex
Zooming
To activate the 2x digital zoom, select the full screen display of the camera
you wish to zoom, then press the Zoom button. Zooming will be indicated by
the LED located directly above the Zoom button. Zooming is also indicated
as ZOOM on the monitor. Zooming works with frozen and non-frozen
images. Zoomed images can also be frozen.
While Zoomed, use the Arrow Button to Pan and Tilt across the image.
Please note, the camera does not move during digital Pan/Tilt.
Zoom Button
with LED
Press the Zoom button again, or another camera button to cancel the Zoom
operations.
NOTE
If the Zoom button is pressed while in a multiscreen display, the camera from the last active
cameo is selected for full screen display. Press the Zoom button again to activate the Zoom
operation.
Searching Recorded Data
The Columbus System Triplex has a powerful search interface feature that allows the user to search
for data on the internal hard disk or an external archive device. The user may search the data for
previous recording sessions, text insertion, alarm conditions, or for motion in a selectable area of the
scene. Because the search interface is so dynamic, it is covered in detail in a separate section of this
manual. See section 5.
2.5 Recording
To begin recording, press the Record button. Recording will be indicated by the
LED located directly above the Record button. The unit always starts recording
at the end of previously recorded data.
The unit will continue recording until the record button is pressed again.
R
Record Button
If Record Lock is active the Record button will not stop the unit from recording.
0150-0201C
20
Vista Columbus System Triplex
Monitor Displays During Recording
Multiscreen Live and Playback display on Monitor A and Monitor B are not affected by recording
operations.
Monitor A
Monitor B
Stop Mode
LIVE
LIVE
or
LIVE
Playback Mode
PLAY
BACK
LIVE
or
LIVE
LIVE
PLAY
BACK
LIVE
Triplex Mode
0150-0201C
21
Vista Columbus System Triplex
2.6 Display Options
Available Multiscreen Displays
Press the Multiscreen buttons to activate the multiscreen display. Pressing the individual multiscreen
button will display the corresponding multiscreen.
16-Way
13-Way
10-Way
7-Way
9-Way
6-Way
4-Way
PIP
The multiscreen display is limited to the number of camera inputs on the unit.
Sixteen-Channel unit: Capable of displaying all multiscreens.
Ten-Channel unit: Only capable of displaying 10-way through 4-way multiscreen and PIP.
The camera assignments for each multiscreen is retained (in non-volatile memory) for both Live and
Playback multiscreen mode on Monitor A, as well as Live multiscreen mode on Monitor B.
PIP: Use the Arrow Button to adjust the location and size of the PIP display. Please note that the PIP
display is only available on Monitor A in Live mode, when Monitor B is in fullscreen display mode.
2.7 Active Cameos
A cameo is defined as any cell within a multiscreen display. Active Cameo mode allows the user to
access and edit each cameo individually.
Entering Active Cameo Mode
While viewing a multiscreen, enter Active Cameo mode by pressing the Enter
button. Active Cameo mode is indicated on-screen by flashing the number
and titles of the active cameo. By default, the top left cameo is activated.
E
N
T
E
R
Enter Button
0150-0201C
22
Vista Columbus System Triplex
Selecting Cameos
Select a cameo using the Arrow Button to navigate the multiscreen.
Pressing the Up or Down arrow selects the next screen up or down a column.
Pressing the Right or Left arrow selects the next screen across a row. The
active cameo will always be indicated by the flashing camera number and
titles.
Arrow Button
Selecting Cameras
Display any camera in the active cameo by pressing the Number button of
the desired camera. Once a camera has been selected, the active cameo
advances to the next cameo on the right.
1
Number Button
The camera selection only changes the multiscreen currently being displayed. Each multiscreen must
be configured separately. Changes to the multiscreen display are saved in non-volatile memory, and
will be retained even if power is removed from the unit.
Freezing
Press the Freeze button to freeze the image in the selected cameo. Each
frozen cameo is indicated as * (a flashing asterisk) on-screen.
Press the Freeze button again to cancel Freeze operations.
Freeze Button
2.8 Sequencing
The sequencing feature allows a camera to be displayed briefly on-screen,
before advancing to the next camera in the sequence list. The default
sequence list displays each camera in numerical order.
Sequence Button
Dwell Time
The dwell time is the amount of time each camera is displayed on-screen before advancing to the next
camera. The Full Screen and Multiscreen Dwell Times are separately programmable in the menu
system. For detailed information about configuring the dwell times in the menu system, see section
3.9.
Autolist™ Custom Sequence List
The Autolist™ feature allows the user to create a custom sequence list, controlling the order the
cameras are displayed and the dwell time. Separate Autolists may be created for Monitor A (Live and
Playback mode) and Monitor B (Live mode). Using the Monitor button, select the monitor to be
programmed. Then, using a Number button, select any camera for full screen display.
NOTE
0150-0201C
The unit must be in Full Screen Display mode before starting to create the sequence list.
This initial camera is not part the sequence list.
23
Vista Columbus System Triplex
To begin recording the Autolist™ sequence: Press the Alarm button and
Sequence button simultaneously. Autolist Program mode is indicated as
PGM on-screen.
Recording starts when the first camera number is pressed. Press the camera
numbers in the order you wish them to appear on-screen. The amount of
time between button presses determines the Dwell Time. During sequence
list programming, pressing any button other than a Number button or the
Sequence button voids the sequence list.
Alarm Button and
Sequence Button
To end the recording: Press the Sequence button. The amount of time between pressing the last
Number button and the Sequence button determines the dwell time for the final camera in the
sequence list.
Returning To The Default Sequence List
The default sequence list is all cameras in numeric order with a three second dwell time.
To return the unit to the default sequence list, go to the Main Menu → Sequencing → Full Screen
Dwell menu. Select 3 seconds by using the Arrow Button, then press the Enter button.
Note: Any alteration of the dwell time from this menu will cancel the sequence list and return to the
default (numeric) order.
Sequencing In Cameos
While viewing a multiscreen display, additional cameras (cameras not shown in the multiscreen
display) can be sequenced in the lower right hand cameo by pressing the Sequence button. The
sequence list is not programmable, but the dwell time can be adjusted in the menu system. Press the
Sequence button again to cancel sequencing.
2.9 On-screen Indicators
There are five types of on-screen indicators.
Camera Titles: Displays the camera number and the camera title.
Status Indicators: Displays Time, Date, and Hard Disk record time left.
Conditional Indicators: Displays indicators for Freeze, Zoom, Alarm, Motion Detection, Videoloss,
Autolist™ Program mode, Macro Record and Macro Playback mode.
Status Display Box: Displays Archive Device, Network status and Image Quality Setting (Playback
mode only).
Text Display Box: Displays ATM/POS Text data.
Camera Titles
Camera Titles are displayed on either the upper or lower corner of the left hand side of the screen.
The camera title can be changed in the menu system (see section 3.14). The user can change display
position and colour. See below.
0150-0201C
24
Vista Columbus System Triplex
Changing Position And Colour Of Title And Status Indicators
Camera Titles: To change the colour and position of the camera
titles, select a camera for full screen display, then press the Enter
button to advance to the next display setting. Repeatedly pressing
the Enter button advances the display settings through the
sequence show in the table on the right.
Status Indicators & Camera Titles: Select Camera 1 for full
screen display. Using the Enter button, cycle through the
sequence shown on the right. Each time the position cycle is
completed, the unit advances the Status Indicator colour. Choose
Black, White or Grey.
Position
Colour
Top Left
Black
Top Left
White
Top Left
Grey
Bottom Left
Black
Bottom Left
White
Bottom Left
Grey
Title not displayed
Status Indicators
Status indicators are displayed on the upper right hand corner of the
screen.
Status indicators include:
•
Time and Date (these can be turned off in the menu system, see
section 3.8). The Time and Date format can also be changed in
the menu system.
•
Time remaining on Hard Disk(s).
Small Cameo
Conditional Indicators
Condition
Full Screen Indicator
Multiscreen Indicator
Alarm
ALM
A in cameo of camera in alarm
Autolist™ Program
mode
PGM
PGM
Freeze
FRZ
* (Asterisk) in frozen cameo
Macro Record mode
F followed by macro number
F followed by macro number
Motion Detection
M
M in cameo w/ motion detection
Videoloss
VDL
V in cameo with videoloss
Zoom
ZOOM
ZOOM
Status Display Box
A Status Display Box can be viewed by pressing the Camera Number button twice. Status Indicators
include:
On Live Fullscreen:
•
•
Archive Status: Not Connected, Not Ready, Ready, Ejecting, Play, and timeleft. Timeleft
indicates the amount of time before the archive medium is full (Only available if the unit has
Background Archiving turned On).
Network: Displays all current Network connections. Normal connection is displayed as ip.ip or --if there is no connection. Live connections are displayed as E1: ip.ip, E2: ip.ip, etc. (where ip.ip
represents the last 2 bytes of the IP Address). POTS connection is displayed as IP 1.1.
On Playback Fullscreen:
•
All the above, including Image Quality Setting: High, Medium, Standard.
0150-0201C
25
Vista Columbus System Triplex
ATM/POS Text Display
Pressing the Camera Number a third time displays an ATM/POS text display. This feature can be
used during live viewing mode to verify that the Columbus System Triplex is receiving ATM/POS text,
or in Playback mode to review recorded text and video.
2.10 Triplex Mode
Triplex mode allows the display of both live and playback images to appear on Monitor A
simultaneously. Live images have grey borders, while playback images have black borders.
To enter Triplex mode, press the Play Forward button while in Play Forward mode. Alternatively, press
the Play Reverse button while in Play Reverse mode. Both the Play Forward LED and the Stop LED
turn on to indicate that the unit is in Triplex mode.
Monitor B always switches to a fullscreen live display whenever Triplex mode is entered.
Play Forward
When in Play Forward mode and the Play Forward button is pressed, the unit will
enter the Triplex mode of operation. When Play Forward is pressed again, the
unit will revert back into the normal Playback mode. While in the Triplex mode, if
reverse play is in progress, the Play Forward button will change the playback
direction. The left and right arrows on the Arrow Button will also change the
playback direction when in triplex mode.
Play Forward
Button
Reverse Play
When in Reverse Play mode and the Reverse Play button is pressed, the unit will
enter the Triplex mode of operation. When Reverse Play is pressed again, the
unit will revert back into the normal Playback mode. While in the Triplex mode, if
forward play is in progress, the Reverse Play button will change the playback
direction.
Reverse Play
Button
Fast Forward
During playback, press the Up Arrow button. The unit will display images at a
higher than normal rate. There are 4 Fast Forward rates. Repeated pressing of
the Up Arrow button will increase the playback speed.
Up Arrow
Button
Rewind
During playback, press the Down Arrow button. The unit will display images (in
reverse) at a higher than normal rate. There are 4 Rewind rates. Repeated
pressing of the Left Arrow button will increase the rewind speed.
Down Arrow
Button
0150-0201C
26
Vista Columbus System Triplex
Pause/Freeze
During playback, press the Freeze button. This feature pauses all full screen and
multiscreen images. Pause is indicated by FRZ on the playback monitor.
Freeze Button
Single Frame Advance
While in Pause mode, press the Right Arrow button. The unit will advance a
single frame, then return to Pause mode.
Right Arrow
Button
Single Frame Rewind
While in Pause mode, press the Reverse Play button. The unit will rewind a
single frame, then return to Pause mode.
Left Arrow
Button
Stop
To stop Triplex mode and return to Live mode on Monitor A, press the Stop
button.
Stop Button
Multiscreen Display
During Triplex mode, press one of the Multiscreen buttons to activate a
multiscreen display. The 6-way and PIP multiscreen displays are not
available in Triplex mode. For detailed information about Multiscreen
displays, see section 2.6. The Live and Playback images in a multiscreen
display may be transposed by pressing the multiscreen button that
corresponds with the current multiscreen display.
Multiscreen Buttons
E.g. If the current display is a 13-way multiscreen with the centre cameo being a playback image and
the rest of the cameos being live images, pressing the 13-way multiscreen button will result in the
centre cameo being live and the rest of the cameos being playback images.
Multiscreen Display With Sequencing
The bottom right cameo of any multiscreen will start sequencing when the
Sequence button is pressed. If this camera is a playback image, the
sequencing will include all the non-displayed playback cameras, and vice
versa for a live image.
0150-0201C
27
Sequence Button
Vista Columbus System Triplex
Full Screen Display
Select any camera for Full Screen display by pressing the Number button of
the desired camera. Pressing the Camera number button again displays the
Status Display Box. Pressing the same button a third time displays any
associated ATM or cash register ASCII text.
1
Number Button
Sequenced Full Screen Display
While in a Full Screen display, press the Sequence button to begin full
screen sequencing. The sequence list and dwell times are programmable.
For detailed information about programming the sequence list see section
2.8. For detailed information about configuring the dwell times in the menu
system, see section 3.9.
Sequence Button
Zooming
To activate the 2x digital zoom, select the full screen display of the camera
you wish to zoom, then press the Zoom button. Zooming will be indicated by
the LED located directly above the Zoom button. Zooming is also indicated
as ZOOM on the monitor. Zooming works with frozen and non-frozen
images. Zoomed images can also be frozen.
While Zoomed, use the Arrow Buttons to Pan and Tilt across the image.
Please note, the camera does not move during digital Pan/Tilt.
Zoom Button
with LED
Press the Zoom button again, or another camera button to cancel the Zoom
operations.
NOTE
If the Zoom button is pressed while in a multiscreen display, the camera from the last active
cameo is selected for full screen display. Press the Zoom button again to activate the Zoom
operation.
2.11 The Print Image Feature
Pressing the Function and Zoom button will print the currently displayed
image. If any multiscreen is the display mode, the Triplex will switch to a
single image display of the last selected fullscreen camera, freeze the image,
and send to the default printer.
Fn
Zoom and Function
Button
Printer Setup
The following equipment and conditions are required for the operation of the Print Image feature.
Equipment
HP DeskJet 3820
Hawking Print Server PN7127P
Conditions
The Printer and Print Server must be connected to the same local network as the Triplex.
The Triplex must be aware of the Print Server’s IP address. The IP address can be input under Main
Menu – Communications – Ethernet – Ethernet Settings (See Section 3.18).
The Printer and Print Server must be On-line and Operational.
0150-0201C
28
Vista Columbus System Triplex
3 Menu System Overview
3.1 Menu Notation In This Manual
In the following sections, there are headings like this:
q
Main Menu → Time/Date → Set Time
Meaning: From the Main Menu, select Time/Date, then press the Enter button. The Time/Date menu
will appear. From the Time/Date menu, select Set Time, then press the Enter button. A pop-up or
pull-down menu will appear.
Selected Items
Items selected in the menu system are represented in the manual as follows:
Selected
Not Selected
Time/Date
Time/Date
3.2 Accessing The Menu System
Enter the menu system by pressing the Menu button. A Password Box will appear
on the primary monitor. Enter either the:
•
•
Operator Password: Providing limited access to the menu system. Only the
Operator and System View menus are available.
M
Menu Button
Installer Password: Providing complete menu access.
Use the Number buttons to enter the appropriate password.
Default passwords are provided in the beginning of this manual, in section 1.
3.3 Available Menus
Main
QuickInstall
Operator
SystemView
Time/Date
Change the time
Sequencing
About DVR
Sequencing
Change the date
Time/Date Display
View Screen 1
Record
Edit Camera Titles
Titles Display
View Screen 2
Alarms
Camera Disable
Alarm History
View Screen 3
Macro
Telemetry Enable
Archive Setup
View Screen 4
Motion Detection
Record Quality
Operator Password
View Screen 5
Camera Setup
Installer Password
View Screen 6
Archive Setup
Auto Disable Now
View Screen 7
Audio Setup
View Screen 8
Telemetry
Communications
Front Panel Lock
Factory Settings
Passwords
0150-0201C
29
Vista Columbus System Triplex
3.4 Menus In This Manual
Each menu is covered in detail in this chapter of this manual. Menus and Menu Items appear in the
manual in the same order they appear on-screen.
•
Main Menu
•
QuickInstall Menu
•
Operator menu
•
SystemView Menus
3.5 Navigating The Menu System
Selecting a Menu from the Menu Bar: When the menu system is first accessed, only the menu bar
is displayed. Use the Arrow Button to select the desired menu.
Opening the Drop Down Menus: Press the Down Arrow.
Navigating in Menus: Press the Up/Down Arrows to highlight items in the drop-down menus.
Selecting Menu Items: Hit the ENTER button to select the highlighted menu item.
Exiting Menus: Press the Menu button to exit a menu. From the menu bar, press the Menu button
to exit the menu system completely.
Left/Right Arrows
Main
QuickInstall
Operator
SystemView
Time/Date
Record
Alarms
Macro
Motion Detection
Camera Setup
Archive Setup
Audio Setup
Telemetry
Up/Down Arrows
Sequencing
Communications
Front Panel Lock
Factory Settings
Passwords
3.6 Menu Shortcuts
Zoom Button:
In menu lists that have 2 settings per camera, the Zoom button will toggle all
selections. This provides a quick and easy way to enable or disable all cameras
for a particular feature.
Camera Button:
In menu lists that provide settings per camera, a particular camera may be
accessed directly by pressing on the associated camera button. Use the Arrow
Button to modify the setting.
0150-0201C
30
Vista Columbus System Triplex
3.7 The Main Menu
Main Menu Overview
The Main menu contains the majority of programmable options for the Columbus System Triplex. Each
item in the Main menu is described in detail in this section of the manual.
Main menu items appear in this section in the same order they appear in the menu.
3.8 Time/Date
Use this menu to specify:
Time/Date Display
•
Which monitors will display the time and date.
Set Time Format
•
The time format: 12 or 24 hours.
Set Date Format
•
The date format: MM/DD/YY, YY/MM/DD, or DD/MM/YY.
Set Time
•
The time and date.
•
Whether the unit’s clock is a master or slave.
•
Set Regional Daylight Savings Time.
q
Set Date
Set Master/Slave
Set Region
Main Menu → Time/Date → Time / Date Display
Use this menu to specify if the time and date will be displayed on:
Time/Date Display
•
Monitor-A.
Monitor A : ON
•
Monitor-B.
Monitor B : ON
•
Both Monitors.
•
Not Displayed
[CANCEL]
[OK]
Use the Up/Down arrows to navigate, then use the Left/Right arrows to change the values.
Save changes and exit the menu: Select [OK], then press the Enter button.
Exit the menu without making changes: Press the Menu button, or select [CANCEL], then press
the Enter button.
q
Main Menu → Time/Date → Set Time Format
Use the Arrow Button to set the desired time format. Select from either:
Time Format Setup
•
12 Hour
Select Format
•
24 Hour
12 HOUR
Press the Enter button to confirm the selection and exit the menu.
Press the Menu button to exit the menu without making changes.
0150-0201C
31
Vista Columbus System Triplex
q
Main Menu → Time/Date → Set Date Format
Use the Arrow Button to set the desired date format. Select from either:
•
MM/DD/YY
•
DD/MM/YY
•
YY/MM/DD
Date Format Setup
Select Format
MM/DD/YY
Press the Enter button to confirm the selection and exit the menu.
Press the Menu button to exit the menu without making changes.
q
Main Menu → Time/Date → Set Time
1.
Using the Up/Down Arrow buttons to navigate, highlight HH MM SS.
2. Press the Enter button, the highlighting will move to the row of numbers.
Time Setup
3. Enter the time in Hours, Minutes, and Seconds. Use the Up/Down Arrow
buttons to change the values and the Left/Right Arrow buttons to navigate.
HH MM SS
03 05 53
4. Press the Enter button to confirm the selection and exit the edit mode.
[CANCEL]
[OK]
5. To save the changes and exit the menu: Use the Up/Down Arrow
buttons to select [OK], then press the Enter button.
6. To exit the menu without making changes: Use the Up/Down Arrow buttons to select
[CANCEL], then press the Enter button.
q
Main Menu → Time/Date → Set Date
Date Setup
1. Press the Enter button, the highlighting will move to the row of
numbers.
MM DD YY Day
2. Enter the date in Months, Days, and Years. The day of the week is
calculated automatically. Use the Up/Down Arrow buttons to change
the values and the Left/Right Arrow buttons to navigate.
01 25 60 MON
[CANCEL]
[OK]
3. Press the Enter button to confirm the selection and exit the edit mode.
4. To save the changes and exit the menu: Use the Up/Down Arrow buttons to select [OK], then
press the Enter button.
5. To exit the menu without making changes: Use the Up/Down Arrow buttons to select
[CANCEL], then press the Enter button.
q
Main Menu → Time/Date → Set Master / Slave
If several multiplexers are installed and connected via RS485 a network,
one of the multiplexers may be set as the master clock. This unit will
control the date and time (including daylight savings time) for all of the
other units.
Master/Slave Select
Master Clock
NO
Select One unit from the RS485 network as the master clock by selecting
YES in this menu. All other units must be set as NO (Default).
0150-0201C
32
Vista Columbus System Triplex
q
Main Menu → Time/Date → Set Region
Use this menu to set the region for the Auto Daylight Savings Time
feature. Choices are:
Regional Settings
•
OFF: Clock will not be changed automatically, but can still
be adjusted by one hour using the daylight saving macros.
Daylight Saving :
USA
Time Zone
GMT+00:00
•
USA: DST starts at 02:00 on the first Sunday in April.
DST ends at 02:00 on the last Sunday in October.
Includes: United States (except Hawaii, American Samoa,
Guam, Puerto Rico, Virgin Islands, parts of Indiana and
Arizona) and Canada (except Saskatchewan).
SUN,
:
7 APR 2002 02:00 (+1)
SUN, 27 OCT 2002 02:00 (-1)
[CANCEL]
[OK]
•
EUR: DST starts at 01:00 GMT on the last Sunday in
March. DST ends at 01:00 GMT on the last Sunday in
October. Includes: European Union Countries.
•
AUS: DST starts at 02:00 on the last Sunday in October. DST ends at 03:00 on the last Sunday
in March. Includes: South Australia, Victoria, ACT, NSW. Excludes: Tasmania.
NOTE
The clock will only be automatically adjusted once on a given time and date. If you manually
set the clock back before the last DST change, the time will not get automatically adjusted
again for that same time change.
3.9 Sequencing
Use this menu to specify:
•
The multiscreen dwell time.
•
The full screen dwell time.
Multiscreen Dwell
Fullscreen Dwell
The dwell time is the amount of time each camera is displayed on-screen (while sequencing) before
advancing to the next camera.
q
Main Menu → Sequencing → Multiscreen Dwell
Use the Arrow buttons to select the desired dwell time (from 1 to 30 seconds).
The default is 3 seconds.
Multiscreen Dwell
1. Press the Enter button to confirm the selection and exit the menu.
(Time in Seconds)
2. Press the Menu button to exit the menu without making changes.
03
q
Main Menu → Sequencing → Fullscreen Dwell
Use the Arrow buttons to select the desired dwell time (from 1 to 30 seconds).
The default is 3 seconds.
Fullscreen Dwell
(Time in Seconds)
1. Press the Enter button to confirm the selection and exit the menu.
03
2. Press the Menu button to exit the menu without making changes.
0150-0201C
33
Vista Columbus System Triplex
3.10 Record
Use this menu to:
•
Specify the record quality: High, Medium, or Standard.
Record Timer
•
Specify if a camera is to be used for event recording,
time-lapse recording, or both.
Record Quality
•
Specify the time-lapse record rate per camera.
Timelapse Record Rate
•
Specify the event record rate per camera.
Event Record Rate
•
Specify the activity record rate per camera.
•
Specify the alarm record rate.
•
Set the Record Lock feature.
•
Perform disk maintenance by Deleting, Un-deleting, or
Destroying previously recorded video.
•
Specify how the unit will handle data overwrite issues
once the hard disk becomes full.
Event Settings
Activity Record Rate
Alarm Record Rate
Record Mode
Disk Maintenance
Record Lock
Auto Delete Mode
q Main Menu → Record → Record Timer
Use this menu to setup Preset Record Timer Events.
Day
Start
Stop
Macro
ON/OFF
1. Use the Left/Right arrows to select a timed event from
the list.
7
22:59
01:59
NONE
ON
MON-FRI
05:56
04:06
10
ON
2. Press the ENTER button to enter the Edit mode.
--
--:--
--:--
3. Use the Up/Down arrows to change the values of the
selected field.
4. Press the Enter button to exit the Edit mode.
--
--
[OK]
Hit ‘ENTER’ to toggle EDIT Mode
5. Use the Up/Down arrows to highlight the [OK] field and
press the ENTER button to save the changes.
q
Main Menu → Record → Record Quality
Use this menu to specify the record quality for each camera.
Decreasing the record quality decreases the amount of disk space
required to store the images, due to a higher compression
scheme.
Record Quality
Camera 01: High
Camera 02: High
Camera 03: High
Record Quality
Picture Quality
Disk Space Needed
High
Excellent
Most
:
Medium
Good
Medium
:
Standard
Fair
Least
1. Use the Arrow Button to navigate, and change the values.
Camera 04: High
Camera 16: High
[CANCEL]
[OK]
2. To save changes and exit the menu: Select [OK], then press
the Enter button.
0150-0201C
34
Vista Columbus System Triplex
3. Exit the menu without making changes: Press the Menu button, or select [CANCEL], and then
press the Enter button.
q
Main Menu → Record → Event Settings
Use this menu to specify how each camera will record during normal
and event conditions.
TL: Records at the Time-lapse Record Rate under normal conditions.
Does not change record rate during an event.
Event: Records during events at the Event Record Rate. Camera
does not record under normal conditions.
Event + TL: Records at the Time-lapse Record Rate under normal
conditions. Records at the Event Record Rate during events.
NOTE
Event Camera Settings
Camera
: 01
Type
: TL
Pre Event Duration : 00
Post Event Duration: 000
[CANCEL]
[OK]
The unit will respond to alarms and activity detection in all modes.
About Events: An Event is an action that the unit acknowledges by recording at the
Event Record Rate, yet it is not cause for an Alarm. Events may be created two ways,
via RS232 text insertion and Activity detection.
Example of an Event: A camera is pointed at the front door inside the lobby during
business hours. With the Event Camera Settings Type set to Event, the unit does not
record while the doorway is empty. When activity motion detection senses that
someone is entering or leaving the doorway, the unit begins recording at the Event
Record Rate and stops recording when the motion ceases.
RS232 Event: See section 9 for information about generating an Event via RS232, and
optionally inserting ASCII text to mark the Event.
Activity Detection Event: See Setup Parameters in section 3.13 for detailed
information about configuring activity detection as an event in the menu system.
Pre Event Duration: The unit will record up to 5 seconds of data ahead of the event trigger, at the
Event Record Rate. Select from 0 to 5 seconds.
Post Event Duration: The unit will record up to 250 seconds after the completion of the Event, at the
Event Record Rate. Select from 0 to 250 seconds.
q
Main Menu → Record → Timelapse Record Rate
The unit records at the Timelapse Record Rate under normal conditions, when there are no alarms,
events, or activity present. Record rates are measured in both Pictures Per Second (pps) and Seconds
Per Picture (spp).
The maximum record rate per camera is inversely proportional to the number of cameras connected to
the unit. The fewer cameras connected, the higher the maximum record rate for each camera, and vice
versa. The maximum record rate for multiple cameras is 40pps. The maximum record rate for a single
camera is 25pps.
The bottom right corner of the menu contains a record duration calculator. The top line indicates the
estimated recording time for the unit in Time-lapse record mode only. The bottom line indicates the
estimated recording time, taking into consideration the amount of time the unit will spend in Activity,
Event, and/or Alarm record mode.
0150-0201C
35
Vista Columbus System Triplex
Timelapse Record Rate
Camera
1 : 0.40 pps 2.5 spp
Camera
2 : 0.29 pps 3.5 spp
Camera
3 : 0.34 pps 2.9 spp
Camera
4 : 0.57 pps 1.8 spp
:
:
:
Camera 15 : 0.40 pps 2.5 spp
Camera 16 : 0.40 pps 2.5 spp
8 days 5 h (TL)
[CANCEL]
[OK]
8 days 5 h (Total)
1. Use the Arrow Button to navigate, and change the values.
2. To save changes and exit the menu: Select [OK], and then press the Enter button.
3. To exit the menu without making changes: Press the Menu button, or select [CANCEL], then
press the Enter button.
q
Main Menu → Record → Event Record Rate
The unit will record at the Event Record Rate when an Event is activated. Events can be activated by
RS232 event generation or activity detection. See Event Settings on page 33.
Record rates are measured in both Pictures Per Second (pps) and Seconds Per Picture (spp).
The maximum record rate per camera is inversely proportional to the number of cameras connected to
the unit. The fewer cameras connected, the higher the maximum record rate for each camera, and vice
versa. The maximum record rate for multiple cameras is 40pps. The maximum record rate for a single
camera is 25pps.
The bottom right corner of the menu contains a record duration calculator. The top line indicates the
estimated recording time of the cameras in Event record mode only. The bottom line indicates the
estimated recording time, taking into consideration the amount of time the unit will spend in Time-lapse,
Activity, Event, and/or Alarm record mode.
0150-0201C
36
Vista Columbus System Triplex
Event Record Rate
Camera
1 : 0.40 pps 2.5 spp
Camera
2 : 0.29 pps 3.5 spp
Camera
3 : 0.34 pps 2.9 spp
Camera
4 : 0.57 pps 1.8 spp
% Time: 4%
:
:
Estimate of the % of time each
camera will typically spend in
Event mode. For example if you
expect to have about 20 total
events each day, each lasting 3
minutes on average, then the %
of the time will be 4%.
(1 hour/24 hours)
:
Camera 15 : 0.40 pps 2.5 spp
Camera 16 : 0.40 pps 2.5 spp
125 days 8 h (EVENT)
[CANCEL]
[OK]
10 days 7 h (Total)
1. Use the Arrow Button to navigate, and change the values.
2. To save changes and exit the menu: Select [OK], and then press the Enter button.
3. To exit the menu without making changes: Press the Menu button, or select [CANCEL], then
press the Enter button.
q
Main Menu → Record → Activity Record Rate
The unit will record at the Activity Record Rate when the camera is in normal Timelapse Record Mode
and activity is detected in the camera scene. Activity should not be linked to Event, in which case the
Event Record Rate will be used.
Record rates are measured in both Pictures Per Second (pps) and Seconds Per Picture (spp).
The maximum record rate per camera is inversely proportional to the number of cameras connected to
the unit. The fewer cameras connected, the higher the maximum record rate for each camera, and vice
versa. The maximum record rate for multiple cameras is 40pps. The maximum record rate for a single
camera is 25pps.
The bottom right corner of the menu contains a record duration calculator. The top line indicates the
estimated recording time of the cameras in Activity record mode only. The bottom line indicates the
estimated recording time, taking into consideration the amount of time the unit will spend in Time-lapse,
Activity, Event, and/or Alarm record mode.
0150-0201C
37
Vista Columbus System Triplex
Activity Record Rate
Camera
1 : 0.40 pps 2.5 spp
Camera
2 : 0.29 pps 3.5 spp
Camera
3 : 0.34 pps 2.9 spp
Camera
4 : 0.57 pps 1.8 spp
% Time: 4%
:
Estimate of the % of time each
camera will typically spend in
periods of activity. For example
if you expect to have about 20
total periods of activity each day,
each lasting 3 minutes on average,
then the % of the time will be 4%.
(1 hour/24 hours)
:
:
Camera 15 : 0.40 pps 2.5 spp
Camera 16 : 0.40 pps 2.5 spp
68 days 11 h (ACTIVITY)
[CANCEL]
9 days 16 h (Total)
[OK]
1. Use the Arrow Button to navigate, and change the values.
2. To save changes and exit the menu: Select [OK], and then press the Enter button.
3. To exit the menu without making changes: Press the Menu button, or select [CANCEL], then
press the Enter button.
q
Main Menu → Record → Alarm Record Rate
During an alarm, the unit records at the alarm record rate. The bottom of the menu contains a record
duration calculator. The top line indicates the estimated recording time of the cameras in Alarm record
mode only. The bottom line indicates the estimated recording time, taking into consideration the amount
of time the unit will spend in Time-lapse, Activity, Event, and/or Alarm record mode.
The configuration of the Alarm Record Rate is closely associated with the Alarm Record Mode. For
detailed information about configuring the Alarm Record Mode, see Alarm Record mode in section 3.11.
Global Alarm Record Rate
% Time:
60 pps
1%
40 days 20 h (Alarm)
15 days 11 h (Total)
[CANCEL]
[OK]
Estimate of the % of time the
unit will typically spend in
alarm mode. For example
if you expect to have about 5
total periods of alarms each day,
each lasting 3 minutes on average,
then the % of the time will be 1%.
(15 min/24 hours)
Record
Duration
Calculator
1. Use the Arrow Button to navigate, and change the values.
2. To save changes and exit the menu: Select [OK], and then press the Enter button.
3. To exit the menu without making changes: Press the Menu button, or select [CANCEL], then
press the Enter button.
0150-0201C
38
Vista Columbus System Triplex
q
Main Menu → Record → Record Mode
Use this menu to specify how the unit will handle data overwrite
issues once the hard disk becomes full.
No overwrite
Write once
No Overwrite:
•
•
•
Continuous
Recording starts at the end of the last recording.
Recording stops when disk becomes full.
When the hard disk becomes full, the unit displays an on-screen message indicating that the
device is full and that the archive device has stopped recording. The user must acknowledge the
message by pressing the Enter button.
Write Once:
•
Recording starts at the end of the last recording.
•
•
Recording stops when disk becomes full.
The user is prompted to authorize overwriting old data.
Continuous:
q
•
•
Recording starts at the end of the last recording.
Unit overwrites all previously recorded data, overwriting the oldest data first.
•
The unit does not stop recording when disk becomes full.
Main Menu → Record → Record Lock
The Record Lock feature prevents Recording from being halted from the Front Panel.
Turning this feature ON automatically starts the unit recording.
Main Menu → Record → Disk Maintenance
Use the Up/Down arrows to select from the following options, then press the
Enter button to begin.
Delete
Delete: Delete all data from the hard disk (with the possibility of restoring it).
UnDelete
Undelete: Restore data that has been deleted, but not yet overwritten.
Destroy
Destroy: Erase all data from the hard disk permanently, without the possibility
of restoring it. Selecting this option brings up a confirmation dialog box.
q
Main Menu → Record → Auto Delete Mode
The ADM feature prevents the unit from displaying or archiving any search results that are more than
thirty days old. This feature may be required by law in some jurisdictions. Choose from 7 to 99 days or
Off. The default setting is Off.
ADM Setting
Message
ADM will change. Are you sure?
99
Days
Yes
0150-0201C
39
Vista Columbus System Triplex
3.11 Alarms
Use this menu to configure the alarm handling features of the unit.
Input Configuration
Alarm Latch
Caution! The Columbus System Triplex’s primary function is
to furnish video multiplexing and recording with a multiscreen
display. Although the unit has alarm handling and motion
detection functions, these are considered secondary
features. This unit should not be the only alarm device
on site.
Alarm Action
Alarm Record Mode
Enable / Disable
Alarm History
Link to a Macro
Fullscreen Alarm
Relay Configuration
Buzzer Setup
Videoloss Action
Pre Alarm Duration
Notification
Archive Alarms
q
Main Menu → Alarms → Input Configuration
Configure the alarm inputs as either Normally Open or Normally Closed.
Configure inputs as follows.
Normally Open Zero Potential Relay Contact: Configure in menu as
Normally Open.
Normally Closed Zero Potential Relay Contact: Configure in menu
as Normally Closed
TTL Active High: Configure in menu as Normally Closed.
TTL Active Low: Configure in menu as Normally Open.
Open Collector Active On: Configure in menu as Normally Open.
Open Collector Active Off: Configure in menu as Normally Closed.
q
Main Menu → Alarms → Alarm Latch
This feature determines how the unit latches alarm conditions.
Selecting from the following options.
Latched
Transparent
Timed Out
Latched: The alarm is activated until it is silenced and acknowledged
by the user.
Transparent: The alarm is active only while receiving alarm input.
The alarm condition is canceled when the alarm input ceases.
Timed Out: The alarm condition is latched for the amount of time selected in this menu, then it is
automatically silenced and acknowledged. If the alarm input exceeds the duration specified in this
menu, the unit silences and acknowledges the alarm when the alarm input ceases. Select the timeout
duration, the range is from 1 to 250 seconds.
Transparent alarms cannot be silenced and acknowledged. If transparent mode is preferred, but the
ability to silence and acknowledge alarms is desired, select Timed Out and set the Alarm Timeout to
two seconds.
0150-0201C
40
Vista Columbus System Triplex
q
Main Menu → Alarms → Alarm Action
Input: Select the input you wish to configure.
Alarm Action Setup
Freeze: Selecting Yes will freeze the alarm camera display (quadrant 1)
at the time the alarm is activated.
Input
Cameras: This setting determines the four cameras displayed on-screen
when an alarm is received. The camera group contains the camera in alarm
and three associated cameras.
Default Settings: The first camera in the list is the camera in alarm. The
second camera in the list is the camera that precedes the alarm camera
numerically. The third and fourth cameras in the list are the two cameras
following the alarm camera numerically.
: 01
Freeze : Yes
Cameras: 01 16 02 03
Relay
: 1
[CANCEL]
[OK]
Relay: Configure which relay will be triggered when an alarm is activated per camera. Select from:
•
1
•
1+2
•
2
•
None
Use the Arrow Buttons to change the values.
q
Main Menu → Alarms → Alarm Record Mode
Use this menu to determine how the unit will record cameras in alarm.
No Change: Unit changes to the Alarm Record Rate, but it does not
give priority to the camera in alarm.
Alarm Record Mode
Select Mode
Interleaved
Exclusive: The unit records only the camera (or cameras) in alarm.
Interleaved: Alarmed cameras are recorded at a higher rate than
non-alarm cameras. The unit accomplishes this by interleaving images
of alarmed cameras between images from non-alarmed cameras in the record list. Interleaved is the
recommended mode of operation.
Example of Record Lists:
q
No Change record list for 8 cameras, Camera-4 in alarm.
1234567812345678
Exclusive record list for 8 cameras, Camera-4 in alarm.
4444444444444444
Interleaved record list for 8 cameras, Camera-4 in alarm.
1424345464748414
Main Menu → Alarms → Enable / Disable
Individual Enable
Use this menu to Enable or Disable the alarm inputs.
Enable All
Select from the following:
Disable All
0150-0201C
41
Vista Columbus System Triplex
•
Individual Enable: Allow the user to access the Alarm
Enable submenu, and enable or disable alarm inputs on
a per camera basis.
•
Enable All
•
Disable All
Use the Arrow Button to navigate, and change the values.
Save changes and exit the menu: Select [OK], then press the
Enter button.
Exit the menu without making changes: Press the Menu
button, or select [CANCEL], then press the Enter button.
q
Main Menu → Alarms → Alarm History
Alarm History Box
Use this window to view a list of the 100 most recent alarms.
Alarms are displayed 10 at a time. Use the Arrow Buttons to
scroll through the alarms.
001- 02/04 18:40:32 16
Information displayed in this window is:
003- 02/28 10:10:20 08
•
The alarms number in the list.
•
The date of the alarm (month and day).
•
The time of the alarm (hours, minutes, and seconds).
002- 02/15 12:00:10 11
:
:
010- 03/15 05:12:16 04
[OK]
The number of the camera input in alarm.
q
Main Menu → Alarms → Link To A Macro
Use this menu to link an alarm input to a macro. If a link is created,
a macro will run each time that alarm is activated.
Alarm: Select the alarm input you would like to link.
Macro: Select the macro number you wish to link to. Leave this
setting blank if you do not wish to link to a macro.
Use the Arrow Button to navigate, and change the values.
Save changes and exit the menu: Select [OK], then press the
Enter button.
Exit the menu without making changes: Press the Menu
button, or select [CANCEL], then press the Enter button.
q
Main Menu → Alarms → Fullscreen Alarm
Selecting Yes from this menu will cause the unit to always display
the alarm camera fullscreen.
Selecting No from this menu will cause the unit to display the 4-way
display configured in the Main Menu → Alarms → Alarm Action
Setup menu.
0150-0201C
42
Fullscreen Alarm
Fullscreen
NO
Vista Columbus System Triplex
q
Main Menu → Alarms → Relay Configuration
Use this menu to configure each relay output as either:
Relay Configuration
•
Normally Open
Relay 01: N/OPEN
•
Normally Closed
Relay 02: N/CLOSED
[CANCEL]
q
[OK]
Main Menu → Alarms → Buzzer Setup
Use this menu to configure the internal buzzer.
Global Buzzer: The Global Buzzer setting acts as a master On/Off
switch. Setting the Global Buzzer to OFF deactivates all buzzer
activity.
Buzzer Setup
: ON
Global Buzzer
Live Alarm Buzzer: ON
Live Alarm Buzzer: Activates while receiving alarm input.
Videoloss Buzzer : ON
Videoloss Buzzer: Activates when video loss is detected.
Playback Buzzer
Disabling the Videoloss buzzer disables all videoloss buzzer activity.
Videoloss buzzers may be disabled on a per camera basis in the
Alarms → Videoloss Action menu.
[CANCEL]
: ON
[OK]
Playback Buzzer: Activates during playback of recorded alarms.
q
Main Menu → Alarms → Videoloss Action
Use this menu to configure how the unit responds to videoloss.
Videoloss Action
Camera: Select the camera you wish to configure.
Relay 1: If enabled, the unit will activate Relay 1 when videoloss
is detected.
Camera : 01
Relay 1: Disable
Relay 2: Enable
Relay 2: If enabled, the unit will activate Relay 2 when videoloss is
detected.
Buzzer: Use this setting to disable the videoloss buzzer activation
on a per camera basis. To disable videoloss buzzer activation on
all cameras go to the Main Menu → Alarms → Buzzer Setup menu,
described in the previous section.
q
Main Menu → Alarms → Pre Alarm Duration
During recording, the unit stores up to 5 seconds of recorded
information in a buffer. This data can be automatically retrieved when
an alarm is activated. Select the amount of time just previous to the
activation of an alarm you wish to retrieve.
q
Buzzer : Enable
[CANCEL]
[OK]
Pre Alarm Duration
(Time in Seconds)
05
Main Menu → Alarms → Notification
Use this menu to select:
•
Email Alarm Notification.
•
TCP/IP Notification.
0150-0201C
Email
TCP/IP
43
Vista Columbus System Triplex
Email Notification Setup
This screen allows the user to setup the types of events to be notified of, and the email addresses (up
to two) to be notified. Follow the context sensitive on-screen instructions to setup the individual fields.
Email Notification Setup
One or more of these
fields must be set to
ENABLE to receive an
email notification of
the selected event.
Notify Vidloss:
ENABLE
Notify Alarm:
DISABLE
Notify Record:
DISABLE
Notify Archive:
DISABLE
Notify Menu Access: DISABLE
Obtain the parameters
for these two fields from
your IT Department.
Notify Power Up:
DISABLE
Notify Connection:
DISABLE
Email User 1:
john.doe
Email Domain 1:
somecompany.com
Email User 2:
jane.doe
Email Domain 2:
somecompany.com
SMTP Server:
0.
SMTP Port:
25
0.
0.
[CANCEL]
0
[OK]
Format of email address: user@domain
Email Address Format
The format of the email addresses should be entered as follows. If the email address to be notified is
[email protected], then john.doe should be entered in one of the Email User fields and
somecompany.com should be entered in the subsequent Email Domain field.
TCP/IP Notification Setup
This screen allows the user to setup the types of events to be notified of, and the IP addresses (up to
two) of the PC(s) where the WaveReader software resides.
WaveReader must be running on the receiving PC(s) and Alarm Monitoring must be setup. See Alarm
Monitoring in the WaveReader Manual for details.
0150-0201C
44
Vista Columbus System Triplex
TCP/IP Notification Setup
One or more of these
fields must be set to
ENABLE to receive an
email notification of
the selected event.
The IP Addresses
of the PC on which
the WaveReader
Software resides
Notify Vidloss:
DISABLE
Notify Alarm:
DISABLE
Notify Record:
DISABLE
Notify Archive:
DISABLE
Notify Menu Access:
DISABLE
Notify Power Up:
DISABLE
Notify Connection:
DISABLE
Primary Host:
0.
0.
0.
0
Backup Host:
0.
0.
0.
0
Port:
1027
Notification Interval (minutes): Immediate
[CANCEL]
[OK]
The Notification Interval can be set from 1 minute to 60 minutes, or immediately upon the event.
q
Main Menu → Alarms → Archive Alarms
Selecting Enable from this menu will cause the unit to activate
Relay 2 if a malfunction occurs while archiving.
Archive Alarm
Relay 2
ENABLE
3.12 Macro
A macro is a recorded sequence of keystrokes. The number of macros depends on the number of
camera inputs (10 or 16). Each macro can have up to 32 keystrokes.
Use this menu to:
• Enter Macro Record mode.
• Program a scheduled start time for a macro.
• Edit the RS232 command string for each submacro.
q
Macro Record
Timed Macro Start
Edit Submacro
Main Menu → Macro → Macro Record
Note: Do not attempt macro programming while the front panel is locked.
Macro Record
To begin recording a macro:
Select Macro
1. Select the macro number you wish to record, then press the
Enter button. The unit will automatically exit the menu
system and go to a starting point. Macro Record mode
is indicated as F and the Macro Number on-screen.
0150-0201C
45
01
Vista Columbus System Triplex
2. From this point, begin recording the desired keystroke sequence. Record up to 32 keystrokes. If
32 keystrokes are exceeded, the unit will end the macro recording automatically.
3. When finished programming, press the Function button then the Enter button to end the macro
recording. A form is provided in section 11 to keep track of recorded macro functions.
NOTE
Keystroke count while in the menu system: While recording a macro, entering the
menu system, changing multiple menu items, and exiting the menu system are only
counted as one keystroke. Using the Arrow Button to navigate the menu system does
not count as keystrokes. Once the menu system has been exited, re-entering the menu
system will count as a second keystroke.
Not all menu items can be programmed using macros. For a complete list of macro
programmable menu items, see the table below.
During macro recording, the following button combinations perform special functions.
Button Sequence
Resulting Action
Function then 1.
Activate Relay 1 output.
Function then 2.
Reset Relay 1 output.
Function then 3.
Pause macro for 1 second.
Function then 4.
Pause macro for 5 seconds.
Function then 5.
Activate Relay 2 output.
Function then 6.
Reset Relay 2 output.
Function, Function, then
Submacro number.
Program a specific submacro to activate when the macro is run.
Function then Enter.
End macro recording
Macro Excluded Features
The following core features or settings cannot be programmed by Macro.
•
•
•
•
•
•
•
q
Disk Maintenance.
Erase Archive Medium.
POTS Settings.
Ethernet Settings.
RS485 Network Address.
Front Panel Lock/Unlock.
Record Timer.
Main Menu → Macro → Timed Macro Start
Use this menu to program scheduled start times for macros. Up
to 20 scheduled start times can be programmed in this menu.
Event: Select the scheduled start event you wish to edit.
Day: Select the start day (Monday – Sunday) of the macro.
Select ** (double asterisks) to run the macro every day.
Select None to cancel the scheduled start time.
Timed Macro Setup
Event : 01
Day
: Monday
Time
: 00:00
Macro : 01
[CANCEL]
[OK]
Time: Select the start time for the macro.
0150-0201C
46
Vista Columbus System Triplex
Macro: Select the desired macro number.
A form is provided in section 11 to keep track of scheduled macros.
q
Main Menu → Macro → Edit Submacro
A submacro is an RS232 command string used to control a peripheral device. Submacros are
activated during macros. See the table on the previous page for information about programming a
macro to activate a submacro.
Select the submacro you wish to edit from the menu system. This menu will appear.
Edit Submacro 01
080 066 066 010 --- --- --- --- --- --[P] [B] [B] [0]
[CANCEL]
[OK]
ENTER key starts Submacro edit
Use this menu to create the RS232 command string. Press the Enter button to Enter and Exit the
submacro edit mode. Use the Arrow Button to navigate, and change the values. Each byte value
can be set from 0 to 255.
Running A Macro
A macro is a recorded sequence of up to 32 keystrokes. To activate a
macro, press the Function button followed by the Number button of the
desired macro. While running, the macro is indicated on-screen as the letter
F and the macro number.
The user can cancel the macro at any time by pressing the Function button.
Fn
1
Function and
Number Buttons
Daylight Savings Time
To adjust the time one hour for daylight savings time, press the Function
button, then the Sequence button. If this function is activated during April,
one hour is added to the time. If this function is activated in October, one
hour is subtracted from the time. This function will only operate once per
time period.
Fn
Function and
Sequence Buttons
3.13 Motion Detection
Use this menu to:
•
•
•
•
•
Enable motion detection on a per camera basis.
Set motion detection as Activity detection or Intrusion Detection.
Configure the motion detection parameters on a per camera basis.
Activate individual zones in a scene to respond to motion
detection.
Activate the on-screen motion detection indicator.
0150-0201C
47
Enable/Disable Detection
Setup Parameters
Setup Active Zones
Indicate Detection
Vista Columbus System Triplex
q
Main Menu → Motion Detection → Enable/Disable Detection
Selecting Enable All or Disable All from this menu will activate or deactivate
motion detection on all cameras.
Selecting Individual Enable from this menu will bring up the following menu.
Individual Enable
Enable All
Disable All
Individual Enable Menu
Use this menu to enable or disable motion detection on a per
camera basis. Use the Arrow Button to navigate, and change
the values.
Detection Enable
Camera 01: Enable
Camera 02: Disable
Camera 03: Enable
:
:
Camera 16: Enable
[CANCEL]
q
[OK]
Main Menu → Motion Detection → Setup Parameters
Use this menu to select the Camera, Motion Detection Type, and Sensitivity of the Motion Detection
you wish to configure.
Motion Detection Parameters Setup
Camera
01
Motion Detection Type
ACTIVITY
Sensitivity
06
Relay Output
2
Link to Event
---
Rejection
LOW
Target Size
01
Link to Alarm
NONE
[CANCEL]
[OK]
Use the Arrow Button to navigate, and change the values.
Activity Vs. Intrusion
Activity Detection is a simple type of motion detection having only a sensitivity setting and a relay
output. Intrusion Detection is a more sophisticated type of motion detection, with additional features
such as false alarm rejection levels, minimum target size, and an alarm output.
Activity Detection Setup
If Activity is selected in Motion Detection Type field, the following parameters are enabled:
0150-0201C
48
Vista Columbus System Triplex
Relay Output: The unit may be configured to activate a relay output when motion detection is
present. Select either 1, 2, 1+2 (both relays), or None.
Link to Event: Selecting Yes in this menu will activate the event record speed when activity detection
is present.
Intrusion Detection Setup
If Intrusion is selected in Motion Detection Type field, the following parameters are enabled:
Sensitivity: Use the Arrow Button to change the motion detection sensitivity, 10 being the most
sensitive.
Rejection: Configure the unit’s false alarm rejection feature by selecting Low, Medium, or High.
These settings are based on the number of simultaneously triggered zones and the persistence of
motion in a scene. The Low setting is the most sensitive to motion. The Medium setting will filter out
most false alarm situations due to sudden luminance changes over the whole scene (clouds passing
over). The High setting will filter out sudden luminance changes as well as spurious motion events
that do not persist for a number of frames (a bird flying past the lens).
Target Size: This setting is the minimum number of zones (from the 16 x 16 grid) that must be
activated simultaneously before it is considered to be valid motion.
Link To Alarm: Select the alarm number that you wish to activate when motion detection is activated.
q
Main Menu → Motion Detection → Setup Active Zones
Use this menu to setup the Active Zones for motion detection. The screen shown below will overlay the
current video image allowing for precise activity zone setup. The disabled zones will be tinted. The
enabled zones will be clear.
Activity Grid Setup Screen
Pressing the Function button will bring up the Help screen shown below. This screen will overlay the
current video image.
0150-0201C
49
Vista Columbus System Triplex
Fn
Function
Button
NOTE
‘MENU’ : Exit Activity Setup
‘ENTER’: Save and Exit Activity Setup
‘PAUSE’: Toggle between Enable and Neutral
‘STOP’ : Toggle between Disable and Neutral
‘ZOOM’ : Disable/Enable all zones
‘PLAY FORWARD’: Increase the Sensitivity level
“PLAY REVERSE’: Decrease the Sensitivity level
This Help Screen will display for 15 seconds, and then disappear. Press the Function
button again to redisplay.
Sensitivity Scope
Use the sensitivity scope to adjust the motion detection sensitivity for the scene. The
sensitivity scope is the bar located near the left-hand corner of the screen.
The black bar raises and lowers to indicate the degree of motion detected. When the
black bar reaches the red bar, a motion detection alarm is activated.
Adjusting Motion Detection Sensitivity: Raise and lower the red bar to change the
motion detection sensitivity. Use the Play Forward button to increase the sensitivity level
and the Play Reverse button to decrease the sensitivity level. The sensitivity level is also
displayed as a numeric value.
Play Reverse to decrease the Sensitivity
Play Forward to increase the Sensitivity
q
Main Menu → Motion Detection → Indicate Detection
Motion Detection may be indicated on-screen by displaying the letter M.
Use this menu to turn this feature On or Off.
Indicate Detection
Detection
ON
3.14 Camera Setup
Use this menu to:
• Edit the title for each camera.
• Adjust the Automatic Gain Control.
• Disable or Enable camera inputs.
•
•
q
Camera Titles
Camera AGC
Camera Disable
Covert Camera
Specify cameras as covert (recorded but not displayed).
View the Camera Scope (Histogram).
Camera Scope
Main Menu → Camera Setup → Camera Titles
Use this menu to:
•
Specify if the camera titles will be displayed on the monitors.
Edit the title for each camera.
0150-0201C
50
Titles Display
Edit Titles
Vista Columbus System Triplex
Titles Display
Titles Display
Camera titles may be displayed on either monitor. Use this menu
to turn this feature On or Off.
Monitor A: ON
Monitor B: OFF
[CANCEL]
Use the Arrow Button to navigate, and change the values.
[OK]
Edit Titles
Use the Arrow Button to select the camera whose title you wish to configure, and then press the Enter
button. The Camera Title Edit menu will appear.
Camera Title Edit
Camera
1
Title :
Camera 01
[CANCEL]
[OK]
@ABCDEFGHIJKLMNOPQRSTUVWXYZ[\]^
SEQ key selects character bank
‘1’ key inserts blank character
‘2’ key inserts selected character
Camera Title Edit Menu
1. With the camera title selected, press the Enter button. The menu will enter the Edit mode and the
character bank will appear in the centre of the menu.
2. Press the Sequence button to select the desired character set.
3. Use the Left/Right arrows to navigate the cursor in the camera title.
4. Use the Up/Down arrows to navigate the cursor in the character bank.
5. Press the Number 1 button to insert a blank character or press the Number 2 button to insert the
selected character.
6. When finished editing the title, press the Enter button to exit the edit mode.
7. Save changes and exit the menu: Select [OK], then press the Enter button.
8. Exit the menu without making changes: Press the Menu button, or select [CANCEL], then press
the Enter button.
q
Main Menu → Camera Setup → AGC
Use the Automatic Gain Control (AGC) to adjust the video input
signal level for cameras whose level is outside the normal range.
The default gain setting is 100%.
Signal Gain Setup
Camera 01
Signal Gain 100%
Use the Arrow Button to navigate, and change the values.
Save changes and exit the menu: Select [OK], then press the
Enter button.
0150-0201C
51
[CANCEL]
[OK]
Vista Columbus System Triplex
Exit the menu without making changes: Press the Menu button,
or select [CANCEL], then press the Enter button.
q
Main Menu → Camera Setup → Camera Disable
Use this menu to:
• Enable or Disable cameras individually
Individual Disable
Power Up Disable
Auto Disable Now
•
Configure the unit to disable cameras automatically at power-up
if video loss is detected.
•
Automatically disable all inputs detecting videoloss.
Camera Disable
Individual Disable
Camera 01: Disable
Use this menu to Disable or Enable each camera input
individually.
Use the Arrow Button to navigate, and change the values.
Save changes and exit the menu: Select [OK], then press
the Enter button.
Exit the menu without making changes: Press the Menu
button, or select [CANCEL], then press the Enter button.
Camera 02: Enable
Camera 03: Disable
Camera 04: Enable
:
:
Camera 16: Enable
[CANCEL]
[OK]
Power Up Disable
With this feature turned On (Enabled), the unit will automatically detect
which inputs are experiencing videoloss at power-up, and
disable them.
Use the Arrow Button to navigate, and change the values.
Power Up Disable
Disable
OFF
Auto Disable Now
This feature detects which inputs have video signals and which are experiencing videoloss. When this
feature is activated, the unit will automatically disable the inputs experiencing videoloss. The Columbus
System Triplex will also re-enable video inputs that were previously disabled if a video input signal is
detected.
q
Main Menu → Camera Setup → Covert Camera
This feature removes cameras from all live and playback displays while
continuing to record them, so that the users and the public are unaware
that the camera is being recorded.
Covert Camera
Camera 01: NO
Camera 02: YES
Camera 03: NO
Select Yes in this menu to configure a camera as covert.
Use the Arrow Button to navigate, and change the values.
Camera 04: NO
:
:
Camera 16: NO
[CANCEL]
0150-0201C
52
[OK]
Vista Columbus System Triplex
q
Main Menu → Camera Setup → Camera Scope
Use this menu to view a live luminance histogram of the currently displayed camera.
Luminance Histogram
A Luminance Histogram is a graphical representation of how many times each gray-level value occurs
in an image.
Use this feature to analyze and optimize the video input signal.
Luminance Histogram
%L
0
Black
White
Luminance
3.15 Archive Setup
Data recorded by the unit can be archived to an external
archive device.
Use this menu to:
• Turn Background Archiving mode Off and On.
• Erase the recorded data on a compatible archive device.
•
q
Background Archive
Erase Archive Medium
QuickWave Setup
Enable or Disable QuickWave Setup.
Main Menu → Archive Setup → Background Archive
Background Archive: Commands the unit to record data to both the
hard disk and the archive device simultaneously.
Select from the following items.
OFF: Turns background archiving Off.
ON: Turns background archiving On.
0150-0201C
53
OFF
ON
Vista Columbus System Triplex
q
Main Menu → Archive Setup → Erase Archive Medium
Use this feature to erase all of the recorded data on an
archive device.
Message
With Erase Archive Medium highlighted, press the Enter
button. If a compatible archive device is connected, a
confirmation box will appear, otherwise no action will occur.
q
Erase all Records. Are you sure?
YES
Main Menu → Archive Setup → QuickWave Setup
QuickWave Setup
This feature provides the option of having the QuickWave software
written to any CDs that are created. This allows the CD to be read
on any PC without installing software. Select ON to enable, OFF to
disable.
QuickWave CD Write: ON
[CANCEL]
[OK]
3.16 Audio Setup
OFF
Use this menu to enable or disable the audio feature of the Triplex. Select
from:
•
OFF
•
G.711
G.711
3.17 Telemetry
Use this menu to:
Telemetry Enable
•
Enable or Disable telemetry for each camera
individually.
•
•
Select either Standard or Alternate telemetry.
Configure the preset mode as Standard or
Enhanced.
Preset Mode
•
•
Enable or Disable preset programming.
Select AC or DC for each camera individually.
Select AC/DC
0150-0201C
54
Telemetry
Preset PGM
Vista Columbus System Triplex
q
Main Menu → Telemetry → Telemetry Enable
Use this menu to Enable or Disable telemetry of
each camera individually.
Telemetry Enable
Camera 01: Disable
Camera 02: Enable
Camera 03: Disable
Camera 04: Enable
:
:
Camera 16: Enable
[CANCEL]
q
[OK]
Main Menu → Telemetry → Telemetry
Use this menu to select the telemetry signal type. Select
from either:
Standard: Asynchronous, not synchronized with the
video signal. This is the older style.
Standard
Alternate
Alternate: Synchronous, synchronized with the video signal. This is the newer style.
Standard telemetry may interfere with some on-screen displays. If this happens, try using Alternate
telemetry. Alternate works with Baxall ZR-mini receivers or DAX units. Changing the telemetry type is
a global function, which changes all telemetry outputs.
q
Main Menu → Telemetry → Preset Mode
Select either Standard or Enhanced. Enhanced
mode is only available on ZRX-mini receivers
manufactured after February 1996.
q
Standard
Enhanced
Main Menu → Telemetry → Preset PGM
Use this menu to Enable or Disable Preset
Programming.
Once the Preset Program is enabled, exit the
menu system and set the camera preset positions
by following the procedures given below.
Disabled
Enabled
The choice of procedure depends on whether Standard or Enhanced mode was selected in the Preset
Mode menu.
0150-0201C
55
Vista Columbus System Triplex
Standard Mode Procedure
1. Press the Telemetry button to enter the telemetry mode.
2. Press and release the Function button, then press the Preset button.
3. Pan and Tilt the camera to the desired position.
4. Press the Iris Open button to store the position.
5. Toggle the Lights button On and Off to advance to the next preset.
6. Repeat the previous 5 steps for each of the eight presets, or exit by switching Camera Power Off.
7. When all presets are stored, press the Telemetry button to exit the telemetry mode.
8. Select the Telemetry menu and disable the Preset PGM option.
Enhanced Mode Procedure
1. Press the Telemetry button to enter the telemetry mode.
2. Pan and Tilt the camera to the desired position.
3. Press and release the Function button, then press the Preset button.
4. Press the required Number button to store the preset.
5. Repeat the previous 4 steps for the next preset.
6. When all presets are stored, press the Telemetry button to exit the telemetry mode.
7. Select the Telemetry menu and disable the Preset PGM option.
q
Main Menu → Telemetry → Select AC/DC
Select the drive type, which matches the power
used by the remote Pan/Tilt head or Dome.
Consult your camera head equipment
documentation or supplier to determine the drive
type.
The default setting for all cameras is AC.
Telemetry Select AC/DC
Camera 01: AC
Camera 02: AC
Camera 03: AC
Camera 04: AC
:
:
Camera 16: AC
[CANCEL]
[OK]
3.18 Communications
Use this menu to:
•
•
•
Configure the baud rates and settings for the RS232 ports.
Configure the network address for the RS485 network.
Configure the Ethernet address and network settings.
0150-0201C
56
RS232
RS485
Ethernet
Vista Columbus System Triplex
q
Main Menu → Communications → RS232
Select the Port you wish to configure and press the ENTER button.
Port 1
Port 2
Port 1
Use this menu to:
•
•
POTS Setup
Enable/Disable POTS and configure the Modem initialization
string (POTS Setup).
Baud Rate
Adjust the Baud rate.
POTS Setup
The default modem string (shown below) is for use with Hayes Accura 56k, Diamond Supra Express
56k, and 5686 US Robotics modems in their default conditions. Consult with the modem manual
before attempting to make any changes. It is strongly recommended that the modem initialization
string only be modified by a qualified technician.
POTS Setup
POTS : DISABLE
Modem Init String : AT&F1&K3M0E1Q0V1S0=0&R2&C1&D0&H1
[Default Modem String]
[CANCEL]
[OK]
@ABCDEFGHIJKLMNOPQRSTUVWXYZ[\]^
SEQ key selects character bank
‘1’ key inserts blank character
‘2’ key inserts selected character
1. With the Modem Init String highlighted, press the Enter button to enter the Edit mode. The
character bank will appear in the centre of the menu.
2. Press the Sequence button to select the desired character bank.
3. Use the Up/Down arrows to navigate to the Modem Init String field.
4. Use the Left/Right arrows to select a character from the character bank.
5. Use the Number 2 button or use the Arrow Buttons to insert the desired character from the
character bank into the Modem Init String and advance to the next character.
6. Use the Number 1 button to insert a blank character.
7. When finished, press the Enter button.
8. To save the changes and reboot, select OK, then press the Enter button. The unit will only reboot
if changes were made to the Modem Init String.
9. To exit the menu without making changes, select Cancel, then press the Enter button. Pressing
the Menu button also exits the menu without making changes.
0150-0201C
57
Vista Columbus System Triplex
Baud Rate
1200
2400
4800
9600
19200
38400
57600
Use this menu to configure the baud rate for Port 1. Use the
Up/Down Button to select a baud rate from the menu.
Save changes and exit the menu: Press the Enter button.
Exit the menu without making changes: Press the Menu button.
Baud
Baud
Baud
Baud
Baud
Baud
Baud
Port 2
The RS232 port 2 is used for Event Generation and ASCII Text Insertion. See Section 7 for the RS232
Protocol required to perform these functions. This port is also used to receive RS232 commands from a
proprietary dome control system.
q
Main Menu → Communications → RS485
Network Address
Connect several units to a single keyboard, or vice-versa. Up to
32 units (any combination of multiplexers and keyboards) can be
networked together. Use this menu to specify the units unique network address.
01
Save changes and exit the menu: Press the Enter button.
Exit the menu without making changes: Press the Menu button.
q
Main Menu → Communications → Ethernet Settings
An ethernet connection can be used to connect to the unit from a
PC for viewing of live or recorded images. Use this menu to configure
the Ethernet communications settings. Select from the following:
Ethernet: Select Enable or Disable.
IP Address / Subnet Mask / Gateway: Consult with a qualified
Network Administrator or an MIS professional to configure these settings.
Print Server: Enter the Print Servers IP address to enable the Print
Image buttons (Function and Zoom).
Ethernet Settings
Ethernet
: Enable
IP Address
: 192.168.
2.
1
Subnet Mask : 255.255.255.
0
Gateway
: 192.168.
Print Server: 192.168.
[CANCEL]
2.254
2.
[OK]
3.19 Front Panel Lock
Use this feature to lock the front panel keypad. While locked,
the only operational key on the front panel is the Menu button.
To unlock the front panel, enter the Installer password and return
to this menu.
Unlock Keyboard
Lock Keyboard
Highlight the item you wish to select.
Save changes and exit the menu: Press the Enter button.
Exit the menu without making changes: Press the Menu button.
0150-0201C
58
Vista Columbus System Triplex
2
3.20 Factory Settings
Return To Factory Defaults
From the Factory Setting menu, press the Enter button. A
password box will appear. Enter the Factory Default password.
Select OK, then press the Enter button.
Factory Default Password
10 and 16-Channel
811
The unit will reboot, returning all settings (except the time and date)
to the factory defaults. Due to the large size of the hard disk, the
reboot may take several minutes.
Change Language
From the Factory Setting menu, press the Enter button. A
password box will appear. Enter the Language password. Select
OK, then press the Enter button.
A menu will appear displaying the available language selections.
Use the Arrow Button to select the desired language.
Save changes and exit the menu: Press the Enter button.
Language Password
10 and 16-Channel
123
Exit the menu without making changes: Press the Menu button.
3.21 Passwords
Use this feature to change the Installer, Operator or Ethernet passwords.
Installer Password
Operator Password
Ethernet Password
Changing the Installer or Operator Passwords
To change the password:
1. Highlight the password you wish to change, then press the
Enter button. A password box will appear.
2. Enter the new password using the Number buttons.
3. Highlight OK, then press the Enter button.
4. Re-enter the password.
Password Box
Enter a new Install Password
---
5. Highlight OK, then press the Enter button. The user will be
prompted, indicating if the password was entered correctly
and changed.
The Ethernet Password
The Ethernet Password feature limits access to only those
users who access the unit using the password feature of
WaveReader versions 2.3 or later. When the unit is first setup,
the default is No Password Protection. Meaning, anyone
using WaveReader and accessing with an ethernet connection
can connect to the unit.
Password Box
Enter a new Ethernet Password
---
Activate The Ethernet Password
1. Enter the new password using the Number buttons.
2. Highlight OK, then press the Enter button.
3. Re-enter the password.
0150-0201C
59
Vista Columbus System Triplex
4. Highlight OK, then press the Enter button. The user will be prompted, indicating if the password was
entered correctly and changed.
Deactivate The Ethernet Password
To return the unit to No Ethernet Password Protection,
enter the Ethernet Access Reset Password in the
password box shown above.
Ethernet Access Reset Password
1 1 1
3.22 The QuickInstall Menu
Change the time
Change the date
QuickInstall Menu Overview
Edit Camera Titles
After installation is complete, it is strongly recommended that, as
a minimum, the items in the QuickInstall menu be configured
before the unit is used.
All items located in the QuickInstall menu are also found in the
Main menu. These items are provided in the separate QuickInstall
menu as a convenience for the installer.
Use the following table to find detailed information about configuring
specific items from the QuickInstall menu.
QuickInstall Menu Item
Camera Disable
Record Quality
Installer Password
Auto Disable Now
Primary Menu Location
Section In
Manual
Change the time
Main Menu → Time/Date → Set Time
3.8
Change the date
Main Menu → Time/Date → Set Date
3.8
Edit Camera Titles
Main Menu → Camera Setup → Camera Titles
3.14
Camera Disable
Main Menu → Camera Setup → Camera Disable
3.14
Record Quality
Main Menu → Record → Record Quality
3.10
Installer Password
Main Menu → Passwords → Installer Password
3.21
Auto Disable Now
Main Menu → Camera Setup → Camera Disable
→ Auto Disable Now
3.14
3.23 The Operator Menu
Sequencing
The Operator Menu Overview
Time/Date Display
The Operator menu is provided so that the user has access to a
limited number of menu items. These menu items are primarily
monitor display setup options, so that the user may “personalize”
the monitor displays during their shifts. Other options include video
archive setup and changing the operator password.
None of the items are unique to the Operator menu. All items
located in the Operator menu are also found in the Main menu.
0150-0201C
60
Titles Display
Alarm History
Archive Setup
Operator Password
Vista Columbus System Triplex
Use the following table to find detailed information about configuring specific items from the Operator
menu.
Operator Menu Item
Primary Menu Location
Section In
Manual
Sequencing
Main Menu → Sequencing
3.9
Time/Date Display
Main Menu → Time/Date → Time/Date Display
3.8
Titles Display
Main Menu → Camera Setup → Camera Titles →
Title Display
3.14
Alarm History
Main Menu → Alarm → Alarm History
3.11
Archive Setup
Main Menu → Archive Setup
3.15
Operator Password
Main Menu → Password → Operator Password
3.21
3.24 The SystemView Menu
About DVR
The SystemView Menu Overview
View Screen 1
The SystemView menu is provided so that users may quickly view global
software and hardware settings.
View Screen 2
View Screen 3
View Screen 4
View Screen 5
View Screen 6
View Screen 7
View Screen 8
About DVR menu: This menu provides information such
as model designation, serial number, software version, software
date, boot code version hard disk size, IP address, and
hardware address (MAC).
Model:
VC16STe
Serial Number:
D406-T72-210001
Software Version: VER 4.09
Software Date:
Oct 15 16:40:18 2002
Boot Code Version: VER 1.03
Disk Size:
163.93 GB
IP Address:
3.18.173.10
Hardware Address: BA-BE-C6-7E-FA-CE
OK
View Screens 1 through 8: These menus provide an overview of the units current operating
parameters and the menu settings selected by the user or installer. Each View Screen is described in
the following tables.
0150-0201C
61
Vista Columbus System Triplex
The View Screens
View Screen 1
Alarm Input
• Enable/Disable: 1 = Enabled, 0 = Disabled
• Normally Open or Normally Closed: 0 = Open, C = Closed
• Macro: Macro number if activated
Alarm Action
• Freeze: 1 = Freeze, 0 = No Freeze
• Cameras: Primary camera in alarm and three associated cameras
• Relay: 1, 2, 1+2, or None
Telemetry
• Enable/Disable: 1 = Enabled, 0 = Disabled
Telemetry AC/DC
• AC or DC
View Screen 2
Camera
• Enable/Disable: 1 = Enabled, 0 = Disabled
• Signal Gain: AGC setting from 1 through 10
• Covert Camera: Yes or No
• Camera Title
Videoloss Action
• Relay 1: 1 = Enabled, 0 = Disabled
• Relay 2: 1 = Enabled, 0 = Disabled
• Buzzer: 1 = Enabled, 0 = Disabled
View Screen 3
Motion Detection
• Enable/Disable: 1 = Enabled, 0 = Disabled
• Activity or Intrusion Detection: I = Intrusion, A = Activity
• Sensitivity: 1 through 10
• Relay Output: None, 1, 2, 1+2
• Link to Event: Yes or No
• Rejection Ratio: High, Medium, or Low
• Target Size: 1 through 256
• Alarm Camera: 1 through 4, 10 or 16
0150-0201C
62
Vista Columbus System Triplex
View Screen 4
Record Rate
• Event Camera Settings: T = Timelapse, E = Event, ET = Event and Timelapse
• Timelapse Record Rate: In pictures per second (pps)
• Event Record Rate: In pictures per second (pps)
• Pre Event Duration: 0 to 5 seconds
• Post Event Duration: 0 to 200 seconds
• Acitvity Record Rate: In pictures per second (pps)
• Record Quality: High, Medium, or Low
View Screen 5
Record Timer
• DAY: 1-31, Mon, Tue, Wed, Thu, Fri, Sat, Sun, Mon-Fri, Sat-Sun, Mon-Sun
• Start: Time (HH:MM)
• Stop: Time (HH:MM)
• Macro: Macro Number, On or Off
View Screen 6
•
•
•
•
•
•
•
•
•
•
•
•
Time and Date Display A: On or Off.
Time and Date Display B: On or Off.
Time Format
Date Format
Titles Display A: On or Off.
Titles Display B: On or Off.
Master Clock: Yes or No.
Multiscreen Dwell: In seconds.
Full Screen Dwell: In seconds.
Record Mode: No Overwrite, Write Once, or Continuous.
Auto Disable: On or Off.
Indicate Detection: On or Off.
View Screen 7
•
•
•
•
•
•
•
•
•
•
•
•
Global Buzzer: On or Off.
Live Alarm Buzzer: On or Off.
Video Loss Buzzer: On or Off.
Playback Buzzer: On or Off.
Relay 1: Normally Open or Normally Closed.
Relay 2: Normally Open or Normally Closed.
Alarm Latch: T = Transparent, L = Latched, TO (020) = Timed Out (Time)
Alarm Record Mode: Interleaved, Exclusive, or No Change.
Full Screen Alarm: Yes or No. This feature is not available on the 4-Channel units.
Global Alarm Record Rate: In pictures per second (pps).
Pre Alarm Duration: In seconds.
Archive Alarm: Enable or Disable.
0150-0201C
63
Vista Columbus System Triplex
View Screen 8
•
•
•
•
•
•
•
•
•
•
Background Archive: On or Off.
Monitor Setup: Single or Dual.
Baud Rate Port 1
Baud Rate Port 2
Network Address
Ethernet: Enable or Disable.
POTS: Enable or Disable.
Language: English, German, or French.
Keyboard Lock: On or Off.
Record Lock: On or Off.
0150-0201C
64
Vista Columbus System Triplex
4 Alarms
4.1 Alarm Input
Alarm devices are connected via the Alarm PCB on the back panel of the unit (see section 1.7). Each
Alarm Input corresponds with the Camera Input of the same number. Alarm input to camera number
assignments can be changed on 10 and 16-channel models. See Alarm Action menu (section 3.11).
4.2 Alarm Output
Front Panel Alarm LED: The LED located to the left of the Alarm button is lit for the duration of the
alarm. The LED located on the right of the Alarm button is activated on video loss.
Internal Buzzer: The internal buzzer is activated until it is silenced and acknowledged. This feature
can be turned off in the menu system (see Buzzer Setup in section 3.11).
Monitor Displays: Discussed below in the On-screen Displays During Alarms section.
Output Relays: The alarm output relays are active for the duration of the alarm. This feature is
configured in the menu system (see Alarm Action and Relay Configuration in section 3.11) and can be
deactivated.
Macro Activation: Unit can be configured in the menu system to activate a macro when an alarm is
detected.
Preset PTZ Camera commands: Unit can be configured in the menu system to send preset
commands to specific cameras when an alarm is detected.
Record Rate: Record Rate can be increased by recording at the Alarm Record Rate (see section
3.10) and by Interleaved or Exclusive Recording (see Alarm Record mode in section 3.11).
4.3 Alarm Acknowledge
Pressing the Alarm button acknowledges to the unit that the alarm has been
recognized and silences the internal buzzer. This does not clear the alarm
condition.
Alarm Button
4.4 On-screen Displays During Alarms
Monitor-A in Live Multiscreen Mode
Single Alarm: When a single alarm is received, the unit changes to 4-way
display containing the camera in alarm, and three associated cameras. The three
associated cameras are defined as a group in the menu system (see Alarm
Action in section 3.11). The top left cameo displays the camera in alarm.
4-Way
Single Alarm
Second Alarm: When a second alarm is received, the unit changes to a 10-way
multiscreen, displaying the alarm cameras in the top two cameos. The
associated cameras are displayed in the remaining cameos.
10-Way
Second Alarm
0150-0201C
65
Vista Columbus System Triplex
Third Alarm: When a third alarm is received, the unit changes to a 9-way
multiscreen, displaying the alarm cameras in the top three cameos. The
associated cameras are displayed in the remaining cameos.
More than three alarms simultaneously: The unit switches to the maximum
multiscreen display, i.e. 16 or 10-way.
9-Way
Third Alarm
Other display options include:
•
A full screen display of a single camera in alarm, with a sequenced full screen display for
additional cameras in alarm. This option is selectable in the menu system (see Full Screen Alarm
in section 3.11).
•
Freeze camera display at the time the alarm was received.
Monitor-B Display During Alarm
Single Alarm: Unit switches to a full screen display of the camera in alarm.
Additional Alarms: Unit switches to a sequenced display of all cameras in alarm.
4.5 Alarm Operations During Playback
Live Alarms Displays
Single Alarm: Unit switches to a full screen display of the camera in alarm on Monitor B.
Additional Alarms: Unit switches to a sequenced display of all cameras in alarm on Monitor B.
LIVE MODE
PLAYBACK MODE
Monitor A
Monitor B
Monitor A
Monitor B
LIVE
LIVE
PLAY
BACK
LIVE
LIVE ALARM
A
LIVE
0150-0201C
LIVE ALARM
FULL
SCREEN
ALARM
66
LIVE ALARM
PLAY
BACK
LIVE ALARM
FULL
SCREEN
ALARM
Vista Columbus System Triplex
Recorded Alarms
Internal Buzzer: During playback, the internal buzzer is activated until it is silenced and
acknowledged. This feature can be turned off in the menu system (see Playback Buzzer, Buzzer
Setup in section 3.11).
Front Panel Alarm LED: The LED located to the left and above the Alarm button is lit for the duration
of the alarm.
Monitor-A Multiscreen: Each camera in alarm is indicated on-screen by a flashing red “A” in its
cameo. Alarm LED lights to indicate an alarm condition. There is no change in the playback (or
Triplex) multiscreen based on playback of recorded alarms.
4.6 Alarm History Box
The Alarm History feature provides a list of the 100 most recent alarms. View the Alarm History Box
by accessing the menu system, and selecting Operator → Alarm History. The Alarm History Box
can also be found under Main Menu → Alarm → Alarm History. For detailed information about
viewing the Alarm History Box see Alarm History in section 3.11.
4.7 Searching For Recorded Alarms
See section 5.
0150-0201C
67
Vista Columbus System Triplex
5 Searching
The Columbus System Triplex provides a powerful search interface to access video files stored on the
hard disk or an external archive device.
Search Menu Overview
Search
Button
Disk Analysis Screen
Disk Analysis Screen
01/21/2002 20:17:01
1
2
3
4
5
X
Last 2hrs
Last 8hrs
Last day
Last 7 days
Last 4 weeks
Last 12 weeks
Custom
11
12
13
14
15
E
N
T
E
R
16
Event
Activity
Videoloss
Present
Hit SEARCH again to enter Advanced Search
Search Filters
Motion Search
6
7
8
9
10
Alarm
Search Filters
Motion Search
Search
Button
Absent
Level 1
Search
Button
Operation:
DATE (MM/DD/YY)
TIME (HH:MM)
Start
Stop
Start
Stop
01/27/02
01/27/02
20:57
20:59
Activity
Event
Text
Alarm
Camera
Enter
Activity Setup
1
2
3
4
5
6
7
8
9 10 11 12 13 14 15 16
X
X
X
X
X
X
X
X
X
X
X
X
X
X
X
X
[CANCEL]
[START SEARCH]
Enter
E
N
T
E
R
Play from Disk
E
N
T
E
R
Search
Button
Enter
Enter
E
N
T
E
R
Search Results
Play Back
Search Results
9
Start Date
Start Time
000
01/21/2002
20:07:10
0 04:35:15
001
01/21/2002
20:08:10
Days HH MM SS
0 00:01:55
002
01/21/2002
20:09:10
0 00:00:38
003
01/21/2002
20:10:10
0 01:07:22
004
01/22/2002
20:07:10
0 00:00:07
005
01/23/2002
20:07:10
0 00:08:56
006
01/24/2002
20:07:10
0 00:00:06
007
01/25/2002
20:07:10
0 05:57:31
008
01/26/2002
20:07:10
0 00:46:43
matches found.
‘PLAY REV/FWD’ to page up/down
‘ENTER’ to play event; ‘SEQ’ to repeatedly play event.
E
N
T
E
R
Enter
Play Back
0150-0201C
68
Vista Columbus System Triplex
5.1 Disk Analysis Screen
Begin by pressing the Search button. The Disk Analysis Screen will appear.
This screen shows a graphical representation of the recorded video stored on the
internal hard disk.
Search Button
02/28/2002 20:45:00
Arrow Cursors
Disk Analysis Screen
Disk Time
and Date
at cursor
location.
01/21/2002 20:17:01
1
2
3
4
5
6
7
8
9
10
11
12
13
14
15
16
R
Record
Button
Alarm
Event
Activity
Videoloss
Present
Hit SEARCH again to enter Advanced Search
Write to CD
Absent
Zoom
Level
Level 1
Use the Left/Right arrows to move the two arrow cursors across the representation of the recorded
video. As the cursors move across the screen the corresponding disk time is indicated in the upper right
of the screen. The video representations are colour-coded by category. Using the Up/Down arrows
expands (Zooms) the display. The Lowest level (most detail) is indicated on screen with an (L). Pressing
the Enter button will start Playback from the cursor location.
5.2 Quick Archive to CD
Archive to CD on the Disk Analysis Screen by selecting the time and date and pressing the record
button. The QuickWave Setup must be set to ON from the Archive Setup → Quick Wave Setup menu
(see section 3.15). The Archive Incident menu should appear.
Archive Incident
1. Use the Up/Down arrows to modify the time parameters and use the
Left/Right arrows to move between the Start and Stop fields.
07/31/2003
Start
02:02:51P
02:20:06P
Stop
02:20:09P
2. Press the Record button on the front panel when satisfied.
3. The CD Writer will open the CD tray when completed.
Capacity: 557MB
‘RECORD’ to Archive
The video may now be viewed on any PC equipped with a CD-ROM.
0150-0201C
69
Vista Columbus System Triplex
5.3 Motion Search
Pressing the Search button a second time will bring up the Motion Search menu. This menu performs a
motion search with six preset time parameters and a custom search option. Use the Arrow Button to
navigate and select a specific parameter. Selecting the Custom option and pressing the Enter button
starts playback and brings up another window with Start/Stop, Time/Date options. These options provide
the parameters to focus the search to a specific time period.
Motion Search
X
Last 2hrs
Last 8hrs
Last day
Last 7 days
Last 4 weeks
Last 12 weeks
Custom
Selecting any of the other options and pressing Enter starts playback and displays the Motion Search
Setup Screen.
5
This screen overlays the current playback video and allows the user to enable or disable motion
detection on the screen within blocks that form a 16 x 16 grid.
Pressing the Function key while in this screen overlays a help screen with all the available
commands.
Fn
Function
Button
‘MENU’ :
‘ENTER’:
‘PAUSE’:
‘STOP’ :
‘ZOOM’ :
Exit Activity Setup
Save and Exit Activity Setup
Toggle between Enable and Neutral
Toggle between Disable and Neutral
Disable/Enable all zones
Pressing Enter upon completion of the activity setup will start the search and launch the Search
Results window. See section 5.4 for operating instructions.
0150-0201C
70
Vista Columbus System Triplex
NOTE
This Help Screen will display for 15 seconds, and then disappear. Press the Function
button again to redisplay.
5.4 Search Filters
Pressing the Search button a third time brings up the Search Filters Menu. Use the Search Filters menu
to specify:
•
The type of operation to be performed: Play from Disk, Play from Archive, Copy from Disk to
Archive, and Copy from Archive to Disk (These will only be enabled if Background Archiving
is turned Off).
•
The Start and Stop date of the search.
•
The Start and Stop time of the search.
•
Searching for recorded activity, events, or alarms.
•
Searching for a text string.
•
Which cameras to search inclusively or exclusively.
Search Filters
Operation:
Play from Disk
The following options are
available when an archive
device is connected:
DATE (MM/DD/YY)
TIME (HH:MM)
Start
Stop
Start
Stop
01/27/02
01/27/02
20:57
20:59
Activity
Event
Text
Alarm
1. Play from Disk.
2. Play from Archive.
3. Copy from Disk to Archive.
4. Copy from Archive to Disk.
Camera
1
2
3
4
5
6
7
8
9 10 11 12 13 14 15 16
X
X
X
X
X
X
X
X
X
X
X
X
X
X
X
Hit Camera buttons to
select/deselect individual
cameras. Use the Zoom
button to globally
select/deselect cameras
to search.
X
[CANCEL]
[START SEARCH]
Selecting Search Parameters
1. Highlight the box adjacent to the parameters that you wish to modify.
2. Once in the Parameter Box, navigate through the fields and the Arrow Button to change the
values.
3. To activate the parameter, place an [X] in the check box.
4. When finished press Enter and navigate to another parameter.
0150-0201C
71
Vista Columbus System Triplex
5.5 Search Results
Activate Search
From the Search Filters menu, navigate to the Start Search parameter. With the Start Search
parameter highlighted, press the Enter button to begin the search operation. When finished searching,
the Search Results window will appear. A maximum of 200 results can be displayed per search.
Follow the directions on-screen to select, archive, playback, etc.
Search Results
9
Start Date
Start Time
Days HH MM SS
000
01/21/2002
20:07:10
0 04:35:15
001
01/21/2002
20:08:10
0 00:01:55
002
01/21/2002
20:09:10
0 00:00:38
003
01/21/2002
20:10:10
0 01:07:22
004
01/22/2002
20:07:10
0 00:00:07
005
01/23/2002
20:07:10
0 00:08:56
006
01/24/2002
20:07:10
0 00:00:06
007
01/25/2002
20:07:10
0 05:57:31
008
01/26/2002
20:07:10
0 00:46:43
matches found.
‘PLAY REV/FWD’ to page up/down
‘ENTER’ to play event; ‘SEQ’ to repeatedly play event.
Some options may be unavailable depending on the type of search performed. These options are not
displayed.
When archiving, the unit will not allow the amount of selected data to exceed the amount of space
available on the target medium.
Press the Menu button to exit the Search Results window without making a selection.
Hitting the Enter button will play the selected search result.
Hitting the Enter button again while in playback will cause the next selection from the search list to be
played.
Press the Sequence button to repeatedly play the selected event.
0150-0201C
72
Vista Columbus System Triplex
6 Telemetry Controls
6.1 The Telemetry Buttons
1
4
2
6
T
10
9
7
8
3
5
Common Equipment Controls
BUTTON
FUNCTION
CAMERAs
Used to select full screen displays of cameras. Also used with the
FUNCTION button, and TELEMETRY button.
ARROWs
Used in MENUs, and for pan and tilt in 2X Zoom. Also used with
telemetry for camera control of pan/tilt/zoom functions.
Telemetry Controls
BUTTON
FUNCTION
1. TELEMETRY
ON / OFF. Must be ON to use telemetry buttons. Telemetry operates on
currently selected camera only. Indicator: LED below button.
2. CAMERA POWER
ON / OFF. Telemetry button must be ON to use. Toggles power state of
currently selected camera only. Indicator: LED above button.
3. CAMERA LAMPS
ON / OFF. Telemetry button must be ON to use. Toggles power to the
lamps of currently selected camera only. Indicator: LED above button.
4. WASHER
ON / OFF. Telemetry button must be ON to use. Toggles power to the
washer of currently selected camera only. Indicator: LED above button.
5. WIPER
ON / OFF. Telemetry button must be ON to use. Toggles power to the
wiper of currently selected camera only. Indicator: LED above button.
6. AUTOPAN
ON / OFF. Telemetry button must be ON to use. Toggles the AutoPan
state of currently selected camera only. Indicator: LED above button.
7. PRESET
Used to set and recall presets. Presets are programmed by the Installer.
8. ZOOM
(Motorised)
Zooms motorised camera lens in or out.
9. IRIS
Used to open and close a motorised iris.
0150-0201C
73
Vista Columbus System Triplex
10 Focus
Used to focus in or out using a motorised lens.
Using Telemetry Cameras
When properly equipped, Telemetry cameras are controlled as follows:
1.
Press any camera
number button to
select a camera to be
controlled
2.
Press the
TELEMETRY button
on the unit.
The LED below the
button illuminates.
The Monitor displays a
flashing TEL indicator
3.
Press any of the
ARROW buttons on
the unit.
The Camera should
move in the direction
of the arrow button
pressed
Verify the movement on
the monitor.
4.
Press the ZOOM IN
or ZOOM OUT
buttons
The camera lens
should respond to the
command
Verify the movement on
the monitor.
5.
Press the FOCUS
NEAR or FOCUS
FAR buttons
The camera lens
should respond to the
command
Verify the movement on
the monitor.
6.
Press the LAMPS
button on the unit.
The telemetry receiver
should respond by
illuminating the
camera lamps.
Verify the operation on the
monitor.
7.
Press the LAMPS
button on the unit
again.
The telemetry receiver
should respond by
extinguishing the
camera lamps.
Verify the operation on the
monitor.
8.
Press the WASHER
button on the unit.
The telemetry receiver
should respond by
activating the washer.
Verify the operation on the
monitor.
9.
Press the WASHER
button on the unit
again.
The telemetry receiver
should respond by
halting the washer.
Verify the operation on the
monitor.
10.
Press the WIPER
button on the unit.
The telemetry receiver
should respond by
activating the wiper.
Verify the operation on the
monitor.
11.
Press the WIPER
button on the unit
again.
The telemetry receiver
should respond by
halting the wiper.
Verify the operation on the
monitor.
0150-0201C
The Monitor should now
be displaying the selected
camera.
74
Vista Columbus System Triplex
12.
Press the AUTOPAN
button on the unit.
The telemetry receiver
should respond by
activating the AutoPan
funtion.
Verify the operation on the
monitor.
13.
Press the AUTOPAN
button on the unit
again.
The telemetry receiver
should respond by
halting the AutoPan
function.
Verify the operation on the
monitor.
NOTE
Autopan limits are programmed by the Installer and can not be adjusted by the
Operator.
Using presets
Command the camera to proceed to any preset as follows:
1.
Press any camera
number button to
select a camera to be
controlled
2.
Press the
TELEMETRY button
on the unit.
3.
Press the PRESET
button on the unit.
4.
Press the number of
the preset desired.
0150-0201C
The Monitor should now
be displaying the selected
camera.
The LED below the
button illuminates.
The Monitor displays a
flashing TEL indicator
The unit should move
to that preset.
Verify the movement on
the monitor.
75
Vista Columbus System Triplex
7 Web Interface
The Triplex has an integrated web interface that include options for setup, upgrade, status information,
and a built-in WebBrowser interface. To access the web interface:
1. Launch Internet Explorer (version 5.5 or later) on any local Internet connected PC or laptop.
2. Type in the Triplex’s IP address in the address field and press enter. The Enter Network Password
box should appear.
3. Enter the correct Username and Password in their respective fields (the default username and
password is admin). Click the OK button. The Triplex home page should display.
The following options are available on this web page:
•
WaveBrowser – View video from ethernet connect units (Versions 4.09 and up).
•
Configure the Unit – Change the Password of the unit.
•
Upgrade the Unit – Upload Software upgrades. Contact Technical Support for details.
•
Properties of the Unit – View various configuration details.
0150-0201C
76
Vista Columbus System Triplex
7.1 WaveBrowser
The WaveBrowser option allows the user to view video from any ethernet connected Triplexes with
software version 4.09 or above.
NOTE
For WaveBrowser to function properly, certain ActiveX controls must be set correctly. To
setup the ActiveX controls:
1. Click on the Tools → Internet Options Menu in Internet Explorer.
2. Click on the Security tab.
3. Select Local Intranet for the Web Content Zone.
4. Click on the Custom Level button.
5. Ensure that both Download unsigned ActiveX controls and Initalize and Script
ActiveX controls not marked as Safe are set to Prompt.
6. Click the OK button.
7. Click on the Yes button in the Warning message.
8. Click the OK button in the Internet Options window.
Click on the WaveBrowser selection to launch. Type the IP address in the IP Address Field and click
the Connect button.
IP Address Field
0150-0201C
77
Vista Columbus System Triplex
WaveBrowser Overview and Controls
Button Panel
Main Viewing
Area
Drop Down
Volume List
The Main program window consists of the following areas:
•
The Main Viewing Area: The large blue area.
•
The Button Panel: The left side of the window.
•
The Drop Down Volume List: Allows the selection of available Disk volumes.
The Main Viewing Area
Pictures are displayed in this area in Multi-Camera, and Single-Camera formats. Picture display order
is according to the information encoded by the unit used to create the original video data file.
Choose from the following displays:
•
16-way Multiscreen Display (Large and Medium)
•
4-way Display
•
•
•
Single Camera Display Large
Single Camera Display Medium
Single Camera Display Small
0150-0201C
78
Vista Columbus System Triplex
The Button Panel
1
1. Play Backward button: Click on this button to playback video in
reverse.
2
3
5
2. Stop button: Click on this button to halt all playback operations. The
Play Pointer Slider Bar moves to the start of data.
3. Play Forward button: Click on this button to playback video.
4
6
7
8
9
4. Single Frame Rewind button: Click on this button to rewind the video a
single frame.
10
5. Pause button: Pauses playback until the Pause button is pressed
again. Clicking any of the buttons, except Stop will also resume
playback. The Play Pointer slider bar stays at the current position while
paused.
13
6. Single Frame Advance button: Click on this button to advance the
video a single frame.
7. Rewind button: Click on this button to perform high-speed reverse
playback.
8. Fast Forward button: Click on this button to perform high-speed
playback.
14
16
17
19
20
10. Password Field: Enter the unit’s password, if necessary.
21
11. Live check box: Click in this box to enable live viewing before connecting.
12. Connect/Disconnect button: Click on this button(s) to connect to the unit.
13. Number buttons: Press any of these buttons to call up individual cameras for display. When
connected to a unit that has more than 16 cameras, right-clicking over the number buttons will
display numbers 17 through 32. Right-click again to return to cameras 1 through 16.
14. Single Camera Display Size: Choose from Small, Medium, or Large.
15. 16-way Multiscreen button: Choose from a Medium 16-way, or Large 16-way.
16. 4-way Multiscreen button: Selects a Large 4-way display.
17. View Live Button: Click on this button while connected to view live video.
18. Play Pointer Slider Bar: The Play Pointer slider bar advances to the right to indicate the playback
position on the disk. The user can drag the bar to navigate forward or backward.
19. Goto Button: Click on this button to go to the selected date for the drop down time and date
boxes.
20. Drop down Date Selection Menu: Click on this field to display a graphic calendar to select a date
to view.
21. Time Selection Menu: Click on the Up or Down Arrows to select a specific time to view.
The Drop Down Volume List Box
Click on the arrow to display a list of available disk volumes on the connected unit. Click on the volume
to select.
79
15
18
9. IP Address Field: Enter the unit’s IP address.
0150-0201C
11
12
Vista Columbus System Triplex
8 Technical Specifications
General
External Power Supply
12 Volt DC. 60 Watt (5 Amp)
Connector
2.1mm barrel connector, centre positive.
Power Consumption
35-Watt nominal (single disk).
Operating Temperature Range
Operating: 0 to 40°C. Storage: -20 to +60°C.
Relative Humidity Range (Non-Condensing)
Operating: 10% to 80%. Storage: 10% to 95%
Dimensions
343 x 442 x 44mm, (1U, 19 inch rack unit)
Weight
4Kg (9 Lbs.)
Connections
10/100 Ethernet Port
RJ-45 Connector.
RS232 Port 1
DB-9 Male Connector.
AUX Port
DB-9 Male Connector.
RS232 Port 2
RJ-45 Connector.
Camera Inputs
BNC connectors. Auto Terminating. Color & Mono.
Monitor-A Output (Y/C)
4-pin Mini-DIN Connector.
Monitor-B Output (Y/C)
Not used.
Monitor-A Output (Composite)
BNC Connector
Monitor-B Output (Composite)
BNC Connector
RS485 Port
Two Looping RJ-45 Connectors
SCSI Port
50 pin, High Density SCSI-2 female connector.
Alarm I/O Port
Use Supplied DB-25 PCB connector.
Video
Video Signal Input
0.5 to 2.0 Volts peak-to-peak with Automatic Gain Control.
Video Signal Output
1 Volt peak-to-peak into 75-Ohm.
Input Termination
75-Ohm (Auto Terminating)
Display Memory
4 Megabytes
Resolution
Horizontal: 720 Pixels. Vertical: 576 Lines.
Grey Scale
256 levels
Colours
Y:U:V 4:2:2, 16.8 Million Colours
Compression Standard
Wavelets
0150-0201C
80
Vista Columbus System Triplex
Audio
Audio Input
315mV, 40k Ohms. Unbalanced.
Audio Output
315mV, 600 Ohms. Unbalanced.
Alarms
Inputs
1 per camera.
Relay Configuration
User programmable as Normally Open or Normally Closed.
Record Priority
Interleaved, Exclusive, or No Change.
Alarm Status Indicators
Relay Outputs, On-screen Indicators. Status Retrievable via RS232
port.
Motion Detection
Zones Per Camera
256: 16 x 16 grid.
Sensitivity Settings
10 levels
Grey Levels Per Zone
256 levels
Motion Detection Status
Output
Relay Outputs, Link to Alarms, Link to Events, On-screen Indicators.
Status retrievable via RS232 port.
Part Numbers
Remote Keyboard
NPX/RKB. Includes motorized pan, tilt, and zoom controls.
Rack Mount Kit
RK6. 1U Height. Part Number: 0110-R601
Replacement Manual
0150-0201C
0150-0201C
81
Vista Columbus System Triplex
9 RS232 Event Generation/Text Insertion Protocol
9.1 Message Structure
The Delimiter byte signals the start of a new message, and has a value of 0xFF.
Delimiter
The Class and Command fields identify the type of message.
Class
The Data Length is a 16-bit value indicating the number of bytes in the Data portion of
the message. Data Length is sent using Intel byte ordering (Little Endian).
Command
Data Length
The Check Sum byte.
Data
Check Sum
9.2 Message Type
One message is currently supported to store text along with recorded video.
0xFF
CMD_ADD_TEXT
0x14
Class byte is 0x14.
0x40
Command byte is 0x40.
Data Length[0]
Data Length is the number of data bytes in the message (from 2 to 502).
Data Length[1]
Camera byte indicates the camera associated with the text. The valid range is from
0 to 15.
Camera
Event
Event field usage is described in the following section.
String[0]
String field contains text characters. The string can be from 0 to 500 characters in
length.
String[1]
:
Checksum. The result of XORing all the message bytes from the Delimiter to the
last text string byte.
String[n-1]
Check Sum
9.3 Event Field
The two least significant bits are currently used. All
other bits should be zero.
MSB 7
0
LSB 0
0
0
0
0
0
End
Start
A – Event 0x00
If both the start and end bits are clear, the associated text will be stored with the next recorded field for
that camera. That camera’s record rate will not be changed.
B – Event 0x01
If only the start bit is set, the associated text will be stored with the next recorded field for that camera.
This will cause the selected camera, as well as any pre-event fields to be recorded at the event record
rate*.
C – Event 0x02
If only the end bit is set, the associated text will be stored with the next recorded field for that camera.
This will start the post-event timer** after which, the selected camera will resume recording at the
normal record rate*.
0150-0201C
82
Vista Columbus System Triplex
D – Event 0x03
If both the start and end bits are set, the associated text will be stored with the next recorded field for
that camera. The selected camera, as well as any pre-event fields will be recorded at the event record
rate, and the post-event timer will be started** after which the selected camera will resume recording
at the normal record rate*.
*If no alarms are present.
**If enabled.
0150-0201C
83
Vista Columbus System Triplex
10 RS232 Remote Control Protocol
The unit supports two different communication types:
• Remote Front Panel Button Emulation
• Remote Configuration and Status
10.1 Front Panel Button Emulation
Data Structure
Byte 1: 0xFF
Byte 2: 0x55
Byte 3: Front Panel Button Code
Description
Byte 1 and 2 are header bytes.
Byte 3 contains the code for a specific front
panel button.
The different buttons and their corresponding
codes are as follows.
No Button Pressed
0
Record
1
Play
2
Stop
3
Alarm
4
Freeze
5
Zoom
6
Sequence
7
16 Way Multiscreen
8
Camera 1
9
Camera 2
10
Camera 3
11
Camera 4
12
Camera 5
13
Camera 6
14
Camera 7
15
Camera 8
16
Camera 9
17
Camera 10
18
Camera 11
19
Camera 12
20
Camera 13
21
Camera 14
22
Camera 15
23
Camera 16
24
Reserved
25 - 40
Menu
41
Enter
42
Reserved
43
Macro
44
Reserved
45-49
Monitor B
50
Camera Power
51
Wash
52
Auto Pan
53
0150-0201C
84
Camera Lights
Wipe
Preset
Focus Far
Focus Near
Iris Close
Iris Open
Zoom In
Zoom Out
Telemetry
Left Arrow
Right Arrow
Up Arrow
Down Arrow
Reserved
Alarm and Sequence
Alarm and Camera 1
Alarm and Camera 2
Alarm and Camera 3
Alarm and Camera 4
Alarm and Camera 5
Alarm and Camera 6
Alarm and Camera 7
Alarm and Camera 8
Alarm and Camera 9
Alarm and Camera 10
Alarm and Camera 11
Alarm and Camera 12
Alarm and Camera 13
Alarm and Camera 14
Alarm and Camera 15
Alarm and Camera 16
Reserved
Search
Frame Reverse
Frame Forward
Play Reverse
Stop
Play Forward
Monitor A
2 Way Multiscreen
4 Way Multiscreen
6 Way Multiscreen
7 Way Multiscreen
9 Way Multiscreen
10 Way Multiscreen
13 Way Multiscreen
54
55
56
57
58
59
60
61
62
63
64
65
66
67
68-74
75
76
77
78
79
80
81
82
83
84
85
86
87
88
89
90
91
92-110
111
112
113
114
115
116
130
131
132
133
134
135
136
137
Vista Columbus System Triplex
10.2 Configuration and
Status
i) Data structure
iii) Requesting data from the DVR
Byte 1: 0xFF
Byte 2: Command Type
0xAA: (SET) Update DVR with data.
0xBB: (GET) Extract data from DVR.
Byte 3: Data Length (n)
Byte 4: Data Type
0x61: Restart DVR
0xFE: Send configuration data to DVR
0x09: Read Alarm History from DVR
0xFF: Read configuration and status data
from DVR
Byte 5: Data byte 1
Byte 6: Data byte 2
:
:
Byte x: Data byte n
When a message of type 0xBB is sent to the
Columbus Triplex, it will respond by sending 16
bytes of requested data.
a) Read Alarm History List
Byte 1: 0xFF
Byte 2: 0xBB
Byte 3: 0
Byte 4: 0x09
When the "Read Alarm History List" message is
received by the Columbus Triplex, it responds by
sending a start byte 0xFF, followed by ASCII
strings for every alarm event in its alarm history
list, and a stop byte, 0xFF. Each string is
formatted as follows:
ii) Sending data to the DVR
dd.bmm/ddbhh:mm:ssbaa<CR><LF>
a)
Restart Columbus Triplex
This command will restart the Columbus
Triplex.
dd:
b:
mm:
dd:
hh:
mm:
ss:
aa:
<CR>
<LF>
Byte 1: 0xFF
Byte 2: 0xAA
Byte 3: 0
Byte 4: 0x61
b)
Send data to Columbus Triplex
Configuration data can be sent to the
Columbus Triplex, to change the way it
operates. The data is arranged in the form of
16 byte blocks, numbered from 1 to 213.
Blocks 182, 183 and 185 are status blocks,
and hence cannot be written to. For details
about the contents of each block, contact
Norbain and request the Block Data
Structure for the Columbus Triplex.
Example: 03. 11/27 22:48:58 15
b)
Byte 1: 0xFF
Byte 2: 0xAA
Byte 3: 17
Byte 4: 0xFE
Byte 5: Block Number
(1-181, 184, 186-213)
Byte 6: data[0]
:
:
:
:
Byte 21:data[15]
Read data from Columbus Triplex
Configuration and status data can be read from
the Columbus Triplex. The data is arranged in the
form of 16 byte blocks, numbered from 1 to 213.
For details about the contents of each block,
contact Norbain and request the Block Data
Structure for the Columbus Triplex.
Byte 1: 0xFF
Byte 2: 0xBB
Byte 3: 1
Byte 4: 0xFF
Byte 5: Block Number 1-213 or 255 if all
blocks are requested.
After sending a block or series of blocks, block
number 255 must be updated to signal the end of
the configuration session. All data bytes for block
255 must be set to 0.
0150-0201C
index number (00 - 99)
space character
month (01-12)
day (01-31)
hours (00-23)
minutes (00-59)
seconds (00-59)
alarm number (01-16)
Carriage return (0x0D)
Line feed (0x0A)
85
The Columbus Triplex responds to the “Read
data” request by sending all the requested data
bytes consecutively, without any start or stop
bytes.
A total of either 16 bytes or 3408 bytes will be
transmitted, depending on whether a single block
or all the blocks were requested.
Vista Columbus System Triplex
11 Macro Tables
Photo copy this page and use it to keep a record of the programmed macro functions.
11.1 Macro Functions Table
Macro
Number
Description
1
2
3
4
5
6
7
8
9
10
11
12
13
14
15
16
Function +
Sequence
0150-0201C
Daylight Savings Time: Sets clock ahead one hour in April, and back one hour in
October.
86
Vista Columbus System Triplex
11.2 Scheduled Macro Table
Event
Day
Time
Macro to Run
1
2
3
4
5
6
7
8
9
10
11
12
13
14
15
16
17
18
19
20
0150-0201C
87
Vista Columbus System Triplex
12 Warranty and Service
12.1 Factory Service
Warning: Do not open the top cover or attempt to service the unit, as this may expose you to dangerous
voltages and other hazards. Programmer maintenance of this unit is limited to external cleaning and inspection.
Refer all servicing to qualified personnel.
If the unit requires factory service, contact the dealer who supplied the unit to you for the correct
procedures on returning the unit to the factory or the nearest factory service centre.
If the dealer is not available, contact the manufacturer of the unit as detailed below and request a
Return Material Authorization number (RMA). The unit’s serial number must be provided before a
RMA number can be issued. Units returned to the factory for service must have freight and insurance
prepaid, and must show the RMA number clearly on all shipping documents. The failure symptoms
must be clearly described by the operator and enclosed with the unit together with a copy of the
original suppliers invoice. Failure to comply with these instructions will delay service of the unit, and
may result in the unit not being accepted by the Repair Centre.
Factory Address
Norbain
Vista
Norbain SD Ltd.
Norbain House
Eskdale Road
Winnersh Triangle
Wokingham
Berkshire
England
RG41 5TS
Telephone: +44 (0) 118 944 0123
Fax: +44 (0) 118 944 0999
For warranty information, see the following page
0150-0201C
88
Vista Columbus System Triplex
12.2 Warranty
All Vista products sold are covered by a warranty for a period of 5 years from the date of invoice to the
original purchaser of the equipment subject to the exclusions below:
•
UK and Ireland only
•
•
•
•
•
Monitor tube failure restricted to 1 year, this does not include ageing or burn-in.
LCD monitors restricted to 1 year
VCRs have 5 years if care package is maintained
Hard disk recorders, hard disk drives restricted to 1 year
IR Illuminator bulbs & LEDs restricted to 90 days
•
All consumable items such as video or digital format tapes, cables, connectors, bulbs and LED
arrays do not carry the 5 year warranty
•
•
Replacement or exchange of product for premature failure is at 1 month
The repair or replacement of a faulty product within the 5 year period remains at the discretion of
Norbain SD Ltd
The type of service offered under warranty is return of product to an approved Norbain SD Ltd repair
centre. A defective unit, will be, at Norbain SD Ltd’s option, either repaired or replaced with a new or
as-new unit of the same or equivalent model.
The above warranty guarantees against defects in parts or workmanship but does not cover fair wear
and tear, defects resulting from misuse (including burned screens), unauthorised modification,
operation or storage outside the environment specification for the product or in-transit damage.
SUMMARY OF BENEFITS:
5 year warranty covers:
•
•
•
Defects in components or workmanship
Repair at Norbain SD Ltd approved service centres
Replacement with a new or as-new unit of the same or equivalent model
Defects excluded:
•
•
Fair wear and tear
Damage by mishandling
•
•
In-transit damage
Operation or storage outside of environmental specification
•
•
Lightning strike
Tube burn-in on monitors due to excessive contrast setting on either normal screens or
text/borders generated by control equipment
This warranty does not effect your statutory rights.
0150-0201C
89
Vista Columbus System Triplex
0150-0201C