1
INSTALLATION INSTRUCTIONS
MOUNTING THE UNIT
WIRING – MAIN POWER
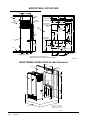
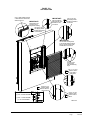
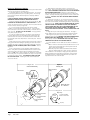
The wall sleeve is attached to the I-TEC unit from the
outside of the building. See Figures 11A & 11B. Refer
to wall sleeve Manual 2100-562 supplied with sleeve.
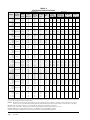
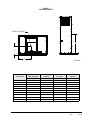
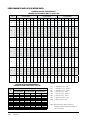
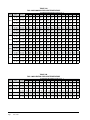
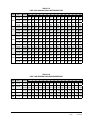
Refer to the unit rating plate and/or Table 2 for wire sizing
information and maximum fuse or circuit breaker size.
Each unit is marked with a “Minimum Circuit Ampacity”.
This means that the field wiring used must be sized to
carry that amount of current. Depending on the installed
KW of electric heat, there may be two field power circuits
required. If this is the case, the unit serial plate will so
indicate. All models are suitable only for connection with
copper wire. Each unit and/or wiring diagram will be
marked “Use Copper Conductors Only suitable for at least
75°C”. THESE INSTRUCTIONS MUST BE ADHERED
TO. Refer to the National Electrical Code (NEC) for
complete current carrying capacity data on the various
insulation grades of wiring material. All wiring must
conform to NEC and all local codes.
Following are the steps for attaching the I-TEC to the
wall sleeve.
1. Lift the unit into place making sure that it is
aligned side to side.
2. Push the unit back until the rear panel touches the
sleeve gasket.
3. This unit must be level from side to side and from
front to back. If adjustments are necessary, shim
up under the base rails with sheets of metal or any
substance not affected by moisture.
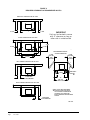
4. Attach the sleeve to the unit using the ten (10) ¾"
long self-tapping screws supplied with the sleeve.
5. The exhaust sleeve has three (3) ¾" long screw slots
in each side flange. Line these up with the screw
engagement holes in the fan panel. Attach using
six (6) ¾" long pointed sheet metal screws supplied
with the sleeve. Extend the sleeve out until it is
flush with the louver grill attachment angles.
6. Lock the sleeve in place using two (2) ½" long
pointed sheet metal screws on each side by
shooting through the slot into a pre-punched hole.
7. A bottom trim piece is shipped loose for
installation beneath the doors. Attach the trim
piece to the unit with screws provided.
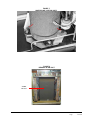
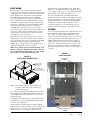
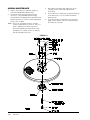
8. The compressor is secured to the base with two (2)
bolts for shipping. Both bolts are identified with a
tag. Remove shipping bolts (Figure 5).
The electrical data lists fuse and wire sizes (75°C copper)
for all models, including the most commonly used heater
sizes. Also shown are the number of field power circuits
required for the various models with heaters.
The unit rating plate lists a “Maximum Time Delay
Relay" fuse or circuit breaker that is to be used with the
equipment. The correct size must be used for proper
circuit protection, and also to assure that there will be
no nuisance tripping due to the momentary high starting
current of the compressor motor.
See “START UP” section for information on three phase
scroll compressor start-ups.
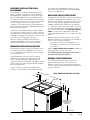
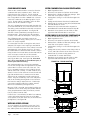
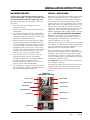
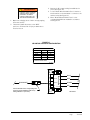
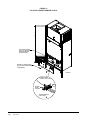
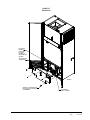
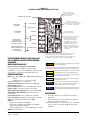
The field wiring conduit connections are located on the
top right-hand corner of the unit with a wire raceway
to feed the wires down to the circuit breaker(s). See
Figure 12.
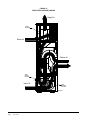
FIGURE 12
COMPONENT LOCATION
ELECTRIC HEAT
INDOOR BLOWER
LOW VOLTAGE
WIRE RACEWAY
EVAPORATOR COIL
CONTROL PANEL
REFRIGERANT PORT
OUTDOOR FAN
CONDENSER COIL
COMPRESSOR
VENT OPTION
Manual2100-549L
Page
21 of 59