1
BURNER ADJUSTMENTS
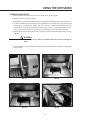
Grill Burner Air Adjustment:
Each grill burner is tested and adjusted at the factory prior to shipment; however, variations in the local
gas supply or a conversion from one gas to another may make it necessary to adjust the burners. The
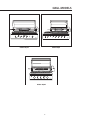
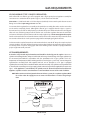
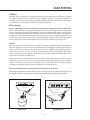
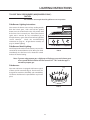
flames of the burners (except the rotisserie burner) should be visually checked and compared to that
of the drawing in Fig.07 and Fig. 08. Flames should be blue and stable with no yellow tips, excessive
noise or lifting. If any of these conditions exist, check if the air shutter or burner ports are blocked by
dirt, debris, spider webs, etc. Proceed with air shutter adjustment. The amount of air which enters a
burner is governed by a sheet metal cup at the inlet of the burner called an air shutter. It is locked in
place by a set screw which must be loosened prior to lighting the burner for adjustment.
To Adjust:
1. Be careful as the burner may be very hot.
2. If the flame is yellow, indicating insufficient air, turn the airshutter counterclockwise to allow more
air to the burner.
3. If the flame is noisy and tends to lift away from the burner, indicating too much air, turn the air
shutter clockwise.
4. Once adjusted turn the burner off and reverse steps to reassemble.
LOW SETTING ADJUSTMENTS:
The valves on the grill feature an adjustable low setting. Due to fluctuations in gas pressure, heating
value or gas conversion, you may feel it necessary to increase or decrease gas flow in the low position.
We do not recommend adjusting the infrared rotis burner.
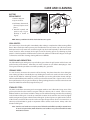
To Adjust:
1. Light the burner.
2. Turn the control knob to the lowest setting (all the way
counter-clockwise).
3. Remove the knob.
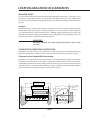
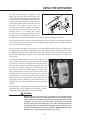
4. While holding the valve shaft with pliers, insert a thin, flat
tipped screwdriver into the shaft and while viewing the
burner adjust to a minimum stable flame (Fig. 09).
FIG.09 Low Setting Adjustment
WARNING: IMPORTANT!
Before lighting, inspect the gas supply piping or hose prior to turning the gas
"on". If there is evidence of cuts, wear, or abrasion, it must be replaced prior to
use.
14