Download Clemas & Co DEMON HURRICANE Specifications
Transcript
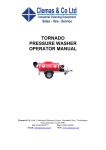
DEMON HURRICANE
PRESSURE WASHERS
OPERATOR MANUAL
Clemas & Co. Unit 5 Ashchurch Business Centre, Alexandra Way, Tewkesbury,
Gloucestershire, GL20 8NB.
Tel: 01684 850777
Fax: 01684 850707
Email: [email protected]
Web: www.clemas.co.uk
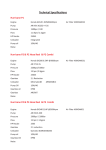
Technical Specifications Hurricane P1 Engine Honda GX120 4HP@3600rpm Pump AR RSV 3G25D + F25 Pressure 1500psi / 100 Flow 11.4lpm/ 2.5gpm HP Nozzle 1505 Unloader Integrated Pump oil 10W/40 Noise Hurricane P2 & P2 4Hire Engine Honda GX200 6.5HP @3600rpm Pump AR XT13.15 Pressure 2200psi/150Bar Flow 13 lpm /2.9gpm HP Nozzle 15045 Gearbox 2:1 Reduction Unloader Minimatic4B Pump Oil 10W/40 Gearbox oil EP90 Gearbox ARCRXT ARMM4B/C Noise Hurricane P4 & P4 HR Engine Honda GX340 11HP @3600rpm Pump AR RK15‐20H Pressure 2900psi / 200Bar Flow 15 lpm / 3.3gpm HP Nozzle 1505 Gearbox 2:1 reduction Unloader Gymatic 3B ARGM3B250 Pump oil 10W/40 Gearbox Oil EP90 Noise Hurricane D1ES & D1ES HR Engine Yanmar L100N 10HP @3600rpm Pump AR RK15‐20 H Pressure 2900psi / 200Bar Flow 15 lpm / 3.3gpm HP Nozzle 1505 Gearbox 2:1 Reduction Unloader Gymatic 3B Pump Oil 10W/40 Gearbox Oil EP90 Noise ARGM3B250 Kits for Hurricane machines Valve Piston Oil Water Support Rings Hurricane P1 ARKIT2186 ARKIT2187 ARKIT2188 ARKIT2189 ARKIT2191 Hurricane P2 ARKIT1864 ARKIT2629 ARKIT1872 ARKIT1874 Hurricane P4 ARKIT1828 ARKIT2757 ARKIT1856 ARKIT1857 ARKIT1829 Hurricane D1ES ARKIT1828 ARKIT2757 ARKIT2757 ARKIT1856 ARKIT1829 FAULT FINDER FAULT CAUSE REMEDY Machine stops suddenly P1/P2/P4—low oil •
check and top up oil Or will not start. D1—flat battery/fuse •
Check/replace battery, re‐
place fuse Sudden pressure loss. Water supply failed. Check water supply. Low pressure No chemical Check chemical drum, close valve HP nozzle worn or unloader set Replace HP nozzle. Set unloader to correct setting. Incorrectly. Low pressure with noise and vibration. Valves worn or Clean/replace as required. blocked. Piston seals Replace. worn. Check water supply pipe and un‐
Pump sucking air. ions. Pump will not by‐pass. Non return valve dirty or jammed. Clean or replace. Water drips from pump box. Pump seals worn. Replace. Oil drips from pump bottom. Oil seal worn. Replace. Oil is milky in colour. Water ingress through oil filter plug. Rinse pump out and replace oil. IF IN DOUBT ASK—OUR ADVICE IS FREE AND CAN SAVE YOU MONEY MINIMUM SERVICE SCHEDULES DAILY CHECK THE FOLLOWING a. b. c. d. Oil level ‐ top up as required. Fuel tank ‐ top up as required. All hose unions for leaks‐ replace O rings if leaking. Hose condition ‐ cuts etc. EVERY 500 HOURS OR SIX MONTHS (WHICHEVER COMES FIRST) a. b. c. d. e. Drain and replace pump oil. Drain and refill fuel tank. Replace fuel filter. Clean water filter. Replace high pressure nozzle. EVERY 1000 HOURS OR 12 MONTHS (WHICHEVER COMES FIRST) a. b. c. d. Complete 500 hour service. Replace pump seals. Replace oil seals. Check unloading pressure and safety valve pressure and adjust. The above service schedules are intended as a guide only, actual service times and replacements parts required will vary according to the area and the usage of the machine. OPERATING INSTRUCTIONS SAFETY I Water at high pressure is dangerous and can cause serious injury. This machine is to be used with great caution. II Petrol is extremely flammable and explosive under certain conditions. EXHAUST FUMES CONTAIN CARBON MONOXIDE – Inhalation of such fumes can KILL. III Diesel is flammable and harmful if swallowed. A Always refuel in an area which is adequately ventilated. B DO NOT smoke when refueling. C Avoid overfilling. D Should fuel be spilt, wipe off any fuel spilt on machine or engine. E Move the equipment away from the area where fuel has been spilt. F DO NOT refuel when the engine is running. G DO NOT run the engine in an area which has a hazardous or explosive atmosphere. H Always ensure that the fuel cap is secure after refueling. I Keep the engine at least 3 metres or more away from any other equipment or Building. J Take care not to get fuel on your clothing. If this happens – CHANGE your clothing IMMEDIATELY. DO NOT start an engine when clothing has been contaminated with fuel. K Use only approved type containers for fuel. DO NOT stand them out in strong sunlight, keep them in the shade. L M N Always ensure that there is a suitable type fire extinguisher available and is within easy access. DO NOT leave an engine running unattended, ALWAYS STOP it before leaving the area. NEVER point the high pressure spray jet at any person, animal, glass or other Material which may shatter. O P PREVENT any over spray from injuring other people or damaging property. DO NOT even try to use a pressure washer on machinery or electrical equipment that is connected in any way to the mains supply ( ALL switches in the OFF position, pull out plugs, if possible remove fuses). Cover or seal electric motors and fittings to prevent entry of water. Before reconnecting electric mains supply check for water penetration. Q DO ALL you can to keep plugs and sockets in a dry place or covered to prevent entry of R water. ALWAYS when using this machine:‐ •
• wear safety goggles and helmet or helmet with a visor. Wear waterproof clothing and gloves. • Take paticular care with detergents and chemicals. S NEVER attempt to disconnect any hose with pressure in it or allow the hose to be flattened or kinked. T DO NOT use a high pressure hose from a ladder. Use a platform tower or proper scaffolding. U Should the equipment fail to operate, DO NOT attempt to rectify or repair, but contact the nearest Service Centre for advice. V Always rinse your pump out after using sea water. PREPARATION Water Supply: A B Ensure there is an adequate water supply either from the mains or a reservoir. Attach water supply hoses to suitable tap or immerse the suction hose with approved suc‐
tion filter into the reservoir. NOTE: ONLY CLEAN WATER SHOULD BE USED. THE PUMP MAY BE DAMAGED IF DIRTY OR CONTAMINATED WATER IS ALLOWED TO PASS THROUGH THE PUMP. Hoses: Low pressure inlet. For models up to 13 litres per minute use ½ “ bore suction hose or feed pipe. For models from 13 litres to 24 litres per minute use ¾” bore suction hose or feed pipe. Hoses:High pressure outlet. For all models use 3/8” RIT or 3/8” R2T hoses. A Check the condition of the “O” rings in the ends of the hose. B Attatch the high pressure hose to the pump connection. C Attatch the spray gun to opposite ends of the high pressure hose. OPERATION A Turn on the water supply. B Start the engine C Direct lance on to surface to be cleaned. Press the lance trigger. D Adjust pressure regulator as required to obtain working pressure if required. E NOTE;:The high pressure water will cause the gun to “kick”. Make sure you have a firm grip of gun and lance. F On completion of operation stop the engine. g. Operate lance trigger h. Turn “ OFF” water supply i. Release residual pressure in gun and lance by operating trigger. When using Cleaning Agents: A. Set machine up as for water. B. Connect detergent hose to machine and place filter end into detergent. C. On completion of work, flush through hose and gun with clean water to remove any resid‐
ual detergent. NOTE: CHEMICAL PICKUP ONLY OPERATES AT PRESSURES BELOW 250PSI. OPEN LANCE VLAVE FULLY TO OBTAIN THIS PRESSURE. Hurricane ‐ General Arrangement Petrol/Diesel & Electric Start Hurricane Handle ‐ DEM10228 Black knob & bolt replacement ‐ DEM102255 Base Plate ‐ PB/P4 MET00193 Wheel ‐WHEEL300 Pressure Guage ‐ DEM20620 Wheel Cap ‐WHEEL25 Demon Hurricane Range Arrangement Drawing— Petrol/Diesel Start with Hose Reel Hose Reel Locking Pin Pressure Control Knob Start / Stop switch Oil filter Pump to Hose Reel HH0020 Fuel tap Fuel tap Speed control lever Demon Hurricane Range Arrangement Drawing— Electric Start Fuel Tap Speed control & Stop Oil Filter Guaze (cleanable) Gearbox Dipstick (EP90) Pump Dipstick (10W40) Voltage Regulator Fuse Demon Hurricane Range Arrangement Drawing— Electric Start Rear View Key Start YAN114351 –77500 Key Switch with loom YAN114549—Ignition Barrel & Keys YAN2746—Keys BAT003 Battery WARRANTY This warranty covers the cost of all replacement parts and labour charges incurred, but does not cover the cost of transport or carriage. It is the owners responsibility to return the machine to a service depot or pay the traveling expenses of a engineer to attend. Demon International`s deci‐
sion in warranty matters is final and binding. Demon International Ltd, undertake to repair or replace,at their discretion, any component which may fail due to a manufacturing fault within a period of 12months from the date of pur‐
chase, provided that any fault or damage was not sustained by; A Lack of regular and proper maintenance, user negligence, misuse, or damage caused by ice or frost. B The effects of contaminated fuel or water, the use of non‐approved chemicals, or an in sufficient or unsuitable electrical supply. C The effects of un‐authorised modification and use. D Compression damage to high pressure hose. ( Hoses are warranted for one month only) E Worn out items considered wear and tear. Parts which may or may not wear out during the first year and which are considered service items which will need replacing from time to time: High pressure nozzle, lance, trigger, hoses, fuel nozzle, fuel filter, piston seals, valves, unloader seats and seals, water filter, non‐return valve, chemical barbs, chemical pipes, and pump oil seals. It is the owners responsibility to ensure the pressure washer is kept in a safe and suitable envi‐
ronment and any faults reported by operatives to be rectified at the earliest possible date. It is the operators responsibility to check the pressure washer for any faults and report them im‐
mediately, and to use the pressure washer in accordance with the manufacturers specifications and guidelines. Demon International Ltd, undertake to use the highest quality components available during manufacture, but can not be held responsible for any undue consequence arising from the use of their pressure washers. This warranty is given the original purchaser only and is not transferable without the fully author‐
ized and written consent of Demon International Ltd. Warranty Procedure End Users If your machine develops a problem: 1. Phone Demon for advice with the model and serial number to hand. 2. Describe fully the problem as best you can. 3. If the problem cannot be resolved over the phone then the machine can be booked in for repair and if the faults are covered by the warranty the repair will be carried out free of charge. 4. If you cannot bring the machine in for repair then we will despatch an engineer. If the fault is covered by the warranty then we will not charge for labour or spares used, however the trans‐
port charge will be payable weather or not the repair is warranty. Hire Centres and Dealers If your machine develops a problem: 1. Phone Demon for advice with the model and serial number to hand. 2. Describe fully the problem. 3. We will advise you on the best course of action, however if parts are required you must raise a purchase order number to cover the parts. When the parts are fitted they must be returned for examination before a credit note is issued. 4. If you are unable to repair the machine then we will despatch an engineer to carry out the repair. We will need a purchase order to cover the cost of transport to and from the site and for parts and labour if the repair is not covered under the warranty. 5. If required Demon will arrange for a carrier to collect a damaged machine, if the warranty claim is valid we will pay this cost, if not it will be charged to the customer. For parts warranty ring Demon and request a warranty claim form faxed to you. This form must accompany any returned parts. Notes: You will not invalidate the warranty by investigating faults and repairing them yourself providing you follow our advice. Hire Centres and Dealers are expected to carry out all repairs themselves with Demon crediting faulty parts upon receipt and inspection. Spare parts fitted to machines are guaranteed for 1 month only or the remainder of the warranty period whichever is longer. Nozzles ‐ you can’t get pressure without one!
How do I know which nozzle I have?
Look at this part of the nozzle and it
will have a four or five digit number
which gives the angle of spray as the
first two digits. The next two or three
numbers are the size. (i.e. 15045 is
15° spray angle with 045 size
aperture.)
Pressure starts and ends at the nozzle. The volume of water pushed down the hose and forced
through the small hole determines the pressure on the gauge. Try taking the nozzle out and then
pulling the trigger. You get virtually no pressure registering on the gauge.
The golden rule when diagnosing a loss of pressure is to start at the nozzle and work back to the
pump.
Example: a new Typhoon is delivered to your branch and is left in the workshop for a few days until a
hire comes up. The lance gets pinched to go out with one of your other pressure washers so you
search around for something to use and find a lance that will do. Unfortunately it came from a petrol
pressure washer and now the Typhoon will only do 1500psi. It must be Demon’s fault. Get them to
dash out and sort it out, must be warranty! No its the nozzle. An 055 fitted to a petrol pressure
washer will only give 1500psi when used on a Typhoon. (This has happened!)
Example: I can’t check that the right nozzle is fitted because the numbers are worn away. If you can’t
read the number then the nozzle is old a probably worn out. Fit a new one and see what pressure you
get. (All the lances are now colour coded)
Model
Flow
Pressure
Nozzle
Colour
Typhoon 1 & Evolution Models
15 litres
2900psi
1505
Red
Tempest 1 Auto
11 litres
1500psi
15045
Blue
Tempest 3 Auto
11 litres
1500psi
15045
Blue
Storm 1
11 litres
1500psi
15045
Blue
Storm 2
11 litres
1500psi
15045
Blue
Tornado & Hurricane P2
13 litres
2200psi
15045
Red
Tornado & Hurricane P4
15 litres
2900psi
1505
Red
Tornado & Hurricane D1ES
15 litres
2900psi
1505
Red
Demon Technical Support 01752 ‐ 690690
Storm
1&2
N/A
N/A
N/A
Cold Water Lance
045 Blue
Cold Water Lance
05 Red
M10031R
Hot Water Lance
M10032B
045 Blue
Hot Water Lance
05 Red
M10031B
M10032R
N/A
Cold Water Lance
04 Yellow
M10031Y
Storm
Description
Part
umber
N/A
N/A
WM4
WM1
N/A
Wall
Mounted
N/A
N/A
P4 & D1
P2
N/A
Hurricane
Evo1 &
Evo 2
N/A
N/A
N/A
N/A
Evolution
N/A
N/A
P4 & D1
P2
P1
Tornado &
Mini-Bowser
Marketing/Lance Colours New Manuals.docx Issue 2 12/08
Typhoon
1&2
N/A
Tempest
1, 3 &
4 (13.17 pump)
Tempest 4
(15.20 Pump)
N/A
N/A
N/A
Typhoon
N/A
N/A
N/A
Tempest
Inc Cabinet
Lance and Machine Colour Codes I can’t get the pressure to where it used to be –
where do I start?
Well by now you should know to check the nozzle ‐ assuming that is correct and you still have no or low
pressure the golden rule is to connect the pump to the mains water supply ‐ whichever machine you are
testing start with a good mains feed.
1. With the gun and lance connected turn the tap on ‐ can you see a leak? If so there is your problem, if
water can leak out air can get in and the pump won’t produce pressure ‐ simple as that. (Leaks from
underneath the pump are either worn seals or a cracked piston ‐ strip to find out which.)
Remedy: Fix leak or replace seals or piston.
2. Check enough flow of water can get into the pump. Make sure all the filters are clean. The new Tempest
hot water machines have a fine filter which will remove most solids. All Demon machines are now double
filtered. Have you checked both of them?
Remedy: Strip and inspect filters.
3. There are no leak’s what next? With the pump switched off pull the trigger, water will spray out. Keeping
the trigger pulled switch the pump on, if the water spray does not improve the valves are the fault. Either
worn out or dirty. Strip and inspect. (The high pressure hose will also vibrate on the ground.)
Remedy: Replace or clean valves.
4. The valves are OK there are no leaks but it still won’t get up to pressure – what next? The unloader valve
piston and seat are damaged or worn allowing some of the water to circulate around the cylinder head ‐ strip
and inspect, you will see any damage.
Remedy: Strip unloader and inspect ‐ replace damaged parts.
5. My cold water pressure washer does not feel as powerful as it used to be but the pressure gauge shows
the correct pressure. What causes this? The chemical pick‐up has a nozzle of 1.8mm or 2.0mm size and can
get partially blocked. This will allow some but not all of the water to flow to the lance.
Remedy: Strip and remove the blockage.
6. The pressure remains high even when I let go of the trigger and the engine or motor is struggling or
stalling. The non‐ return valve in the unloader is damaged or jammed.
Remedy: Strip and clean or replace.
Demon Technical Support 01752 ‐ 690690
Adjustable Nozzle QR Lamce P2 N26001/15045 N26001/1505 MTM90040 DEM10031B DEM10031Y DEM10031R DEM10030 MTM70012 1 1 2 3 3 3 4 5 MVG Coupling QR Trigger QR Lance P4 & D1ES QR Lance P1 Nozzle P4 & D1ES Nozzle P2 Nozzle P1 N26001/1504 1 Description Part No Pos COLD WATER LANCES 1 1 1 1 1 1 1 1 1 Qty 3
1
Nut High Pressure Hose Hose Joiner 2. 3. 4. 15 Metre 30 Metre 2
HH00100MVG HH00050MVG MV00500 HH00030MVG MV00490 (items 1 & 2) Alternative Hose Lengths Hose Insert 1. 4
High Pressure Hoses
Hurricane Petrol XT 11.14 Pump / XT 13.12 Pump / XT 13.15 Pump XT 1450 Pos Code No Description Qty Pos Code No Description Qty 1 AR1322730 Screw 6 40 AR1320020 Pump Head 1 2 AR620301 Plug 1 41 AR180101 O Ring 1 7 AR1260162 Plug 6 42 AR820361 Plug 1 8 AR960160 O Ring 6 43 AR1260200 Crankshaft 1 9 AR1269050 Complete Valve 6 43 AR1320260 Crankshaft 1 10 AR880830 O Ring 6 44 AR1380520 Key 1 11 AR1320340 Support Ring 3 45 AR1320370 Bearing 1 12 AR1260220 Gasket 3 46 AR1260750 Seal 1 13 AR1320351 Piston Guide 3 47 AR1260470 Screw 4 14 AR1260420 O Ring 3 48 AR1263890 Base 2 15 AR1260450 Gasket 3 83 AR1260790 Circlip 1 16 AR1260460 Seal 3 85 AR1381550 Washer 6 19 AR1260790 Circlip 1 88 AR1269222 Pump Head pre‐ass 1 20 AR1320370 Bearing 1 89 AR1266740 Cap 1 21 AR1320330 Bushing 1 22 AR1320010 Pump Housing 1 23 AR880130 Oil Plug 1 24 AR1260110 Nut 3 25 AR1260100 Washer 3 26 AR1260210 Piston 3 27 AR480480 O Ring 3 28 AR1260091 Spacer 3 29 AR1260070 Guiding Piston 3 30 AR1260080 Piston Pin 3 31 AR1260760 Screw 6 32 AR1269101 Complete Cover 1 32 AR1320910 Complete Cover 1 36 AR1260060 Con Road 3 36 AR1320140 Con Road 3 37 AR1260040 Gasket 1 38 AR740290 O Ring 2 39 AR1980740 Plug 2 ARKIT1864 ARKIT2629 Valve Kit Piston Kit ARKIT1872 ARKIT1874 Water Seals Oil Seal Kit Pos Qty Pos Qty Pos Qty 9 6 24 3 16 3 10 6 25 3 37 1 26 3 46 1 27 3 89 1 28 3 11 3 12 3 14 3 15 3 Gearbox for Hurricane P2 ARCRXT Gearbox for Hurricane P4 & D1 ARCRXR Gearbox for Hurricane P4 & D1 ARCRXR Hurricane Diesel RK 15.20 Pump / RK 21.15 Pump RK MODEL: 15.20H Pos Part No Description Qty Pos Part No Description Qty 1 AR960160 O Ring 6 36 AR1343510 Screw 6 2 AR960090 Plug 6 40 AR1380120 0.10mm shim 1÷3 2 AR1380740 Plug 6 40 AR1380130 0.20mm shim 1÷3 3 AR1389051 Complete Valve 6 40 AR1380530 0.25mm shim 1÷3 4 AR880830 O Ring 6 40 AR1382810 0.05mm shim 1÷3 5 AR880581 Plug 2 42 AR740290 O ring 3 /8 G plug 2 Screw 4 Base 2 6 AR820510 O Ring 2 43 AR1980740 11 AR960110 Support Ring 3 44 AR1260470 12 AR880320 Gasket 3 45 AR1380141 13 AR1380090 Piston Guide 3 46 3
AR1980740 3
/8 G Plug 1 1 14 AR961240 O Ring 3 46 AR1981180 3/
8 G Plug 15 AR880330 Gasket 3 47 AR180101 O Ring 1 16 AR138130 Seal 3 48 AR820361 Plug 1 17 AR850370 Screw 8 48 AR960870 Plug 1 18 AR1380050 Closed Bearing sup 1 49 AR1381071 Pump head 1 19 AR640030 O Ring 1 50 AR820150 Screw 8 20 AR2280240 Bearing 1 60 AR1380320 Bearing 1 21 AR1382770 Pump Housing 1 61 AR621170 Seal 1 22 AR880130 Oil Cap 1 62 AR1380220 O Ring 1 23 AR962010 Nut 3 63 AR1380210 Shaft cover 1 24 AR962000 Washer 3 66 AR2280180 Hollow Shaft 28mm 1 24 AR1380940 Ceramic Piston 3 66 AR2280170 Hollow Shaft 028mm 1 26 AR1380950 Spacer 3 66 AR2280160 Hollow Shaft 028mm 1 27 AR600180 O ring 3 66 AR2280150 Hollow Shaft 028mm 1 28 AR1380920 Guiding Piston 3 67 AR1380370 El Motor flange 1 29 AR1380060 Piston Pin 3 76 AR620610 Screw 4 30 AR1383050 Aluminium con‐rod 3 86 AR1260250 Oil Indicator 1 31 AR1080401 Ring 3 87 AR1260430 Snap Ring 1 32 AR1381850 Washer 8 88 AR1780690 Disc 1 34 AR1780510 O Ring 1 89 AR1140450 O Ring 1 35 AR1789010 Complete cover 1 Valve Kit Piston Kit Oil Seal Kit Water Seal Support Ring ARKIT1828 ARKIT2757 ARKIT1856 ARKIT1857 ARKIT1829 Pos Qty Pos Qty Pos Qty 3 6 25 3 16 3 4 6 19 1 34 1 61 1 62 1 Pos Qty Pos Qty 12 3 11 3 14 3 15 3 GYMATIC 3/B Pos 1 Part No AR1560580 Description Knob Plug Qty 1 Pos 39 Part No Description AR1560670 Detergent Reg Knob 2 3 4 5 6 7 8 9 10 11 AR180030 AR1660210 AR1560400 AR1080070 AR1560420 AR1560410 AR1560440 AR1560350 AR108610 AR1080660 Screw Nut Handle Pin Adjusting Screw Spring Guide Plate Spring Spring Plate Pin 1 1 1 1 1 1 1 1 1 1 40 41 42 42 43 44 50 54 55 56 AR1540020 AR154120 AR1540090 AR1540200 AR1560290 AR480440 AR1540050 AR1560310 AR1560300 AR1266330 By‐pass housing Washer Fitting 1/2” G Fitting 1/2” NPT Washer O Ring Fitting 1/2” G Fitting Ring Nut Filter 1 1 1 1 1 1 1 1 1 1 12 13 14 15 16 17 18 AR1080540 AR391000 AR108640 AR1560150 AR1560100 AR1560140 AR180101 Upper Piston O Ring Back up Ring O Ring Jet Spring O Ring 1 1 1 1 1 1 1 57 AR1560660 Ring 1 19 19 20 21 22 23 24 25 26 27 28 29 30 30 30 31 32 33 34 35 35 36 37 38 AR1540080 AR1540190 AR1540110 AR1560010 AR1080550 AR480480 AR1560280 AR1560320 AR880270 AR1560051 AR390080 AR1560510 AR1560500 AR1560530 AR1560540 AR1560520 AR1250280 AR480480 AR1560490 AR1560110 AR1560111 AR1560650 AR800560 AR480560 Fitting 3/8”G Fitting 3/8” NPT Washer Valve Housing Back Up ring O Ring Washer Lower piston O Ring By pass adaptor O Ring Nut Fitting 3/8” G Fitting 3/8”G Fitting 3/8”G Spring Ball O Ring Hose Tail Adaptor 3/8”G Adaptor 3/8”G Hose Tail O Ring O Ring 1 1 1 1 2 2 1 1 1 1 1 1 1 1 1 1 1 1 1 1 1 1 1 1 Pos 13 14 15 18 20 22 Qty 1 1 1 1 1 2 ARKIT2611 Pos Qty 23 2 24 1 26 1 28 1 33 1 41 1 Pos 43 Qty 1 Qty1 1 Hurricane Range Inlet Fittings 2 8 6 1 4 3 6 5 Position Part No Description Qty 1 DEM10041 100 Mesh Suction Filter 2 MTM86010 Chemical Filter 3 MTM73001 QR Nipple Female 4 MTM73020 QR Nipple Male 5 HH0053 Yellow Hose 6 DEM20500 Jubilee Clip 7 DEM10042 Suction filter with INC (1‐4‐5‐6) Hose and fittings DEM10115 Detergent Pipe (Chemical Pipe) 8 COMMON PART NUMBERS DEM102255 Hurricane Black Knob & Bolt Replacement Kit WHEEL300 Wheel WHEEL25 Wheel Cap DEM20620 Pressure Gauge 0‐4000 psi DEM100760 Push Button Switch DEM100755 Rotary Switch DEM100775 Domed Light YAN11435‐77500 YAN114549 YAN2746 MTM20091/1 YAN714650‐53100 Key switch & Loom Barrel & Key Keys Swivel Nut 90O Hose Reel attachment L100 Injector DEM100532 05 Turbo Nozzle MTM39001 Easy Start Valve DEM10370 Rubber Mounts DEM10228 Hurricane Handle HONDA006 Honda Fuel Filter HONDA005 Honda Air Filter


