1
www.blaupunkt.com
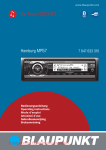
Car Radio CD MP3 WMA
New Jersey MP68
7 648 498 310
Bedienungs- und Einbauanleitung
Operating and installation instructions
Mode d’emploi et de montage
Istruzioni d’uso e di installazione
Gebruiksaanwijzing en inbouwhandleiding
Bruks- och monteringsanvisning
01NJerseyMP68_de.indd 1
28.10.2008 15:16:36 Uhr
Contents
Inserting and removing a CD .................. 80
Selecting the CD as audio source ............ 80
About these instructions ......................... 70
Tuner mode ............................................ 81
Symbols used .......................................... 70
Use as directed ........................................ 70
Set the device to the region Europe, USA,
South America or Thailand ......................... 81
Declaration of conformity .......................... 70
Starting tuner mode.................................. 81
Safety Notes........................................... 71
If you are installing device yourself .............. 71
Observe the following! .............................. 71
Cleaning notes ......................................... 71
Disposal note .......................................... 71
The tuner display ................................... 81
Setting the waveband/memory bank........ 82
Adjusting stations..................................... 82
Station seek tuning ............................... 82
Tuning into stations manually ................. 83
Selecting stored stations ....................... 83
What can the device do? ............................ 73
Storing stations........................................ 83
Storing stations manually....................... 83
Searching and storing stations automatically
(FM only: TRAVEL STORE) ..................... 83
Controls .................................................. 73
Changing the seek tuning sensitivity (SENS) ...84
Theft protection ..................................... 75
Scanning all receivable stations
(BANDSCAN)........................................... 84
Scope of delivery .................................... 72
Device description .................................. 73
Device code............................................. 75
Entering the code ................................. 75
Adjusting the code................................ 75
Device card ............................................. 76
Startup .................................................. 76
Switching the device on/off ....................... 76
Adjusting the volume ................................ 76
Muting the device ..................................... 77
Overview of the menu operation ................. 77
Setting the Menu Language ........................ 78
Resetting the device (NORMSET)................ 78
USB port ................................................. 78
Connecting the USB cable ..................... 78
Connecting the USB medium.................. 79
What characteristics do USB media
have to have? ....................................... 79
Selecting the USB as audio source .......... 79
ENGLISH
Contents
Displaying radio text ................................. 84
Receiving traffic announcements ................ 84
Switching the priority of traffic reports
on/off ................................................. 85
Skipping a traffic announcement ............ 85
Receiving an alternative frequency of a
station .................................................... 85
Allowing/preventing alternative
frequencies (RDS) ................................ 85
Allow/prevent changing to other
regional programmes (REGIONAL) .......... 85
Receiving the programme type ................... 86
Selecting a programme type or
switching off PTY (PTY TYPE)................. 86
Selecting the programme type language
(PTY LANG) ......................................... 86
CD mode (audio)..................................... 87
Starting the audio CD mode ....................... 87
Handling CDs ........................................... 79
What features do MP3 or WMA CDs
have to have? ....................................... 80
67
02_NJerseyMP68_gb.indd 67
29.10.2008 10:59:51 Uhr
Contents
The audio CD display ............................... 87
Adjusting the rear AUX input mode ............ 101
The CD menu ........................................... 87
Connecting other external audio sources
to the rear AUX input ............................... 102
Switching the external audio source
on/off and selecting it ......................... 102
Functions in the CD mode (audio) ............... 88
CD/USB mode (MP3/WMA) ..................... 89
Starting the CD/USB mode ........................ 89
The MP3 display ..................................... 89
Functions in the CD/USB mode (MP3/WMA) ..90
The MP3 menu ......................................... 91
The Browse mode..................................... 91
The browse display ............................... 91
Selecting tracks in Browse mode ............ 91
The Playlist mode ..................................... 92
The Playlist display ............................... 92
Selecting tracks in Playlist mode ............. 92
C'n'C mode............................................. 93
Starting C'n'C mode .................................. 93
The C'n'C display .................................... 93
Naming external audio sources
(AUX EDIT) ............................................ 103
Mixing an external audio source with
another audio source (MIX AUX) ............... 103
Managing several C'n'C-ready devices ....... 104
Bluetooth® phone call ........................... 105
Bluetooth® preparation ........................... 105
How is a Bluetooth® connection
established? .......................................... 105
Opening the Bluetooth® menu .................. 105
Registering the cell phone........................ 106
Determining the master telephone ............ 106
CD changer mode ................................... 96
Managing registered Bluetooth® devices .... 107
Unregister all registered Bluetooth®
devices ............................................. 107
Managing registered Bluetooth® devices
in the device list ................................. 107
Switching to CD changer mode ................... 96
Answering/rejecting a phone call .............. 108
Selecting a CD ......................................... 96
Making a phone call (DIAL NEW) ............... 108
The CD changer display ........................... 96
Ending a call .......................................... 108
Functions in the CD changer mode .............. 97
Redirecting an ongoing phone call to the
cell phone ............................................. 109
Functions in C'n'C mode ............................ 94
The C'n'C menu ........................................ 95
The CD changer menu ............................... 97
Bluetooth® streaming mode..................... 98
Registering Bluetooth® players ................... 98
Automatic connection of the Bluetooth® player ..98
Starting the Bluetooth® streaming mode ...... 99
The Bluetooth® streaming display................ 99
Functions in the Bluetooth® streaming mode ...100
AUX mode ............................................ 101
Storing and calling a phone number in
the phone book of the device ................... 109
Storing phone numbers ....................... 109
Calling a phone number ....................... 109
Editing an entry.................................. 110
Deleting entries.................................. 110
The phone book of the cell phone ............. 110
Downloading a phone book .................. 110
Calling an entry in the phone book ........ 111
FRONT-AUX-IN socket and rear AUX input ... 101
Front AUX-IN socket ............................ 101
Rear AUX input ................................... 101
68
02_NJerseyMP68_gb.indd 68
29.10.2008 10:59:52 Uhr
Changing the Bluetooth® name of
the device (RAD NAME) ........................... 113
Selecting the colour of the display
illumination from the colour scan
(COL SCAN) ...................................... 119
Switching the constant colour change
for the display illumination on/off
(CONTSCAN) ..................................... 120
Sound settings ..................................... 113
Changing the scan time (SCANTIME) ......... 120
Opening the Audio menu ......................... 113
Additional settings ............................... 121
Adjusting bass, treble and volume
distribution ........................................... 113
Configuring the preamplifier output for
the subwoofer (SUBOUT) ...........................121
Selecting a sound presetting (PRESETS) .... 114
Activating/deactivating demo mode .......... 121
Equalizer settings ................................... 114
Which equalizer setting is the correct
one? ................................................. 114
Changing equalizer settings
(EBASS, ETREBLE, EMIDDLE, EXBASS) ..115
Displaying version numbers ..................... 121
Calling a phone number from the history .... 111
Speed dial ............................................. 112
Changing the PIN (PIN NUM) .................... 112
User settings ........................................ 116
Opening the System menu ....................... 116
ENGLISH
Contents
Updating the device software ................... 122
Technical data ...................................... 123
Service ................................................ 124
Warranty.............................................. 124
Changing the welcome text (ON MSG) ....... 116
Glossary .............................................. 124
Changing time settings ............................ 116
Switching time display on/off (OFF CLK) ....116
Selecting 12h/24h time display
(CLK MODE) ...................................... 116
Setting the time (CLK SET) .................. 117
Index ................................................... 126
Factory settings.................................... 129
Installation instructions ....................... 389
Changing volume presettings ................... 117
Adjusting power-on volume
(ON VOL/LAST VOL) ........................... 117
Changing volume presettings for TA,
TEL and MUTE ................................... 117
Activating/deactivating the signal tone
(BEEP ON) ........................................ 118
Setting the speed-dependent volume
increase (AUTO SND) .......................... 118
Changing display settings ........................ 119
Adjusting the display viewing angle
(ANGLE) ........................................... 119
Changing the day/night brightness
(D-DAY/D-NIGHT) ............................... 119
Mixing the color for the display
illumination (DISP COL) ...................... 119
69
02_NJerseyMP68_gb.indd 69
29.10.2008 10:59:52 Uhr
About these instructions
About these instructions
These instructions contain important information to easily and safely install and operate the
device.
• Read these instructions carefully and
completely before using the device.
Use as directed
This device is intended for installation and operation in a vehicle with 12 V vehicle system voltage
and must be installed in a 2-DIN slot. Observe
the 'performance limits in the technical data.
Repairs and installation, if necessary, should be
performed by a specialist.
• Keep the instructions at a location so that
they are always accessible to all users.
• Always pass on the device to third parties
together with these instructions.
In addition, observe the instructions of the devices used in conjunction with this device.
Declaration of conformity
The Blaupunkt GmbH declares that the New
Jersey MP68 device complies with the basic
requirements and the other relevant regulations
of the directive 1999/5/EG.
Symbols used
These instructions employ the following symbols:
DANGER!
Warns about injuries
DANGER!
Warns about accidents
DANGER!
Warns about hearing loss
CAUTION!
Warns about laser beam
CAUTION!
Warns about damaging the CD drive
The CE mark confirms the compliance
with EU directives.
쏅 Identifies a sequencing step
• Identifies a listing
70
02_NJerseyMP68_gb.indd 70
29.10.2008 10:59:52 Uhr
Safety notes
The device was manufactured according to the
state of the art and established safety guidelines.
Even so, dangers may occur if you do not observe
the safety notes in these instructions.
If you are installing device yourself
You may only install the device yourself if you are
experienced in installing car sound systems and
are very familiar with the electrical system of the
vehicle. For this purpose, observe the installation
instructions at the end of these instructions.
Observe the following!
Cleaning notes
Solvents, cleaning and scouring agents as well as
dashboard spray and plastics care product may
contain ingredients that will damage the surface
of the device.
• Use only a dry or slightly moistened cloth for
cleaning the device.
ENGLISH
Safety Notes
Disposal note
Do not dispose of your old unit in the
household trash!
Use the return and collection systems
available to dispose of the old device.
CAUTION!
The device contains a Class 1 laser
that can cause injuries to your eyes.
ü Do not open the device and do not perform
any modifications.
In operation
• For the front AUX-IN socket, use only the
angled jack plug from Blaupunkt
(7 607 001 535). All protruding parts, incl.
straight plugs or adapters, lead to an
increased injury risk in case of an accident.
• Operate the device only if traffic situation
permits it! Stop at a suitable location to
perform extensive settings.
• To protect your hearing, always listen at a
moderate volume.
During mute phases (e.g. when changing
Travelstore, CD changer), changing the
volume is not audible until after the mute
phase. Do not increase the volume during
this mute phase.
• Always listen at a moderate volume so that
you can always hear acoustic warning signals
(e.g. police).
71
02_NJerseyMP68_gb.indd 71
29.10.2008 10:59:52 Uhr
Scope of delivery
Scope of delivery
The scope of delivery includes:
1 New Jersey MP68
1 Operating/installation instructions
1 Support frame
2 Disassembly tools
1 USB connecting cable
1 Microphone for Bluetooth® phone calls
1 Microphone connecting cable
1 Plug housing
1 Set of small parts
72
02_NJerseyMP68_gb.indd 72
29.10.2008 10:59:52 Uhr
Device description
Device description
• C'n'C-ready Blaupunkt interfaces via the rear
What can the device do?
• Either a CD changer or an external audio
source, e.g. MiniDisc or MP3 player, via the
rear AUX socket (REAR AUX-IN socket only if
no C'n'C-ready Blaupunkt interface is
connected)
In addition to the tuner, the device features an
integrated CD player for playing audio CDs and
MP3/WMA CDs. Your device is equipped with
an RDS receiving unit to conveniently listening
to the radio. For example, you can use the RDS
functions TA and EON for the priority of traffic
information stations or PTY for searching for stations with your preferred programme type. The
built-in Bluetooth® module and the microphone
connector allow the hands-free use of a phone
via the car sound system. In addition, the following external audio sources can be connected and
used:
• An additional external audio source via the
FRONT-AUX-IN socket
ENGLISH
AUX socket
• USB medium (player, stick or disk) with MP3
or WMA files
• Navigation device or telephone
(Tel/Navi Line-In)
For further details, please read the installation
instructions.
Controls
2
1
3
4
5
6
7
17
16
15
14
13 12 11
10 9
8
73
02_NJerseyMP68_gb.indd 73
29.10.2008 10:59:52 Uhr
Device description
1
button
Ejecting CD from CD drive
2 CD drive
3 Display
4
button (Reject button)
Rejecting/ending an incoming call
5
button (Answer button)
Making/answering a phone call
6 Front AUX-IN socket
7 USB port
8 SOURCE button
Selecting an audio source
9 MENU button
Calling up a menu
@ Rocker switches and as well as
and
In menus and in radio mode: Selecting
submenus and menu items/functions
In other operating modes (e.g. CD or MP3
mode): Selecting track, CD and directory
A Alphanumeric keys
Radio mode (0 - 9): Selecting stored stations (press short), storing stations (press
for longer than 2 seconds)
Bluetooth® speed dial (0 - 9): Calling stored
phone number (press for longer than
2 seconds)
In menus: Entering, for example, PIN codes,
phone numbers and names
: OK button
In menus: Calling up menu items and
confirming settings (press short)
Scanning tracks/radio stations (SCAN
function; press for longer than 2 seconds)
; DIS•ESC button
Exiting the menu and changing to the
display of the audio source, selecting the
display mode (e.g. MP3 browse mode in
MP3 display)
< AUDIO button
Calling up the audio menu for sound
settings
= TUNER button
Changing to radio mode
Radio mode: Opens menu for selecting the
waveband/memory bank
> Volume control
? On/Off button
Switch-on, muting sound (press short)
Switch-off (press for longer than 2 seconds)
74
02_NJerseyMP68_gb.indd 74
29.10.2008 10:59:53 Uhr
Theft protection
쏅 Enter the code by pressing the corresponding buttons of the A keys.
Device code
쏅 Press the OK button : to confirm the code
entered.
You can protect this device against theft with an
individual, four-digit code number. If the code
query is activated, the code number must be entered after every interruption of the power supply from the vehicle battery. Without this code
number, the device is useless to a thief.
You can activate and deactivate the code query:
If you set the code number to "0000", the code
query is automatically deactivated. As soon as
you enter a different code number than "0000",
the code query is automatically activated (see
the section "Adjusting the code").
The code number is factory set to "0000", so that
the code query is deactivated. It is recommended to set an individual code number and thereby
activate the code query. Your device is then useless to a thief and protected against abuse.
Note:
Record your individual code number and
store it in a safe place. For example, enter
the individual code number in the device
card and store the device card separate from
the device outside of the vehicle!
After entering the correct code, "CODE OK!!"
briefly appears on the display and the device
starts with the last used audio source. After entering an incorrect code, "INCORRECT CODE!!"
PLEASE TRY AGAIN!!" briefly appears on the
display. You can repeat the code entry five more
times.
ENGLISH
Theft protection
After the fourth incorrect entry, the display shows
"2 TRIALS LEFT!! RADIO WILL BE BLOCKED
AFTER THAT! PRESS OK".
쏅 Press the OK button : to reach the code
entry again.
After the fifth incorrect entry, the display shows
"1 TRIAL LEFT!! RADIO WILL BE BLOCKED AFTER
THAT! PRESS OK".
쏅 Press the OK button : to reach the code
entry again.
After the sixth incorrect entry, the display shows
"THE RADIO IS BLOCKED!! PLEASE CONTACT
THE SERVICE CENTER". Contact your Blaupunkt
specialised dealer or the Blaupunkt customer
service.
Entering the code
Adjusting the code
If a different code number than "0000" is set
and the device has been disconnected from the
vehicle's electrical system (e.g. removal of the
battery in case of repairs), the display shows
"PLEASE ENTER CODE" and "_ _ _ _" after switchon, and you can enter the code.
Adjust an individual code number to automatically activate the code query, or set the code
number to "0000" to deactivate the code query.
The code number is factory set to "0000", so that
the code query is deactivated.
Notes:
• You have 6 attempts to enter the correct
code before the device is blocked and can
only be enabled with the master code.
• You can switch off the device again
without having entered the code.
75
02_NJerseyMP68_gb.indd 75
22.01.2009 16:46:44 Uhr
Theft protection | Startup
Note:
Your individual code number is not reset
when restoring the factory settings, but
retained.
쏅 Press the MENU button 9.
쏅 Press the rocker switch
"Syst" system menu.
@ to open the
Startup
This chapter contains information about switching the device on and off, adjusting the volume,
performing menu settings, and resetting the device to the factory settings. It also provides information about connecting a USB medium and correctly inserting a CD in the device.
The "CODE" menu item is selected.
쏅 Press the OK button to call up the menu
item.
쏅 If the code query is activated, enter the
current code number by pressing the
corresponding buttons of the A keys.
쏅 Press the OK button : to confirm the
current code number.
쏅 Enter the new code number by pressing the
corresponding buttons of the A keys.
쏅 Press the OK button : to save the new
code number.
You are returned to the system menu.
Device card
In case of a theft, the device card on the back of
these instructions together with the purchase receipt is your proof of ownership. Enter the serial
number and the code number of the device. The
serial number is located on the side of the device
and poss. also on the original box.
Switching the device on/off
The device is switched on or off with the ignition. The introductory animation starts and can
be cancelled with the OK button :. The device
plays the audio source you previously listened
to.
To manually switch on the device,
쏅 press the On/Off button ?.
To switch off the device,
쏅 press and hold the On/Off button ? for
approx. 2 seconds.
Note:
To protect the vehicle battery if the ignition
is switched off, the device automatically
switches off after one hour.
Adjusting the volume
DANGER!
High volume
Excessive volume can damage your hearing and
you may fail to hear acoustic warning signals!
ü The devices mutes itself while it changes the
CD in the CD changer or the audio source.
During this mute phase, the volume may be
changed, but it is not audible. Do not
increase the volume during a mute phase.
ü Always set the device to a moderate volume.
쏅 Turn the volume control >.
The current volume is shown on the display and
used for all audio sources.
76
02_NJerseyMP68_gb.indd 76
29.10.2008 10:59:53 Uhr
Startup
Note:
You cannot call up the menu if the device is
muted ("MUTE").
Note:
The volume can also be changed during a
traffic announcement/phone call/navigation
announcement using the volume control >
for the duration of the phone call or the announcement.
B
C
ENGLISH
A
Muting the device
쏅 Briefly press the On/Off button ?.
"MUTE" appears on the display.
To cancel the mute function,
쏅 briefly press the On/Off button ? again.
OR:
쏅 Turn the volume control >.
Overview of the menu operation
The different basic settings of the device and
many functions of the different operating modes
are available via menus:
• In the System menu, you perform the basic
settings for the device (e.g. display brightness and colour, power-on volume and
volume for traffic announcements, telephone calls and more, time, scan time and
settings for C'n'C and AUX mode).
• In the Audio menu, you perform sound
settings (e.g. bass, treble, volume distribution, equalizer).
• In the menu of the respective operating
mode (e.g. tuner or CD mode), you can
perform settings for the current operating
mode and select functions.
To open a menu,
쏅 press the MENU button 9.
By default, the menu of the current operating
mode is opened, e.g. the tuner menu, if the device is in tuner mode when you press the MENU
button 9.
D
E
A
B
C
D
Option of the selected menu item
Selected menu item
Menu items of the selected menu
Arrows indicate in which direction you can
scroll in the menu
E Menu selection
To select a different menu,
쏅 press the rocker switch
or
@.
It switches from the menu of the current operating mode to the System or Audio menu. The
Tuner menu is also available in all other operating modes, e.g. to switch the priority for traffic
information on or off.
To select and call up a menu item in the current
menu,
쏅 press the rocker switch
or
@.
쏅 Press the OK button :.
You can exit a menu as follows:
• You confirm a setting with the OK button :
and go back one higher menu level.
Text input (e.g. your personal welcome text)
should always be confirmed with the OK button : to save the text change.
• The DIS•ESC button ; returns you directly
to the display of the active audio source.
77
02_NJerseyMP68_gb.indd 77
29.10.2008 10:59:53 Uhr
Startup
Text inputs are not automatically saved.
Pressing the DIS•ESC button ; cancels the
text input without saving it. All other settings
are saved.
• Every menu contains the "EXIT" menu item.
If you select "EXIT" and press the OK button
:, you return to the higher-level menu.
If no selection or setting is performed in a menu
for approx. 8 seconds, the display automatically
returns to the display of the audio source (in the
Bluetooth® menu, this time is approx. 30 seconds). Your settings – with the exception of text
inputs – are saved.
Setting the Menu Language
You can also set German as the menu language
instead of English. Many important menu entries
and messages, particularly in the Bluetooth®
menu, are then displayed in German.
쏅 Press the MENU button 9.
쏅 Press the rocker switch
"Syst" system menu.
@ to open the
쏅 Press the rocker switch or
the "LANGUAGE" function.
@ to select
쏅 Press the OK button :.
쏅 Press the rocker switch or @ to select
the desired setting "ENGLISH" or
"DEUTSCH".
쏅 Press the OK button : to select a different
function, or press the DIS•ESC button ; to
exit the menu.
Resetting the device (NORMSET)
You can reset the device to the factory settings
(see appendix A1). Your personal settings. e.g.
your welcome text, will be deleted in the process.
쏅 Press the MENU button 9.
쏅 Press the rocker switch
"Syst" system menu.
@ to open the
@ to select
쏅 Press the rocker switch or
the "NORMSET" function.
쏅 Press and hold the OK button : for longer
than 4 seconds.
The display briefly shows "NORM ON". The factory settings are restored. The radio briefly
switches off and automatically on again during
the process.
Note:
If you press and hold the OK button : for
less than 4 seconds, "NORM OFF" is displayed. Your personal settings are retained.
Press the OK button : to select a different
function, or press the DIS•ESC button ; to
exit the menu.
USB port
You can connect the following USB media to the
device and use them as audio source:
• USB stick
• USB hard disk (max. 800 mA)
• MP3 player with USB port
The device can play MP3 or WMA formats (WMA
version 9, without DRM copy protection only).
Note:
Blaupunkt cannot guarantee the proper
functioning of all USB media available on
the market!
Connecting the USB cable
Plug the supplied USB cable into the USB port on
the front side of the device. For further details,
please read the installation instructions.
78
02_NJerseyMP68_gb.indd 78
29.10.2008 10:59:53 Uhr
The USB cable can then be routed, for example,
to the glove compartment or a suitable place of
the center console.
Connecting the USB medium
Note:
Always switch off the device before connecting or disconnecting your USB medium! The
USB medium is correctly registered/unregistered only with switching on/off.
쏅 Switch off the car sound system by holding
the On/Off button ? pressed for longer
than 2 seconds.
쏅 Connect the USB medium with the USB
cable.
What characteristics do USB media have to
have?
The device recognises the USB medium only if it
is a mass storage with the following features:
Under Windows 2000/XP, the FAT32 formatting
creates a maximum partition size of 32 GB. If you
are using a USB medium with more than 32 GB,
it may result in read errors for additional partitions.
If a large number of files is stored on your USB
medium, the speed of the file search may be reduced.
Selecting the USB as audio source
쏅 Press the SOURCE button 8 repeatedly
until "USB" appears on the display.
"READING" briefly appears on the display. The
playback starts.
If USB is selected as audio source, the MP3 display is shown. For further details, please read the
chapter "CD/USB mode (MP3/WMA)".
Handling CDs
The device can play the following CD formats:
• Audio CD with the CompactDisc logo (some
File system
FAT16 or FAT32,
no NTFS!
ID3 tags
Version 1 or 2
Format
Only MP3 or WMA files,
folders, playlists
• CD-R or CD-RW with MP3 or WMA files
Number
Max. 1,500 files (folders
and tracks) per folder
(WMA version 9, without DRM copy
protection only)
Naming of
files
File extension ".wma"/
".mp3"
Max. 24 characters (more
characters are possible,
but they reduce the max.
number of files)
No special characters or
umlauts
Bit rate
MP3: 8 to 320 kbps
WMA: 8 to 192 kbps
ENGLISH
Startup
CDs with copy protection cannot be played)
Note
Blaupunkt cannot guarantee the proper
functioning of copy-protected CDs!
Note:
The quality of self-burnt CDs fluctuates due
to different CD blanks, burner software, and
burn speeds. For this reason, it is possible
that the device cannot play some self-burnt
CDs.
If you cannot play a CD-R/CD-RW:
• Use blanks from a different manufacturer or
a different colour.
• Reduce the burn speed.
79
02_NJerseyMP68_gb.indd 79
29.10.2008 10:59:54 Uhr
Startup
What features do MP3 or WMA CDs have to
have?
The device can only play and display MP3 or
WMA CDs with the following features:
Note:
Label CDs only by using a marker since it
does not contain any caustic materials.
Permanent markers can damage CDs.
쏅 If a CD is in the drive, press the
1.
button
CD format
ISO 9660 (Level 1 or 2) or
Joliet
ID3 tags
Version 1 or 2
쏅 Remove the CD.
Format
Only MP3 or WMA files,
folders, playlists
If you do not remove the CD, it is automatically
pulled in again after a few seconds.
Number
Max. 999 tracks
in 99 folders
Naming of
files
File extension ".wma"/
".mp3"
쏅 Insert the CD with its printed side uppermost into the CD drive 2 until you feel
some resistance.
The CD is ejected.
Max. 16 characters (more
characters are possible,
but they reduce the max.
number of files)
No special characters or
umlauts
Bit rate
MP3: 8 to 320 kbps
WMA: 8 to 192 kbps
Inserting and removing a CD
CAUTION!
Damaging the CD drive
Labelled or shaped CDs can damage the CD
drive.
The CD is automatically drawn in.
"READING" briefly appears on the display. Next,
the following appears:
• The audio CD display if an audio CD is
inserted.
• The MP3 display if an MP3 or WMA CD is
inserted.
The CD starts playing.
Selecting the CD as audio source
You can select an inserted CD as audio source:
쏅 Press the SOURCE button 8 repeatedly
until "CD" (for audio CD) or "MP3" (for MP3
CD) appears on the display.
Note:
The CD mode can be selected only if a readable CD is inserted.
ü Do not insert any mini CDs (8 cm diameter)
or shape CDs damage.
To operate the audio CD display, please read the
chapter "CD mode (audio)".
ü Insert only circular CDs with a 12-cm
diameter.
To operate the MP3 display, please read the
chapter "CD/USB mode (MP3/WMA)".
ü Do not attach labels to CDs since the label
may detach during operation.
80
02_NJerseyMP68_gb.indd 80
29.10.2008 10:59:54 Uhr
Tuner mode
The tuner display
Tuner mode
This device can receive radio stations in the FM
frequency ranges as well as MW and LW.
A
B
C
D
E
The device is set to the frequency ranges and
station technologies of the region in which it was
purchased. You can adjust this setting to the different frequency ranges and station technologies
of Europe, the United States, South America or
Thailand. To do so, the device must be switched
off:
쏅 Simultaneously press the AUDIO < and
button A while switching on the device.
*
The display shows "TUNER AREA" and the current setting as well as a list of available options.
쏅 Press the rocker switch or @ to
switch between the regions EUROPE, USA,
SAMERICA and THAILAND.
쏅 Confirm the setting with the OK button :.
Note:
The tuner functions described in these operating instructions refer to the region Europe
(tuner setting "EUROPE").
ENGLISH
Set the device to the region Europe,
USA, South America or Thailand
F
A Waveband/memory bank
B Memory location of the current station
(if stored)
C Traffic information priority
D Bluetooth® status
E Display area for frequency, time, station
name and radio text
F Menu selection
In tuner mode, you can adjust and store stations
in the current waveband and select stored stations (for further details, please read the section
"Adjusting stations" or "Storing stations manually" in this chapter).
Starting tuner mode
All other functions are available in the following
3 menus in menu mode:
쏅 Press the SOURCE button 8 repeatedly
until "TUNER" appears on the display.
• List: In the List menu, the frequencies/
OR:
stations stored on the station buttons are
displayed in a list and can be selected.
쏅 Press the TUNER button =.
• Tune: The Tune menu provides functions for
The playback starts immediately with the previously played station if the vehicle is within the
reception area of this station.
• Band: The Band menu allows selecting the
scanning stations and automatic station
storage.
waveband or the memory bank.
81
02_NJerseyMP68_gb.indd 81
29.10.2008 10:59:54 Uhr
Tuner mode
In regular tuner mode, "Norm" is displayed on the
left side in the menu selection F.
To change from regular tuner mode to menu
mode and back,
쏅 press the DIS•ESC button ;.
In menu mode, "List" is displayed in the menu selection F instead of "Norm". The "List" menu (list
of stored stations) is selected. The options of the
"List" G menu are displayed
The desired waveband or memory bank is adjusted. After a short period of time, the display automatically returns to the regular tuner mode.
You can now perform the following actions in this
waveband/memory bank:
• Adjusting stations
• Storing stations
Adjusting stations
There are 3 ways of tuning into a station:
• Tuning into stations automatically (station
seek tuning)
• Tuning into stations manually
• Selecting stored stations
F
G
Station seek tuning
쏅 Press the rocker switch
or
@.
F Menu selection
G Options of the current menu
or
If you press and hold the rocker switch
@ automatic seek tuning skips the stations
found until you release the rocker switch again.
You can switch between the menus with the rocker switch or @. The options of the respective G menu are displayed.
The tuner searches for the next receivable station
in the current waveband. The adjusted sensitivity
of the station seek tuning (section "Changing the
seek tuning sensitivity") and the following settings are taken into consideration:
Setting the waveband/memory bank
You can adjust and set radio stations of the FM,
MW and LW wavebands.
The wavebands MW and LW each provide one
memory bank with 10 memory locations each.
The FM waveband features 2 memory banks each
with 10 memory locations each: FM and FMT.
쏅 Press the TUNER button =.
OR:
쏅 To change to the menu mode, press the
DIS•ESC button ;.
쏅 Press the rocker switch
the "Band" menu.
@ twice to open
쏅 Press the rocker switch or @ to select
the desired waveband or memory bank.
• The "PTY TYPE" (programme type) setting in
the "TUNER" menu: The tuner searches for
stations that are broadcasting the defined
programme type.
• The "TRAFFIC" (traffic information) setting
in the "TUNER" menu: With priority for traffic
announcements, the tuner exclusively
adjusts traffic information stations.
Note:
These settings are available only for FM.
An exact description of these settings can
be found in the following sections of this
chapter.
쏅 Press the OK button :.
82
02_NJerseyMP68_gb.indd 82
29.10.2008 10:59:54 Uhr
Tuner mode
Notes:
• Tuning into stations manually is possible
only if the RDS functions and PTY are
deactivated.
• If the RDS function is activated, you can
scroll in the broadcasting networks in
whose reception area you are located.
쏅 Press the rocker switch or @ to change
the frequency quickly (press and hold) or in
100-kHz increments (press short).
Selecting stored stations
쏅 Select the desired waveband or memory
bank.
쏅 Press one of the station buttons 0 - 9 A.
Or in the List menu:
쏅 To change to the menu mode, press the
DIS•ESC button ;.
쏅 Press the rocker switch or @ to select
a frequency or station from the list.
쏅 Press the OK button :.
The stored station is called up, provided that it
can be received at the current vehicle position.
The frequency of the station or the station name
appears on the display.
Storing stations
There are 2 ways of storing a station:
• Storing stations manually
• Searching and storing stations automatically
(Travelstore)
Storing stations manually
After tuning into a station, it can be stored as
follows:
ENGLISH
Tuning into stations manually
쏅 Press one of the station buttons 0 - 9 A for
approx. 2 seconds to which you want to
assign the station.
Or in the List menu:
쏅 To change to the menu mode, press the
DIS•ESC button ;.
쏅 Press the rocker switch or
a memory location in the list.
@ to select
쏅 Press and hold the OK button : for approx.
2 seconds.
The list displays the frequency or the name of the
station at the selected memory location. The station was stored.
Searching and storing stations automatically
(FM only: TRAVEL STORE)
You can automatically search for and store the
ten FM stations offering the strongest reception
in the region in the FMT memory bank, Stations
that were previously stored in the FMT memory
bank are automatically deleted.
쏅 To change to the menu mode, press the
DIS•ESC button ;.
쏅 Press the rocker switch @ to open the
"Tune" (adjusting stations) menu.
쏅 Press the rocker switch
the "T-STORE" function.
or
@ to select
"TRAVEL STORE" appears on the display.
쏅 Press the OK button :.
The tuner starts with the automatic seek tuning.
After the storing is completed, the radio plays the
station at memory location 1 of the FMT level.
83
02_NJerseyMP68_gb.indd 83
29.10.2008 10:59:55 Uhr
Tuner mode
Changing the seek tuning sensitivity
(SENS)
The seek tuning sensitivity determines whether
the automatic station seek tuning locates only
strong stations or also weaker stations. You can
adjust the seek tuning sensitivity separately for
the FM and MW/LW wavebands.
쏅 Select the waveband for which you want to
set the seek tuning sensitivity.
쏅 Press the MENU button 9.
The Tuner menu opens.
쏅 Press the rocker switch
the "SENS" function.
or
@ to select
쏅 Press the OK button :.
쏅 Press the rocker switch or @ to adjust
the sensitivity between "SENS LOW 1"
(lowest sensitivity) and "SENS HIGH 6"
(highest sensitivity.
쏅 Press the OK button : to select a different
function, or press the DIS•ESC button ; to
exit the menu.
Scanning all receivable stations
(BANDSCAN)
You can scan all receivable stations of a waveband. The scan time can be set as described in
the chapter "User settings".
쏅 Select the waveband (FM, MW, LW) whose
receivable stations you want to scan.
쏅 To change to the menu mode, press the
DIS•ESC button ;, if necessary.
쏅 Press the rocker switch @ to open the
"Tune" (adjusting stations) menu.
The "BANDSCAN" function is selected.
쏅 Press the OK button :.
"SCAN" and the current frequency or the station
name appear on the display.
The tuner is searching for stations. As soon as
the tuner has located a station, it is played.
To continue listening to the currently scanned
station,
쏅 Press the OK button :.
After a complete search of the frequency band,
scanning stops. The previously set station is
played.
Displaying radio text
In addition to your programme, stations can
broadcast text news (radio text) that can be
shown on the display.
To switch the display of radio text on/off:
쏅 Press the MENU button 9.
The Tuner menu opens.
쏅 Press the rocker switch
the "R-TEXT" function.
or
@ to select
쏅 Press the OK button :.
쏅 Switch between the settings with the rocker
switch or @.
•
•
"RADIO TEXT"
: Radio text on.
"RADIO TEXT"
: Radio text off.
쏅 Press the OK button : to select a different
function, or press the DIS•ESC button ; to
exit the menu.
Receiving traffic announcements
If you switch on the priority for traffic announcements, the device uses the RDS services TA
(Traffic Announcement) and EON (Enhanced
Other Network). TA switches traffic reports even
if you are currently listening to a different audio
source. The volume for the traffic announcement
can be adjusted (see the chapter "User settings",
section "Changing volume presettings").
If no traffic information station is currently defined, the RDS service EON ensures that the device automatically changes to a traffic information station of the same broadcasting network
for the duration of a traffic announcement.
84
02_NJerseyMP68_gb.indd 84
29.10.2008 10:59:55 Uhr
Switching the priority of traffic reports
on/off
Receiving an alternative frequency
of a station
The priority of traffic reports is switched on if the
symbol appears on the display. This setting
limits the station search and scanning (SCAN) for
traffic information stations.
The device can automatically switch to the best
alternative frequency of the same station if the
reception becomes poor.
To switch the traffic report priority on/off,
Allowing/preventing alternative frequencies
(RDS)
쏅 press the MENU button 9.
To switch RDS on/off,
The Tuner menu opens.
쏅 Press the rocker switch
the "TRAFFIC" function.
or
@ to select
쏅 Press the OK button :.
쏅 Switch between the settings with the rocker
switch or @.
•
•
"TRAFFIC"
: Priority on.
"TRAFFIC"
: Priority off.
쏅 Press the OK button : to select a different
function, or press the DIS•ESC button ; to
exit the menu.
Note:
For the device to switch through traffic
reports, a station must be defined that
supports TA or belongs to a broadcasting
network with traffic information stations.
A signal tone appears every 30 seconds if you
leave the broadcast area of the traffic information station or switch to a station that does not
support the traffic information priority. In this
case, switch off the priority or tune into a traffic
information station. If a different audio source
than the tuner is active, the device automatically
searches for a traffic information station.
Skipping a traffic announcement
To cancel a traffic announcement without switching off the priority of traffic announcements,
쏅 press the DIS•ESC button ;.
The previously active audio source is played
again. If a traffic announcement is broadcast
again, the device automatically switches it
through again.
ENGLISH
Tuner mode
쏅 press the MENU button 9.
The Tuner menu opens, the "RDS" function is
selected.
쏅 Press the OK button :.
쏅 Switch between the settings with the rocker
switch or @.
•
"RDS" : RDS on, allowing alternative
frequencies.
•
"RDS" : RDS off, preventing
alternative frequencies.
쏅 Press the OK button : to select a different
function, or press the DIS•ESC button ; to
exit the menu.
Note:
For the device to switch to an alternative frequency (AF) in case of poor reception, the
station must also support the RDS function
Alternative frequency (AF).
Allow/prevent changing to other regional
programmes (REGIONAL)
Some stations divide their programmes into regional programmes with different contents at
certain times. You can use the REG function to
prevent the device from switching to alternative frequencies that are transmitting different
programme content.
To switch the regional function on/off,
쏅 press the MENU button 9.
The Tuner menu opens.
쏅 Press the rocker switch or
the "REGIONAL" function.
@ to select
85
02_NJerseyMP68_gb.indd 85
29.10.2008 10:59:55 Uhr
Tuner mode
쏅 Press the OK button :.
쏅 Switch between the settings with the rocker
switch or @.
•
"REGIONAL" : Regional function on.
The tuner only changes to alternative
frequencies of the set stations that
broadcast the same regional programme.
•
"REGIONAL" : Regional function off.
The tuner also changes to alternative
frequencies that broadcast another
regional programme.
쏅 Press the OK button : to select a different
function, or press the DIS•ESC button ; to
exit the menu.
Receiving the programme type
You can select a programme type (PTY) to purposefully search for stations, for example, that
broadcast rock music or sport events.
Selecting a programme type or switching off
PTY (PTY TYPE)
쏅 Press the MENU button 9.
The Tuner menu opens.
쏅 Press the rocker switch or
the "PTY TYPE" function.
@ to select
You can locate a station that broadcasts the selected programme type by using the automatic
station seek tuning. For instructions, please read
the section "Station seek tuning" in this chapter.
If no station with the correct programme type is
found, the display briefly shows "NO PTY FOUND"
and the original frequency is adjusted again.
Selecting the programme type language
(PTY LANG)
You can select the language in which the programme types should be displayed. Available are
"DEUTSCH", "ENGLISH" and "FRANÇAIS".
쏅 Press the MENU button 9.
The Tuner menu opens.
쏅 Press the rocker switch or
the "PTY LANG" function.
@ to select
쏅 Press the OK button :.
@ to select
쏅 Press the rocker switch
the desired language.
or
쏅 Press the rocker switch
the selected language.
@ to switch on
쏅 Press the OK button : to select a different
function, or press the DIS•ESC button ; to
exit the menu.
쏅 Press the OK button :.
A list with available programme types and the
setting "NO PTY" (PTY off) are displayed.
쏅 Press the rocker switch or @ to select
the desired programme type or the "NO PTY"
setting.
쏅 Press the OK button : to select a different
function, or press the DIS•ESC button ; to
exit the menu.
86
02_NJerseyMP68_gb.indd 86
29.10.2008 10:59:55 Uhr
CD mode (audio)
The CD menu
Audio CDs are played in the CD mode (audio).
How to insert and remove CDs is described in the
chapter "Startup".
The CD menu provides functions such as MIX and
REPEAT (see the lower table on the next page).
To select a function and its desired option in the
CD menu,
Starting the audio CD mode
쏅 press the MENU button 9.
You can select an inserted CD as audio source:
The CD menu opens.
쏅 Press the SOURCE button 8 repeatedly
until "CD" appears on the display.
쏅 To select the desired function, press the
rocker switch or @.
The playback starts.
쏅 Press the OK button :.
Note:
As long as the CD is in the drive, the device
stores track and playing time of the previously played CD. After calling up the audio
source, the playback starts at the point
where it was interrupted.
ENGLISH
CD mode (audio)
쏅 Press the rocker switch @ to switch on
the selected option, or the rocker switch
@ to switch it off.
쏅 Press the OK button : to select a different
function, or press the DIS•ESC button ; to
exit the menu.
The audio CD display
A
E
B
C
D
A Traffic information priority
B Bluetooth® status
C Display area for track number and CD text
(album, artist, track name if available and
switched on)
D Random playback (MIX) or repeat function
(RPT)
E Playing time or time
87
02_NJerseyMP68_gb.indd 87
29.10.2008 10:59:56 Uhr
CD mode (audio)
Functions in the CD mode (audio)
The functions of the following table can be called
directly on the CD display by touching a button.
Function
Selecting tracks
Action
Press the rocker switch
or @.
Display/description
: Playing the next track
: Repeats the track. Press again: Plays the
previous track
Fast search
Press and hold the rocker
switch or @.
Audibly scanning a track forward or back
Scanning tracks
Press the OK button :
for longer than 2 seconds.
"SCAN": Scans all tracks on the CD (scan time
can be adjusted: chapter "User settings"). Press
again briefly: Switches scan off
Playing time/
time
Press the DIS•ESC button ;.
Change between display of playing time and
time.
The functions of the following table can be called
up in the CD menu. For further details, please
read the preceding section "The CD menu".
Function
Menu item
Random playback
MIX
Repeating tracks
REPEAT
Display CD text
CD-TEXT
Options
"MIX CD"
: Mixing the tracks on the CD.
"MIX CD"
: Regular playback.
"REPEAT TRACK"
: Repeat the current track.
"REPEAT TRACK"
: Regular playback.
: The display shows CD text.
: The display does not show CD text.
Switching scrolling text on/off
SCROLL
: The track information appears as scrolling text.
: The track information does not appear as scrolling text.
88
02_NJerseyMP68_gb.indd 88
29.10.2008 10:59:56 Uhr
CD/USB mode (MP3/WMA)
CD/USB mode
(MP3/WMA)
The MP3 display
A
B
C
D
In CD/USB mode, you can play CD-Rs or CD-RWs
or a USB medium with MP3 or WMA tracks.
ENGLISH
The chapter "Startup" describes what you must
observe when connecting and disconnecting
USB media. It also contains information about
inserting and removing CDs.
Starting the CD/USB mode
You can select an already inserted CD-R or CDRW or a connected USB data carrier as audio
source:
쏅 Press the SOURCE button 8 repeatedly
until "CD" or "MP3" or "USB" appears on the
display.
The playback starts.
Note:
The USB mode can be selected only if a valid
USB medium is connected.
G
A
B
C
D
E
F
E
MP3 source ("CD MP3" or "USB")
Traffic information priority
Bluetooth® status
Current directory
Display area for the file names as well as
artist, album or track1
F Random playback (MIX) or repeat function
(RPT)
G Playing time
You can switch between the following modes
with the DIS•ESC button ;:
• MP3 display
• Browse mode
• Playlist mode (if playlist is available on
USB/CD)
1 Album and artist can be displayed only if they are stored in the ID3 tags of the MP3 track.
89
02_NJerseyMP68_gb.indd 89
29.10.2008 10:59:56 Uhr
CD/USB mode (MP3/WMA)
Functions in the CD/USB mode (MP3/WMA)
The functions of the following table can be called directly on the MP3 display by touching a button.
Function
Action
Response
Selecting folders
Press the rocker switch
or @.
: Selecting the next folder
Selecting tracks
Press the rocker switch
or @.
: Playing the next track
: Selecting the previous folder
: Repeats the track. Press again: Plays the
previous track
Fast search
Press and hold the rocker
switch or @.
Audibly scanning a track forward or back
Scanning tracks
Press the OK button :
for longer than 2 seconds.
"SCAN": Scans all tracks on the CD/USB (scan
time can be adjusted: chapter "User settings").
Press again briefly: Switches scan off
The functions of the following table can be called up in the MP3 menu. For further details, please read
the following section, "The MP3 menu".
Function
Menu item
Random
playback
MIX
Repeating tracks
REPEAT
Options
"MIX FOLDER": Mix tracks of the current folder.
"MIX ALL": Mix all the tracks.
"REPEAT TRACK": Repeat the current track.
"REPEAT FOLDER": Repeat the current folder.
Displaying track
information
DISPLAY
Switching scrolling text on/off
SCROLL
"ARTIST": Display the artist.
"ALBUM": Display the album.
"SONG": Display the track names.
: The track information appears as scrolling text.
: The track information does not appear as scrolling text.
90
02_NJerseyMP68_gb.indd 90
29.10.2008 10:59:56 Uhr
CD/USB mode (MP3/WMA)
A Marked directory or track
The MP3 menu
To select a function and its desired option in the
MP3 menu,
(open or playback with rocker switch
@)
B Directory
C Up and down arrows indicate in which
The MP3 menu opens.
쏅 To select the desired function, press the
rocker switch or @.
쏅 Press the OK button :.
direction you can scroll
ENGLISH
쏅 press the MENU button 9.
D Currently playing track
E Track
쏅 To select the desired option among several
options, press the rocker switch or @.
Selecting tracks in Browse mode
쏅 Press the rocker switch @ to switch on
the selected option, or the rocker switch
@ to switch it off.
쏅 During MP3/WMA playback, press the
DIS•ESC button ; repeatedly until the
Browse mode is displayed.
쏅 Press the OK button : to select a different
function, or press the DIS•ESC button ; to
exit the menu.
It shows all folders and tracks stored on the data
carrier.
To select a track or folder,
쏅 press the rocker switch or @ to scroll
through the tracks and folders.
The Browse mode
In the Browse mode, tracks and directories are
displayed the same way they are stored on the
MP3 data carrier. This allows you to purposefully search for and open a specific directory and
select a track stored in that directory without
having to interrupt the current playback.
Fast scrolling is achieved by pressing the rocker
switches for a longer time.
The browse display
The files are played back in the order in which
they were physically stored on the data carrier.
This order is also displayed in the Browse mode.
A
B
쏅 Press the rocker switch
to a higher-level folder.
@ to change up
쏅 Press the rocker switch @ to open a
folder or to play a track.
Note:
Fast searching is not available in Browse
mode.
E
D
C
91
02_NJerseyMP68_gb.indd 91
29.10.2008 10:59:57 Uhr
CD/USB mode (MP3/WMA)
The Playlist mode
The device can play playlists that were created with an MP3 manager, such as WinAmp or
Microsoft Media Player. The playlists must be
stored in the root folder of the data carrier. The
following playlist formats are valid: M3U, PLS,
WPL, ASX and RMP.
The tracks are played in the order in which they
are stored in the playlist. This order is also displayed in the Playlist mode.
Note:
Fast searching is not available in Playlist
mode.
The Playlist display
A
C
B
A Playlist
B Up and down arrows indicate in which
direction you can scroll
C Marked playlist
@)
(open with rocker switch
Selecting tracks in Playlist mode
쏅 During MP3/WMA playback, press the
DIS•ESC button ; repeatedly until Playlist
mode is displayed.
It shows all playlists stored in the root folder of
the data carrier.
To select a track from a playlist,
쏅 press the rocker switch
through the playlists.
or
@ to scroll
Fast scrolling is achieved by pressing the rocker
switches for a longer time.
쏅 Press the rocker switch
playlist.
@ to open a
쏅 Press the rocker switch or @ to scroll
through the tracks of the playlist.
쏅 Press the rocker switch
@ to play a track.
92
02_NJerseyMP68_gb.indd 92
29.10.2008 10:59:57 Uhr
C'n'C mode
C'n'C mode
The C'n'C display
A
In C'n'C mode (C'n'C = Command and Control),
you access devices that are connected via a
C'n'C-ready interface.
B
C
D
ENGLISH
Note:
For details about connecting a C'n'C-ready
interface and the required settings, please
read the chapter "AUX mode".
Starting C'n'C mode
쏅 Press the SOURCE button 8 repeatedly
until the name of the device connected via
C'n'C appears on the display.
The playback starts.
Note:
The C'n'C mode can be selected only if a
suitable device is connected via a C'n'Cready interface.
H
A
B
C
D
E
F
G
F
E
Name of audio source
Traffic information priority
Bluetooth® status
Name of current directory
Directory and track number
Display area for the track names as well as
artist and album
G Random playback (MIX) or repeat function
(RPT)
H Playing time
You can switch between the following modes
with the DIS•ESC button ;:
• C'n'C display
• C'n'C display with time
• Browse mode
Note
In the C'n'C mode, you can select tracks and
directories as well as playlists in Browse
mode. Playlist can be selected as directories
in Browse mode and opened. For further
details, please read the section "The Browse
mode" in the chapter "CD/USB mode (MP3/
WMA)".
93
02_NJerseyMP68_gb.indd 93
29.10.2008 10:59:57 Uhr
C'n'C mode
Functions in C'n'C mode
The functions of the following table can be called directly on the C'n'C display by touching a button.
Function
Action
Response
Selecting folders
Press the rocker switch
or @.
: Selecting the next folder
Selecting tracks
Press the rocker switch
or @.
: Playing the next track
: Selecting the previous folder
: Repeats the track. Press again: Plays the
previous track
Fast search
Press and hold the rocker
switch or @.
Audibly scanning a track forward or back
Scanning tracks
Press the OK button :
for longer than 2 seconds.
"SCAN": Scans all tracks on the device (scan
time can be adjusted: chapter "User settings").
Press again briefly: Switches scan off
The functions of the following table can be called up in the C'n'C menu. For further details, please read
the following section, "The C'n'C menu".
Function
Random playback
Menu item
MIX
Options
"MIX FOLDER": Mix tracks of the current folder.
"MIX ALL": Mix all the tracks.
"MIX MAG"1: Mix the tracks of all CDs in the CD changer.
"MIX SONG"2: Mix all the tracks with the same track name.
"MIX ALBUM"2: Mixx all the tracks with the same album name.
Repeating tracks
REPEAT
"REPEAT TRACK": Repeat the current track.
"REPEAT FOLDER": Repeat the current folder.
"REPEAT DISC"1: Repeat the current CD.
Displaying track
information
DISPLAY
Switching scrolling text on/off
SCROLL
"ARTIST": Display the artist.
"ALBUM": Display the album.
"SONG": Display the track names.
: The track information appears as scrolling text.
: The track information does not appear as scrolling text.
1 Option is only available if CD changer is connected via C'n'C interface.
2 Option is only available if iPod® is connected via C'n'C interface.
94
02_NJerseyMP68_gb.indd 94
29.10.2008 10:59:57 Uhr
C'n'C mode
The C'n'C menu
To select a function and its desired option in the
C'n'C menu,
쏅 press the MENU button 9.
ENGLISH
The C'n'C menu opens.
쏅 To select the desired function, press the
rocker switch or @.
쏅 Press the OK button :.
쏅 To select the desired option among several
options, press the rocker switch or @.
쏅 Press the rocker switch @ to switch on
the selected option, or the rocker switch
@ to switch it off.
쏅 Press the OK button : to select a different
function, or press the DIS•ESC button ; to
exit the menu.
95
02_NJerseyMP68_gb.indd 95
29.10.2008 10:59:58 Uhr
CD changer mode
The CD changer display
CD changer mode
A
You can connect the following CD changers to the
device.
B
C
• Blaupunkt CDC A03
• Blaupunkt CDC A08
• Blaupunkt IDC A09
How to insert CDs in the CD changer magazine is
described in the instructions of your CD changer.
Note:
For details about connecting a CD changer
and the required settings, please read the
chapter "AUX mode".
Switching to CD changer mode
Note:
To be able to select the CD changer as
audio source, at least one CD must be in the
magazine.
F
A
B
C
D
E
E
D
Traffic information priority
Bluetooth® status
Track number
CD number
Random playback (MIX) or repeat function
(RPT)
F Playing time or time
To select a connected CD changer as audio
source,
쏅 press the SOURCE button 1 repeatedly
until "CDC" appears on the display.
If you select a CD changer as audio source for the
first time, "MAG SCAN" appears on the display
until the CD changer is operational.
The CD changer display appears. The playback
starts.
Selecting a CD
쏅 To select a CD, press the rocker switch
@.
or
"LOADING CD" briefly appears on the display.
The selected CD starts playing.
96
02_NJerseyMP68_gb.indd 96
29.10.2008 10:59:58 Uhr
CD changer mode
Functions in the CD changer mode
Action
Press the rocker switch
or @.
Display/response
: Playing the next track
: Repeats the track. Press again: Plays the
previous track
ENGLISH
Function
Selecting tracks
Fast search
Press and hold the rocker
switch or @.
Audibly scanning a track forward or back
Scanning tracks
Press the OK button :
for longer than 2 seconds.
"SCAN": Scans all tracks of all CDs (scan time
can be adjusted: chapter "User settings"). Press
again briefly: Switches scan off
Playing time/
time
Press the DIS•ESC button ;.
Change between display of playing time and
time.
The functions of the following table can be called up in the CD changer menu. For further details,
please read the following section "The CD changer menu".
Function
Menu item
Random playback
MIX
Repeating tracks
REPEAT
Options
"MIX CD": Mix the tracks on the current CD.
"MIX ALL": Mix all the tracks.
"REPEAT TRACK": Repeat the current track.
"REPEAT DISC": Repeat the current CD.
The CD changer menu
To select a function and its desired option in the
CD changer menu,
쏅 press the MENU button 9.
The CD changer menu opens.
쏅 To select the desired function, press the
rocker switch or @.
쏅 Press the rocker switch @ to switch on
the selected option, or the rocker switch
@ to switch it off.
쏅 Press the OK button : to select a different
function, or press the DIS•ESC button ; to
exit the menu.
쏅 Press the OK button :.
쏅 To select the desired option, press the
rocker switch or @.
97
02_NJerseyMP68_gb.indd 97
29.10.2008 10:59:58 Uhr
Bluetooth® streaming mode
Bluetooth® streaming mode
Devices such as MP3 players can also be connected to the device via Bluetooth® if they feature the corresponding equipment. The transfer
of audio contents, such as music, via Bluetooth®
is referred to as Bluetooth® streaming.
For additional information about Bluetooth® technology, please refer to the chapter "Bluetooth®
phone call".
Registering Bluetooth® players
The device can be registered with up to
5 Bluetooth®-ready cell phones or other devices
such as MP3 players. If you register a sixth one,
the Bluetooth® device registered first is unregistered.
For additional information about managing more
registered Bluetooth® devices, see the chapter
"Bluetooth® phone call", section "Managing registered Bluetooth® devices".
After entering one digit, the device automatically
switches to the next one. To correct any entry errors, select the corresponding digit by pressing
the rocker switch or @ again.
After entering the complete PIN number,
쏅 press the OK button :.
The display briefly shows "START PAIRING".
Note:
Entering the PIN of the device (default
"1234") may be required in the Bluetooth®
player to be registered. To do so, follow the
instructions of the Bluetooth® player.
If the connection is established, "DEVICE
CONNECTED" briefly appears on the display.
If no connection could be established, then
"CONNECTION FAILED" is briefly displayed.
Note:
The time required for the connection is dependent upon the Bluetooth® player and can
differ from device to device.
To register a Bluetooth® player,
쏅 press the MENU button 9.
쏅 Press the rocker switch
"Syst" system menu.
@ to open the
쏅 Press the rocker switch or
"BT" menu item is selected.
@ until the
쏅 Press the OK button : to call up the menu
item.
The "PAIR" menu item is selected.
쏅 Press the OK button : to call up the menu
item.
쏅 Press the rocker switch or @ until the
"OTHER" menu item is selected.
쏅 Press the OK button :.
Automatic connection of the
Bluetooth® player
During switch-on, the car sound system automatically attempts to establish a Bluetooth® connection to the Bluetooth® player connected last or to
the first device in the list of registered devices.
If the connection has been established, "DEVICE
CONNECTED" is briefly shown on the display,
and you can select the connected Bluetooth®
player as audio source. If the car sound system
was in Bluetooth® streaming mode during switchoff, the connected Bluetooth® player is automatically selected as current audio source after the
connection is established.
If necessary – the display shows "ENTER PIN" –
you can enter the PIN number of the Bluetooth®
player:
쏅 Enter the number sequence by pressing the
corresponding buttons of the A keys.
98
02_NJerseyMP68_gb.indd 98
29.10.2008 10:59:58 Uhr
Bluetooth® streaming mode
• CONNECTION FAILED – DEVICE NOT
FOUND: The car sound system cannot find
the Bluetooth® player, e.g. because the
Bluetooth® player is switched off or its
Bluetooth® function is deactivated.
Starting the Bluetooth® streaming
mode
쏅 Press the SOURCE button 8 repeatedly
until "STREAMING" appears on the display.
The playback starts.
Notes:
• The Bluetooth® streaming mode can be
selected only if a suitable Bluetooth®
device is connected.
• CONNECTION FAILED: The car sound
system finds the Bluetooth® player, but the
connection cannot be established due to a
Bluetooth® error.
In these two cases, the car sound system
continues to attempt the connection in
the background. If you attempt to call up
a Bluetooth® function on the car sound
system, "BLUETOOTH LINK BUSY – PRESS
REJECT KEY TO CANCEL" is displayed. If
you want to cancel the connection attempt,
press the
button 4. If necessary,
attempt to manually establish the connection to the Bluetooth® player in the device
list (see the section "Managing registered
Bluetooth® devices in the device list" in the
chapter "Bluetooth® phone call").
ENGLISH
If the connection cannot be established, the display shows a corresponding message:
• If the phone book of a connected cell
phone is being transferred in the
Bluetooth® streaming mode, the audio
transfer is interrupted for the duration of
the phone book download.
The Bluetooth® streaming display
A
C
B
• CONNECTION FAILED – PLAY FROM THE
DEVICE VIA BLUETOOTH: The car sound
system can establish a Bluetooth® connection to the Bluetooth® player, but the
Bluetooth® player can transfer audio data, e.
g. since you currently have a menu open on
the Bluetooth® player.
If the transfer of audio data fails, you can select on the Bluetooth® player (or the streaming-ready cell phone) whether you want to
allow or disallow the audio streaming to the
car sound system. If necessary, please read
the instructions of your Bluetooth® player for
further details.
D
A
B
C
D
Traffic information priority
Bluetooth® status
Track information
Time
99
02_NJerseyMP68_gb.indd 99
29.10.2008 10:59:59 Uhr
Bluetooth® streaming mode
Functions in the Bluetooth®
streaming mode
Function
Selecting tracks
Action
Press the rocker switch
or @.
Display/response
: Playing the next track
: Repeats the track. Press again: Plays the
previous track
100
02_NJerseyMP68_gb.indd 100
29.10.2008 10:59:59 Uhr
AUX mode
FRONT-AUX-IN socket and rear AUX
input
Front AUX-IN socket
DANGER!
Increased risk of injury from
connector.
In case of an accident, the protruding connector
in the front AUX-IN socket may cause injuries.
The use of straight plugs or adapters leads to an
increased risk of injury.
• Other external audio sources, such as
portable CD players, MiniDisc players, MP3
players or a non-C'n'C-ready Blaupunkt
interface.
The C'n'C interface from Blaupunkt (C'n'C =
Command and Control) allows an even more
convenient control of devices and data carriers
that are connected to the car sound system via a
C'n'C-ready Blaupunkt interface.
This device is factory set for the connection of
C'n'C-ready Blaupunkt accessory devices. If
you want to connect a non-C'n'C-ready device,
such as a CD changer or another external audio
source, please perform the settings described in
the following sections.
For this reason, we recommend using angled
jack plugs, e.g. the Blaupunkt accessories cable
(7 607 001 535).
Adjusting the rear AUX input mode
As soon as an external audio source, such as a
portable CD/MiniDisc or MP3 player is connected to the FRONT-AUX-IN socket, it can be selected with the SOURCE button 8. "FRONT AUX"
then appears on the display.
• C'n'C mode for C'n'C-ready Blaupunkt
Note:
You can individually name the audio source
connected via the FRONT-AUX-IN socket
and mix it with another audio source. For
further details, please read the sections
"Naming external audio sources (AUX EDIT)"
and "Mixing an external audio source with
another audio source (MIX AUX)" in this
chapter.
Rear AUX input
You can connect different external audio sources
to the device via the rear AUX input:
• C'n'C-ready devices from the Blaupunkt
accessories programme (e.g. an iPod®/USB
interface).
• CD changer
ENGLISH
AUX mode
You can select between these modes for the rear
AUX input:
interfaces.
• Non-C'n'C mode for non-C'n'C-ready
Blaupunkt interfaces, CD changers and
other external audio sources.
The C'n'C mode is activated by default.
To switch between C'n'C mode and non-C'n'C
mode,
쏅 press the MENU button 9.
쏅 Press the rocker switch
"Syst" system menu.
@ to open the
쏅 Press the rocker switch or
"CDC" menu item is selected.
@ until the
쏅 Press the OK button : to call up the menu
item.
쏅 Switch between the settings with the rocker
switch or @.
•
•
"CDC ON"
: Non-C'n'C mode.
"CDC ON"
: C'n'C mode.
As soon as you change the setting, the device
briefly switches off and back on again with the
selected setting (Reset).
101
02_NJerseyMP68_gb.indd 101
29.10.2008 10:59:59 Uhr
AUX mode
Connecting other external audio
sources to the rear AUX input
Switching the external audio source on/off
and selecting it
If no C'n'C Blaupunkt accessory device and no
CD changer is connected to the device, you can
connect other external audio sources via the rear
AUX input, such as portable CD players, MiniDisc
players or MP3 players.
If you connected an external audio source to the
rear AUX input, you must activate the AUX input
in the menu. Then you can select the external
audio source with the SOURCE button 8.
"AUX" then appears on the display.
Note:
An adapter cable is needed to connect
an external audio source via the rear AUX
input. You can obtain this cable (Blaupunkt
no.: 7 607 897 093) from your Blaupunkt
dealer.
If you want to connect such an external audio
source, proceed as follows:
1. Check whether the non-C'n'C mode is set for
the rear AUX input. For further details,
please read the section "Adjusting the rear
AUX input mode" in this chapter.
2. Connect the external audio source to the
rear AUX input while the device is switched
off.
쏅 Press the MENU button 9.
쏅 Press the rocker switch
"Syst" system menu.
@ to open the
쏅 Press the rocker switch or
"AUX" menu item is selected.
@ until the
쏅 Press the OK button : to call up the menu
item.
쏅 Switch between the settings with the rocker
switch or @.
•
•
"REAR AUX"
: AUX input on.
"REAR AUX"
: AUX input off.
쏅 Press the OK button : to select a different
function, or press the DIS•ESC button ; to
exit the menu.
3. In the menu of the device, switch on the
external audio source. For further details,
please read the following section, "Switching
the external audio source on/off and
selecting it".
4. If necessary, make additional settings for the
external audio source. For further details,
please read the sections "Naming external
audio sources (AUX EDIT)" and "Mixing an
external audio source with another audio
source (MIX AUX)" in this chapter.
102
02_NJerseyMP68_gb.indd 102
29.10.2008 10:59:59 Uhr
AUX mode
For the two rear AUX inputs, you can enter a
separate name that is shown on the display if
you select the connected audio source.
쏅 Press the MENU button 9.
쏅 Press the rocker switch
"Syst" system menu.
@ to open the
쏅 Press the rocker switch or @ until the
"AUXEDIT" menu item is selected.
쏅 Press the OK button : to call up the menu
item.
The current name is displayed. The position digit
flashes and can be changed. You can now enter
your own name with up to 12 characters:
쏅 Enter the name by pressing the corresponding buttons of the A keys. Select the
desired letter, if necessary by pressing a
button several times.
After entering one letter, the device automatically switches to the next one. To correct any entry
errors, select the corresponding digit by pressing the rocker switch or @ again.
After entering the complete name,
쏅 press the OK button : to store the name
entered.
Notes:
• To quit the text input without changing
the name, press the DIS•ESC button ;.
• If the text entry is interrupted, e.g. by a
traffic announcement, the previous
changes are not stored.
Mixing an external audio source
with another audio source
(MIX AUX)
You can play an external audio source simultaneously with any other audio source of the radio
(radio, CD, USB or Bluetooth® streaming).
This function allows you, e.g. to connect a mobile
Blaupunkt navigation device as external audio
source and to play the navigation announcements via the radio loudspeakers while listening
to one of the other audio sources. Note that the
other audio source is not muted in this case if a
navigation announcement is broadcast.
ENGLISH
Naming external audio sources
(AUX EDIT)
Note:
The volume of the external audio source and
the volume of the audio source of the radio
are adjusted separately:
• Adjust the volume for the radio, CD, USB
or Bluetooth® streaming playback with
the volume control >.
• Use an output on the connected device
whose volume you can adjust (e.g. the
headphones output), and adjust the
volume of the external audio source with
the corresponding controller of the
device.
The simultaneous playback must be activated
in the menu. If "MIX AUX" is activated for the
FRONT-AUX-IN socket or for the rear AUX input,
the corresponding audio source is played back
together with the currently selected audio source
(e.g. radio or CD). If "MIX AUX" is deactivated for
both AUX inputs, only the selected audio source
is played back.
To switch "MIX AUX" on/off,
쏅 press the MENU button 9.
쏅 Press the rocker switch
"Syst" system menu.
@ to open the
쏅 Press the rocker switch or @ until the
"MIX AUX" menu item is selected.
103
02_NJerseyMP68_gb.indd 103
29.10.2008 10:59:59 Uhr
AUX mode
쏅 Press the OK button : to call up the menu
item.
쏅 Selected the desired option with the rocker
switch or @:
• "FRONT AUX" (FRONT-AUX-IN socket)
• "REAR AUX" (rear AUX input)
쏅 Switch between the settings for the selected
option with the rocker switch or @
•
•
"FRONT AUX"/"REAR AUX"
: On.
"FRONT AUX"/"REAR AUX"
: Off.
쏅 Press the OK button : to select a different
function, or press the DIS•ESC button ; to
exit the menu.
Note:
The PIN of a C'n'C device consists of 4
hexadecimal digits. Every digit can take on
16 different values from 0 to 9 and A to F. To
enter the values from A to F for a digit, press
the "2" or "3" button of the keys as often as
required.
After entering one digit, the device automatically
switches to the next one. To correct any entry errors, select the corresponding digit by pressing
the rocker switch or @ again.
After entering the complete PIN number,
쏅 press the OK button :.
Managing several C'n'C-ready
devices
When using suitable adapter cables, you can connect up to 3 C'n'C-ready Blaupunkt interfaces to
the device. For the device to distinguish the different interfaces, you can assign them individual
device numbers.
쏅 Press the MENU button 9.
쏅 Press the rocker switch
"Syst" system menu.
@ to open the
쏅 Press the rocker switch or @ until the
"CNC EDIT" menu item is selected.
쏅 Press the OK button : to call up the menu
item.
The menu displays the 3 C'n'C devices "DEVICE 1"
to "DEVICE 3".
쏅 Select a device with the rocker switch
@.
or
쏅 Press the OK button :.
You can now enter the four-digit PIN number of
the device:
쏅 Enter the number sequence by pressing the
corresponding buttons of the A keys.
104
02_NJerseyMP68_gb.indd 104
29.10.2008 11:00:00 Uhr
Besides cell phones, you can also connect
Bluetooth®-ready MP3 players with the device
and play back audio contents via Bluetooth®
streaming. For further details, please read the
chapter "Bluetooth® streaming mode".
If you want to connect another registered cell
phone with the car sound system, you can do so
manually (please read the section "Managing registered Bluetooth® devices" in this chapter). If the
device is switched off and on again, it automatically attempts to establish a connection with the
master telephone (see the section "Determining
the master telephone"). If the master telephone
is not within range or switched off, the device attempts to establish a connection with another
registered cell phone, and in the order in which
the telephones were connected last.
Bluetooth® preparation
Opening the Bluetooth® menu
Prerequisites for Bluetooth® phone calls are a
Bluetooth®-ready cell phone and the installation
of the supplied microphone (see the installation
instructions).
The Bluetooth® menu contains all the required
settings and functions.
Bluetooth® phone call
The integrated Bluetooth® module in your device allows the hands-free use of a phone via a
Bluetooth® connection. The cell phone can remain in the bag or the glove compartment – you
have both hands free for steering.
Note:
Use only the supplied Blaupunkt microphone. Conventional microphones are not
suitable for a connection to this device.
The cell phones that are compatible with the
car sound system can be found under www.
blaupunkt.com or at your Blaupunkt specialised
dealer.
The Bluetooth® technology is a wireless connection with a short range. That is, the cell phone
must be close to the car sound system (in the
vehicle).
How is a Bluetooth® connection
established?
First, the cell phone and the car sound system
have to "become acquainted" with each other,
i.e. they must be registered. When you register
the devices, a Bluetooth® connection is subsequently established. This connection remains in
effect as long as the cell phone is within range. If
the connection is interrupted, e.g. because you
moved the cell phone outside the range, the connection is automatically re-established as soon
as you are back within range.
ENGLISH
Bluetooth® phone call
To open the Bluetooth® menu,
쏅 press the MENU button 9.
쏅 Press the rocker switch
"Syst" system menu.
@ to open the
쏅 Press the rocker switch or
"BT" menu item is selected.
@ until the
쏅 Press the OK button : to call up the menu
item.
The Bluetooth® menu opens.
Note:
If a Bluetooth® process is currently taking
place (e.g. registering a device or downloading a phone book), you cannot open the
Bluetooth® menu. A corresponding message
appears on the display. To return to the
current audio source, press the DIS•ESC
button ;. To cancel the Bluetooth® process
and open the Bluetooth® menu, press the
button 4.
105
02_NJerseyMP68_gb.indd 105
29.10.2008 11:00:00 Uhr
Bluetooth® phone call
Registering the cell phone
Determining the master telephone
The device can be registered with up to
5 Bluetooth®-ready cell phones or other devices
such as MP3 players. If you register a sixth one,
the Bluetooth® device registered first is unregistered.
If you register several telephones with the device, you can determine a master telephone.
The master telephone has a higher priority than
the other registered telephones:
To register a cell phone,
쏅 open the Bluetooth® menu.
The "PAIR" menu item is selected.
쏅 Press the OK button : to call up the menu
item.
The Device menu opens. The "PHONE" menu
item is selected.
쏅 Press the OK button :.
The display shows the PIN number for the
Bluetooth® connection. The Bluetooth® cell
phone can now be registered.
쏅 If requested, enter the PIN displayed in your
cell phone.
The car sound system automatically establishes
a Bluetooth® connection with the cell phone. If
the connection has been established, "DEVICE
CONNECTED" is briefly shown on the display,
and the symbol for the Bluetooth® signal strength
appears. If no connection could be established,
then "CONNECTION FAILED" is briefly displayed.
Notes:
• The time required for the connection is
dependent upon the cell phone and can
differ from cell phone to cell phone.
• If the car sound system is switched off
and on again, it automatically attempts to
establish a connection with the master
telephone (see the next section) or the
cell phone that was connected last. If the
cell phone is not available, the display
briefly shows "NO DEVICE FOUND –
BLUETOOTH CONNECTION FAILED".
• If the device is switched on, it first attempts
to establish a connection with the master
telephone. Only if the master telephone is
not available, does the device attempt to
establish a connection with the telephone
registered last.
• If you register a sixth Bluetooth® device, the
one registered first is unregistered. During
the process, the master telephone always
remains registered, even if it is the first
registered Bluetooth® device in the list.
Instead, the next Bluetooth® device in the list
is unregistered.
쏅 Open the Bluetooth® menu.
쏅 Press the rocker switch or @ until the
"MASTER" menu item is selected.
쏅 Press the OK button : to call up the menu
item.
A list of the registered cell phones is displayed.
쏅 Press the rocker switch
a telephone.
or
@ to select
쏅 Press the OK button :.
The selected telephone is defined as master
telephone and identified by an "M".
To delete the master telephone,
쏅 select the master telephone in the list with
the rocker switch or @.
쏅 Press the OK button :.
The "DELETE" option is selected in the submenu.
쏅 Press the OK button :.
106
02_NJerseyMP68_gb.indd 106
29.10.2008 11:00:00 Uhr
Bluetooth® phone call
쏅 Press the rocker switch
the Bluetooth® menu.
@ to return to
Managing registered Bluetooth®
devices
In the Bluetooth® menu, you can manage the registered Bluetooth® devices (cell phones and devices such as MP3 player).
The "DEL ALL" function allows deleting all registered Bluetooth® devices.
The registered devices are displayed on the "DEV
LIST" device list. You can do the following:
• Unregister the connection to the currently
connected Bluetooth® device (DISCON)
• Establish a connection to one of the
registered Bluetooth® devices (CONNECT)
• Unregister a Bluetooth® device (DELETE)
Unregister all registered Bluetooth® devices
쏅 Open the Bluetooth® menu.
Managing registered Bluetooth® devices in
the device list
To mange the registered Bluetooth® devices in
the device list,
쏅 open the Bluetooth® menu.
쏅 Press the rocker switch or @ until the
"DEV LIST" menu item is selected.
쏅 Press the OK button : to call up the menu
item.
쏅 Use the rocker switch or @ to select
whether cell phones (PHONE) or devices
such as MP3 players (OTHER) should be
managed.
쏅 Press the OK button :.
쏅 Select the desired Bluetooth® device with
the rocker switch or @.
쏅 Press the OK button :.
쏅 Select one of the following functions with
the rocker switch or @:
• "CONNECT": The selected Bluetooth®
device is being connected.
• "DISCON": The connection to the selected
Bluetooth® device is disconnected.
쏅 Press the rocker switch or @ until the
"DEL ALL" menu item is selected.
• "DELETE": The selected Bluetooth®
쏅 Press the OK button : to call up the menu
item.
Note:
The "DISCON" function is available only to
the currently connected Bluetooth® device,
the "CONNECT" function only for the other
registered, but not connected Bluetooth®
devices.
The "YES" menu item is selected.
쏅 Press the OK button : to unregister all
registered Bluetooth® devices and return to
the Bluetooth® menu.
ENGLISH
Note:
After the deletion, no telephone is defined
as master telephone. However, the former
master telephone remains registered.
device is being unregistered.
OR:
쏅 Use the rocker switch or @ to select
the menu item "NO" or "EXIT".
쏅 Press the OK button : to retain all
registered Bluetooth® devices and return to
the Bluetooth® menu.
107
02_NJerseyMP68_gb.indd 107
29.10.2008 11:00:00 Uhr
Bluetooth® phone call
Answering/rejecting a phone call
• Selecting a phone number from the history
If you are receiving a call, the display shows
"INCOMING CALL" and the phone number of the
caller or his entry in the phone book. The active
audio source is muted and the ring tone is sent to
the loudspeakers.
To enter a phone number and make a call or to
save it,
In case of an incoming call, you must answer or
reject the call. At this time, it is not possible to
perform another operation using the car sound
system.
To reject the call,
쏅 press the
button 4.
The display shows "CALL ENDED".
To answer the call,
쏅 press the
button 5.
The display shows "IN CALL–HANDSFREE".
Your caller's voice is broadcast via the loudspeakers.
During the phone call, you can change the volume by means of the volume control >.
Note:
During the Bluetooth® phone call, no traffic
or navigation announcements are switched
through.
Making a phone call (DIAL NEW)
There are several ways of making a phone call via
the car sound system:
• Entering a phone number and dialing or
storing it under a button of the keys
• Dialing a number stored under a button of
the keys (section "Speed dial")
• Selecting a phone number stored in the
phone book of the device (see the section
"Storing and calling a phone number in the
phone book of the device")
• Selecting a phone number stored in the
phone book of the connected cell phone
(see the section "The phone book of the cell
phone")
(see the section "Calling a phone number
from the history")
쏅 open the Bluetooth® menu.
쏅 Press the rocker switch or @ until the
"DIAL NEW" menu item is selected.
쏅 Press the OK button : to call up the menu
item.
Now you can enter a phone number:
쏅 Enter the number sequence by pressing the
corresponding buttons of the A keys.
After entering one digit, the device automatically
switches to the next one. To correct any entry errors, select the corresponding digit by pressing
the rocker switch or @ again.
To call the number entered,
쏅 press the
button 5.
The display shows "CALLING" and the dialed
phone number or its entry in the phone book. If
the number is invalid or the call cannot be made
for some other reasons, the display briefly shows
"CALL FAILED".
To store the phone number entered under a button of the keys A,
쏅 Press the OK button :.
The display shows "Press Number Key to Store
OR Press Accept to Call".
쏅 Press the desired key 0 - 9 of the keys A.
The display briefly shows "Number Saved". The
number is stored under the selected button and
you are returned to the number entry.
Ending a call
To end a call,
쏅 press the
button 4.
The display shows "CALL ENDED".
You can also end the phone call by switching off
the device.
108
02_NJerseyMP68_gb.indd 108
29.10.2008 11:00:01 Uhr
Bluetooth® phone call
By default, the voice of the person calling you
is played back via the loudspeakers of the vehicle during a phone call. You can also redirect a
phone call to your cell phone:
쏅 Briefly press the
button 5.
The loudspeakers in the vehicle are muted and
your calling partner is switched to your cell
phone; the display shows "IN CALL–HANDSET".
Pressing the
button again plays the sound
via the loudspeakers in the vehicle; the display
shows "IN CALL–HANDSFREE" again.
OR
쏅 Press the On/Off button ? for longer than
2 seconds.
The car sound system is switched off and your
caller is redirected to your cell phone.
Storing and calling a phone number
in the phone book of the device
The device features its own phone book in which
you can store 10 entries. Every entry consists
of a name and a phone number. The numbers
stored in the phone book of the device are available independent of the currently connected cell
phone.
You can now enter your the name of the entry
with up to 20 characters:
쏅 Enter the name by pressing the corresponding buttons of the A keys. Select the
desired letter, if necessary by pressing a
button several times.
After entering one letter, the device automatically switches to the next one. To correct any entry
errors, select the corresponding digit by pressing the rocker switch or @ again.
After entering the complete name,
쏅 press the OK button :.
Now you can enter the phone number:
쏅 Enter the number sequence by pressing the
corresponding buttons of the A keys.
After entering the complete phone number,
쏅 press the OK button :.
The new entry is stored.
Calling a phone number
To call a number stored in the phone book of the
device,
쏅 open the Bluetooth® menu.
쏅 Press the rocker switch or @ until the
" RADIO" menu item (phone book of the
device) is selected.
Storing phone numbers
쏅 Press the OK button : to call up the menu
item.
To store an entry in the phone book of the device,
쏅 Press the rocker switch or @ until the
"VIEW PBK" menu item is selected.
쏅 open the Bluetooth® menu.
쏅 Press the rocker switch or @ until the
" RADIO" menu item (phone book of the
device) is selected.
쏅 Press the OK button : to call up the menu
item.
The "ADD NEW" menu item is selected.
쏅 Press the OK button :.
ENGLISH
Redirecting an ongoing phone call
to the cell phone
쏅 Press the OK button :.
The entries of the phone book of the device are
displayed.
쏅 Select the desired entry with the rocker
switch or @.
쏅 Press the
button 5 to make the call.
The display shows "CALLING" and the selected
entry in the phone book.
109
02_NJerseyMP68_gb.indd 109
29.10.2008 11:00:01 Uhr
Bluetooth® phone call
Editing an entry
To edit an existing entry in the phone book of the
device,
쏅 open the Bluetooth® menu.
쏅 Press the rocker switch or @ until the
" RADIO" menu item (phone book of the
device) is selected.
쏅 Press the OK button : to call up the menu
item.
쏅 Press the rocker switch or @ until the
"EDIT PBK" menu item is selected.
쏅 Press the rocker switch or @ until the
" RADIO" menu item (phone book of the
device) is selected.
쏅 Press the OK button : to call up the menu
item.
쏅 Press the rocker switch or @ until the
"DELETE" menu item is selected.
쏅 Press the OK button :.
The entries of the phone book of the device are
displayed.
쏅 Press the OK button :.
쏅 Select the desired entry with the rocker
switch or @.
The entries of the phone book of the device are
displayed.
The selected entry is deleted.
쏅 Select the desired entry with the rocker
switch or @.
쏅 Press the OK button :.
You can now edit the name of the entry:
쏅 If necessary, press the rocker switch
@ to select a position.
or
쏅 Enter the desired character by pressing the
corresponding button of the keys A once
or several times.
After editing the complete name,
쏅 press the OK button :.
Now you can edit the phone number:
쏅 If necessary, press the rocker switch
@ to select a position.
or
쏅 Enter the desired digit by pressing the
corresponding button of the keys A.
After editing the complete phone number,
쏅 press the OK button :.
The modified entry is stored.
Deleting entries
To delete an existing entry in the phone book of
the device,
쏅 open the Bluetooth® menu.
쏅 Press the OK button :.
Note:
To delete all the entries of the phone book,
select the menu item "DEL ALL" instead of
"DELETE" and press the OK button :.
The phone book of the cell phone
You can upload the phone book of the connected
cell phone to the device and then select and call
entries from the phone book via the device.
Note:
Downloading the phone book means that
the entries are copied from the cell phone
to the device. The phone book of the cell
phone is not deleted in the process.
The device stores phone book entries of up to
3 cell phones with up to 500 entries each. Each
entry may contain up to 4 different phone numbers, e.g. for private and office numbers of a
person.
Downloading a phone book
To download the phone book,
쏅 open the Bluetooth® menu.
쏅 Press the rocker switch or @ until the
"PBK DNL" menu item is selected.
쏅 Press the OK button : to call up the menu
item.
110
02_NJerseyMP68_gb.indd 110
29.10.2008 11:00:01 Uhr
Bluetooth® phone call
Note:
If the device is currently in the Bluetooth®
streaming mode when the phone book is
being downloaded, the audio transfer is
interrupted for the duration of the phone
book download.
Calling an entry in the phone book
Note:
Only the phone book of the currently connected cell phone is available (if this phone
book has already been downloaded to the
device).
To call an entry in the phone book of the cell
phone,
쏅 open the Bluetooth® menu.
쏅 Press the rocker switch or @ until the
" MOBILE" menu item is selected.
쏅 Press the OK button : to call up the menu
item.
To call a different number of the entry,
쏅 Press the OK button :.
All numbers stored under this entry are displayed.
쏅 Select the desired number with the rocker
switch or @.
쏅 Press the
button 5.
The call is being made. "CALLING" and the name
of the entry are shown on the display.
Calling a phone number from the
history
The history of the cell phone is automatically
downloaded after establishing the Bluetooth®
connection. The following phone numbers are
stored in the history of the cell phone:
• Numbers dialed
• The numbers of received calls
• The numbers of missed calls
To call one of these numbers,
쏅 open the Bluetooth® menu.
쏅 Press the rocker switch or @ until the
"CALL LOG" menu item is selected.
The entries of the phone book are displayed.
쏅 Press the OK button : to call up the menu
item.
쏅 Select the desired entry with the rocker
switch or @.
쏅 Press the rocker switch or @ to select
one of the following menu items:
Note:
To reach the desired entry faster, press the
button of the alphanumeric keys A with the
corresponding starting letter.
In each case, the first available number for the
currently selected entry is displayed. If additional numbers are available under the entry, e.g.
an office or cell phone number, it is indicated by
means of corresponding symbols on the display.
To call the first number of the entry,
쏅 press the
button 5.
ENGLISH
The download of the phone book from the cell
phone to the device starts. The display shows
"PHONEBOOK DOWNLOADING – Please Wait
...".After the transfer is complete, "DOWNLOAD
COMPLETE" is shown; if the transfer was not successful, "DOWNLOAD FAILED" appears.
• RECEIVED: Calls received
• MISSED: Unanswered calls
• DIALED: Numbers dialed
쏅 Press the OK button : to call up the menu
item.
The entries of the corresponding list are displayed. The date and time are displayed for the
selected entry, if available.
쏅 Select the desired entry with the rocker
switch or @.
쏅 Press the
button 5 to make the call.
111
02_NJerseyMP68_gb.indd 111
29.10.2008 11:00:02 Uhr
Bluetooth® phone call
Speed dial
The speed dial function allows direct access to
the phone book of the device, the phone book
transferred from the cell phone, the history lists,
the voice dialing function and the phone numbers saved under the buttons of the keys.
To use the speed dial,
쏅 press the
operation.
button 5 during regular
Note:
A long press of the
button 5 brings
you directly to the menu of the device-specific phone book.
A menu with the following menu items is displayed:
•
•
•
•
•
•
MOBILE: Phone book transferred from
the cell phone
RADIO: Phone book of the device
RECEIVED: Received calls
MISSED: Missed calls
DIALED: Numbers dialed
VR DIAL: Voice dialing
To dial a number from one of the phone books or
one of the lists of the history,
쏅 select the desired menu item with the rocker
switch or @.
쏅 Press the OK button :.
쏅 Select the desired entry or the number with
the rocker switch or @.
쏅 Press the
button 5 to make the call.
To enter a phone number and make a call,
쏅 enter the number as described in the section
"Making a phone call (DIAL NEW)" by briefly
pressing the corresponding buttons of the
keys A.
The menu for the number entry is automatically
opened with the first button pressed.
To call a number stored under a number key,
쏅 press and hold the corresponding button of
the keys A for approx. 2 seconds.
To use voice dialing,
쏅 use the rocker switch or
the "VR DIAL" menu item.
@ to select
쏅 Press the OK button :.
The voice recognition is activated. The display
shows "SPEAK NOW".
쏅 Say the name for the desired phone number.
Notes:
• The duration for which the voice recognition activated depends on the connected
cell phone.
• To cancel voice recognition and return to
the last audio source, press the
button 4.
• If your speech input is not recognised or
the voice dialing on the cell phone is not
switched on, the display briefly shows "
VOICE RECOGNITION LINK NOT ACTIVE".
• If no Bluetooth® connection is established, the display briefly shows "VOICE
DIAL FAILED – NO Bluetooth®
CONNECTION".
• To use voice dialing, this function must be
supported by your cell phone and
activated in the cell phone.
The call is being made.
Changing the PIN (PIN NUM)
If you want to register a cell phone with the car
sound system, you must enter PIN "1234". This
PIN can also be changed:
쏅 Open the Bluetooth® menu.
쏅 Press the rocker switch or @ until the
"PIN NUM" menu item is selected.
쏅 Press the OK button : to call up the menu
item.
112
02_NJerseyMP68_gb.indd 112
29.10.2008 11:00:02 Uhr
Bluetooth® phone call | Sound settings
After entering one digit, the device automatically
switches to the next one. To correct any entry errors, select the corresponding digit by pressing
the rocker switch or @ again.
After entering the complete new PIN number,
Sound settings
The following sound settings can be changed in
the Audio menu:
• Adjusting bass, treble and volume distribution
ENGLISH
Now you can enter the new PIN:
쏅 Enter the number sequence by pressing the
corresponding buttons of the A keys.
• Selecting the sound presetting
• Changing equalizer settings
쏅 press the OK button :.
The new entry is stored.
Changing the Bluetooth® name of
the device (RAD NAME)
The Bluetooth® name of the device under which it
is displayed by other Bluetooth® devices is set to
"BLAUPUNKT BT" at the factory. To change this
name,
쏅 open the Bluetooth® menu.
쏅 Press the rocker switch or @ until the
"RAD NAME" menu item is selected.
Note:
The settings for bass (BASS), middle
(MIDDLE) and treble (TREBLE) are each
stored for the current audio source.
Opening the Audio menu
To call up the Audio menu,
쏅 press the AUDIO button <.
OR:
쏅 Press the MENU button 9.
@ until the Audio
쏅 Press the OK button : to call up the menu
item.
쏅 Press the rocker switch
menu is displayed.
You can now enter a new Bluetooth® name:
Adjusting bass, treble and volume
distribution
쏅 Enter the name by pressing the corresponding buttons of the A keys. Select the
desired letter, if necessary by pressing a
button several times.
After entering one letter, the device automatically switches to the next one. To correct any entry
errors, select the corresponding digit by pressing the rocker switch or @ again.
After entering the complete name,
쏅 press the OK button :.
The new Bluetooth® name is stored.
To perform settings,
쏅 in the Audio menu, press the rocker switch
or @ to select one of these menu
items:
• "BASS": Bass level between -7 and +7
• "TREBLE": Treble between -7 and +7
• "BALANCE": Volume distribution left/right
between -9 and +9
• "FADER": Volume distribution front/rear
between -9 and +9
• "X-BASS": Increasing the bass at low
volume from 0 (off) to 3
The currently active setting is represented by a
bar display.
113
02_NJerseyMP68_gb.indd 113
29.10.2008 11:00:02 Uhr
Sound settings
쏅 Press the OK button : to call up the menu
item.
쏅 To change the setting, press the rocker
switch or @.
쏅 Press the OK button : to select a different
function, or press the DIS•ESC button ; to
exit the menu.
Selecting a sound presetting
(PRESETS)
You can select sound presets for Pop, Rock and
Classical. A sound preset allows adjusting a suitable combination of bass and treble for the type
of music.
쏅 In the Audio menu, press the rocker switch
or @ repeatedly until the "EN AUDIO"
(Enhanced menu) menu item is selected.
쏅 Press the OK button : to call up the menu
item.
The Enhanced menu opens.
쏅 In the Enhanced menu, press the rocker
switch or @ repeatedly until the
"PRESETS" menu item is selected.
쏅 Press the OK button : to call up the menu
item.
쏅 Select one of the following sound presets
with the rocker switch or @:
• "POP"
• "ROCK"
• "CLASSIC"
쏅 Switch the selected sound preset off with
the rocker switch @ or on with the rocker
switch @.
쏅 Press the OK button : to select a different
function, or press the DIS•ESC button ; to
exit the menu.
Notes:
• Only one sound preset can be switched
on at any time. To activate no sound
preset, switch off the currently switchedon sound preset.
• To obtain a perfect sound, the presettings
can be supplemented further by the
equalizer settings according to personal
preferences. If you change the level
setting for bass, treble or middle, the
selected sound preset is switched off in
the menu; but the other level settings of
the sound preset are retained.
Equalizer settings
Your device features a digital 3-band equalizer.
It allows you to adjust the sound to your vehicle
and your personal preferences and eliminate
problems, such as droning or poor voice comprehension.
Which equalizer setting is the correct one?
Measure
Sound impression Frequency
Level
(Hz)
Unclean bass,
100–200 approx. –4
droning, unpleasant
pressure
Very transparent,
1000–
approx. –4
aggressive sound,
2500
to –6
no stereo effect
Muffled sound,
10000–
approx. +4
low transparency,
12500
to +6
instruments do not
excel
Insufficient bass
60–80
approx. +4
to +6
114
02_NJerseyMP68_gb.indd 114
29.10.2008 11:00:02 Uhr
Sound settings
The table shows the expanded setting options
for bass (EBASS), treble (ETREBLE), middle
(EMIDDLE) and X-Bass (EXBASS) that can be
performed in the Enhanced menu.
Note:
The table does not contain all the settings
that are possible in the Enhanced menu.
쏅 Press the OK button : to call up the menu
item.
The Enhanced menu appears.
쏅 in the Enhanced menu, press the rocker
switch or @ to select one of these
menu items:
•
•
•
•
"EBASS": Bass
"ETREBLE": Treble
ENGLISH
Tip:
Insert a CD which you know very well if you
want to adjust the equalizer. First, set the
bass, treble, balance, and fader to zero. For
equalizer settings, first change the settings
of the mid-frequencies, followed by those
for treble and finally bass.
"EMIDDLE": Middle
"EXBASS": Increasing bass at low volume
쏅 Press the OK button : to call up the menu
item.
쏅 Press the rocker switch or @ to
switch between the available menu items
(see the table):
• "GAIN"
• "FREQ"
• "QUAL"
Changing equalizer settings (EBASS,
ETREBLE, EMIDDLE, EXBASS)
In the Enhanced menu, you can change these
settings:
• "GAIN" (level)
• "FREQ" (frequency)
• "QUAL" (quality factor)
쏅 Press the rocker switch
the setting.
or
@ to change
After you performed the settings for all menu
items,
To adjust the equalizer,
쏅 In the Audio menu, press the rocker switch
or @ repeatedly until the "EN AUDIO"
(Enhanced menu) menu item is selected.
쏅 Press the OK button : to select a different
function, or press the DIS•ESC button ; to
exit the menu.
AUDIO (Audio menu)
EN AUDIO (Enhanced menu)
EBASS
ETREBLE
EMIDDLE
EXBASS
Level (GAIN)
–
–
-7 to +7
0 to 3
Frequency
(FREQ)
60 Hz, 80 Hz,
100 Hz, 200 Hz
10 kHz, 12.5 kHz,
15 kHz, 17.5 kHz
500 Hz, 1,000 Hz,
1,500 Hz,
2,500 Hz
30 Hz, 60 Hz
100 Hz
Quality factor (QUAL)
1.0, 1.25, 1.5, 2.0
–
0.5, 0.75, 1.0,
1.25
–
115
02_NJerseyMP68_gb.indd 115
29.10.2008 11:00:03 Uhr
User settings
User settings
In the System menu, you can adjust these presettings to your preferences:
•
•
•
•
•
Notes:
• To quit the text input without changing
the welcome text, press the DIS•ESC
button ;.
Welcome text
• If the text entry is interrupted, e.g. by a
Clock settings
traffic announcement, the previous
changes are not stored.
Volume settings
Display settings
Changing time settings
Scan time
Opening the System menu
쏅 Press the MENU button 9.
쏅 Press the rocker switch
"Syst" System menu.
@ to open the
Changing the welcome text
(ON MSG)
When you switch on the device, an animation appears. It contains the factory set welcome text
"THE ADVANTAGE IN YOUR CAR". To change this
text,
쏅 in the System menu, press the rocker switch
or @ until the "ON MSG" menu item is
selected.
쏅 Press the OK button : to call up the menu
item.
The current welcome text is displayed. The position digit flashes and can be changed. You can
now enter your own welcome text with up to
35 characters:
쏅 Enter the text by pressing the corresponding
buttons of the A keys. Select the desired
letter, if necessary by pressing a button
several times.
After entering one letter, the device automatically switches to the next one. To correct any entry
errors, select the corresponding digit by pressing the rocker switch or @ again.
After entering the complete welcome text,
쏅 press the OK button : to store the
welcome text entered.
The following settings can be changed in the
System menu:
• Switching time display on/off (OFF CLK)
• Selecting 12h/24h time display
(CLK MODE)
• Setting the time (CLK SET)
Switching time display on/off (OFF CLK)
The time can be displayed while the device is
switched off, if the vehicle ignition is switched
on. To switch this time display on/off,
쏅 in the System menu, press the rocker switch
or @ repeatedly until the "OFF CLK"
menu item is selected.
쏅 Press the OK button : to call up the menu
item.
쏅 Switch between the settings with the rocker
switch or @.
•
•
"OFF CLK"
: Time display is on.
"OFF CLK"
: Time display is off.
쏅 Press the OK button : to select a different
function, or press the DIS•ESC button ; to
exit the menu.
Selecting 12h/24h time display (CLK MODE)
The time can be displayed using the 12-hour or
24-hour format.
쏅 In the System menu, press the rocker switch
or @ repeatedly until the "CLK MODE"
menu item is selected.
쏅 Press the OK button : to call up the menu
item.
116
02_NJerseyMP68_gb.indd 116
29.10.2008 11:00:03 Uhr
User settings
쏅 Press the rocker switch
the selected setting.
@ to switch on
쏅 Press the OK button : to select a different
function, or press the DIS•ESC button ; to
exit the menu.
Adjusting power-on volume (ON VOL/LAST
VOL)
To adjust the power-on volume,
쏅 in the System menu, press the rocker switch
or @ repeatedly until the "ON VOL"
menu item is selected.
쏅 Press the OK button : to call up the menu
item.
Setting the time (CLK SET)
The current power-on volume is displayed.
쏅 In the System menu, press the rocker switch
or @ repeatedly until the "CLK SET"
menu item is selected.
쏅 Set the power-on volume with the rocker
switch or @.
쏅 Press the OK button : to call up the menu
item.
The time is displayed.
쏅 Select the hours or minutes with the rocker
switch or @.
쏅 Enter the desired digit by pressing the
corresponding button of the keys A.
After entering the complete time,
쏅 press the OK button : to store the time
entered.
Note:
To finish the entry without changing the
time, press the DIS•ESC button ;.
Changing volume presettings
The following presettings can be changed in the
System menu:
• Power-on volume (ON VOL / LAST VOL)
• Volume presettings of traffic announcement
(TA VOL), telephone/navigation announcement (TEL VOL) and volume reduction
(MUTE VOL)
• Signal tone (BEEP ON)
• Speed-dependent volume increase
(AUTO SND)
ENGLISH
쏅 Use the rocker switch or @ to select
the setting "12 HR – AM", "12 HR – PM" or
"24 HR MODE".
쏅 Press the OK button : to select a different
function, or press the DIS•ESC button ; to
exit the menu.
You can also select the setting "LAST VOL". This
sets the volume at power-on to the volume at the
last switch-off:
쏅 In the System menu, press the rocker switch
or @ repeatedly until the "LAST VOL"
menu item is selected.
쏅 Press the OK button : to call up the menu
item.
쏅 Switch between the settings with the rocker
switch or @.
•
•
"LAST VOL"
: On.
"LAST VOL"
: Off.
쏅 Press the OK button : to select a different
function, or press the DIS•ESC button ; to
exit the menu.
Note:
If "LAST VOL" is switched off, the device is
switched on with the volume adjusted under
"ON VOL".
Changing volume presettings for TA, TEL and
MUTE
If the device switches a traffic announcement,
phone call or navigation announcement, it
always starts with the volume preset here.
117
02_NJerseyMP68_gb.indd 117
29.10.2008 11:00:03 Uhr
User settings
In addition, you can assign a lower volume up
to the value 0 (mute) to the volume reduction
(MUTE).
쏅 In the System menu, press the rocker switch
or @ repeatedly until one of these
menu items is displayed:
• "MUTE VOL": Presets the volume of the
volume reduction
• "TEL VOL": Presetting the volume of the
phone call/navigation announcement
• "TA VOL": Presetting the volume of the
traffic announcement
쏅 Press the OK button : to call up the menu
item.
The currently set volume is displayed.
쏅 Set the volume with the rocker switch
@.
or
쏅 Press the OK button : to select a different
function, or press the DIS•ESC button ; to
exit the menu.
Notes:
The volume preset by you will not be used,
• if the volume currently listened to is lower
than the set mute level. The device
continues playing with the volume
listened to.
• if the volume currently listened to is
higher than the set TEL volume. In this
case, phone calls/navigation announcements are reproduced with the volume
listened to.
• if the volume currently listened to is
higher than the set TA volume. In this
case, traffic announcements are reproduced with the volume listened to.
Activating/deactivating the signal tone
(BEEP ON)
You can deactivate the signal tone that sounds as
a confirmation in the menus or when storing the
stations on the station buttons.
쏅 in the System menu, press the rocker switch
or @ repeatedly until the "BEEP ON"
menu item is selected.
쏅 Press the OK button : to call up the menu
item.
쏅 Switch between the settings with the rocker
switch or @.
•
•
"BEEP ON"
: Signal tone on.
"BEEP ON"
: Signal tone off.
쏅 Press the OK button : to select a different
function, or press the DIS•ESC button ; to
exit the menu.
Setting the speed-dependent volume
increase (AUTO SND)
When you are driving faster, the device can automatically increase the volume to compensate
for the driving noise. The volume is increased
depending upon the speed. In order for this to
work, the speedometer signal must be connected as described in the installation instructions.
The optimum setting for this volume increase depends on how noise levels develop in your particular vehicle. Try the setting that is perfect for
your vehicle. You can select a value between OFF
(no increase) and 5 (maximum increase).
쏅 In the System menu, press the rocker switch
or @ repeatedly until the "AUTO SND"
menu item is selected.
쏅 Press the OK button : to call up the menu
item.
The current setting is displayed.
쏅 Select the desired setting with the rocker
switch or @.
118
02_NJerseyMP68_gb.indd 118
29.10.2008 11:00:04 Uhr
User settings
Changing display settings
The following display settings can be changed in
the System menu:
• Day/night brightness (D-DAY / D-NIGHT)
• Adjusting the display viewing angle (ANGLE)
• Adjusting the display color (DISP COL, COL
SCAN, CON SCAN)
Adjusting the display viewing angle (ANGLE)
The angle at which the driver looks at the display
is dependent upon, among other things, the installation position of the device, the seating position, and the physical size of the driver. You can
optimise the display contrast for your viewing
angle:
쏅 In the System menu, press the rocker switch
or @ repeatedly until the "ANGLE"
menu item is selected.
(day brightness) or "D-NIGHT" (night
brightness) menu item is selected.
쏅 Press the OK button : to call up the menu
item.
The current setting is displayed.
쏅 Use the rocker switch or @ to select
the desired setting between 1 and 16.
쏅 Press the OK button : to select a different
function, or press the DIS•ESC button ; to
exit the menu.
Mixing the color for the display illumination
(DISP COL)
To customise the display illumination to suit
your tastes you can mix a colour yourself using
the three primary colours red, green and blue
(RGB).
쏅 In the System menu, press the rocker switch
or @ repeatedly until the "DISP COL"
menu item is selected.
쏅 Press the OK button : to call up the menu
item.
쏅 Press the OK button : to call up the menu
item.
The current settings for "GREEN", "RED" and
"BLUE" are displayed.
The current setting is displayed.
쏅 Select a colour with the rocker switch
@.
쏅 Use the rocker switch or @ to select
the desired setting between –6 and +6.
쏅 Press the OK button : to select a different
function, or press the DIS•ESC button ; to
exit the menu.
Changing the day/night brightness
(D-DAY/D-NIGHT)
The device automatically switching to night
mode if you turn on the light of your vehicle. For
this purpose, the device must be connected with
your vehicle via a corresponding connection as
described in the installation instructions.
You can adjust the display brightness separately
for day and night.
ENGLISH
쏅 Press the OK button : to select a different
function, or press the DIS•ESC button ; to
exit the menu.
or
쏅 Adjust the value for the selected colour with
the rocker switch or @ between 0 and
16.
After you adjusted all colours as desired,
쏅 press the OK button : to select a different
function, or press the DIS•ESC button ; to
exit the menu.
Selecting the colour of the display
illumination from the colour scan
(COL SCAN)
During the colour seek, the colour of the display
illumination changes continuously, and you can
select the current colour.
쏅 In the System menu, press the rocker switch
or @ repeatedly until the "D-DAY"
119
02_NJerseyMP68_gb.indd 119
29.10.2008 11:00:04 Uhr
User settings
쏅 In the System menu, press the rocker switch
or @ repeatedly until the "COL SCAN"
menu item is selected.
쏅 Press the OK button : to call up the menu
item.
The colour seek is started. The display intermittently shows "PRESS OK" and "SCANNING".
쏅 Press the OK button : to select the current
colour, or press the DIS•ESC button ; to
cancel the colour seek without selecting a
new colour.
Switching the constant colour change for the
display illumination on/off
(CONTSCAN)
You can select a constant colour change as the
colour of the display illumination. If the colour
change is activated, the display colour changes
constantly. The colour change is switched on or
off in the system menu.
Changing the scan time (SCANTIME)
The scan time of the SCAN function can be adjusted in the System menu for all audio sources
between 5 and 30 seconds.
쏅 In the System menu, press the rocker switch
or @ repeatedly until the "SCANTIME"
menu item is selected.
쏅 Press the OK button : to call up the menu
item.
The current setting is displayed.
쏅 Use the rocker switch or @ to select
the desired setting in 5-second increments
between 5 and 30.
쏅 Press the OK button : to select a different
function, or press the DIS•ESC button ; to
exit the menu.
쏅 In the System menu, press the rocker switch
or @ repeatedly until the
"CONTSCAN" menu item is selected.
쏅 Press the OK button : to call up the menu
item.
쏅 Switch between the settings with the rocker
switch or @.
•
"CONTINUOUS COLSCAN"
change is on.
: Colour
•
"CONTINUOUS COLSCAN"
change is off.
: Colour
쏅 Press the OK button : to select a different
function, or press the DIS•ESC button ; to
exit the menu.
120
02_NJerseyMP68_gb.indd 120
29.10.2008 11:00:04 Uhr
Additional settings
After you performed the settings for all menu
items,
You can perform additional settings:
쏅 Press the OK button : to select a different
function, or press the DIS•ESC button ; to
exit the menu.
• Configuring the preamplifier output for the
subwoofer
• Activating/deactivating demo mode
• Displaying the version number of device
Activating/deactivating demo mode
The Demo mode uses animations to show you
which functions the device offers.
components
• Updating the device software
ENGLISH
Additional settings
To switch the demo mode on or off,
Configuring the preamplifier output
for the subwoofer (SUBOUT)
If you want to use an additional subwoofer via an
external amplifier, it can be adjusted to the other loudspeakers. You can adjust the level of the
Subout preamplifier output for a selected cut-off
frequency.
You adjust the following settings in the Enhanced
menu for this purpose:
The device switches on with activated or deactivated demo mode. By pressing any button, the
demo mode is interrupted and you can operate
the device.
You can display the version numbers of the different device components.
쏅 Press the AUDIO button <.
쏅 Press the rocker switch or @
repeatedly until the "EN AUDIO" menu item
is selected.
쏅 Press the OK button : to call up the menu
item.
The Enhanced menu appears.
쏅 In the Enhanced menu, press the rocker
switch or @ repeatedly until the
"SUBOUT" menu item is selected.
쏅 Press the OK button : to call up the menu
item.
쏅 Press the rocker switch or @ to
change between these menu items:
• "GAIN" (from 0 to +7)
• "FREQ" (80 Hz, 120 Hz or 160 Hz)
or
쏅 Simultaneously press the MENU button 9
and the 0 button of the alphanumeric
keys A while switching on the device.
Displaying version numbers
• "GAIN" (level)
• "FREQ" (cut-off frequency)
쏅 Press the rocker switch
the setting.
쏅 switch off the device.
쏅 Switch off the device.
쏅 Simultaneously press the MENU button 9
and the # button of the alphanumeric
keys A while switching on the device.
The version display with information about the
software appears.
쏅 Press the rocker switch or @ to
change between device components.
To exit the version display,
쏅 use the rocker switch
the "EXIT" menu item.
or
@ to select
쏅 press the OK button :.
The display of the audio source previously listened to is displayed.
@ to change
121
02_NJerseyMP68_gb.indd 121
29.10.2008 11:00:05 Uhr
Additional settings
Updating the device software
You can update the software of this device without removing it. New software versions can be
found on the Internet under www.blaupunkt.
com. The software is transferred to the device
with a USB data carrier.
Notes:
• Ensure that the files and directories of the
USB data carrier are named according to
ISO 9660 Level 1 ("8.3" format).
• The download File must have the file
extension .EDL. The file name may feature
capital letters (A-Z), numbers (0-9) and
the underscore character (_).
• Since the device must be supplied with a
stable voltage during the installation, do
not disconnect the device from the
battery during the installation, do not
start the vehicle and do not switch on any
other consumers, such as the headlights
or the fan.
Please also observe the information obtained at www.blaupunkt.com for handling
the downloaded file and for installing the
software on your device.
Note:
If the code query is activated, you must enter the current device code prior to installing
the new software.
Note:
If a USB data carrier is not connected, the
display briefly shows "Insert USB" and you
are returned to the menu. First, connect
the USB data carrier.
The device reads the data of the data carrier;
while the display shows "USB READING". As
soon as the data have been read, the files of the
data carrier are displayed in a list.
쏅 Select the download file with the rocker
switch or @.
쏅 Press the OK button :.
Note:
If the file is damaged or you selected an
incorrect file, the display briefly shows
"INVALID FILE".
The display shows the current software version
of the device and the version of the download
file.
쏅 Press the OK button : to start the
installation of the download file.
The display shows "UPDATING SOFTWARE". The
installation progress is indicated by a progress
bar. After the installation is complete, the device
automatically switches off and on again with the
new software.
To start the installation,
쏅 connect the USB data carrier with the new
software to the device.
쏅 Press the MENU button 9.
쏅 Press the rocker switch
"Syst" System menu.
@ to open the
쏅 Press the rocker switch or @ to select
the "SW DNL" (software download) function.
쏅 Press the OK button : to start the
installation of the new software.
122
02_NJerseyMP68_gb.indd 122
29.10.2008 11:00:05 Uhr
Technical data
Technical data
Weight
approx. 1.79 kg
Voltage supply
ENGLISH
10.5–14.4 V
Operating voltage:
Current consumption
In operation:
max. 10 A
10 seconds after switch-off:
< 3.5 mA
Amplifier output power acc. to DIN 45324:
4 x 25 W sine
max. power:
4 x 50 W at 14.4 V
Preamplifier output (Preamp Out)
3V
5 channels:
Input sensitivity
Rear AUX-IN:
2 V / 6 kΩ
Front AUX-IN:
500 mV / 6 kΩ
Tel./Navi input:
10 V / 1 kΩ
Tuner
Wavebands in Europe and Thailand
FM:
87.5–108 MHz
AM / MW:
531–1602 kHz
LW (Europe only):
Wavebands in the US
Wavebands in South America
FM frequency response:
153–279 kHz
FM:
87.7–107.9 MHz
AM:
530–1710 kHz
FM:
87.5–107.9 MHz
AM:
530–1710 kHz
35–16,000 Hz
CD player
Frequency response:
20–20,000 Hz
USB port
Current load
max. 800 mA
Subject to technical changes!
123
02_NJerseyMP68_gb.indd 123
29.10.2008 11:00:05 Uhr
Service | Warranty | Glossary
Service
Glossary
In some countries Blaupunkt offers a specific
repair service including a pick-up service.
AF – Alternative frequency
If you want to use this service, you may request a
pick-up service for your device via the Internet.
Refer to www.blaupunkt.com to check if this
service is available in your country.
Warranty
We provide a manufacturer's warranty for products bought within the European Union. For devices purchased outside the European Union,
the warranty terms issued by our respective responsible domestic agency are valid.
The warranty terms can be called up under
www.blaupunkt.com or requested directly from:
Blaupunkt GmbH
Hotline
Robert-Bosch-Str. 200
D-31139 Hildesheim
The range of FM stations is limited. For this reason, FM programmes are distributed to different
frequencies. The AF RDS service sends these
frequencies to the tuner. If the vehicle leaves the
reception area of a frequency, the tuner can automatically change to the best receivable alternative frequency of the programme you listened to.
Bluetooth®
Bluetooth® is a wireless radio communication for
short distances. This technology allows for transmitting voice and data between devices, e.g. car
sound system and cell phone.
Broadcasting network
A broadcasting network is the offer of several
stations with different programmes of a broadcasting station.
EON – Enhanced Other Network
In case of a traffic announcement, the device
switches over from a non-traffic information station to a traffic information station of the same
station chain. After the traffic announcement,
the system switches back to the previously heard
programme.
ID3 tags
ID3 tags contain additional information for MP3
files (e.g. artist, title, album, genre, year).
Mass storage device
Format for storage media that can permanently
store large amounts of data, such as USB removable storage devices (USB stick or USB hard
disk).
MP3, WMA
MP3 and WMA are audio data formats that allow
for high compression with little loss in quality.
124
02_NJerseyMP68_gb.indd 124
29.10.2008 11:00:05 Uhr
Playlist
Subwoofer, Subout
Playback list for MP3 or WMA files In playlists,
you determine the order in which certain titles
should be played. They are created with an MP3
manager, such as WinAmp or Windows Media
Player.
Separate low-bass loudspeaker. The device has
a Subout preamplifier output. You can connect
either an active subwoofer or a separate power
amplifier with subwoofer.
PTY – Program Type
The device searches only for stations with the
previously selected programme content (e.g.
news, rock, pop, sports, etc.).
The device switches traffic announcements at a
preset volume. Even if you are currently listening to another audio source (e.g. CD, AUX) or the
radio is muted.
RDS – Radio Data System
TRAVEL STORE
RDS is a service of the radio stations. Besides
the conventional music and voice contributions,
additional information is broadcast in the form of
encrypted digital signals which can be analysed
by the device (e.g. station name). The RDS services are not supported by all radio stations.
Automatic searching and storing of the 10 strongest radio stations received of the region.
REG – Regional
USB is an interface for connecting external
removable storage devices to the device.
Some radio stations divide their programmes
into regional programmes with different contents
at certain times. With the RDS function Regional,
the tuner only changes to alternative frequencies of the set stations that broadcast the same
regional programme.
Root folder
TA – Traffic Announcement
ENGLISH
Glossary
Tuner
Receiving unit of the radio.
USB – Universal Serial Bus
X-BASS
X-BASS allows for boosting the bass at low volume levels. This renders the sound richer even
at a low volume.
Main folder of a data carrier. The root folder contains all other folders.
Quality factor – QUALITY
It determines the filter quality of the equalizer,
i.e. the edge steepness and filter bandwidth,
dependent upon the characteristic frequency.
Shape CDs
A shape CD is a CD whose form deviates from the
usual circular shape. It can be cornered or contoured. The non-circular form does not allow the
device to correctly center and read the CD in the
drive. This results in damage to the CD drive.
125
02_NJerseyMP68_gb.indd 125
29.10.2008 11:00:05 Uhr
Index
Index
Note:
Keywords in capital letters refer to menu items.
A
Alternative frequency (AF) 85, 124
ANGLE 119
Audio menu 113
AUTO SND 118
AUX 101
Switching AUX input on 102
AUX EDIT 103
B
BALANCE 113
BANDSCAN 84
BASS 113
BEEP ON 118
Bluetooth® 105, 124
Bluetooth® name 113
Changing the PIN 112
Connection 106
Making a phone call 108
Preparation 105
Streaming 98
Broadcasting network 83, 84, 124
Browse mode 91
C
C'n'C 101, 104
C‘n‘C mode 101
CD (audio, CD-R, CD-RW) 80, 125
CD changer 96, 97
CD mode
Inserting/removing a CD 80
Playing an MP3/WMA CD 89
Start 87, 89
Changing the scan time 120
Cleaning 71
CLK MODE, 12HR and 24HR 116
Clock, time display 116
COL SCAN 119
Connection, Bluetooth® 105, 106
Controls 73
CONTSCAN 120
Cut-off frequency 121
D
D-DAY, D-NIGHT (brightness for day and night)
119
DEL ALL 107
DELETE 107
Demo mode 121
Device card 76
Device software 122
DIAL NEW (dialing a phone number) 108
DISP COL 119
Display
Settings 119
Disposal 71
E
EBASS, EMIDDLE, ETREBLE 115
Equalizer 115
EXBASS 115
External audio source: See AUX
F
Factory settings: See Resetting (NORMSET)
FADER 113
FM, FMT 82
FREQ 115, 121
126
02_NJerseyMP68_gb.indd 126
29.10.2008 11:00:05 Uhr
H
PRESETS 114
PTY (Program Type) 86, 125
PTY LANG 86
PTY TYPE 86
History (Bluetooth®) 111
Q
I
QUAL 115
Quality factor 115
G
GAIN 115, 121
ID3 tags 124
Installation, self-installation 71
L
LAST VOL 117
Level 115, 121
M
Master telephone (Bluetooth®) 106
Memory bank 82
MENU button 74
MIX AUX 103
MP3 78, 79, 89
MUTE: See Muting
MUTE VOL 118
Muting 77
N
NORM SET 78
O
ON MSG 116
ON VOL 117
P
PAIR: See Registering (Bluetooth®)
Phone book of the cell phone 110
Phone book of the device 109
PIN NUM 112
Playlist 92, 125
ENGLISH
Index
R
RDS 85, 125
REGIONAL 85
Registering (Bluetooth®) 98, 106
Resetting (NORMSET) 78
Resetting the device (NORMSET) 78
Root directory 125
S
Safety 70, 71
SCAN TIME 120
Seek tuning sensitivity 84
SENS 84
Setting the region 81
Setting the regional programme::
See Alternative frequency (AF)
Signal tone 118
Sound presettings 114
Sound settings 113
Speed dial (Bluetooth®) 112
Station
Scanning 84
Storing 83
Tuning, calling 82
SUBOUT 121
Subwoofer 121, 125
Switch-off 76
Switch-on 76
127
02_NJerseyMP68_gb.indd 127
29.10.2008 11:00:06 Uhr
Index
T
TA VOL 118
TEL VOL 118
Traffic announcements 124, 125
Skip 85
Switching the priority on/off 85
TRAVEL STORE 83, 125
TREBLE 113
Tuner 81, 125
Adjusting stations, storing 82
Alternative frequency (AF) 85
Seek tuning sensitivity 84
Selecting a programme type 86
Selecting a region 81
Selecting a waveband 82
U
USB medium 125
Connecting 78
Requirements 79
Selecting 79, 89
V
Version numbers 121
Volume 74, 76
Changing presettings 117
Increase, speed-dependent 118
W
Waveband 82
Welcome text 116
WMA 79, 89
X
X-BASS 113, 125
128
02_NJerseyMP68_gb.indd 128
29.10.2008 11:00:06 Uhr
Factory settings
Factory settings
ENGLISH
Notes:
• When restoring the factory settings, your
individual device code and the adjusted
tuner region settings are retained and not
reset.
• Some of the factory settings listed here
apply only to the tuner region Europe
(EU), USA (US) or South America (S-AM).
TA VOL (EU only)
20
ON VOL
15
MUTE VOL
0
TEL VOL
17
SENS
SENS HIGH 6
OFF CLOCK
OFF
CLOCKSET
0:00
CLK MODE
24 HR MODE
BEEP ON
ON
D-DAY
D-NIGHT
16
15
ANGLE
0
AUTO SOUND
OFF
SCAN TIME
10
MIX AUX
OFF
DEMO MODE
OFF
PIN-NUM (Bluetooth®)
1234
RDS (EU only)
ON
TRAFFIC (EU only)
OFF
PTY (EU, US, S-AM only)
OFF
REG (EU only)
ON
129
02_NJerseyMP68_gb.indd 129
29.10.2008 11:00:06 Uhr
• Minuspol der Batterie abklemmen! Dabei die
• Disconnect the negative terminal of the bat-
Sicherheitshinweise des Kfz- Herstellers beachten.
tery! When doing so, please observe the vehicle manufacturer’s safety instructions.
• Beim Bohren von Löchern darauf achten,
• Make sure you do not damage vehicle compo-
dass keine Fahrzeugteile beschädigt werden.
• The cross sections of the positive and nega-
darf 1,5 mm² nicht unterschreiten.
• Fahrzeugseitige Stecker nicht an das
Radio anschließen!
Die für Ihren Fahrzeugtyp erforderlichen
Adapterkabel erhalten Sie im BLAUPUNKTFachhandel.
• Je nach Bauart kann Ihr Fahrzeug von dieser
tive cables must not be less than 1.5 mm².
• Do not connect the vehicle’s plug connectors to the radio!
You can obtain the adapter cable required for
your vehicle type from any BLAUPUNKT dealer.
• Depending on the model, your vehicle may
Beschreibung abweichen. Für Schäden durch
Einbau- oder Anschlussfehler und für Folgeschäden übernehmen wir keine Haftung.
differ from the description provided here.
We accept no responsibility for any damages
due to incorrect installation or connection or
for any consequential damages.
Sollten die hier aufgeführten Hinweise für
Ihren Einbau nicht passen, so wenden Sie
sich bitte an Ihren Blaupunkt-Fachhändler,
Ihren Fahrzeughersteller oder unsere TelefonHotline.
If the information provided here is not suitable for your specific installation requirements, please contact your Blaupunkt dealer,
your vehicle manufacturer or our telephone
hotline.
Bei Einbau eines Amplifier oder Changers müssen unbedingt erst die Gerätemassen angeschlossen werden, bevor die Stecker für die LineIn- oder Line-Out-Buchse kontaktiert werden.
When installing an amplifier or changer, you
must first connect the device earth connections
before connecting the plugs for the line-in or lineout jacks.
Fremdgerätemassen dürfen nicht an der
Autoradiomasse (Gehäuse) angeschlossen
werden.
Earth connection of external devices may not
be connected to earth of car sound system
(housing).
ITALIANO
• Der Querschnitt des Plus- und Minuskabels
nents when drilling any holes.
ENGLISH
When carrying out installation work and
making connections please observe the following safety instructions:
FRANÇAIS
Safety instructions
Für die Dauer der Montage und des
Anschlusses beachten Sie bitte folgende
Sicherheitshinweise.
NEDERLANDS
Sicherheitshinweise
Installation instructions
SVENSKA
Einbauanleitung
DEUTSCH
Einbauanleitung • Installation instructions • Notice de montage • Istruzioni di installazione •
Inbowhandleiding • Monteringsvejledning
389
EA_NJerseyMP68_Buch1.indd 389
28.10.2008 15:35:51 Uhr
Mitgelieferte Montage- und
Anschlussteile
Als Sonderzubehör erhältlich
Supplied Mounting Hardware
Disponible en option
Materiel de montage fourni
Reperibili come accessori extra
Componenti di fissaggio comprese nella
fornitura
Als speciale accessoire verkrijgbaar
Available as an optional accessory
Meegeleverde montagematerialen
Tillval
Medföljande monteringsdetaljer
Preamp,/Sub,/Center - out cable
A
7 607 001 512
A
B
7 607 621 . . .
USB cable
Einbausätze
Installation kits
Kits de montage
Set di montaggio
Inbouwsets
Monteringssatser
C
D
E
BLA
UP UN
KT
7 608 . . . . . .
392
EA_NJerseyMP68_Buch1.indd 392
28.10.2008 15:35:52 Uhr
1.
DEUTSCH
3.
ENGLISH
0°- 30°
12V
FRANÇAIS
+/– 10°
+/– 10°
ITALIANO
2.
SVENSKA
NEDERLANDS
ca. 10 mm
15 mm
≈150º C
393
EA_NJerseyMP68_Buch1.indd 393
28.10.2008 15:35:53 Uhr
Mikrofon
B LA
UPU
NKT
E
D
schwarz, black, noir,
nero, zwart, svart
C
rot, red, rouge, rosso,
rood, röd
New Jersey MP68
Pin 9 MIC GND
Pin 10 MIC INPUT
394
EA_NJerseyMP68_Buch1.indd 394
28.10.2008 15:35:54 Uhr
FRANÇAIS
ENGLISH
6. Ausbau / Removal / Démontage /
Smontaggio / Demontage / Urmontering
DEUTSCH
4.
antenna connection
8 613 150 002
ITALIANO
B
SVENSKA
NEDERLANDS
5.
7.
A
12V
395
EA_NJerseyMP68_Buch1.indd 395
28.10.2008 15:35:54 Uhr
8.
C-1
10
2
C-3
8 11
15 18
C
6
3
4
5
7
2
4
6
8
1
3
5
7
2
4
6
8
A
B
FB +12V / RC +12V
+12V Amplifier
*
8
14 17 20
3
10 Ampere
A
Summe, Sum
Somme, Somma
Som, Sum
300 mA
B
1
2
3
4
5
6
7
8
Gala
Radio Mute
Sub-Out
Permanent +12V
Aut. antenna
Illumination
Kl.15/Ignition *
Masse/GND
1
2
3
4
5
6
Line Out LR
Line Out RR
Line Out / Ground
Line Out LF
Line Out RF
+12V Amplifier*
1
2
3
4
5
6
7
8
C1
Equalizer
Aut. antenna
13 16 19
9 12
5
1
5
6
3
1
D
C-2
7 10
4
2
7
9
1
D
1
2
3
4
5
6
7
8
9
10
Speaker out RR+
Speaker out RR–
Speaker out RF+
Speaker out RF–
Speaker out LF+
Speaker out LF–
Speaker out LR+
Speaker out LR–
C2
7
8
9
10
11
12
Telefon NF in +
Telefon NF in –
Radio Mute
RC +12V *
Remote Control
RC - GND
NC
NC
NC
NC
NC
NC
NC
NC
MIC GND
MIC INPUT
C3
13
14
15
16
17
18
19
20
CDC-Data In
CDC-Data Out
Permanent +12V
+12V *
Bus / GND
AF / GND
CDC Line In - L
CDC Line In - R
Amplifier
Optional
(Remote Control Eye)
CD-Changer
396
EA_NJerseyMP68_Buch1.indd 396
28.10.2008 15:35:55 Uhr
DEUTSCH
9.
FRANÇAIS
ENGLISH
Preamp./Sub./Center - out cable
7 607 001 512
BN
ITALIANO
+12V
A
Sub out
Relais
7
1 35
Kl. 15 +12V
8
24 6
Gala
RR
F LR
RF L
+
+
+
+
-
SVENSKA
Radio Mute
NEDERLANDS
+12V
+12V Amplifier
4 Ohm
4 Ohm
4 Ohm
4 Ohm
+12V
12V
Änderungen vorbehalten!
Subject to changes!
Sous réserve de modifications!
Modifiche riservate!
Wijzigingen voorbehouden!
Ändringar förbehålles!
397
EA_NJerseyMP68_Buch1.indd 397
28.10.2008 15:35:55 Uhr
© 2008 All rights reserved by Blaupunkt. This material may be reproduced, copied or distributed for personal
use only.
This product is protected by certain intellectual property rights of Microsoft. Use or distribution of such technology
outside of this product is prohibited without a license from Microsoft.
398
EA_NJerseyMP68_Buch1.indd 398
28.10.2008 15:35:55 Uhr
SVENSKA
Bitte den ausgefüllten Gerätepass sicher aufbewahren!
Please keep the filled-in radio pass in a safe place!
Prière de conserver soigneusement la carte d’autoradio remplie !
Tenete per favore il libretto di apparecchio, debitamente riempito, in
un posto sicuro!
Bewaar de ingevulde apparaatpas op een veilige plaats!
Vänligen förvara ifyllt apparatpass på säker plats!
399
EA_NJerseyMP68_Buch1.indd 399
28.10.2008 15:35:56 Uhr
Germany
Austria
Denmark
Finland
Great Britain
Greece
Ireland
Italy
Luxembourg
Norway
Portugal
Spain
Sweden
Switzerland
Czech. Rep.
Hungary
Poland
Turkey
USA
Brasil
(Mercosur)
Malaysia
(Asia Pacific)
Phone:
Fax:
WWW:
(D)
(A)
(DK)
(FIN)
(GB)
(GR)
(IRL)
(I)
(L)
(N)
(P)
(E)
(S)
(CH)
(CZ)
(H)
(PL)
(TR)
(USA)
0180-5000225
01-610 39 0
44 898 360
09-435 991
01-89583 8880
210 94 27 337
01-46 66 700
02-369 62331
40 4078
+47 64 87 89 60
2185 00144
902 52 77 70
08-7501850
01-8471644
02-6130 0446
76 889 704
0800-118922
0212-335 07 23
800-950-2528
05121-49 4002
01-610 39 391
44-898 644
09-435 99236
01-89583 8394
210 94 12 711
01-46 66 706
02-369 62464
40 2085
+47 64 87 89 02
2185 00165
91 410 4078
08-7501810
01-8471650
02-6130 0514
–
022-8771260
0212-346 00 40
708-6817188
http://www.blaupunkt.com
(BR)
0800 7045446
+55-19 3745 2773
(MAL) +604-6382 474
01/09 - CM-AS/SCS (de, gb, fr, it, nl, sw)
Country:
+604-6413 640
Name:
New Jersey MP68
.............................................................................
Typ:
7 648 498 310
............................................................................
Serien-Nr:
BP ........................................................................
8622406212
Gerätepass
Blaupunkt GmbH, Robert-Bosch-Straße 200, D-31139 Hildesheim
400
EA_NJerseyMP68_Buch1.indd 400
23.01.2009 10:17:42 Uhr