1
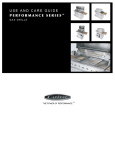
USE AND CARE GUIDE
P E R F O R M A N C E S E R I E S™
SIDE BURNERS
THE POWER OF PERFORMANCE
TM
TABLE OF CONTENTS
Introduction
Warnings
i
ii
Safety Practices and Precautions
2-4
Gas Requirements (NAT/LP)
5-6
Leak Testing
7
Built-In Clearances
8
Replacing Regulators and Hose
9
Lighting Instructions
10
Care and Cleaning
11
Troubleshooting
12
Installer's Final Checklist
13
We're here for you
14
Wiring Diagram:
Wiring Diagram—PSQSB2000
15
Warranty
16
Notes
capital cooking is your friend
hello and welcome to Capital...
We thank you for choosing our Performance
Series™ cooking equipment. Because of the
unique features found in our products, we
recommend spending some time to familiarize
yourself with this booklet before using your
product. In it you will find valuable information on
how to safely operate and maintain your
appliance for years of enjoyable cooking.
We understand that questions arise from time to
time on use and care about our products, so we
want to make it easy for you to find the answers.
That’s why we pride ourselves on superior
customer service and work harder to respond to
your needs quickly and effectively.
Our Customer Service representatives are here
to assist you and are just a phone call away.
You can reach us toll free: 1-866-402-4600; by
e-mail: [email protected];
or by standard mail: 13211 Florence Ave. Santa
Fe Springs, CA, 90670.
When you contact us, please make sure you
have the model # and your serial # ready.
This allows us to better serve your needs.
We realize you have a choice in your appliance
needs so we feel honored to welcome you to our
family, where passion for improving the quality of
your culinary life is our number one priority.
your friends at Capital Cooking Equipment.
WARNINGS!
ii
read this:
This Appliance is FOR OUTDOOR USE ONLY!
WARNING!
If the information in this manual is not followed
exactly, a fire or explosion may result, causing
property damage, personal injury or death. Please
read the installation, operating and maintenance
instructions thoroughly before use.
WARNING!
Do not try lighting this appliance without reading
the “Lighting Instructions” section in this manual.
Improper installation, adjustment, alteration,
service or maintenance can cause property
damage, injury or death. Read the installation,
operating and maintenance instructions
thoroughly before use, installing or servicing this
appliance. This outdoor gas appliance is not
intended to be installed in or on recreational
vehicles and/or boats!
PRECAUTION!
Do not store or use gasoline or any other
flammable liquids in the vicinity of this or any
other appliance.
FOR YOUR SAFETY!
If You Smell Gas:
Shut off gas to the appliance
Extinguish any open flames
If odor persists, immediately call your gas supplier
NOTE—Installation and service must be
performed by qualified installer, service
agency or the gas supplier.
PLEASE RETAIN THIS MANUAL FOR
FUTURE REFERENCE!
important technical info:
Tested in accordance with ANSI Z21.58b CAN/CGA 1.6b-2002 For US and Canada for LP and Natural Gas.
STANDARD FOR OUTDOOR USE ONLY.
Check your local building codes for the proper method of installation. In the abscence of local codes, this
unit should be installed in accordance with the National Fuel gas Code No. Z223.1-1998 and the National
Electrical Code ANSI/NFPA No. 70-1990
BE SAFE!
2
WE HOPE YOU UNDERSTAND:
Damage caused by a failure to
heed warnings, follow basic
safety instructions, or basic
safety practices ARE NOT
covered by the warranty.
WARNING!
When in use, portions of this appliance get hot enough to cause severe
burns. Children and pets should never be left alone or unattended in an
area where the appliance is being used. Never allow children to sit, stand,
or play on or around the Grill or Side Burner at any time.
IMPORTANT!
Improper use or installation is dangerous. Carefully follow these
instructions.
When properly cared for, your Performance Series™ grill or side burner
will give you years of safe and reliable enjoyment. However, extreme
care must be taken since this appliance produces intense heat, increasing
the risk of accident potential. When using the grill, basic safety practices
must be followed, including the following:
To reduce the risk of fire, burns, or other injury, read this Use and Care
guide thoroughly. Begin by ensuring proper installation and servicing.
Do not repair or replace any part of the grill or side burner unless
specifically recommended in this manual. All other service must be
referred to a qualified Factory Authorized Technician, call us at
1-866-402-45600 for details.
DO NOT store items of interest to children in or around the grill or side
burner. Never allow children to use the Performance Series™ grill or
side burner.
NEVER let clothing, pot holders or other flammable materials come into
contact with or come too close to any grate, burner or hot surface until it
has cooled. Fabric may ignite and result in personal injury.
DO NOT heat unopened food containers as a build up of pressure may
cause the container to burst
NEVER lean on an open grill or side burner. When lighting a burner, always
pay close attention to what you are doing. Be certain you are pushing the
ignition button when you attempt to light the burner.
DO NOT touch the grill grates (racks) or side burner grate, or any item in
the interior cavity or surrounding area of the appliance when burners are
on. These areas become extremely hot and could cause severe burns.
GREASE is flammable. Let hot grease cool before attempting to handle it.
DO NOT line grill or side burner grates with aluminum foil. This may
severely disrupt combustion airflow or trap excessive heat in the controlled
area. This may result in melted knobs and/or igniters, and damage to the
lighting system.
TAKE CAUTION when cleaning the grill or side burner. Avoid steam burns:
Do not use a wet sponge or cloth to clean any surface while it is hot. Some
cleaners produce noxious fumes or can ignite if applied to a hot surface.
BE SAFE!
3
BE SURE all control knobs are in the OFF position and grill
or side burner is cool prior to using any aerosol cleaner on
or around it. The chemical that produces the spraying
action could, in the presence of heat, ignite or cause metal
parts to corrode.
ALWAYS use dry potholders: moist or damp potholders on
hot surfaces may cause steam burns. Do not use a towel or
bulky cloth in place of potholders. DO NOT let potholders
touch hot portions of the Side Burner grate or burner.
DO NOT operate the grill or side burner under unprotected
combustible construction. Use only in well ventilated area.
DO NOT obstruct the flow of combustion and ventilation air.
DO NOT use the grill or side burner in buildings, garages,
sheds, breezeways or other such enclosed areas. This unit
is for Outdoor Use Only!
KEEP ALL electrical cords away from the heated areas of
this appliance.
BEGIN by ensuring proper installation and servicing. Follow
the installation instructions provided with this product. Have
your grill or side burner installed by a qualified technician.
Have the installer show you where the gas supply shut off
valve is located, so that you know where to shut off the gas
to the grill.
IF YOU SMELL GAS, your installer has not done a proper
job of checking for leaks. If the connections are not
perfectly sealed, you can have a small leak and therefore a
faint gas smell. Finding a leak is not a “do-it-yourself”
procedure. Some leaks can only be found with the burner
control in the “ON” position, and this must be done only by a
qualified technician.
IMPORTANT SAFETY NOTICE REGARDING LP TANKS:
Certain Liquid Propane dealers may fill liquid propane
cylinders for use in the grill or side burner beyond
cylinder filling capacity. This “Overfilling” may create
a dangerous condition.
“Overfilled” tanks can build up excess pressure. As a
safety device, the tank’s pressure relief valve will vent
propane gas vapor to relieve this excess pressure.
This vapor is combustible and therefore can be ignited.
To reduce this danger, you should take the following
safety precautions:
1. When you have your tank filled, be sure you tell
the supplier to fill it to no more than 3/4 (75%) of its total
filling capacity.
2. If you own or use an extra tank, or have a disconnected
tank, you should never store it near or under the grill unit or
heat box, or near any other ignition or heat source.
BE SAFE!
4
WARNING!:
Keep the area surrounding the grill free from
combustible materials, trash, or combustible fluids
and vapors such as gasoline or charcoal lighter
fluid. DO NOT obstruct the flow of combustion
and ventilation air.
WARNING!:
NEVER use the grill in windy conditions. If
located in a consistently windy area (oceanfront,
mountaintop, etc.) a windbreak will be required.
Always adhere to specific clearances listed.
IMPORTANT:
Never use a dented or rusty LP tank.
A NOTE ON CLOTHING:
For personal safety, wear proper apparel. Loose fitting
garments or sleeves should never be worn while using
this appliance. Some synthetic fabrics are highly
flammable and should not be worn while cooking.
A NOTE ON COOKWARE:
Only certain types of glass, heat-proof glass ceramic,
earthenware, or other glazed utensils are suitable for
grill use. Use of these types of materials may break
with sudden temperature changes. Use only on low
or medium heat settings according to the
manufacturer’s directions.
IMPORTANT:
SPIDER AND INSECT WARNING!:
Spiders and insects can nest in the burners of this and
any other grill, and cause the gas to flow from the front
of the burner. This is a very dangerous condition that can
cause a fire to occur behind the valve panel, thereby
damaging the grill and making it unsafe to operate.
please do this!
When using the open top burners, always use
flat-bottomed utensils large enough to cover the burner.
Adjust the flame so that it heats only the bottom of the
pan to avoid ignition of clothing. Position handles inward,
away from open edges of the unit to avoid burns
associated with unintentional spillovers. Hold the
handle of the pan to prevent movements of the utensil
when turning or stirring food. For proper lighting and
performance of the burners, keep the burner ports
clean. It is necessary to clean them periodically for
optimum performance.
Keep the Performance Series (TM) grill covered when
not in use. Never connect an unregulated gas line to
the grill. If the grill has not been used for an extended
period of time (over winter, for example), the unit should
be checked for gas leaks and obstructions in the burner.
Thoroughly clean the Performance Series™ grill on a
regular basis.
Only use the Performance Series (TM) grill with
the type of gas specified on the rating plate. To change
from LP gas to natural, a factory conversion kit is
available for purchase (see your Capital authorized
dealer for details)
Please inspect the burner(s) at least once a
year or immediately if any of the following
conditions are present:
• The smell of gas in conjunction with the burner flames
appearing yellow.
• The grill does not reach temperature.
• While in use, a slight popping noise will be heard
after shut off with LP gas.
IMPORTANTGOVERNMENTALSTUFF
CALIFORNIA PROPOSITION 65-WARNING:
The burning of gas cooking fuel generates some
by-products that are on the list of substances
which are known by the State of California to
cause Cancer or reproductive harm. California law
requires businesses to warn customers of potential
exposure to such substances. To minimize
exposure to these substances, always operate
this unit according to the Use and Care Guide,
ensuring you provide good ventilation when
cooking with gas.
natural gas requirements:
5
Verify the type of gas to be used, either LP (propane), or Natural gas,
and make sure the marking on the appliance rating plate agrees with
that of the supply. The rating plate is located on the outside back wall of
NEVER connect an unregulated gas line to
the appliance!
the grill.
An installer supplied gas shut-off valve must be installed in an easily
accessible location. All installer-supplied parts must conform to local
codes, or in the absence of local codes, with the National Electrical
Code, ANSI/NFPA 70-1990, and the National Fuel gas Code, ANSI
Z223.1-1988.
All pipe sealants must be an approved type and resistant to the actions
of LP gases. Never use pipe sealant on flare fittings. All gas
connections should be made by a qualified technician and in
accordance with local codes and ordinances. In the absence of local
codes, the installation must comply with the National Fuel Gas Code
ANSI Z223.1-1988. Gas conversion kits are available from the factory.
When ordering gas conversion kits, please have the model # and gas
type (natural or LP) available from your grill.
performance fact!
TOTAL GAS CONSUMPTION = 30,000 BTU/HR
The appliance and its individual shut-off valve must be disconnected
from the gas supply piping system during any pressure testing of that
system at test pressures in excess of 1/2 PSIG (3.5 kPa). The
appliance must be isolated from the gas supply piping system by closing
its individual manual shut-off valve during any pressure testing of the
gas supply piping system at test pressures equal to or less than 1/2
PSIG (3.5 kPa). The installation of this appliance must conform with
local codes or, in the absence of local codes, with the National Fuel Gas
Code, ANSI Z223. 1a-1988. Installation in Canada must be in
accordance with the standard Can 1-b149.1 and/or .2 (installation code
for gas burning appliances and equipment) and local codes.
NATURAL GAS HOOKUP:
Connection: 1/2” NPT male. Operating Pressure: 4.0” W.C.
Supply Pressure: 5” to 14” water column. If in excess of 14” W.C.
a step down regulator is required. Check with your local gas utility
company or with local codes for instructions on installing gas supply
lines. Be sure to check on type and size or run, and how deep to bury
the line. If the gas line is too small, the grill will not function properly.
Any joint sealant used must be an approved type and be resistive
to the actions of LP gases.
TO HOOK-UP THE FITTINGS SUPPLIED WITH THE SIDE BURNER:
Use threading compound on male threads only. Use second pipe
wrench to hold the grill inlet pipe to avoid shifting any internal gas lines
of the grill. Ensure that the regulator arrow points in the direction of gas
flow towards the unit, away from the supply.
Do not forget to place the installer supplied gas valve in an
accessible location.
lp gas requirements:
7
6
LP GAS HOOK UP (TYPE 1 OR QCC1 REGULATOR)
Side Burners orificed for use with LP gas come equipped
with a high capacity hose/regulator assembly for connection
to a standard 20lb. LP cylinder (Type 1). The LP tank is
not included.
Connection: 1/2” NPT male with a 3/8” Flare adapter
(included). LP hose with a quick disconnect and fittings
are included. Operating Pressure: 10.0” W.C.
To connect the LP regulator/hose assembly to the tank/valve
assembly, first make sure the main valve on the tank is
completely closed. Although the flow of gas is stopped when
the Type 1 system is disconnected as part of its safety feature,
you should always turn off the LP tank main valve after each
use and during transport of the tank or unit. Insert the
regulator inlet into the tank valve and turn the black coupler
clockwise until the coupler tightens up. Do not over-tighten the
coupler. Turn the main tank valve “ON” and turn the burner
control valves on the unit to the “HI” position for about 20
seconds to allow the air in the system to purge before
attempting to light the burners.
NOTE—Side Burner uses the LP regulator from
adjoining grill.
LP TANK REQUIREMENTS:
A dented or rusty LP tank may be hazardous and should be
checked by your LP supplier. Never use a cylinder with a
damaged valve. Always check for leaks after every LP tank
change. The LP gas cylinder must be constructed and marked
in accordance with the specifications for LP gas cylinders of
the U.S. Department of Transportation (DOT) and designed for
use with a Type 1 system only. Do not change the
regulator/hose assembly from that supplied with the unit or
attempt to use a Type 1 equipped regulator/hose assembly
with a standard 510 POL tank/valve assembly. The cylinder
must be provided with a shut off valve terminating in an LP gas
supply cylinder valve outlet specified, as applicable, for
connection Type 1. If the appliance is stored indoors, the
cylinder must be disconnected and removed from the
appliance. Cylinders must be stored outdoors in a
well-ventilated area out of the reach of children.
NOTE: When an LP unit is directly attached into an LP
house system, the step down regulator MUST be used to
reduce the supply pressure to a max. 14" W.C. and min.
11" W.C. to the grill regulator.
leak testing:
78
7
GENERAL:
Although all gas connections on the PSQSB2000 Side
Burner are leak tested at the factory prior to shipment, a
complete gas tightness check must be performed at the
installation site due to possible mishandling in shipment,
or excessive pressure unknowingly being applied to the
unit. Periodically check the whole system for leaks, or
immediately check if the smell of gas is detected.
BEFORE TESTING:
Do not smoke while leak testing. Extinguish all open
flames. Never leak test with an open flame. Make a soap
solution of one part liquid detergent and one part water.
You will need a spray bottle, brush, or rag to apply the
solution to the fittings. For LP units, check with a full
cylinder. The valve panel must be removed to check the
valves and fittings. First, remove the knobs. Next, access
the screws that affix the front panel to the unit. They are
located at the bottom left and right hand corners of the
front fascia. Using a screwdriver, remove the screws.
Lastly, gently pull the panel downward and out, making
sure that you do not pull out the ignition system wires.
Unplug the wires from the ignition module and the back
of the ignition button.
TO TEST:
Make sure that all control valves are in the “OFF” position.
Turn the gas supply “ON”. Check all connections from the
supply line, or LP cylinder up to and including the
manifold. Soap bubbles will appear where a leak is
present. If a leak is present, immediately turn off gas
supply, tighten any leaking connections, turn gas on, and
recheck. Check all the gas connections at the base of the
control valves where they screw into the manifold pipe.
Do not use the side burner until all connections have
been checked and do not leak.
Check all gas supply fittings for leaks before each use.
It is handy to keep a spray bottle of soapy water near the
shut-off valve of the gas supply valve. Spray all the
fittings. Bubbles indicate leaks.
built in clearances:
GENERAL:
The PSQSB2000 Side Burner is designed for easy
placement into non-combustible masonry enclosures.
For non-combustible applications the grill drops into the
opening and hangs from its side flanges. A deck is not
required to support it from the bottom.
Please review the detail drawing shown and take into
account the provisions shown for gas line hook-up
clearances in the right rear corner. It is recommended
that ventilation holes are provided in the enclosure in the
event of a gas leak. The supporting ledges or deck must
be level and flat. The counter should also be level.
KEY:
9
7
8
LOCATION:
When determining a suitable location, take into
account concerns such as exposure to wind,
proximity to traffic paths, and keeping any gas or
electrical supply lines as short as possible.
Locate the grill only in a well-ventilated area.
Never locate the grill in a building, garage,
breezeway, shed or other such enclosed areas
without an approved ventilation system. During
heavy use, the grill will produce a lot of smoke.
Ensure there is adequate area for it to dissipate.
IMPORTANT:
A minimum of 6" clearance from the sides and
back must be maintained from the side burner
above and 1" below the cooking surface to
combustible construction.
A - width = 11-1/8"
B - height = 8-3/4"
C - depth = 24-3/4"
4 x 4 opening for
manifold intake
pipe
C
B
A
replacing hose & regulator: 7
9
WARNING!
Before lighting, inspect the gas supply piping or hose prior to turning the
gas “ON”. If there is evidence of cuts, wear, or abrasion, it must be
replaced prior to use.
REPLACEMENT OF REGULATORS AND HOSE:
The pressure regulator and hose assembly supplied with
the unit must be used. The replacement pressure
regulators and hose assembly must be the type
specified by the manufacturer. Do not use the grill or
side burner if the odor of gas is present. If the unit is LP,
screw the regulator into the tank and leak check the
hose and regulator connections with a soap and water
solution before operating the grill. Turn all knobs to
“OFF” then turn on the gas supply. If LP, is there gas in
the tank? Always keep your face and body as far away
as possible from the Side Burner when lighting.
DO NOT leave the side burner unattended
while cooking.
KEEP a spray bottle of soapy water near the
gas supply valve and check the connections
before each use.
DO NOT attempt to “light” the side burner if
odor of gas is detected.
WAIT five minutes before relighting a hot grill
or side burner.
Note: If using LP gas, your preheat time may be
shorter than recommended. To prevent overcooking
or burning, you may want to lower heat settings.
lighting instructions:
WARNING:
Keep hands and face away from front of burner!
STAND TO THE SIDE WHEN LIGHTING. ONCE LIT
MOVE HAND AWAY QUICKLY!
13
7
10
Lighting The Side Burner:
Note: Open the side burner lid and/or remove the top
grate cover before lighting. Turn all knobs to “OFF.”
Turn the main gas supply on. If you smell gas,
shut-off gas-supply and call for service.
Push and hold the ignition button and turn the selected
burner knob to “HIGH.” If the burner does not light
within 4 to 5 seconds, turn knob “OFF” and wait 5
minutes before trying again for any accumulated gas
to dissipate.
Your PSQSB2000 side burner is equipped with the
same sealed burners we use on our indoor residential
ranges. Each burner is rated at 15,000 BTU/HR and
has a battery ignition for efficient lighting. The burner
grates are porcelain enamel over cast iron for
maximum durability. The side burner cover protects
the Side Burners from dust and debris and also acts
as a work surface. When using the grill burners with
the Side Burner cover in place, be careful as heat can
conduct from the grill section and cause the cover to
heat up.
WARNING! NEVER attempt to light the side
burner with the cover in place.
Flame Height:
The correct height of the flame depends on the
size of and material of the utensil being used,
the food being cooked and how much liquid is in
the utensil. Here are some basic rules for
selecting the flame height.
Flame should never extend beyond the bottom
of the pan.
Utensils that conduct heat slowly (such as
glass-ceramic) should be used with a low or
medium flame, unless you are cooking with a
large amount of liquid.
caring for your side burner: 7
11
Side Burner Cleaning:
BEFORE REMOVING: ensure the gas supply is turned off and the knobs are in
the “OFF” position. Make sure the grill is cool. Remove the top grate. Lift and
remove the burner caps and clean sealed pan with a mild soap and warm water
cleaner. Clean burner base with a soap and warm water solution. Burner ports
may be cleaned with a straightened paperclip.
Burners:
Each burner is constructed of a porcelain coated cast iron top cap coupled with
an aluminum burner containing ports and an aluminized base. The burners are
sealed, which means that spills are contained in a sealed top section for easy
cleanup. Frequency of cleaning will depend upon the climate and location, and
how often you use the grill. If spill deposits, grease residue, and dust are
allowed to collect over time, the presence of these materials can seriously
jeopardize burner performance. It will be necessary to clean out the burner
ports using a thin wire, needle or straightened paper clip.
Stainless Steel:
The PSQSB200 is constructed out of non-rusting and non-magnetic stainless
steel. After initial usage, areas of the side burner may discolor from the intense
heat given off by the burners: this condition is normal. There are many different
stainless steel cleaners available. Always use the mildest cleaning procedure
first, scrubbing in the direction of the grain. To touch up noticeable scratches in
the stainless steel, sand very lightly with dry 100 grit emery paper in the
direction of the grain. Specks of grease can gather on the surfaces of the steel
and bake on to the surface giving a “rust-like” appearance. For removal, use an
abrasive pad in conjunction with a stainless steel cleaner. Always rub in the
direction of the grain.
IMPORTANT!
Stainless steel tends to rust in presence of chlorides and sulfides specifically
in coastal area. To ensure rust prevention, wash all stainless steel surfaces
every 3-4 weeks with fresh water and condition with stainless steel cleaner.
Battery Replacement:
• Battery location is indicated on the front panel
• Flip the battery service panel up
• You will see a 9 volt battery ready for
replacement
• Pull battery out and replace
• Push to snap in
Note: battery condition should be checked
at least once a year.
troubleshooting:
12
Before Calling For Service:
If your PSQSB2000 Side Burner does not function properly, use the
following checklist before contacting your dealer for service. You
may save the cost of a service call. Troubleshooting is for general
purposes only. If the problem persists and you feel you require a
service call, contact your dealer or the nearest authorized service
agency to perform service. Only factory authorized service agencies
can perform warranty service. Call Capital customer service at
1.866.402.4600.
Side Burner won’t light when ignition button is pushed:
• Remove the side burner top grate and watch the ignition tip.
You should see a spark jump from the tip of the ignition when the
ignition is pushed.
• If there is no spark when ignition button is pushed, check the
battery condition. (Battery condition should be checked at least
once a year.)
• Attempt to match light the burners.
• Check to see that other burners on the unit operate.
• Clean ignition tip of any debris.
Burner flame is yellow or orange, in conjunction with
the odor of gas:
• Check the burner inlet for obstructions such as spider webs.
• Check the air shutter for proper adjustment.
• Side Burner may be in a dusty area.
• Move to a less dusty area if possible.
Low heat with knob on “HI” position:
• If only one of the burners appears low, clean the orifice and burner,
clearing ports of any obstruction.
• Check for proper gas supply and pressure.
• Pre-heat Side Burner for a full 15 minutes.
• If using LP gas, check for empty tank.
final checklist:
13
installer: initial beside each item
INSTALLER FINAL CHECKLIST:
Specified Clearances Maintained
Side Burner Grates in Place
User Informed of Gas Supply Shut-Off Location
Nylon Straps Removed from Burners
Pressure Regulator Connected and Set for 4.0"
W.C. Natural or 10" W.C. LP gas
All Internal Packaging Removed
Manual Shut-Off Valve Installed and Accessible
Knobs Turn Freely and Bezels Centered
Unit Tested and Free of Leaks
Each Burner Lights Individually
Igniter Clicks when Pressed
Note: User, ensure that installer completes this checklist, explains each item before leaving.
CUSTOMER: Ensure that installer completes checklist,
explains each item before leaving. Please make sure the
installer initials above and signs in the space provided.
INSTALLER: Please sign and date
here and leave these instructions
with customer:
X
date: ________________
we're here for you:
14
HOW TO OBTAIN SERVICE:
For service, contact one of our PERFORMANCE SERIES SPECIALISTS at
1-866-402-4600.
Before you call, please have the following information ready:
• Model Number
• Serial Number
• Date of purchase and Installation
• A brief description of the problem
• Dealer name
Your satisfaction is of the utmost importance to us. If a problem cannot be resolved to your
satisfaction, please write or fax us at:
Capital Cooking Equipment
Attn: Customer Service
13211 Florence Ave
Santa Fe Springs, CA
90670
USA
Fax us at 562-903-1167
Email us at [email protected]
FOR: ________________________________________________________________________
MODEL #: ___________________________________________________________________
SERIAL #: ____________________________________________________________________
GAS TYPE: __________________________________________________________________
NOTES: _____________________________________________________________________
____________________________________________________________________________
____________________________________________________________________________
____________________________________________________________________________
PERFORMANCE SERIES SIDE BURNERS
WARRANTY
• One (1) Year full parts and labor covers entire product.
• Five (5) Year comprehensive warranty covering the porcelain coated cast iron range-top burners and porcelain
enameled cast iron top grate. Should structural deterioration occur to the degree of non-performance,
a replacement will be furnished.
• Limited Lifetime Warranty against rust on all stainless steel components (excludes normal heat discoloration).
WILL PAY FOR:
All repair labor found to be defective due to materials or workmanship for one full year “IN HOME” warranty during
the first year of ownership. This does not apply if the unit was subjected to other than normal household use.
Service must be performed by a Factory Authorized Service Agent during normal business hours. No charges will
be made for repair or replacement at the location of initial installation or factory for parts returned pre-paid, through
the dealer and claimed within the warranty period, and found by Capital to be defective.
Replacement will be FOB Capital, and Capital will not be liable for any transportation costs, labor costs, or export
duties. This warranty shall not apply, nor can we assume responsibility for damage that might result from a failure to
follow manufacturer’s instructions or local codes, where the appliance has been tampered with or altered in any way
or which, in our judgment, has been subjected to misuse, negligence, or accident. Implied warranty shall not extend
beyond the duration of this written warranty. This warranty is in lieu of all warranties expressed or implied and all
other obligations or liability in connection with the sale of this appliance.
WILL NOT PAY FOR:
•
•
•
•
Installation or start up.
Shipping damage.
Service by an unauthorized agency.
Damage or repairs due to service performed by an unauthorized service agency or the use of
unauthorized parts.
• Service during other than normal business hours.
• Improper installation, such as improper hook-up.
• Service visits to teach consumers how to use the appliance, correct the installation, reset circuit breakers or
replace home fuses.
• Repairs due to other than normal household use.
• Damage caused from accident, abuse, alteration, misuse, incorrect installation or installation not in accordance
with local codes.
• Units installed in non-residential application such as day care centers, bed and breakfast centers, churches,
nursing homes, restaurants, hotels, motels, schools, etc.
• Isolated geographic locations of 50 miles of travel distance or two hours of travel time both ways, for example,
such places that require plane, train, boat or ferry trips, etc.
This warranty applies to appliances used in residential application only. It does not cover their use in
commercial situations (commercial situations include but are not limited to restaurants, public parks and
recreation areas, any area where units are exposed to multiple users, public cooking areas, etc.) This
warranty is for products purchased and retained in the 50 States of the U.S.A, the District of Columbia and
Canada. This warranty applies even if you should move during the warranty period. Should the original
purchaser sell the appliance during the warranty period, the new owner continues to be protected until the
expiration date of the original purchaser ’s warranty period. This warranty gives you the specific legal
rights. You may also have other rights, which vary from State to State.