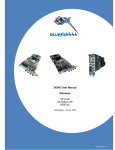
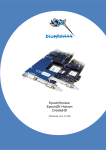
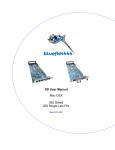
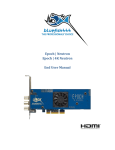
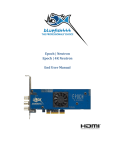
Download Bluefish444 SD Focus User manual
Transcript
SD|Greed User Manual Limited Warranty Bluefish444 warrants that this product will be free from defects in materials and workmanship for a period of three (3) years from the date of purchase. This warranty is provided only to customers who register the Bluefish444 serial number at the place nominated on the Bluefish444 homepage. If a product proves to be defective during this three year warranty period, Bluefish444, at its option, will either repair the defective product without charge for parts and labor, or will provide a replacement in exchange for the defective product. In order to obtain service under this warranty, the customer must notify Bluefish444 of the defect before the expiration of the warranty period. The customer shall be responsible for packing and shipping the defective product to a designated service centre nominated by Bluefish444 with shipping charges prepaid. Bluefish444 shall pay for the return of the product to the customer. This warranty shall not apply to any defect, failure or damage caused by improper use or improper or inadequate maintenance and care. Bluefish444 shall not be obligated to furnish service under this warranty a) to repair damage resulting from attempts by personnel other than Bluefish444 authorized resellers to install, repair or service the product, b) to repair damage resulting from improper use or connection to incompatible equipment, c) to repair any damage resulting or malfunction caused by the use of non Bluefish444 parts or supplies, or d) to service a product that has been modified or integrated with other products when the effect of such a modification or integration increases the time or difficulty of servicing the product. This warranty specifically shall not apply to Bluefish444 products purchased second hand. This warranty is given by Bluefish444 in lieu of any other warranties, expressed or implied. Bluefish444’s responsibility to repair or replace defective products is the whole and exclusive remedy provided to the customer for any indirect, special, incidental or consequential damages. 2 Support Contact Details. If you have any questions please contact support at [email protected]. Email Support is free for the life of the warranty. For phone support you must register your product at http://www.bluefish444.com/support/techsupport. In order to speed the resolution of your problem please ensure that you provide the following information when contacting support. • • • • • • System configuration and manufacture, Mother board type and Devices installed. SCSI or RAID controller card type. Storage array configuration, OS version. Applications installed Bluefish444 Serial number and product type. For phone support and access to other support resources, hardware configurations etc please register your card at the following website link; http://www.bluefish444.com/products/warranty/register.asp If an issue still exists please contact your integrator or reseller or contact Bluefish444 technical support; World [email protected] North America [email protected] Europe [email protected] Australasia / APAC 9am to 5pm (GMT+10 hours) ph +61 3 9682 9136 [email protected] North America 9am to 5pm (GMT -5 hours) ph 775-727-6950 [email protected] Europe 9am to 5pm ph +44 (0)20 8868 2575 [email protected] 3 Contents ....................................................................................................................................................................... 1 SD|Greed........................................................................................................................................................ 1 User Manual................................................................................................................................................... 1 Limited Warranty........................................................................................................................................... 2 Support Contact Details................................................................................................................................. 3 Australasia / APAC................................................................................................................................ 3 North America ....................................................................................................................................... 3 Europe.................................................................................................................................................... 3 Contents ......................................................................................................................................................... 4 Overview........................................................................................................................................................ 8 Features........................................................................................................................................................ 10 Hardware...................................................................................................................................................... 10 Video Modes........................................................................................................................................ 10 Digital Signal Format .......................................................................................................................... 10 Analog Signal Format.......................................................................................................................... 10 Digital Audio ....................................................................................................................................... 10 Analog Audio....................................................................................................................................... 10 Pixel Formats. ...................................................................................................................................... 10 File Formats ......................................................................................................................................... 10 Hardware Features ............................................................................................................................... 10 Software....................................................................................................................................................... 11 Windows .................................................................................................................................................. 11 Bluefish444 Symmetry ....................................................................................................................... 11 Bluefish444 Feature Application......................................................................................................... 12 Adobe Premiere Pro 1.5.1.................................................................................................................... 12 Adobe After Effects ............................................................................................................................. 13 Photoshop CS....................................................................................................................................... 13 Apple Mac OS ......................................................................................................................................... 13 Supported Retail Applications................................................................................................................. 14 What’s in the Box ........................................................................................................................................ 16 System Requirements .................................................................................................................................. 17 Software Applications ............................................................................................................................. 17 Symmetry................................................................................................................................................. 17 Premiere Pro 1.5.1 ................................................................................................................................... 18 Final Cut Pro HD ..................................................................................................................................... 18 Adobe After Effects 6.5........................................................................................................................... 19 Adobe Photoshop CS............................................................................................................................... 19 Storage Requirements.................................................................................................................................. 20 Real Time Playback in Adobe Premiere Pro 1.5.1 .................................................................................. 21 Certified Storage for Real Time Solutions .............................................................................................. 21 Storage Capacity Guide ........................................................................................................................... 22 Cable Connection......................................................................................................................................... 23 4 Overview.................................................................................................................................................. 23 External Connections........................................................................................................................... 23 Internal Connections............................................................................................................................ 24 SD|Greed Cable Connection Guide ............................................................................................................. 25 SD|Greed Cable Connection Guide ......................................................................................................... 26 Digital Video I/O & Genlock .................................................................................................................. 27 Analog Video I/O .................................................................................................................................... 28 Digital Audio Option 1 - S/P DIF BNC 8 Channels I/O, Unbalanced .................................................... 29 Digital Audio Option 2 - AES/EBU XLR 6 Channels I/O, Balanced ..................................................... 30 Analog Audio Option 1 - RCA Dual channel, Unbalanced..................................................................... 31 Analog Audio Option 2 - XLR Dual channel, Balanced ......................................................................... 32 Deck Control............................................................................................................................................ 33 Windows XP Installation............................................................................................................................. 34 Installation Check List............................................................................................................................. 34 Requirements. .......................................................................................................................................... 34 Installation Steps...................................................................................................................................... 34 Step 1 - Update your system. .............................................................................................................. 34 Step 2 - Install Bluefish444 supported 3rd party applications. Step 3 - Install QuickTime version 6.5.2 or above. ..................................................................................................................................... 34 Step 4 - Install 3rd party application plug-ins and updates. ............................................................... 34 Step 5 - Installing the Bluefish444 hardware...................................................................................... 34 Step 6 - Install the Bluefish444 Installer............................................................................................. 34 Step 7 - Connecting to the outside world............................................................................................ 34 Step 8 - Driver Installation. ................................................................................................................. 34 Step 1 - Update your system. ................................................................................................................... 35 Step 2 - Install 3rd party applications. ..................................................................................................... 35 Step 3 - Install QuickTime version 6.5.2 or above .................................................................................. 36 Step 4 - Install 3rd party application plug-ins and updates ..................................................................... 36 Step 5 - Installing the Bluefish444 hardware. ......................................................................................... 36 Installing your SD|Greed Card ................................................................................................................ 38 Step 7 - Connecting to the outside world................................................................................................. 39 Typical Connection Workflow 1 ............................................................................................................. 40 Typical Connection Workflow 2 ............................................................................................................. 41 Step 8 Driver Installation........................................................................................................................ 42 APPLE Mac OS Installation................................................................................................................ 42 SDK Installation .................................................................................................................................. 42 Windows Installation ............................................................................................................................... 42 New Installations ..................................................................................................................................... 43 Installing From Previous Installations ..................................................................................................... 44 Uninstall Installed Bluefish444 Installers. .......................................................................................... 44 Install the Buefish444 Installer. .......................................................................................................... 45 Controlling the SD|Greed ............................................................................................................................ 46 About the Bluefish444 Feature Application. ........................................................................................... 46 Feature App Main Control Interface........................................................................................................ 46 Card Type ............................................................................................................................................ 47 5 Pixel Format......................................................................................................................................... 47 Input Signal Type. ............................................................................................................................... 47 Output Video Mode. ............................................................................................................................ 47 Key Channel. ....................................................................................................................................... 48 Video + Video, Video + Key;.............................................................................................................. 48 Video, Key;.......................................................................................................................................... 48 Genlock/Timing Adjust. .......................................................................................................................... 48 Reference Video Mode;....................................................................................................................... 48 Reference Video Source; ..................................................................................................................... 48 Horizontal; ........................................................................................................................................... 48 Vertical; ............................................................................................................................................... 48 Set; ....................................................................................................................................................... 49 Miscellaneous Functions. ........................................................................................................................ 49 Signal format converter; (HD product range only); ............................................................................ 49 Safe Picture;......................................................................................................................................... 49 Safe Title;............................................................................................................................................. 49 Enable Onboard Keyer; ....................................................................................................................... 49 Time Code (currently not supported) ...................................................................................................... 50 Letter Box. ............................................................................................................................................... 50 Letter box lines .................................................................................................................................... 50 Set ........................................................................................................................................................ 50 Cropping presets .................................................................................................................................. 50 Video............................................................................................................................................................ 51 Analog Output Signal Type. .................................................................................................................... 52 Video Input Signal Type.......................................................................................................................... 53 Analog Configuration Guide ................................................................................................................... 54 Analog Video Output Signal Properties. ................................................................................................. 55 Unity .................................................................................................................................................... 55 Enable PED.......................................................................................................................................... 55 Analog Video Input Signal Properties..................................................................................................... 56 Analog input only. ............................................................................................................................... 56 Unity. ................................................................................................................................................... 56 Enable PED.......................................................................................................................................... 56 Load Default values............................................................................................................................. 56 Save as Default. ................................................................................................................................... 57 Refresh................................................................................................................................................. 57 Close. ................................................................................................................................................... 57 Audio I/O Settings ................................................................................................................................... 58 Digital Audio to Analog Audio Monitor Routing ............................................................................... 59 Appendices .................................................................................................................................................. 60 Appendix A – Manual Bluefish Driver and DLL Removal ................................................................ 60 1. New Installations. ........................................................................................................................ 60 2. Installing From Previous Installations ......................................................................................... 60 3. Manual Removal of Bluefish444 files and Drivers ..................................................................... 60 Appendix B – The Onboard Keyer...................................................................................................... 60 6 Appendix A - Bluefish444 Driver Installation ........................................................................................ 61 1) New Installations. ........................................................................................................................ 61 2) Installing From Previous Installations ......................................................................................... 61 3) Manual Removal of Bluefish444 files and Drivers....................................................................... 61 1) New Installations............................................................................................................................. 61 2) Installing From Previous Installations............................................................................................. 62 3) Manual Removal of Bluefish444 files and Drivers......................................................................... 63 Step 1 - Uninstall Bluefish4444 Installers. .......................................................................................... 63 Step 2 - Remove Bluefish444 Drivers and System files...................................................................... 63 Step 3 - Delete Plug-in’s...................................................................................................................... 64 Step 4 - Uninstall Drivers via Device Manager................................................................................... 64 Step 5 - Installing version 5.X installer. .............................................................................................. 64 Appendix B – The Onboard Keyer.......................................................................................................... 66 How to use the onboard keyer ............................................................................................................. 66 Spotlight........................................................................................................Error! Bookmark not defined. 7 Overview SD|Greed is the latest, dedicated SD digital and analog video and audio card from Bluefish444. SD|Greed brings the highest quality SD video and audio to Windows, Apple and Linux platforms. SD|Greed is a combination of all our SD products and the needs of the professional studios all rolled in to one PCI card. SD|Greed supports 12 bit digital SDI I/O, capable of supporting the complete range of SDI connection standards up to 12 bit Dual link (4:4:4) I/O including Dual link Video + Key (4:2:2:4). SD|Greed also supports selectable Single link SDI I/O (4:2:2) connections and simultaneous independent SDI I/O, allowing a range of operating modes such as simultaneous capture and playback, multiple independent captures and playback via the 3 customizable SDI outputs and two SDI input BNC cables. SD|Greed analog video interfaces use 12 bit and A/D and D/A converters which provide accurate conversion with extremely low noise. Analog sources acquired from Betacam|SP are preserved at the highest quality. SD|Greed supports a range of memory formats such as 10 and 8 bit RGB/YUV uncompressed video and Apple QuickTime v210. Support for DV25 and DV50 codecs is also supported all within your Apple power Mac or windows systems. SD|Greed provides the most comprehensive audio I/O support than any other card currently available today. SD|Greed supports balanced digital AES/ EBU, embedded I/O, unbalance S/P DIF, balanced XLR and unbalanced RCA analog audio I/O. SD|Greed supports 24 bit processing at 48Hz and includes hardware sample rate converters removing synchronization issues. 8 The sample rate converters are genuine, high order poly-phase interpolation filters rather than the minimalist algorithms found in some competing systems SD|Greed also includes RS 422 deck control and Bi level sync genlock input SD|Greed is a single 32 bit PCI card supporting 32 bit/64 bit PCI /PCI-X slots at 66/33 MHz bus speeds. SD|Greed comes with 5 connection ports for the 7 cables, providing flexible and customizable options that can be tailored to your specific requirements and cater to what ever source and monitoring equipment you have. 9 Features SD|Greed provides a professional set of hardware and software features that compliments a large range of off the shelf retail and OEM solutions Hardware Video Modes • • PAL 720 x 576 (4:3) & PAL 720 x 576 (Widescreen 16:9) NTSC 720 x 486 (4:3) & NTSC 720 x 486 (Widescreen 16:9) Digital Signal Format • • • • • 12/10 bit SD SDI I/O Dual link 4:4:4, 4:4:4:4 (RGB/YUV) I/O 4:2:2:4 Video and Key (YUV) I/O Single link 4:2:2 (YUV) I/O 2 x Independent/Simultaneous SDI I/O Analog Signal Format • • 12 bit Component RGB output, 12 bit Component YUV, Composite, S-Video I/O Digital Audio • • • 6 channels of balanced AES/EBU XLR I/O 8 Channels of unbalanced S/P DIF BNC I/O 16 Channels of embedded audio per SDI Analog Audio • 2 channels balanced (XLR) I/O & unbalanced (RCA) I/O Pixel Formats. • 10 bit YUV/RGB, 8 bit YUV/RGB File Formats • QuickTime, TGA, AVI, Cineon and DPX support Hardware Features • • • • Real time hardware overlay for internal keying Real Time hardware color space conversion 2 X General purpose I/O interface LTC I/O 10 • • • • • • • 4 X RS 422 Serial Ports, 1 external Built-in safe area, safe title and letterbox generator Audio sample rate converters Genlock. 128MB. Onboard RAM PCI 32 bit 66 MHz or PCI 32 bit 33 MHz PCI X 133 slot Software Windows Bluefish444 supports a range of software solutions and applications supported with the Bluefish444 retail installer that is shipped with your product box or downloadable on the Bluefish444 web site in the downloads section. The Bluefish444 retail installer ships with the following software features and application support; Bluefish444 Symmetry Symmetry, Bluefish444’s capture and playback software utility for Windows is integrated and included with all Bluefish444 video cards that support I/O and 10 bit RGB modes. Symmetry can be used as a digital intermediary or as a capture and playback solution for digital content creators, compositors and editors that work in either 10 bit RGB, 8 bit RGB, 10 bit YUV and 8 bit YUV color space. Bluefish444 continually updates Symmetry’s feature set, allowing customers to constantly upgrade to new features - at no charge. Symmetry is a FREE integrated software solution for the Bluefish444 I/O video card product range. • • • • • • • Deck control capture and playback software via a unique and simple user interface. 10 bit RGB DPX and Cineon sequential capture and playback. QuickTime V210 10 bit YUV Capture and playback. TGA 8 bit RGBA Capture and playback. CGR and SMPTE scaling. Play list feature. Batch Capture. 11 • • • • Shuttle & Jog. Drop frame error reporting on playback and capture. Log mode for system/Storage performance benchmarking Import batch and capture list from supported 3rd party applications such as AVID’s DS Nitris and Assimilates’s Scratch For further information on Symmetry, refer to the Symmetry user manual included in the installation CDROM and on the Bluefish444 web site. Bluefish444 Feature Application • • • • Control interface to access the lower level functions of the hardware that are not directly controlled by 3rd party applications Controls signal format mode switching, analog or digital I/O, letter box, sync input etc. Monitors current input and output mode. Monitors current pixel or memory format the Bluefish444 card is in. Adobe Premiere Pro 1.5.1 (Application Software not included) SD and HD real time effects • Full support for the native Adobe Premiere Pro 1.5.1 effects & transitions Software engine. • Effects such as titling, color correction, dissolves are simultaneously broadcast monitored and previewed in real time. Multiple file format real time playback • Uncompressed and compressed clip and sequential file formats that are imported into the Adobe Premiere Pro 1.5.1 timeline are previewed and broadcast monitored in real time. • Supports playback Adobe Premiere Pro 1.5.1 supported file formats such as AVI, DV/HDV, TGA, JPEG, TIFF, MPEG etc. • Choose to conform to Bluefish444’s uncompressed 10 bit YUV QuickTime file format during export to tape, or, encode to HDV, DVD or any other Adobe Premiere Pro 1.5.1 supported file format. SD DV offline • Capture to SD DV AVI file format via SDI 12 • • SD DV AVI file format is 1/10th the size of SD 10 bit YUV uncompressed files, reducing storage capacity and can be used for SD and HD uncompressed offline editing SD DV offline AVI is an industry standard file format, providing DV editors with a migration option to uncompressed SDI I/O. Adobe After Effects (Application Software not included) • HD and SD Broadcast monitoring • Real-time playback via RAM player • 8 and 10 bit RGB frame buffer support • 8 and 10 bit project mode support • Dedicated QuickTime v210 exporter Photoshop CS (Application Software not included) • HD and SD broadcast monitoring • Action driven output, fully customizable via actions interface Apple Mac OS Bluefish444 provides MAC OS drivers that are available on the Bluefish444 CDROM or downloadable via the Bluefish444 website in the downloads section. Bluefish444 hardware is a multiplatform solution supporting more platforms and application than any other Video I/O solution available. The SD|Greed is a QuickTime compatible card and supports a QuickTime based applications on the Mac OS platform such as; Final Cut Pro HD, After Effects, Combustion and Shake. (Application software is not included) Mac OS driver for the SD|Greed card will be available 1st Quarter of 2006 13 Supported Retail Applications SD|Greed supports a range of retail and OEM solutions that are readily available from various resellers or directly from the manufacture. SD|Greed provides professional editors, compositors and artists with a choice of solutions on various platforms. The support is continually growing, they include; Digital Intermediate & I/O. Multi file format capture and playback solutions that can digitize to a range of file formats, import edls, encode etc. • Bluefish444 Symmetry • Drastic Technologies Quick Clip Pro • Microsoft™ Windows Media Encoder • Root 6 Technology Content manager • D.A.V.I.D Compositing & Digital Content Creation, Color Correction. The SD|Greed also allows compositing and effects artists and graders to monitor on broadcast or projected devices either via anlog or SDI. • Nucoda Film Master • Eyeon Digital Fusion • D2 Software NUKE™ • Bauhaus Software Mirage • Adobe After Effects 6.5 • Adobe Photoshop CS • Discreet Combustion • Chrome Imaging Matrix • Apple Motion • Apple Shake 14 NLE, Conform Digitizing, monitoring, editing and conforming digital content for export to decks or other distributed mediums. • • • Adobe Premiere Pro 1.5.1 Apple Final Cut Pro Nucoda Data Conform Video Servers, Clip Servers, Encoders, Ingest. • • • Pixel Post Studios Oxygen Microsoft™ Windows Media Encoder Telestream MAP Paint & Character Generators Video + • • • • Adobe Photoshop CS Cue Graphics Pyro VDS Twister FAB 15 What’s in the Box When you open the Bluefish444 SD|Greed Box you will find the following items; • • • • Bluefish444 SD|Greed 32 bit PCI Card. CDROM Software and documentation including Symmetry application, Feature Application control panel, Adobe Premiere Pro plug ins, After Effects plug ins, Adobe Photoshop plug ins, QuickTime Codec. Reference card cable connection guide. 7 cables consisting of the following; Digital Video I/O 1 x Mini Din 9 pin cable with 6 BNC Labeled ‘DVID SDI’, ‘A/B/X’, ‘IN/OUT’, ‘Genlock’ Analog Video I/O 1 x Mini Din 9 pin cable with 6 BNC consisting of 2 sets of 3 Labeled; AVID ‘Y/G/CVBS’, ‘U/B/Y’, ‘V/R/C’ Digital Audio S/P DIF I/O 1 x HD Sub 15 pin with 8 BNC consisting of 4 pairs Labeled ‘DIG AUDIO IN’, DIG AUDIO OUT’, ‘1/2’, ‘3/4’, ‘5/6’, ‘7/8’ Digital Audio AES/EBU I/O 1 x HD Sub 15 pin with 3 male & 3 female paired XLR Labeled ‘DIG AUDIO IN’, ‘DIG AUDIO OUT’, ‘1/2’, ‘3/4’, ‘5/6’ Analog Audio XLR I/O 1 x Mini Din 9 pin cable with 2 channels XLR Labeled ‘AN AUDIO IN’, AN AUDIO OUT’, ‘Left’, ‘Right’ Analog Audio RCA I/O 1 x Mini Din 9 pin cable with 2 channels RCA Labeled ‘AN AUDIO IN, AN AUDIO OUT’, ‘Left’, ‘Right’ Deck Control Mini Din 8 pin RS 422 to 232 deck control cable for SD|Greed RS 422 ports. 16 System Requirements SD|Greed supports a range of software solutions that requires different system configurations and requirements. It is recommended that you contact the software manufacture for the correct system configuration. For further information on supported software please refer to http://www.bluefish444.com/support/compatibility/hardware/. For detailed information on hardware configurations for Symmetry and Adobe Premiere Pro, refer to the Bluefish444 manuals for each application. Bluefish444 provides direct support for the following solutions; Software Applications Symmetry Symmetry is a single stream capture and playback solution that is designed to capture to a range of storage solutions. Depending on the file format you selected will determine the storage solution you will require. For more up to date information please refer to the hard disk arrays section on the Bluefish444 web site; http://www.bluefish444.com/support/compatibility/hardware/mediaarray.asp Minimum SD Recommended CPU P4 3.4 Ghz or Dual Core Intel Dual Xenon 2.4 Ghz, AMD Opteron 242+ Operating System Windows XP SP2, QuickTime 6.5.2, Direct X 9.0C Windows XP SP2, QuickTime 6.5.2 Direct X 9.0C RAM 1GB 2GB Chipset 925X and above 7505/7525 or AMD Graphics AGP /PCI express AGP /PCI express System Drive SATA/PATA SATA/PATA Controller Device PATA/SATA/SCSI/FC SATA/SCSI/FC Video Storage SATA/SCSI SCSI to SCSI/SATA, FC to SATA 17 Premiere Pro 1.5.1 Bluefish444 has introduced real-time effects and multi file format playback with in the Adobe Premiere Pro editing solution. RT Effects playback are scalable and based on the performance of the CPU and disk storage ability to access multiple streams of compressed or uncompressed video and audio clips simultaneously. CPU Minimum Recommended P4 3.0 Ghz Intel Dual Xenon 2.4 Ghz, AMD Opteron 242+ Operating System Windows XP SP2, QuickTime 6.5.2, Direct X 9.0C Windows XP SP2, QuickTime 6.5.2 Direct X 9.0C RAM 1GB 2GB Chipset 925X, AMD 7505/7525 or AMD Graphics AGP /PCI express AGP /PCI express System Drive SATA/PATA SATA/PATA Controller Device SCSI Video Storage SCSI/FC External SCSI to SATA External SCSI to SCSI/SATA, FC to SATA Minimum Recommended OSX 10.3.8, QuickTime 6.5.2 OSX or higher QuickTime 6.5.2 Final Cut Pro HD CPU/System Operating system Power Mac G5 Power Mac G5 RAM 512 MB 1 GB+ ( Application dependant) 4 GB+ for compositing applications Graphics ATI or NVIDA graphics card with latest firmware and driver System Drive SATA 2 x SATA in RAID configuration Controller Device ATTO UL3D SCSI ATTO UL4D SCSI or FC Video Storage External SCSI to SATA External SCSI to SCSI/SATA, FC to SATA, Apple XServe RAID. 18 Adobe After Effects 6.5 Minimum Recommended CPU P4 3.0 Ghz Intel Dual Xenon 2.4 Ghz, AMD Opteron 242+ Operating System Windows XP SP2, QuickTime 6.5.2, Direct X 9.0C Windows XP SP2, QuickTime 6.5.2 Direct X 9.0C RAM 1GB 4GB Chipset 925X 7505/7525 or AMD Graphics AGP /PCI express AGP /PCI express System Drive SATA/PATA SATA/PATA Controller Device SCSI SCSI/FC Video Storage Internal/External SCSI to SATA External SCSI to SCSI/SATA, FC to SATA Adobe Photoshop CS Minimum Recommended CPU P4 3.0 Ghz Intel Dual Xenon 2.4 Ghz, AMD Opteron 242+ Operating System Windows XP SP2, QuickTime 6.5.2, Direct X 9.0C Windows XP SP2, QuickTime 6.5.2 Direct X 9.0C RAM 1GB 2GB or more Chipset 925X 7505/7525 or AMD Graphics AGP /PCI express AGP /PCI express System Drive SATA/PATA SATA/PATA Controller Device SCSI SCSI/FC Video Storage External/ Internal SCSI or SATA RAID External SCSI to SCSI/SATA, FC to SATA 19 Storage Requirements SD|Greed is primarily an uncompressed capture and playback card providing an unprecedented level of quality on the Windows, Linux and Apple Mac OS systems. Bluefish444 recommends that your storage system be able to provide and sustain a data rate up to 45 MB per sec for single stream applications and at least up to 90 MB for dual stream and above for multiple stream solutions. Certain applications may require specific storage requirements and can be broken down into the following category types Single Stream Applications that capture and play back one video clip or frame at a time. Single Stream Sequential Applications that capture and playback sequential file formats such as DPX, Cineon, TGA, TIFF Multiple Stream Applications that playback multiple video clips simultaneously. For real time effects between two or more clips such as dissolves, titling, masking etc Multiple Stream Sequential Applications that playback multiple streams of sequential file formats simultaneously such as DPX, Cineon, TGA, TIFF, MOV Note, the following examples are based on Standard Definition resolutions and are provided as a simple guide. Controller type Storage Type Application SATA (onboard) SATA Single stream SATA (PCI) SATA Single Stream SCSI (Onboard) single SCSI to SATA Multiple Stream (2) SCSI (Onboard) Dual SCSI to SATA Multiple Stream (3+) SCSI (PCI) Dual SCSI to SATA Multiple Stream (4+) SCSI (PCI) Dual SCSI to SCSI Multiple Stream (5+) Multiple Stream Sequential FC FC to SATA Multiple Streams (4+) The ability of the storage solution and the RAID type used, will determine how many streams of uncompressed SD streams your application will be able to playback in real time. NOTE “SCSI to SATA” refers to a JBOD SCSI interface with SATA hard drives in a RAID configuration. SCSI to SCSI is the same but with SCSI hard drives 20 Real Time Playback in Adobe Premiere Pro 1.5.1 Bluefish444 has introduced real-time effects and multi file format playback within the Adobe Premiere Pro editing solution. Performance of RT Effects playback in Adobe Premiere Pro is scalable and increases as the system performance increases. The amount of data streams is based on the performance of the system CPU and the disk storages ability to access multiple streams of video and audio clips simultaneously to sustain real-time playback . Factors slowing the performance of RT; • • • • • • Not using Bluefish444 v210 QuickTime files Compressed files that are traditionally complex to decode Multiple sequential files that are on a heavily fragmented disk array Using an unsupported storage solution or configuration Too many streams called for playback The type of effect used Bluefish444 uses the QuickTime 10 bit YUV v210 pixel format in our Adobe Premiere Pro editing mode Certified Storage for Real Time Solutions Bluefish444 continually test and certify storage and controller solutions as they become available. Look for the RT certified solution logos for SD and HD workstations and storage solutions that are “RT” ready with your Bluefish444 hardware. For a list of storage solution vendors go to the Bluefish444 web site at; http://www.bluefish444.com/support/compatibility/hardware/mediaarray.asp 21 Storage Capacity Guide W X H X Rate E.G. PAL v210 = (720 X 576 X 40/15) MB/sec RGB(10) (40/10) MB/sec RGBA(8) (40/10) MB/sec RGB (8) (40/13) MB/sec V210 (40/15) MB/sec BV10 (40/16) MB/sec 720 X 576I @ 50 720 X 486I @ 60/1.001 41.57 41.98 41.57 41.98 31.10 31.46 27.65 27.97 25.92 26.22 1 hour 5 hours 151 GB 755 GB 151 GB 755 GB 131 GB 655 GB 100 GB 500 GB 94 GB 470 GB Standard Definition 22 Cable Connection Overview SD|Greed connects to external devices via the break out cables supplied. Connections can be customized depending on the type of source or monitoring equipment you have. SD|Greed is shipped with 7 breakout cables ; External Connections Digital Video & Genlock • 5 SDI, 2 input and 2 output with an ancillary SDI output • Genlock reference input • 16 Channels of embedded audio via SDI Analog Video • 6 BNC software selectable as either 3 input and 3 output combination or 6 output combination in the following analog signal types; Component, Composite, SVideo RGB. Other Combinations are possible Digital Audio Option 1 • S/P DIF, BNC, 8 Channels, Unbalanced, 4 Channel pairs I/O. Digital Audio Option 2 • AES/EBU, XLR 6 Channels, Balanced. 3 Channel pairs I/O. Analog Audio Option 1 • RCA, Dual channel, Left & Right I/O. Analog Audio Option 2 • XLR, Dual channel, Left & Right I/O. Deck Control • 1 X 8 Pin RS-422 Port Deck Control external. • Master of slave connections under software control. 23 Internal Connections SD|Greed supports the following internal connection options. Cables are available for OEM solutions only and are not shipped with the retail product. Deck Control • 3 additional RS-422 Connectors. GP I/O • 2 X general purpose input connectors and two general purpose output interfaces (with power) LTC I/O • 1 X LTC I/O connector (balanced/unbalanced) 24 SD|Greed Cable Connection Guide 25 SD|Greed Cable Connection Guide RS 422 Deck Control Analog Audio (1) RCA 2 Ch Analog Audio (2) XLR 2 Ch Digital Audio (1) 8 Ch S/P DIF (BNC) Digital Audio (2) 6 Ch AES/EBU (XLR) Analog Video Digital Video & Genlock 26 Digital Video I/O & Genlock (DVID 1) SDI ‘A’ OUT (DVID 2) SDI ’B’ OUT (DVID 3) SDI ‘A’ IN (DVID 4) SDI ‘B’ IN Mini Din male 9 pin (DVID 5) SDI ‘X’ OUT GENLOCK SD|Greed supports two SD SDI inputs and three SDI outputs. SD|Greed supports independent inputs and outputs allowing for a combination of two simultaneous capture and playback streams. The Digital video cable can be customized to support a range of SDI dual link and single link modes. The auxiliary SDI can be either used as a 3rd output which can be configured to monitor dual link modes as a single link 4:2:2 connection. SDI inputs and outputs support a total of 16 channels of embedded audio, 8 channels per SDI Reference input is BI Level via supported by 1 x BNC Bi level Sync. All card outputs are unconditionally stable. SDI outputs always meets SMPTE jitter specifications with or without genlock. Type Supported Mode Label Cable Color 2 X SDI Inputs (BNC) Dual Link 4:4:4, 4:4:4:4 DVID 3 SDI “A” In DVID 4 SDI “B” In Video + Key, 4:2:2:4 Dual independent, 2 X 4:2:2 GREEN BLUE 2 X SDI Outputs (BNC) Dual Link 4:4:4, Video + Key, Dual independent, DVID 1 SDI “A” Out DVID 2 SDI “B” Out RED YELLOW 1 X SDI (BNC) SDI Ancillary Output/input. DVID 5 SDI “x” Out GREY Genlock (BNC) Genlock Genlock WHITE * Feature will be available in future firmware releases 27 Analog Video I/O (AVID 1) Y/G/CVBS Output (AVID 2) U/B/Y Output (AVID 3) V/R/C Output (AVID 4) Y/G/CVBS I/O Mini Din male 9 pin (AVID 5) U/B/Y I/O (AVID 6) V/R/C I/O The analog video cable can support a range of input and output combinations. Combined with the SDI I/O cables the SD|Greed provides effective Broadcast quality conversion between digital to analog and analog to digital. SD|Greed’s analog video allows you to mix output combinations with SDI, Component, S Video, or, SDI, Component, S Video and composite, etc. Digital to analog and analog to digital conversion is done at 12 bits maintaining the highest quality signal accuracy and during the conversion process Label Cable Color Analog Video Connection Options AVID 1 AVID 2 AVID 3 Red Yellow Green G (Output) B (Output) R (Output) Y (Output) U (Output) V (Output) CVBS (Output) Y (Output) C (Output) - - - AVID 4 AVID 5 AVID 6 Blue Grey White - Y (Output) U (Output) V (Output) CVBS (Output) Y (Output) C (Output) Y (Input) U (Input) V (Input) CVBS (Input) Y (Input) C (Input) - RGB/YUV = Component YC Composite CVBS = S Video 28 Digital Audio Option 1 - S/P DIF BNC 8 Channels I/O, Unbalanced DIG AUDIO IN 1/2 DIG AUDIO IN 3/4 DIG AUDIO IN 5/6 DIG AUDIO IN 7/8 DIG AUDIO OUT 1/2 DIG AUDIO OUT 3/4 DIG AUDIO OUT 5/6 DIG AUDIO OUT 7/8 SD|Greed provides 8 BNC connectors. Each BNC connector supports a pair of pair channels. There are 4 pairs for input and 4 pairs for output. Note: These BNC connections produce digital signals and can not be used with analog speakers. Type Supported Mode Label 8 Channels BNC S/P DIF Unbalanced DIG AUDIO IN/OUT 1/2, 3/4, 5/6, 7/8 29 Digital Audio Option 2 - AES/EBU XLR 6 Channels I/O, Balanced DIG AUDIO OUT 1/2 DIG AUDIO OUT 3/4 DIG AUDIO OUT 5/6 DIG AUDIO IN 1/2 DIG AUDIO IN 3/4 DIG AUDIO IN 5/6 SD|Greed provides 6 XLR connectors, supporting AES/EBU balanced digital audio. 3 female XLR pairs provides 6 channels of input and 3 male XLR pairs provides 6 channels of output. Note: These XLR connections produce digital signals and can not be used with analog speakers Type Supported Mode Label 6 Channels XLR, Balanced AES/EBU DIG AUDIO IN/OUT 1/2, 3/4, 5/6 30 Analog Audio Option 1 - RCA Dual channel, Unbalanced AN AUDIO IN LEFT AN AUDIO IN RIGHT AN AUDIO OUT LEFT AN AUDIO OUT RIGHT SD|Greed provides 2 RCA, unbalanced analog input and 2 RCA unbalanced analog output connectors, one for each channel. The connectors are RCA-style (“phono”) jacks which allow you to connect into a range of analog monitoring devices such as phono jack speakers and headphones for in expensive monitoring of audio. The Inputs may be connected to domestic Hi Fi components such as CD Players etc Type Supported Mode Label Analog, unbalanced RCA AN Audio IN/OUT, LEFT/RIGHT 31 Analog Audio Option 2 - XLR Dual channel, Balanced AN AUDIO OUT LEFT AN AUDIO OUT RIGHT AN AUDIO IN LEFT AN AUDIO IN RIGHT SD|Greed provides 2 balanced analog input and 2 balanced analog output connectors, one for each channel. The connectors are XLR male for input and female for output. Allows you to plug into a range of professional analog monitoring, recording, processing, and transmission equipment that support the standard XLR connections Type Supported Mode Label Analog , balanced XLR AN Audio IN/OUT, LEFT/RIGHT 32 Deck Control A Male DB8 connector provides connection between the SD|Greed card and decks, DDRS, cameras and other supported devices using RS422 SMPTE (Sony) protocol. . The SD|Greed also supports a further 3 internal connectors for RS - 422 control that are available for OEM configurations only. The DB8 connector is wired to the Apple standard. All four serial ports may be either master or slave connection under software control. 33 Windows XP Installation Installation Check List. Make sure you have the following installed prior to installing the SD|Greed card. Requirements. • • • • • • • • Administrator rights to your system and logged on as the user that had previously performed the installation of the bluefish444 hardware and software, QuickTime 6.5.2, Windows XP service pack 1a or 2 with latest .NET framework installed, DirectX 9C, Latest Graphic card drivers, Latest system drivers and BIOS updates, Supported bluefish444 hardware installed in the correct PCI slot for your system configuration, You have the correct storage array requirements for the solution you intend to use. Installation Steps. Step 1 - Update your system. Step 2 - Install Bluefish444 supported 3rd party applications. Step 3 - Install QuickTime version 6.5.2 or above. Step 4 - Install 3rd party application plug-ins and updates. Step 5 - Installing the Bluefish444 hardware. Step 6 - Install the Bluefish444 Installer. Step 7 - Connecting to the outside world. Step 8 - Driver Installation. 34 Step 1 - Update your system. Ensure you have installed the latest drivers and BIOS updates for your system. Please refer to the certified hardware guide section for more information. http://www.bluefish444.com/support/compatibility/hardware/ • • Install the latest drivers for your system Ensure you have the latest updates and service packs for your system Step 2 - Install 3rd party applications. It is normally best to have the application(s) pre installed before running the Bluefish444 installer. The plug-ins for Adobe products are installed with the Bluefish444 installer. For other supported applications such as Eyeon Digital Fusion, Combustion, NUKE, Bauhaus Mirage or Drastic Quick Clip Pro for example, you can install them at anytime as Bluefish444 support is built into the vendor’s application. For a list of supported applications and their requirements see the Bluefish444 compatibility section at http://www.bluefish444.com/support/compatibility/software/ If you have not already done so, install the Bluefish supported 3rd party software you intend to use with the SD|Greed card. For example; • • • • • • • • • Drastic Technology Quick Clip Pro Adobe Premiere Pro Adobe After Effects Eyeon Digital Fusion Adobe Photoshop Bauhaus Mirage D2 Software nuke Discreet Combustion And so on….. For more information on supported 3rd party application go to page 10 of this manual or go to the Bluefish website at; http://www.bluefish444.com/support/compatibility/software/ NOTE; Symmetry will be automatically installed along with the bluefish feature application as default. 35 Step 3 - Install QuickTime version 6.5.2 or above Download and install the latest QuickTime installer available at the following site. http://www.apple.com/quicktime/ Step 4 - Install 3rd party application plug-ins and updates Install Deck control software for Premiere Pro 1.5 and the Premiere Pro 1.5.1 update which is available at the Adobe website. NOTE Premiere Pro is supported only on the Windows XP operating system. Deck Control plug-ins We have tested and recommend the Digital Pipe Pro VTR version 7.2 Deck control plug-in and serial cable (rs-232 to rs 422), available at Digital Pipeline; http://www.thepipe.com/. Step 5 - Installing the Bluefish444 hardware. Bluefish444 provides detailed information on tested and certified hardware configurations for a range of common motherboards and computer systems. Please refer to this free informative section available on our web site at the following Link; http://www.bluefish444.com/support/compatibility/hardware/ 1. Place your system in an easily accessible place that has sufficient lighting. It is not recommend to insert the card in an awkward position that will increase the chances of a poorly contacted or miss inserted card. 2. Ensure your hands are clean and free of dirt and fluid. 3. Remove your systems protective case. 4. Make sure you are earthed and discharge any static build up before handling the Bluefish444. With your hand, touch the metal frame of the PC case to discharge any static electricity you may have built up. 5. Remove the power cable from your system. 6. Identify a free PCI slot as outlined in the hardware configuration for your Bluefish444 certified motherboard or system. 36 7. Remove the PCI slot aperture for the corresponding slot the SD|Greed card will be inserted into. For more detailed information on correct slots for your motherboard or system type, please refer to the Bluefish systems and hardware support section at;http://www.bluefish444.com/support/compatibility/hardware/ NOTE Certain slots on motherboards share the same bus. Motherboards supporting PCI-X 133 MHz slots usually are on a separate bus and will not be affected by inserting the SD|Greed card. For a G5 or Intel/AMD motherboards, you should always have the controller card and the SD|Greed on a separate bus. For systems with an onboard SCSI controller such as the HP 8200/9300, the 100 MHz bus is shared with the onboard SCSI, so it is wise to place the SD|Greed in the PCI - X 133 MHz slot, so as to not affect the performance of the SCSI or FC controller card. Quick Slot Guide System Type Slot type Power Mac G5. 100 MHz slot Dual Xeon/AMD with onboard SCSI. PCI-X 133 MHz slot Dual Xeon/AMD with controller card and no onboard SCSI. 100 MHz slot Dual Xeon/AMD with two controller cards and no onboard SCSI. PCI-X 133 MHz slot Intel/AMD 32 Bit Slot. Any 32 bit slot 37 Installing your SD|Greed Card 1. Remove the Bluefish SD|Greed card from the antistatic bag.. 2. Hold the card by the PCI shield top and at the top of the PCB at the opposite end of the PCI shield. This will reduce any chance of any damage of the bluefish444 card circuitry. 3. Do not touch the components on the PCB, do not touch the PCI slot mating edge. Areas to apply force On edge of PCB and PCI shield Co (see handling region diagram below). 4. Insert the SD|Greed into the correctly chosen slot by firmly pressing down on the metal PCI shield and the edge of the PCB. 5. Secure the card with a screw or PCI clip, depending on the chassis and computer system you are using. 6. Replace the system chassis cover and connect the power to your system. 38 Step 7 - Connecting to the outside world The Bluefish SD|Greed is and extremely versatile Video/Audio I/O card that can connect to a range of devices simultaneously. There will be a range of connection workflows that can not be covered by this manual instead we will focus on two typical connection work flows commonly used in the professional broadcast industry. Connectivity Example Analog /SDI I/O Beta cam SP Dual Link 4:4:4 SD I/O Consumer recorders & playback devices, VCR/DVD SDI/Analog Cameras SD|Greed Digital 5.1 Surround Sound SDI/Analog Monitors Consumer Television Digital 7.1 Surround Sound Analog headphones & consumer Audio devices 39 Typical Connection Workflow 1 The following example is a typical workflow you might use if your source is SDI but you have analog monitoring for video and audio and two channels of audio are required. • • • SDI video I/O Digital XLR audio I/O 2 Channels of Audio Analog video and audio monitoring Your source and master is Digital SDI for video and Digital Audio by AES/EBU XLR . Your monitoring is Analog component and analog audio If your deck supports embedded audio you could I/O the audio via the SDI and monitor the 4 channels via XLR or S/P DIF. Cable Connection Guide (DVID 1) SDI ‘A’ OUT Input of Deck (DVID 3) SDI ‘A’ IN, Output of Deck Genlock (AVID 1) Y/G/CVBS Output (AVID 2) U/B/Y Output (AVID 3) V/R/C Output DIG AUDIO IN 1/2 DIG AUDIO IN 3/4 DIG AUDIO OUT1/2 DIG AUDIO OUT 3/4 ANG AUDIO OUT LEFT ANG AUDIO OUT RIGHT Feature application Settings Digital audio routing channels 1 & 2 to Analog left and right 40 Typical Connection Workflow 2 The following example is a typical workflow you might use if you wish to edit and monitor with 6 channels of audio for surround sound 5.1 editing • • • • SDI video I/O with 8 channels of embedded audio Digital XLR audio I/O 6 Channels of Audio Analog video monitoring - component Genlock Your source and master is Digital SDI for video and Digital Audio via AES/EBU XLR . Your monitoring is Analog component video and analog audio If your deck supports embedded audio you could I/O the audio via the SDI and monitor the 4 channels via XLR or S/P DIF. Cable Connection Guide (DVID 1) SDI ‘A’ OUT Input of Deck (DVID 3) SDI ‘A’ IN, Output of Deck SDI deck 6 Channels audio Genlock Audio will be captured and outputted to deck via the embedded audio support. (AVID 4) Y/G/CVBS I/O (AVID 5) U/B/Y I/O Component Video (AVID 6) V/R/C I/O Digital 5.1 Surround 41 Step 8 Driver Installation The SD|Greed is a multiplatform video card supporting the Windows, Apple Mac OS and Linux operating systems. This manual will cover the installation procedures for the Windows operating system only. APPLE Mac OS Installation For installation of the SD|Greed on the Apple MAX OS platform please refer to the SD|Greed MAX OS installation manual. SDK Installation Bluefish provides a software developers kit for the windows and linux platforms. Information on obtaining the SDK is available online at the Bluefish website at http://www.bluefish444.com/support/OEM./. Linux support and drivers is via OEM solutions only and is available via application. Do not use the SDK installer for retail installations or for public distribution. You must use the Bluefish retail installer. Windows Installation Depending if you have had previous installations of Bluefish cards or this is a new system installation will determine the type of installation procedure. Key points to remember when to run the Bluefish444 installer; • • • • • • You must have Administrator privileges. You must install the Bluefish444 installer for each user of the same workstation. Always uninstall any previous installer before running the installation program. Always shut down your system, after installing the drivers, do not do a soft restart. Always run the installer if you change cards, even if it is the same model, as there maybe different firmware versions that are not compatible with the installer version you intend to use. Always read the “README_vXXX.pdf” (vXXX refers to the version number e.g. 5.0.9) that is shipped with your Bluefish installer. It will provide up to date, critical information on the installer version you are using. 42 New Installations If this is the first time a Bluefish444 card has been installed in your system, 1. Turn on your system with an installed supported Bluefish444 video card. 2. When Windows loads, you may be presented with “New Hardware Found“ Dialog box. 3. Close the Dialog box. 4. Run the Bluefish444 installer vXXX 5. Select next and say yes to all prompts to continue. 43 6. Restart your system 7. Go to “Start” menu button and select “Turn Off Computer”. 8. Select “Turn Off” to shut down your system for a few seconds 9. Restart your system 10. You may under certain circumstances see another “new hardware found” dialog box appear after you restart your computer system because the firmware introduces a new Rev ID, and so to the operating system it is a new device. in the “found new hardware Wizard” dialog box select “install the software automatically” option. 11. Select next. 12. Select “Continue Anyway 13. Select finish 14. Launch Symmetry and the Bluefish444 feature application to test your configuration. Installing From Previous Installations Uninstall Installed Bluefish444 Installers. Make sure you have closed all applications, 1. In the Windows Control panel, go to Add or Remove Programs, 2. Uninstall all Bluefish444 installers in the Add remove programs dialog box, e.g.; a. Bluefish444 Adobe Installer, b. Bluefish444 installer 2, c. Bluefish444 installer 3.1, 44 d. Bluefish444 installer 4.1.2, e. Bluefish444 installer 5.XX 3. Restart your system NOTE; The Bluefish Windows retail and SDK installer supports a range of Bluefish444 video cards, insure the installer you are using has support for the SD|Greed. Contact the application manufacture or your reseller for further information. Install the Buefish444 Installer. After your system restarts you may be presented with “New Hardware Found“ Dialog box. 1. 2. 3. 4. 5. Close the Dialog box if present. Run the latest Bluefish444 installer that supports the SD|Greed. Say yes to all prompts to continue. Restart your system. You may under certain circumstances see another “new hardware found” dialog box appear after you restart your computer system because the firmware introduces a new Rev ID, and so to the operating system it is a new device. in the “found new hardware Wizard” dialog box select “install the software automatically” option. 6. Select next. 7. Select “Continue Anyway. 8. Select finish. 45 Controlling the SD|Greed About the Bluefish444 Feature Application. The Bluefish444 feature application allows you to control and monitor your Bluefish444 Video I\O card. It can be used as a diagnostic tool and provides an interface to enable or disable extended features independently of your current software application. The Bluefish444 feature app provides at a glance a range of information about what video mode and pixel format your card is currently operating in. Feature App Main Control Interface. The Bluefish444 feature application interface supports all of the Bluefish444 product range. Depending on the card type you have installed, the Bluefish444 feature app will make available certain features. For example the SD|Greed SDI/analog video I/O card supports both dual link SDI I/O as well as Analog I/O. When the feature application is launched you will be presented with two section tabs, the main feature app section and an extra Analog BNC property tab Bluefish444 Feature App section. 46 Card Type This tells you what card you have installed and is currently active for the Feature Application. If you have more than one Bluefish444 card installed the feature application will ask you which card you wish to attach to each time the Feature App is launched. Pixel Format. Indicates what pixel format, the card is set to. Pixel formats are also referred to as the frame buffer mode, engine or memory format the hardware is currently operating in. Some of the pixel formats supported by the SD|Greed are; Pixel Format Color Space Link ARGB BGR+A 4:4:4:4 ARGB_PC RGB+A 4:4:4:4 BV8 YUV 4:2:2 BV10 YUV 4:2:2 CINEON/DPX RGB 4:4:4 V210 YUV 4:2:2 2VUY YUV 4:2:2 YUVA YUV 4:2:2 Bit Depth 8 bit 8 bit 8 bit 10 bit 10 bit 10 bit 8 bit 8 bit Depending on the application used will determine what memory format the SD|Greed is currently in at the time the feature app was loaded. You can update the information by clicking refresh. Final Cut Pro and Adobe Premiere PRO for example use the v210, a 10 bit YUV memory format, some applications can also use multiple memory formats. Input Signal Type. Indicates the current signal the card is receiving on the SD Input source from the deck or other signal source. Output Video Mode. Indicates the current video mode the SD|Greed is in. The video mode can not be change in the feature application, it is controlled by the Application (e.g. Adobe Premiere Pro or Combustion, etc) 47 Key Channel. This section gives you direct control of the output signal format from your Bluefish444 product. Altering these settings will override what the current application has set the card to. In most cases you will not need to use these features as the application will enable or disable them. Video + Video, Video + Key; Dual link cards allow you to switch the Link B BNC between KEY or VIDEO Video, Key; Allows you to switch the output of our single link cards between KEY and VIDEO KEY is the alpha channel output of a Video or Frame. The Bluefish444 dual link cards have the ability to extract the alpha channel and output to a specific BNC. Video and KEY is normally used in live broadcast environments such as virtual sets. Genlock/Timing Adjust. Reference Video Mode; Displays the input type that the SD|Greed is detecting on the reference input. Reference Video Source; This allows you to select the reference source as either • • • Genlock BNC SDI link A SDI link B Horizontal; Adjusts the relative horizontal timing between the genlock signal and the cards output signals Vertical; Adjusts the relative vertical timing between the genlock signal and the cards output signals 48 Set; Commits any changes made to the new default power up values Miscellaneous Functions. Signal format converter; (HD product range only); The SD|Greed does not support HD to SD down conversion Safe Picture; Enable and disables the safe picture overlay on the SDI output. Safe Title; Enable and disables the safe title overlay on the SDI output. Enable Onboard Keyer; The onboard keyer feature provides you with the ability to apply graphics and animation content over the incoming stream and out put the result in real time. Perfect for real time overlay and logo branding for off the shelf applications. Applications that can be used are Adobe After Effects, Discreet Combustion, VDS Twister, Photoshop CS/7.0, Eyeon Digital Fusion, Symmetry 2.2 and many more that support the following frame buffer mode , 8ARGB or 8BGRA Symmetry version 2.2 will be supporting TARGA 32 bit sequences playback and capture and can effectively be used to playback clips that can be keyed with the SD|Greed video card. With Symmetry you can load a range of sequences with the play list feature and output animations and frames over your incoming video. Symmetry version 2.2 supporting TARGA and play list will be available early 1st Quarter 2006 for free 49 Time Code (currently not supported) • • • RP-188 Time code User Bits Output Time code Offset Letter Box. This section controls the letter box feature that Bluefish444 hardware supports. Letterbox blanks the top and bottom of the screen. This su used to create a 16.94:3 monitor Letter box lines Controls the amount of horizontal blanking lines at the top and bottom of the screen. Set Commits the changes to the Bluefish444 card Cropping presets (not selectable with SD products) Contains a range of cropping presets such as 16:9, 4:3, 2.35:1, and custom Custom - Activates the Advance Blanking control section 50 Video The video features can be broken down into 4 sections; • Analog Output Signal Type • Input Signal Type • Analog Video Output Properties • Analog Video Input Properties 51 Analog Output Signal Type. The SD|Greed supports a range of output configurations consisting of a mixture of digital and analog I/O options. The SD|Greed’s analog I/O cables have 6 connectors that can be configured between Composite, S Video, Component YUV, Component RGB input and output. For a guide of the possible configurations supported by the SD|Greed please refer to the section “Analog Configuration Guide” on page 54 52 Video Input Signal Type SD|Greed supports both digital and analog input signal types such as; Analog • Composite • S-Video • Component YUV Digital • SDI A • SDI B Currently the SD|Greed supports either a Digital or analog input. In the next free driver release the SD|Greed will be able to have a combination of Digital and analog inputs and outputs as independent and simultaneous streams. To select the input type you desire, select the Input Signal Type drop down box and select your input signal. 53 Analog Configuration Guide The SD|Greed supports an array of configurations that can be selected by using the “Analog output signal type” selector and the “Input signal type” selector. Numerous combinations are available. In general any of the analog video connectors that are not used as inputs can be used as outputs. Therefore the table below is arranged to show which output signal types will be available given the output signal type that will be used. For a detailed Color Guide please refer to the SD Greed Cable guide included in your SD Greed box or refer to this manual “SD|Greed Cable Connection Guide”. SD|Greed Analog and Digital I/O Configurations and Labeling Guide Input Type Output Configurations Digital Analog Set 1 Analog Set 2 SDI DVID 3 or DVID 4 SDI Video + Key SDI Video + Video Component/RGB (AVID 1,2,3) Composite (AVID 4) S Video (AVID 5,6) Component SDI Video + Key SDI Video + Video Component/RGB (AVID 1,2,3) Input Component (AVID 4, 5,6) Or Composite & (AVID 1) S Video (AVID 2,3) S Video SDI Video + Key SDI Video + Video Component/RGB (AVID 1,2,3) Input S Video (AVID 5,6) Or Composite (AVID 1) & S Video (AVID 2,3) Composite SDI Video + Key SDI Video + Video Component/RGB (AVID 1,2,3) Input Composite & (AVID 4) Or Composite (AVID 1) & S Video (AVID 2,3) 54 Analog Video Output Signal Properties. The feature application allows you to manually adjust the analog output signal properties. By using the vertical slider bars on this tab you can adjust various signal properties for the output and save them as the default load up values. The output signal fields that can be adjusted are; • Luma Gain • Chroma Gain • Hue • Black level • Sharpness Unity This button centers each slider bar to the default values of 0.0 Enable PED This adds the 7.5 IRE “pedestal” to analog NTSC signals 55 Analog Video Input Signal Properties Analog input only. The input signal properties tab is similar to output except for the sharpness option has been removed. • Luma Gain • Chroma Gain • Hue • Black level Unity. This button centers each slider bar to the default values of 0.0 Enable PED. Removes the 7.5 IRE “pedestal” from analog NTSC signals. If you know your input has a pedestal information you will need to check the “Enable Pedestal” box. Load Default values. Loads the default values. 56 Save as Default. Save the current settings as the default power up values. Refresh. Returns the value to the current defaults. Close. Close the Bluefish444 feature Application utility. 57 Audio I/O Settings The SD|Greed supports a diverse range of audio connectivity options than any other video I/O card in its class. The SD Greed currently supports the following audio inputs and output options Type Connection Connect Type Channels Digital Audio Digital Audio Digital Audio * Analog Audio Analog Audio External External External External External BNC XLR BNC (SDI) XLR RCA 8 Channels 6 Channels 8 Channels 2 Channels 2 Channels In most cases conditions, applications will automatically select the audio input source, however you may wish to manually select it To do so just select the audio input type from the drop down list. 58 Digital Audio to Analog Audio Monitor Routing With the SD|Greed you can monitor the 8 digital audio channels with the analog audio outputs. For example of you wish to listen to digital outputs 1 & 2 and wish to route them to the analog pairs for monitoring you simple select channels 1 and 2 to route to analog left and right pairs. 59 Appendices Appendix A – Manual Bluefish Driver and DLL Removal 1. New Installations. 2. Installing From Previous Installations 3. Manual Removal of Bluefish444 files and Drivers Appendix B – The Onboard Keyer 60 Appendix A - Bluefish444 Driver Installation 1) New Installations. 2) Installing From Previous Installations 3) Manual Removal of Bluefish444 files and Drivers 1) New Installations. If this is the first time a Bluefish444 card has been installed in your system; 1. Turn on your system with the SD|Greed video card installed int eh correct slot. 2. When Windows loads, you may be presented with “New Hardware Found“ Dialog box. 3. Close the Dialog box. 4. Run the Bluefish444 installer v5.X.X 5. Say yes to all prompts to continue.. 6. Select yes to shut down the system if required. 7. If your system does not shut down automatically; 8. Go to “Start” menu button and select “Turn Off Computer”. 9. Select “Turn Off” to shut down your system. 10. Restart your system 11. You may under certain circumstances see another “new hardware found” dialog box, this is because the firmware introduces a new Rev ID, and so to the operating system it is a new device. 12. In the “found new hardware Wizard” dialog box select “install the software automatically” option. 13. Select next. 14. Select “Continue Anyway 15. Select finish 16. Launch Symmetry and the Bluefish444 feature application to test your configuration. 61 2) Installing From Previous Installations 1. 2. 3. 4. Close all applications. Uninstall all previous Bluefish4444 Installers. In the Windows Control panel, go to Add or Remove Programs, Uninstall all Bluefish444 installers in the Add remove programs dialog box e.g.; Bluefish444 installer 5.1.9. 5. Follow all on bard prompts. 6. Restart your system. 7. Run the Bluefish444 installer v5.X.X 8. Say yes to all prompts to continue. 9. Select yes to shut down the system if required. 10. If your system does not shut down automatically; 11. Go to “Start” menu button and select “Turn Off Computer”. 12. Select “Turn Off” to shut down your system. 13. Restart your system. 14. You may under certain circumstances see another “new hardware found” dialog box, this is because the firmware introduces a new Rev ID, and so to the operating system it is a new device. 15. In the “found new hardware Wizard” dialog box select “install the software automatically” option. 16. Select next. 17. Select “Continue Anyway” 18. Select finish. 19. Launch Symmetry and the Bluefish444 feature application to test your configuration. 62 3) Manual Removal of Bluefish444 files and Drivers Step 1 - Uninstall Bluefish4444 Installers. 1. Make sure you have closed all applications, 2. In the Windows Control panel, go to Add or Remove Programs, 3. Uninstall all Bluefish444 installers in the Add remove programs dialog box Step 2 - Remove Bluefish444 Drivers and System files. Note, you will be deleting files that are in system folders, ensure you do not delete incorrect files as this may affect the operation of your system. You will also need to turn on “show system files and folders” in Tools-> Folder Options -> View 4. In “Windows Explorer” select tolls and folder option in the menu bar 5. Select the “View” tab 6. In advance settings scroll to “Hidden files and folders” 7. select “Show hidden files and folders” 8. Go to the C:\Windows\inf folder and open it 9. Select the Search Utility and select the “Files or Folders” option. 10. In the “What do you want to search for” option box select “A word or phrase in the file” 11. Type in “Bluefish” 12. A file name beginning with OEMX.inf will be presented, X donates a numeric value e.g. OEM11.inf. 13. Delete the file. 14. Type in and search for the following files and delete all instances of them. 15. In C:\Program Files delete the Bluefish444 folder and all the contents, 16. In C:\WINDOWS\system32 folder delete the following files; i. BlueSetupApi.dll ii. BlueVelvet3.dll iii. BlueVelvet3_d.dll iv. BlueVelvet.dll v. BlueVelvet_d.dll vi. BlueVelvetCom.dll vii. Puffer.dll viii. BXQTPremiere.dll ix. FileInterChangeDll3.dll Note not all these files may or may not be present due to uninstall process in step 1, 17. In C:\Program Files\BlueFish444\Driver, delete the following files if present; 63 a. b. c. d. e. BlueDriver.sys BlueSD.sys BlueGM.sys BlueHD.sys BlueBAG_X.rbf files, X denotes a numeric value e.g. BlueBAG_147.rbf Step 3 - Delete Plug-in’s. 18. In the Start menu, select the Search Utility and select the “Files or Folders” option. 19. In the “What do you want to search for” option box select “ All Files and Folders”. 20. Type in and search for the following files and delete all instances of them. For After Effects a. Bluefish444IO.aex b. bluefishemp.aex c. bluefishio.aex For Adobe Premiere Pro 1.0/1.5 d. e. f. g. h. bluefish444asio.dll cm-Bluefish-Compiler.prm im-Bluefish-Import.prm pm-Bluefish-Playback.prm rm-Bluefish-Record.prm Step 4 - Uninstall Drivers via Device Manager. 21. In the “Device Manager” (Device Manager can be opened by right clicking the “My Computer” Icon in the desktop and select “manage”. This will open the Computer management window. Select the “Device Manager”.) 22. In “Sound, Video and Game Controllers” right click the “Bluefish444 “X” device” and select “Uninstall”. (X Denotes Bluefish444 product type) 23. Follow onboard prompts. 24. Restart your system. Step 5 - Installing version 5.X installer. 25. Turn on your system with the SD|Greed video card installed int eh correct slot. 26. When Windows loads, you may be presented with “New Hardware Found“ Dialog box. 27. Close the Dialog box. 64 28. Run the Bluefish444 installer v5.X.X 29. Say yes to all prompts to continue.. 30. Select yes to shut down the system if required. 31. If your system does not shut down automatically; 32. Go to “Start” menu button and select “Turn Off Computer”. 33. Select “Turn Off” to shut down your system. 34. Restart your system 35. You may under certain circumstances see another “new hardware found” dialog box, this is because the firmware introduces a new Rev ID, and so to the operating system it is a new device. 36. In the “found new hardware Wizard” dialog box select “install the software automatically” option. 37. Select next. 38. Select “Continue Anyway 39. Select finish 40. Launch Symmetry and the Bluefish444 feature application to test your configuration. Finish 65 Appendix B – The Onboard Keyer Key image generated from application SD|Greed key’s frame buffer image over input stream Image is overlaid in RT Output From Source The onboard keyer feature provide the use the ability to overlay over the input signal in real time with any frame buffered image or frame generated from applications that support RGBA. This provides studios and live broadcast environments the ability to brand transmissions, perform logo insertions and output copyright signals to tapes etc Symmetry will be supporting TGA sequential playback which also can be used to playback sequences for internal keying. How to use the onboard keyer 1. Connect the output of the Bluefish444 card to a valid SDI monitor 2. Connect the HD card genlock input to a sync reference via the SDI cable. ( use the deck reference) 3. Launch the Bluefish444 feature application tool and enable the onboard keyer in the Misc functions section of the feature application. 4. If the image is positioned incorrectly, adjust the horizontal and vertical timing adjust by adding a value and pressing “SET” 66 5. Launch your supported digital content creation tool, for example Adobe After Effects. Set the composition resolution and frame rate to the input of the source you wish to overlay. 6. You should see the input source outputted to the SDI monitor. 7. Create some content like text, the text will be overlaid in real time. 8. You can also create an animation loop by loading the animation to RAM player and looping the playback. 9. Ensure to turn the Onboard keyer feature off if you intend to use it with other applications that require input functionality such as Symmetry and Adobe Premiere Pro. Finish 67


