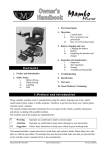
1
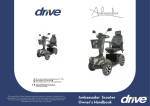
CONTENTS QUICK REFERENCE GUIDE Problem: Scooter will not switch on Symptoms: Remedy: Batteries not connected Check batteries connected Circuit breaker has tripped Push circuit breaker to reset Rear and front sections not Check connection on frontconnected to-rear loom 1. PREFACE 2. SAFETY NOTICE 2.1 Before Driving Problem: Scooter will switch on but will not run Symptoms: Remedy: Flat batteries Recharge battery Charger plugged in Unplug charger from scooter Motor in freewheel mode Push down freewheel lever 2.2 Whilst Driving 2.3 Labelling 2.4 Electromagnetic Interference Problem: Scooter appears slow Symptoms: Remedy: Flat batteries Recharge battery Speed setting slow Turn up speed dial 3. PARTS INTRODUCTION 4. OPERATION 4.1 Control Panel Problem: Seat moves whilst in use Symptoms: Remedy: Seat not locked in position Slowly rotate the seat until it drops in place and is secure. 4.2 How to Operate Your Scooter 5. DRIVING ON THE ROAD Problem: Tiller appears loose or will not swivel freely Symptoms: Remedy: Tiller adjustment knob loose Tighten tiller adjustment knob Release Tiller Lock Tiller Lock Applied 6. BATTERY CHARGING AND CARE 7. INSPECTION AND MAINTENANCE 7.1 Daily Checking 7.2 Service Record Problem: Horn sounds involuntarily / automatically Symptoms: Remedy: The scooter has diagnosed a Ensure the wigwag paddle is fault released and switch the scooter off and on. Recharge batteries if error persists. 7.3 Battery Pack and Tyres 7.4 Cleaning 7.5 Storage 7.6 Moving About 7.7 Disassembling the Scooter for Transportation 7.8 Assembling the Scooter 8. TROUBLESHOOTING 9. SPECIFICATION 10. WARRANTY 11. APPENDIX: SERVICE RECORD Scout Electric Scooter Page 1 of 16 Owner’s Handbook (Code: MS008_IFU 08/13) 1. PREFACE AND INTRODUCTION Please carefully read this owner’s handbook before using the scooter to ensure that you operate the scooter safely. Improper use of the scooter could result in damage, injury or traffic accidents. This handbook also advises how to get most out of your scooter by giving comprehensive operating, assembly and maintenance instructions for the scooter. A repair and maintenance record chart and warranty information is included with this handbook. Please keep it in a safe place or with the scooter. If someone else uses the scooter make sure that you provide him or her with this handbook for their consideration. As designs change some of the illustrations and pictures in the manual may not correspond to the scooters that you purchased. We reserve the right to make design modifications. The Scout range of scooters have been designed and manufactured to provide a comfortable and secure yet affordable solution for some mobility requirements. They are designed for a single user to compensate for a loss of mobility as a result of a disability. They are manoeuvrable and are suitable for indoor and some outdoor application where the terrain is forgiving (for example smooth paths, shopping centres, etc). They are class 2 scooters as defined by the Road Traffic Act 1988. They feature a rotating seat and can be easily folded and disassembled. There are two styles of Scout scooter available: 2. SAFETY 2.1 Before Driving The user needs to be familiar with the use and operation of this scooter before driving. Ride on the pavement and pedestrian areas only. Never ride on motorways or dual carriageways. Only use roads to cross to other side of the pavement. Be aware of traffic when crossing or using roads. Use extreme caution when driving your scooter in busy areas such as shopping malls. Do not drive the scooter under the influence of drink or drugs, or when you are tired. Be careful when using the scooter in low light. It has not been designed for use at night. Before using the scooter in busy or hazardous environments, familiarise yourself with the operation of the scooter. Practice in an open and safe area which is free from hazards and other people. Turn the speed dial down for your initial practice. 2.2 Whilst Driving Do not use your scooter on surfaces that are muddy, gravelly, bumpy, narrow, snowed over, icy; or on towpaths near to canals which are not guarded. 3-wheel model for compact environments Do not use your scooter outside when it is raining, snowing, misty or windy. 4-wheel model for greater stability Do not make erratic turnings on your scooter. Bear in mind driving motions such as accelerating, stopping, turning, reversing, and the effect of gradients. Scout Electric Scooter Page 2 of 16 Owner’s Handbook (Code: MS008_IFU 08/13) Slow down when driving on gradients. Always lean forward when climbing a steep gradient. Do not travel on gradients exceeding those stated on the diagram below: WARNING: EMI REFER TO OPERATORS MANUAL FOR INFORMATION Above: Located on rear REF Do not drive on roads with large drops or potholes. MS008PB S/No REFER TO WARNING: OPERATORS MANUAL FOR EMI INFORMATION THIS UNIT HAS ACHIEVED 20 V/m EMI TESTING Drive Medical Ltd (HX5 9JP) Drive Medical GmbH (D-88316) The scooter is not suitable for carrying passengers. 5 06 02 6 6 8 48 7 11 MADE IN VIETNAM Maximum User Mass 130kg Above: Located on rear Do not use the scooter to carry heavy goods. Do not use a mobile phone or other wireless communication devices whilst driving. Always stop somewhere suitable and switch off the scooter before using the phone. WARNING Please hold the tiller before loosen the tiller adjustment knob. Before lifting or driving the scooter make certain the tiller adjustment knob is fully tightened. Never attempt to adjust the tiller whilst the scooter is in motion Above: Located on tiller Do not set in freewheel mode when driving, especially on a gradient. Ensure that the scooter’s automatic brake is applied before use. Do not exceed the weight limit of the scooter. 2.4 Electromagnetic Interference 2.3 Labelling Please carefully read all labels applied to the scooter before driving. For future reference, do not remove them from the scooter. The labels are also shown below: NEVER LIFT SCOOTER UP BY THE REAR OR FRONT OF SHROUD Above: Located on rear shroud ! WARNING Never operate the freewheel lever while seated on the scooter or on an incline! OPERATION OF THE FREEWHEEL LEVER Always pull UP FIRMLY for freewheel mode Always push DOWN FIRMLY for drive mode Scooters may be susceptible to electromagnetic interference (EMI) from sources such as mobile phones, walkie-talkies, TV and radio broadcast stations and amateur radio sets. In some cases, there is a risk this interference may cause involuntary movement of the scooter. The scooter has been tested and passed to withstand interference to a level of 20V per metre. Be aware that the above sources may cause involuntary movement due to EMI. Exercise caution whilst using the aforementioned devices and avoid close proximity to TV and Radio broadcast stations. The addition of components or accessories may effect the EMI susceptibility of the scooter. Do not fit accessories other than Drive Medical authorised accessories. Above: Located by freewheel lever on rear Scout Electric Scooter Page 3 of 16 Owner’s Handbook (Code: MS008_IFU 08/13) 4.2 How To Operate Your Scooter 3. PARTS INTRODUCTION Scout 4-wheel pictured below CONTROL PANEL SEAT Key Ignition. The key ignition acts as the power switch for the scooter. To switch the power on, turn the key clockwise and battery gauge should illuminate. To switch the power off, turn the key anticlockwise, after which the battery gauge should switch off and the key can be removed. Do not turn the ignition off whilst driving as this will lead to an emergency stop and possible risk of damage or injury. SEAT POST TILLER ADJ. KNOB CHARGER SOCKET BATTERY PACK TILLER LOCK Speed Dial. Turn the speed dial to determine the maximum speed of the scooter. Turn the dial clockwise to increase the speed setting and turn the dial anticlockwise to decrease the speed setting. Do not adjust the speed dial whilst driving as this could result in loss of control. Do not set the highest speed whilst driving indoors. Rear section shown below (applicable to both models) FREEWHEEL LEVER Tiller Lock. When the tiller is centred, pull the tiller lock down to secure the tiller for transportation. Push the tiller lock up to release. Always ensure the tiller lock is disengaged when driving the scooter. Always check the tiller moves and turns freely before driving. ANTI TIP WHEEL 4. OPERATION 4.1 Control Panel BATTERY GAUGE SPEED DIAL WIGWAG PADDLE HORN BUTTON Moving and Braking. To move forward, pull the right hand side of the wigwag paddle with your hand towards you whilst resting the palm of your hand on the lower handle bar. Pull the left hand side of the wigwag paddle towards you and the scooter will move backwards, emitting an audible reversing alarm. To brake, release the wigwag paddle which will return to neutral and activate the electromagnetic brake automatically and bring the scooter to a prompt stop. The wigwag paddle allows you to control the speed of the scooter up to a maximum speed determined by the Speed Dial. The further the wigwag paddle is deflected, the faster the scooter will go (up to 4mph). Warning Do not push both left and right hand sides of the wigwag simultaneously. You Scout Electric Scooter Page 4 of 16 Owner’s Handbook (Code: MS008_IFU 08/13) will not be able to control the scooter. Horn Button. Press the horn button to sound the horn. Release the button to stop the horn. The horn is the yellow button located on the control panel. Braking – Electromagnetic Brake. Release the wigwag paddle completely, and the electromagnetic brake will be activated automatically and the scooter will stop. If the leftmost LED is flashing, this means the scooter has encountered a problem. The LED will flash a number of times then pause. Count the number of flashes to determine the problem. If you experience any flash sequences first restart the scooter, ensuring the wigwag paddle is released. If this does not remedy the problem recharge the batteries. If the error persists contact your Drive Medical Dealer. Attention You should recharge the batteries after each use to ensure maximum range. Read the Battery Charging section in the handbook before use. When on a gradient, never set the vehicle to freewheel mode. The brakes will not be applied. Seat. The seat can be rotated and locked in position at 45º intervals. Push the seat lever forward and swivel the seat. Release the lever and then continue swivelling the seat until it locks in position. Attention. Return the seat to the forward position before driving. Adjusting the Seat Height. Firstly remove the seat by rotating the seat (as described above) whilst pulling up on the seat. Remove the nut and bolt securing the chrome post in to the chassis of the scooter. Reposition the seat post to the required height and then secure by reattaching the nut and bolt. Circuit Breaker (Arrowed Below). The circuit breaker may trip when the scooter is under excessive load or when travelling on steep inclines. It will be more prone to tripping when the scooter is low on battery charge. Under normal conditions the circuit breaker button will protrude by 2mm – 3mm. If the circuit breaker has tripped the button will protrude by 7mm. To reset the circuit breaker, push the button in and the scooter should operate as normal. Battery Gauge. The battery gauge on the tiller console lights LEDs to show remaining power: Green (3 or 4 LEDS lit) - 40% - 100% capacity Yellow (2 LEDs lit) - draining charge (10% - 30%) Red (1 LED lit) - immediate recharge is necessary. The remaining power indicated by the battery gauge will vary by the driving time incurred and how you drive. Repeated starting, stopping and climbing will consume power more quickly. The gauge is shown previously. Scout Electric Scooter Page 5 of 16 Owner’s Handbook (Code: MS008_IFU 08/13) Freewheel Lever Engaged (Drive) Mode: Push the lever down completely and the scooter can be driven by the motor. Tiller Adjustment The tiller can be adjusted in to many different positions to suit each user. To adjust follow the steps below: 1. Loosen the knob (as shown below in the photo) so the tiller can move. 2. Using the other hand, reposition the tiller as required then retighten the knob to secure. Freewheel Mode: Pull the lever up and switch the scooter off. The scooter can now be pushed / moved manually. Warning The lever should only be set to FREEWHEEL when on flat ground and unoccupied by the user. Otherwise, there is a risk of damage or injury. Scout Electric Scooter Page 6 of 16 Owner’s Handbook (Code: MS008_IFU 08/13) 5. DRIVING ON THE ROAD Starting and Driving 1. Make sure the seat is installed properly. 2. Make sure the tiller has been secured properly and the tiller lock is disengaged. 3. Fold down the armrests so you can rest your arms on them. 4. Switch the key ignition on. 5. Check the battery gauge to check there is enough power for your journey. If you have any doubt about the remaining power, recharge the battery pack before use. 6. Set the speed dial to a position you feel safe and comfortable with. 7. Check the wigwag paddle and automatic brake work correctly. 8. Before driving, check the environment around you is safe for you to drive. 6. BATTERY CHARGING AND CARE The battery pack can be charged either when it is installed or removed from the scooter. To Charge 1. 2. 3. 4. 5. Switch the key ignition off. Plug the charger’s power cord in to the mains. If required, remove the battery pack (see next section for details) Open the charging socket cap on the battery pack. Then connect the charger’s round plug in to the charging socket (as shown in photo) Switch on the plug socket at the mains. Warning Be careful whilst driving in heavy traffic or crowded areas. Whilst reversing the vehicle, be aware of people or objects behind you. Stopping 1. Release the wigwag paddle completely. The vehicle will automatically brake and stop. 2. Switch the scooter off at the key ignition and pull out the key. To Remove the Battery Pack 1. Switch the key ignition off. 2. Lift out of the scooter using the handle on the battery pack. Stopping distance will vary with speed so begin braking as early as possible. Always park on flat ground, switch off and remove the key before dismounting. To Install The Battery Pack Lower the battery pack in to the scooter. Use the locking lever to secure the battery pack. Scout Electric Scooter Page 7 of 16 Owner’s Handbook (Code: MS008_IFU 08/13) Charger Light The charger light will illuminate orange to indicate the batteries are charging. The charging duration is about 8 hours (for the 12Ah battery pack) or 12 hours (for the 20Ah battery pack), however a 12 hour charge is recommended for optimum performance. The orange light will turn green when charging is complete. Ensure that the charger is removed from the mains and the scooter or battery pack after charging. Failure to do this may flatten the battery. Do not remove the battery pack whilst the scooter is switched on. About the Battery Pack The battery pack contains two 12V batteries. The batteries are sealed lead acid type and are maintenance free and are non-spillable. They are fitted with spade terminals. The batteries require charging every week to ensure battery longevity. The batteries supplied as standard with the battery pack are classified as safe for air transport under IATA special provision A67. Warning If battery pack loses contact with the scooter during operation switch the key ignition off, re-insert the battery pack and switch the ignition back on. Suggestions 1. Do not disconnect the charger cord until charging is completed and the light is lit Green. 2. When fully charged the battery charger will still trickle charge the battery for optimum range. 3. Even when not in use, the scooter should be charged at least every week to ensure battery longevity. 4. Ambient temperature will effect charging time. Charging time will be longer in cold environments. 5. The batteries carry a 1 year warranty which covers manufacturing defects only. It does not cover battery faults as result of not following the guidelines herein. Battery Care 1. You should recharge the batteries after each time the scooter is used to ensure maximum battery range. The batteries should be charged at least once a week even if the scooter is not used. 2. After charging or replacing a new battery, drive the scooter for a short period to ensure battery capacity is sufficient. 3. In cold environments, the battery may respond more slowly and range will be reduced. 4. When driving on a gradient, the battery gauge will fluctuate. This is a normal occurrence. 5. Battery range is reduced when driving up gradients or on rough terrain, as the scooter uses more power. 6. The batteries should not be charged for more than 24 hours. Warning 1. Only use the charger supplied with the scooter. Using the wrong type of charger may cause damage. Never disassemble or modify the scooter. 2. Always charge the scooter in a well ventilated space. Avoid direct sunlight or contact with water and moisture. 3. Do not charge or operate the scooter in temperatures below -10ºC or above 50ºC. Do not expose the battery pack to these temperatures. Battery Replacement It is natural for the battery capacity to reduce with time, even if the battery is charged as directed above. When the battery range is about half of its peak performance we recommend that the batteries are changed. Continuing to use an old battery will result in a rapid reduction in the range of the scooter and can cause excessive wear and tear on other parts of the scooter. Scout Electric Scooter Page 8 of 16 Owner’s Handbook (Code: MS008_IFU 08/13) 7. INSPECTION AND MAINTENANCE 7.1 Weekly Checking Check the following items weekly or before driving. If you find anything abnormal contact your Drive Medical Dealer for further inspection or advice. Tiller. Ensure it is not loose and can turn smoothly Speed control dial. Ensure it adjusts freely. Wigwag paddle. Ensure scooter moves when lever is pressed, and stops when lever released. Motor. Check for any abnormal noise and electromagnetic brakes work correctly. Freewheel Lever. Ensure it works correctly. Seat. Ensure is swivels and locks easily. 7.5 Storage Tyres. Check tyre tread depth and for any signs of damage such as cracking. 7.2 Service Record To ensure your scooter is correctly serviced take it to your Drive Medical dealer for regular servicing. We recommend that scooters are serviced at least annually, and your dealer may charge a fee for this. A copy of the service record is at the back of this handbook. Even if the scooter has not been used, it should still be serviced annually. Tyre condition will be affected by how you drive the scooter and what terrain it is driven on. The Scout comes with solid tyres which are puncture proof, so there is no need to check tyre pressure. Ensure the scooter is stored with the seat set in the forward position, the scooter switched off with the battery pack removed and charger disconnected. Store the scooter in environments which are free from direct sunlight and water or moisture. 7.6 Moving About 1. Switch off the scooter using the ignition key and dismount from the scooter. 2. Lift the scooter by the chassis only. 3. For your safety ask for help if required. You will need two or more people when moving or lifting the scooter as a whole. Never lift the scooter by the bumpers or body panels, as this can cause injury or damage. 7.3 Battery Pack and Tyres For information on the battery pack, please read section 6 on Battery Charging and Care. Use a soft, wrung dry cloth to keep your scooter clean and dust free. Use a damp cloth and mild detergent to clean the scooter. Warning Do not use a hose pipe or splash water directly on to the scooter. Do not use petrol, solvents or vaporising solutions as these many damage body panels. Do not use wax Ensure the charger is unplugged and the scooter switched off before cleaning the scooter. 7.4 Cleaning The scooter should be cleaned periodically, especially if you tend to drive on sand, gravel or in other adverse environments. Scout Electric Scooter Page 9 of 16 Owner’s Handbook (Code: MS008_IFU 08/13) 7.7 Disassembling the Scooter 7.8 Assembling the Scooter 1. Line up the two sections of base. Lift up the handle and use the handle to slowly lower the two parts so they lock together. All models of Scout can be disassembled in to four pieces without tools: seat, front section, rear section and battery pack The procedure for disassembly is the same for all scooters. Please perform the following steps: 1. Push the Seat Rotate Lever whilst pulling up on the seat to remove. 2. Unlock front tiller by pulling the locking knob out and turning 90º. 2. Turn the handle to release the battery pack, then lift out the battery pack from the main body of the scooter. 3. Loosen the tiller adjustment knob and pull up the tiller to the required height. Retighten the knob to secure. 4. Lower battery pack in to the compartment in the scooter and then turn the handle to secure the pack in place. 3. Turn the tiller knob anti-clockwise to loosen tiller. Lower the tiller and then turn the tiller knob clockwise to secure. 5. Replace the seat and rotate it until it locks in to its correct position. 4. Lock front tiller by pulling the locking knob out and turning 90º. After assembling the Scout, make sure the tiller adjustment knob is fully tightened. 5. Pull up on the Connecting Handle to split the two halves of the base. Scout Electric Scooter The weights of the major component parts for the 4wheel Scout are below: Page 10 of 16 Seat – 7.2kg (15.9lb) Front Section - 15.8kg (34.7lb) Rear Section – 10.7kg (23.5lb) 12Ah Battery Pack – 9.2kg (20.2lb) 20Ah Battery Pack – 14.2kg (31lb) Owner’s Handbook (Code: MS008_IFU 08/13) 8. TROUBLESHOOTING The troubleshooting guide is also featured on page 1 of the Owner’s Handbook. Problem: Scooter will not switch on Symptoms: Remedy: Batteries not connected Check batteries connected Circuit breaker has tripped Push circuit breaker to reset Rear and front sections not Check connection on frontconnected to-rear loom Problem: Scooter will switch on but will not run Symptoms: Remedy: Flat batteries Recharge battery Charger plugged in Unplug charger from scooter Motor in freewheel mode Push down freewheel lever Problem: Scooter appears slow Symptoms: Remedy: Flat batteries Recharge battery Speed setting slow Turn up speed dial Problem: Seat moves whilst in use Symptoms: Remedy: Seat not locked in position Slowly rotate the seat until it drops in place and is secure. Problem: Tiller appears loose or will not swivel freely Symptoms: Remedy: Tiller adjustment knob loose Tighten tiller adjustment knob Tiller Lock Applied Release Tiller Lock Problem: Horn sounds involuntarily / automatically Symptoms: Remedy: The scooter has diagnosed a Ensure the wigwag paddle is fault released and switch the scooter off and on. Recharge batteries if error persists. Scout Electric Scooter Page 11 of 16 Owner’s Handbook (Code: MS008_IFU 08/13) Weights of Component Parts 9. SPECIFICATION Model Reference Dimension (L x W x H) Total Weight (see below for weights of component parts) Scout 3-wheel 108cm x 48cm x 91cm 42.5” x 19” x 36” 43.5kg / 96lb (12Ah model) 48.5kg / 107lb (20Ah) Propulsion motor Battery Charger Front Tyre Rear Tyre Top Speed (Forward) Reverse Climbing angle The weights of the major component parts for the 4wheel Scout are below: • Seat – 7.2kg (15.9lb) • Front Section (4-wheel) - 15.8kg (34.7lb) • Rear Section – 10.7kg (23.5lb) • Battery Pack (12Ah) – 9.2kg (20.2lb) 270W / 0.36hp 12V x 2 (12Ah or 20Ah) 24V 1.8A 200 x 50 solid 200 x 50 solid 6.4kph / 4.0mph 4.0kph / 2.5mph Up to 8 13-16km / 8-10 mile (12Ah) 16-20km / 10-13 mile (20Ah) 110cm / 43” 6cm / 2.5” 5cm / 2” 5cm / 2” 130kg / 20 stone • Battery Pack (20Ah) – 14.2kg (31lb) Model Reference Dimension (L x W x H) Total Weight (see below for weights of component parts) Scout 4-wheel 108cm x 48cm x 91cm 42.5” x 19” x 36” 42.8kg / 94lb (12Ah model) The scooter is classed as a type A vehicle as defined by EN 12184. Propulsion motor Battery Charger Front Tyre Rear Tyre Top Speed (Forward) Reverse Climbing angle 270W / 0.36hp 12V x 2 (12Ah or 20Ah) 24V 1.8A 200 x 50 solid 200 x 50 solid 6.4kph / 4.0mph 4.0kph / 2.5mph Up to 8 13-16km / 8-10 mile (12Ah) 16-20km / 10-13 mile (20Ah) 140cm / 55” 6cm / 2.5” 5cm / 2” 5cm / 2” 130kg / 20 stone Maximum Cruising range (see note) Min. turning radius Ground clearance Kerb climbing ability Obstacle climbing ability Max. Weight Capacity Maximum Cruising range (see note) Min. turning radius Ground clearance Kerb climbing ability Obstacle climbing ability Max. Weight Capacity Scout Electric Scooter Remark: The manufacturer reserves the right to modify the specification if necessary. The final specification is subject to the individual scooter you purchase from your dealer. Note: Maximum driving distance is based on an ambient temperature of 20 ºC, a 75kg driver and a brand new fully charged battery by a constant driving speed at 6 km/h with 70% battery power discharged. 47.8kg / 105lb (20Ah) Page 12 of 16 Owner’s Handbook (Code: MS008_IFU 08/13) 10. VIN NUMBER To ensure the correct after sales service and warranty service support, please write down the scooter serial number. The serial number is located on the back right- 3. Should any part of the scooter require repair or full or part replacement, as a result of a manufacturing or material defect within twelve months of receiving the scooter, replacement parts will be supplied free of charge. hand side of the frame. VIN Number Motor S/No. Controller S/No. Also, note your Drive Medical dealer below: Note: This guarantee is not transferable 4. Any repaired or replaced parts will be covered by this warranty for the balance of the warranty period on the scooter. 5. Consumable items supplied will not generally be covered during the normal warranty period unless such items require repair or replacement clearly as a direct result of a manufacturing or material defect. Such items include (among others): upholstery, tyres and batteries. Dealer Address 6. The above warranty conditions apply to brand new scooter purchased at the full retail price. If you are unsure whether your scooter is covered, check with the service agent. Postcode 7. Under normal circumstances, no responsibility will be accepted where the scooter has failed as a direct result of: Telephone a) The scooter or part not having been maintained in accordance with the manufacturer’s recommendations. 11. WARRANTY b) Failure to use the manufacturer’s specified parts There is a comprehensive one-year warranty from the date on which your new scooter is delivered. The warranty covers the scooter for repairs or replacement during this period. For full warranty conditions or to make a warranty claim, contact your Drive Medical dealer from whom you purchased the scooter. 1. Any work or replacement part installation must be carried out by an authorized Drive Medical dealer / service agent. 2. To apply the warranty should your scooter require attention please contact the designated service agent listed above. Scout Electric Scooter c) The scooter or part having been damaged due to neglect, accident or improper use d) The scooter or part having been altered from the manufacturer’s specifications or repairs having been attempted before the service agent is notified Please note your local service agent’s contact details in the previous box. In the event of your scooter requiring attention, contact them and give all relevant details so they can act quickly. The manufacturer reserves the right to alter without notice any weights, measurements or other technical data shown in this manual. All figures, measurements and capacities shown in this manual are approximate and do not constitute specifications. Page 13 of 16 Owner’s Handbook (Code: MS008_IFU 08/13) Appendix A: Service Record 1 2 3 4 5 YEAR 1 2 3 4 5 YEAR Service Dates Service Dates Controller Upholstery On/off switch Seat Control Lever Back Braking Armrests Recharge point Electrics Batteries Connections condition Levels Lights Connections Test run Discharge test Forwards Wheels and Tyres Reverse Wear Emergency stop Pressure Left turn Bearings Right turn Wheel nuts Slope test Motors Over obstacles Wiring List Items repaired Noise Connections Brake Brushes Chassis Condition Steering Scout Electric Scooter Page 14 of 16 Owner’s Handbook (Code: MS008_IFU 08/13) Notes: Scout Electric Scooter Page 15 of 16 Owner’s Handbook (Code: MS008_IFU 08/13) Notes: Scout Electric Scooter Page 16 of 16 Owner’s Handbook (Code: MS008_IFU 08/13)