1
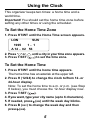
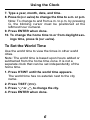
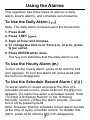
POCKET DIRECTORY
RFPP-3
POCKET PLANNER
RF411-3
User’s Guide
20
License Agreement
READ THIS LICENSE AGREEMENT BEFORE USING THE
ELECTRONIC REFERENCE. YOUR USE OF THE
ELECTRONIC REFERENCE DEEMS THAT YOU ACCEPT
THE TERMS OF THIS LICENSE. IF YOU DO NOT AGREE
WITH THESE TERMS, YOU MAY RETURN THIS
PACKAGE WITH PURCHASE RECEIPT TO THE DEALER
FROM WHICH YOU PURCHASED THE ELECTRONIC
REFERENCE AND YOUR PURCHASE PRICE WILL BE
REFUNDED. ELECTRONIC REFERENCE means the
software product and documentation found in this package
and FRANKLIN means Franklin Electronic Publishers, Inc.
Limited Use License
All rights in the ELECTRONIC REFERENCE remain the
property of FRANKLIN. Through your purchase, FRANKLIN
grants you a personal and nonexclusive licensed to use this
ELECTRONIC REFERENCE. You may not make any copies
of the ELECTRONIC REFERENCE or of the data stored
therein, whether in electronic or print format. Such copying
would be in violation of applicable copyright laws. Further,
you may not modify, adapt, disassemble, decompile,
translate, create derivative works of, or in any way reverse
engineer the ELECTRONIC REFERENCE. You may not
export or reexport, directly or indirectly, the ELECTRONIC
REFERENCE without compliance with appropriate
governmental regulations. The ELECTRONIC REFERENCE
contains Franklin’s confidential and proprietary information
which you agree to take adequate steps to protect from
unauthorized disclosure or use. This license is effective until
terminated. This license terminates immediately without
notice from FRANKLIN if you fail to comply with any provision
of this license.
1
Getting Started
Before you start using this organizer for the first time,
do the following steps.
1. Turn your organizer over and carefully pull the
battery insulation tape to remove it.
Now, you should perform a system reset.
Warning! A system reset erases any user-entered
information and clears all settings.
2. Press ON/OFF to turn the organizer off.
3. Use a thin, pointed object (e.g., a paper clip) to
press the Reset button on the back of the organizer.
4. Press ENTER to reset the organizer.
✓ Disabling the Keytone
The keytone is the tone that sounds whenever you
press a key. To turn off the keytone, first press
SHIFT and then press V ( ). To turn the keytone
on again, repeat these steps.
✓ Keep Written Copies of Important Data
Data is safely kept in memory as long as the battery
supplies power. If the battery loses power or is removed all of your data will be lost. Data can also be
lost or corrupted if you make a mistake while operating the organizer. Because of this, you should always keep written copies of your important data just
in case it is corrupted or lost.
2
Key Guide
ON/OFF
3KB M E M O R Y
BUSINESS PERSONAL
B
P
Q
W
SPACE
HT/WT
ALM
CAL/CONV
E
R
T
Y
M+
MRC
A
SCHD
M-
S
D
%
DST AM/PM
F
G
AC
SYM
CE/C
Z
X
C
7
8
9
÷
4
5
6
x
1
2
3
–
0
.
=
+
U
I
O
T.SET
SHIFT
+/-
12/24
H
P
J
K
L
DEL
INS
DAY
V
B
N
M ENTER
Function Keys
BUSINESS
PERSONAL
SCHD
HT/WT
Selects the business phone directory.
Selects the personal phone directory.
Selects the scheduler.
Toggles between the home time and
world time clocks.
ALM
Selects the alarm clock.
CAL/CONV Toggles between the calculator and the metric converter.
Other Keys
B (DAY)
Lets you select the day of the week when
setting the home and world time clocks.
C (CE/C)
Shifted, clears your most recent entry.
ENTER
Stores an entered record.
G (DST AM/PM) When the home time is displayed,
3
Key Guide
changes the time to or from daylight
savings. When setting the home time,
changes the time to or from a.m. or p.m.
H (12/24) Shifted, toggles home and world time
clocks between 12 and 24 display.
ON/OFF
Turns the organizer on or off.
SHIFT
Pressed once, shifts a key to perform the
function printed above the key. Pressed
twice, starts the shift lock.
SPACE
Types a space.
T.SET(
) Lets you set the home time, world time,
alarm clock, password, exchange rates,
and other functions.
X (SYM)
Shifted, lets you type symbols (e.g., $, :, #).
Direction Keys
▼
▼
▼
▼
Lets you move in the indicated direction: up,
down, left, or right.
Displays records.
Calculator Function Keys
A (MRC)
C (CE/C)
D (M-)
F (%)
L (+/-)
S (M+)
Z (AC)
Pressed once, retrieves a number from the
memory. Pressed twice, clears the memory.
Clears the most recent entry.
Stores a negative number in the memory.
Calculates a percentage.
Changes number from/to positive or negative.
Stores a positive number in the memory.
Clears all calculator entries and memory.
4
Using the Clock
This organizer keeps two times: a home time and a
world time.
Important! You should set the home time zone before
setting any other times or using the scheduler.
To Set the Home Time Zone
1. Press HT/WT until the Home Time screen appears.
LON
SUN
1995
1- 1
A 12 - 02 56
2. Press
or
3. Press T.SET (
until a city in your time zone appears.
) to set the time zone.
To Set the Home Time
1. Press HT/WT until the home time appears.
The home time has an asterisk at the upper left.
2. Press H (12/24) to change the clock to/from 12- or
24-hour display.
Note: To set the home time to a.m. or p.m. (see Step
8 below), you must choose the 12-hour display now.
3. Press T.SET (
).
4. If you want, type your city name (up to 6 characters).
5. If needed, press (INS) until the week day blinks.
6. Press B (DAY) to change the week day and then
press (INS).
5
Using the Clock
7. Type a year, month, date, and time.
8. Press G (DST AM/PM) to change the time to a.m. or p.m.
Note: To change to and from a.m. to p.m. by pressing
G, the blinking cursor must be positioned at the
leftmost hour numeral.
9. Press ENTER when done.
10. To change the home time to or from daylight savings time, press G (DST AM/PM).
To Set the World Time
Use the world time to view the times in other world
cities.
Note: The world time is based upon hours added or
subtracted from the home time zone. It is not a
separate clock that can be set independently of the
home time.
1. Press HT/WT until the world time appears.
The world time has no asterisk next to the city
name.
2. Press T.SET (
).
3. Press
or
to change the city.
4. Press ENTER when done.
6
Using the Alarms
This organizer has three types of alarms: a daily
alarm, hourly alarms, and schedule record alarms.
To Use the Daily Alarm (
)
Note: The daily alarm is based upon the home time.
1. Press ALM.
2. Press T.SET (
).
3. Type an hour and minutes.
4. To change the time to or from a.m. or p.m., press
G (DST AM/PM).
5. Press ENTER when done.
The
icon indicates that the daily alarm is set.
To Use the Hourly Alarm (
)
To turn on the hourly alarm, press ALM until the bell
icon appears. To turn this alarm off, press ALM until
the bell icon disappears.
To Use the Schedule Record Alarm ( ((\)) )
To set an alarm to sound whenever the time of a
schedule record occurs, press ALM unti the ((\)) icon
appears. (To learn how enter a schedule record, read
“To Enter a Schedule Record” in the “Entering
Records” section.) When the alarm sounds, you can
turn it off by pressing ALM.
Note, however, that the schedule record alarm sounds
at the time of every schedule record. To disable this
alarm, press ALM until the ((\)) icon disappears.
7
Entering Records
To Enter a Business or Personal Phone
Directory Record
Business and personal phone directory records have
three fields of information. You can type up to 36
characters in each field.
In the first field you can letters and numbers. In the
second and third fields, you can type numbers.
1. Press BUSINESS or PERSONAL.
The number at the right indicates unused memory.
2. Type a name or other information and then press ▼.
To type symbols (e.g., $, :, #), press SHIFT twice to
engage to shift lock, press X (SYM) until the symbol
you want appears, and then press SHIFT.
To change a character, use (DEL) and then retype it.
3. In the second field, type a phone number and
then press ▼.
4. In the third field, type another phone number if
you want.
SMITH BOB
555 - 1234
F 555 - 5678
This is a sample phone directory record.
5. Press ENTER to store the entry.
To learn how to view, edit, or delete business and
personal phone directory records, read “Viewing,
Editing, and Deleting Records.”
8
Entering Records
To Enter a Schedule Record
Schedule records have three fields of information. The
first field can hold up to 36 characters. The second
and third fields hold numbers. You can also set an
alarm to go off when a scheduled event occurs.
1. Press SCHD.
2. Type an event description in the first field and
then press ▼.
To type symbols (e.g., $, :, #), press SHIFT twice to
engage to shift lock, press X (SYM) until the symbol
you want appears, and then press SHIFT.
To change a character, use (DEL) and then retype it.
3. In the second field, type the year, month, and date
of the event, and then press ▼.
4. In the third field, type hour and minutes.
MEETING
1997
P 03 - 30
01 - 31
This is a sample schedule record.
5. Press G (DST AM/PM) to change the time to or from
a.m. and p.m.
Note: To change a.m. and p.m., the blinking cursor
must be positioned at a time digit (hour or minute)
and the home time clock must be set in the 12-hour
display mode.
6. Press ENTER to store the record.
9
Viewing, Editing, and Deleting Records
To View, Edit, or Delete a Record
You view, edit, and delete business and personal
phone directory records, as well as schedule records,
in the same manner.
1. Press BUSINESS, PERSONAL, or SCHD.
or
to cycle through the records alpha2. Use
betically. Or type the first letter of a record when
or
to find
BUSINESS appears and then use
the correct record.
3. To edit a record, first press SHIFT, use (DEL) and
(INS) to move the cursor, type your changes, and
then press ENTER to store the changes.
4. To delete a record, first press SHIFT, press C
(CE/C), and then press ENTER to delete it.
Note: If you do not want to delete a record after you
have pressed C (CE/C), press any key except ENTER.
10
Using a Password
This organizer has a secret mode, which allows you to
create secret business phone directory records, personal
phone directory records, and scheduler records that only
someone with the password you set can use.
Caution! Your secret records can only be viewed if
you remember your password, so always write down
your password and keep it in a separate location.
To Set the Password
1. Press BUSINESS, PERSONAL, or SCHD.
).
2. Press T.SET (
KEY WORD?
3. Type a password of up to six characters.
Remember to write down your password and keep it
in a separate location.
4. Press T.SET (
) to store the password and engage the secret mode.
The key icon on the screen indicates that the secret
mode is now engaged.
5. Press T.SET (
) two more times to disengage
the secret mode.
To Enter Secret Records
To enter secret records, you must set a password and
have engaged the secret mode, indicated by the key
11
Using a Password
icon on the screen. To learn how, read “To Set the
Password” above.
1. Press BUSINESS, PERSONAL, or SCHD.
2. Type a record.
To learn how, read “Entering Records.”
3. Press T.SET (
).
Notice that the key icon appears on screen.
4. Press ENTER to store the secret record.
To View Secret Records
1. Press T.SET (
).
)
2. Type your password and then press T.SET (
to engage the secret mode.
Notice the key icon appears on the screen. Remember, when the key icon is on the screen you can
view only your secret records, if any.
3. Press BUSINESS, PERSONAL, or SCHD.
4. View any secret records.
To learn how, read “Viewing, Editing, and Deleting
Records.”
To Change or Disable the Password
1. Press T.SET (
2. Press SHIFT.
).
3. Use (DEL) and (INS) to move the cursor, type
your changes, and then press ENTER.
12
Using the Calculator
To Make Basic Calculations
1. Press CALC/CONV until the calculator screen appears.
0.
2. Type a number.
You can type up to 10 digits with this calculator. To
change the number to or from positive or negative,
press L (+/-).
3. Press the addition, subtraction, multiplication, or
division key.
4. Type another number.
5. Press = to make your calculation.
6. To clear the calculation, press C (C/CE).
Or press G (%) to calculate the percentage.
To Use the Calculator Memory
1. Make a calculation as shown above or simply type
a number in the calculator.
2. Press S (M+) to add the result to the memory as a
positive number or D (M-) to add it to the memory
as a negative number.
3. To retrieve the number from memory,
press A (MRC) once.
4. To clear the memory, press A (MRC) a second time.
13
Converting Measures and Currency
To Convert Measures
1. Press CAL/CONV until the inches-to-centimeters
conversion screen appears.
or
until the desired conversion ap2. Press
pears.
3. To change the direction of the conversion, press
(DEL) or (IINS).
4. Type a number.
5. Press ENTER to convert it.
To Set Currency Exchange Rates
You can set more than on exchange rate and convert
currencies in both directions.
1. Press CAL/CONV until the inches-to-centimeters
conversion screen appears.
or
until the blank conversion screen
2. Press
appears.
– –>
0.
3. Press T.SET (
).
4. Type a short abbreviation for the entry currency
(e.g., USD for U.S. dollars).
5. Press (ins).
6. Type a short abbreviation for the target currency
(e.g., YEN ) and then press ENTER.
14
Converting Measures and Currency
7. Type an exchange rate (units of the target currency/one unit of the entry currency) and then
press ENTER.
To Convert Currencies
Note: To convert currencies, you must first set their
exchange rates. To learn how, read “To Set Currency
Exchange Rates.”)
1. Press CAL/CONV until the inches-to-centimeters
conversion screen appears.
or
until the appropriate conversion
2. Press
screen appears.
USD
– –>
YEN
114.
3. To change the direction of the conversion, press
(DEL) or (INS).
4. Type units of the entry currency and then press ENTER to convert it to the target currency.
This organizer may change operating modes due to
Electro-static Discharge. Normal operation of this
organizer can be re-established by pressing the ON/
OFF key.
15
Replacing the Battery
This organizer uses one CR2025, 3-volt lithium battery.
Before you follow these steps you should have a small
Phillips screwdriver and a new battery in hand.
Warning! When no battery is installed, this organizer will
save your information for only about 30 seconds. So
quickly install a new battery when you remove the old one.
1. Turn off the organizer and turn it over.
2. With the Phillips screwdriver, remove the two
screws at the top of the battery cover and then remove the lid itself.
Do not remove the screws at the sides of the organizer.
3. Remove the old battery and quickly replace it with
the new battery, with its plus (+) sign facing you.
4. Replace the battery cover.
Warning! If RESET? appears when you next turn
on the organizer, do not press ENTER unless you
want to reset the organizer and erase all your information (see below).
To Reset the Organizer
Warning! Resetting the organizer permanently erases
all the information entered in it. Perform a reset only
when you want to erase and lose all your information.
1. If needed, turn the organizer on.
2. Using the pointed end of a paper clip, press the recessed RESET button on the back of the organizer.
RESET? should appear on the screen.
3. Press ENTER to reset the organizer or any other
key to cancel the reset.
16
Limited Warranty (U.S. Only)
Franklin Electronic Publishers, Inc. (“Franklin”) warrants to the end user that this product
will be free from defects in material and workmanship for a period of ONE YEAR from the
date of original retail purchase, as evidenced by sales receipt. On discovery of a defect, the
end user must return this product (transportation charges prepaid) either to the dealer from
whom it was purchased or directly to Franklin at the address given below. Each product
returned must include the user’s name, address, and telephone number, as well as a brief
description of the nature of the defect and a copy of the sales receipt as proof of the date of
the original retail purchase. Franklin will, at its option, repair or replace any product at no
further charge to the end user on determination by Franklin, in its sole discretion, that the
product was defective and that such defect arose within the duration of this limited warranty.
This warranty does not apply if, in the sole discretion of Franklin, the product has been
tampered with, damaged by accident, abuse, misuse, or misapplication, or as a result of
service or modification by any party, including any dealer, other than Franklin. FRANKLIN
SHALL NOT BE RESPONSIBLE IN ANY WAY FOR ANY SERVICE OR MODIFICATION
TO THIS PRODUCT BY ANY PARTY, INCLUDING ANY DEALER, OTHER THAN
FRANKLIN.
This warranty applies only to products manufactured by or for Franklin. Batteries, corrosion
of battery contacts and any damage caused by batteries are not covered by this warranty.
ALL IMPLIED WARRANTIES, INCLUDING ANY IMPLIED WARRANTIES OF
MERCHANTABILITY OR FITNESS FOR A PARTICULAR PURPOSE, SHALL BE
STRICTLY LIMITED IN DURATION TO THAT OF THE EXPRESS WARRANTY SET
FORTH ABOVE, THAT IS, ONE YEAR FROM THE DATE OF ORIGINAL RETAIL
PURCHASE.
THE WARRANTY AND REMEDY SET FORTH ABOVE ARE THE EXCLUSIVE REMEDY
OF THE RETAIL BUYER AND END USER IN CONNECTION WITH THE MANUFACTURE,
SALE, OR USE OF THIS PRODUCT AND ARE IN LIEU OF ANY AND ALL OTHER
WARRANTIES OR REMEDIES, WRITTEN OR ORAL, EXPRESS OR IMPLIED. NO
FRANKLIN DEALER, AGENT, OR EMPLOYEE IS AUTHORIZED TO MAKE ANY
ADDITIONAL WARRANTY IN THIS REGARD OR TO MAKE ANY MODIFICATION OR
EXTENSION OF THIS EXPRESS WARRANTY.
FRANKLIN SHALL NOT BE RESPONSIBLE FOR SPECIAL, INCIDENTAL, OR
CONSEQUENTIAL DAMAGES RESULTING FROM THE BREACH OF ANY EXPRESS
OR IMPLIED WARRANTY OR IN CONNECTION WITH THE MANUFACTURE, SALE,
OR USE OF THIS PRODUCT UNDER ANY LEGAL THEORY, WHICH DAMAGES SHALL
INCLUDE, BUT NOT BE LIMITED TO, LOST PROFITS, DAMAGES TO PROPERTY OR
DAMAGES FOR PERSONAL INJURY (BUT ONLY TO THE EXTENT PERMITTED BY
LAW). UNLESS OTHERWISE CONTRARY TO APPLICABLE LAW, FRANKLIN’S
LIABILITY SHALL IN NO CASE EXCEED THE PRICE PAID FOR THE PRODUCT
CLAIMED TO BE DEFECTIVE.
This warranty shall not be applicable to the extent that the enforcement of any provision
may be prohibited by applicable law. This warranty gives you specific rights, and you may
also have other rights which vary from state to state. Some states do not allow the exclusion
or limitation of incidental or consequential damages or limitation on how long an implied
warranty may last so the above limitation or exclusion may not apply to you. Enclose $3.00
check or money order for shipping and handling to:
FRANKLIN ELECTRONIC PUBLISHERS, INC.
ATTENTION: SERVICE DEPARTMENT
ONE FRANKLIN PLAZA
BURLINGTON, NEW JERSEY 08016
609-386-2500
17
Your Notes
18
Specifications
Models RF411-3 and RFPP-3
Size: 11.8 x 7.1 x 1.1 cm • Weight: 2.5 oz •Batteries: 1 CR-2025 Lithium
Storage capacity: 300 items
Cleaning This Product
To clean this product, spray a mild glass cleaner onto a cloth and wipe its
surface. Don’t spray liquids directly onto the unit. Don’t use or store your
organizer in extreme or prolonged heat, cold, humidity, or other adverse
conditions.
FCC Notice
Complies with the limits for a Class B computing device pursuant to
Subpart B of Part 15 of FCC Rules. Operation is subject to the following
two conditions (1) This device may not cause harmful interference; and
(2) This device must accept any interference received, including
interference that may cause undesirable operation.
Copyrights, Trademarks, Patents, ISBN
© 1997 Franklin Electronic Publishers, Inc.
Burlington, N.J. 08016-4907 USA. All rights reserved.
Rolodex is a registered trademark of Insilco Corporation.
Patents Pending
Limited Warranty (outside U.S.)
This product, excluding batteries is guaranteed by Franklin for a period of
one year from the date of purchase. It wil be repaired or replaced (at
Franklin’s option) free of charge for any defect due to faulty workmanship
or materials.
Products purchased outside the United States that are returned under
warranty should be returned to the original vendor with proof of purchase
and description of fault. Charges will be made for all repairs unless valid
proof of purchase is provided.
This warranty explicitly excludes defects due to misuse, accidental damage,
or wear and tear. This guarantee does not affect the consumer’s statutory
rights.
For sales and customer service, please call 1-800-266-5626.
REP-28000-00
P/N 7201854
Rev. A
19