1
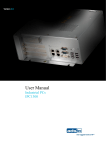
Version 2.4 User Manual Industrial PCs OPC5012 Industrial PCs OPC5012 Product Portfolio Copyright © ads-tec GmbH Raiffeisenstr.14 D-70771 Leinfelden-Echterdingen Germany 2 © ads-tec GmbH • Raiffeisenstr.14 • 70771 Leinfelden-Echterdingen Industrial PCs OPC5012 INDEX 1 REMARKS ............................................................................................................................... 5 1.1 1.2 1.3 1.4 1.5 1.6 1.7 1.8 1.9 2 SAFETY INFORMATION .......................................................................................................... 8 2.1 2.2 2.3 2.4 2.5 3 SYS LED (TWO COLORS) ............................................................................................................. 17 INTERFACES ......................................................................................................................... 18 7.1 7.2 7.3 7.4 7.5 7.6 7.7 7.8 7.9 7.10 7.11 8 FRONT CONTROL BUTTONS ........................................................................................................... 14 SOFTWARE KEYBOARD ................................................................................................................. 15 EXTERNAL KEYBOARD .................................................................................................................. 16 MOUSE .................................................................................................................................... 16 TOUCH SCREEN.......................................................................................................................... 16 STATUS INDICATORS ...........................................................................................................17 6.1 7 AVAILABLE INTERFACES................................................................................................................ 12 CABLE INSTALLATION .................................................................................................................. 13 STARTUP PROCEDURE .................................................................................................................. 13 OPERATIONAL READINESS CHECK .................................................................................................... 13 OPERATION .......................................................................................................................... 14 5.1 5.2 5.3 5.4 5.5 6 MOUNTING OPTIONS ................................................................................................................... 10 DEVICE MOUNTING ILLUSTRATION .................................................................................................. 10 MOUNTING PROCEDURE ............................................................................................................... 11 STARTUP .............................................................................................................................. 12 4.1 4.2 4.3 4.4 5 PLACE OF INSTALLATION ................................................................................................................8 DAMAGE DUE TO IMPROPER USAGE....................................................................................................9 WARRANTY AND REPAIRS ...............................................................................................................9 COMPLAINTS SUBSEQUENT TO DELIVERY ............................................................................................. 9 HANDLING AND PROPER DISPOSAL OF LITHIUM BATTERIES....................................................................... 9 MOUNTING ........................................................................................................................... 10 3.1 3.2 3.3 4 RELEVANT DEVICE DOCUMENTATION .................................................................................................5 EXPLANATION OF THE SYMBOLS USED IN THIS DOCUMENT ....................................................................... 5 DATA, ILLUSTRATIONS, MODIFICATIONS ............................................................................................. 5 TRADEMARKS ..............................................................................................................................5 COPYRIGHT ................................................................................................................................ 6 AMBIENT CONDITIONS ...................................................................................................................6 STANDARDS ................................................................................................................................ 7 MODELS .................................................................................................................................... 7 SCOPE OF DELIVERY ......................................................................................................................7 INTERFACE CONFIGURATION.......................................................................................................... 18 INTERFACE ASSIGNMENT .............................................................................................................. 18 24 V DC POWER SUPPLY .............................................................................................................. 18 USB CONNECTIONS .................................................................................................................... 18 NETWORK CONNECTION (RJ45) .................................................................................................... 19 SERIAL COM INTERFACE (RS232) ................................................................................................. 19 OPTIONAL USB CONNECTION ON THE FACEPLATE ............................................................................... 19 EXTERNAL DRIVES ...................................................................................................................... 19 DVI INTERFACE ......................................................................................................................... 20 HARD DRIVE / COMPACTFLASH (IDE INTERFACE) ............................................................................ 21 PS/2 CONNECTION .................................................................................................................. 21 SOFTWARE/DRIVER INSTALLATION ...................................................................................22 © ads-tec GmbH • Raiffeisenstr.14 • 70771 Leinfelden-Echterdingen 3 Industrial PCs OPC5012 8.1 8.2 8.3 9 INSTALLING THE OPERATING SYSTEM ............................................................................................... 22 TOUCH SCREEN DRIVER INSTALLATION (WINDOWS 2000/XP) ............................................................... 23 SOFTWARE KEYBOARD ................................................................................................................. 23 TECHNICAL DETAILS ............................................................................................................24 9.1 9.2 9.3 10 DISPLAY DATEN ......................................................................................................................... 24 COMPUTER TECHNICAL DATA ......................................................................................................... 24 GENERAL DATA .......................................................................................................................... 24 SERVICE AND SUPPORT ....................................................................................................25 10.1 10.2 4 ADS-TEC SUPPORT................................................................................................................... 25 COMPANY ADDRESS: ................................................................................................................ 25 © ads-tec GmbH • Raiffeisenstr.14 • 70771 Leinfelden-Echterdingen Industrial PCs OPC5012 1 REMARKS 1.1 RELEVANT DEVICE DOCUMENTATION Consult the following documentation for information pertaining to device setup and operation: User manual on the service CD (this documentation): Contains information pertaining to device mounting, startup and operation as well as the technical data for the device hardware. Service CD: Contains drivers, user manual and installation instructions for installing drivers, calibration and using the touch screen. 1.2 EXPLANATION OF THE SYMBOLS USED IN THIS DOCUMENT Warning: The "Caution" symbol indicates actions that could cause damage to hardware, software or persons! Note: This symbol conveys conditions that must be adhered to in order to ensure error-free operation. It also indicates tips and suggestions for using the device efficiently and optimizing software use. 1.3 DATA, ILLUSTRATIONS, MODIFICATIONS All text, data and illustrations in this document are of non-binding nature. We reserve the right to make any modifications required for technical progress. 1.4 TRADEMARKS All software and hardware names as well as all company brand names included in this documentation are subject to trademark and patent laws. WINDOWS NT™ is a trademark of Microsoft Corp. ® ® WINDOWS , WINDOWS CE and WINDOWS® CE.net™ are registered trademarks of Microsoft Corp. Citrix® and ICA® are registered trademarks of Citrix Systems Inc. Intel® and Pentium® are registered trademarks of Intel Corp. VIA C3™ is a trademark of VIA Technologies, Inc. ® IBM , PS/2® and VGA® are registered trademarks of IBM Corp. SanDisk® is a registered trademark of SanDisk Corp. CompactFlash™ and CF™ are trademarks of SanDisk Corp. We hereby recognize all other locally and internationally known trademarks and product names. © ads-tec GmbH • Raiffeisenstr.14 • 70771 Leinfelden-Echterdingen 5 Industrial PCs OPC5012 1.5 COPYRIGHT This manual and any illustrations contained therein are copyrighted. Any use of this manual which deviates from the copyright stipulations is prohibited. Reproduction, translation and/or electronic and photographic archiving and modification require written permission from ads-tec GmbH. The violation of these rights will be prosecuted. 1.6 AMBIENT CONDITIONS The device can be operated in the following ambient conditions. The device warranty will be rendered invalid upon noncompliance with these specifications. ads-tec shall not be held responsible for damages resulting from improper handling. 6 • Temperature for devices with hard disk drives during use 0 … 40 C in storage -10 … 60 C (due to temperature peak value memory inside) • Temperature for devices with CompactFlash during use 0 … 40 C in storage -10 … 60 C (due to temperature peak value memory inside) • Humidity during use in storage • Vibration during use • Bump during use 10 … 85% without condensation 10 … 85% without condensation 1 G, 10 … 500 Hz (DIN EN 60068-2-6) 5 G, at alternation of 30 ms (DIN EN 60068-2-29) © ads-tec GmbH • Raiffeisenstr.14 • 70771 Leinfelden-Echterdingen Industrial PCs OPC5012 1.7 STANDARDS The device meets the requirements and objectives of the following EC directives: • • The device complies with the test specifications for the CE label according to the European test standards EN 55022 and EN 50082-2. The device complies with the test specifications DIN EN 60950 (VDE 0805, IEC 950) "Safety of Information Technology Equipment". • The device complies with the DIN EN 60068-2-6 (sinusoidal vibration) test specifications. • The device complies with the DIN EN 60068-2-29 (bump) test specifications. Note: The manufacturer keeps a corresponding declaration of conformity for the responsible authorities and can present that document upon request. In order for the device to comply with the legal requirements pertaining to electromagnetic compatibility, all connected components and cable connections have to meet these requirements as well. Therefore shielded bus and LAN cables with shielded plugs should be used and installed as specified in this manual. 1.8 MODELS Two models of the system are provided: Platform with CompactFlash: This platform has no rotating mass storage media (e.g. hard drives) and incorporates an embedded operating system (Windows CE.net / XP embedded) for stationary use. Platform with hard drive: This model includes a hard drive for stationary use in production environments and incorporates standard operating systems. 1.9 SCOPE OF DELIVERY Shipment includes the following: • 1 device • Power plug: • Fastener set for control cabinet • Service CD 3 pin Phoenix Contact COMBICON MC 1.5/3-GF-3.81 feedthrough header (already mounted in the device socket) Optional components • Operating system © ads-tec GmbH • Raiffeisenstr.14 • 70771 Leinfelden-Echterdingen 7 Industrial PCs OPC5012 2 SAFETY INFORMATION The device is electrically charged and contains highly sensitive components. Permissible modification by the user is limited to installing add-on cards. The manufacturer or a service provider authorized by the manufacturer should be consulted if any other modifications are to be carried out. Whenever such modifications are carried out the device must first be switched off and the power cable must be disconnected. The appropriate measures should be implemented to avoid electrostatic shock to the components upon contact. Opening of the device by a non-authorized person could result in hazards to the user and renders any warranty claims invalid. General notice: • • • • • • The manual should be read by all users and should be kept readily accessible at all times. Mounting, startup and operation should only be carried out by trained personnel. All persons using the device should observe the safety information and the manual. The rules and regulations pertaining to accident prevention should be observed in the place of device installation. The manual contains the most important information required for safe operation of the device. Proper storage, transport, installation and startup are required to ensure correct and safe device operation. Warning: The device should be switched off prior to connecting any cables (power supply, peripherals) to prevent damage to the device. 2.1 PLACE OF INSTALLATION The control system is intended for installation in the control cabinet. The specified ambient conditions should always be adhered to. Use in non-specified environments (e.g. on boats, in explosive hazard areas or at extreme altitudes) is prohibited. Warning: In order to avoid formation of condensation, the device should only be switched on once it has acclimated to the room temperature. The same applies if the device has been exposed to extreme variations in temperature. Preventing overheating during operation: The device should not be exposed to direct sunlight or other sources of light. Measures to prevent heat accumulation should be implemented if the device is installed in a console, casing or similar enclosing structure. The maximum permissible ambient temperature should not be exceeded. 8 © ads-tec GmbH • Raiffeisenstr.14 • 70771 Leinfelden-Echterdingen Industrial PCs OPC5012 2.2 DAMAGE DUE TO IMPROPER USAGE If the control system shows obvious damage caused by incorrect operational and/or storage conditions or improper handling, then the device is to be shut down immediately and protected against unintentional startup. 2.3 WARRANTY AND REPAIRS During the warranty period, repairs may only be carried out by the manufacturer or persons authorized by the manufacturer. 2.4 COMPLAINTS SUBSEQUENT TO DELIVERY If the control system shows obvious damage subsequent to transport, then the device is to be protected against unintentional startup immediately. The supplier and forwarder are to be notified immediately of any obvious damages in transit. Notification of any hidden damages in transit is to be filed with the supplier within 5 days after delivery. Damages of this type can no longer be recognized once this period has expired. 2.5 HANDLING AND PROPER DISPOSAL OF LITHIUM BATTERIES Warning: Danger of explosion and the release of toxic substances Lithium batteries should not be exposed to fire, soldered, recharged, opened, shortcircuited, reversed or heated above 100 °C and they should be disposed of properly as well as protected against sunlight, moisture and condensation. The lithium battery can only be replaced by the same type or a type recommended by the manufacturer. The used lithium battery should be disposed of in accordance with local legal regulations. © ads-tec GmbH • Raiffeisenstr.14 • 70771 Leinfelden-Echterdingen 9 Industrial PCs OPC5012 3 MOUNTING 3.1 MOUNTING OPTIONS The device is intended for installation in control panels and cabinet doors. The control panels and consoles should be accessible from the back for mounting and operation (plug connectors). The device can be installed in control cabinets with wall thicknesses of 2...7 mm. We recommend at least 3 mm for proper mounting with front IP65 protection. Warning: Preventing overheating during operation: The device should not be exposed to direct sunlight or other sources of light. Measures to prevent heat accumulation should be implemented if the device is installed in a console, casing or similar enclosing structure. The maximum permissible ambient temperature should not be exceeded. Devices with drives should only be installed in an upright position. Any deviations from this should be agreed upon with ads-tec GmbH. The front is only IP65 protected if mounted correctly. If the device is delivered with a CD/DVD-ROM drive, then there should be sufficient space provided (approx. 130 mm) on the left side (as seen from the front) to open the drive. 3.2 10 DEVICE MOUNTING ILLUSTRATION © ads-tec GmbH • Raiffeisenstr.14 • 70771 Leinfelden-Echterdingen Industrial PCs OPC5012 3.3 MOUNTING PROCEDURE • Cut out the section or the control panel or cabinet door as shown in the illustration. • Slide the device into the cutout from the front (place the ON/OFF switch of an OPC with 24 V DC to the center position). • Insert the fastening bolts with slot nuts in the matching slots in the sheet metal cover and then tighten the screws on all bolts equally (max. torque 25 Ncm) until the faceplate is pulled into place in the cutout. Warning: The cutout is different for an OPC with a 24 V DC connection. Overtightening the screws could bend the faceplate out of shape beyond repair and break the glass in touch screen devices. Note: The device is connected to the power supply using the accompanying power cable or a lead out terminal with a screw connection. A ground connection does not have to be made, because the grounding conductor of the device plug or supply connection serves this purpose. If additional grounding conductors are attached to a grounding screw, a wire diameter of at least 2.5 mm² is specified. © ads-tec GmbH • Raiffeisenstr.14 • 70771 Leinfelden-Echterdingen 11 Industrial PCs OPC5012 4 STARTUP Warning: The PC should be switched off before disconnecting plugs in order to avoid damage to electronic components! In order to avoid formation of condensation, the device should only be switched on once it has acclimated to the room temperature. Pay attention to the voltage permitted for the device. You should allow five seconds to pass between switching the device off and switching it back on. 4.1 AVAILABLE INTERFACES The devices have the following interfaces as standard: Note: Cable shielding of a data cable has to be connected to the plug connection casing (EMC). The interfaces have to be enabled in the embedded operating system and the matching drivers have to be installed to be able to use the interfaces. 12 © ads-tec GmbH • Raiffeisenstr.14 • 70771 Leinfelden-Echterdingen Industrial PCs OPC5012 4.2 CABLE INSTALLATION The device interfaces and power supply plug are found on the side or the back of the casing. Care should be taken not to damage the pins when connecting the plugs. 4.3 4.4 STARTUP PROCEDURE • For 24 V DC device: Place the cable end sleeves of the power cable wires in the terminals. • Connect the cable for serial / parallel data transfer and fasten the plugs to the sockets. • Connect all further required cables and secure against slippage. OPERATIONAL READINESS CHECK • Connect the power cable to the power source. • Check the device to determine whether hidden damages have been caused by improper transport, incorrect operation or storage conditions or improper handling (e.g. smoke emission from the device, etc.). If damages are found, immediately shut down the device and protect it against unintentional startup. © ads-tec GmbH • Raiffeisenstr.14 • 70771 Leinfelden-Echterdingen 13 Industrial PCs OPC5012 5 OPERATION 5.1 FRONT CONTROL BUTTONS Depending on the device model, factory settings will include an operating system (Windows CE.net, Windows XP embedded or Windows XP Professional) and a software keyboard. The buttons on the front have already been assigned the following functions in the software keyboard by a special driver: Level 1: Displaying and closing the software keyboard to enter characters via the touch screen. Level 2: The volume level can be increased in devices with audio output. Level 1: Task switch (Alt+ESC) in Windows. Level 2: The volume level can be decreased in devices with audio output. Level 1: Not assigned Level 2: Increase the display brightness Level 1: Right mouse button function Level 2: Decrease the display brightness Shift key for the second keyboard level. The button has to be pressed at the same time as the required function key. Note: If no software keyboard has been installed, then only the functions for display and volume adjustment will be activated. The settings for these adjustments will not be displayed on the screen. The button functions can be modified to accommodate individual customer requirements. The functions described above only represent factory settings. 14 © ads-tec GmbH • Raiffeisenstr.14 • 70771 Leinfelden-Echterdingen Industrial PCs OPC5012 5.2 SOFTWARE KEYBOARD If the factory settings include the operating system, then the software keyboard will be installed as well. If the factory settings do not include the operating system, then the software keyboard still has to be installed. The software keyboard can be used to enter data using the touch screen as you would with an external keyboard. Operating the software keyboard version 3.11 and higher: Displaying and closing the software keyboard to enter characters via the touch screen as well as switching between the numeric and alphabetic keyboard using the ABC / 123 button Switches the numeric block display (only displayed with numeric block) Display switch (alphabetic keyboard to numeric block F1-F12) Increases the display size of the software keyboard Decreases the display size of the software keyboard Note: If functions are to be invoked, which require pressing two keys at the same time on a standard keyboard (e.g. Alt + F4), then these keys are to be pressed one after the other on the software keyboard and the special keys Shift, Alt and Ctrl always have to be pressed first. We can not guarantee that the software keyboard will function with all software due to differences in software programming. The most recent activated status is saved upon closing the software keyboard (alphabetic/numeric block or F1 F12) and this status will be displayed again the next time the software keyboard is invoked. © ads-tec GmbH • Raiffeisenstr.14 • 70771 Leinfelden-Echterdingen 15 Industrial PCs OPC5012 5.3 EXTERNAL KEYBOARD The control system has a 6-pin PS/2 connector labeled "keyboard". Standard AT compatible keyboards with the appropriate plugs can be connected here. Proper functioning of a keyboard is to be tested before use. Note: Cherry keyboards are preferred because the timing of the integrated controller is tuned to these devices. While the software keyboard is displayed on the screen, the external keyboard function is limited. The keyboard has to be connected before the device is turned on because the keyboard interface is initialized during the boot procedure! The keyboard will not function if it is connected to the device after the boot procedure is complete. 5.4 MOUSE A two-button Microsoft compatible mouse can be connected to the interface labeled "Mouse". The compatibility of the mouse is to be tested before use. The mouse can also be used if a touch screen is connected. Note: The mouse has to be connected before the device is turned on because the mouse interface is initialized during the boot procedure! The mouse will not function if it is connected to the device after the boot procedure is complete.ot function if it is connected to the device after the boot procedure is complete. 5.5 TOUCH SCREEN The control system is furnished with the analog resistive touch screen "AccuTouch", which is controlled via the USB interface. The touch screen is connected internally to a USB interface. The driver required to use the touch screen is integrated in the respective operating system or can be installed from the provided service CD. 16 © ads-tec GmbH • Raiffeisenstr.14 • 70771 Leinfelden-Echterdingen Industrial PCs OPC5012 6 STATUS INDICATORS 6.1 SYS LED (TWO COLORS) Various different device states are displayed by the color and flashing patterns of the SYS LED. The following signals are indicated: • • • LED green LED orange LED off © ads-tec GmbH • Raiffeisenstr.14 • 70771 Leinfelden-Echterdingen Device is on (power on). The switch for changing the display setting is pressed. The device is off. (power off). 17 Industrial PCs OPC5012 7 INTERFACES 7.1 INTERFACE CONFIGURA ATION INTERFACE COM1 LPT 7.2 IRQ 4 7 ADDRESS 3F8h 378h INTERFACE ASSIGNMEN NT The interfaces are fo ound on the back of the casing. All interfaces are e labeled. The lead out terminal for the pow wer supply is also found on the back of the control system. Note: When using the embedded operating system Windows CE.net et, the communication U etc.) have to be enabled and the drivers have h to be installed so interfaces (COM, USB, that they can be ussed! 7.3 24 V DC POWER SUPPLLY The power supply cable is inserted via a lead out terminal witth a screw connector onnector in the device). (illustration show co PIN NUMBER SIGNAL NAME 1 2 3 24 V DC PE 0 V DC echnical data Power supply unit te • • Power consu umption: Input voltag ge: Max. 60 Watts 19…29 V DC Note: The device's typicaal power input is listed in the "Technical Details" section. s 7.4 USB CONNECTIONS The USB interfaces can c be used to connect peripheral devices with USB U plugs. 18 PIN NUMBER SIGNAL NAME 1 2 3 4 VDC DD+ GND © ads-tec GmbH • Raiffeisensttr.14 • 70771 Leinfelden-Echterdingen Industrial PCs OPC5012 7.5 NETWORK CONNECTION (RJ45) If the required drivers are installed on the device, the control system can be integrated in an Ethernet network with 10/100 Mbit support using the Ethernet 10/100BaseT network connector and a suitable network cable. The specifications of the underlying network topology are to be adhered to. The drivers required to use this function can be installed from the provided service CD if needed. 1 7.6 PIN NUMBER SIGNAL NAME 1 2 3 4 5 6 7 8 TX + 8 TX RX + NC NC RX NC NC SERIAL COM INTERFACE (RS232) This interface should only be used for monitoring, debugging or a log printer because the interface is not galvanically isolated. 7.7 PIN NUMBER SIGNAL NAME 1 2 3 4 5 6 7 8 9 DCD RxD TxD DTR GND DSR RTS CTS RI OPTIONAL USB CONNECTION ON THE FACEPLATE A USB interface can optionally be accessible from the front. The interface is found under a plastic cover to the right under the display. The cover has a tab on the right side, which can be used to open it. The plastic cover is to be closed carefully after having used the USB interface, because otherwise the protection class IP65 is not ensured on the front. 7.8 EXTERNAL DRIVES There are no CD/floppy drives installed in the standard models of the device. However, the system has a USB interface which can be used to connect an external drive. The devices used for this purpose should always be suitable for industrial environments. Warning: It is not permissible to connect or disconnect an external drive while the device is running, because it can not be ruled out that the drive is in use at this time. Nonadherence can cause loss of data! © ads-tec GmbH • Raiffeisenstr.14 • 70771 Leinfelden-Echterdingen 19 Industrial PCs OPC5012 7.9 DVI INTERFACE The DVI Interface iss used to transfer analog video signals. It is possible to connect a VGA display by using a su uitable DVI-VGA adapter. Note: The Interface of the t Panel PC works like a DVI-A Interface. transferred analog. g. The video signals are PIN-NUMMER SIGNAL NAME N/C 1 N/C 2 N/C 3 N/C 4 N/C 5 N/C 6 N/C 7 Analog vertical sync 8 N/C 9 N/C 10 N/C 11 N/C 12 N/C 13 N/C 14 N/C 15 N/C 16 N/C 17 18 N/C N/C 19 N/C 20 N/C 21 N/C 22 N/C 23 N/C 24 Analog Red C1 Analog Green C2 Analog Blue C3 Analog Horizontal Sync C4 Analog GND Return: (analog R, G, B) An C5 20 © ads-tec GmbH • Raiffeisensttr.14 • 70771 Leinfelden-Echterdingen Industrial PCs OPC5012 7.10 HARD DRIVE / COMPAC CTFLASH (IDE INTERFACE) The choice of storag ge media depends on individual customer requirrements. The following storage options are available: CompactFlash: his option implements a CompactFlash card with a capacity of at least Th 12 28 MB. The capacity should be chosen depending g on the required op perating system and additional programs to be in nstalled. Hard drive: Th his option implements a 2,5" Festplatte mind. 30 GB G (UDMA). The hard drrive is formatted using the NTFS file system (Win ndows XP default). Note: Recommendationss for choosing the storage medium for a basic insttallation: CompactFlash: Windows CE.net Windows XP Embedded Hard drive: Windows XP Professional 7.11 PS/2 CONNECTION A mouse and a keyb board can be connected to the two PS/2 connecto ors. The connectors on the device are color--coded to indicate the intended use. PIN NUMBER SIGNAL NAME 1 2 3 4 5 6 Data © ads-tec GmbH • Raiffeisenstr.14 • 70771 Leinfelden-Echte erdingen NC GND +5V Clock NC 21 Industrial PCs OPC5012 8 SOFTWARE/DRIVER INSTALLATION The device is provided with a preinstalled Windows operating system if requested by the customer. The drivers required for this are configured and the operating system is activated by entering the licensing information. If you have to reinstall the operating system, please proceed as follows. More recent operating systems such as Windows XP recognize the network and graphics cards upon initial installation and therefore you only have to install the drivers for the touch screen and the software keyboard. Note: If the hard drive has been formatted, then the operating system can be installed again using the provided interfaces. An external keyboard is required for installation. 8.1 INSTALLING THE OPERATING SYSTEM If the device has no integrated drive, then the operating system can only be installed using the USB interface. Installation procedure: USB: In order to be able to boot the system from the USB interface, you have to set the boot drive to USB in the BIOS. Restart the device and insert a Windows CD. Installing Windows and configuring the basic data. The touch screen driver and the software keyboard should be installed for devices with touch screen. You can use a USB stick containing an image file to perform a complete install of Windows CE.net or Windows XP Embedded. You can obtain the required image from ads-tec or the ASSIX online portal. 22 © ads-tec GmbH • Raiffeisenstr.14 • 70771 Leinfelden-Echterdingen Industrial PCs OPC5012 8.2 TOUCH SCREEN DRIVER INSTALLATION (WINDOWS 2000/XP) Warning: The touch screens in the CPC50XX and OTC50XX devices are connected to the internal USB interface. The required driver has to be installed and the touch screen is automatically recognized by Windows XP. Installation is to be carried out as described in the following: • Switch on and boot the PC • Click on "Start => Run => Browse..." and select the path to the drivers that have been copied to the hard drive (e.g. <HDD ROOT>:\EloWin NT or XP) • In this directory, launch SETUP.EXE. • Follow the instructions on the screen and accept the licensing agreement. • Select the "Single Monitor" setting and then enter the PC's serial interface COM2 that the touch screen is connected to internally. Click on OK to restart Windows NT/XP. • The touch screen has to be calibrated after restarting Windows NT/XP. If the driver is not launched automatically, invoke the configuration menu by clicking on "Start => Settings => Control Panel => Elo Touchscreen". • Start calibrating the touch screen by clicking on "Calibration data" and then confirm the series of crosses appearing on the screen. When the cursor matches the touch of the finger on the screen, you can exit the control field by clicking on "OK". 8.3 SOFTWARE KEYBOARD In order to be able to use the 5 buttons (6 buttons in the VMT series) under the screen, the software keyboard has to be installed from the provided CD-ROM. Installation is to be carried out as described in the following: • • • • Connect the external drive to the device. Turn the PC on and, after it has booted, insert the driver CD in the drive. Launch the installation program in the service CD. Follow the instructions on the screen, install the drivers, select the language and confirm the request to restart the computer. Note: Basic and advanced settings can be made for software keyboard. The readme file in the software keyboard installation directory contains more information pertaining to this. © ads-tec GmbH • Raiffeisenstr.14 • 70771 Leinfelden-Echterdingen 23 Industrial PCs OPC5012 9 TECHNICAL DETAILS 9.1 9.2 DISPLAY DATEN Display 12.1", 800 x 600 Pixel Displayable colors max. 256k. colors TouchScreen Resistive industrial touch screen COMPUTER TECHNICAL DATA The device can be furnished with the following adsX modules (depending on customer requirements). 9.3 24 Version 1 Pentium M 1.1 GHz 256MB - 2GB DDR RAM Intel 855 GME Version 2 Celeron M 1.0 GHz ULV 256MB - 2GB DDR RAM Intel 855 GME Version 3 Celeron M 800 MHz ULV 256MB - 2GB DDR RAM Intel 855 GME Graphics memory max. 64 MB shared Mass storage 2.5" hard disk, 40 GB or more (UDMA) Alternative: 1x CompactFlash internal Interfaces COM 1 (RS232), 1 PS/2 mouse, 1 PS/2 keyboard, 1 PnD (VGA + USB), 2 USB 2.0, Network 1 Ethernet (10/100 Mbit) RJ 45 (Intel 52551QM) GENERAL DATA External dimensions 330 mm x 268 mm x 74 mm (W x H x D) Installation dimensions 318 mm x 256 mm (W x H) Weight approx. 4,2 kg Protection class front, IP 65 Power consumption 25 Watts (type) Max. switch-on current 7 Amperes (2ms) © ads-tec GmbH • Raiffeisenstr.14 • 70771 Leinfelden-Echterdingen Industrial PCs OPC5012 10 SERVICE AND SUPPORT ads-tec and its partners provide customers a comprehensive range of services and a competent support team for quick response to all questions concerning ads-tec products and assemblies. ads-tec devices are also deployed by partner companies and can therefore be customized to meet individual customer needs. Only the system manufacturer can respond to questions pertaining to special configurations and software installations in each case. No support can be provided for devices that were not purchased directly from ads-tec. The ads-tec partners responsible for installation will provide the support required in these cases. 10.1 ADS-TEC SUPPORT The ads-tec support team is available for direct clients from Monday to Friday from 08:30 AM to 05:00 PM using the following phone number: Phone: +49 711 45894-500 Fax: +49 711 45894-990 Email: [email protected] 10.2 COMPANY ADDRESS: ads-tec Automation Daten- und Systemtechnik GmbH Raiffeisenstraße 14 D-70771 Leinfelden-Echterdingen Germany Phone: +49 711 45894-0 Fax: +49 711 45894-990 Email: [email protected] Home: www.ads-tec.de © ads-tec GmbH • Raiffeisenstr.14 • 70771 Leinfelden-Echterdingen 25