1
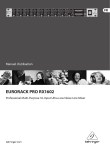
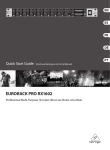
User Manual
EURORACK PRO RX1602
Professional Multi-Purpose 16-Input Ultra-Low Noise Line Mixer
2
EURORACK PRO RX1602 User Manual
Table of Contents
Important Safety Instructions....................................... 3
Legal Disclaimer.............................................................. 3
Limited warranty............................................................. 3
1. Introduction................................................................ 4
1.1 Before you get started....................................................... 4
1.1.1 Shipment........................................................................... 4
1.1.2 Initial operation.............................................................. 4
1.1.3 Warranty............................................................................ 4
1.2 The user’s manual................................................................ 4
2. Control Elements and Connections.......................... 4
2.1 Channel section.................................................................... 4
2.2 Main section.......................................................................... 5
2.3 Mains connection................................................................ 6
3. Applications................................................................ 6
3.1 Keyboards sub-mixer.......................................................... 6
3.2 Sub-mix with samplers...................................................... 7
3.3 Monitoring multi-track recorders.................................. 7
3.4 Small live setup.................................................................... 8
4. Installation.................................................................. 8
4.1 Rack mounting ..................................................................... 8
4.2 Audio connections.............................................................. 8
5. AUX Channels Modification ...................................... 9
6. Specifications............................................................ 10
3
EURORACK PRO RX1602 User Manual
Important Safety
Instructions
Terminals marked with this symbol carry
electrical current of sufficient magnitude
to constitute risk of electric shock.
Use only high-quality professional speaker cables with
¼" TS or twist-locking plugs pre-installed. All other
installation or modification should be performed only
by qualified personnel.
This symbol, wherever it appears,
alerts you to the presence of uninsulated
dangerous voltage inside the
enclosure - voltage that may be sufficient to constitute a
risk of shock.
This symbol, wherever it appears,
alerts you to important operating and
maintenance instructions in the
accompanying literature. Please read the manual.
Caution
To reduce the risk of electric shock, do not
remove the top cover (or the rear section).
No user serviceable parts inside. Refer servicing to
qualified personnel.
Caution
To reduce the risk of fire or electric shock,
do not expose this appliance to rain and
moisture. The apparatus shall not be exposed to dripping
or splashing liquids and no objects filled with liquids,
such as vases, shall be placed on the apparatus.
9. Do not defeat the safety purpose of the polarized
or grounding-type plug. A polarized plug has two blades
with one wider than the other. A grounding-type plug
has two blades and a third grounding prong. The wide
blade or the third prong are provided for your safety. If the
provided plug does not fit into your outlet, consult an
electrician for replacement of the obsolete outlet.
10. Protect the power cord from being walked on or
pinched particularly at plugs, convenience receptacles,
and the point where they exit from the apparatus.
11. Use only attachments/accessories specified by
the manufacturer.
12. Use only with the
cart, stand, tripod, bracket,
or table specified by the
manufacturer, or sold with
the apparatus. When a cart
is used, use caution when
moving the cart/apparatus
combination to avoid
injury from tip-over.
13. Unplug this apparatus during lightning storms or
when unused for long periods of time.
14. Refer all servicing to qualified service personnel.
Servicing is required when the apparatus has been
damaged in any way, such as power supply cord or plug
is damaged, liquid has been spilled or objects have fallen
into the apparatus, the apparatus has been exposed
to rain or moisture, does not operate normally, or has
been dropped.
15. The apparatus shall be connected to a MAINS socket
outlet with a protective earthing connection.
16. Where the MAINS plug or an appliance coupler is
used as the disconnect device, the disconnect device shall
remain readily operable.
Caution
These service instructions are for use
by qualified service personnel only.
To reduce the risk of electric shock do not perform any
servicing other than that contained in the operation
instructions. Repairs have to be performed by qualified
service personnel.
1. Read these instructions.
2. Keep these instructions.
3. Heed all warnings.
4. Follow all instructions.
5. Do not use this apparatus near water.
6. Clean only with dry cloth.
7. Do not block any ventilation openings. Install in
accordance with the manufacturer’s instructions.
8. Do not install near any heat sources such as
radiators, heat registers, stoves, or other apparatus
(including amplifiers) that produce heat.
LEGAL DISCLAIMER
TECHNICAL SPECIFICATIONS AND APPEARANCES
ARE SUBJECT TO CHANGE WITHOUT NOTICE AND
ACCURACY IS NOT GUARANTEED. BEHRINGER,
KLARK TEKNIK, MIDAS, BUGERA, AND TURBOSOUND
ARE PART OF THE MUSIC GROUP (MUSIC-GROUP.COM).
ALL TRADEMARKS ARE THE PROPERTY OF THEIR
RESPECTIVE OWNERS. MUSIC GROUP ACCEPTS NO
LIABILITY FOR ANY LOSS WHICH MAY BE SUFFERED
BY ANY PERSON WHO RELIES EITHER WHOLLY OR
IN PART UPON ANY DESCRIPTION, PHOTOGRAPH
OR STATEMENT CONTAINED HEREIN. COLORS AND
SPECIFICATIONS MAY VARY FROM ACTUAL PRODUCT.
MUSIC GROUP PRODUCTS ARE SOLD THROUGH
AUTHORIZED FULLFILLERS AND RESELLERS ONLY.
FULLFILLERS AND RESELLERS ARE NOT AGENTS OF
MUSIC GROUP AND HAVE ABSOLUTELY NO AUTHORITY
TO BIND MUSIC GROUP BY ANY EXPRESS OR IMPLIED
UNDERTAKING OR REPRESENTATION. THIS MANUAL
IS COPYRIGHTED. NO PART OF THIS MANUAL MAY
BE REPRODUCED OR TRANSMITTED IN ANY FORM
OR BY ANY MEANS, ELECTRONIC OR MECHANICAL,
INCLUDING PHOTOCOPYING AND RECORDING OF ANY
KIND, FOR ANY PURPOSE, WITHOUT THE EXPRESS
WRITTEN PERMISSION OF MUSIC GROUP IP LTD.
ALL RIGHTS RESERVED.
© 2013 MUSIC Group IP Ltd.
Trident Chambers, Wickhams Cay, P.O. Box 146,
Road Town, Tortola, British Virgin Islands
LIMITED WARRANTY
For the applicable warranty terms and conditions
and additional information regarding MUSIC Group’s
Limited Warranty, please see complete details online at
www.music-group.com/warranty.
4
EURORACK PRO RX1602 User Manual
1. Introduction
Congratulations! With the EURORACK PRO RX1602, you have purchased a
multifarious “problem-solver” for signal distribution. This piece of equipment
was developed for those among you with the highest expectations, who are in
the business of professional recording, radio and TV broadcast studios, PA and
home recording situations, etc. The RX1602’s extensive range of possibilities
make it ideal for routing separate signals to a single stereo output (mixer),
or for signal level adjustment of individual signals (level translator)—all these
functions can be achieved by using the EURORACK PRO RX1602.
Future-oriented BEHRINGER technology
Our rack mixer’s technology is based on experience and insights spanning many
years, delving into the fields of audio technology already used worldwide in
countless studios as well as radio and TV applications.
Power is delivered via the cable enclosed with the unit. All requiered safety
precautions have been adhered to.
◊ Please make sure that the unit is grounded at all times. For your own
protection, you should never tamper with the grounding of the cable or
the unit itself.
1.1.3 Warranty
Please take a few minutes and send us the completely filled out warranty
card within 14 days of the date of purchase. You may also register online at
behringer.com. The serial number needed for the registration is located at the top
of the unit. Failure to register your product may void future warranty claims.
1.2 The user’s manual
Balanced inputs
The user’s manual is designed to give you both an overview of the control
elements, as well as detailed information on how to use them. In order to help
you understand the links between the controls, we have arranged them in groups
according to their function. If you need to know more about specific issues,
please visit our website at www.behringer.com, where you’ll find additional
information on mixing consoles, effects units and dynamic processors.
The BEHRINGER RX1602 features electronically servo-balanced inputs.
The automatic servo function detects when unbalanced jacks are connected,
and internally adjusts the signal level so that no level difference between input
and output signals occurs (6 dB correction).
2. Control Elements
and Connections
To allow for the highest possible level of operational safety, we manufacture our
equipment under the highest quality standards in the industry. Your RX1602 has
been manufactured under ISO9000 certified management system.
◊ The following user’s manual is intended to familiarize you with the
unit’s control elements, so that you can master all the functions.
After having thoroughly read the user’s manual, store it at a safe place
for future reference.
1.1 Before you get started
In this chapter we go about describing all control elements of your EURORACK
PRO RX1602. All controls and connectors will be explained in full detail. You will
also receive useful information about possible applications.
2.1 Channel section
(1)
1.1.1 Shipment
(2)
(5)
The RX1602 was carefully packed at the factory to assure secure transport.
Should the condition of the cardboard box suggest that damage may have taken
place, please inspect the unit immediately and look for physical indications
of damage.
◊ Damaged units should NEVER be sent directly to us. Please inform the
dealer from whom you acquired the unit immediately as well as the
transportation company from which you took delivery of the unit.
Otherwise, all claims for replacement/repair may be rendered invalid.
1.1.2 Initial operation
Please make sure the unit is provided with sufficient ventilation, and never place
the EURORACK on top of an amplifier or in the vicinity of a heater to avoid the risk
of overheating.
◊ Before plugging the unit into a power socket, please make sure you
have selected the correct voltage:
The fuse compartment near the power plug socket contains three triangular
markings. Two of these triangles are opposite one another. The voltage
indicated adjacent to these markings is the voltage to which your unit has
been set up, and can be altered by rotating the fuse compartment by 180°.
ATTENTION: This does not apply to export models that were for example
manufactured only for use with 120 V!
◊ If you alter the unit’s voltage, you must change the fuse accordingly. The correct value of the fuse needed can be found in the
chapter “Specifications”.
◊ Faulty fuses must be replaced with fuses of appropriate rating without
exception! The correct value of the fuses needed can be found in the
chapter “Specifications”.
Front
Rear
(3)
(4)
(4)
Fig. 2.1: Control elements of the channel section
(1) Use the MON/FX control to set the signal level of the respective channel
for monitoring or effects purposes. You can take the MON/FX signal at the
MON OUT SEND connector (14). The MON/FX SEND control (7) of the main
section governs the overall MON/FX SEND signal level.
This aux send path is factory set to pre fader and post mute. It means that
the respective channels’ monitor signal or effects send signal is still present
at the MON OUT SEND-connector when the LEVEL control (4) is turned to
its left-most position. If the MUTE switch (3) is in its depressed position,
the signal is muted totally. The LEVEL control is equivalent to channel faders
on conventional mixing consoles.
◊ You have the option to retroactively make the monitor channel perform
dependently from the setting of the LEVEL control (“post fader”).
This modification can be done individually for each channel.
This modification makes sense when you for example wish to frequently use
certain channels for effect applications.
How necessary actions are taken is explained in ch. 5:
“Aux Channels Modification”.
5
EURORACK PRO RX1602 User Manual
(2) By using the BALANCE control, you can
• set up the position of mono signals in the stereo image, and
• regulate the ratio of left/right channel signals when processing
stereo signals
(3) The MUTE switch is used to interrupt the signal path, thus muting the
respective channel. When pressed (signal muted) the switch is lit red.
When the MUTE switch is not depressed, the red light functions as CLIP
display, indicating when the input signal level is too high (>+17 dBu).
To avoid distortion, please reduce the signal level using the LEVEL control
(4) in case the CLIP indicator is frequently or permanently lit.
(4) To increase or reduce the input signal level, use the LEVEL control
(increase up to +15 dB, reduce all the way down to -∞).
Similarly, use the LEVEL controls of the channel sections to regulate the
channel’s signal level present in the main mix.
Gain setting:
To correctly set the input gain of a channel, please press the MUTE switch
(3) of the remaining channels.
When recording with digital multi-channel recorders, the peak meter on the
recorder should not reach over 0 dB. This is because unlike with digital recordings,
even the smallest amount of distortion can lead to unpleasant-sounding
end result.
With analog recorders, the VU meters of the recording device should read roughly
up to +3 dB in case of low-frequency signals (e.g. bass drum). Because of their
inherent inertia, VU meters tend to display levels of signals with frequencies
of above 1 kHz too low. Therefore, when using instruments such as a hi-hat,
you should set the input gain only up to -10 dB. Snare drums should be set up to
roughly 0 dB.
◊ The peak meters of your EURORACK PRO display the level virtually
frequency-independent. A re-cording level of 0 dB is recommended for
all kinds of signals.
(5) Use the OPERATING LEVEL switch located on the rear of your RX1602
to individually adjust each channel to the output signal level of your
equipment. When the switch is depressed (-10 dBV), the inputs are
more sensitive.
(10) The TO PHONES switch gives you the option to feed the signals routed to the
monitor/effects bus into your headphones for control purposes.
(6) These are the inputs of the channel sections on balanced 1/4" TRS connectors.
Of course, you can connect mono jacks (unbalanced operation). To use a
channel for a mono signal, please connect the signal source to the left input.
◊ We would like to bring your attention to the fact that high volume
2.2 Main section
(7)
(8)
(9)
Attention!
levels may damage your hearing and/or your headphones. Please turn
the MAIN LEFT and MAIN RIGHT controls as well as the PHONES control
in the main section all the way to the left before powering up the unit.
Please always pay keen attention to an appropriate volume level.
(11) The LEVEL control in the MAIN section governs the volume level of
your headphones.
Please connect your headphones to the PHONES connector. It is a standard
1/4" TRS stereo connector.
(11)
(3)
Fig. 2.2: Main section
(7) Use the MON/FX SEND control to set the signal level of those signals
that are routed to the MON OUT SEND connector (14) for monitoring or
effects applications.
(8) The left signal portion of the mix created using the LEVEL and BALANCE
controls of each channel is set using the MAIN LEFT control.
The right signal portion of the mix is correspondingly adjusted using
the MAIN RIGHT control. Amplification of up to +15 dB is possible
on both controls.
(9) You can easily get a readout of both channels by observing the
highly acurate 7-digit level meters labeled LEFT OUTPUT LEVEL
and RIGHT OUTPUT LEVEL.
(12)
Fig. 2.3: POWER switch, LEVEL control and PHONES connector
(12) Use the POWER switch to power up your RX1602. The POWER switch should
always be in the “Off” position when you are about to connect your unit to
the mains.
◊ Attention: The POWER switch does not fully disconnect the unit from
the mains. Unplug the power cord completely when the unit is not used
for prolonged periods of time.
6
EURORACK PRO RX1602 User Manual
3. Applications
3.1 Keyboards sub-mixer
Very often, keyborards feature a stereo design, their signals are already
pre-amplified and require no sound processing. To avoid using valuable channels
of your main mixer for a purpose other than processing mic signals, you can
instead use your RX1602 as a sub-mixer.
(13)
In this case, the output signals of keyboards, samplers or similar sound sources
are connected to the inputs (6) of the RX1602. You can route the MAIN OUTs of
your RX1602 into your main mixer via the aux returns or a stereo channel.
(14)
Fig. 2.4: MAIN OUT and MON OUT SEND connectors
(13) The MAIN OUT connectors come as 1/4" TRS jacks. The main mix signal
(derived from all channels) is present here. You can set the output signal
level by using the MAIN LEFT and MAIN RIGHT controls (8) (reducing all the
way down to -∞ , increasing up to +15 dB). The main mix signal can be used
to feed your mixing console or stereo amplifier, among others.
Keyboard
(14) The monitor signal can be taken at the MON OUT SEND connector
(1/4" TRS connector). It is just as well-suited for being used with
effects applications.
Channel inputs
2.3 Mains connection
EURORACK PRO RX1602
L
Stereo input channels/
stereo aux returns
(15)
(13)
(14)
Fig. 2.5: Mains connector with integrated fuse compartment
(15) The mains connection is achieved via the standard IEC connector. A matching
power cord is included.
FUSE COMPARTMENT/VOLTAGE SELECTION: Before plugging the unit into
a power socket, please make sure you have selected the correct voltage.
Faulty fuses must be replaced with fuses of appropriate rating without
exception. Some units feature a fuse compartment that can be operated
in two different positions, allowing alternating between 230 V and 120 V.
Attention: when using the unit outside of Europe (running on 120 V),
you have to implement a fuse with a higher rating.
SERIAL NUMBER. The serial number is located on the top of the
unit. Please take a few minutes and send to us a completely filled
out warranty card within 14 days of the original date of purchase.
Otherwise, warranty claims may be rendered invalid. Or fill out the
warranty information online at behringer.com.
XENYX X2222FX USB
Fig. 3.1: Keyboard sub-mix using the RX1602
Main outputs
R
7
EURORACK PRO RX1602 User Manual
3.2 Sub-mix with samplers
3.3 Monitoring multi-track recorders
Those of you who work with hardware samplers in studio environments, and who
combine many outputs of these units on a single RX1602, can save yourselves
a lot of frequent plugging in and out of cables. At the same time, you get a
practical way to adjust the signal level to various recording equipment inputs.
Last but not least, you also get an extra effects bus.
Professional sound cards and multi-track recorders can replay several tracks
simultaneously. For this purpose, your RX1602 can be ideally used as a spacesaving monitor mixer.
PC with recording software
Hardware sampler
8-channel
sound card
Multi-track recorder
VIRTUALIZER PRO DSP2024P
Channel inputs
Monitor output
EURORACK PRO RX1602
EURORACK PRO RX1602
Monitor o
utput
L
Main out right
Main out left
R
HPS3000
PC with
recording
software
Sound
card
Active studio monitors TRUTH B2031A
Fig. 3.3: Monitoring multi-track recorders or multi-channel sound cards
XENYX X2222USB
Fig. 3.2: Sampler/PC application
8
EURORACK PRO RX1602 User Manual
3.4 Small live setup
4. Installation
Compact and powerful, feature-rich equipment is optimal for musicians who
spend a lot of their time on the road. Fig. 3.4 shows an example of a compact
solution for keyboard and vocal amplification, whereby a singing guitar player or
an additional musician can easily be integrated into the mix.
4.1 Rack mounting
The BEHRINGER EURORACK PRO RX1602 requires one height unit (1 HU) for being
installed into a 19" rack. Please allow at least an extra 4" of space for the
connectors on the rear panel.
Also, please make sure that sufficient ventilation of the unit is provided
for, and never put the rack mixer onto an amp or similar equipment to
avoid overheating.
B-2 PRO
Please use M6 machine screws and nuts to install your RX1602 into a rack.
4.2 Audio connections
ULTRAGAIN PRO MIC2200
You will require several types of cables for the various kinds of connections
possible. The following illustrations show you how to wire different cables.
Always use high-quality cables.
COMPOSER PRO-XL MDX2600
EURORACK PRO RX1602
The audio inputs of the RX1602 are electronically balanced to avoid
hum problems.
Of course, you can also connect equipment featuring un-balanced outputs.
To this end, use either mono jacks or connect ring and sleeve of the stereo jack
(bridge pin 1 and pin 3 when using XLR connectors).
Main
outputs
L
R
Unbalanced ¼" TS connector
strain relief clamp
Keyboard
sleeve
tip
EUROPOWER EP2000
sleeve
(ground/shield)
Fig. 3.4: Expandable small live setup
tip
(signal)
Fig. 4.1: 1/4" TS connector
9
EURORACK PRO RX1602 User Manual
Balanced ¼" TRS connector
strain relief clamp
sleeve
ring
tip
sleeve
ground/shield
ring
cold (-ve)
tip
hot (+ve)
For connection of balanced and unbalanced plugs,
ring and sleeve have to be bridged at the stereo plug.
5. AUX Channels Modification
All monitor and effects signals are tapped into post mute and pre fader,
which resembles the function of a pre fader aux channel on conventional mixing
consoles. If you prefer to use the aux channels mainly for effect applications,
we suggest to alter them to post Fader. The difference is that you extract
the respective channels’ signal from the effect mix, too, when you turn the
LEVEL-control to minimum. You can do this modification for each channel
individually, the choice is yours.
◊ The following modifications put your soldering skills to the test.
Only attempt to implement them if you feel you have enough
past experience. Consider hiring professional help. Regardless of
who implements these modifications, they effectively void all
warranty claims.
◊ A piece of advice for the brave: bridge endings that are to be soldered
should not be put into the drill holes. Instead, bridge endings should
be soldered above the drill holes in a flat fashion! A bridge should be
somewhat upwardly curved between both of the bases.
Fig. 4.2: 1/4" TRS connector
¼" TRS headphones connector
strain relief clamp
sleeve
ring
tip
1. Power down the unit and unplug the power cord before you remove the
cover from the rest of the housing!
2. The positions in question are found on the part of the circuit board located
perpendicular to the front side. Please observe figure 5.1.
◊ Hold the unit so that you can read the FX/MON insignia on the circuit
board. Soldering points should match those in the illustration.
sleeve
ground/shield
ring
right signal
tip
left signal
Fig. 4.3: 1/4" TRS connector for headphones operation
3. Separate the “pre fader” conductor path.
4. Solder a “post fader” bridge.
5. Repeat this step on as many channels as desired.
cut “pre Fader”
add “post Fader” link
Fig. 5.1: Modification MON/FX “pre fader” > “post fader”0
10
EURORACK PRO RX1602 User Manual
6. Specifications
Audio Inputs
Power Supply
Input L/R
Voltage
Type
1/4" TRS connector,
electronically balanced
Impedance
approx. 20 kΩ balanced,
10 kΩ unbalanced
Gain range
-∞ to +15 dB
Operating level
variable, +4 dBu/-10 dBV (switchable)
Max. input level
+22 dBu
Common-mode rejection
CMRR @ 1 kHz
typ. 44 dB
USA/Canada
120 V~, 60 Hz
Europe/U.K./Australia
230 V~, 50 Hz
Japan
100 V~, 50 - 60 Hz
General export model
120/230 V~, 50 - 60 Hz
Power consumption
max. 14 W
Fuse
100 - 120 V~: T 630 mA H
200 - 240 V~: T 315 mA H
Mains connection
Standard IEC connector
Dimensions/Weight
Audio Outputs
Main Out L/R
Type
1/4" TRS connector, unbalanced
Gain range
-∞ to +15 dB
Impedance
approx. 120 Ω
Max. output level
+22 dBu
Mon Out
Type
1/4" TRS connector, unbalanced, mono
Impedance
approx.120 Ω
Max. output level
+22 dBu
Phones Output
Type
1/4" TRS connector, stereo
Minimum load impedance
100 Ω
System Specifications
Bandwidth
20 Hz - 20 kHz +/-0.2 dB
Frequency range
20 Hz - 200 kHz +0/-3 dB
Signal-to-noise ratio
< -97 dB
THD
0.0025% @ +4 dB input 1 kHz gain 1
Crosstalk
< -70 dB
Dimensions
approx. 1 3/4 x 19 x 8 1/2"
approx. 44.5 x 483 x 217 mm
Weight
approx. 5.46 lbs / 2.48 kg
Shipping weight
approx. 7.30 lbs / 3.32 kg
BEHRINGER is constantly striving to maintain the highest professional standards. As a result of these efforts,
modifications may be made from time to time to existing products without prior notice. Specifications and
appearance may differ from those listed or illustrated.
We Hear You