1
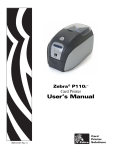
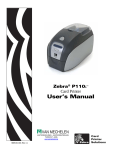
Zebra® P110i & P110m
Card Printers
User’s Manual
980515-001 Rev. C
ii
P110i & P110m Card Printer User’s Manual
980515-001 Rev. C
Foreword
This manual contains installation and operation information for the Zebra P110i and P110m
card printers manufactured by Zebra Technologies Corporation.
The only difference between these models is that the P110i supports full-color ribbons (which
may include a protective overcoat panel), and the P110m supports monochrome color printing
only. Photographs and drawings that show the front faceplate show the P110i name; for P110m
printers these would show P110m.
In this manual, references that are specific to the P110i or P110m will be identified as such;
references that apply to both models will use the term “the printer.”
Copyright Notice
© 2005, 2006, 2007 ZIH Corp.
This document contains information proprietary to Zebra Technologies Corporation. This
document and the information contained within is Copyrighted by Zebra Technologies
Corporation and may not be duplicated in full or in part by any person without written
approval from Zebra Technologies Corporation. While every effort has been made to keep the
information contained within current and accurate as of the date of publication, no guarantee is
given that the document is error-free or that it is accurate with regard to any specification.
Zebra Technologies Corporation reserves the right to make changes, for the purpose of product
improvement, at any time.
Trademarks
P110i and P110m are trademarks and Zebra is a registered trademark of Zebra Technologies
Corporation. Windows is a registered trademark of Microsoft Corp. All other trademarks or
registered trademarks are marks of their respective holders.
980515-001 Rev. C
P110i & P110m Card Printer User’s Manual
iii
Foreword
Product Disposal
Product Disposal Information • Do not dispose of this product in unsorted municipal
waste. This product is recyclable, and should be recycled according to your local
standards. For more information, please see our web site at:
http://www.zebra.com/environment
Return Materials Authorization
Before returning any equipment to Zebra Technologies Corporation for in-warranty or out-ofwarranty repair, contact Repair Administration for a Return Materials Authorization (RMA)
number. Repack the equipment in the original packing material and mark the RMA number
clearly on the outside. Ship the equipment, freight prepaid, to the address listed below:
For USA, Latin America, and Asia / Pacific:
Zebra Technologies Corporation
Zebra Card Printer Solutions
1001 Flynn Road
Camarillo, CA. 93012-8706.USA
Phone: +1 (805) 578-5001
FAX: +1 (805) 579-1808
For Europe and Middle East:
Zebra Technologies Corporation
Zebra Card Printer Solutions
Pittman Way, Fulwood
Preston, PR2 9ZD
Lancashire, U.K.
Phone: +44 - 1 - 772 - 797555
FAX: +44 - 1 - 772 - 693000
Declarations of Conformity
FCC Regulations
Models P110i and P110m have been tested and found to comply with the limits for a Class A
digital device, pursuant to Part 15 of the FCC Rules. These limits are designed to provide
reasonable protection against harmful interference when the equipment is operated in a
commercial environment. This equipment generates, uses, and can radiate radio frequency
energy and, if not installed and operated in accordance with the P110i and P110m User’s
Manual, may cause harmful interference to radio communications. Operation of this
equipment in a residential area is likely to cause harmful interference in which case the user
will be required to correct the interference at his own expense.
Pursuant to Part 15.21 of the FCC Rules, any changes or modifications to this equipment not
expressly approved by Zebra may cause harmful interference and void the FCC authorization
to operate this equipment.
iv
P110i & P110m Card Printer User’s Manual
980515-001 Rev. C
Foreword
Industry Canada Notice
This device complies with Industry Canada ICES-003 class A requirements.
Cet équipement est conforme à l 'ICES-003 classe A de la Norme Industrielle Canadienne.
EMC Directive
EN 55022
(1998)
RF Emissions control
EMC Directive
EN 301489-3
V1.4.1
RF Emissions and Immunity for
radio equipment
EMC Directive
EN55024
(2001)
Immunity to Electro-Magnetic
Disturbances
73/23/EEC
modified by 93/
68/EEC
Low voltage
Directive
EN 60950-1
(2001)
Product safety
1999/5/CE
R&TTE
Directive
EN300330-2
V1.1.1
Radio Frequency Interferences
89/336/EEC
modified by
92/31/EEC and
93/68/EEC
For a formal certificate, please contact the Compliance Office at Zebra’s Camarillo facility.
EUROPE: Norway Only: This product is also designed for IT power system with phase to phase
voltage 230V. Earth grounding is via the polarized, 3-wire power cord.
FI: “Laite on liitettävä suojamaadoitus koskettimilla varustettuun pistorasiaan”
SE: “Apparaten skall anslutas till jordat uttag”
NO: “Apparatet må tilkoples jordet stikkontakt”
980515-001 Rev. C
P110i & P110m Card Printer User’s Manual
v
Foreword
Icons
Throughout this manual, different icons highlight important information, as follows:
Note • Indicates information that emphasizes or supplements important points of the main
text.
Advises you of information that is essential to complete a task, or points out the importance
of specific information in the text.
Electric Shock Caution • Warns you of a potential electric shock situation.
Electrostatic Discharge Caution • Warns you of a situation where electrostatic
discharge could cause damage to electronic components.
Caution • Advises you that failure to take or avoid a specific action could result in
physical harm to you, or could result in physical damage to the hardware.
vi
P110i & P110m Card Printer User’s Manual
980515-001 Rev. C
Foreword
Printer Models
The Zebra Product Number tells a story:
Here is a quick review of the Zebra Card Printer Series numbering and lettering system to help
you.
Model numbers include identifiers that specify options using the following lettering
conventions:
Part Number
Description
P 1 1 0 i - _ _ _ _ _ - _ _ _
P 1 1 0 m - _ _ _ _ _ - _ _ _
Base Printer
P110i Single Sided Color Card Printer
P110m Single Sided Monochrome Card Printer
_ _ _ _ _ - 0 _ _ _ _ - _ _ _
Smart Card Options
None
_ _ _ _ _ - _ 0 _ _ _ - _ _ _
_ _ _ _ _ - _ M _ _ _ - _ _ _
Magnetic Encoder
None
Yes (select defaults below)
_ _ _ _ _ - _ _ 0 _ _ - _ _ _
_ _ _ _ _ - _ _ 1 _ _ - _ _ _
Magnetic Encoder Defaults
None
Stripe Down, HiCo/LoCo
_ _ _ _ _ - _ _ _ 0 _ - _ _ _
Memory Expansion
None
_ _ _ _ _ - _ _ _ _ A - _ _ _
_ _ _ _ _ - _ _ _ _ C - _ _ _
Interface
USB Only
USB and Ethernet
_ _ _ _ _ - _ _ _ _ _ - I _ _
_ _ _ _ _ - _ _ _ _ _ - U _ _
Power Cords
U. S. and Europe
U. K. and Australia
_ _ _ _ _ - _ _ _ _ _ - _ D _
_ _ _ _ _ - _ _ _ _ _ - _ _ 0
_ _ _ _ _ - _ _ _ _ _ - _ _ S
Windows Drivers and User Documentation included on one CD
(Software & Documentation Package) which contains Multilanguage documentation - English, Spanish, French, German,
Chinese, Italian, and Portuguese
Starter Kit
No Starter Kit
Starter kit (including 200 - 30 mil PVC cards and one
YMCKO ribbon, part number 800015-940) (P110i only)
Example
P 1 1 0 i - 0 M 1 0 A - I D 0
P110i Single-Sided Color Card Printer, Magnetic Stripe Encoder
(HiCoDn), Standard Memory, USB Inter-face, US and Europe
Power Cords, Windows Driver and User Documentation CD
Accessories
105862-001
105912-912
P120i/110i/P110m Card SenseTM single card feed upgrade kit
P120i/110i/P110m Cleaning Kit, includes 4 print engine cleaning
cards and 4 feeder cleaning cards
980515-001 Rev. C
P110i & P110m Card Printer User’s Manual
vii
viii
P110i & P110m Card Printer User’s Manual
980515-001 Rev. C
Table of Contents
• Foreword . . . . . . . . . . . . . . . . . . . . . . . . . . . . . . . . . . . . . . . . . . . . . iii
Copyright Notice. . . . . . . . . . . . . . . . . . . . . . . . . . . . . . . . . . . . . . . . . . . . . iii
Trademarks . . . . . . . . . . . . . . . . . . . . . . . . . . . . . . . . . . . . . . . . . . . . . . . . iii
Product Disposal . . . . . . . . . . . . . . . . . . . . . . . . . . . . . . . . . . . . . . . . . . . . iv
Return Materials Authorization . . . . . . . . . . . . . . . . . . . . . . . . . . . . . . . . . . iv
Declarations of Conformity . . . . . . . . . . . . . . . . . . . . . . . . . . . . . . . . . . . . . iv
Icons. . . . . . . . . . . . . . . . . . . . . . . . . . . . . . . . . . . . . . . . . . . . . . . . . . . . . . vi
Printer Models . . . . . . . . . . . . . . . . . . . . . . . . . . . . . . . . . . . . . . . . . . . . . . vii
1 • Getting Started . . . . . . . . . . . . . . . . . . . . . . . . . . . . . . . . . . . . . . . 1
Unpacking Your Card Printer . . . . . . . . . . . . . . . . . . . . . . . . . . . . . . . . . . .
Controls and Indicators . . . . . . . . . . . . . . . . . . . . . . . . . . . . . . . . . . . . . . .
Multi-Function LCD Panel . . . . . . . . . . . . . . . . . . . . . . . . . . . . . . . . . .
Rear Panel Connectors, Controls, and Indicators . . . . . . . . . . . . . . . .
1
2
2
4
2 • Printer Installation. . . . . . . . . . . . . . . . . . . . . . . . . . . . . . . . . . . . . 7
Installing the P110i or P110m Printer . . . . . . . . . . . . . . . . . . . . . . . . . . . . . 7
Installing the Printer Driver . . . . . . . . . . . . . . . . . . . . . . . . . . . . . . . . . . . . .11
Print Driver Installation . . . . . . . . . . . . . . . . . . . . . . . . . . . . . . . . . . . . 12
Change Printer Driver Options . . . . . . . . . . . . . . . . . . . . . . . . . . . . . . . . . 14
3 • Printer Setup . . . . . . . . . . . . . . . . . . . . . . . . . . . . . . . . . . . . . . . . 19
Printer Features . . . . . . . . . . . . . . . . . . . . . . . . . . . . . . . . . . . . . . . . . . . .
Loading Ribbon Cartridge . . . . . . . . . . . . . . . . . . . . . . . . . . . . . . . . . . . .
Loading Cards . . . . . . . . . . . . . . . . . . . . . . . . . . . . . . . . . . . . . . . . . . . . .
Card Feeder . . . . . . . . . . . . . . . . . . . . . . . . . . . . . . . . . . . . . . . . . . . .
Card Output Hopper. . . . . . . . . . . . . . . . . . . . . . . . . . . . . . . . . . . . . .
Printing a Test Card . . . . . . . . . . . . . . . . . . . . . . . . . . . . . . . . . . . . . . . . .
980515-001 Rev. C
P110i & P110m Card Printer User’s Manual
19
20
21
21
23
23
ix
Table of Contents
4 • Printer Operation . . . . . . . . . . . . . . . . . . . . . . . . . . . . . . . . . . . . 25
Printing . . . . . . . . . . . . . . . . . . . . . . . . . . . . . . . . . . . . . . . . . . . . . . . . . . . 25
Creating a Sample Card. . . . . . . . . . . . . . . . . . . . . . . . . . . . . . . . . . . 26
Printing a Sample Card . . . . . . . . . . . . . . . . . . . . . . . . . . . . . . . . . . . 27
5 • Cleaning. . . . . . . . . . . . . . . . . . . . . . . . . . . . . . . . . . . . . . . . . . . . 29
Cleaning System . . . . . . . . . . . . . . . . . . . . . . . . . . . . . . . . . . . . . . . . . . .
When to Clean . . . . . . . . . . . . . . . . . . . . . . . . . . . . . . . . . . . . . . . . . .
How to Clean . . . . . . . . . . . . . . . . . . . . . . . . . . . . . . . . . . . . . . . . . . .
Cleaning the Print Head . . . . . . . . . . . . . . . . . . . . . . . . . . . . . . . . . . . . . .
29
29
29
31
6 • Troubleshooting . . . . . . . . . . . . . . . . . . . . . . . . . . . . . . . . . . . . . 33
Troubleshooting Procedures . . . . . . . . . . . . . . . . . . . . . . . . . . . . . . . . . .
Print Quality Issues . . . . . . . . . . . . . . . . . . . . . . . . . . . . . . . . . . . . . .
Troubleshooting the Ethernet Connection and Adapter . . . . . . . . . . . . . .
Resetting to Factory Defaults. . . . . . . . . . . . . . . . . . . . . . . . . . . . . . .
Ethernet Adapter Status Indicator . . . . . . . . . . . . . . . . . . . . . . . . . . .
Network Status/Activity Indicator . . . . . . . . . . . . . . . . . . . . . . . . . . . .
33
34
37
37
38
39
7 • Technical Specifications . . . . . . . . . . . . . . . . . . . . . . . . . . . . . . 41
Card Dimensions . . . . . . . . . . . . . . . . . . . . . . . . . . . . . . . . . . . . . . . . . . . 43
ISO standard dimensions for plain card . . . . . . . . . . . . . . . . . . . . . . . 43
ISO standard dimensions for magnetic stripe card . . . . . . . . . . . . . . 43
Appendix A • Magnetic Card Encoder . . . . . . . . . . . . . . . . . . . . . . 45
Introduction . . . . . . . . . . . . . . . . . . . . . . . . . . . . . . . . . . . . . . . . . . . . . . .
Media Loading Orientation . . . . . . . . . . . . . . . . . . . . . . . . . . . . . . . . .
Magnetic Encoder Cleaning . . . . . . . . . . . . . . . . . . . . . . . . . . . . . . . .
ISO Standard Encoding . . . . . . . . . . . . . . . . . . . . . . . . . . . . . . . . . . .
45
46
46
47
Appendix B • Card SenseTM Single Card Feed Mode . . . . . . . . . . 49
Printing a Single Card Without Using the Feeder. . . . . . . . . . . . . . . . . . .
Install Card SenseTM Single Card Feed Kit . . . . . . . . . . . . . . . . . . .
Install Card Cleaning Cartridge . . . . . . . . . . . . . . . . . . . . . . . . . . . . .
Printing a Single Card . . . . . . . . . . . . . . . . . . . . . . . . . . . . . . . . . . . . . . .
49
49
50
52
Appendix C • Connecting to a Network . . . . . . . . . . . . . . . . . . . . . 55
Printer Sharing . . . . . . . . . . . . . . . . . . . . . . . . . . . . . . . . . . . . . . . . . . . . . 55
External Print Server . . . . . . . . . . . . . . . . . . . . . . . . . . . . . . . . . . . . . . . . 56
Internal Print Server . . . . . . . . . . . . . . . . . . . . . . . . . . . . . . . . . . . . . . . . . 56
Appendix D • Worldwide Sales & Support . . . . . . . . . . . . . . . . . . . 57
Sales and Support Locations . . . . . . . . . . . . . . . . . . . . . . . . . . . . . . . . . . 57
Website . . . . . . . . . . . . . . . . . . . . . . . . . . . . . . . . . . . . . . . . . . . . . . . . . . 58
x
P110i & P110m Card Printer User’s Manual
980515-001 Rev. C
1
Getting Started
Unpacking Your Card Printer
Your P110i or P110m printer ships in a cardboard carton, protected by styrofoam inserts
and a protective anti-static bag. Keep all packaging material in case you need to move or
re-ship the printer.
1. Before opening and unpacking the printer, inspect the carton to ensure that no damage
occurred during shipment.
2. Ensure that you have a clean and nearly dust free environment for proper operation
and storage of the printer.
3. Unlatch and remove the handle, open the carton, and remove the box containing the
printer accessories from the shipping carton.
4. Remove the styrofoam packing material from the top of the printer.
5. Lift the printer out of the carton by holding it on both sides of the bottom and lifting
the printer gently from the carton.
6. Make sure the following accessories are included with your printer:
a.
Software CD-ROM
b. Quick Start Guide
c.
Cleaning Kit
d. 120 VAC and 230 VAC Power Cords
e.
Power Transformer
f.
USB Printer Cable
If any items are missing, please contact your dealer. To reorder; refer to Appendix D of
this manual.
980515-001 Rev. C
P110i & P110m Card Printer User’s Manual
1
Getting Started
Controls and Indicators
Multi-Function LCD Panel
Your printer is equipped with a Multi Function LCD Readout Panel to provide printer status
information. The readout is controlled by the multi-function control button directly below the
viewing window.
Multi-Function
LCD Panel
Multi-Function
Control Button
The LCD Panel can display the following messages:
Message
Mode
Operational
Initializing
Fixed
SELF TEST
Fixed
READY
Fixed
DOWNLOADING DATA
Fixed
MAG ENCODING
Fixed
PRINTING MONO
Fixed
PRINTING CYAN
PRINTING YELLOW
PRINTING MAGENTA
PRINTING BLACK
Fixed (These
messages do not
apply to the P110m
Printer.)
PRINTING OVERLAY
DOWNLOADING FIRMWARE
2
P110i & P110m Card Printer User’s Manual
Fixed
980515-001 Rev. C
Getting Started
Message
Mode
CLEANING
Fixed
REMOVE RIBBON THEN CLOSE LID
Scrolling
EMPTY FEEDER THEN CLOSE COVER
Scrolling
FEED LONG CLEANING CARD IN EXIT
Scrolling
REMOVE LONG CLEANING CARD
Scrolling
INSERT FEEDER CLEANING CARD
Scrolling
CLOSE FEEDER DOOR
Scrolling
REMOVE FEEDER CLEANING CARD
Scrolling
SINGLE CARD READY-PRINT OR EJECT
Scrolling
INSERT CARD
Fixed
PUSH BUTTON TO CONTINUE
Scrolling
Warnings (Printer will still operate)
REMOVE CARD AT EXIT
Scrolling
CLEAN PRINTER
Fixed
CHECKING RIBBON
Fixed
ENCODING ERROR
Fixed
INVALID MAGNETIC DATA
Scrolling
CHECK RIBBON
Fixed
CLOSE LID
Fixed
FLASH ERROR
Fixed
READING ERROR
Fixed
Errors (Printer will not operate)
980515-001 Rev. C
OUT OF RIBBON
Fixed
OUT OF CARDS
Fixed
MECHANICAL ERROR
Fixed
COVER OPEN
Fixed
PARAMETERS ERROR
Fixed
COMMAND ERROR
Fixed
LID OPEN
Fixed
OUT OF RIBBON
Fixed
P110i & P110m Card Printer User’s Manual
3
Getting Started
Rear Panel Connectors, Controls, and Indicators
The figure below shows the rear of the P110i or P110m Printer.
Power
Socket
USB
Port
Power
Switch
Power Switch
The power switch is located at the rear of the printer unit, bottom right.
Power Socket
The power socket is located at the rear of the printer, to the left of the power switch.
USB Port
The USB port is located at the rear of the printer unit, bottom left.
4
P110i & P110m Card Printer User’s Manual
980515-001 Rev. C
Getting Started
Ethernet Option
If your Printer includes the Ethernet option, the rear of the printer will look like the figure
below.
Power
Socket
USB
Port
Power
Switch
Network
Status /
Activity
Indicator
980515-001 Rev. C
Ethernet
Adapter
Status
Indicator
Ethernet
Reset
Button
Ethernet
Connector
P110i & P110m Card Printer User’s Manual
5
6
P110i & P110m Card Printer User’s Manual
980515-001 Rev. C
2
Printer Installation
Installing the P110i or P110m Printer
Caution • Do not power the printer with USB attached to your computer at this
time. THE DRIVER WILL PROMPT YOU WHEN IT IS TIME TO PLUG IN AND POWER
UP YOUR PRINTER.
Caution • Limit electrical power supplied to the P110i or P110m Printer to 24
VDC. Limit excess current draw to 16 amps or less, using an associated circuit
breaker or other such device. Never operate the printer in a location where
operator, computer, or printer can get wet. Personal injury could result. The
printer must be connected to an earthed electrical power supply and properly
protected against electrical surges and grounding faults. The power supply pack
can only be replaced by the same product from the manufacturer.
980515-001 Rev. C
P110i & P110m Card Printer User’s Manual
7
Printer Installation
1. Place the printer in a location that allows easy access to all sides. The printer should never
be operated while resting on its side or upside down
2. Remove the yellow CAUTION label from the back of the printer.
3. Ensure that the printer’s power switch is in the OFF (O) position.
8
P110i & P110m Card Printer User’s Manual
980515-001 Rev. C
Printer Installation
4. Insert the power supply plug into the power socket, attach the power cord (120VAC or
230VAC) to the power supply, then plug the power cord in to a grounded electrical socket
of the proper voltage and type.
115 VAC
230 VAC
Caution • Intermittent or unpredictable operation may occur from unsecured
connectors. If damaged, the power cable must be replaced by an exact equivalent. The
socket should always be easily accessible to power off the printer.
5. If your printer has only the USB interface, attach the included USB cable to your
computer and the printer.
980515-001 Rev. C
P110i & P110m Card Printer User’s Manual
9
Printer Installation
6. If your printer has the optional Ethernet interface (as well as the USB interface), connect
either the USB cable to printer and computer or the Ethernet cable to the printer and the
Ethernet network.
Important • Do not connect both the USB and the Ethernet interfaces at the same time!
10
P110i & P110m Card Printer User’s Manual
980515-001 Rev. C
Printer Installation
Installing the Printer Driver
Important • Do not power the printer with USB attached to your computer at this time. The
driver will prompt you when it is time to plug in and power up your printer.
To install the Printer Driver on Windows 2000 and Windows XP operating systems, insert the
User Documentation and Drivers CD, included with your printer, into your computer and the
InstallWizard will walk you through the required installation steps.
Both the P110i and P110m Printers use the same Printer Driver.
The InstallWizard will:
• Automatically install the User Interface when the driver CD is inserted.
• Start the installation process when the Install Printer Driver menu item is selected from
the Main Menu.
• Allow you to install Ethernet drivers, if you plan on networking your card printer via an
external print server
• Check to see which operating system you are using
• Detect previous versions of the driver and clean up any unnecessary Windows registry
entries. You must select “Remove” from the install options to remove any previous driver
versions.
• Install the new driver files
• Reboot your computer
980515-001 Rev. C
P110i & P110m Card Printer User’s Manual
11
Printer Installation
Print Driver Installation
Install the Printer driver as follows:
1. Insert the P110i / P120i / P110m User Documentation and Drivers CD into the CD drive
of the host computer. The Select Language window will open.
2. From the Select Language window, choose the appropriate language for your system. The
Main Menu will open in the selected language.
12
P110i & P110m Card Printer User’s Manual
980515-001 Rev. C
Printer Installation
3. From the Main Menu, under Install Printer Driver, select P110i / P110m.
Note • Note that the Driver installer will refer to the P110i. Remember, the same driver is
used for both the P110i and P110m Printers.
4. The InstallShield Wizard will be installed and a progress window will be displayed. Once
the InstallShield Wizard has been installed, the Welcome to InstallShield Wizard
window will open.
5. On the Welcome to InstallShield Wizard window, click the Next button.
980515-001 Rev. C
P110i & P110m Card Printer User’s Manual
13
Printer Installation
6. Select USB or Ethernet, click the Next button, then follow the instructions that appear on
the screen.
7. When driver installation is complete, you will be prompted to restart your computer.
Change Printer Driver Options
Note • The screen shots shown in this section are for the P110i Printer using the USB
interface. If you are using the Ethernet interface, the screens will refer to the “Zebra P110i
Network Printer.” Again, remember that the P110m Printer uses the same driver.
14
P110i & P110m Card Printer User’s Manual
980515-001 Rev. C
Printer Installation
You can change the default settings for the printer driver. Change the options as follows:
1. Select Start>Settings>Printers and Faxes.
2. From the Printers and Faxes list, right click the P110i USB Card Printer and select
Properties from the pop-up menu. The Printer Properties window will open.
3. On the General tab, click on the Printing Preferences button to change the card orientation
settings, monochrome conversion settings, various ribbon settings, or to adjust the color
and head settings properties.
980515-001 Rev. C
P110i & P110m Card Printer User’s Manual
15
Printer Installation
4. On the Sharing tab, you can choose to share the printer over the network, and install
additional drivers to accommodate different operating systems.
5. On the Ports tab, you can add, delete, and configure the printer ports, as well as choose
which port the printer is assigned.
16
P110i & P110m Card Printer User’s Manual
980515-001 Rev. C
Printer Installation
6. On the Color Management tab, you can add, remove, or change printer color profiles.
7. Use the Security tab to change permissions for the printer.
980515-001 Rev. C
P110i & P110m Card Printer User’s Manual
17
Printer Installation
8. On the Advanced tab, you can choose various printer properties, install different printer
drivers, and change default printer settings.
9. On the Device Settings tab, you can change settings for a Magnetic Encoder and change to
or from single feed mode.
10. Once the printer driver options have been configured to your satisfaction, click the OK
button to save your new configuration and close the Properties window.
18
P110i & P110m Card Printer User’s Manual
980515-001 Rev. C
3
Printer Setup
Printer Features
The following shows an interior view of your P110i / P110m Printer.
Print
Head
Lid
Card
Output
Hopper
Ribbon
Cartridge
Card
Guide
Card
Feeder
:
980515-001 Rev. C
P110i & P110m Card Printer User’s Manual
19
Printer Setup
Loading Ribbon Cartridge
The Printer requires approved ribbon cartridges. The Resin Thermal Transfer and Dye
Sublimation ribbons are specifically designed for your Printer.
• i Series Printers require the use of i Series ribbons for full color printing.
• Each ribbon cartridge includes an integrated adhesive cleaning roller assembly that is
used to clean the cards entering the printer. Improper cleaning will reduce printer life
and degrade print quality
• When the ribbon is completely used, change the whole cartridge assembly.
Electrostatic Discharge Caution • DO NOT TOUCH the print head or the electronic
components on the print head. Discharge of electrostatic charge from the human body or other
surfaces can damage the print head or other electronic components
1. Open printer lid by pressing the Cover Release button on the top of your printer.
2. Peel protective wrapper from adhesive cleaning roller by gently pulling on the tape.
Discard the protective wrapper.
Adhesive
Cleaning
Roller
3. Insert the ribbon cartridge with the cleaning roller facing down, so the gears on the ends of the
rollers fit into the appropriate slots.
20
P110i & P110m Card Printer User’s Manual
980515-001 Rev. C
Printer Setup
4. Close the printer lid and push down until you hear an audible click.
Note • After the lid is closed, the ribbon automatically synchronizes when the printer power
is on.
Loading Cards
To help you load, print, and collect cards, the printer has the following items:
Card Feeder
The card feeder is used for loading cards, it can hold up to 100 cards of 30 mils thickness. The
card feeder is located under the card feeder cover of the Printer.
Caution • DO NOT bend cards or touch print surfaces as this can reduce print quality.
Note • The surface of the cards must remain clean and dust free. Always store cards in an
enclosed container. Ideally, use cards as soon as possible. If cards stick together, carefully
fan or shuffle them.
Note • For Cards with magnetic stripe, refer to Appendix A for loading instructions.
Load cards into card feeder as follows:
1. Open card feeder cover.
2. Slide card guide all the way to the right until it locks in place with an audible click.
Card
Feeder
Card
Guide
3. Remove cellophane wrapper from card stack.
980515-001 Rev. C
P110i & P110m Card Printer User’s Manual
21
Printer Setup
Note • Static charges and edge burrs from the card die-cutting process can render individual
cards stuck together with significant adhesion force. These cards must be physically
separated from each other before inserting into the feeder; if not separated, feeding or
printing problems may occur.
4. Holding the card deck by the sides, hold it vertically against a flat surface such as a
desktop. If the deck is too thick for your hand to hold it comfortably, use about half a deck
at a time.
5. Push the stack back and forth to an angle of about 45° from vertical, so as to separate all of
the cards.
6. Restore the card stack to its original squared-off condition, and place the cards in the input
hopper.
7. Place stack of up to 100 cards into card feeder and close the card feeder cover. When card
feeder cover is closed, the card guide locking mechanism will automatically be released.
22
P110i & P110m Card Printer User’s Manual
980515-001 Rev. C
Printer Setup
Card Feeder Cover
Card
Stack
Card Feeder
Card Output Hopper
1. Raise the printer lid and pull the output hopper down to place it in its functional position.
2. When not using the printer, place the card output hopper back in its closed position to
protect the printer from dust.
Card
Output
Hopper
Printing a Test Card
With ribbon cartridge and cards loaded, your printer is ready to print. To check the operation of
the printer, you should print a test card.
1. Place the printer power switch in the OFF (0) position.
2. While holding down the Multi Function Button, place the printer power switch in the
ON ( | ) position. The LCD status window will glow blue.
980515-001 Rev. C
P110i & P110m Card Printer User’s Manual
23
Printer Setup
MultiFunction
Switch
Power
Switch
P520CEM
Serial N¡ 060376
Firmware: V1.50
Head resistance: 1568
Offset: X002 - Y015
EC: 0014
Printing Counter: 00002716
3. Keep pressing the Multi Function button until the SELF TEST message appears in the
window.
4. Release the Multi Function button, and a test card will print after a few seconds.
24
P110i & P110m Card Printer User’s Manual
980515-001 Rev. C
4
Printer Operation
Printing
Printing with the P110i or P110m Printer requires the Windows Printer Driver, your card
design/issuing software or printer command level programming through the printer
interface.
The Printer can be used with any Windows 2000 or Windows XP software application
program, using the drivers provided on CD with the printer. See Section 2 for instructions
on installing the Printer Driver.
980515-001 Rev. C
P110i & P110m Card Printer User’s Manual
25
Printer Operation
Creating a Sample Card
Before you begin a new printing session, print a sample card to ensure that the cards will be
printed correctly. Follow the steps below to print your first card using the True ColoursTM
Card Printer Ribbon Cartridge and the Windows printer driver.
1. Go to the Microsoft Word Software.
2. If the printer was not selected as the default printer, go to File> Select Printer and choose
Printer from the printer names list. Close the Print dialog box.
3. Go to File>Page Setup.
4. Select the Size tab, and under Paper Size, choose Card. Under orientation, select
Landscape or Portrait.
5. Select the Margins tab, and set the Top, Bottom, Left and Right margins to O (zero).
6. Press OK to close Page Setup window.
7. The card appears on the window.
8. Design a card with both black and colored text and with colored pictures similar to the
sample card shown below. (For the P110m, design a card with text and pictures in the
same monochrome color as the ribbon.)
http://www.zebracard.com
26
P110i & P110m Card Printer User’s Manual
980515-001 Rev. C
Printer Operation
Printing a Sample Card
Once you completed creating your sample card, you are ready to print. Ensure your printer has
a True Colours™ Card Printer Ribbon Cartridge installed and there is card stock in the card
feeder. See Section 3 for instructions on installing the ribbon and loading the cards Print your
sample card as follows:.
1. Select File>Print to open the Print dialogue box. Ensure the following settings in the Print
dialogue box:
•
Printer Name: - Zebra P110i Card Printer
•
Print to File: - Unchecked
•
Page Range: - All
•
Number of Copies: - 1
•
Collate: - Unchecked
•
Print What?: - Document
•
Print: - All pages in range
•
Pages per sheet: - 1 page
•
Scale to paper size: - No scaling
2. Click the OK button.
3. The printer will feed in a card and start printing. The data download time will vary
depending on the complexity of the card design and the processing speed of the computer.
4. Once the printing is completed, the card is ejected from the printer into the printed card
hopper.
5. Remove the sample card from the card output hopper and check for any discrepancies. If
the sample card is correct, your printer is to produce more cards.
980515-001 Rev. C
P110i & P110m Card Printer User’s Manual
27
28
P110i & P110m Card Printer User’s Manual
980515-001 Rev. C
5
Cleaning
Cleaning System
N
Caution • PROTECT YOUR FACTORY WARRANTY!
The recommended maintenance procedures must be performed to maintain your
factory warranty. Other than the recommended cleaning procedures described in this
manual, allow only Zebra authorized technicians to service the P110i or P110m
Printer.
NEVER loosen, tighten, adjust, or bend, etc., a part or cable inside the printer.
NEVER use a high-pressure air compressor to remove particles in the printer.
Your Printer includes a simple cleaning system using Pre-Saturated Cleaning Cards
provided. The regular use of these cards will clean and maintain important parts of your
printer that cannot be reached: including Print Head, the Transport Rollers, and the
Magnetic Encoder Station (optional feature).
When to Clean
After approximately 1000 color cards have been printed, the printer LCD will prompt
CLEAN PRINTER, or when print quality has been degraded.
How to Clean
1. Leave power on.
2. Press and hold the Multi-Function Control Button for 5 seconds.
980515-001 Rev. C
P110i & P110m Card Printer User’s Manual
29
Cleaning
Feeder Cleaning
Card
Multi-Function
LCD Panel
Card
Feeder
Cover
Multi-Function
Control Button
Printer Path
Cleaning Card
3. When the cleaning cycle is initiated, the LCD message REMOVE RIBBON THEN
CLOSE LID will display.
4. After the ribbon is removed and the lid is closed, the message EMPTY FEEDER THEN
CLOSE COVER will display.
5. If the lid is opened and closed without removing the ribbon, the REMOVE RIBBON
THEN CLOSE LID message will remain.
6. Once the cover is closed, the firmware will eject any card inside the printer. The message
EJECTING CARD will display.
7. The LCD will then display FEED LONG CLEANING CARD IN EXIT. When the card
sensor registers the presence of the cleaning card, the rollers should take the card into the
printer.
8. When the cleaning process is done, the printer will eject the cleaning card. If the card
sensor still senses the cleaning card, the message REMOVE LONG CLEANING CARD
will display.
9. Once the long cleaning card is no longer sensed by the exit card sensor, the message
INSERT FEEDER CLEANING CARD will display. Open the feeder cover and insert
the feeder cleaning card.
10. When the feeder cleaning card has been sensed by the feeder card sensor, the message
CLOSE FEEDER COVER will display.
11. When feeder cleaning is complete, the message REMOVE FEEDER CLEANING
CARD will display.
12. After the card is removed, the LCD will display READY. You may now reload the ribbon
and cards and continue printing.
30
P110i & P110m Card Printer User’s Manual
980515-001 Rev. C
Cleaning
Cleaning the Print Head
Use of the cleaning cards will normally do an adequate job of cleaning the printer. However, a
separate Print head cleaning, using swabs, can remove more stubborn deposits when print
anomalies persist. To avoid deposits, only use foam-tipped swabs.
Caution • Never use a sharp object to scrape deposits from the print head. Permanent
damage to the print head will result
1. Place the printer power switch in the OFF (0) position.
2. Open printer lid by pressing cover release button and open cover fully to reveal the print
head mounted to inside of the cover.
3. Clean Print Head by moving alcohol-moistened swab tip side-to-side across Print Head
elements. Only use moderate force.
4. Allow two to three minutes for the printhead to dry before placing the printer power
switch in the ON ( | ) position.
5. To reorder swabs, see the P110i or P110m Printer Media List.
980515-001 Rev. C
P110i & P110m Card Printer User’s Manual
31
32
P110i & P110m Card Printer User’s Manual
980515-001 Rev. C
6
Troubleshooting
Troubleshooting Procedures
The table below offers causes and solutions to symptoms related to improper operation.
Check the table when experiencing any loss of operation or print quality.
980515-001 Rev. C
Problem / Description
Cause / Solution
The LCD Panel displays OUT
OF CARDS message.
1. Check for cards in the card
feeder. If no cards present, load
cards.
2. Press the Panel Button for 1
second. The printing job will
restart.
The LCD Panel displays OUT
OF RIBBON message.
1. Check ribbon. Replace if
defective or entirely used.
Ribbon will automatically
synchronize and printing will
restart with a new card.
The LCD Panel displays PRINT
HEAD OPEN message.
1. Check that Print Head Carriage
is closed and latched. If not, close
and latch it.
P110i & P110m Card Printer User’s Manual
33
Troubleshooting
The LCD Panel displays
MECHANICAL ERROR
message.
1. Check that you are using the
correct card type (see Section 7).
2. If two cards are fed into the
printer at the same time:
Open cover and remove Card
Cleaning Cartridge, empty
the Card Feeder, and pull the
jammed cards out. Replace
the Card Cleaning Cartridge.
Remove cards from Card
Feeder, separate them as
shown in Loading Cards in
Section 3, and replace.
3. Check that ribbon is loaded
correctly.
The LCD Panel displays
ENCODING ERROR message.
1. Check that you are using the
correct magnetic card type (for
low or high coercivity encoding).
2. Verify command syntax.
3. Contact Zebra technical
support.
The LCD Panel displays
CLEAN PRINTER message.
1. Printer cleaning required (see
Section 4).
Print Quality Issues
This section will help you resolve print quality problems The print quality is dependent on
several factors. The two most important factors that will increase your print quality are
cleanliness and card stock. To diagnose and fix print quality problems, follow the
troubleshooting procedures below:
34
P110i & P110m Card Printer User’s Manual
980515-001 Rev. C
Troubleshooting
Example • Small spots appear on the printed card with a non-printed area or a different color.
Possible Cause:
• Contamination on the card surface
Solutions:
• Check that cards are stored in a dust free environment
• Use a different supply of cards
Possible Cause:
• Cleaning roller not installed
• Dust inside the printer and/or dirty Cleaning Roller
Solutions:
•
•
Perform a Cleaning of the printer (see Section 5)
Check that the protective cover was removed from the ribbon cartridge cleaning roller
(see Section 3).
• If printing one card at a time, replace the cleaning roller located at the front of the
printer (see Appendix B).
Example • There are non-printing horizontal lines (white) on the card surfaces.
Possible Cause:
• Ribbon cartridge is not correctly positioned.
Solutions:
•
Ensure that the ribbon is properly rolled onto the ribbon cores of the cartridge and that
there are no wrinkles in the ribbon.
• Replace ribbon cassette.
Possible Cause:
• Print Head is dirty.
Solutions:
• Clean the Print Head
Possible Cause:
• Print Head elements are damaged (e.g., scratched or burnt).
Solutions:
•
980515-001 Rev. C
Call Zebra Customer Service for Print Head replacement information.
P110i & P110m Card Printer User’s Manual
35
Troubleshooting
Example • Printing shows very pale or inconsistent results.
Possible Cause:
• Ribbon cartridge have been stored improperly or is damaged.
Solution:
• Change ribbon cartridge and print again.
Possible Cause:
• Cards may not meet specifications
Solution:
• Use a different supply of cards.
Possible Cause:
• Contrast and/or Intensity may be set to values which are too high.
Solution:
• Adjust Contrast and/or Intensity values in software.
Possible Cause:
• Dust or embedded contamination on elements of the Print Head.
Solution:
•
Perform a Cleaning of the Print Head (see Section 4).
Example • Printing shows blurry printed image.
Possible Cause:
• Ribbon cartridge may not be correctly positioned.
Solution:
•
Check that the ribbon is properly rolled onto the ribbon cores of the cartridge, with no
wrinkles.
• Replace ribbon cartridge, making sure it locks in place, and print again.
Possible Cause:
•
Ribbon may not be synchronized on the correct color panel position (model P110i
only).
Solution:
• Open lid, then close lid to synchronize ribbon.
Possible Cause:
•
36
Cards may not meet specifications.
P110i & P110m Card Printer User’s Manual
980515-001 Rev. C
Troubleshooting
Solution:
• Use a different supply of cards.
Possible Cause:
• Dust or embedded contamination inside the printer and/or dirty Cleaning Roller.
Solution:
•
•
Clean the Print Head.
Replace Cleaning Roller.
Example • No printing on the card.
Possible Cause:
• Ribbon cartridge may not be installed in the printer.
Solution:
• Check for ribbon cartridge in the printer.
Possible Cause:
• Cards may not meet specifications.
Solution:
• Use a different supply of cards.
Possible Cause:
• Cable on Print Head may be disconnected.
• Print Head elements may be scratched or burnt.
Solution:
•
Call Service for Print Head repair or replacement information.
Troubleshooting the Ethernet Connection and Adapter
Resetting to Factory Defaults
To reset the Ethernet Adapter configuration parameters to the factory defaults, press the
Ethernet Switch
and hold it in while turning the printer power on. Keep the Panel Button pressed until the
Status Indicator light turns green, then release the Ethernet Switch. To print a configuration
card, press and hold the Ethernet Switch until a card starts to print.
980515-001 Rev. C
P110i & P110m Card Printer User’s Manual
37
Troubleshooting
Ethernet Adapter Status Indicator
A bi-color Status Indicator displays the operational status of the Ethernet Adapter.The
following conditions might occur:
1. During normal operation, the LED is solid green for more than 30 seconds. This indicates
all the hardware is functioning properly and the Ethernet Adapter has detected the
presence of the network. It does not mean the Ethernet Adapter has an IP address or is
attached to a printer queue.
2. If the LED is rapidly flashing green (9 times/sec), the Ethernet Adapter has not detected
the presence of a network cable. To solve the problem:
• Verify that the network cable is appropriate for the network and has an RJ-45
connector.
• Turn the printer power off (O). Remove the network cable from the Ethernet Adapter.
Plug the network cable back in until you hear a positive click. Check the other end of
the cable in the same manner. Turn the printer power on; if the Ethernet Adapter still
does not detect a cable, continue.
• Connect the Ethernet Adapter to a known good network connection. If the Ethernet
Adapter is still unable to detect the network cable, contact Technical Support for
assistance.
Important • Cables with a rating higher than CAT-6 have not been tested.
3. If the LED is slowly flashing green (1 time/sec), the Ethernet Adapter is trying to print a
job. If the job does not print, check the following:
• Verify that the printer has media and ribbon. If the printer is showing any errors, it is
unlikely that the Ethernet Adapter can send data to the printer. The LED continues to
blink until the printer malfunction is resolved or until the printer is turned off (O).
• Flashing red indicates the Power On Self Test (POST) is in progress.
4. If the LED is solid red for more than 30 seconds, the Ethernet Adapter has failed the
POST. A failed POST can be caused by any of the following:
• The printer attached to the Ethernet Adapter device is malfunctioning. Turn the
printer power off, wait 10 seconds, then turn the printer back on ( | ).
• If the Ethernet Adapter still fails the POST, the Ethernet Adapter has a hardware
problem that can be fixed only by replacing or returning the unit. Contact Technical
Support for repair or replacement information.
5. If the LED is alternately flashing red and green for longer than 2 minutes, the Ethernet
Adapter is in firmware-download mode. This means it is waiting for new firmware data to
be sent before it continues normal functioning. Perform the following:
• If the Ethernet Adapter was purposely put into firmware-download mode, finish the
download with the proper update utility. Contact the Zebra web site at
http://www.zebra.com to download this utility.
• Contact Technical Support for help recovering this unit.
38
P110i & P110m Card Printer User’s Manual
980515-001 Rev. C
Troubleshooting
Network Status/Activity Indicator
A bi-color Status/Activity LED indicates network speed, established link, and network
activity.
1. If the LED is off, no link was established.
2. If the LED is solid green, a 100Base link is established.
3. If the LED is flashing green, a 100Base link is established and network activity has been
detected.
4. If the LED is solid orange, a 10Base link is established.
5. If the LED is flashing orange, a 10Base link was established and network activity has
been detected.
Network activity detected by this LED does not mean the activity is data for the print server.
The activity is all activity on the network seen on the Ethernet Adapter.
980515-001 Rev. C
P110i & P110m Card Printer User’s Manual
39
40
P110i & P110m Card Printer User’s Manual
980515-001 Rev. C
7
Technical Specifications
General
•
Load-N-GoTM drop-in ribbon cartridge
•
16-digit LCD display
•
Windows® drivers for 2000 and XP
•
Color dye sublimation or monochrome thermal transfer printing (P110i);
Monochrome thermal transfer printing only (P110m)
•
30 seconds per card full color single sided (YMCKO) (P110i only)
•
300 dpi (11.8 dots/mm) print resolution
•
Code 39, Code 128 B & C with & without check digit
•
2 of 5 & 2 of 5 Interleaved
•
UPC-A, EAN 8 & EAN 13
•
PDF-417 2D bar code and other symbologies can be printed via
Windows drivers
•
Types: PVC, PVC Composite
•
Card width/length: ISO CR-80-ISO 7810, 2.12" (54mm) x 3.38" (86mm)
•
Magnetic Stripe-ISO 7811
•
Smart Card-ISO 7816
•
Card thickness: 30 mil (.76mm) (+/- 10%)
•
Card feeder capacity: 100 cards (30 mil)
•
Card output hopper capacity: 45 cards (30 mil)
Color Printing
Bar Code
Cards
980515-001 Rev. C
P110i & P110m Card Printer User’s Manual
41
Technical Specifications
Ribbons Cartridges
•
Load-N-GoTM ribbon cartridge with integrated card-cleaning roller
•
i Series technology featuring contact-chip-based ribbon detection (P110i
only)
•
YMCKO: 200 cards/cartridge (P110i only)
•
Monochrome: 1000 cards/cartridge in black or blue; 850 cards/cartridge
white
•
USB 1.1 (cable included)
•
USB 1.1 and built-in Ethernet (optional)
•
Width: 7.9 in (201mm)
•
Depth: 12.9 in (328mm)
•
Height: 8.5 in (216mm)
•
Weight: 9.5 lbs (4.3kg)
•
110 ~ 240 Volts AC, 50 ~ 60 Hz (auto switching)
•
8 MB image memory standard
•
FCC Class A, CE, UL and CUL approved
•
Operating Temperature: 60°F to 86°F (15°C to 30°C)
•
Operating Humidity: 20% to 65% non-condensing
•
Storage Temperature: 23°F to 158°F (-5°C to 70°C)
•
Storage Humidity: 20% to 70% non-condensing
•
Ventilation: Free air
•
Magnetic encoder (30 mil cards only), 3 track HiCo/LoCo
•
CardSenseTM single card-feed mode
•
P110i Starter Kit (200 cards and 1 YMCKO ribbon)
•
Cleaning Kit (1 cleaning card and 1 cleaning swab)
Interfaces
Dimensions
Electrical
Environmental
Options
42
P110i & P110m Card Printer User’s Manual
980515-001 Rev. C
Technical Specifications
Card Dimensions
ISO standard dimensions for plain card
2.125 ± 0.002in
(53.98 ± 0.050mm)
980504-07-01
3.375 ± 0.010in
(85.72 ± 0.25mm)
Radius
0.125in
(3.18mm)
0.009 ~ 0.034in
(0.23 ~ 0.84mm)
ISO standard dimensions for magnetic stripe card
0.623in (15.82mm) min
980504-07-02
0.218in (5.54mm) max
MAGNETIC STRIPE
0~0.115 in (2.92 mm)
0~0.115in (2.92mm)
980515-001 Rev. C
P110i & P110m Card Printer User’s Manual
43
44
P110i & P110m Card Printer User’s Manual
980515-001 Rev. C
Appendix A
Magnetic Card Encoder
Introduction
This section contains information on the additional operations of the P110i or P110m
Printers with Magnetic Card Stripe Encoder.
980515-001 Rev. C
P110i & P110m Card Printer User’s Manual
45
Magnetic Card Encoder
Media Loading Orientation
Caution • ONLY USE cards that comply with ISO 7810 & 7811 standards for magnetic
stripe cards. The magnetic stripe must be flush to the surface of the card to work properly.
Never use cards which have taped-on magnetic stripes.
The magnetic encoder is a factory installed item with the read/write head positioned below or
above the card path, available with HiCo or LoCo encoding.
When loading cards with magnetic stripes into the card feeder, please ensure that the magnetic
stripe is facing the left side of the printer, and closest to the bottom edge of the card feeder, as
shown below.
Magnetic
Stripe
Note • Zebra approved HiCo & LoCo PVC cards are available.
Magnetic Encoder Cleaning
Use the standard cleaning card process as described in Section 5. This cleans the most
important parts of the printer; including the Print Head, Transport Roller, and Magnetic Stripe
Encoder.
46
P110i & P110m Card Printer User’s Manual
980515-001 Rev. C
Magnetic Card Encoder
ISO Standard Encoding
Track #
Field
Separator
Track
Density
Valid
Characters
# of
characters
Alphanumeri
c (ASCII
20~95†)
Numeric
(ASCII
48~62)
Numeric
(ASCII
48~62)
79‡
1
^
210 BPI*
2
=
75 BPI*
3
=
210 BPI*
40‡
107‡
*Bits per inch
†Except the “?” character
‡Including Start, Stop, and LRC characters. Also note that these 3
characters areautomatically managed by the magnetic encoder according
to the ISO Standard Norms.
Note • Refer to the Card Printer Programmer’s Manual for complete programming
information.
980515-001 Rev. C
P110i & P110m Card Printer User’s Manual
47
48
P110i & P110m Card Printer User’s Manual
980515-001 Rev. C
Appendix B
Card SenseTM Single Card
Feed Mode
Printing a Single Card Without Using the Feeder
For operating the P110i or P110m Card Printer in single card feed mode, the printer
requires that the operator install an optional Card SenseTM Single Card Feed Kit. In Single
Card Feed Mode, the printer will only accept cards through the front slot, not from the card
feeder.
Install Card SenseTM Single Card Feed Kit
1. Set printer to OFF.
980515-001 Rev. C
P110i & P110m Card Printer User’s Manual
49
Card Sense TM Single Card Feed Mode
Ribbon
Cartridge
Printer
Lid
2. Open the lid and remove the ribbon cartridge.
Important • Make sure the output hopper remains closed.
Roller from
Single Card
Feed Kit
Blue
Tabs
3. Install the black roller from the Single Card Feed Kit into the blue tabs at the front of the
printer, and press roller down firmly to lock into the tabs.
Install Card Cleaning Cartridge
Install the Card Cleaning Cartridge as follows:
1. Open the lid of the card cleaning cartridge.
50
P110i & P110m Card Printer User’s Manual
980515-001 Rev. C
Card SenseTM Single Card Feed Mode
Blue
Tape
Card
Cleaning
Cartridge
2. Insert the cleaning roller into the card cleaning cartridge and close the cartridge.
3. Peel protective wrapper from adhesive cleaning roller by gently pulling on the blue tape,
and discard the wrapper.
4. Slide the Card Cleaning Cartridge into the slots provided at the front of the printer. An
alignment tab is located on the left side of the Card Cleaning Cartridge to ensure proper
installation.
Ribbon
Cartridge
5. Insert the Ribbon Cartridge with the cleaning roller facing down, so the gears on the ends
of the rollers fit into the appropriate slots.
6. Close the printer lid and push down until you hear an audible click. If you can not close
the lid, the cleaning cartridge or the ribbon cartridge may be installed wrong.
980515-001 Rev. C
P110i & P110m Card Printer User’s Manual
51
Card Sense TM Single Card Feed Mode
Setting Up the Printer Driver
1. Go to Printer Properties.
2. Select the Device Settings tab.
3. Select Single Feed Properties.
4. Select Enable Single Feed Support.
5. Click the Apply button.
Important • You can disable Single Feed Support and return to printing cards from the
hopper. You do not have to remove the components of the Single Card Feed Kit in order to
operate in normal mode.
Printing a Single Card
1. Place the printer power switch in the ON ( | ) position.
52
P110i & P110m Card Printer User’s Manual
980515-001 Rev. C
Card SenseTM Single Card Feed Mode
INSERT CARD
2. Insert a single card into the slot at the front of the printer, directly above the card output
hopper. Do not feed more than one card at a time. Printer will take the card.
980515-001 Rev. C
P110i & P110m Card Printer User’s Manual
53
54
P110i & P110m Card Printer User’s Manual
980515-001 Rev. C
Appendix C
Connecting to a Network
Card printers can be connected to an Ethernet network in three ways.
Printer Sharing
In printer sharing, the printer is connected locally to the host computer and configured to
be shared to other client computers. Client computers connect to the printer over the
network through the host computer.
980515-001 Rev. C
P110i & P110m Card Printer User’s Manual
55
Connecting to a Network
External Print Server
A stand alone device that acts as a server on the network specifically for receiving print jobs
and passing them to the printer. Client computers connect to the print server over a network.
Internal Print Server
Similar to an external print server, except the print server is integrated into the printer. This
removes the need for a separate power supply and separate device drivers. This is the simplest
way to network a printer.
56
P110i & P110m Card Printer User’s Manual
980515-001 Rev. C
Appendix D
Worldwide Sales & Support
Sales and Support Locations
North America:
Zebra Technologies Card Printer Solutions
1001 Flynn Road
Camarillo, CA 93012-8706 USA
Phone: + 1 (805) 579 1800
Fax: + 1 (805) 579 1808
e-mail: [email protected]
Europe, Middle East, and Africa:
Zebra Technologies Card Printer Solutions
The Valley Centre, Gordon Road
High Wycombe
Buckinghamshire HP13 6EQ
United Kingdom
Phone: + 44 (0) 870 241 1527
Fax: + 44 (0) 870 241 0765
e-mail: [email protected]
980515-001 Rev. C
P110i & P110m Card Printer User’s Manual
57
Worldwide Sales & Support
Asia Pacific:
Zebra Technologies Card Printer Solutions
120 Robinson Road
#06-01 Parakou Building
Singapore 068913
Phone: + 65 6858 0722
Fax: + 65 6885 0836
e-mail: [email protected]
Latin America:
Zebra Technologies Card Printer Solutions
9800 NW 41st Street, Suite 220
Doral, FL 33178 USA
Phone: + 1 (305) 558 3100
Fax: + 1 (305) 558-8485
e-mail: [email protected]
Website
www.zebracard.com
58
P110i & P110m Card Printer User’s Manual
980515-001 Rev. C