1
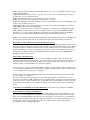
Disk Jockey Forensic Quick Start Guide
Welcome to the Diskology Disk Jockey (DJ) Quick Start guide for the new, Disk Jockey Forensic Kit!
This quick start guide was designed to get you up and running as quickly as possible. The DJ is actually a
very easy-to-use device. Regardless of the task that you want your DJ to accomplish, a quick understanding
of how the DJ works both attached to the computer and as a stand alone unit should help. If you are
interested in more of the theory behind the different “modes” of the DJ (mount drives, copy, verify, test
and erase x1, erase DoD x7) you can download the full user’s guide located in the support section of our
webpage (more specifically http://www.diskology.com/DiskJockeyUserGuide.pdf). NOTE – Your new
forensic Disk Jockey does not support mirroring or spanning of drives as found in the IT version.This
would require the ability to write to the Source Disk side of the DJ, something that you can not do with the
forensic DJ in order to ensure that the integrity of the suspect, or source, hard drive is kept. If you are
interested in these features please see the DJ IT on our website.
Forensic Features –
This forensic model has been designed with the forensic professional in mind. Specifically, the Drive1 port,
or Source, side of the DJ is ALWAYS write protected, you can not write to a drive attached to this port.
Therefore, as you become familiar with the various modes, items such as mounting a drive to access as
standard desktop storage (mode 0) as well as 1x erase (mode 6) and 7x DoD erase (mode 7) will only allow
you to write to, or erase, data on drives attached to the Drive2 or Destination port on the DJ. For example,
if you wish to erase a drive, simply attach it to the Drive2 port; you may leave the Drive1 port empty.
The forensic DJ also includes two copy modes, Copy Standard (Mode 2) and Copy w/HPA & DCO (Mode
3). HPA and DCO stand for Host Protected Area and Drive Configuration Overlay respectively. We
recommend for forensic use that you always copy in Mode 3 to ensure that you are copying all areas of the
drive.
Basic DJ Features –
The concept behind the DJ is that you select the desired mode, attach the drive(s) that you intend to use and
press the blue button once to power the drives up and again to begin the function. Problems with the drives,
cables not securely fastened, etc., will result in a series of loud beeps from the DJ. You can learn more
about the beep patterns in the user’s guide on our web site. This Quick Start guide also includes a copy of
our generic “tech support email” that typically answers most questions. You can also find more Q&A’s at
the support section of our web site or you can email [email protected] for a quick answer.
Using Modes 3, 4, 5, 6 & 7 (copy, compare, disk check and disk erase)
The following is an example using the most popular DJ mode, mode 3, Copy Mode. Note – All modes that
don’t require a computer operate in the way described below. So if you are looking to copy (Mode 3),
compare (4), disk check (5) or erase data via either a one-pass or seven-pass erase mode (6 or 7) the
following instructions will help you complete the task.
Step 1: Using the small screwdriver switch the DJ to Mode 3 (or 4, 5, 6 or 7 depending on desired results)
on the Mode Switch dial.
Step 2: Attach the drive that you wish to copy data from (source) to port 1 of the DJ. There is an arrow
showing data copy flow on the DJ as well.
Step 3: Attach the drive that to copy to (destination) to port 2 of the DJ.
Step 4: Connect power to the DJ (plug it into the wall while you’re at it!)
Step 5: Press the Blue power button on the DJ one time. You should hear the drives start spinning up. Wait
for the red power LED to turn green.
Step 6: After waiting a few seconds (typically no more than 5-10 seconds) press the Blue power button
again FIRMLY, the copy process should begin.
Step 7: Go surf the web, answer some email, etc. The progress of the copy can be deciphered using the
LEDs per the notes in the manual, but you can typically count on a copy of about 2 GB/min (actually a
little less). So if you are copying a 40 GB drive, the entire process should take between 18-20 minutes.
When the copy is complete the DJ will automatically power down the drives and shut off.
NOTE – If you run into a problem with the DJ and need to power the unit down, hold down the Blue power
button for approximately 10 seconds and you will hear the drives spin down and the power turn off.
Using Modes 0 and 1 (Standard and Standard with Write Protect)
Modes 0 and 1 (mounting drives as standard desktop storage via USB or firewire including write protection
in mode 1) require that the DJ is hooked up to the computer via the included USB or firewire cable. Mode 0
will make the drive(s) attached to the DJ accessible as typical desktop storage, no need for an enclosure
with only the Drive1, or Source, port write protected. You may write to a drive attached to the Drive2, or
Destination, port. Mode 1 (write protect) will function in the exact same way as mode 0 HOWEVER
BOTH ports will be write protected.
Support Help / Troubleshooting
This document began as an “auto-response” to people emailing with support questions. We now have
thousands of DJ’s in the field and are able to solve most problems with just a few simple answers. If one of
these items doesn’t solve your problem, promptly contact support and we will work to solve your issue
ASAP or replace your unit should the one you have be defective.
To begin, here are a couple of items that may make you think "of course I'm doing that!" but trust us, about
75% of our support inquiries are from some simple oversights. The Disk Jockey is actually a fairly simple
tool; too simple at times so people try to out think it. :-)
1- Please check cable connections and make sure cables are fastened securely. If you need longer cables
they are available on our webstore. .
If you are still having trouble it's typically not a bad idea to put the DJ into mode 0 and see if you can
access the source drive via USB or firewire. We also recommend trying each drive in mode 5 Disk Check
mode. Try one drive at a time, if the DJ beeps, try switching cables, isolate whether or not the cable, drive
or DJ could be the problem. It’s a good idea to try and rule out the drives, cables, etc. before initiating a
return.
2- Remember, the DJ ONLY works with UDMA drives. Drives must also be jumpered as “master.”
Same-sized Drives and Drive Size Differences
Finally, unfortunately not all similar sized drives are created equally. The DJ copies EVERY sector on a
disk. So, if you have a 250 GB drive from Maxtor for example and let's say it formats out to 242.7 GB.
Then you get a WD 250 GB drive and it formats out to 242.6 GB, you won't be able to copy the Maxtor to
the WD because the Disk Jockey will notice right away that there are not enough formatted free sectors on
the target drive. Then you'll get beeping. The other way would work fine, however. We typically
recommend copying to a slightly larger drive.
Bad Sectors – The DJ currently can’t copy drives with severely damaged sectors. We will attempt to retry a
sector 32 times, however if we still can’t get a good read we will issue an audible alert. This typically
means physical damage to the disk platters or to the read head.
Check FAQ’s
Please don’t forget to check the FAQ section on our web site if you’re still having troubles or contact us
[email protected]. We hope that you enjoy the Disk Jockey! If you have any question, comments,
suggestions or concerns please do not hesitate to contact us at either [email protected] or
[email protected].