1
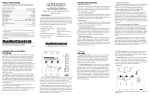
Quick Install Guide
Since some of you will want to install your Matrix Plus on your own
we offer a few reminders in the following short section to speed up your
installation.
➊ Physically mount the Matrix Plus in a location that keeps it away
from soda spills, food crumbs, and curious fingers.
Placement And Mounting of Optional Dash Remote (ACR-1):
(Purchased Separately) The dash control may be mounted under the
dash using its own bracket or through a custom hole in the
dash. It should be within reach of the driver and in a
spot where the LED is plainly visible.
➋ The Matrix Plus needs to be installed as close to the source unit as
possible. Connect RCA cables from source unit to Matix Plus inputs. If
this is not obvious to you, quickly pack up your Matrix Plus and run to
your nearest authorized AudioControl dealer to have them perform the
installation. You will thank us later.
➌ Use RCA connecting cables to connect the RCA outputs of the
Matrix Plus to your amplifier(s).
➍ Connect +12 power, and ground.
➎ Connect your head units Remote turn on 12-volt trigger to the Matrix
Plus.
➏ Turn your amp gains fully down before turning on the system.
➐ Turn on the system and level match your Matrix Plus to your source
unit, signal processor and amplifiers. For more help see our technical
videos at http://www.audiocontrol.com/t34/Mobile-Audio.html
If you have your authorized AudioControl dealer install your Matrix Plus, we
will extend the normal one-year warranty to a full five years. AudioControl
products are, by nature, more technical than many others and we spend a good
deal of time training our dealers and installers so we know our products will
be installed correctly.
-9-
- 10 -