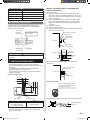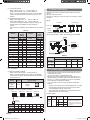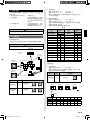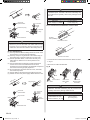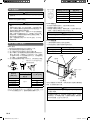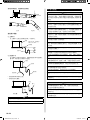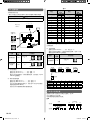
1
English
VRF SYSTEM
INDOOR UNIT
Duct Type
INSTALLATION MANUAL
For authorized service personnel only.
Contents
1. SAFETY PRECAUTIONS.............................................. 2
2. ABOUT THE UNIT
2.1. Precautions for using R410A refrigerant................ 2
2.2. Special tool for R410A............................................ 2
2.3. Accessories............................................................ 3
6. ELECTRICAL WIRING
6.1. Electrical requirement............................................. 9
6.2. Wiring method........................................................ 9
6.3. Unit wiring............................................................... 9
6.4. Connection of wiring ............................................ 11
3. INSTALLATION WORK
3.1. Selecting an installation location............................ 3
3.2. Installation dimension............................................. 4
3.3. Installation the unit................................................. 4
7. FIELD SETTING
7.1. Setting the address.............................................. 11
7.2. Custom code setting............................................. 12
7.3. Function setting.................................................... 12
4. PIPE INSTALLATION
4.1. Selecting the pipe material..................................... 5
4.2. Pipe requirement.................................................... 6
4.3. Flare connection (pipe connection)........................ 6
4.4. Installing heat insulation......................................... 7
8. TEST OPERATION
8.1. Test operation using PCB (Outdoor unit).............. 13
8.2. Test operation using remote controller................. 13
5. INSTALLING DRAIN PIPES.......................................... 7
9. CHECK LIST................................................................ 13
10. ERROR CODES.......................................................... 13
PART NO. 9373870036-02
9373870036_02_IM_en.indd 1
25/2/2552 9:17:24
]1
1. SAFETY PRECAUTIONS
• Be sure to read this Manual thoroughly before installation.
• The warnings and precautions indicated in this Manual
contain important information pertaining to your safety. Be
sure to observe them.
• Hand this Manual, together with the Operating Manual, to the
customer. Request the customer to keep them on hand for
future use, such as for relocating or repairing the unit.
WARNING
This mark indicates procedures which, if
improperly performed, might lead to the
death or serious injury of the user.
•Request your dealer or a professional installer to install
the indoor unit in accordance with this Installation Manual.
An improperly installed unit can cause serious accidents
such as water leakage, electric shock, or fire. If the
indoor unit is installed in disregard of the instructions in
the Installation Manual, it will void the manufacturer’s
warranty.
2.2. Special tool for R410A
WARNING
•To install a unit that uses R410A refrigerant, use dedicated
tools and piping materials that have been manufactured
specifically for R410A use. Because the pressure of
R410A refrigerant is approximately 1.6 times higher
than the R22, failure to use dedicated piping material
or improper installation can cause rupture or injury.
Furthermore, it can cause serious accidents such as
water leakage, electric shock, or fire.
Tool name
Changes
Gauge manifold
The pressure in the refrigerant
system is extremely high and cannot be measured with a conventional gauge. To prevent erroneous
mixing of other refrigerants, the
diameter of each port has been
changed. It is recommended to
use a gauge manifold with a high
pressure display range of –0.1 to
5.3 MPa and a low pressure display
range of –0.1 to 3.8 MPa.
Charging hose
To increase pressure resistance, the
hose material and base size were
changed.
(The charging port thread diameter
for R410A is 1/2 UNF 20 threads per
inch.)
Vacuum pump
A conventional vacuum pump can be
used by installing a vacuum pump
adapter.
Be sure that the pump oil does
not backflow into the system. Use
one capable for vacuum suction of
–100.7 kPa (5 Torr, –755 mmHg).
Gas leakage detector
Special gas leakage detector for
R410A refrigerant.
•Do not turn ON the power until all work has been
completed. Turning ON the power before the work is
completed can cause serious accidents such as electric
shock or fire.
•If refrigerant leaks while work is being carried out,
ventilate the area. If the refrigerant comes in contact with
a flame, it produces a toxic gas.
•Installation work must be performed in accordance with
national wiring standards by authorized personnel only.
CAUTION
This mark indicates procedures which,
if improperly performed, might possibly
result in personal harm to the user, or
damage to property.
2. ABOUT THE UNIT
1
2.1. Precautions for using R410A refrigerant
WARNING
•Do not introduce any substance other than the prescribed
refrigerant into the refrigeration cycle. If air enters the
refrigeration cycle, the pressure in the refrigeration cycle
will become abnormally high and cause the piping to
rupture.
•If there is a refrigerant leak, make sure that it does not
exceed the concentration limit. If a refrigerant leak
exceeds the concentration limit, it can lead to accidents
such as oxygen starvation.
•Do not touch refrigerant that has leaked from the
refrigerant pipe connections or other area. Touching the
refrigerant directly can cause frostbite.
•If a refrigerant leak occurs during operation, immediately
vacate the premises and thoroughly ventilate the area. If
the refrigerant comes in contact with a flame, it produces
a toxic gas.
En-2
9373870036_02_IM_en.indd 2
25/2/2552 9:17:25
]1
Name and Shape
Drain hose
2.3. Accessories
WARNING
Hose Band
2
• The following installation parts are furnished. Use them as
required.
• Keep the Installation Manual in a safe place and do not
discard any other accessories until the installation work has
been completed.
Q’ty
Application
For installing drain pipe
2
•For installation purposes, be sure to use the parts
supplied by the manufacturer or other prescribed parts.
The use of non-prescribed parts can cause serious
accidents such as the unit falling, water leakage, electric
shock, or fire.
Name and Shape
Q’ty
Drain hose insulation
2
For installing drain
hose
For installing drain
hose
Application
Operating Manual
3. INSTALLATION WORK
1
Especially, the installation place is very important for the split
type air conditioner because it is very difficult to move from
place to place after the first installation.
(This book)
Installation Manual
]1
3.1. Selecting an installation location
Decide the mounting position together with the customer as
follows.
1
WARNING
For fixing the coupler
heat insulation
Binder (Large)
4
Binder (Medium)
3
Coupler heat insulation
(Small)
1
CAUTION
For power supply
and transmission and
remote control cable
binding
For indoor side pipe
joint (Small)
For indoor side pipe
joint (Large)
Coupler heat insulation
(Large)
1
Special nut A
(Large flange)
For suspending the
indoor unit from ceiling
4
Special nut B
(Small flange)
•Select installation locations that can properly support the
weight of the indoor unit. Install the units securely so that
they do not topple or fall.
Do not install the indoor unit in the following areas:
•Area with high salt content, such as at the seaside. It will
deteriorate metal parts, causing the parts to fall or the
unit to leak water.
•Area filled with mineral oil or containing a large amount
of splashed oil or steam, such as a kitchen. It will
deteriorate plastic parts, causing the parts to fall or the
unit to leak water.
•Area that generates substances that adversely affect the
equipment, such as sulfuric gas, chlorine gas, acid, or
alkali. It will cause the copper pipes and brazed joints to
corrode, which can cause refrigerant leakage.
•Area that can cause combustible gas to leak, contains
suspended carbon fibers or flammable dust, or volatile
inflammables such as paint thinner or gasoline. If gas
leaks and settles around the unit, it can cause a fire.
•Area where animals may urinate on the unit or ammonia
may be generated.
•Do not use the unit for special purposes, such as storing
food, raising animals, growing plants, or preserving
precision devices or art objects.
It can degrade the quality of the preserved or stored
objects.
•Do not install where there is the danger of combustible
gas leakage.
4
•Do not install the unit near a source of heat, steam, or
flammable gas.
•Install the unit where drainage does not cause any
trouble.
En-3
9373870036_02_IM_en.indd 3
25/2/2552 9:17:27
]1
•Install the indoor unit, outdoor unit, power supply cable,
transmission cable, and remote control cable at least 1 m
away from a television or radio receivers. The purpose of
this is to prevent TV reception interference or radio noise.
(Even if they are installed more than 1 m apart, you could
still receive noise under some signal conditions.)
•If children under 10 years old may approach the unit,
take preventive measures so that they cannot reach the
unit.
3.3. Installation the unit
WARNING
•Install the air conditioner in a location which can
withstand a load of at least five times the weight of the
main unit and which will not amplify sound or vibration. If
the installation location is not strong enough, the indoor
unit may fall and cause injuries.
•Take precautions to prevent the unit from falling.
CAUTION
•Confirm the directions of the air intake and outlet before
installing the unit.
•The unit takes in air from the evaporator side, and expels
it from the fan side.
3.3.1. Installing the hangers
Hanging bolt installation diagram.
85 mm
1,050 mm
400 mm
1,000 mm
155 mm
]1
3.2. Installation dimension
AIR
500 mm
585 mm
(1) Install the indoor unit on a place having a sufficient strength
so that it withstands against the weight of the indoor unit.
(2) The inlet and outlet ports should not be obstructed; the air
should be able to blow all over the room.
(3) Leave the space required to service the air conditioner.
(4) Install the unit where connection to the outdoor unit is
easy.
(5) Install the unit where the connection pipe can be easily
installed.
(6) Install the unit where the drain pipe can be easily installed.
(7) Install the unit where noise and vibrations are not
amplified.
(8) Take servicing, etc., into consideration and leave the
spaces. Also install the unit where the filter can be
removed.
(9) Do not install the unit where it will be exposed to direct
sunlight.
Install at least 20 mm from the ceiling.
AIR
AIR
20 mm or more
1,080 mm
Hanging bolt M10
(Field supply)
300 mm
or more
Provide a service hole for inspection purposes as shown
below.
Do not place any wiring or illumination in the service space,
as they will impede service.
500 mm
AIR
AIR
30 mm or more
: Service hole
Washer
(Field
supply)
Hanger
Special nut B (Small)
(Accessories)
CAUTION
•Fasten the unit securely with special nuts A and B.
300 mm
or more
Unit
Special nut A (Large)
(Accessories)
500 mm or more
: Service space
En-4
9373870036_02_IM_en.indd 4
25/2/2552 9:17:28
3.3.2. Leveling
•Install the air inlet grille for air circulation. The correct
temperature can not be detected.
Use the procedure in the following figure to adjust the
levelness.
Unit
Duct
(Field supply)
Level meter
B
Outlet Grille
(Field supply)
A
Inlet Grille
(Field supply)
(Room)
•Be sure to install the air filter in the air inlet. If the air filter
is not installed, the heat exchanger may be clogged and
its performance may decrease.
(Front)
4. PIPE INSTALLATION
Level meter
]
B
CAUTION
A
•Be more careful that foreign matter (oil, water, etc.) does
not enter the piping than with refrigerant R410A models.
Also, when storing the piping, securely seal the openings
by pinching, taping, etc.
•While welding the pipes, be sure to blow dry nitrogen gas
through them.
(Side)
The side A of the unit with the drain port should be slightly
lower than the opposite side B of the unit. The height
difference between sides A and B should be from 0 to 20 mm.
]1
4.1. Selecting the pipe material
3.3.3. Mounting the duct
Follow the procedure in the following figure to install the ducts.
324 mm
∗ 14 mm
862 mm
14 mm
∗ 27 mm
Intake port flange
26 mm
Outlet port flange
851 mm
295 mm
∗ Spacing between flange and drain pan.
CAUTION
•To prevent people from touching the parts inside the unit,
be sure to install grilles on the inlet and outlet ports. The
grilles must be designed in such a way that cannot be
removed without tools.
•The static pressure outside the unit is as follows.
ARXC36L Model: 100-200 Pa
ARXC45/60L Models: 100-250 Pa
•If an intake duct is installed, take care not to damage the
temperature sensor (the temperature sensor is attached
to the intake port flange).
CAUTION
•Do not use existing pipes.
•Use pipes that have clean external and internal sides
without any contamination which may cause trouble
during use, such as sulfur, oxide, dust, cutting waste, oil,
or water.
•It is necessary to use seamless copper pipes.
Material : Phosphor deoxidized seamless copper pipes
It is desirable that the amount of residual oil is less than
40 mg/10 m.
•Do not use copper pipes that have a collapsed,
deformed, or discolored portion (especially on the interior
surface). Otherwise, the expansion valve or capillary tube
may become blocked with contaminants.
•Improper pipe selection will degrade performance. As an
air conditioner using R410A incurs pressure higher than
when using conventional refrigerant, it is necessary to
choose adequate materials.
• Thicknesses of copper pipes used with R410A are as shown
in the table.
• Never use copper pipes thinner than those indicated in the
table even if they are available on the market.
Thicknesses of Annealed Copper Pipes (R410A)
Pipe outside diameter [mm (in.)]
Thickness [mm]
6.35 (1/4)
0.80
9.52 (3/8)
0.80
12.70 (1/2)
0.80
15.88 (5/8)
1.00
19.05 (3/4)
1.20
En-5
9373870036_02_IM_en.indd 5
25/2/2552 9:17:29
Width across
flats
1
4.2. Pipe requirement
Pipe outside
diameter [mm (in.)]
Width across flats
of Flare nut [mm]
6.35 (1/4)
17
9.52 (3/8)
22
12.70 (1/2)
26
15.88 (5/8)
29
19.05 (3/4)
36
CAUTION
•Refer to the Installation Manual of the outdoor unit
for description of the length of connecting pipe or for
difference of its elevation.
• Use pipe with water-resistant heat insulation.
4.3.2. Bending pipes
CAUTION
•Install heat insulation around both the gas and liquid
pipes. Failure to do so may cause water leaks.
Use heat insulation with heat resistance above 120 °C.
(Reverse cycle model only)
In addition, if the humidity level at the installation location
of the refrigerant piping is expected to exceed 70 %,
install heat insulation around the refrigerant piping.
If the expected humidity level is 70-80 %, use heat insulation that is 15 mm or thicker and if the expected
humidity exceeds 80 %, use heat insulation that is 20
mm or thicker. If heat insulation is used that is not as
thick as specified, condensation may form on the surface
of the insulation.
In addition, use heat insulation with heat conductivity of
0.045 W/(m·K) or less (at 20 °C).
1
• The pipes are shaped by your hands or pipe bender. Be
careful not to collapse them.
• Do not bend the pipes in an angle more than 90°.
• When pipes are repeatedly bend or stretched, the material
will harden, making it difficult to bend or stretch them any
more. Do not bend or stretch the pipes more than three
times.
CAUTION
•To prevent breaking of the pipe, avoid sharp bends.
•If the pipe is bent repeatedly at the same place, it will
break.
4.3.3. Pipe connection
When the flare nut is tightened properly by your hand,
hold the body side coupling with a separate spanner, then
tighten with a torque wrench.
4.3. Flare connection (pipe connection)
CAUTION
4.3.1. Flaring
• Use special pipe cutter and flare tool exclusive for R410A.
(1) Cut the connection pipe to the necessary length with a
pipe cutter.
(2) Hold the pipe downward so that cuttings will not enter the
pipe and remove any burrs.
(3) Insert the flare nut (always use the flare nut attached to
the indoor and outdoor units respectively) onto the pipe
and perform the flare processing with a flare tool. Use the
special R410A flare tool, or the conventional flare tool.
Leakage of refrigerant may result if other flare nuts are
used.
(4) Protect the pipes by pinching them or with tape to prevent
dust, dirt, or water from entering the pipes.
B
Check if [L] is flared uniformly
and is not cracked or scratched.
Die
L
Pipe
Tighten with two wrenches.
Holding wrench
Torque wrench
Flare nut
Indoor unit pipe
(Body side)
Dimension A [mm]
Flare tool for R410A,
clutch type
CAUTION
0
Dimension B-0.4
[mm]
6.35 (1/4)
9.1
9.52 (3/8)
13.2
12.70 (1/2)
•Tighten the flare nuts with a torque wrench using the
specified tightening method. Otherwise, the flare nuts
could break after a prolonged period, causing refrigerant
to leak and generate a hazardous gas if the refrigerant
comes into contact with a flame.
Connection pipe
A
Pipe outside
diameter
[mm (in.)]
•Hold the torque wrench at its grip, keeping it in the right
angle with the pipe, in order to tighten the flare nut
correctly.
0 to 0.5
16.6
15.88 (5/8)
19.7
19.05 (3/4)
24.0
When using conventional flare tools to flare R410A pipes,
the dimension A should be approximately 0.5 mm more
than indicated in the table (for flaring with R410A flare tools)
to achieve the specified flaring. Use a thickness gauge to
measure the dimension A.
•Be sure to apply the pipe against the port on the indoor
unit and the outdoor unit correctly. If the centering is
improper, the flare nut cannot be tightened smoothly.
If the flare nut is forced to turn, the threads will be
damaged.
•Do not remove the flare nut from the indoor unit pipe until
immediately before connecting the connection pipe.
•Do not use mineral oil on flared part. Prevent mineral
oil from getting into the system as this would reduce the
lifetime of the units.
En-6
9373870036_02_IM_en.indd 6
25/2/2552 9:17:29
Flare nut [mm (in.)]
Tightening torque [N·m (kgf·cm)]
6.35 (1/4) dia.
16 to 18 (160 to 180)
9.52 (3/8) dia.
32 to 42 (320 to 420)
12.70 (1/2) dia.
49 to 61 (490 to 610)
15.88 (5/8) dia.
63 to 75 (630 to 750)
19.05 (3/4) dia.
90 to 110 (900 to 1,100)
4.4. Installing heat insulation
Install the coupler heat insulation after completing the
refrigerant leak check (for details, refer to the Installation
Manual for the outdoor unit).
Coupler heat
insulation
(Accessories)
INSTALL THE DRAIN HOSE TO THE MAIN AND
SAFETY DRAIN PORT
Working procedure
(1) Install the attached drain hose to the main and safety
drain port of the body. Install the hose band from the top
of the hose within the graphic display area. Secure firmly
with the hose band.
(2) Use vinyl adhesive agent to glue the drain piping (PVC
pipe VP25) which is prepared on site or piping socket.
(Apply color adhesive agent evenly until the gauge line
and seal)
(3) Check the drainage.
(4) Install the heat insulation.
(5) Use the attached heat insulation to insulate the drain port
and band parts of the body.
Ensure there is no space
Cover this portion with
heat insulation.
Hose Band
(Accessories)
Soft PVC side
Drain pan
10~15mm
Binder (Large)
(Accessories)
Heat insulation
Hard PVC side
CAUTION
• Use general hard polyvinyl chloride pipe (VP25) and
connect it with adhesive (polyvinyl chloride) so that there is
no leakage.
• The position of the installed drain pipe should have a
downward gradient of 1/100 or more.
• To prevent the pipe from freezing, use a heat insulation
material as needed.
Joint pipe
(Field supply)
Drain pipe (VP25)
(Field supply)
•There should be no gaps between the insulation and the
product.
5. INSTALLING DRAIN PIPES
Applying
area of
adhesive
Drain hose
(Accessories)
4 mm or less
Wrap the Drain hose insulation around the drain hose
connection.
Drain hose insulation
(Accessories)
Drain pan
Position of drain piping
100mm
139 mm
Drain hose
Main drain port
Drain pipe
• For main drain port
• For safety drain port
371 mm
356 mm
208 mm
41 mm
108 mm
123 mm
Safety drain port
Hose opening view
Wind the attached heat insulation
around the hose band. Make sure
the alignment is on top.
After installing the Drain hose, check if the drainage is smooth.
O.D.
32 mm (VP25)
Downward gradient
2.5-5.0mm
• This product has drain ports in two locations. Follow the
procedure in the figure to connect drain hose and drain
pipes to each of them.
En-7
9373870036_02_IM_en.indd 7
25/2/2552 9:17:31
6. ELECTRICAL WIRING
]
WARNING
NO GOOD
OK
INSTALL THE DRAIN PIPE
1Main drain
On the main drain, provide one trap near the indoor unit.
Unit
H1=100 mm (Approx.)
H2=50-100 mm
H2 H1
Drain pipe (Main)
Trap
2Safety drain
There is no need to provide a trap for the safety drain.
If the safety drain is connected to the main drain, make the
connection below the main trap.
Unit
•Electrical work must be performed in accordance with this
Manual by a person certified under the national or regional
regulations. Be sure to use a dedicated circuit for the unit.
An insufficient power supply circuit or improperly
performed electrical work can cause serious accidents
such as electric shock or fire.
•Before starting work, check that power is not being
supplied to the indoor unit and outdoor unit.
•Use the included connection cables and power cables
or ones specified by the manufacturer. Improper
connections, insufficient insulation, or exceeding the
allowable current can cause electric shock or fire.
•For wiring, use the prescribed type of cables, connect
them securely, making sure that there are no external
forces of the cables applied to the terminal connections.
Improperly connected or secured cables can cause
serious accidents such as overheating the terminals,
electric shock, or fire.
•Do not modify the power cables, use extension cables,
or use any branches in the wiring. Improper connections,
insufficient insulation, or exceeding the allowable current
can cause electric shock or fire.
•Match the terminal board numbers and connection cable
colors with those of the outdoor unit. Erroneous wiring
may cause burning of the electric parts.
Drain pipe (Main)
Drain pipe (Safety)
•Securely connect the connection cables to the terminal
board. In addition, secure the cables with wiring holders.
Improper connections, either in the wiring or at the ends
of the wiring, can cause a malfunction, electric shock, or
fire.
•Always fasten the outside covering of the connection
cable with the cable clamp. (If the insulator is chafed,
electric leakage may occur.)
• Make sure that drain pipe is installed without rises.
• Do not perform air bleeding.
Rise
•Securely install the electrical box cover on the unit.
An improperly installed electrical box cover can cause
serious accidents such as electric shock or fire through
exposure to dust or water.
•Install sleeves into any holes made in the walls for wiring.
Otherwise, a short circuit could result.
Air bleeding
NO GOOD
Rise
CAUTION
•Be sure to properly insulate the drain pipes.
•Make sure the drain water is properly drained.
•Install a ground leakage breaker. In addition, install the
ground leakage breaker so that the entire AC main power
supply is cut off at the same time. Otherwise, electric
shock or fire could result.
•Install a ground leakage breaker.
If a ground leakage breaker is not installed, it may cause
electric shock or fire.
•Always connect the ground cable.
Improper grounding work can cause electric shocks.
•Install the remote control cables so as not to be direct
touched with your hand.
•Perform wiring work in accordance with standards so that
the air conditioner can be operated safely and positively.
•Connect the connection cable firmly to the terminal
board. Imperfect installation may cause a fire.
En-8
9373870036_02_IM_en.indd 8
25/2/2552 9:17:32
]1
CAUTION
•Ground the unit. Do not connect the ground cable to a gas pipe, water
pipe, lightning rod, or a telephone ground cable.
Improper grounding may cause electric shock.
6.2. Wiring method
(EXAMPLE)
POWER SUPPLY
OUTDOOR UNIT
TRANSMISSION
•Do not connect power supply cables to the transmission
or remote control terminals, as this will damage the
product.
POWER SUPPLY
•Never bundle the power supply cable and transmission
cable together. Bundling these cables together will cause
miss operation.
TRANSMISSION
POWER REMOTE
SUPPLY CONTROL
BREAKER
• Cut power (breaker) off.
• Touch metal part of the indoor and outdoor units for
more than 10 seconds to discharge static electricity
charged in the body.
Power
supply cable
2.5
Transmission
cable
0.33
Remote
control cable
0.33
BREAKER
REMOTE
CONTROL UNIT
(MASTER)
POWER SUPPLY
TRANSMISSION
POWER REMOTE
SUPPLY CONTROL
BREAKER
REMOTE
CONTROL UNIT
(SLAVE)
POWER
SUPPLY
REMOTE
CONTROL UNIT
6.3. Unit wiring
• Before attaching the cable to terminal block.
6.1. Electrical requirement
Recommended cable
size (mm2)
TRANSMISSION
POWER REMOTE
SUPPLY CONTROL
]1
]1
Voltage rating
Operating range
POWER
SUPPLY
INDOOR UNIT
INDOOR UNIT
INDOOR UNIT
•When handling PCB, static electricity charged in the body
may cause malfunction of the PCB. Follow the cautions
below:
• Establish a ground for the indoor and outdoor units and
peripheral devices.
• Do not touch terminals of parts and patterns
implemented on PCB.
BREAKER
6.3.1. Power supply cable
230 V
198 - 264 V
Cable type
Remark
1ø 50 Hz
198 - 264 V
2 Cable + ground
22 AWG
LEVEL 4 (NEMA)
LONWORKS
non-polar 2 core,
compatible cable twisted pair solid
core diameter
0.65 mm
Sheathed
Polar 3 core
PVC cable*
Twisted pair
Type245 IEC57
or equivalent
*: Use shielded cable in accordance with local rules for
remote control cable.
20
mm
Earth cable
30
mm
Power supply cable
A. For solid core wiring
(1) To connect the electrical terminal, follow the below
diagram and connect after looping it around the end of the
cable.
(2) Use the specified cables, connect them securely, and
fasten them so that there is no stress placed on the
terminals.
(3) Use an appropriate screwdriver to tighten the terminal
screws. Do not use a screwdriver that is too small,
otherwise, the screw heads may be damaged and prevent
the screws from being properly tightened.
(4) Do not tighten the terminal screws too much, otherwise,
the screws may break.
(5) See the table for the terminal screw tightening torques.
(6) Please do not fix two power supply cables with one screw.
En-9
9373870036_02_IM_en.indd 9
25/2/2552 9:17:32
WARNING
ip
Str
m
5m
•Use ring terminals and tighten the terminal screws to the
specified torques, otherwise, abnormal overheating may
be produced and possibly cause heavy damage inside
the unit.
2
Loop
Screw with
special washer
Screw with
special
washer
Cable end (Loop)
Cable
Cable
Tightening torque
M4 screw
1.2 to 1.8 N·m
(Power supply/L, N, GND)
(12 to 18 kgf·cm)
6.3.2. Transmission and Remote control cable
Cable end
(Loop)
25
mm
Shielded
cable (No film)
Terminal block
35
mm
WARNING
Transmission cable
•When using solid core cables, do not use the ring
terminal. If you use the solid core cables with the ring
terminal, the ring terminal’s pressure bonding may
malfunction and cause the cables to abnormally heat up.
20
B. For strand wiring
(1) Use ring terminals with insulating sleeves as shown in the
figure below to connect to the terminal block.
(2) Securely clamp the ring terminals to the cables using an
appropriate tool so that the cables do not come loose.
(3) Use the specified cables, connect them securely, and
fasten them so that there is no stress placed on the
terminals.
(4) Use an appropriate screwdriver to tighten the terminal
screws. Do not use a screwdriver that is too small,
otherwise, the screw heads may be damaged and prevent
the screws from being properly tightened.
(5) Do not tighten the terminal screws too much, otherwise,
the screws may break.
(6) See the table for the terminal screw tightening torques.
(7) Please do not fix two power supply cables with one screw.
ip
Str
mm
Remote control cable
• Connect remote control and transmission cables as shown
in Fig. B.
• When the two cables are attached.
Fig. B
Screw
m
0m
1
Terminal block
Ring terminal
Cable
Cable of the
same caliber:
OK
Cable of the
different caliber:
NO GOOD
Sleeve
WARNING
Screw with
special washer
Screw with
special
washer
Ring terminal
Cable
Cable
Ring
terminal
•Tighten the terminal screws to the specified torques,
otherwise, abnormal overheating may be produced and
possibly cause heavy damage inside the unit.
Tightening torque
M3.5 screw
0.8 to 1.0 N·m
(Transmission/X1, X2)
(8 to 10 kgf·cm)
(Remote control/Y1, Y2, Y3)
Terminal block
En-10
9373870036_02_IM_en.indd 10
25/2/2552 9:17:33
7. FIELD SETTING
CAUTION
•To peel the film from the lead cable, use a dedicated tool
that will not damage the conductor cable.
•When installing a screw on the terminal block, do not cut
the cable by overtightening the screw. On the other hand,
an undertightened screw can cause faulty contact, which
will lead to a communication failure.
]1
6.4. Connection of wiring
(1) Remove the control box cover and install each connection
cable.
• Refer to the following three items for setting the FIELD
SETTING address. The respective settings are included
below.
(1) IU AD, REF AD SW settings.... This section
(2) Remote control settings......... Refer to the wired or
wireless remote control
manual for detailed setting
information. (Set IU AD,
REF AD SW to 0)
(3) Automatic address settings.... Refer to the indoor unit
manual for detailed setting
information. (Set IU AD,
REF AD SW to 0)
CAUTION
•Be sure to turn OFF the power before performing the
field setting.
Cover box
]1
7.1. Setting the address
Manual address setting method
• The indoor unit address and the refrigerant circuit address
can also be set up through the wireless remote controller
CAUTION
Loosen the screws.
(2 locations)
•Use an insulated screwdriver to set the dip switches.
(2) After wiring is complete, clamp the remote control cable,
transmission cable and power supply cable with binder.
SW SW SW SW
1 2 3 4
Binder (Medium)
(Accessories)
Dip switch
“SET3”
Remote
control cable
Y1: Red
Y2: White
Y3: Black
X1, X2:
Transmission
cable
Binder
(Medium)
(Accessories)
Rotary switch
Example: “0”
Rotary switch
Example: “0”
L, N: Power
supply cable
CAUTION
•When installing a screw on the terminal block, do not cut
the cable by overtightening the screw. On the other hand,
an undertightened screw can cause faulty contact, which
will lead to a communication failure.
(3) Attach the control box cover.
Setting
Setting
range
Indoor unit
address
0–63
Refrigerant
circuit
address
0–99
Type of switch
Setting
example
2
IU AD × 10
IU AD × 1
Setting
example
63
REF AD × 10
REF AD × 1
En-11
9373870036_02_IM_en.indd 11
25/2/2552 9:17:35
(1) Indoor unit address
Rotary switch (IU AD × 1)......Factory setting “0”
Rotary switch (IU AD × 10)....Factory setting “0”
When connecting multiple indoor units to one refrigerant
system, set the address at IU AD SW as shown in the
Table A.
(2) Refrigerant circuit address
Rotary switch (REF AD × 1)......Factory setting “0”
Rotary switch (REF AD × 10)....Factory setting “0”
In the case of multiple refrigerant systems, set REF AD
SW as shown in the Table A for each refrigerant
system.
Set to the same refrigerant circuit address as the outdoor
unit.
]1
7.2. Custom code setting
Selecting the custom code prevents the indoor unit mix-up.
(Fig. B)
(Up to 4 codes can be set.)
Perform the setting for both the indoor unit and the remote
controller.
Fig. B
Confusion
Indoor unit
Remote
controller
Table A
Rotary
Switch
Setting
REF AD SW
×10
×1
0
0
0
1
0
2
0
3
0
4
0
5
0
6
0
7
0
8
0
9
1
0
1
1
1
2
..
..
.
.
Address
Refrigerant
circuit
0
1
2
3
4
5
6
7
8
9
10
11
12
..
.
99
9
Rotary
Switch
Setting
IU AD SW
×10
×1
0
0
0
1
0
2
0
3
0
4
0
5
0
6
0
7
0
8
0
9
1
0
1
1
1
2
..
..
.
.
Address
Indoor
unit
0
1
2
3
4
5
6
7
8
9
10
11
12
..
.
9
63
6
(3) Remote controller address
Rotary switch (RC AD SW)....Factory setting “0”
When connecting multiple indoor units to one standard
wired remote controller, set the address at RC AD SW in
sequence from 0.
Setting
Setting
range
Remote controller
address
0–15
Type of switch
Setting
example
0
Example If 4 indoor units are connected.
Indoor unit
Indoor unit
Indoor unit
RC AD SW
0
RC AD SW
1
RC AD SW
2
RC AD SW
3
B
C
D
Set the DIP SW SET 3 SW1, SW2, referring to the Table B.
SW SW SW SW
1 2 3 4
ON
OFF
Dip switch
“SET 3”
Table B
DIP SW
SET 3 SW1
DIP SW
SET 3 SW2
Custom code
A (Factory setting)
B
C
D
OFF
ON
OFF
ON
OFF
OFF
ON
ON
]1
7.3. Function setting
• FUNCTION SETTING can be performed with the wired or
wireless remote control.
(The remote control is optional equipment)
• Refer to the wired or wireless remote control manual for
detailed setting information. (Set IU AD, REF AD SW to 0)
• Refer to “7.1. Setting the address” for indoor unit address
and refrigerant circuit address settings.
• Turn the power of the indoor unit ON before starting the
setting.
* Turning on the power indoor units initializes EEV, so make
sure the piping air tight test and vacuuming have been
conducted before turning on the power.
* Also check again to make sure no wiring mistakes were
made before turning on the power.
RC AD
Indoor unit
A
D
• Custom code setting for indoor unit
3
Do not set the indoor unit address (IU AD SW) at 64 to 99. It
may result failure.
Code change
B
C
A
Function details
Function
Remote
controller
RC AD SW
Address
0
0
1
1
2
2
3
3
4
4
5
5
6
6
7
7
RC AD SW
Address
8
8
9
9
A
10
B
11
C
12
D
13
E
14
F
15
Filter
indicator
interval
Function
number
11
Setting
number
00
Default
01
Longer
02
Shorter
Default
○
Details
Adjust the filter cleaning interval
notification. If the notification is
too early, change to setting 01. If
the notification is too late, change
to setting 02.
En-12
9373870036_02_IM_en.indd 12
25/2/2552 9:17:36
Filter
indicator
action
Horizontal swing
airflow
direction
Cool air
temperature
trigger
Hot air
temperature
trigger
Auto
restart
External
control
Error
report
target
00
Enable
01
Disable
02
Display
only on
central
remote
control
13
24
30
31
40
○
Enable or disable the filter
indicator. Setting 02 is for use
with a central remote control.
○
00
Default
01
Left half
02
Right half
00
Default
01
Adjust (1)
02
Adjust (2)
00
Default
01
Adjust (1)
02
Adjust (2)
03
Adjust (3)
00
Enable
01
Disable
○
00
Start/Stop
○
01
Emergency
stop
○
○
46
47
00
All
01
Display
only on
central
remote
control
9. CHECK LIST
Pay special attention to the check items below when
installing the indoor unit(s). After installation is complete, be
sure to check the following check items again.
]1
○
Check items
Adjust the horizontal swing airflow
direction.
(For horizontal swing equipped
models)
Adjust the cool air trigger
temperature. To lower the trigger
temperature, use setting 01. To
raise the trigger temperature, use
setting 02.
Adjust the hot air trigger
temperature. To lower the trigger
temperature by 6 degrees C, use
setting 01. To lower the trigger
temperature by 4 degrees C, use
setting 02. To raise the trigger
temperature, use setting 03.
Enable or disable automatic
system restart after a power
outage.
Allow an external controller to
start or stop the system, or to
perform an emergency shutdown.
*If an emergency shutdown is
performed from an external
controller, all refrigerant systems
will be disabled.
Change the target for reporting
errors. Errors can either be
reported in all locations, or only
on the wired remote.
Has the indoor unit
been installed correctly?
Has there been a
check for gas leaks
(refrigerant pipes)?
Has heat insulation
work been completed?
Does water drain easily
from the indoor units?
Is the voltage of the
power source the same
as that indicated on the
label on the indoor unit?
Are the wires and
pipes all connected
completely?
Is the indoor unit
grounded?
Is the connection cable
the specified thickness?
Are the inlets and outlets
free of any obstacles?
After installation is
completed, has the
proper operation
and handling been
explained to the user?
If not performed
correctly
Vibration, noise,
indoor unit may drop
Check
box
No cooling, No heating
Water leakage
Water leakage
No operation, heat
or burn damage
No operation, heat
or burn damage
Short circuit
No operation, heat
or burn damage
No cooling, No heating
8. TEST OPERATION
]1
8.1. Test operation using PCB (Outdoor unit)
• Refer to the Installation Manual for the outdoor unit if the
PCB for the outdoor unit is to be used for the test operation.
8.2. Test operation using remote controller
• Refer to the Installation Manual for the remote control unit to
perform the test operation using the remote control unit.
• When the air conditioner is being test run, the OPERATION
and TIMER indicator lamps flash slowly at the same time.
For details, please refer to the Manual of “IR Receiver Unit” or
“Wired Remote Controller”.
En-13
9373870036_02_IM_en.indd 13
25/2/2552 9:17:37
10. ERROR CODES
If you use a wired type remote control, error codes will appear
on the remote control display. If you use a wireless remote
control, the lamp on the photodetector unit will output error
codes by way of blinking patterns. See the lamp blinking
patterns and error codes in the table below.
]1
Abnormal display
Wired
OPERATION
TIMER
FILTER Remote
indicator
indicator
indicator Controller
lamp (green) lamp (orange) lamp (red) Error code
Abnormal
contents
(1)
(2)
Remote control
abnormal
communication
(1)
(4)
Anomalous
network
communications
(1)
(6)
Abnormal parallel
communication
(3)
(1)
Abnormal power
frequency
(3)
(2)
Abnormal model
information
/ abnormal
EEPROM
accession
(4)
(1)
Abnormal room
temperature
thermistor
(4)
(2)
Abnormal indoor
heat exchanger
temperature
thermistor
(5)
(1)
Abnormal indoor
fan motor
(5)
(3)
Abnormal
drainage
(9)
(15)
Abnormal
outdoor unit
Display mode :0.5s ON / 0.5s OFF
:0.1s ON / 0.1s OFF
( ):Number of flashing
Wired Remote Controller Display
Error code
For details on marking the ERROR CODES, please refer to
the Manual of “IR Receiver Unit” or “Wired Remote
Controller”.
En-14
9373870036_02_IM_en.indd 14
25/2/2552 9:17:39
VRF 系统
室内机组
风管式
安装说明书
只供授权专业维修人员使用。
目录
1. 安全注意事项................................................................. 2
2. 关于机组
2.1. 使用 R410A 制冷剂时的注意事项.................................. 2
2.2. R410A 的专用工具 .........................................................2
2.3. 附件 .................................................................................3
3. 安装工作
3.1. 选择安装位置 .................................................................3
3.2. 安装尺寸 .........................................................................4
3.3. 安装机组 .........................................................................4
4. 管道安装
4.1. 选择管材 .........................................................................5
4.2. 管道要求 .........................................................................6
4.3. 扩口接头(管接头).......................................................6
4.4. 安装绝热材料 .................................................................7
6. 电气接线
6.1. 电气要求 .........................................................................9
6.2. 接线方法 .........................................................................9
6.3. 机组连线 .........................................................................9
6.4. 线路的连接 ..................................................................10
7. 现场设置
7.1. 设置地址 .......................................................................11
7.2. 用户代码设置 ...............................................................12
7.3. 功能设置 .......................................................................12
8. 试运行
8.1. 使用 PCB 进行试运转(室外机)................................12
8.2. 使用遥控器进行试运转.................................................. 12
9. 检查项目表 .................................................................. 13
10. 故障代码 ...................................................................... 13
5. 安装排水软管................................................................. 7
PART NO. 9373870036-02
9373870036-02_IM_SC.indd 1
2009/2/20 16:25:38
1
1. 安全注意事项
2.2. R410A 的专用工具
• 安装之前务必彻底阅读该说明书。
• 该说明书指出的警告和注意事项包含与您的安全密切相关的
重要信息。请务必遵循这些信息。
• 将该说明书与操作手册交给用户。请用户将它们收藏好,以
便日后使用,例如更换机组位置或对机组进行修理。
警告
警告
• 要安装使用 R410A 制冷剂的机组,请使用专供 R410A 使
用而制造的专用工具和管道材料。由于 R410A 制冷剂的压
力约是 R22 的 1.6 倍,未使用专用的管道材料或不当的安
装可能会导致管道破裂或造成人身伤害。另外,还可能会
导致如漏水、电击或火灾等严重事故。
该标志表示如果步骤执行失当,可能会导
致用户死亡或严重伤害。
• 请您的经销商或专业安装人员依照该安装说明书安装机组。
机组安装不适当可能造成严重的事故,例如漏水、电击或
火灾。如果没有依照安装说明书中的说明来安装室内机组,
则制造商不会保用。
工具名称
变更内容
• 未完成所有工作之前请勿打开电源。在工作完成之前打开
电源可能造成严重的事故,例如电击或火灾。
压力表歧管
压力较高,不能使用传统的压力计
测量。为了避免与其它制冷剂错误
混合,每个接口的直径均已更改。
建议使用具有高压力显示范围为
-0.1 至 5.3 MPa 以及低压力显示范
围为 -0.1 至 3.8 MPa 的压力表歧管。
• 如果制冷剂在执行工作时泄漏,请为该区域通风。如果制
冷剂接触火,就会产生有害气体。
• 务必由授权的维修人员按照国家接线标准执行安装工作。
注意
充注软管
为了增加抗压能力,软管材料和尺
寸已变更。
(R410A 的充注接口螺纹直径为 1/2
UNF 每英寸 20 个螺纹。)
真空泵
可以通过安装真空泵适配器使用传
统的真空泵。
确保真空泵油不会回流到系统中。
使用真空吸力能够达到 –100.7 kPa
(5 Torr, –755 mmHg) 的真空泵。
气体泄漏检测器
HFC 制冷剂 R410A 的专用气体泄
漏检测器。
该标志表示,如果步骤执行不当,可能会
导致用户人身伤害或财产损害。
2. 关于机组
1
2.1. 使用 R410A 制冷剂时的注意事项
]
警告
• 请勿让除规定的制冷剂之外的其他物质进入制冷循环。如
果空气进入制冷循环,则其中的压力将变得异常之高,并
且会造成管道破裂。
• 如果制冷剂泄漏,请确保它未超过浓度限制。如果制冷剂
泄漏超过了浓度限制,则可能造成缺氧等事故。
• 请勿触摸从制冷剂管接头等部位泄漏的制冷剂。直接触摸
制冷剂会导致冻伤。
• 如果运行过程中发生制冷剂泄漏,请立即离开建筑物,并对
该区域彻底通风。如果制冷剂接触火,就会产生有害气体。
]
Sc-2
9373870036-02_IM_SC.indd 2
2009/2/20 16:25:38
1
3. 安装工作
2.3. 附件
对于分体式空调,安装地点尤为重要,因为首次安装后,移动
位置非常困难。
警告
• 安装时,请务必使用制造商供应的部件或其他规定部件。
使用非规定部件可能造成严重的事故,例如机组掉落、漏
水、电击或火灾。
• 本机配有以下安装部件。请按照需要使用。
• 请妥善保管安装说明书,并且不要在安装工作完成前丢弃任
何其它附件。
说明
数量
应用
使用说明书
(本书)
1
用于固定接管绝热材料
扎线带(大)
4
扎线带 ( 中等 )
3
3.1. 选择安装位置
请按照以下要求与用户一起决定安装位置。
警告
• 选择能有效支撑室内机重量的安装位置。将机组安装牢固,
以免倾倒或坠落。
注意
1
安装说明书
]1
用于绑定电源和信号
线以及遥控器线
请勿将机组安装在下列区域 :
• 盐含量高的区域,例如海边。这会损坏金属部件,使部件
掉落或使机组漏水。
• 充满矿物油或包含大量溅油或蒸气的区域,例如厨房。这
会损坏塑料部件,使部件掉落或使机组漏水。
• 会产生对设备有负面影响的物质(例如硫磺气体、氯气、
酸或碱)的区域。这会腐蚀铜管和铜焊接合,从而造成制
冷剂泄漏。
• 可能造成易燃气体泄漏、含有悬浮碳纤维或易燃尘埃,或
者如涂料稀释剂或汽油等挥发性易燃物的区域。如果气体
泄漏并沉积在机组周围,可能会造成火灾。
• 动物可能会在机组上排尿或者可能会产生氨的区域。
• 请勿将机组用于特殊用途,例如存放食物、饲养动物、栽
培植物或保存精密装置或艺术品。
这可能降低保存或存放对象的质量。
• 请勿安装在可能泄漏燃烧气体的地方。
接管绝热材料(小)
1
接管绝热材料(大)
用于室内机管道接头
(小管)
用于室内机管道接头
(大管)
1
专用螺母 A
(大法兰)
专用螺母 B
(小法兰)
4
用于将室内机组悬挂在
天花板上
4
用于安装排水软管
排水软管
2
• 请勿将机组安装在靠近热源、蒸汽或易燃气体的地方。
• 将机组安装在排水不会造成任何问题的地方。
• 请在距离电视机和收音机 1 m 以外的地方进行室内机和室
外机、电力接线、信号接线及遥控接线的安装,以免发生
图像失真和声音失真。(然而,即使将上述机组和接线安
装在距电视机和收音机 1 m 以外的地方,根据电波的状况
的不同,声音失真也可能无法避免。)
• 如 10 岁以下的儿童有可能接触到时,请采取适当的预防
措施,使他们无法接触机组。
• 请采取预防措施防止机组坠落。
(1) 将室内机安装在具有足够强度的地方,以便能承受室内机
的重量。
(2) 请勿堵塞进气口和出气口。空气应能吹向整个房间。
(3) 请保留可以维修空调的空间。
(4) 将机组安装在容易连接室内机的地方。
(5) 请在方便安装连接管的地方安装机组。
(6) 请在方便安装排水管的地方安装机组。
(7) 将机组安装在不会将噪音和振动放大的地方。
(8) 应考虑之后的维修等情况,并留出空间。将机组安装在可
以拆卸过滤网的地方。
(9) 请勿在易受阳光直射处安装机组。
用于安装排水软管
软管卡子
2
用于安装排水软管
排水管绝热材料
2
Sc-3
9373870036-02_IM_SC.indd 3
2009/2/20 16:25:39
3.3.1. 安装吊具
]1
3.2. 安装尺寸
距天花板至少 20 mm 处安装。
悬吊螺栓安装示意图。
85 mm
1,050 mm
400 mm
1,000 mm
气流
500 mm
585 mm
20 mm或以上
155 mm
气流
气流
1,080 mm
提供用于检查的检修孔,如下图所示。
切勿在维修空间布置线路或照明设施,否则会妨碍维修。
300 mm
或以上
500 mm
气流
垫圈
(现场供应)
300 mm
或以上
机组
专用螺母 A(大)
(附件)
悬吊螺栓 M10
(现场供应)
气流
吊具
500 mm 或以上
30 mm 或以上
: 检修孔
专用螺母 B(小)
(附件)
: 维修空间
注意
]1
3.3. 安装机组
• 用专用螺母 A 和 B 牢固地拧紧。
警告
• 将空调安装在能够承受至少主机重量 5 倍并且不会将噪音
或振动放大的地方。如果安装位置不够坚固,室内机可能
会坠落,引起人身伤害。
3.3.2. 调平
用下图所示的步骤调整水平度。
注意
• 请在安装机组前确认进气和出气方向。
机组从蒸发器一侧进气,从风扇一侧出气。
水平仪
B
A
( 前面 )
水平仪
B
A
( 侧面 )
Sc-4
9373870036-02_IM_SC.indd 4
2009/2/20 16:25:40
机组有排水口的一侧 A 应稍低于机组的另一侧 B。A 侧与 B 侧
之间应该有 0 至 20 mm 的高度差。
4. 管道安装
注意
3.3.3. 安装风管
按照下图所示的步骤安装风管。
324 mm
862 mm
14 mm
∗ 14 mm
• 要小心注意的是,杂质(油、水等)不会像制冷剂 R410A
型号那样进入管道。另外,存放管道时,通过夹住、捆绑
等牢固密封管口。
• 焊接管道时,务必向里面冲入干燥的氮气。
进气口法兰
]1
4.1. 选择管材
注意
∗ 27 mm
出气口法兰
26 mm
295 mm
851 mm
• 不要使用原有的管道。
• 使用的管道应内外表面清洁,不含在使用过程中可能引起
故障的污染物,例如硫、氧化物、灰尘、切屑、油或水。
• 必须使用无缝铜管。
材料 :经过磷脱氧处理的无缝铜管
残油量最好小于 40 mg/10 m。
∗ 法兰与排水盘之间的距离。
注意
• 为了防止别人触碰机组内部的部件,请务必在进气口和出
气口安装格栅。格栅必须设计为无法用工具拆卸。
• 使用的铜管不能带有压扁、变形或变色的部分(尤其是在
内部表面)。 否则,膨胀阀或毛细管可能会被污染物堵塞。
• 机组外静压如下 :
ARXC36L 机型 :100-200 Pa
ARXC45/60L 机型 :100-250 Pa
• 管道选择不当会降低性能。 由于使用 R410A 的空调会比
使用传统的制冷剂时承受更高的压力,因此需要选择适当
的材料。
• 如果安装了进气管,请小心不要损坏温度传感器(温度传
感器安装在进气口法兰上)。
• 使用 R410A 的铜管厚度如表所示。
• 绝对不要使用厚度不足于表中所示的铜管,即使市场上有售。
• 安装用于空气循环的进气格栅。无法检测到正确的温度。
退火铜管的厚度(R410A)
机组
风管
(现场供应)
出气格栅
(现场供应)
(房间)
进气格栅
(现场供应)
管道外径 [mm (in.)]
厚度 [mm]
6.35 (1/4)
0.80
9.52 (3/8)
0.80
12.70 (1/2)
0.80
15.88 (5/8)
1.00
19.05 (3/4)
1.20
• 请务必在进气口中安装空气过滤网。如果未安装空气过滤
网,热交换器可能被堵塞并降低性能。
Sc-5
9373870036-02_IM_SC.indd 5
2009/2/20 16:25:40
1
4.2. 管道要求
扳手开口宽度
管道外径 [mm (in.)]
扩口螺母的扳手开口
宽度 [mm]
6.35 (1/4)
17
9.52 (3/8)
22
12.70 (1/2)
26
15.88 (5/8)
29
19.05 (3/4)
36
注意
• 有关连接管道长度或不同标高的规格,请参见室外机的安
装说明书。
• 使用带防水热绝缘材料的管道。
注意
• 请在气体和液体管道周围安装绝热材料。否则可能会导致
漏水。
请使用抗热能力超过 120℃的绝热材料。(仅限逆循环型)
此外,如果安装制冷剂管道的地方的湿度可能会超过 70%,
请在制冷剂管道周围安装绝热材料。
如果预计的湿度为 70-80%,请使用 15 mm 或更厚的绝热
材料 ;如果预计的湿度超过 80%,请使用 20 mm 或更厚
的绝热材料。如果使用的绝热材料未达到指定的厚度,可
能会在材料表面形成冷凝。
此外,请使用热传导率为 0.045 W/(m•K) 或以下(20˚C 时)
的绝热材料。
• 用手或弯管器使管道成形。注意请勿将它们压扁。
• 弯曲管道时角度不应超过90˚。
• 如果反复弯曲或拉伸管道,材料将变硬,以至很难再次弯曲
或拉伸。弯曲或拉伸管道的次数不应超过三次。
注意
• 为了防止管道破裂,应避免过度的弯曲。
• 如果管道在同一位置反复弯曲,它会破裂。
4.3.3. 管道连接
用手正确地拧紧扩口螺母时,用单独的扳手按住机身侧沟槽连
接件,然后用扭矩扳手拧紧。
1
4.3. 扩口接头(管接头)
注意
4.3.1. 扩口
• 请使用专用的切管机和 R410A 专用的扩口工具。
(1) 使用切管机将连接管道截成所需的长度。
(2) 向下按住水管以避免切屑进入管道并去除毛刺。
(3) 将扩口螺母(必须使用分别连接到室内机和室外机的扩口
螺母)插入管道,并使用扩口工具执行扩口工序。请使用
专用的 R410A 扩口工具或传统的扩口工具。如果使用其它
扩口螺母,会导致制冷剂泄漏。
(4) 请夹住或用胶带保护管道,防止灰尘、污物或水进入管道。
B
4.3.2. 弯管加工
• 握住扭矩扳手的手柄,使其与管道成 90 度,以便顺利地
拧紧扩口螺母。
• 按照指定的拧紧方法,用扭矩扳手拧紧扩口螺母。 否则长
时间以后,扩口螺母会破裂,导致制冷剂泄漏,如果制冷
剂与火焰接触,还会产生有害气体。
使用两个扳手拧紧。
固定扳手
请检查[L]的扩口是否均匀且
没有破裂或刮伤。
扩口螺母
扭矩扳手
螺
钉模
A
室内机管道
(机身侧)
L
管道
连接管道
管道外径
[mm (in.)]
尺寸 A [mm]
R410A的扩口工具,
离合式
6.35 (1/4)
9.1
9.52 (3/8)
13.2
12.70 (1/2)
0至0.5
注意
0
尺寸 B-0.4 [mm]
16.6
15.88 (5/8)
19.7
19.05 (3/4)
24.0
当使用传统的扩口工具对 R410A 管道进行扩口时,尺寸 A 应
比表中(针对使用 R410A 扩口工具进行扩口)所示的尺寸大约
0.5 mm 以获得指定的扩口。使用厚度测量仪测量尺寸 A。
• 务必要将管道与室内机的接口正确连接。如果没有对齐,
扩口螺母将无法顺利紧固。如果强行旋转扩口螺母,将损
坏螺纹。
• 只有在对连接管道进行连接之前才能从室内机管道上拆除
扩口螺母。
• 请勿在扩口部件上使用矿物油。防止矿物油进入系统,因
为这样会降低机组的寿命。
扩口螺母[mm (in.)]
拧紧扭矩[N·m (kgf·cm)]
直径 6.35 (1/4)
16至18 (160至180)
直径 9.52 (3/8)
32至42 (320至420)
直径 12.70 (1/2)
49至61 (490至610)
直径 15.88 (5/8)
63至75 (630至750)
直径 19.05 (3/4)
90至110 (900至1,100)
Sc-6
9373870036-02_IM_SC.indd 6
2009/2/20 16:25:41
4.4. 安装绝热材料
确保没有空隙
软管卡子(附件)
请在完成制冷剂泄漏检查后安装管接头绝热材料(有关详细信
息,请参见室外机的安装说明书)
。
软 PVC 侧
排水盘
接管绝热材料
(附件)
将该部分用绝热材料包
住。
10~15 mm 排水软管
(附件)
胶粘剂
涂刷
区域
硬 PVC 侧
扎线带(大)
(附件)
绝热材料
接管
(现场供应)
排水管(VP25)
(现场供应)
4mm 或以下
注意
将排水软管绝缘材料缠裹在排水软管连接处的四周。
• 绝热材料与产品之间不得有间隙。
排水软管绝缘材料
(附件)
5. 安装排水软管
排水盘
• 使用普通的硬聚氯乙烯管(VP25)并使用不干胶(聚氯乙烯)
连接,确保其没有泄漏。
• 排水管的安装位置应有至少 1/100 的向下坡度。
• 为防止管子冻结,请根据需要使用绝热材料。
排水软管
100 mm
排水管的位置
139 mm
软管剖开视图
将附带的绝热材料缠在软管卡子上。
确保调整部分位于顶部。
123 mm
371 mm
356 mm
208 mm
108 mm
41 mm
安装排水软管后,检查排水是否顺畅。
主排水口
倾斜角
2.5-5.0 mm
安全排水口
外径
排水管
• 用于主排水口
• 用于安全排水口
32 mm (VP25)
• 本产品有两处排水口。请按照图中所示步骤将排水软管和排
水管连接到各排水口。
将排水软管安装到主排水口和安全排水口
操作步骤
(1) 将附带的排水软管安装在机体的主排水口和安全排水口上。
在图形显示区域内从软管的顶部安装软管卡子。 请用软管夹
箍牢牢地固定。
(2) 用乙稀胶粘剂粘合在现场准备的排水管(PVC 管 VP25)或
管道插槽。(在规线和密封件之前均匀地涂有色胶粘剂)
(3) 检查排水情况。
(4) 安装绝热材料。
(5) 用附带的绝热材料对机体的排水口和卡子部分进行绝热。
正确
不正确
Sc-7
9373870036-02_IM_SC.indd 7
2009/2/20 16:25:41
1 主排水口
在主排水口上靠近室内机处形成一个存水弯。
6. 电气接线
]
机组
H1=100 mm(近似值)
H2=50-100 mm
H2 H1
主排水管
存水弯
2 安全排水口
安全排水口不需要有存水弯。如果将安全排水口连接到主排
水口,则应在主存水弯以下连接。
警告
• 必须由持有证书的人员根据国家或地方法规并按照本说明
书执行电气作业。务必使用机组专用的电路。电源电路供
电不足或不当的电气作业可能会导致如电击或火灾的严重
事故。
• 开始工作前,检查室内机和室外机是否没有通电。
• 使用附带的连接线和电源线,或者制造商指定的线缆。连
接不当、绝缘不充分或者超出了允许的电流限制可能会导
致电击或火灾。
• 对于接线,使用指定类型的电线,将其牢固连接,并确保
电线的外力没有施加到接线端子上。电线连接或紧固不当
可能会导致如端子过热、电击或火灾的严重事故。
• 请勿改装电源线、使用延长线或者使用接线中的任何支线。
连接不当、绝缘不充分或者超出了允许的电流限制可能会
导致电击或火灾。
机组
主排水管
• 将接线板号码与室外机上的连接线颜色相匹配。错误的接
线可能会导致电气部件烧毁。
• 将连接线牢靠地连接到端子板。此外,使用接线座紧固电
线。如果接线内或端部连接不当,可能会导致故障、电击
或火灾。
安全排水管
• 必须用线夹固定连接线的绝缘层。(如果绝缘层未被夹住,
可能会发生漏电。)
• 安装排水管时不得有立管。
• 请勿执行排气操作。
• 在机组上牢固地安装电气盒盖。电气盒盖安装不当可能会
因暴露于灰尘或水而导致如电击或火灾的严重事故。
• 在用于接线的墙壁开孔中安装套管。否则,可能会导致短
路。
凸起
• 安装接地漏电断路器。此外,安装接地漏电断路器,以便
同时切断整个 AC 主电源。否则,可能会导致电击或火灾。
排气
不正确
• 安装接地漏电断路器。
如果未安装接地漏电断路器,可能会导致电击或火灾。
• 必须连接地线。
不当的接地工作可能会导致电击。
凸起
注意
• 必须对排水管进行正确绝热。
• 确保可以正常排水。
• 安装遥控器电线时,要确保不会用手直接触摸到。
• 按照标准进行接线工作,以便空调器可以安全无故障地运
行。
• 将连接电缆牢固地连接在接线板上。不正确的安装可能会
导致火灾。
注意
• 将机组接地。
请勿将地线连接到气体管、水管、避雷针或电话地线。
不适当的接地可能造成电击。
• 请勿将电源线连接到信号线或遥控器接线端,因为这会损
坏该产品。
• 绝不要将电源线和信号线束在一起。将这些线束在一起会
导致错误运行。
Sc-8
9373870036-02_IM_SC.indd 8
2009/2/20 16:25:42
]1
• 操作 PCB 时,机身上的静电可能造成控制 PCB 发生故障。
请遵循下列注意事项 :
6.3. 机组连线
• 将电线连接到接线板之前。
• 对室内和室外机组以及外围设备使用接地线。
6.3.1. 电源线
• 切断电源(断路器)。
• 请触摸室内和室外机组金属部分 10 秒以上,以释放机身
静电。
20
• 请勿触碰接线 PCB 上的部件端子和布线模式。
mm
地线
30
]1
6.1. 电气要求
电缆尺寸推
荐值 (mm2)
电线类型
电源线
2.5
245 IEC57
或相当品
信号线
0.33
LONWORKS
兼容线
聚氯乙烯
外皮电缆 *
0.33
遥控器线
电源线
230 V
198 - 264 V
额定电压
操作范围
mm
A. 对于实芯接线
备注
1ø 50 Hz
198 - 264 V
2 电线 + 地线
22 AWG
LEVEL 4 (NEMA)
非极性双芯双
绞实芯线,直
径 0.65 mm
极性 3 芯
双绞线
(1) 要连接电端子,请将电线在端部结环后根据下图进行连接。
(2) 用指定的电线连接牢固,然后拧紧,保持端子上没有张力。
(3) 使用适当的螺丝刀拧紧端子螺钉。不要使用过小的螺丝刀,
否则,螺钉头可能会被损坏并且无法将螺钉正确拧紧。
(4) 不要过分拧紧端子螺钉,否则螺钉可能会断裂。
(5) 请参见表中的端子螺钉拧紧扭矩。
(6) 请不要用一颗螺丝固定两根电源线。
剥去
25
mm
*: 根据当地规则,对遥控器使用屏蔽电缆。
环
]1
6.2. 接线方法
带特殊垫片的螺钉
( 示例 )
电源
室外机
信号线
电线端部(环)
断路器
电线
电线
电源
电源
信号线
遥控
断路器
电源
电源
电源
电线端部
(环)
接线盒
信号线
遥控
断路器
遥控器
(主)
室内机
室内机
室内机
信号线
带特殊垫片
的螺钉
电源
• 使用实芯电线时,请勿使用环形端子。如果使用带有环形
端子的实芯电线,环形端子的气压粘结可能会发生故障并
导致电线异常发热。
断路器
遥控器
(副)
电源
警告
遥控
遥控器
B. 对于绞合线
(1)
(2)
(3)
(4)
如下图所示,用带绝缘套管的环形端子连接到接线盒。
用适当的工具将环形端子压紧到电线,不要让电线松脱。
用指定的电线连接牢固,然后拧紧,保持端子上没有张力。
使用适当的螺丝刀拧紧端子螺钉。不要使用过小的螺丝刀,
否则,螺钉头可能会被损坏并且无法将螺钉正确拧紧。
(5) 不要过分拧紧端子螺钉,否则螺钉可能会断裂。
(6) 请参见表中的端子螺钉拧紧扭矩。
(7) 请勿对电源线进行分支接线。
Sc-9
9373870036-02_IM_SC.indd 9
2009/2/24 10:34:24
警告
m
剥去
m
10
• 将端子螺钉拧紧到指定的扭矩,否则可能会造成异常过热
并可能造成机组内部严重损坏。
环形端子
套管
拧紧扭矩
M3.5 螺钉
(传输 /X1, X2)
(遥控器 /Y1, Y2, Y3)
带特殊垫片的螺钉
带特殊垫片
的螺钉
注意
环形端子
• 要剥去引线上的绝缘层,请使用不会损坏导线的专用工具。
环形
端子
电线
电线
接线盒
0.8 至 1.0 N · m
(8 至 10 kgf · cm)
• 在接线盒上安装螺钉时,请勿过度拧紧螺钉而折断电线。
同时,过度拧紧的螺钉可能造成错误接触,从而导致通信
故障。
]1
6.4. 线路的连接
(1) 卸下控制箱盖并安装每条连接线。
警告
• 使用环形端子并将端子螺钉拧紧到指定的扭矩,否则可能
会造成异常过热并可能造成机组内部严重损坏。
拧紧扭矩
M4 螺钉
(电源 /L, N, GND)
1.2 至 1.8 N · m
(12 至 18 kgf · cm)
箱盖
6.3.2. 信号线和遥控器线
25
mm
松开螺钉(2 处)
屏蔽电线
(无绝缘层)
35
(2) 接线完成后,用绑扎件夹住遥控器线、信号线和电源线。
mm
绑扎件(中等)
(附件)
信号线
20
遥控器线
Y1: 红色
Y2: 白色
Y3: 黑色
mm
X1, X2:
信号线
绑扎件
(中等)
(附件)
遥控器线
• 如图 B 所示连接遥控和信号线。
• 连接两根电线时。
图B
L, N: 电源线
注意
螺钉
接线盒
电线
相同口径的电
线 :正确
不同口径的电
线 :不正确
• 将螺丝安装在接线盒上时,不要过分拧紧螺丝而将电线剪
断。 另一方面,未充分拧紧的螺丝可能会造成错误的接触,
从而导致通信故障。
(3) 固定控制箱盖。
Sc-10
9373870036-02_IM_SC.indd 10
2009/2/25 13:18:03
7. 现场设置
• 要设置现场设置地址,请参考下列 3 个项目。以下包括了相
应的设置。
(1) IU AD, REF AD SW 设置 ......... 本部分内容
(2) 遥控器设置 ............................... 有关详细的设置信息,请参
阅有线或无线遥控器的说明
书。(将 IU AD, REF AD SW
设为 0)
(3) 自动地址设置 ........................... 有关详细的设置信息,请参
阅室内机的说明书。(将 IU
AD, REF AD SW 设为 0)
(1) 室内机地址
旋转开关 (IU AD × 1).............. 出厂设置“0”
旋转开关 (IU AD × 10)............ 出厂设置“0”
将多台室内机连接到一个制冷剂系统时,请参见表 A 中 IU
AD SW 处的地址。
(2) 制冷剂回路地址
旋转开关 (REF AD × 1).............. 出厂设置“0”
旋转开关 (REF AD × 10)............ 出厂设置“0”
在有多个制冷剂系统的情况下,请按表 A 所示为每个制冷
剂系统设置 REF AD SW。
设置为与室外机相同的制冷剂回路地址。
表A
注意
旋转开关
设置
REF AD SW
× 10 × 1
0
0
0
1
0
2
0
3
0
4
0
5
0
6
0
7
0
8
0
9
1
0
1
1
1
2
..
..
.
.
地址
• 在执行现场设置之前,请确保切断电源。
制冷剂回路
0
1
2
3
4
5
6
7
8
9
10
11
12
..
.
]1
7.1. 设置地址
手动地址设置方法
• 则也可以通过无线遥控器来设置室内机地址和制冷剂地址。
注意
• 请使用绝缘螺丝刀来设置 DIP 开关。
SW SW SW SW
1 2 3 4
Dip 开关
“SET 3”
99
旋转开关
示例 :“0”
室内机
0
1
2
3
4
5
6
7
8
9
10
11
12
..
.
9
63
6
3
请勿在 64 至 99 之间设定室内机地址(IU AD SW)。否则可能
会导致故障。
(3) 遥控器地址
旋转开关 (RC AD SW)............ 出厂设定为“0”
将多台室内机连接到一个标准有线遥控器时,请从 0 开始
顺次设置 RC AD SW 处的地址。
旋转开关
示例 :“0”
设置
设置范围
室内机地址
0–63
制冷剂回路
地址
9
旋转开关
设置
IU AD SW
× 10 × 1
0
0
0
1
0
2
0
3
0
4
0
5
0
6
0
7
0
8
0
9
1
0
1
1
1
2
..
..
.
.
地址
0–99
设置
设置
范围
遥控器地址
0–15
开关类型
设置示例
0
RC AD
开关类型
示例
设置示例
2
IU AD × 10
IU AD × 1
REF AD × 10
REF AD × 1
如果安装了 4 台室内机。
室内机
室内机
室内机
室内机
RC AD SW
0
RC AD SW
1
RC AD SW
2
RC AD SW
3
设置示例
63
遥控器
RC AD SW
地址
0
0
1
1
2
2
3
3
4
4
5
5
6
6
7
7
RC AD SW
地址
8
8
9
9
A
10
B
11
C
12
D
13
E
14
F
15
Sc-11
9373870036-02_IM_SC.indd 11
2009/2/24 10:34:24
]1
]1
7.2. 用户代码设置
7.3. 功能设置
选择用户代码可以防止室内机信号混同。
(图 B)
(可以设置多达 4 个代码)
为室内机和遥控器执行该设置。
• 可以使用有线或无线遥控器执行功能设置。
(遥控器为选购设备)
• 有关详细的设置信息,请参阅有线或无线遥控器的说明书。
(将 IU AD, REF AD SW 设为 0)
• 有关室内机地址和制冷剂回路地址设置,请参阅“7.1 设置地
址”。
• 开始设置之前,请打开室内机的电源。
图B
混同
A
代码变化
C
D
B
D
B
室内机
遥控器
A
C
• 室内机的用户代码设置
参考表 B 设置 DIP SW SET 3 SW1, SW2。
SW SW SW SW
1 2 3 4
* 打开电源时,室内机初始化 EEV,所以请确保在打开电源
之前已执行了管道气密性测试和抽真空作业。
* 打开电源前,请再次检查以确保没有接线错误。
功能详情
功能
功能号码
过滤网指
示器间隔
11
过滤网指
示器操作
ON
OFF
Dip 开关
“SET 3”
水平摆动
气流方向
13
24
表B
A ( 出厂设置 )
DIP SW
SET 3 SW1
DIP SW
SET 3 SW2
用户代码
B
C
D
OFF
ON
OFF
ON
OFF
OFF
ON
ON
冷空气
温度触发
热空气
温度触发
30
31
自动重新
启动
40
外部控制
46
故障报告
对象
47
设置号码
00
默认设置
01
较长
02
较短
00
启用
01
禁用
02
仅在中央遥
控器上显示
00
默认设置
01
左半区
02
右半区
00
默认设置
01
调节 (1)
02
调节 (2)
00
默认设置
01
调节 (1)
02
调节 (2)
03
调节 (3)
00
启用
01
禁用
00
开始 / 停止
01
紧急停止
00
所有
默认
设置
○
说明
调整过滤网清洁间隔通知。如果
通知时间过早,请更改为设置01。
如果通知时间过迟,请更改为
设置02。
○
启用或禁用过滤网指示器。设置
02适用于中央遥控。
○
○
○
○
○
○
仅在中央遥
01
控器上显示
调整水平摇摆气流方向。
(适用于带有水平摇摆功能的
机型)
调节冷空气触发温度。要降低触
发温度,使用设置01。要提高触
发温度,使用设置02。
调节热空气触发温度。要降低触
发温度6摄氏度,使用设置01。
要降低触发温度4摄氏度,使用
设置02。要提高触发温度,使用
设置03。
电源中断后,启用或禁用自动系
统重新启动。
允许外部控制器启动或停止系
统,或者执行紧急关机。
* 如果从外部控制器执行紧急关
机,将禁用所有制冷剂系统。
更改报告故障的对象。可以在所
有位置报告故障,也可以只在有
线遥控器上报告故障。
8. 试运行
8.1. 使用 PCB 进行试运转(室外机)
• 如果使用室外机的 PCB 来进行试运转,请参考本安装说明书
了解室外机。
8.2. 使用遥控器进行试运转
• 要使用无线遥控器来进行试运转,请参考遥控器的安装说明书。
• 对空调器进行试运转时,运转和定时器指示灯同时缓慢地闪烁。
详情请参阅“IR 接收器”或“遥控器(有线式)”的安装说明书。
Sc-12
9373870036-02_IM_SC.indd 12
2009/2/20 16:25:44
有线遥控器显示
9. 检查项目表
故障代码
安装室内机(组)时,请特别注意以下的检查项目。安装完成
后,请确保再次检查以下的检查项目。
]1
检查项目
正确地安装了室内机了
吗?
已检查气体泄漏(制冷
剂管道)了吗?
已完成绝热工作了吗?
室内机组排水容易吗?
电源电压与室内机标签
上显示的相同吗?
电线和管道全都连接正
确吗?
室内机接地了吗?
连接电缆具有规定的粗
细吗?
保持进口和出口无阻塞
物了吗?
安装完成后,向用户说明
正确的操作和处理了吗?
如果未正确执行
振动,噪音,室内机可能
掉落
检查框
无制冷,无制热
有关指示灯闪烁的详细标记方法,请参阅“IR 接收器”或“遥
控器(有线式)”的安装说明书。
漏水
漏水
不运转,发热或烧坏
不运转,发热或烧坏
短路
不运转,发热或烧坏
无制冷,无制热
10. 故障代码
如果您使用有线型遥控器,则故障代码将显示在遥控器的显示
屏上。如果您使用无线遥控器,机组上的指示灯将通过各种闪
烁的组合输出故障代码。请参阅下表中的指示灯闪烁组合和故
障代码。
]1
故障显示
有线遥
运转指示 定时器指示 过滤网指示 控器故
灯(绿色) 灯(橙色) 灯(红色) 障代码
故障内容
(1)
(2)
遥控器通信故障
(1)
(4)
网络通信故障
(1)
(6)
并行通信故障
(3)
(1)
电源频率异常
(3)
(2)
型号信息异
常 /EEPROM
存取故障
(4)
(1)
室温热敏电
阻故障
(4)
(2)
室内机热交换器
热敏电阻故障
(5)
(1)
室内机风扇故障
(5)
(3)
排水异常
(9)
(15)
室外机故障
显示模式
: 亮 0.5 秒/灭 0.5 秒
: 亮 0.1 秒/灭 0.1 秒
( ) : 闪烁次数
Sc-13
9373870036-02_IM_SC.indd 13
2009/2/20 16:25:44
9373870036-02_IM_SC.indd 14
2009/2/20 16:25:45
English
VRF System
INDOOR UNIT
Duct Type
INSTALLATION MANUAL
For authorized service personnel only.
Contents
1. SAFETY PRECAUTIONS.............................................. 2
2. ABOUT THE UNIT
2.1. Precautions for using R410A refrigerant....................2
2.2. Special tool for R410A............................................. 2
2.3. Accessories............................................................. 2
3. INSTALLATION WORK
3.1. Selecting an installation location............................. 3
3.2. Installation dimension.............................................. 4
3.3. Installation the unit.................................................. 4
4. PIPE INSTALLATION
4.1. Selecting the pipe material...................................... 5
4.2. Pipe requirement..................................................... 6
4.3. Flare connection (pipe connection)......................... 6
4.4. Installing heat insulation.......................................... 9
5. Installing drain pipes.......................................... 9
6. ELECTRICAL WIRING
6.1. Electrical requirement........................................... 11
6.2. Wiring method....................................................... 11
6.3. Unit wiring............................................................. 11
6.4. Connection of wiring ............................................ 13
6.5. Air flow changing................................................... 13
7. FIELD SETTING
7.1. Setting the address............................................... 14
7.2. Custom code setting............................................. 15
7.3. Function setting..................................................... 15
8. TEST OPERATION
8.1. Test operation using PCB (Outdoor unit).............. 15
8.2. Test operation using remote controller.....................15
9. CHECK LIST................................................................ 16
10. ERROR CODES.......................................................... 16
PART NO. 9365748077-02
9365748077-02_IM_en.indd 1
2/23/2009 10:03:20 AM
1
1. SAFETY PRECAUTIONS
2.2. Special tool for R410A
• Be sure to read this Manual thoroughly before installation.
• The warnings and precautions indicated in this Manual
contain important information pertaining to your safety. Be
sure to observe them.
• Hand this Manual, together with the Operating Manual, to the
customer. Request the customer to keep them on hand for
future use, such as for relocating or repairing the unit.
WARNING
•To install a unit that uses R410A refrigerant, use dedicated
tools and piping materials that have been manufactured
specifically for R410A use. Because the pressure of
R410A refrigerant is approximately 1.6 times higher
than the R22, failure to use dedicated piping material
or improper installation can cause rupture or injury.
Furthermore, it can cause serious accidents such as
water leakage, electric shock, or fire.
This mark indicates procedures which, if
WARNING improperly performed, might lead to the
death or serious injury of the user.
•Request your dealer or a professional installer to install
the indoor unit in accordance with this Installation Manual.
An improperly installed unit can cause serious accidents
such as water leakage, electric shock, or fire. If the
indoor unit is installed in disregard of the instructions in
the Installation Manual, it will void the manufacturer’s
warranty.
Tool name
Changes
Gauge manifold
The pressure in the refrigerant
system is extremely high and cannot be measured with a conventional gauge. To prevent erroneous
mixing of other refrigerants, the
diameter of each port has been
changed. It is recommended to
use a gauge manifold with a high
pressure display range of –0.1 to
5.3 MPa and a low pressure display
range of –0.1 to 3.8 MPa.
Charging hose
To increase pressure resistance, the
hose material and base size were
changed.
(The charging port thread diameter
for R410A is 1/2 UNF 20 threads per
inch.)
Vacuum pump
A conventional vacuum pump can be
used by installing a vacuum pump
adapter.
Be sure that the pump oil does
not backflow into the system. Use
one capable for vacuum suction of
–100.7 kPa (5 Torr, –755 mmHg).
Gas leakage detector
Special gas leakage detector for
R410A refrigerant.
•Do not turn ON the power until all work has been
completed. Turning ON the power before the work is
completed can cause serious accidents such as electric
shock or fire.
•If refrigerant leaks while work is being carried out,
ventilate the area. If the refrigerant comes in contact with
a flame, it produces a toxic gas.
•Installation work must be performed in accordance with
national wiring standards by authorized personnel only.
CAUTION
This mark indicates procedures which,
if improperly performed, might possibly
result in personal harm to the user, or
damage to property.
2. ABOUT THE UNIT
1
2.1. Precautions for using R410A refrigerant
WARNING
]1
2.3. Accessories
WARNING
•Do not introduce any substance other than the prescribed
refrigerant into the refrigeration cycle. If air enters the
refrigeration cycle, the pressure in the refrigeration cycle
will become abnormally high and cause the piping to
rupture.
•For installation purposes, be sure to use the parts
supplied by the manufacturer or other prescribed parts.
The use of non-prescribed parts can cause serious
accidents such as the unit falling, water leakage, electric
shock, or fire.
•If there is a refrigerant leak, make sure that it does not
exceed the concentration limit. If a refrigerant leak
exceeds the concentration limit, it can lead to accidents
such as oxygen starvation.
• The following installation parts are furnished. Use them as
required.
• Keep the Installation Manual in a safe place and do not
discard any other accessories until the installation work has
been completed.
•Do not touch refrigerant that has leaked from the
refrigerant pipe connections or other area. Touching the
refrigerant directly can cause frostbite.
•If a refrigerant leak occurs during operation, immediately
vacate the premises and thoroughly ventilate the area. If
the refrigerant comes in contact with a flame, it produces
a toxic gas.
En-2
9365748077-02_IM_en.indd 2
2/23/2009 10:03:20 AM
t
Name and Shape
Q’ty
Application
Operating Manual
3. INSTALLATION WORK
Especially, the installation place is very important for the split
type air conditioner because it is very difficult to move from
place to place after the first installation.
1
]1
Installation Manual
(This book)
1
Binder (Large)
4
Binder (Medium)
3
Coupler heat insulation
(Small)
Coupler heat insulation
(Large)
1
1
Relay wire
1
Special nut A
(Large flange)
Special nut B
(Small flange)
4
Decide the mounting position together with the customer as
follows.
For fixing the
connection pipe
(Large and Small)
For power supply and
transmission and
remote control cable
binding
For indoor side pipe
joint (Small)
For indoor side pipe
joint (Large)
For switching
static pressure
For suspending the
indoor unit from ceiling
4
Hose Band
(Large)
Hose Band
(Small)
CAUTION
Do not install the indoor unit in the following areas:
•Area with high salt content, such as at the seaside. It will
deteriorate metal parts, causing the parts to fall or the
unit to leak water.
•Area filled with mineral oil or containing a large amount
of splashed oil or steam, such as a kitchen. It will
deteriorate plastic parts, causing the parts to fall or the
unit to leak water.
•Area that generates substances that adversely affect the
equipment, such as sulfuric gas, chlorine gas, acid, or
alkali. It will cause the copper pipes and brazed joints to
corrode, which can cause refrigerant leakage.
•Area that can cause combustible gas to leak, contains
suspended carbon fibers or flammable dust, or volatile
inflammables such as paint thinner or gasoline. If gas
leaks and settles around the unit, it can cause a fire.
•Area where animals may urinate on the unit or ammonia
may be generated.
•Do not use the unit for special purposes, such as storing
food, raising animals, growing plants, or preserving
precision devices or art objects.
It can degrade the quality of the preserved or stored
objects.
•Do not install the unit near a source of heat, steam, or
flammable gas.
8
Drain hose
(Small)
WARNING
•Select installation locations that can properly support the
weight of the indoor unit. Install the units securely so that
they do not topple or fall.
•Do not install where there is the danger of combustible
gas leakage.
Washer
Drain hose
(Large)
3.1. Selecting an installation location
1
1
1
1
Drain hose insulation
2
For installing drain pipe
(For main drain port)
For installing drain pipe
(For safety drain port)
For installing drain
hose (Large)
For installing drain
hose (Small)
For installing drain
hose
•Install the unit where drainage does not cause any
trouble.
•Install the indoor unit, outdoor unit, power supply cable,
transmission cable, and remote control cable at least 1 m
away from a television or radio receivers. The purpose of
this is to prevent TV reception interference or radio noise.
(Even if they are installed more than 1 m apart, you could
still receive noise under some signal conditions.)
•If children under 10 years old may approach the unit,
take preventive measures so that they cannot reach the
unit.
•Take precautions to prevent the unit from falling.
(1) Install the indoor unit on a place having a sufficient
strength so that it withstands against the weight of the
indoor unit.
(2) The inlet and outlet ports should not be obstructed; the air
should be able to blow all over the room.
(3) Leave the space required to service the air conditioner.
(4) Install the unit where connection to the outdoor unit is
easy.
(5) Install the unit where the connection pipe can be easily
installed.
En-3
9365748077-02_IM_en.indd 3
2/23/2009 10:03:21 AM
(6) Install the unit where the drain pipe can be easily installed.
(7) Install the unit where noise and vibrations are not
amplified.
(8) Take servicing, etc., into consideration and leave the
spaces. Also install the unit where the filter can be
removed.
(9) Do not install the unit where it will be exposed to direct
sunlight.
3.3.1. Conveyance method
Packing hardware (4 pieces)
]1
3.2. Installation dimension
Provide a service hole for inspection purposes as shown
below.
Do not place any wiring or illumination in the service space,
as they will impede service.
: Service hole
: Service space
300 mm
890 mm or more
AIR
200 mm or more
Installation Dimensions 1
Unit
Leave the packing materials on until the unit is at the
installation site.
Remove the packing hardware and dispose of it.
3.3.2. Installing hangers
Suspend the indoor unit by referring to the following figures.
AIR
400 mm or more
If the service space shown in Fig. INSTALLATION DIMENSIONS 1 is unavailable, provide a 900 mm service space at
either the left or right side of the unit as shown below. Do not
place any wiring or illumination in this space.
450 mm
68 mm
AIR
Inlet port
700 mm
655 mm
30 mm or more
1,550 mm
1,410 mm
Installation Dimensions 2
AIR
900 mm or more
900 mm or more
]1
3.3. Installation the unit
Hanging bolt M10
(Field supply)
Outlet port
AIR
Special nut A
(Accessories)
Washer
(Accessories)
WARNING
•Install the air conditioner in a location which can
withstand a load of at least five times the weight of the
main unit and which will not amplify sound or vibration. If
the installation location is not strong enough, the indoor
unit may fall and cause injuries.
Hanger
Special nut B
(Accessories)
1
CAUTION
•Confirm the directions of the air intake and outlet before
installing the unit.
The unit takes in air from the evaporator side, and expels
it from the fan side.
CAUTION
•Fasten the unit securely with special nuts A and B.
En-4
9365748077-02_IM_en.indd 4
2/23/2009 10:03:21 AM
3.3.3. Leveling
•Install the air inlet grille for air circulation. The correct
temperature can not be detected.
Use the procedure in the following figure to adjust the
levelness.
Level meter
Unit
Duct
(Field supply)
B
Outlet Grille
(Field supply)
A
Inlet Grille
(Field supply)
(Room)
(Front)
4. PIPE INSTALLATION
Level meter
]
CAUTION
B
•Be more careful that foreign matter (oil, water, etc.) does
not enter the piping than with refrigerant R410A models.
Also, when storing the piping, securely seal the openings
by pinching, taping, etc.
A
•While welding the pipes, be sure to blow dry nitrogen gas
through them.
]1
4.1. Selecting the pipe material
(Side)
The side of the unit that holds the drain port A should be
slightly lower than the opposite side of the unit B. The slant
should allow from 0 to 20 mm of difference between A and B.
3.3.4. Mounting the duct
Follow the procedure in the following figure to install the ducts.
* 20 mm 370 mm 15 mm
1,251 mm
Inlet port flange
CAUTION
•Do not use existing pipes.
•Use pipes that have clean external and internal sides
without any contamination which may cause trouble
during use, such as sulfur, oxide, dust, cutting waste, oil,
or water.
•It is necessary to use seamless copper pipes.
Material : Phosphor deoxidized seamless copper pipes
It is desirable that the amount of residual oil is less than
40 mg/10 m.
•Do not use copper pipes that have a collapsed,
deformed, or discolored portion (especially on the interior
surface). Otherwise, the expansion valve or capillary tube
may become blocked with contaminants.
15 mm
35 mm
* 25 mm
75 mm Outlet port flange
7 × 150 pitch=1,050 mm
1,199 mm
350 mm 2 × 160 pitch=320 mm
* Spacing between flange and drain pan.
CAUTION
•To prevent people from touching the parts inside the unit,
be sure to install grilles on the inlet and outlet ports. The
grilles must be designed in such a way that cannot be
removed without tools.
•Set the external static pressure between 100 and 300
Pa.
•If an intake duct is installed, take care not to damage the
temperature sensor (the temperature sensor is attached
to the intake port flange).
•Improper pipe selection will degrade performance. As an
air conditioner using R410A incurs pressure higher than
when using conventional refrigerant, it is necessary to
choose adequate materials.
• Thicknesses of copper pipes used with R410A are as shown
in the table.
• Never use copper pipes thinner than those indicated in the
table even if they are available on the market.
Thicknesses of Annealed Copper Pipes (R410A)
Pipe outside diameter [mm (in.)]
Thickness [mm]
6.35 (1/4)
0.80
9.52 (3/8)
0.80
12.70 (1/2)
0.80
15.88 (5/8)
1.00
19.05 (3/4)
1.20
En-5
9365748077-02_IM_en.indd 5
2/23/2009 10:03:21 AM
Width across
flats
1
4.2. Pipe requirement
CAUTION
•Refer to the Installation Manual of the outdoor unit
for description of the length of connecting pipe or for
difference of its elevation.
• Use pipe with water-resistant heat insulation.
Width across flats
of Flare nut [mm]
6.35 (1/4)
17
9.52 (3/8)
22
12.70 (1/2)
26
15.88 (5/8)
29
19.05 (3/4)
36
4.3.2. Bending pipes
CAUTION
•Install heat insulation around both the gas and liquid
pipes. Failure to do so may cause water leaks.
Use heat insulation with heat resistance above 120 °C.
(Reverse cycle model only)
In addition, if the humidity level at the installation location
of the refrigerant piping is expected to exceed 70 %,
install heat insulation around the refrigerant piping.
If the expected humidity level is 70-80 %, use heat
insulation that is 15 mm or thicker and if the expected
humidity exceeds 80 %, use heat insulation that is 20
mm or thicker. If heat insulation is used that is not as
thick as specified, condensation may form on the surface
of the insulation.
In addition, use heat insulation with heat conductivity of
0.045 W/(m·K) or less (at 20 °C).
1
4.3. Flare connection (pipe connection)
• The pipes are shaped by your hands or pipe bender. Be
careful not to collapse them.
• Do not bend the pipes in an angle more than 90°.
• When pipes are repeatedly bend or stretched, the material will
harden, making it difficult to bend or stretch them any more.
Do not bend or stretch the pipes more than three times.
CAUTION
•To prevent breaking of the pipe, avoid sharp bends.
•If the pipe is bent repeatedly at the same place, it will
break.
4.3.3. Pipe connection
• The gas and liquid pipes connections must be brazed.
• Be sure to braze them before performing any wiring work or
installing the drain pipe.
Outer diameter of pipe
4.3.1. Flaring
• Use special pipe cutter and flare tool exclusive for R410A.
(1) Cut the connection pipe to the necessary length with a
pipe cutter.
(2) Hold the pipe downward so that cuttings will not enter the
pipe and remove any burrs.
(3) Insert the flare nut (always use the flare nut attached to
the indoor and outdoor units respectively) onto the pipe
and perform the flare processing with a flare tool. Use the
special R410A flare tool, or the conventional flare tool.
Leakage of refrigerant may result if other flare nuts are
used.
(4) Protect the pipes by pinching them or with tape to prevent
dust, dirt, or water from entering the pipes.
B
Pipe outside
diameter [mm (in.)]
Liquid pipe
12.70 mm
Gas pipe
25.40 mm
Rear Panel
Control Box
Connection pipe
(Gas)
Check if [L] is flared uniformly
and is not cracked or scratched.
Die
A
L
Pipe
Pipe outside
diameter
[mm (in.)]
Dimension A [mm]
Flare tool for R410A,
clutch type
Maintenance Panel
Safety drain pan
0
Dimension B-0.4
[mm]
6.35 (1/4)
9.1
9.52 (3/8)
13.2
12.70 (1/2)
0 to 0.5
Connection pipe
(Liquid)
16.6
15.88 (5/8)
19.7
19.05 (3/4)
24.0
When using conventional flare tools to flare R410A pipes,
the dimension A should be approximately 0.5 mm more
than indicated in the table (for flaring with R410A flare tools)
to achieve the specified flaring. Use a thickness gauge to
measure the dimension A.
When the flare nut is tightened properly by your hand,
hold the body side coupling with a separate spanner, then
tighten with a torque wrench.
CAUTION
•Hold the torque wrench at its grip, keeping it in the right
angle with the pipe, in order to tighten the flare nut
correctly.
•Tighten the flare nuts with a torque wrench using the
specified tightening method. Otherwise, the flare nuts
could break after a prolonged period, causing refrigerant
to leak and generate a hazardous gas if the refrigerant
comes into contact with a flame.
En-6
9365748077-02_IM_en.indd 6
2/23/2009 10:03:22 AM
Tighten with two wrenches.
Holding wrench
Torque wrench
Flare nut
Indoor unit pipe
(Body side)
Connection pipe
CAUTION
•Be sure to apply the pipe against the port on the indoor
unit and the outdoor unit correctly. If the centering is
improper, the flare nut cannot be tightened smoothly. If the
flare nut is forced to turn, the threads will be damaged.
•Do not remove the flare nut from the indoor unit pipe until
immediately before connecting the connection pipe.
•Do not use mineral oil on flared part. Prevent mineral
oil from getting into the system as this would reduce the
lifetime of the units.
Flare nut [mm (in.)]
Tightening torque [N·m (kgf·cm)]
6.35 (1/4) dia.
16 to 18 (160 to 180)
9.52 (3/8) dia.
32 to 42 (320 to 420)
12.70 (1/2) dia.
49 to 61 (490 to 610)
15.88 (5/8) dia.
63 to 75 (630 to 750)
19.05 (3/4) dia.
90 to 110 (900 to 1,100)
1
En-7
9365748077-02_IM_en.indd 7
2/23/2009 10:03:22 AM
WARNING
•Be sure to use wet cloth, etc., to protect the pipe rubber, pipe heat insulation, and the heat insulation of the safety drain pan
as shown below. Because these parts are extremely flammable, they can cause a fire if they are not properly protected.
•The heat exchanger contains a thermistor.
Do not expose the thermistor to the flame.
Protect these areas with wet cloth, etc.
Pipe heat insulation
Pipe rubber
Completely cover the pipe
rubber and pipe heat insulation
with wet cloth, etc., to prevent
them from burning.
Brazing
Pipe rubber
Pipe heat insulation
•Do not expose the unit (control box, rear panel, maintenance panel, etc.) and the inlet grille to the flame. The exposure of
these parts to the flame will adversely affect their appearance and functions or cause a fire.
CAUTION
•If air or another type of refrigerant enters the refrigeration cycle,
the internal pressure in the refrigeration cycle will become
abnormally high and prevent the unit from exerting its full
performance.
•Apply nitrogen gas while brazing the pipes. Nitrogen gas pressure:
0.02 MPa (= pressure felt sufficiently on the back of your hand)
Cap
Pressure regulating valve
Nitrogen gas
Brazing area
•If a pipe is brazed without applying nitrogen gas, it will create an oxidation film. This can degrade performance or damage the
parts in the unit (such as the compressor or valves).
•Do not use flux to braze pipes. If the flux is the chlorine type, it will cause the pipes to corrode. Furthermore, if the flux
contains fluoride, it will adversely affect the refrigerant pipe system such as by degrading the refrigerant oil.
•For brazing material, use phosphor copper that does not require flux.
En-8
9365748077-02_IM_en.indd 8
2/23/2009 10:03:22 AM
1
4.4. Installing heat insulation
• Install the coupler heat insulation after completing the
refrigerant leak check (for details, refer to the Installation
Manual for the outdoor unit).
• There should be no gaps between the insulation and the
product.
No gap
Binder (Large)
(Accessories)
Coupler heat
insulation (Large)
(Accessories)
No gap
Coupler heat
insulation (Small)
(Accessories)
Binder (Large)
(Accessories)
• This product has drain ports in two locations. Follow the
procedure in the figure to connect drain hose and drain
pipes to each of them.
INSTALL THE DRAIN HOSE TO THE MAIN AND SAFETY
DRAIN PORT
Working procedure
(1) Install the attached drain hose to the main and safety
drain port of the body. Install the hose band from the top
of the hose within the graphic display area. Secure firmly
with the hose band.
(2) Use vinyl adhesive agent to glue the drain piping (PVC
pipe VP25) which is prepared on site or piping socket.
(Apply color adhesive agent evenly until the gauge line
and seal)
(3) Check the drainage.
(4) Install the heat insulation.
(5) Use the attached heat insulation to insulate the drain port
and band parts of the body.
Drain hose
For main drain port
(Large)
Drain hose
For safety drain port
(Small)
5. Installing drain pipes
Accessories
Hose band Drain hose
(Large)
insulation
Hose band Drain hose
(Small)
insulation
Ensure there is no space
• Use general hard polyvinyl chloride pipe (VP25) and
connect it with adhesive (polyvinyl chloride) so that there is
no leakage.
• The position of the installed drain pipe should have a
downward gradient of 1/100 or more.
• To prevent the pipe from freezing, use a heat insulation
material as needed.
Hose Band
(Accessories)
Soft PVC side
Drain pan
Position of drain piping
10~15mm
200 mm
Hard PVC side
Drain hose
(Accessories)
Applying
area of
adhesive
427 mm
Joint pipe
(Field supply)
Drain pipe (VP25)
(Field supply)
4 mm or less
Wrap the Drain hose insulation around the drain hose
connection.
Safety drain port
Drain hose insulation
(Accessories)
40 mm
Drain pan
100mm
403 mm
Drain hose
Hose opening view
Wind the attached heat insulation
around the hose band. Make sure
the alignment is on top.
Drain port
Drain pipe
• For main drain port
• For safety drain port
O.D.
32 mm (VP25)
En-9
9365748077-02_IM_en.indd 9
2/23/2009 10:03:23 AM
After installing the Drain hose, check if the drainage is
smooth.
6. ELECTRICAL WIRING
]
WARNING
Downward
gradient
2.5- 5.0mm
•Electrical work must be performed in accordance with this
Manual by a person certified under the national or regional
regulations. Be sure to use a dedicated circuit for the unit.
An insufficient power supply circuit or improperly
performed electrical work can cause serious accidents
such as electric shock or fire.
•Before starting work, check that power is not being
supplied to the indoor unit and outdoor unit.
NO GOOD
OK
INSTALL THE DRAIN PIPE
1 Main drain
On the main drain, provide one trap near the indoor unit.
Unit
H1=100 mm (Approx.)
H2=50-100 mm
H1
Drain pipe
H2
Trap
2 Safety drain
There is no need to provide a trap for the safety drain. If
the safety drain is connected to the main drain, make the
connection below the main trap.
Unit
Main
•For wiring, use the prescribed type of cables, connect
them securely, making sure that there are no external
forces of the cables applied to the terminal connections.
Improperly connected or secured cables can cause
serious accidents such as overheating the terminals,
electric shock, or fire.
•Do not modify the power cables, use extension cables,
or use any branches in the wiring. Improper connections,
insufficient insulation, or exceeding the allowable current
can cause electric shock or fire.
•Match the terminal board numbers and connection cable
colors with those of the outdoor unit. Erroneous wiring
may cause burning of the electric parts.
•Securely connect the connection cables to the terminal
board. In addition, secure the cables with wiring holders.
Improper connections, either in the wiring or at the ends of
the wiring, can cause a malfunction, electric shock, or fire.
•Always fasten the outside covering of the connection
cable with the cable clamp. (If the insulator is chafed,
electric leakage may occur.)
•Securely install the electrical box cover on the unit.
An improperly installed electrical box cover can cause
serious accidents such as electric shock or fire through
exposure to dust or water.
Drain pipe
Safety
•Use the included connection cables and power cables
or ones specified by the manufacturer. Improper
connections, insufficient insulation, or exceeding the
allowable current can cause electric shock or fire.
• Make sure that drain pipe is installed without rises.
• Do not perform air bleeding.
Rise
Air bleeding
Rise
NO GOOD
CAUTION
•Be sure to properly insulate the drain pipes.
•Install sleeves into any holes made in the walls for wiring.
Otherwise, a short circuit could result.
•Install a ground leakage breaker. In addition, install the
ground leakage breaker so that the entire AC main power
supply is cut off at the same time. Otherwise, electric
shock or fire could result.
•Install a ground leakage breaker.
If a ground leakage breaker is not installed, it may cause
electric shock or fire.
•Always connect the ground cable.
Improper grounding work can cause electric shocks.
•Install the remote control cables so as not to be direct
touched with your hand.
•Perform wiring work in accordance with standards so that
the air conditioner can be operated safely and positively.
•Connect the connection cable firmly to the terminal
board. Imperfect installation may cause a fire.
•Make sure the drain water is properly drained.
En-10
9365748077-02_IM_en.indd 10
2/23/2009 10:03:23 AM
0
1
CAUTION
•Ground the unit.
Do not connect the ground cable to a gas pipe, water
pipe, lightning rod, or a telephone ground cable.
Improper grounding may cause electric shock.
]
6.2. Wiring method
(EXAMPLE)
POWER SUPPLY
OUTDOOR UNIT
TRANSMISSION
•Do not connect power supply cables to the transmission
or remote control terminals, as this will damage the
product.
POWER SUPPLY
•Never bundle the power supply cable and transmission
cable together. Bundling these cables together will cause
miss operation.
BREAKER
• Touch metal part of the indoor and outdoor units for
more than 10 seconds to discharge static electricity
charged in the body.
Power
supply cable
2.5
Transmission
cable
0.33
Remote
control
cable
0.33
BREAKER
POWER SUPPLY
REMOTE
CONTROL UNIT
(MASTER)
REMOTE
CONTROL UNIT
(SLAVE)
POWER
SUPPLY
REMOTE
CONTROL UNIT
6.3. Unit wiring
• Before attaching the cable to terminal block.
6.1. Electrical requirement
Recommended cable
size (mm2)
POWER
SUPPLY
BREAKER
TRANSMISSION
POWER REMOTE
SUPPLY CONTROL
]1
1
Voltage rating
Operating range
TRANSMISSION
POWER REMOTE
SUPPLY CONTROL
TRANSMISSION
POWER REMOTE
SUPPLY CONTROL
• Cut power (breaker) off.
INDOOR UNIT
INDOOR UNIT
INDOOR UNIT
•When handling PCB, static electricity charged in the body
may cause malfunction of the PCB. Follow the cautions
below:
• Establish a ground for the indoor and outdoor units and
peripheral devices.
• Do not touch terminals of parts and patterns
implemented on PCB.
BREAKER
6.3.1. Power supply cable
230 V
198 - 264 V
25
Cable type
Remark
1ø 50 Hz
198 - 264 V
2 Cable + ground
22 AWG
LEVEL 4 (NEMA)
LONWORKS
non-polar 2 core,
compatible cable twisted pair solid
core diameter
0.65 mm
Type245 IEC57
or equivalent
Sheathed
PVC cable*
Polar 3 core
Twisted pair
*: Use shielded cable in accordance with local rules for
remote control cable.
mm
Earth cable
35
mm
Power supply cable
A. For solid core wiring
(1) To connect the electrical terminal, follow the below
diagram and connect after looping it around the end of the
cable.
(2) Use the specified cables, connect them securely, and
fasten them so that there is no stress placed on the
terminals.
(3) Use an appropriate screwdriver to tighten the terminal
screws. Do not use a screwdriver that is too small,
otherwise, the screw heads may be damaged and prevent
the screws from being properly tightened.
(4) Do not tighten the terminal screws too much, otherwise,
the screws may break.
(5) See the table for the terminal screw tightening torques.
(6) Please do not fix two power supply cables with one screw.
En-11
9365748077-02_IM_en.indd 11
2/23/2009 10:03:23 AM
WARNING
ip
Str
m
5m
•Use ring terminals and tighten the terminal screws to the
specified torques, otherwise, abnormal overheating may
be produced and possibly cause heavy damage inside
the unit.
2
Loop
Screw with
special washer
Screw with
special
washer
Tightening torque
M4 screw
1.2 to 1.8 N·m
(Power supply/L, N, GND)
(12 to 18 kgf·cm)
6.3.2. Transmission and Remote control cable
Cable end (Loop)
Cable
Cable
Cable end
(Loop)
20
mm
Terminal block
Shielded
cable (No film)
30
WARNING
mm
Transmission cable
•When using solid core cables, do not use the ring
terminal. If you use the solid core cables with the ring
terminal, the ring terminal’s pressure bonding may
malfunction and cause the cables to abnormally heat up.
20
mm
B. For strand wiring
(1) Use ring terminals with insulating sleeves as shown in the
figure below to connect to the terminal block.
(2) Securely clamp the ring terminals to the cables using an
appropriate tool so that the cables do not come loose.
(3) Use the specified cables, connect them securely, and
fasten them so that there is no stress placed on the
terminals.
(4) Use an appropriate screwdriver to tighten the terminal
screws. Do not use a screwdriver that is too small,
otherwise, the screw heads may be damaged and prevent
the screws from being properly tightened.
(5) Do not tighten the terminal screws too much, otherwise,
the screws may break.
(6) See the table for the terminal screw tightening torques.
(7) Please do not fix two power supply cables with one screw.
Remote control cable
• Connect remote control and transmission cables as shown
in Fig. B.
• When the two cables are attached.
Fig. B
Screw
ip
Str
10
Terminal block
mm
Cable
Ring terminal
Sleeve
Screw with
special washer
Screw with
special
washer
Ring terminal
Cable
Cable
Ring
terminal
Cable of the
same caliber:
OK
Cable of the
different caliber:
NO GOOD
WARNING
•Tighten the terminal screws to the specified torques,
otherwise, abnormal overheating may be produced and
possibly cause heavy damage inside the unit.
Tightening torque
M3.5 screw
0.8 to 1.0 N·m
(Transmission/X1, X2)
(8 to 10 kgf·cm)
(Remote control/Y1, Y2, Y3)
Terminal block
En-12
9365748077-02_IM_en.indd 12
2/23/2009 10:03:24 AM
CAUTION
External
Static
Pressure
•To peel the film from the lead cable, use a dedicated tool
that will not damage the conductor cable.
•When installing a screw on the terminal block, do not cut
the cable by overtightening the screw. On the other hand,
an undertightened screw can cause faulty contact, which
will lead to a communication failure.
Relay wire
Remark
ARXC72 :
50-150Pa
1 PINK
ARXC90 :
2 PURPLE
100-200Pa
3 BLUE
Accessories
(Standard
static
pressure)
1
6.4. Connection of wiring
(1) Remove the control box cover and install each connection cable.
• Layout of circuit board
High Static Pressure mode : 150-300Pa (ARXC72)
200-300Pa (ARXC90)
(Factory setting)
Loosen the screws.
(2 locations)
(2) After wiring is complete, clamp the remote controller cable,
connection cable and power supply cable with cable clamp.
Remote control cable
Y1: Red
Y2: White
Y3: Black
Binder
(Medium)
(Accessories)
X1, X2:
Transmission
cable
Binder
(Medium)
(Accessories)
L, N: Power
supply cable
PCB wire
Fan motor wire
Standard Static Pressure mode : 50-150Pa (ARXC72)
100-200Pa (ARXC90)
(Change setting)
CAUTION
•When installing a screw on the terminal board, do not cut
the cable by overtightening the screw. On the other hand,
an undertightened screw can cause faulty contact, which
will lead to a communication failure.
(3) Attach the control box cover.
]1
6.5. Air flow changing
When apply external static pressure less than 150Pa
(ARXC72) or 200Pa (ARXC90) on the model, please follow
the methods below to connect relay wire.
(1) Disconnect the PCB wire connector from Fan motor wire
connector.
(2) Connect the Fan motor wire with Relay wire.
(3) Connect the PCB wire with Relay wire.
PCB wire
Fan motor wire
Relay wire
Be sure to connect the wire with connector.
If connection is improper, it will not operate properly.
En-13
9365748077-02_IM_en.indd 13
2/23/2009 10:03:24 AM
7. FIELD SETTING
• Refer to the following three items for setting the FIELD SETTING
address. The respective settings are included below.
(1) IU AD, REF AD SW settings....This section
(2) Remote control settings.........Refer to the wired or wireless
remote control manual for
detailed setting information.
(Set IU AD, REF AD SW to 0)
(3) Automatic address settings....Refer to the indoor unit
manual for detailed setting
information. (Set IU AD, REF
AD SW to 0)
CAUTION
•Be sure to turn OFF the power before performing the
field setting.
]1
7.1. Setting the address
Manual address setting method
• The indoor unit address and the refrigerant circuit address
can also be set up through the wireless remote controller
CAUTION
•Use an insulated screwdriver to set the dip switches.
SW SW SW SW
1 2 3 4
(2) Refrigerant circuit address
Rotary switch (REF AD ×1)...... Factory setting “0”
Rotary switch (REF AD ×10).... Factory setting “0”
In the case of multiple refrigerant systems, set REF AD
SW as shown in the Table A for each refrigerant
system.
Set to the same refrigerant circuit address as the outdoor
unit.
Table A
Rotary
Rotary
Address
Address
Switch Setting
Switch Setting
Refrigerant
REF AD SW
IU AD SW
Indoor unit
× 10
×1
× 10
×1
circuit
0
0
0
0
0
0
1
0
1
1
0
1
2
0
2
2
0
2
3
0
3
3
0
3
4
0
4
4
0
4
5
0
5
5
0
5
6
0
6
6
0
6
7
0
7
7
0
7
8
0
8
8
0
8
9
0
9
9
0
9
10
1
0
10
1
0
11
1
1
11
1
1
12
1
2
12
1
2
..
..
..
..
..
..
.
.
.
.
.
.
99
Dip switch
“SET 3”
9
9
63
6
3
Do not set the indoor unit address (IU AD SW) at 64 to 99. It
may result failure.
(3) Remote controller address
Rotary switch (RC AD SW)....Factory setting “0”
When connecting multiple indoor units to one standard
wired remote controller, set the address at RC AD SW in
sequence from 0.
Rotary switch
Example: “0”
Rotary switch
Example: “0”
Setting
Setting
range
Remote
controller
address
0–15
Type of switch
Setting
example
0
RC AD
Example If 4 indoor units are connected.
Setting
Setting
range
Indoor unit
address
0–63
Refrigerant
circuit
address
0–99
Type of switch
Setting
example
2
Setting
example
63
IU AD × 10
IU AD × 1
REF AD × 10
REF AD × 1
(1) Indoor unit address
Rotary switch (IU AD × 1).......Factory setting “0”
Rotary switch (IU AD × 10).....Factory setting “0”
When connecting multiple indoor units to one refrigerant
system, set the address at IU AD SW as shown in the
Table A.
Indoor unit
Indoor unit
Indoor unit
Indoor unit
RC AD SW
0
RC AD SW
1
RC AD SW
2
RC AD SW
3
Remote
controller
RC AD SW
Address
0
0
1
1
2
2
3
3
4
4
5
5
6
6
7
7
RC AD SW
Address
8
8
9
9
A
10
B
11
C
12
D
13
E
14
F
15
En-14
9365748077-02_IM_en.indd 14
2/23/2009 10:03:25 AM
Function details
]1
7.2. Custom code setting
Selecting the custom code prevents the indoor unit mix-up.
(Fig. B)
(Up to 4 codes can be set.)
Perform the setting for both the indoor unit and the remote
controller.
Function
Filter
indicator
interval
Fig. B
Confusion
Code change
B
C
A
Indoor unit
Remote
controller
A
B
Function
number
00
11
D
C
Filter
indicator
action
13
Horizontal swing
airflow
direction
24
D
• Custom code setting for indoor unit
Set the DIP SW SET 3 SW1, SW2 referring to the Table B.
Cool air
temperature
trigger
SW SW SW SW
1 2 3 4
ON
OFF
Dip switch
“SET 3”
Hot air
temperature
trigger
30
31
Table B
DIP SW
SET 3 SW1
DIP SW
SET 3 SW2
Custom code
A (Factory setting)
B
OFF
OFF
ON
OFF
C
D
OFF
ON
ON
Auto
restart
ON
External
control
40
7.3. Function setting
* Turning on the power indoor units initializes EEV, so make
sure the piping air tight test and vacuuming have been
conducted before turning on the power.
* Also check again to make sure no wiring mistakes were
made before turning on the power.
Error
report
target
Default
01
Longer
02
Shorter
00
Enable
01
Disable
02
Display
only on
central
remote
control
00
Default
Default
○
○
Left half
02
Right half
00
Default
01
Adjust (1)
02
Adjust (2)
00
Default
01
Adjust (1)
02
Adjust (2)
03
Adjust (3)
00
Enable
01
Disable
○
00
Start/Stop
○
01
Emergency
stop
47
All
01
Display
only on
central
remote
control
Adjust the filter cleaning interval
notification. If the notification is
too early, change to setting 01. If
the notification is too late, change
to setting 02.
Enable or disable the filter
indicator. Setting 02 is for use
with a central remote control.
01
00
Details
○
○
○
46
1
• FUNCTION SETTING can be performed with the wired or
wireless remote control.
(The remote control is optional equipment)
• Refer to the wired or wireless remote control manual for
detailed setting information. (Set IU AD, REF AD SW to 0)
• Refer to “7.1. Setting the address” for indoor unit address
and refrigerant circuit address settings.
• Turn the power of the indoor unit ON before starting the setting.
Setting
number
○
Adjust the horizontal swing airflow
direction.
(For horizontal swing equipped
models)
Adjust the cool air trigger
temperature. To lower the trigger
temperature, use setting 01. To
raise the trigger temperature, use
setting 02.
Adjust the hot air trigger
temperature. To lower the trigger
temperature by 6 degrees C, use
setting 01. To lower the trigger
temperature by 4 degrees C, use
setting 02. To raise the trigger
temperature, use setting 03.
Enable or disable automatic
system restart after a power
outage.
Allow an external controller to
start or stop the system, or to
perform an emergency shutdown.
*If an emergency shutdown is
performed from an external
controller, all refrigerant systems
will be disabled.
Change the target for reporting
errors. Errors can either be
reported in all locations, or only
on the wired remote.
8. TEST OPERATION
]1
8.1. Test operation using PCB (Outdoor unit)
• Refer to the Installation Manual for the outdoor unit if the
PCB for the outdoor unit is to be used for the test operation.
8.2. Test operation using remote controller
• Refer to the Installation Manual for the remote control unit to
perform the test operation using the remote control unit.
• When the air conditioner is being test run, the OPERATION
and TIMER flash slowly at the same time.
For details, please refer to the Manual of “IR Receiver Unit” or
“Wired Remote Controller”.
En-15
9365748077-02_IM_en.indd 15
2/23/2009 10:03:25 AM
9. CHECK LIST
10. ERROR CODES
Pay special attention to the check items below when
installing the indoor unit(s). After installation is complete, be
sure to check the following check items again.
]1
Check items
Has the indoor unit
been installed correctly?
Has there been a
check for gas leaks
(refrigerant pipes)?
Has heat insulation
work been completed?
Does water drain easily
from the indoor units?
Is the voltage of the
power source the same
as that indicated on the
label on the indoor unit?
Are the wires and
pipes all connected
completely?
Is the indoor unit
grounded?
Is the connection cable
the specified thickness?
Are the inlets and outlets
free of any obstacles?
After installation is
completed, has the
proper operation
and handling been
explained to the user?
If not performed
correctly
Vibration, noise,
indoor unit may drop
No cooling, No heating
Water leakage
Check
box
If you use a wired type remote control, error codes will appear
on the remote control display. If you use a wireless remote
control, the lamp on the photodetector unit will output error
codes by way of blinking patterns. See the lamp blinking
patterns and error codes in the table below.
]1
Abnormal display
Wired
OPERATIOR TIMER
FILTER
Remote
indicator indicator indicator
Controller
lamp
lamp
lamp
Error CODE
(green)
(orange)
(red)
(1)
(2)
Remote control
abnormal
communication
(1)
(4)
Anomalous
network
communications
(1)
(6)
(3)
(1)
(3)
(2)
(4)
(1)
(4)
(2)
(5)
(1)
(5)
(3)
Abnormal
drainage
(9)
(15)
Abnormal
outdoor unit
Water leakage
No operation, heat
or burn damage
No operation, heat
or burn damage
Abnormal
parallel
communication
Abnormal
power
frequency
Abnormal
model
information /
abnormal
EEPROM
accession
Abnormal room
temperature
thermistor
Abnormal
indoor heat
exchanger
temperature
thermistor
Abnormal
indoor fan
motor
Short circuit
No operation, heat
or burn damage
No cooling, No heating
Abnormal
contents
Display mode :0.5s ON / 0.5s OFF
:0.1s ON / 0.1s OFF
( ):Number of flashing
Wired Remote Controller Display
Error code
For details on marking the ERROR CODES, please refer to
the Manual of “IR Receiver Unit” or “Wired Remote Controller”.
En-16
9365748077-02_IM_en.indd 16
2/23/2009 10:03:26 AM
VRF 系统
室内机组
风管式
安装说明书
只供授权专业维修人员使用。
目录
1. 安全注意事项................................................................. 2
2. 关于机组
2.1. 使用 R410A 制冷剂时的注意事项.................................. 2
2.2. R410A 的专用工具 .........................................................2
2.3. 附件 .................................................................................2
3. 安装工作
3.1. 选择安装位置 .................................................................3
3.2. 安装尺寸 .........................................................................4
3.3. 安装机组 .........................................................................4
4. 管道安装
4.1. 选择管材 .........................................................................5
4.2. 管道要求 .........................................................................6
4.3. 扩口接头(管接头).......................................................6
4.4. 安装绝热材料 .................................................................9
5. 安装排水软管................................................................. 9
6. 电气接线
6.1. 电气要求 .......................................................................11
6.2. 接线方法 .......................................................................11
6.3. 机组连线 .......................................................................11
6.4. 线路的连接 ..................................................................12
6.5. 气流更改 .......................................................................13
7. 现场设置
7.1. 设置地址 .......................................................................14
7.2. 用户代码设置 ...............................................................14
7.3. 功能设置 .......................................................................15
8. 试运行
8.1. 使用 PCB 进行试运转(室外机)................................15
8.2. 使用遥控器进行试运转.................................................. 15
9. 检查项目表 .................................................................. 16
10. 故障代码 ...................................................................... 16
PART NO. 9365748077-02
9365748077-02_IM_sc.indd 1
2009/2/20 14:03:06
1
1. 安全注意事项
2.2. R410A 的专用工具
• 安装之前务必彻底阅读该说明书。
• 该说明书指出的警告和注意事项包含与您的安全密切相关的
重要信息。请务必遵循这些信息。
• 将该说明书与操作手册交给用户。请用户将它们收藏好,以
便日后使用,例如更换机组位置或对机组进行修理。
警告
警告
• 要安装使用 R410A 制冷剂的机组,请使用专供 R410A 使
用而制造的专用工具和管道材料。由于 R410A 制冷剂的压
力约是 R22 的 1.6 倍,未使用专用的管道材料或不当的安
装可能会导致管道破裂或造成人身伤害。另外,还可能会
导致如漏水、电击或火灾等严重事故。
该标志表示如果步骤执行失当,可能会导
致用户死亡或严重伤害。
• 请您的经销商或专业安装人员依照该安装说明书安装机组。
机组安装不适当可能造成严重的事故,例如漏水、电击或
火灾。如果没有依照安装说明书中的说明来安装室内机组,
则制造商不会保用。
工具名称
变更内容
压力表歧管
压力较高,不能使用传统的压力计
测量。为了避免与其它制冷剂错误
混合,每个接口的直径均已更改。
建议使用具有高压力显示范围为
-0.1 至 5.3 MPa 以及低压力显示范
围为 -0.1 至 3.8 MPa 的压力表歧管。
• 未完成所有工作之前请勿打开电源。在工作完成之前打开
电源可能造成严重的事故,例如电击或火灾。
• 如果制冷剂在执行工作时泄漏,请为该区域通风。如果制
冷剂接触火,就会产生有害气体。
充注软管
为了增加抗压能力,软管材料和尺
寸已变更。
(R410A 的充注接口螺纹直径为 1/2
UNF 每英寸 20 个螺纹。)
真空泵
可以通过安装真空泵适配器使用传
统的真空泵。
确保真空泵油不会回流到系统中。
使用真空吸力能够达到 –100.7 kPa
(5 Torr, –755 mmHg) 的真空泵。
气体泄漏检测器
HFC 制冷剂 R410A 的专用气体泄
漏检测器。
• 务必由授权的维修人员按照国家接线标准执行安装工作。
注意
该标志表示,如果步骤执行不当,可能会
导致用户人身伤害或财产损害。
2. 关于机组
]1
2.3. 附件
1
2.1. 使用 R410A 制冷剂时的注意事项
警告
• 请勿让除规定的制冷剂之外的其他物质进入制冷循环。如
果空气进入制冷循环,则其中的压力将变得异常之高,并
且会造成管道破裂。
• 如果制冷剂泄漏,请确保它未超过浓度限制。如果制冷剂
泄漏超过了浓度限制,则可能造成缺氧等事故。
• 请勿触摸从制冷剂管接头等部位泄漏的制冷剂。直接触摸
制冷剂会导致冻伤。
警告
• 安装时,请务必使用制造商供应的部件或其他规定部件。
使用非规定部件可能造成严重的事故,例如机组掉落、漏
水、电击或火灾。
• 本机配有以下安装部件。 请按照需要使用。
• 请妥善保管安装说明书,并且不要在安装工作完成前丢弃任
何其它附件。
说明
数量
应用
使用说明书
1
• 如果运行过程中发生制冷剂泄漏,请立即离开建筑物,并对
该区域彻底通风。如果制冷剂接触火,就会产生有害气体。
(本书)
安装说明书
1
用于固定连管
(大和小)
扎线带(大)
4
扎线带 ( 中等 )
3
用于绑定电源和信号
线以及遥控器线
Sc-2
9365748077-02_IM_sc.indd 2
2009/2/20 14:03:07
t
说明
数量
接管绝热材料(小)
1
3. 安装工作
应用
用于室内机管道
接头(小管)
对于分体式空调,安装地点尤为重要,因为首次安装后,移动
位置非常困难。
]1
3.1. 选择安装位置
接管绝热材料(大)
1
用于室内机管道
接头(大管)
请按照以下要求与用户一起决定安装位置。
警告
用于切换静压
继电器电线
• 选择能有效支撑室内机重量的安装位置。将机组安装牢固,
以免倾倒或坠落。
1
注意
专用螺母 A
(大法兰)
专用螺母 B
(小法兰)
4
用于将室内机组悬挂在
天花板上
4
垫圈
8
排水软管
(大)
1
请勿将机组安装在下列区域 :
• 盐含量高的区域,例如海边。这会损坏金属部件,使部件
掉落或使机组漏水。
• 充满矿物油或包含大量溅油或蒸气的区域,例如厨房。这
会损坏塑料部件,使部件掉落或使机组漏水。
• 会产生对设备有负面影响的物质(例如硫磺气体、氯气、
酸或碱)的区域。这会腐蚀铜管和铜焊接合,从而造成制
冷剂泄漏。
• 可能造成易燃气体泄漏、含有悬浮碳纤维或易燃尘埃,或
者如涂料稀释剂或汽油等挥发性易燃物的区域。如果气体
泄漏并沉积在机组周围,可能会造成火灾。
• 动物可能会在机组上排尿或者可能会产生氨的区域。
• 请勿将机组用于特殊用途,例如存放食物、饲养动物、栽
培植物或保存精密装置或艺术品。
这可能降低保存或存放对象的质量。
用于安装排水软管
(用于主排水口)
• 请勿安装在可能泄漏燃烧气体的地方。
• 请勿将机组安装在靠近热源、蒸汽或易燃气体的地方。
• 将机组安装在排水不会造成任何问题的地方。
排水软管
(小)
软管卡子
(大)
1
用于安装排水软管
(用于安全排水口)
用于安装排水软管(大)
• 请在距离电视机和收音机 1 m 以外的地方进行室内机和室
外机、电力接线、信号接线及遥控接线的安装,以免发生
图像失真和声音失真。(然而,即使将上述机组和接线安
装在距电视机和收音机 1 m 以外的地方,根据电波的状况
的不同,声音失真也可能无法避免。)
• 如 10 岁以下的儿童有可能接触到时,请采取适当的预防
措施,使他们无法接触机组。
1
• 请采取预防措施防止机组坠落。
软管卡子
(小)
用于安装排水软管(小)
1
用于安装排水软管
排水管绝热材料
2
(1) 将室内机安装在具有足够强度的地方,以便能承受室内机
的重量。
(2) 请勿堵塞进气口和出气口。空气应能吹向整个房间。
(3) 请保留可以维修空调的空间。
(4) 将机组安装在容易连接室内机的地方。
(5) 请在方便安装连接管的地方安装机组。
(6) 请在方便安装排水管的地方安装机组。
(7) 将机组安装在不会将噪音和振动放大的地方。
(8) 应考虑之后的维修等情况,并留出空间。将机组安装在可
以拆卸过滤网的地方。
(9) 请勿在易受阳光直射处安装机组。
Sc-3
9365748077-02_IM_sc.indd 3
2009/2/20 14:03:08
3.3.1. 运输方法
]1
3.2. 安装尺寸
提供用于检查的检修孔,如下图所示。
切勿在维修空间布置线路或照明设施,否则会妨碍维修。
包装五金件 (4 件 )
: 检修孔
: 维修空间
300 mm
890 mm 或以上
气流
机组
30 mm 或以上
200 mm 或以上
安装尺寸 1
400 mm 或以上
气流
如果不能提供图“安装尺寸 1”所示的维修空间,则应按下图
所示在机组的左侧或右侧提供 900 mm 的维修空间。切勿在此
空间布置线路或照明设施。
机组到达安装场地前,切勿拆掉包装材料。
拆下包装五金件并将其弃置。
3.3.2. 安装吊具
参照下图将室内机悬挂起。
安装尺寸 2
1,550 mm
1,410 mm
450 mm
68 mm
气流
900 mm 或以上
900 mm 或以上
700 mm
655 mm
进气口
]1
3.3. 安装机组
警告
• 将空调安装在能够承受至少主机重量 5 倍并且不会将噪音
或振动放大的地方。如果安装位置不够坚固,室内机可能
会坠落,引起人身伤害。
1
注意
• 请在安装机组前确认进气和出气方向。
机组从蒸发器一侧进气,从风扇一侧出气。
气流
出气口
气流
专用螺母 A ( 附件 )
悬吊螺栓 M10
(现场供应)
垫圈(附件)
吊具
专用螺母 B ( 附件 )
注意
• 用专用螺母 A 和 B 牢固地拧紧。
Sc-4
9365748077-02_IM_sc.indd 4
2009/2/20 14:03:09
3.3.3. 调平
• 安装用于空气循环的进气格栅。无法检测到正确的温度。
用下图所示的步骤调整水平度。
水平仪
机组
风管
(现场供应)
B
出气格栅
(现场供应)
A
进气格栅
(现场供应)
(房间)
( 前面 )
4. 管道安装
水平仪
]
注意
• 要小心注意的是,杂质(油、水等)不会像制冷剂 R410A
型号那样进入管道。另外,存放管道时,通过夹住、捆绑
等牢固密封管口。
B
• 焊接管道时,务必向里面冲入干燥的氮气。
A
]1
4.1. 选择管材
注意
( 侧面 )
• 不要使用原有的管道。
机组有排水口的一侧 A 应稍低于机组的另一侧 B。A 与 B 之
间允许有 0 至 20 mm 的倾斜度。
• 使用的管道应内外表面清洁,不含在使用过程中可能引起
故障的污染物,例如硫、氧化物、灰尘、切屑、油或水。
3.3.4. 安装风管
• 必须使用无缝铜管。
材料 :经过磷脱氧处理的无缝铜管
残油量最好小于 40 mg/10 m。
按照下图所示的步骤安装风管。
1,251 mm
∗ 20 mm
370 mm 15 mm
进气口法兰
• 使用的铜管不能带有压扁、变形或变色的部分(尤其是在
内部表面)。 否则,膨胀阀或毛细管可能会被污染物堵塞。
• 管道选择不当会降低性能。 由于使用 R410A 的空调会比
使用传统的制冷剂时承受更高的压力,因此需要选择适当
的材料。
• 使用 R410A 的铜管厚度如表所示。
• 绝对不要使用厚度不足于表中所示的铜管,即使市场上有售。
75 mm
15 mm
35 mm
∗ 25 mm
350 mm
出气口法兰
7 × 150 节距 =1,050 mm
1,199 mm
2 × 160 节距 =320 mm
∗ 法兰与排水盘之间的距离。
注意
退火铜管的厚度(R410A)
管道外径 [mm (in.)]
厚度 [mm]
6.35 (1/4)
0.80
9.52 (3/8)
0.80
12.70 (1/2)
0.80
15.88 (5/8)
1.00
19.05 (3/4)
1.20
• 为了防止别人触碰机组内部的部件,请务必在进气口和出
气口安装格栅。 格栅必须设计为无法用工具拆卸。
• 将外部静压设在 100 至 300 Pa 之间。
• 如果安装了进气管,请小心不要损坏温度传感器(温度传
感器安装在进气口法兰上)。
Sc-5
9365748077-02_IM_sc.indd 5
2009/2/20 14:03:09
1
4.2. 管道要求
扳手开口宽度
管道外径 [mm (in.)]
扩口螺母的扳手开口
宽度 [mm]
6.35 (1/4)
17
9.52 (3/8)
22
12.70 (1/2)
26
15.88 (5/8)
29
19.05 (3/4)
36
注意
• 有关连接管道长度或不同标高的规格,请参见室外机的安
装说明书。
• 使用带防水热绝缘材料的管道。
注意
• 请在气体和液体管道周围安装绝热材料。否则可能会导致
漏水。
请使用抗热能力超过 120℃的绝热材料。(仅限逆循环型)
此外,如果安装制冷剂管道的地方的湿度可能会超过 70%,
请在制冷剂管道周围安装绝热材料。
如果预计的湿度为 70-80%,请使用 15 mm 或更厚的绝热
材料 ;如果预计的湿度超过 80%,请使用 20 mm 或更厚
的绝热材料。如果使用的绝热材料未达到指定的厚度,可
能会在材料表面形成冷凝。
此外,请使用热传导率为 0.045 W/(m•K) 或以下(20˚C 时)
的绝热材料。
4.3.2. 弯管加工
• 用手或弯管器使管道成形。注意请勿将它们压扁。
• 弯曲管道时角度不应超过90˚。
• 如果反复弯曲或拉伸管道,材料将变硬,以至很难再次弯曲
或拉伸。弯曲或拉伸管道的次数不应超过三次。
注意
• 为了防止管道破裂,应避免过度的弯曲。
• 如果管道在同一位置反复弯曲,它会破裂。
4.3.3. 管道连接
• 气体管和液体管的管接头必须进行铜焊。
• 必须在配线或安装排水管前铜焊这些管接头。
1
4.3. 扩口接头(管接头)
4.3.1. 扩口
• 请使用专用的切管机和 R410A 专用的扩口工具。
(1) 使用切管机将连接管道截成所需的长度。
(2) 向下按住水管以避免切屑进入管道并去除毛刺。
(3) 将扩口螺母(必须使用分别连接到室内机和室外机的扩口
螺母)插入管道,并使用扩口工具执行扩口工序。请使用
专用的 R410A 扩口工具或传统的扩口工具。如果使用其它
扩口螺母,会导致制冷剂泄漏。
(4) 请夹住或用胶带保护管道,防止灰尘、污物或水进入管道。
B
螺
钉模
管子外径
液体管
12.70 mm
气体管
25.40 mm
后面板
控制箱
请检查[L]的扩口是否均匀且
没有破裂或刮伤。
A
L
管道
管道外径
[mm (in.)]
尺寸 A [mm]
R410A的扩口工具,
离合式
6.35 (1/4)
0
尺寸 B-0.4 [mm]
9.1
9.52 (3/8)
12.70 (1/2)
连接管(气体)
13.2
0至0.5
16.6
15.88 (5/8)
19.7
19.05 (3/4)
24.0
当使用传统的扩口工具对 R410A 管道进行扩口时,尺寸 A 应
比表中(针对使用 R410A 扩口工具进行扩口)所示的尺寸大约
0.5 mm 以获得指定的扩口。使用厚度测量仪测量尺寸 A。
连接管
(液体)
维修面板
安全排水盘
用手正确地拧紧扩口螺母时,用单独的扳手按住机身侧沟槽连
接件,然后用扭矩扳手拧紧。
注意
• 握住扭矩扳手的手柄,使其与管道成 90 度,以便顺利地
拧紧扩口螺母。
• 按照指定的拧紧方法,用扭矩扳手拧紧扩口螺母。 否则长
时间以后,扩口螺母会破裂,导致制冷剂泄漏,如果制冷
剂与火焰接触,还会产生有害气体。
Sc-6
9365748077-02_IM_sc.indd 6
2009/2/20 14:03:10
使用两个扳手拧紧。
固定扳手
扭矩扳手
扩口螺母
室内机管道
(机身侧)
连接管道
注意
• 务必要将管道与室内机的接口正确连接。如果没有对齐,
扩口螺母将无法顺利紧固。如果强行旋转扩口螺母,将损
坏螺纹。
• 只有在对连接管道进行连接之前才能从室内机管道上拆除
扩口螺母。
• 请勿在扩口部件上使用矿物油。防止矿物油进入系统,因
为这样会降低机组的寿命。
扩口螺母[mm (in.)]
拧紧扭矩[N·m (kgf·cm)]
直径 6.35 (1/4)
16至18 (160至180)
直径 9.52 (3/8)
32至42 (320至420)
直径 12.70 (1/2)
49至61 (490至610)
直径 15.88 (5/8)
63至75 (630至750)
直径 19.05 (3/4)
90至110 (900至1,100)
1
Sc-7
9365748077-02_IM_sc.indd 7
2009/2/20 14:03:10
警告
• 必须按下图所示用湿布等保护管子橡胶件、管子绝热材料和安全排水盘的绝热材料。因为这些零件非常易燃,如果保护不当,
会引起火灾。
• 热交换器中有热敏电阻。
切勿使热敏电阻遇火。
用湿布等保护这些部位。
管子绝热材料
管子橡胶件
用湿布等将管子橡胶件和管子
绝热材料完全包住,以防止其
燃烧。
铜焊
管子橡胶件
管子绝热材料
• 切勿使机组 ( 控制箱、后面板、维修面板等 ) 和进气格栅遇火。如果这些零件遇火,会对其外观和功能有不利影响,也可能引
起火灾。
注意
• 如果空气或其它类型的制冷剂进入制冷循环,制冷循环的内压会异
常升高,阻碍机组达到最大能力。
压力调节阀
帽
• 进行管子铜焊时要使用氮气。
氮气压力 :0.02 MPa (= 手背能感到的压力 )
氮气
铜焊部位
• 如果在管子铜焊时没有使用氮气,会产生氧化膜。这样会降低机组部件 ( 压缩机或阀门 ) 的性能或损坏机组部件。
• 在管子铜焊时切勿使用焊剂。如果焊剂是含氯焊剂,会引起管子腐蚀。此外,如果焊剂中含有氟化物,会对制冷剂管路系统产
生不利影响 ( 例如使制冷油变质 )。
• 使用铜焊材料时,请使用不需要焊剂的磷铜。
Sc-8
9365748077-02_IM_sc.indd 8
2009/2/20 14:03:10
• 本产品有两处排水口。请按照图中所示步骤将排水软管和排
水管连接到各排水口。
1
4.4. 安装绝热材料
• 请在完成制冷剂泄漏检查后安装管接头绝热材料(有关详细
信息,请参见室外机的安装说明书)。
• 绝热材料与产品之间不得有间隙。
无缝隙
扎线带(大)
(附件)
接管绝热材料
(大)(附件)
无缝隙
接管绝热材料
(小)(附件)
将排水软管安装到主排水口和安全排水口
操作步骤
(1) 将附带的排水软管安装在机体的主排水口和安全排水口上。
在图形显示区域内从软管的顶部安装软管卡子。请用软管夹
箍牢牢地固定。
(2) 用乙稀胶粘剂粘合在现场准备的排水管(PVC 管 VP25)或
管道插槽。(在规线和密封件之前均匀地涂有色胶粘剂)
(3) 检查排水情况。
(4) 安装绝热材料。
(5) 用附带的绝热材料对机体的排水口和卡子部分进行绝热。
附件
排水口
(大)
排水口
(小)
用于主排水口
用于安全排水口
扎线带(小)
(附件)
软管夹子
(大)
软管夹子
(小)
排水软管
绝热材料
排水软管
绝热材料
确保没有空隙
软管卡子(附件)
5. 安装排水软管
• 使用普通的硬聚氯乙烯管(VP25)并使用不干胶(聚氯乙烯)
连接,确保其没有泄漏。
• 排水管的安装位置应有至少 1/100 的向下坡度。
• 为防止管子冻结,请根据需要使用绝热材料。
软 PVC 侧
排水盘
排水管的位置
10~15 mm 排水软管
(附件)
200 mm
胶粘剂
涂刷
区域
硬 PVC 侧
427 mm
接管
(现场供应)
排水管(VP25)
(现场供应)
4mm 或以下
将排水软管绝缘材料缠裹在排水软管连接处的四周。
安全排水口
排水软管绝缘材料
(附件)
40 mm
排水盘
排水软管
403 mm
100 mm
软管剖开视图
将附带的绝热材料缠在软管卡子上。
确保调整部分位于顶部。
排水口
外径
排水管
• 用于主排水口
• 用于安全排水口
32 mm (VP25)
Sc-9
9365748077-02_IM_sc.indd 9
2009/2/20 14:03:10
安装排水软管后,检查排水是否顺畅。
6. 电气接线
]
警告
倾斜角
2.5-5.0 mm
• 必须由持有证书的人员根据国家或地方法规并按照本说明
书执行电气作业。务必使用机组专用的电路。电源电路供
电不足或不当的电气作业可能会导致如电击或火灾的严重
事故。
• 开始工作前,检查室内机和室外机是否没有通电。
• 使用附带的连接线和电源线,或者制造商指定的线缆。连
接不当、绝缘不充分或者超出了允许的电流限制可能会导
致电击或火灾。
正确
不正确
安装排水软管
1 主排水口
在主排水口上靠近室内机处形成一个存水弯。
机组
H1=100 mm(近似值)
H2=50-100 mm
H1
排水管
H2
存水弯
2 安全排水口
安全排水口不需要有存水弯。如果将安全排水口连接到主
排水口,则应在主存水弯以下连接。
机组
主排水
• 对于接线,使用指定类型的电线,将其牢固连接,并确保
电线的外力没有施加到接线端子上。电线连接或紧固不当
可能会导致如端子过热、电击或火灾的严重事故。
• 请勿改装电源线、使用延长线或者使用接线中的任何支线。
连接不当、绝缘不充分或者超出了允许的电流限制可能会
导致电击或火灾。
• 将接线板号码与室外机上的连接线颜色相匹配。错误的接
线可能会导致电气部件烧毁。
• 将连接线牢靠地连接到端子板。此外,使用接线座紧固电
线。如果接线内或端部连接不当,可能会导致故障、电击
或火灾。
• 必须用线夹固定连接线的绝缘层。(如果绝缘层未被夹住,
可能会发生漏电。)
• 在机组上牢固地安装电气盒盖。电气盒盖安装不当可能会
因暴露于灰尘或水而导致如电击或火灾的严重事故。
• 在用于接线的墙壁开孔中安装套管。否则,可能会导致短
路。
• 安装接地漏电断路器。此外,安装接地漏电断路器,以便
同时切断整个 AC 主电源。否则,可能会导致电击或火灾。
• 安装接地漏电断路器。
如果未安装接地漏电断路器,可能会导致电击或火灾。
• 必须连接地线。
不当的接地工作可能会导致电击。
• 安装遥控器电线时,要确保不会用手直接触摸到。
排水管
安全排水
• 按照标准进行接线工作,以便空调器可以安全无故障地运
行。
• 将连接电缆牢固地连接在接线板上。不正确的安装可能会
导致火灾。
• 安装排水管时不得有立管。
• 请勿执行排气操作。
凸起
排气
凸起
注意
• 将机组接地。
请勿将地线连接到气体管、水管、避雷针或电话地线。
不适当的接地可能造成电击。
• 请勿将电源线连接到信号线或遥控器接线端,因为这会损
坏该产品。
• 绝不要将电源线和信号线束在一起。将这些线束在一起会
导致错误运行。
不正确
注意
• 必须对排水管进行正确绝热。
• 确保可以正常排水。
Sc-10
9365748077-02_IM_sc.indd 10
2009/2/20 14:03:11
]1
• 操作 PCB 时,机身上的静电可能造成控制 PCB 发生故障。
请遵循下列注意事项 :
6.3. 机组连线
• 将电线连接到接线板之前。
• 对室内和室外机组以及外围设备使用接地线。
6.3.1. 电源线
• 切断电源(断路器)
。
• 请触摸室内和室外机组金属部分 10 秒以上,以释放机身
静电。
25
mm
• 请勿触碰接线 PCB 上的部件端子和布线模式。
地线
35
]1
6.1. 电气要求
电缆尺寸推
荐值 (mm2)
电线类型
电源线
2.5
245 IEC57
或相当品
信号线
0.33
LONWORKS
兼容线
聚氯乙烯外
皮电缆 *
0.33
遥控器线
电源线
230 V
198 - 264 V
额定电压
操作范围
mm
A. 对于实芯接线
备注
1ø 50 Hz
198 - 264 V
2 电线 + 地线
22 AWG
LEVEL 4 (NEMA)
非极性双芯双
绞实芯线,直
径 0.65 mm
极性 3 芯
双绞线
(1) 要连接电端子,请将电线在端部结环后根据下图进行连接。
(2) 用指定的电线连接牢固,然后拧紧,保持端子上没有张力。
(3) 使用适当的螺丝刀拧紧端子螺钉。不要使用过小的螺丝刀,
否则,螺钉头可能会被损坏并且无法将螺钉正确拧紧。
(4) 不要过分拧紧端子螺钉,否则螺钉可能会断裂。
(5) 请参见表中的端子螺钉拧紧扭矩。
(6) 请不要用一颗螺丝固定两根电源线。
剥去
25
mm
*: 根据当地规则,对遥控器使用屏蔽电缆。
0
环
1
]
6.2. 接线方法
带特殊垫片的螺钉
带特殊垫片
的螺钉
( 示例 )
电源
室外机
信号线
电线
断路器
电线端部(环)
电线
电线端部
(环)
电源
信号线
电源
遥控
断路器
信号线
电源
遥控
断路器
接线盒
室内机
室内机
室内机
信号线
电源
警告
遥控
• 使用实芯电线时,请勿使用环形端子。如果使用带有环形
端子的实芯电线,环形端子的气压粘结可能会发生故障并
导致电线异常发热。
断路器
B. 对于绞合线
电源
遥控器
(主)
电源
遥控器
(副)
电源
遥控器
(1)
(2)
(3)
(4)
如下图所示,用带绝缘套管的环形端子连接到接线盒。
用适当的工具将环形端子压紧到电线,不要让电线松脱。
用指定的电线连接牢固,然后拧紧,保持端子上没有张力。
使用适当的螺丝刀拧紧端子螺钉。不要使用过小的螺丝刀,
否则,螺钉头可能会被损坏并且无法将螺钉正确拧紧。
(5) 不要过分拧紧端子螺钉,否则螺钉可能会断裂。
(6) 请参见表中的端子螺钉拧紧扭矩。
(7) 请不要用一颗螺丝固定两根电源线。
Sc-11
9365748077-02_IM_sc.indd 11
2009/2/23 11:52:45
剥去
10
警告
mm
• 将端子螺钉拧紧到指定的扭矩,否则可能会造成异常过热
并可能造成机组内部严重损坏。
环形端子
拧紧扭矩
M3.5 螺钉
(传输 /X1,X2)
(遥控器 /Y1,Y2, Y3)
套管
带特殊垫片的螺钉
带特殊垫片
的螺钉
0.8 至 1.0 N · m
(8 至 10 kgf · cm)
注意
• 要剥去引线上的绝缘层,请使用不会损坏导线的专用工具。
环形端子
环形
端子
电线
电线
接线盒
• 在接线盒上安装螺钉时,请勿过度拧紧螺钉而折断电线。
同时,过度拧紧的螺钉可能造成错误接触,从而导致通信
故障。
]1
6.4. 线路的连接
(1) 卸下控制箱盖并安装每条连接线。
警告
• 使用环形端子并将端子螺钉拧紧到指定的扭矩,否则可能
会造成异常过热并可能造成机组内部严重损坏。
拧紧扭矩
M4 螺钉
(电源 /L, N, GND)
1.2 至 1.8 N · m
(12 至 18 kgf · cm)
松开螺钉。
(2 处)
6.3.2. 信号线和遥控器线
20
屏蔽电线
(无绝缘层)
mm
(2) 接线完成后,用线夹夹住遥控器线、连接线和电源线。
30
遥控器线
Y1: 红色
Y2: 白色
Y3: 黑色
绑扎件
(中等)
(附件)
mm
信号线
20
X1, X2:
信号线
绑扎件
(中等)
(附件)
mm
L, N: 电源线
遥控器线
• 如图 B 所示连接遥控和信号线。
注意
• 将螺丝安装在接线板上时,不要过分拧紧螺丝而将电线剪
断。另一方面,未充分拧紧的螺丝可能会造成错误的接触,
从而导致通信故障。
• 连接两根电线时。
图B
(3) 固定控制箱盖。
螺钉
接线盒
电线
相同口径的电
线 :正确
不同口径的电
线 :不正确
Sc-12
9365748077-02_IM_sc.indd 12
2009/2/23 11:52:46
]1
6.5. 气流更改
标准静压模式 : 50-150Pa (ARXC72)
100-200Pa (ARXC90)
(更改设定)
在空调上应用小于 150Pa (ARXC72) 或 200Pa (ARXC90) 的外部
静压时,请按照如下方法连接继电器电线。
(1) 从风机电机电线接头断开 PCB 电线接头。
(2) 连接继电器电线和风机电机电线。
(3) 连接继电器电线和 PCB 电线。
外部静压
ARXC72 :
50-150Pa
ARXC90 :
100-200Pa
继电器电线
1 粉红色
2 紫色
3 蓝色
备注
附件
(标准静压)
• 电路板的布局
高静压模式 : 150-300Pa (ARXC72)
200-300Pa (ARXC90)
(出厂设定)
PCB 电线
继电器电线
风机电机电线
请务必连接电线和接头。
如果连接不当,则无法正常操作。
7. 现场设置
• 要设置现场设置地址,请参考下列 3 个项目。以下包括了相
应的设置。
(1) IU AD,REF AD SW 设置 ........ 本部分内容
(2) 遥控器设置 ............................... 有关详细的设置信息,请参
阅有线或无线遥控器的说明
书。
(将 IU AD, REF AD SW
设为 0)
(3) 自动地址设置 ........................... 有关详细的设置信息,请参
阅室内机的说明书。(将 IU
AD, REF AD SW 设为 0)
PCB 电线
风机电机电线
注意
• 在执行现场设置之前,请确保切断电源。
Sc-13
9365748077-02_IM_sc.indd 13
2009/2/23 11:52:46
表A
]1
7.1. 设置地址
地址
手动地址设置方法
• 则也可以通过无线遥控器来设置室内机地址和制冷剂地址。
制冷剂回路
注意
0
1
2
3
4
5
6
7
8
9
10
11
12
..
.
• 请使用绝缘螺丝刀来设置 DIP 开关。
SW SW SW SW
1 2 3 4
Dip 开关
“SET 3”
旋转开关
示例 :“0”
99
旋转开关
示例 :“0”
设置
室内机地址
9
旋转开关
设置
IU AD SW
× 10 × 1
0
0
0
1
0
2
0
3
0
4
0
5
0
6
0
7
0
8
0
9
1
0
1
1
1
2
..
..
.
.
地址
室内机
0
1
2
3
4
5
6
7
8
9
10
11
12
..
.
9
63
6
3
请勿在 64 至 99 之间设定室内机地址(IU AD SW)。否则可能
会导致故障。
设置
范围
0–63
(3) 遥控器地址
旋转开关 (RC AD SW)............ 出厂设定为“0”
将多台室内机连接到一个标准有线遥控器时,请从 0 开始
顺次设置 RC AD SW 处的地址。
开关类型
0–99
设置
设置
范围
遥控器地址
0–15
设置示例
2
IU AD × 10 IU AD × 1
制冷剂回路
地址
旋转开关
设置
REF AD SW
× 10 × 1
0
0
0
1
0
2
0
3
0
4
0
5
0
6
0
7
0
8
0
9
1
0
1
1
1
2
..
..
.
.
开关类型
设置示例
0
RC AD
设置示例
63
示例
REF AD × 10
REF AD × 1
(1) 室内机地址
旋转开关 (IU AD × 1).............. 出厂设置“0”
旋转开关 (IU AD × 10)............ 出厂设置“0”
将多台室内机连接到一个制冷剂系统时,请参见表 A 中 IU
AD SW 处的地址。
如果安装了 4 台室内机。
室内机
室内机
室内机
室内机
RC AD SW
0
RC AD SW
1
RC AD SW
2
RC AD SW
3
遥控器
(2) 制冷剂回路地址
旋转开关 (REF AD × 1).............. 出厂设置“0”
旋转开关 (REF AD × 10)............ 出厂设置“0”
在有多个制冷剂系统的情况下,请按表 A 所示为每个制冷
剂系统设置 REF AD SW。
设置为与室外机相同的制冷剂回路地址。
RC AD SW
地址
0
0
1
1
2
2
3
3
4
4
5
5
6
6
7
7
RC AD SW
地址
8
8
9
9
A
10
B
11
C
12
D
13
E
14
F
15
代码变化
C
D
B
D
]1
7.2. 用户代码设置
选择用户代码可以防止室内机信号混同。(图 B)
(可以设置多达 4 个代码)
为室内机和遥控器执行该设置。
图B
混同
室内机
遥控器
A
A
B
C
Sc-14
9365748077-02_IM_sc.indd 14
2009/2/24 10:26:54
• 室内机的用户代码设置
功能详情
参考表 B 设置 DIP SW SET 3 SW1, SW2。
功能
过滤网指
示器间隔
SW SW SW SW
1 2 3 4
功能号码
11
ON
OFF
过滤网指
示器操作
Dip 开关
“SET 3”
水平摆动
气流方向
表B
A ( 出厂设置 )
DIP SW
SET 3 SW1
DIP SW
SET 3 SW2
用户代码
B
C
D
OFF
ON
OFF
ON
OFF
OFF
ON
ON
冷空气
温度触发
热空气
温度触发
1
7.3. 功能设置
• 可以使用有线或无线遥控器执行功能设置。
(遥控器为选购设备)
• 有关详细的设置信息,请参阅有线或无线遥控器的说明书。
(将 IU AD, REF AD SW 设为 0)
• 有关室内机地址和制冷剂回路地址设置,请参阅“7.1 设置地
址”。
• 开始设置之前,请打开室内机的电源。
* 打开电源时,室内机初始化 EEV,所以请确保在打开电源
之前已执行了管道气密性测试和抽真空作业。
* 打开电源前,请再次检查以确保没有接线错误。
13
00
默认设置
01
较长
02
较短
00
启用
01
禁用
默认
设置
说明
○
调整过滤网清洁间隔通知。如果
通知时间过早,请更改为设置 01。
如果通知时间过迟,请更改为设
置 02。
○
启用或禁用过滤网指示器。设置
02 适用于中央遥控。
仅在中央遥
02
控器上显示
24
30
31
自动重新
启动
40
外部控制
46
故障报告
对象
设置号码
47
00
默认设置
01
左半区
02
右半区
00
默认设置
01
调节 (1)
02
调节 (2)
00
默认设置
01
调节 (1)
02
调节 (2)
03
调节 (3)
00
启用
01
禁用
○
00
开始 / 停止
○
01
紧急停止
允许外部控制器启动或停止系统,
或者执行紧急关机。
* 如果从外部控制器执行紧急关
机,将禁用所有制冷剂系统。
00
所有
○
更改报告故障的对象。可以在所
有位置报告故障,也可以只在有
线遥控器上报告故障。
○
调整水平摇摆气流方向。
(适用于带有水平摇摆功能的机
型)
○
○
仅在中央遥
01
控器上显示
调节冷空气触发温度。要降低触
发温度,使用设置 01。要提高触
发温度,使用设置 02。
调节热空气触发温度。要降低触
发温度 6 摄氏度,使用设置 01。
要降低触发温度 4 摄氏度,使用
设置 02。要提高触发温度,使用
设置 03。
电源中断后,启用或禁用自动系
统重新启动。
8. 试运行
]1
8.1. 使用 PCB 进行试运转(室外机)
• 如果使用室外机的 PCB 来进行试运转,请参考本安装说明书
了解室外机。
8.2. 使用遥控器进行试运转
• 要使用无线遥控器来进行试运转,请参考遥控器的安装说明
书。
• 对空调器进行试运转时,运转和定时器指示灯同时缓慢地闪
烁。
详情请参阅“IR 接收器”或“遥控器(有线式)”的安装说明书。
Sc-15
9365748077-02_IM_sc.indd 15
2009/2/24 10:26:55
有线遥控器显示
9. 检查项目表
故障代码
安装室内机(组)时,请特别注意以下的检查项目。安装完成
后,请确保再次检查以下的检查项目。
]1
检查项目
正确地安装了室内机了
吗?
已检查气体泄漏(制冷
剂管道)了吗?
已完成绝热工作了吗?
室内机组排水容易吗?
电源电压与室内机标签
上显示的相同吗?
电线和管道全都连接正
确吗?
室内机接地了吗?
连接电缆具有规定的粗
细吗?
保持进口和出口无阻塞
物了吗?
安装完成后,向用户说明
正确的操作和处理了吗?
如果未正确执行
振动,噪音,室内机可能
掉落
检查框
无制冷,无制热
有关指示灯闪烁的详细标记方法,请参阅“IR 接收器”或“遥
控器(有线式)”的安装说明书。
漏水
漏水
不运转,发热或烧坏
不运转,发热或烧坏
短路
不运转,发热或烧坏
无制冷,无制热
10. 故障代码
如果您使用有线型遥控器,则故障代码将显示在遥控器的显示
屏上。如果您使用无线遥控器,机组上的指示灯将通过各种闪
烁的组合输出故障代码。请参阅下表中的指示灯闪烁组合和故
障代码。
]1
故障显示
有线遥
运转指示 定时器指示 过滤网指示 控器故
灯(绿色) 灯(橙色) 灯(红色) 障代码
故障内容
(1)
(2)
遥控器通信故障
(1)
(4)
网络通信故障
(1)
(6)
并行通信故障
(3)
(1)
电源频率异常
(3)
(2)
型号信息异
常 /EEPROM
存取故障
(4)
(1)
室温热敏电
阻故障
(4)
(2)
室内机热交换器
热敏电阻故障
(5)
(1)
室内机风扇故障
(5)
(3)
排水异常
(9)
(15)
室外机故障
显示模式
: 亮 0.5 秒/灭 0.5 秒
: 亮 0.1 秒/灭 0.1 秒
( ) : 闪烁次数
Sc-16
9365748077-02_IM_sc.indd 16
2009/2/20 14:03:14