1
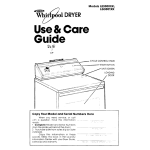
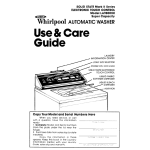
SOLID STATE Mark II Series
ELECTRONIC TOUCH CONTROt
Models lE9800XK and LG980lXK
WhirlpOOl
DRYER
Use & Care
Guide
POWER ON /OFF
LAUNDRY
INFORMATION
Copy
your Model
and Serial Numbers
If you ever need to call for service, you
WII need to give the Model and Serial Numbers Your dryer has these numbers on a plate
behind the door.
Copy the numbers In these spaces
Keep this book In the Laundry lnformotron
Center with your Dryer Guide, sales slop
and warranty
here
Model
Sem
No
No
Purchase
lnstollat~on
Date
Before using
your Dryer
You are personally
responsible for making sure that your dryer...
Is installed
by o awllfled
installer
Is properly
Installed ana leveled
In a
3 0 floor that
.uell JentMated
rcc\lrl
car support the /,elght
l
Is connected
t( t~‘ls rlgh’ kind c’f outlet
elecir c supply ar ~a ~grou~ding
l
Is properly
conr7eAea
tr fuel and
exhaust svstems
l
Is used only for .CS r~3rrnall~
expected
of kwrr ‘J \ I?thes ‘arveri
l
Is properI\
ma~r~:oifxx
0 Ii out of the tie0tkr
l
Is nc>t rur &here +kre rnav be expli~
sive fc.mes
l
l
FOR YOUR SAFETY
Do not store or use
gasoline or other
flammable
vapors and
liquids in the vicinity of
this or any other
appliance.
Please read this manual.
Follow the instructions
to help
you get the best drying
results.
Save the manual
for future use
SPECIAL INSTRUCTIONS: See the
Dryer Guide for drying tips, information about permanent
press and
knits, instructions
for drying special
items and for things not to be dried in
your dryer.
FOR YOUR SAFETY
If you smell gas:
1 Open windows
2. Don’t touch
electrical
switches
3. Extinguish any open
flame
4. Immeaiately
call
your gas supplier.
Contents
Before
Using Your Dryer
Loading
Your Dryer
Understanding
Your Dryer
Using Your Dryer
Selecting
A Drying
Temperature
CUSTOM
DRY CONTROL..
FLUFF AIR
TIMEDDRY
CONTROL
,..
rUMBLE PRESS Control
FINISH GUARD
Control
End-of-Cycle
Signal
LIntScreen
DrumLight
:‘:I
Using the Drying
Rack
If You Need Service
or Help
1 Before Calling
for Service
2 If You Need Service
3 If You Have a Problem
_~
i
2
4”
1:
loading
Dryer
your
I--,-I5
Allow room +#!. te”‘, to tumble
freely 7ne load 5~11 3r~ fc:ster with fewer
wrlnk ei
Svbe- 3y11-ICI I.?ril19 hen? press,
dry smaller-than-normal
loads for the
best wrrnkle removal
Use a mesh bag ‘~3 ? ?ld small
Items WC/~ as babL SCKkS
Read the Dryer Guide
for more
hints or‘ sorting anti lcadlng
Understanding
your Dryer
‘hs dryer IS drfferent from ones
, may have Jsed before.
It has Solid
:t jte Controls that outomatrcally
run the
d, ;er tiie way most loads are dried You
111y hove to make a time selectron
for
q?cla~
loads Jrke fluffing pillows)
For example,
this dryer has a
tt ature called
CUSTOM DRY CONTROL A sensor in the dryer “feels ‘the
Z: Jndrv Items and shuts off the heat
V*g’ren the load ‘feels about as dry as
i Jr cl-loice
t/our dryer also has an automatic
V<lSH :GUARD
Control
If you don’t
‘e notie a load within five mrnutes after
‘hr> dyer stops FINISH GUARD Control
ti ;’ tumble the clothes without heat
es, tzr\ five minutes
This i/se Kc Core Guide contains
,L.:jgestlor8s on the way to use your dryer
tc get tne best results and longest useful
if+ from your dryer Please read It
:cireful y
Using
yourDryer
1.
Put the sorted load in the dryer
and close the door tightly.
Move the POWER SWITCH to ON.
You now have erght seconds to touch
one of four FABRIC-TEMP
SELECTORS.
l The four FABRIC-TEMP
SELECTOR
lrghts will blink in sequence
Select one
of them by touchrng
the lower half of it
l FINISH GUARD
,ond NORMAL
DRY
lights will come or automat~callv
(See
steps 4 and 6 1
2.
l
3.
Touch the FABRIC-TEMP
SELECTOR you want for the kind
of load you have in the dryer.
You can touch REG HEAVY HIGH for
regular or heavy fabrics and a high
temperature,
PERM T PRESS MED for
permanent
press fobrrcs or things that
need a medium
‘emperature,
KNITS
GENTLE LOW for ~Jelrcote fabrrcs ana a
low temperature
FLUFF AIR for tumblrng
thongs without heat [see page 7) or
TUMBLE PRESS [see step 5,
l
l If the dryer
turns off, start over agarn
from step 2
4.
FINISH GUARD’
Control
If you don’t remove the load from the
dryer at the end of a dryrng cycle, the
FINISH GUARD optron WIII tumble the
load every five minutes, without heat
[See page 8 for details )
l Touch
FINISH GUARD only if you don’t
want the FINISH GUARD Control to
tumble the load after dryrng IS done
l The FINISH GUARD
optron can be
selected
or elimrnated
anflrme
during
the drying cycle
l
TUMBLE PRESS Control
To use TUMBLE PRESS, move the
POWER SWITCH to ON Touch TUMBLt
PRESS.
l TUMBLE PRESS IS 15 mrnutes
of tumbling
ot the medium
fabric temperature,
and
5 minutes of tumblrng
without heat
l Use this cycle
for freshenrng
dry Items
that are wrrnkled from storing in
surtcases or cramped
closets
l Touch
FINISH GUARD If you don’t want
It to follow Tumble Press
5.
l
Touch the lower half of the FABRICTEMP SELECTOR The ‘Irver WIII not
start If
~ YOU didn t toiif:h
the selector
‘ht> lower
ha’1
3
6.
CUSTOM
DRY CONTROL
With this control, you don’t need to
guess how quch t/me you need to dry o
load The CUSTOM
DRY CONTROL
lets
you ch,oose how dry you want the load
to be
l If you choose
a temperature,
but not a
time, the dryer will automatrcally
select
NORMAL
DRY
l
When you touch a FABRIC-TEMP
SELECTOR the lrghi ,w~l stop blrnkrng
and stay on
l The lights
will blink for only eight
seconds.
If you don’t select
a fabric
temperature
in that time, a signal
will beep
and the dryer will turn off.
l
4
III
345
0 You may waqt SC11 t: I, \-~a, t3 be I-ES’
DRY or MORE DRv ‘ha ; x”ia/
See
aaae 6 for hints
i F’Gd the CUSTOM
DRY CONTROL
settings you like best fc’r f xr loaas The
sensor WIII help keep most loads to about
the so-ne dryness IFvel
l Touch
the drynesT setting iou want
after you touch a FABRIC-TEMP
SELECTOR
7.
TIMED DRY CONTROL
0 Sometimes
you Vay want toset a time
Instead of letting tl~e CUSTOM
DRY
CONTROL
take ober
l After
you touch CI FABRIC-TEMP
SELECTOR, touch the TIMED DRY
CONTROL
for the (ITount
of time you
want
20, 30, 40.63 or 80 minutes
See
page
7 for more cetails
8.
TO STOP THE DRYER
You can stoo the (dryer txy
opening
the door >r TC’~ ng the POWEr;!
SWITCH to OFF
I/
67
After moving the POWER SWITCH tc
OFF, you will need to reset all the
contr&
to start the dryer again
l
IMPORTANT
Opening the door while the
dryer is running will erase all the
settings...so
will moving the
POWER SWITCH to OFF.
If you stop the dryer while It IS running
and
1 The load IS still damp,
close the
door Touch a FABRIC-TEMP
SELECTOR, touch a CUSTOM DRY
CONTROL
to finish drying the
load (If you take out all but a few
items, add dry lint-free towels for
better tumbling
of the load.)
2 The load IS dry, but too hot to handle, close the door, move POWER
SWITCH to ON, and touch FLUFF
AIR When the load has cooled
enough
to handle,
remove
It
I-nmedlately
SELECTING A DRYING TEMPERATURE
The chart
below
has suggested
fabrrc
loads
and
dryrng
temperatures
TYPE OF LOAQ
FABRIC-TEMP
SELECTOR
COTTONS
HEAWBedspreads
mattress
pads
qurlts, towels,
denms
~‘AEDIUM AND ~~:,H71’wt~:--’ -Shirts
dresses
sheets,
work clothes,
REG
REG
diapers
HEAVY-HIGH
HEAVY-HIGH
PERMANENT PRESS
,YEAWWork clothes
jackets,
rancoats.
etc
%1ED/UmWt/G;li6
Shirts uniforms,
dresses, slacks
PERM’T PRESS-MED
PERM’T PRESS-MED
etc
KNITS
YEAWWEIGHT
COTTONS,
RAYONS
BLENDS -- T-shirts, slacks, polo
shorts. etc
LIGHTWE/GHT
SYNTHETIC FIBERS (polyester
ocryl~c. etc ) AND
BLENDS - Lingerie
blouses, dresses
etc
DELICATELY CONSTRUCTED
FOAM RUBBER ARTICLES
To leave
a load
slightly
FABRICS - Sheer curtains
(2 or 3 panels)
KNITS
GENTLE-LOW
KNITS GENTLE-LOW
KNITS
GENTLE-LOW
FLUFF AIR
damp
for lronlng
select
the DAMP
DRY setting
MIXED LOADS
If you dry a load
the lrghtest one
‘with mlxed welghts
of a fabric, use the FABRIC-TEMP SELECTOR for
When the dryer stops, take out the dry Items and restart the dryer
CUSTOM DRY CONTROL
If you use one of the CUSTOM
DRY CONTROL
selectrons
(VERY DRY,
MORE DRY, NORMAL
DRY, LESS DRY or
DAMP DRY], the dryer will run until the
selected
dryness IS reached.
There IS no
need to set a time
As the load tumbles, the items
touch a sensor on the back of the dryer
drum Thus sensor ‘feels ‘the amount
of
moisture In the load The dryer shuts
off when the loud IS about as dry as the
setting you picked
on the CUSTOM
DRY
CONTROL
panel
During
the
lost few
minutes,
the
load IS tumbled
without heat This cooldown helps keep wrrnkles from setting In
and makes handlrng
the dry Items more
comfortable
Any CUSTOM
DRY CONTROL
selectron
WIII hove up to10 mrnufes of
cool-down
h
before
the
dryer
stops
The length
of the cool-down
depends
on the size of the load
how long It has been drying.
time
and
SUGGESTIONS:
If you do not touch a CUSTOM DRY
or TIMED DRY CONTROL
selector,
the dryer will automatically
give you
NORMAL
DRY
l For the first few loads
you dry, use
NORMAL DRY When the dryer stops,
check to see if the load IS as dry as
you want
l If the load
IS too dry. you can use
LESS DRY the next trme, or DAMP DRY
if you want to Iron the clothes
l If the load
IS not as dry as you like,
use MORE DRY or VERY DRY
l Bulky loads
[bedspreads,
blankets
qurlts) will dry with, befter results If
you use a FABRIC-TEMP
CONTROL
and a TIMED DRY CONTROL
setting
[Start with 60 minutes )
l For best drying
results and the most
wnnkle-free
Items, use the CUSTOM
DRY CONTROL
for most loads
l
FLUFF AIR
IWhen you rrove the POWER
SWITCH to ON and touch FLUFF AIR. you
get 2G minutes of tumbling
without heat.
To remind you of what WIII happen,
the
FLUFF AIR, FINISH GUARD and 20.minute
lights WIII come on (You can cancel
FINISH GUARD by tsuching
It )
This setting I; useful for fluffing
bedding,
pillows and clothing.
Use it
heat-sensitive
items
also for dames-drvlna
FLUFF AIR should be used for such
Items as plastic shower curtains or
tablecloths,
rubber-backed
rugs, some
pillows, stuffed toys. etc
If you want more than 20 minutes
of tumbling,
touch FLUFF AIR and the
TIMED DRY CONTROL
for the amount of
time you want (up to 80 minutes)
Setting Drying Times
Modern
dryers are designed
with dying
temperatures
needed
to
safely handle
modern
fobrlcs.
Cooldown times have been added
to heat
settings
You mlgr,t notice slightly
longer drying times
The time It takes to dry a load
depends
on
l The K/nd of fobi,:
,ts we/gbt
and the
sue of +he iood P large load of jeans
~111 take a lot longer to dry than a
small ‘oad of light synthetics
l The ~Jrrrount
of r)olsture
:ii the load
Towels hold a lot of moisture,
synthettcs
don’t
Synthetics
dry faster
l Te-nperoture
of +he rmse tooter Cold
rinses help save cn energv
and wrinkles, but a cold load will take slightly
longer to dry thor o worm one
l A,-aunt
of //qt o7 ihe s;ieen
A full
lint screen slows the air flow and can
make drying time ionger
l Tevperoiure
or~:u’~
‘1-e dryer The
dryer heats room air If thot air IS cold,
drying time will be ,onger
0 Proper insto/iotic~n
on:! exhaust
sys
terns For the fastest possible
drying
time, InstallIng
and exhausting
your
dryer properly
is important
See installation Instructions
TIMEDDRY CONTROL
Use a TIMED DRY CONTROL
setting for any load you want to dry by
time (for example,
very small loads
or large, bulky item loads]
l Touch
a FABRIC-TEMP
CONTROL
setting.
l Touch
the number of minutes you
want 20, 30,40,60
or 80.
Each TIMED DRY CONTROL setting has a cool-down
time. That time
depends
on the setting
Includes 5Minute
Cool-Down.
Includes
to-Minute
Cool-Down.
TUMBLE PRESS@’
Control
When you move the POWER
SWTCH to ON and touch TUMBLE PRESS,
you get 15 minutes of tumbling
at the
medium
fabric temperature,
and 5
more minutes of tumbling
without heat
To remind you of what will happen,
‘he 7JMBLE PRESS, FINISH GUARD and
20-minute
lights will come on (You can
cancel
FINISH GUARD by touching
It )
This setting IS useful for freshening
dry items that are wrinkled
from pocking I? sultcoses
or closets
For best results, TUMBLE PRESS
only a few items at a time Put them on
hangers or fold them as soon OS the
dryer stops
TUMBLE PRESS con t be combined
w:tn ony other setting except FiNiSH
GUARD If you wont longer tumbling,
touch PERM’T PRESS-MED and the TIMED
DRY CONTROL
for the time you want
FINISH GUARDI~
Control
When yoi~ TE r It .icle to unload
the tlr;er as :oor I:S It .sp
wrinkles
can set in
Your dryer ‘1 -IS c: fea:Jre
xlled
FINIY- GUARD If ~1.x cj 3r t open the
door wrthrn five mnutes after the dryer
stops FINISH GUARD token over
cutomatically
The FlNISt- ‘>UA .‘C :-,ontrol tumbles the load, Lvi+hout p,ect, even/ five
mrnutes Thus tumbllny
rearranges
and
fluffs the load to help cvcrd wrrnkles
caused
by a load slttirg in a warm
dryer
The end-of
!.:\i,~e slgnal WI/! beep
after every FINISH GJARD tumbling.
The tumbling
WIII go on for 29 hours
unless you open the mdrver door
Indicator
lights ‘~11 stay on OS
long as FINISH GUARCS ‘s tumbling
the
load
If you don
.vcr’- :he FINISH
GUARD option at the end of the dn/ing
cycle, touch FINISt-1 GUA7D when you
start the dryer (or cnyt’me
‘during c
drying cycle]
If you touchac
FINISH GUARD ‘c
cancel
it, and then change
your mint
touch FINISH GUARD again
End-of-Cycle
Signal
~
‘he signal also beeps every time
the FINISH GUARD Control tumbles the
load. And it beeps If you turn the
POWER SWITCH to ON and don’t touch
a FABRIC-TEMP
SELECTOR withrn
eight seconds.
The signal can’t be turned off and
it IS not adjustable
lint Screen
The !rnt screen IS under the lid on
top of the dryer
C/eon the hnf screen before each
load A screen that’s blocked
by lint
can cause longer drying times
Tc remove the screen, open tne
:ld and pull the screen straight out. Roll
the lent off the screen with your fingers
DO NOT rinse the screen
or wash
it. ‘Wet lint IS hard to remove
When replacing
the screen, push
It firrnl~ into place
Close the lid
Drum light
A signal V. #I betit’ i -e times to et
you know the+ tr e .dn+er YIS stopped
N*
will not beep if )08j #.)pe: the drver door
whl e the dryer 15KJno vg
The slgno
1~ r)? r?ft.,
Nhen
you
cQ;rg
permaner
t press i~~nthetlcs
and c-ther Items iblat ~c~‘~ should be
tokrr~ out as sa r ‘0: +*-- :ver S+ODS
am
When the light inside the drum
needs to be changed,
you ccr reach I+
easrly through the dver door
1. Unplug the dryer tc avoid possible
electrlcci
shock
2. 3per
the door and remove the ‘,ght
bulb cover bq turnrng it clockK~se
3, Remove
the light biJ!b br
counterclockwlse
tUrnlr?g
4. Repmx
t7e ,CIL 1 ;’ , “v lY c; ‘$7
opphonce
boib (from m 1st hardware,
grocery
or varletv <stores
5. Replace
the lrght~bu b cover ail
lock in place by turning
counterclockwrse.
1’
w:J~+
3. The rack does not move, but the
:lrum turns Be sure nothing hangs over
tne edges of -he rack Do not hang
items from the rack
4. Gose the door and move the
FOWER SWITCH to ON
5. ‘ouch a FABRIC-TEMP
SELECTOR.
6. he
a TIMED DRY CONTROL
sett ng Iryrng trrne selected
will depend
,)n how much moisture the Items hold
uggested
dryng temperatures
are
&en
In the following
chart
7. To remove the rack, push It back, IIft
up and pull out
Fabric-Temp
Selector
Items for
Rack Drying
1. Wool Socks
(Block
Using the
Drying Rack
The d-qing I XK ets \IX drv items
the’ L x, mai not :tont i:z, tumble,
IIke
sneakers
st~Jfed t ;is e+c-
1. Fit the rear leg: i\r +hc: dock intc the
grooves C?I-It hIe bee k ~~11 of the drYer
Push teem or and et the front legs of the
rack dowr or the front >f the dryer as
showr;
2. Lay wet items (111top #Jf the rack
A/low \~c’c:c :;efwi,e,’
+‘ie”- ‘or o/r to
-0.e
Lr?Ll” !
to shape
and
lay flat on rack )
2. Stuffed Toys
(Cotton or polyester
fiber frlled )
3. Stuffed Toys
(Foam rubber’ fllled )
4. TennisShoes
5. Foam Rubber
Pillows’
KNITS GENTLE
~ LO’UV
REG
HEAVY-HIGH
FLUFF AIR
FLUFF AIR
FLUFF AIR
If You Need
Service or Help,
We Suggest You
Follow These Three
Steps:
1. Before
calling
for service’
...
Problems ‘are solnetimes
caused
bv lrttle things vclu car correct wrthout
tm - Check this 6’ betore you Cd
fc’r srr\,lce
DRYER DOES NC’- RUl\l
Is electric
power car ~1plugged
l
In7
?-‘?YE’) RUNS BUT DOES NOT HEAT
Did you touch c FABRIC-TEMP
SELECTOR other than FLUFF AIR7
Is I+ ,=1gas dryer’ See If the gas IS
turned or If not, move the POWER
SWITCH to OFF Turn on the gas and
WCI+ f ve rnrnutes for the cutomatrc
:w;tch to reset Then try starting it
agcrr
1’sI: cn e ectrlc dryer’ Check the cirSIJ t breakers
or fuses in the fuse box
An electric
dryer WIII nave two fuses. If
.)ne IS blowr
the dryer may run, but
plot heat.
Di?YlNG TIME iS LONGER THAN USUAL
l Check
the lint screen
Remove lent.
Keep the screen clean
. Modern
dryers are designed
with drying temperatures
needed
to
safely handle
modern
fabrics
Cooldown times have been added
to
heat settings
You might notice
slightly longer dryrng times
2. If you need
service
:
Is +re dryer door closed tightly7 Your
drver has a switch b$v the door that
shuts off the drier If the door IS
opened
l
l
l
DIG you move
the POWER SWITCH to
ON’) And touch c FABRIC-TEMP
SELECTOR WI:II~
erght seconds’
Check circuit breakers
or fuses In tie
fuse box
If your WHIRLPOOL
appliance
ever
needs service anywhere
In the United
States, help IS lust a phone ccl away
to your nearest Whirlpool
franchised
TECH-CARE
service representative
Whirlpool
maintains
a nationwide
network of franchised
TECH-CARE service companies
to fulfill your warranty
ard provide
after-warranty
service and
mainterlance
to keep your WHIRLPOOL
appl,ar,ce
ir, peak cordtion
yc;L
” f nd
y&r
P,->(J’P”
-r
;‘.cb,pE
servrze company
ste:i rS I 3rjr oc c
telephsre
book “61 c’-A” %ges unoti’
Washers
Dyers ~~ ;ieporrr-g
or Ser
vrcrng Should
you not find a
listing,
dial free, the Whirlpool
COOL-LINE’
service
assistance
telephone
number
(800) 253-1301.
When calling
from:
Michigan
(800) 632-2243
Alaska
&
Hawaii
(800) 253-1121
If you move...To
make sure that yo(Jr
applronce
IS correctly
rnstalled ard
to insure rts contrnued
satrsfactory
operation,
please telephone
your
nearest TECH-CARE
service
company
for rnstaration
or tc get tne
name of a quailfred
installer
(lnstallatron
cost w’ll of course, be
pard by YOU !
Helpful hints...Yoll carI ‘nerp your
TECH-CARE service representative
grve you faster serl rce rf CDJ Include
the model and serral number of your
opplrance
when requestrrg
service
Also. retarn your sales slop ond
warranty
to verify y<:lur warranty
status
Remember...Your
TECti-CARE
service representative
is specrclly
trarned rn the expert reparrng
ana
servrcrng of your WhlRLPOC;L
appliances
He car] heir‘ \‘3lJ
maintain
the qualily
orrglralry
burl+
in’o your WHIRLPCCL
app’,ance
So
why no+ take the time n?‘.: to look
up “IIS telepnone
rl,,rnber and tot
it dowr
n the space p)rC. <ed on the
cover
3. If you have a problem
:
Cair ~Ni;~r~pool
Corporation
In
Berton Harbor at the COOL-LINE
sers. Ice ass stance telephone
r unber
[see Step 2) or write
Mr Stephen E IJpton, VICP President
ti’l~rlpool
Corporatron
Aaminrstrative
Center
2000 L S 33 North
Benton Harbor, Mrch gan 49022
rf ycu must call or wrote, please
provrae
your name, address,
telephone
number, type of applronce.
brand
model, serial number, date of
purchase,
the dealers
name, and a
complete
descrrptron
of the problem
IS needed
rn order to
This reformation
better respond
to your request for
assstance
Model
and Serlol
Number
Plate
Part No
6P125R
Fe,
4