1
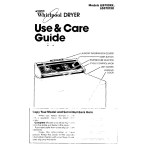
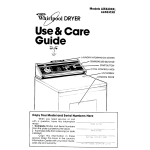
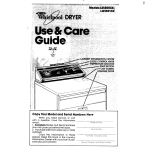
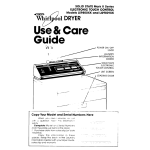
Models
whidpd
LE5750XF :
LG5751XF’
DRYER
Use & Care
Guide
-A
LAUNDRY
-!
-/
Copy
with
a
ready:
Your Model
When
you
question,
1. Complete
need
have
and Serial
Numbers
service,
or call
this information
Model
and Serial Numbers
[from the plate just behind
the door).
2. Purchase
date from sales slip [or date
installed).
Copy
this information
in these
spaces.
Keep
this book
in the Laundry
Information
Center
with your Dryer Guide,
sales slip and warranty.
-
INFORMATION
CENTER
CYCLE CONTROL
KNOB
TEMPERATURE SELECTOR
START BUTTON
Here
Before using
your Dryer
Please read this booklet
to be
sure your dryer is installed
and used
properly.
It WIII help you get the best
results and longest life your dryer was
designed
to give
You are personally
responsible for making sure that your dryer...
FOR YOUR SAFETY
If you smell gas:
1. Open windows
2. Don’t touch
electrical
switches
3. Extinguish any open
flame
4. Immediately
call
your gas supplier.
Is installed
by a qualified
Installer.
l Is Installed
In an area protected
from
the weather
l Is properly
Installed
and leveled
in a
well ventilated
room ’ on a floor that
can support the weight
l Is located
In an area where the temperature
is above
45 F (7.2 C).
l Is connected
to the right kind of outlet.
electric
supply and grounding..
l Is properly
connected
to fuel and
exhaust systems.
l Is used
only for jobs normally
expected
of home clothes dryers.
l Is properly
maintained.
l Is not run where
there may be explosive fumes
l Is not used
by children
or anyone
unable
to operate
it properly.
Remove the Consumer
Buy
Guide label before using your dryer. It
will be easier to remove.
Wipe out the drum with a damp
cloth to remove any dust.
l
Please read this manual.
Follow the instructions to help
you get the best drying results.
Save the manual for future use.
SPECIAL INSTRUCTIONS: See the
Dryer Guide for drying tips, information about permanent
press and
knits, instructions
for drying special
items and for things not to be dried in
your dryer.
.See the “Installation
Instructions”
complete
information
.See Setting Drying Times section,
for
page
FOR YOUR SAFETY
Do not store or use
gasoline or other
flammable
vapors and
liquids in the vicinity of
this or any other
appliance.
,
2
4
I
\
Contents
Before Using Your Dryer
Loading Your Dryer
Understanding
Your Dryer
Lint Screen
Using Your Dryer
Setting Drying Times
Selecting
Cycles and
Temperature
Settings
Using the Automatic
Settings
FLUFF AIR
TUMBLE PRESS’ Control
Using the Drying Rack
If You Need Service or Help
1. Before
Calling
for Service
2. If You Need Service
3
4
If You Have
a Problem
I
loading
Dryer
your
For best drying results and energy
sort dryer loads carefully
Separate
loads accordrng
to
the type of fabric and weight
For
example
l
Dry heavy fabrrcs (denims. towels,
cottons)
separately
from lrght fabrics
(permanent
press, synthetics)
l Separate
lent grvers (towels, sweatshirts. etc ) from lint takers (synthetrcs,
blends, permanent
press).
l Keep
dark colors and light colors
separate
l Keep
colorfast
items away from noncolorfast
fabrrcs.
Allow room for items to tumble
freely The load will dry faster with fewer
wrrnkles.
When drying permanent
press,
dry smaller-than-normal
loads for the
best wrinkle removal
Use a mesh bag to hold small
Items such as baby socks.
Read the Dryer Guide for more
hints on sortrng and loading
savings,
Knob won’t move untrl the load begins
to get as dry as the setting you
selected.
The AUTOMATIC
PERMANENT
PRESS Cycle operates
very much the
same, but it has a longer “cool-down”
time at the end. The cool-down
IS
Important
to help keep wrinkles from
settrng into permanent
press Items
The TIMED DRYING Cycle can
be used when you want to dry for a set
number
of minutes, or when you want
to damp
dry or fluff items wrthout
heat.
This Use & Core Guide contains
suggesttons
on the way to use your
dryer to get the best results and longest useful life from your dryer. Please
read It carefully.
lint Screen
The lint screen
top of the dryer
IS under
the Ird on
C/eon the iid screen before each
ioad A screen that’s blocked
by lint
can cause longer drying ttmes
Understanding
your Dryer
This dryer has a setting for TIMED
DRYING, like most other dryers But...tt
also has two automatrc
cycles:
AUTOMATIC REGULAR and AUTOMATIC
PERMANENT
PRESS.
These automatic
settings allow
you to choose
how dry you want the
load instead
of how long you need to
dry it.
For example,
in the AUTOMATIC
REGULAR Cycle, you can set the Cycle
Control
Knob anywhere
between
VERY
DRY and LESS DRY. The Cycle Control
To remove the screen, open the
lid and pull the screen straight out. Roll
the lint off the screen with your fingers
DO NOT rinse the screen
or wash
it. Wet lint is hard
to remove.
When replacing
the screen,
it firmly into place. Close the lid.
push
Using Your Dryer
1.
Put the sorted load In the dryer
and close the door tightly.
2.
Turn the Cycle Control
the cycle you want.
Knob to
Use the Automatrc
Cycles for most
loads. Start wrth the pornter at the
mrddle of an Automatrc
Cycle. See
page 6 for more informatron.
l
NOTE: In the Automatic
Cycles, the
Cycle Control Knob does not keep
moving.
It starts and stops, depending on the heat and the dryness of
the load.
Use TIMED DRYING for drying a certain
number of minutes, or for damp drying.
fluffing, or tumbling
items without air.
l
3.
Set TEMPERATURE SELECTOR.
Turn the TEMPERATURE SELECTOR to
the drying temperature
needed
for the
load. See page 5 for suggested
settings.
l
4.
Push the Start Button.
Make sure the door is closed and the
Cycle Control is set. If the door IS
opened
during the cycle, the dryer will
stop. To restart the dryer, close the
door and push the Start Button.
l
5.
To stop the dryer:
Open the door.
l Or, turn the Cycle
of the OFF positions.
l
Control
Knob to one
To change
the setting while
dryer is running, turn the Cycle
l
Knob, either way. so it points
ting you want.
the
Control
to the set-
-1
Setting Drying
Times Modern
dryers are designed
with drying temperatures
needed
to
Coolsafely handle
modern
fabrics.
down times have been added
to heat
settings. You might notice slightly
longer drying times.
The time it takes to dry a load
depends
on:
0 The kind of fabric, its weight,
4
and the
size of the load. A large load of jeans
will take a lot longer to dry than a
small load of light synthetics.
0 The amount
of moisture
in the load.
Towels hold a lot of moisture;
don’t. Synthetics
dry faster.
synthetics
l Temperature
of the rinse water Cold
rinses help save on energy
and wrinkles, but a cold load will take slightly
longer to dry than a warm one.
l Amount
of linf on the screen. A full
lint screen slows the air flow and can
make drying time longer.
l Temperature
around
the dryer. The
dryer heats room air. If the room air
temperature
is not above
45°F (7.2”(Z),
drying time will be longer and removal
of wrinkles
may be poor.
0 Proper instollotion
tems. For the fastest
IMPORTANT: To help reduce wrinkling, take the load from the dryer as
soon as tumbling
stops. This is very
important
for permanent
press, knits
and other synthetic
fabrrcs.
2
time,
dryer
lation
and exhaust
sys-
possible
drying
installing
and exhausting
your
properly
is important.
See instalinstructions.
SELECTING CYCLES AND TEMPERATURE SETTINGS
Choose the correct
settings according
to the chart below
TYPE OF LOAD
COTTONS
HEAVY-
DRYING CYCLE
Bedspreads,
mattress pads, quilts
UGHTWEiGHiShorts, dresses, sheets,
drapers, towels, work clothes
PERMANENT PRESS
HEAVY- Work clothes, lockets. rancoats.
etc
MEDiUMAND
MEDiUMWEiGHT-
Shirts, unrforms. dresses, slacks, etc
TEMPERATURE
SELECTOR
AUTOMATIC
REGULAR
AUTOMATIC
REGULAR
PERMIT PRESS HEAVY HIGH
PERM’T PRESSHEAVY HIGH
AUTOMATIC
PERMANENT
PRESS
AUTOMATIC
PERMANENT
PRESS
PERM’T PRESSHEAVY HIGH
AUTOMATIC
PERMANENT
PRESS
AUTOMATIC
PERMANENT
PRESS
AUTOMATIC
PERMANENT
PRESS
TIMED DRYING
PERM’T PRESS HEAVY HIGH
PERM’T PRESSHEAVY HIGH
KNITS
- COTTONS, RAYONS, BLENDS -T-shorts,
slacks, polo shorts, etc.
HEAVYWEIGHT
SYNTHETIC FIBERS (polyester, acrylic,
etc.1 AND BLENDS-t .ingerte, blouses. dresses,
etc’
,.
DELICATELY CONSTRUCTED FABRICS -Sheer Curtains
(2 or 3 panels]
LIGHTWEIGHT-
FOAM RUBBER ARTICLES - Pillows, bras. etc
KNITS GENTLE LOW
KNITS GENTLE LOW
FLUFF-AIR
To damp dry clothes for Ironing. set control In the TIMED DRYING Cycle for 15 to 25 minutes
MIXED LOADS
If ycu dry a mixed load of various weights of fabrrcs, select the cycle for the lighter weight
fabric. When dryer stops. remove the dry articles and reset the control
Using the
Automatic
Settings
With AUTOMATIC
REGULAR and
AUTOMATIC
PERMANENT PRESS, you
select how dry you want the load to be.
The dryer is designed
to shut off automatically
when the load is as dry as the
setting.
Use the AUTOMATIC
REGULAR
Cycle to dry most family loads. During
the last five minutes of the dryrng cycle,
the load is tumbled
without heat This
helps make the load easier to handle.
Use the AUTOMATIC
PERMANENT
PRESS Cycle to dry permanent
press,
knits and other synthetic
fabrrcs. The last
10 minutes of the drying cycle are without heat. This cool-down
trme helps
keep wrinkles from setting rn
For the first few loads, set the
Cycle Control Knob to point In the midC Ile between
VERY DRY and LESS DRY.
AUTOMATIC
REGULAR
This temperature
setting is useful
for fluffing bedding,
pillows and clothing, or dusting drapes.
It is also best
to use when damp-drying
heatsensitive items.
FLUFF AIR should be used for
such items as plastic shower curtains
or tablecloths,
rubber-backed
rugs,
some pillows, stuffed toys, etc.
l
Turn the TEMPERATURE SELECTOR to
FLUFF AIR,
l
Turn the Cycle Control Knob to the
number of minutes you want in the
TIMED DRYING Cycle.
l
Push the Start Button.
TUMBLE PRESS R
Control
LESS DRY
When the dryer stops, feel the
items tn the load. If they are about how
you like them, keep using this setting
If the Items are drier than you like,
use a setting nearer LESS DRY or COOL
DOWN the next time you dry a load IIke
that.
If the Items are not as dry as you
want, use a settrng nearer VERY DRY the
next trme you dry a load like that
After drying a few loads, you will
find a favorite
settrng to use.
6
FLUFF AIR
This setting is useful for removing
wrinkles from packrng
in suitcases
or
closets. TUMBLE PRESS WIII help put them
back into therr pre-set shape.
l
Set Cycle Control Knob to TUMBLE
PRESS.
Set TEMPERATURE SELECTOR to
PERM’T PRESS-HEAVY
HIGH.
8 Push the Start Button.
For best results, TUMBLE PRESS
only a few items at a time; put them on
hangers
or fold them as soon as the
dryer stops.
l
If You Need
Service or Help,
We Suggest You
Follow These
Three Steps:
1. Before
calling
service.
:
for service*...
Problems
are sometrmes
caused
by little things you can correct
without
tools Check
thus list before
you Call
for service
DRYER DOES NOT RUN
0 Is electric
power
cord plugged
In7
s
3
.‘% A . -1
Is the dryer door closed
trghtly? YOU
dryer has a switch by the door that
shuts off the dryer if the door is
opened.
v_
. Did you push
the Start Button?
_
,
/
Tzl
%
l
Check
circuit breakers
or fuses in the
fuse box.
DRYER RUNS BUT DOES NOT HEAT
l Is the
Cycle Control
Knob set correctly?
[The last 5 mtnutes are cooldown time in AUTOMATIC
REGULAR;
the last 10 minutes in AUTOMATIC
PERMANENT
PRESS are without
heat.)
l Is it a gas
dryer? See If the gas is
turned on. If not, turn the Cycle Control Knob to OFF. Turn on the gas
and wait five mrnutes for the automatic swatch to reset. Then try starting
it again
l Is it an electric
dryer? Check
the
circurt breakers
or fuses rn the fuse
box. An electric
dryer WIII have two
fuses. If one is blown,
the dryer may
run, but not heat.
DRYING TIME IS LONGER THAN USUAL
l Check
the lent screen
Remove
lint.
Keep the screen clean for best
drying results and times
l Modern
dryers are designed
to dry
at the cooler temperatures
needed
by modern
fabrrcs. They may need
more time than you are used to.
l
2. If you need
If your WHIRLPOOL’
applrance
ever
needs service
anywhere
in the United
States, help is just a phone call away
.to your nearest
Whirlpool
franchised
TECH-CARE”
service
representative.
Whirlpool
maintains
a nationwide
network
of franchised
TECH-CARE
service companies
to fulfill your warranty
and provide
after-warranty
service
and maintenance
to keep your
WHIRLPOOL
applrance
In peak
condition.
You’ll find your nearest
TECH-CARE
service
company
listed in your local
telephone
book Yellow Pages under
APPLIANCES - HOUSEHOLD - MAJOR
SERVICE & REPAIR. Should you not
find a listing, dial free, the
Whirlpool
COOL-LINE” service assistance telephone
number.
When calling
from:
Michigan
(800) 632-2243
Alaska &
Hawaii
... ,
(800) 253-l 121
All other
states
...
.
(800) 253-1301
If you move...To
make sure that your
appliance
is correctly
installed
and
to insure its continued
satisfactory
operation,
please telephone
your
nearest
TECH-CARE R service
company
for installation
or to get the name of
a qualified
installer. (Installation
cost
will, of course, be pard by you.)
Helpful hlnts...You can help your
TECH-CARE
service
representative
give
you faster service
tf you include
the
model and serial number
of your
appliance
when requestrng
service.
Also, retain your sales slip and
warranty
to verify your warranty
status
Remember...Your
TECH-CARE
service representative
is specially
trained
in the expert repairing
and
servicing
of your WHIRLPOOL
appliances.
He can help you
maintain
the quality
originally
built
rnto your WHIRLPOOL appliance.
So
why not take the time, now, to look
up his telephone
number and jot
it down in the space provided
on the
cover.
3. If you have
a problem*
:
Call Whrrlpool
Corporation
in
Benton Harbor at the COOL-LINE
service assrstance
telephone
number [see Step 2) or write:
Mr. Guy Turner, Vice Presrdent
Whirlpool
Corporation
Administrative
Center
2000 U.S. 33 North
Benton Harbor, Michrgan
49022
*If you must call or wrote, please
provrde.
your name, address.
telephone
number, type of appliance.
brand, model, serial number, date of
purchase,
the dealer’s
name. and a
complete
description
of the problem.
This information
is needed
in order to
better respond
to your request for
assistance.
FSP IS CI regstered trademark
of WhlrlpcO Corporation
for
quality parts Look for this
symbol of quollty whenever
FSP
you need a replacement
part
8
for your WhIrlpool appliance
FSP replacement
parts
WI/I fit right and work rIghI because they are
made to the same exacting speclflcatlons
used to build every new WhIrlpool appltance
0
Whirlpool
Home
*ppl,ances
Benlon Harbor. Michigan. Aulomalic Washers. Clothes Dryers.
Freezers. Relrigeralor-Freezers.
Ice Makers. Dishwashers.
Built-in Ovens and Surlace Units, Ranges. Microwave Ovens,
Compactors, Room Air Conditioners.
Dehumidiliers,
Central
Healing and Air Comlllioning Syslems.
Quality. Our way of life.
Part No. 69l259
Rev. B
Printed in U.S.A.