1
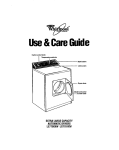
Use& CareGuide
Cycle control knob
and temperature
Model and serial
LARGECAPACITY
AUTOMATICDRYERS
LE5550XT LG5551XT
Contents
Important Safety lnstructlons
Additional safety instructions
and your responsibilities
Page
............... .3
Operatlng lnstructlons
Starting your dryer.. ........................
The regular/permanent
press cyde.. ...............................
The knits, delicate cycle ................
The fluff air cycle ...........................
Using TUMBLE PRESSa.. .............
Using damp dry .............................
signal ........................
Endofcycle
.
.6
.6
.7
8
.8
.8
Carlng For Your Dryer
Cleaning the lint screen.. ............... .9
Lint screen maintenance ............... .9
Cleaning the dryer interior.. .......... 10
Lint removal ................................. 11
If You Need Servke Or
Assistance .................................... .l3
Whlrlpool Automatic Dryer
Warranty ....................................... .16
Thank you for buying a Whirlpool
appliance. Please complete and mail
the Owner Registration Card provided
with this product. Then complete the
form below. Have this information ready
if you need service or call with a
question.
l Copy model and serial numbers
from
plate (on the frame behind the door)
and purchase date from sales slip.
l Keep this book, the Dryer Guide and
the sales slip together in a handy
place.
Model Number
serfal Number
Purchase Date
(al991 Whirlpool Corporation
lt your dryer has a Consumer Buy
Guide label, remove it. ft will be easier
to remove before the dryer is used. To
remove any remaining glue:
l Rub briskly with thumb to make a
ball, then remove.
or
. Soak area with liquid hand
dishwashing detergent before
removing glue as described above.
Do not use sharp instruments, rubbing
alcohol, flammable fluids or abrasive
cleaners. These can damage the finish.
See ‘Important Safety Instructions” on
page 3.
NOTE: Do not remove any permanent
instruction labels inside the dryer.
You should wipe out the dryer drum
with a damp cloth before using to
remove dust from storing or shipping.
Servlce Company
Phone Number
FOR YOUR SAFETY
If you smell gas:
1. Open windows.
2. Don’t touch electrlcal
switches.
3. ;zlnegulsh any open
.
4. Immediately call your gas
suppller.
FOR YOUR SAFETY
Do not store or use gasoline
or other flammable vapors
and llqulds In the vlclnlty of
thls or any other appliance.
The fumes can create a fire
hazard or exploslon.
ImportantSafetyInstructions
To reduce the rlsk of fire, electrlcal shock, or
Injury to persons when uslng your dryer, follow
bask precautions, lncludlng the followlng:
l
l
9 You are responsible for making
sure that your dryer is installed,
Read all lnstructlons before uslng
the dryer.
NEVER dry items cleaned, washed,
soaked in or spotted with wax, paint,
gasoline or flammable fluids in the
dryer. The fumes can create a FIRE
l
HAZARD or EXPLOSION. ALWAYS
hand launder and air dry fabrics
containing these materials.
b NEVER allow children to operate,
play with or crawl inside the dryer.
Close supervision of children is
necessary when the dryer is used
near children.
l DO NOT reach into a dryer if the
drum is moving.
. When discarding an old dryer,
ALWAYS remove the door to
prevent accidental entrapment.
n DO NOT install or store dryer where
it will be exposed to the weather.
) DO NOT tamper with the controls.
l
l
l
l
repaired and has parts replaced by a
qualified person.
Use only fabric softeners specifically
labeled as not being harmful to the
dryer.
FIRE HAZARD and DAMAGE to
materials can result from:
-drying rubber, rubber-like and heat
sensitive materials with heat.
-allowing lint build-up inside the
dryer or exhaust system. Cleaning
should be done periodically by a
qualified person.
Clean lint screen before or after
each bad.
DO NOT let dust, lint, paper, rags,
chemicals, etc. pile up around or
under the dryer.
Dryer must be electrically grounded.
See the Installation Instructions.
- SAVE THESE INSTRUCTIONS -
Additional safety instructionsand your responsibilities
l
l
l
l
NEVER operate the dryer if:
- II is not working right (i.e. noisy,
too hot).
-it is damaged.
-parts are missing (i.e. door latch).
-all panels are not in place.
-the lint screen is loose, damaged
or missing.
ALWAYS shut off the gas valve
before leaving on vacation if you
have a gas dryer.
ALWAYS unplug the power supply
cord or turn off electrical power
before attempting to service the
dryer. Shut off GAS VALVE if you
have a gas dryer.
You are responslble for making
sure that your dryer:
-is properly maintained.
-is properly installed and leveled on a
floor that can support the weight in a
well ventilated room.*
-is located in an area where the
temperature is above 45°F (7°C).
- is connected to the proper outlet and
electrical supply.’
-is properly connected to fuel and
exhaust systems.’
-is not installed against drapes or
curtains.’
-is used only for jobs normally
expected of home clothes dryers.
-is not used by anyone unable to
operate it properly.
‘See the Installation Instructions
complete information.
for
OperatingInstructions
Starting your dryer
Be sure to refer to the chart below and the Dryer Guide for Proper sorting, loading
and control setting information before starting your dryer.
NOTE: Do not overdry. Overdrying can cause shrinkage, static ding, and damage
some fabrics.
SUGGESTED
CYCLE
TYPE OF LOAD
Cottons and Ilnsns
EXTRA HEAVY-Bedspreads,
mattress
pads, quilts
HEAVYWEIGHT-Towels,
jeans, axduroys.
wok dothes
MEDIUMWEIGHTSheets,
pillowcases,
cdton underwear, diapers
LIGHTWEIGHT-Batistes.
organdies,
lingerie
Permanent press, synthetics
and blends
HEAVYWEIGHT-Work
dothes. jadtets,
raincoats
MEDIUMWEIGHTShirts.
play dothes,
sheets, slacks
LIGHTWEIGHT-Lingerie,
blouses, dresses
Knits
HEAVYWEIGHT-Cottons,
rayons, blends,
T-shirts, slacks. shirts
MEDlUMWElGHTSynthetic
(polyester,
aaylic, etc.), dress sladts, skirts. sweaters
LIGHTWEIGHTSynthetic
(polyester,
aaylic, etc.) and blends, lingerie, blouses,
dresses
Dslkate fabrlca
Sheer curtains (2 or 3 panels)
RegularIPermY
Press
RegularIPermY
Press
RegularIPermT
Press
RegulanPerm’t
Press
SUGGESTED
TIME
70-80 minutes
50-80 minutes
40-50 minutes
30-40 minutes
RegularIPermY
Press
RegularIF’erm’t
Press
Knits, Delicate
40-50 minutes
‘RegularIPerm’t
40-50 minutes
30-40 minutes
20-30 minutes
Press
Knits, Delicate
3040
minutes
Knits, Delicate
20-30 minutes
Knits, Delicate
15-20 minutes
Fluff
Fluff
Fluff
Fluff
20-30
20-30
40-50
15-20
gauze, lace, etc.
Rubber, plastic,
heat-aensltlve
fabrlca
FOAM RUBBER-Pillows,
bras, stuffed toys
PLASTIC-Shower
curtains, tablecloths
RUBBER-BACKED
RUGS
OLEFIN, POLYPROPYLENE,
SHEER NYLON
4
Air
Air
Air
Air
minutes
minutes
minutes
minutes
2. Push the Start Button to start
3. To atop and restart the dryer:
l
l
wn
the door or turn th& Cycle
Control Knob to OFF to stop the
dryer.
Close the door, select a cycle (if
necessary) and push the Start
Button to restart the dryer.
Operating lnstructlons
Continued
The REGULAR/PERMANENT
PRESScycle
The REGULAFVPERMANENT PRESS
Cycle helps provide the special care
that cottons, permanent press and
synthetic fabrics need. The cycle
consists of a timed period of heated
drying and a 10 minute cool down
period. During the cool down, the bad
tumbles without heat. This helps keep
wrinkles from setting and makes the
bad easier to handle.
NOTE: To help reduce wrinkling,
remove the bad from the dryer as
soon as tumbling stops. This is
important for permanent press, knits
and synthetic fabrics.
The KNITS,DELICATEcycle
The KNITS, DELICATE Cycle helps
provide the special care that delicate
fabrics need. The cycle consists of a
timed period of reduced heat drying
and a 10 minute cool down period.
During the cool down, the bad tumbles
virihout heat. This helps keep wrinkles
from setting and makes the bad easier
to handle.
NOTE: To help reduce wrinkling,
remove the bad from the dryer as
soon as tumbling stops. This is
important for permanent press, knits
and synthetic fabrics.
The FLUFFAIR cycle
I
Flre Hazard
Do not dry plastic or rubber
items wlth heat. Use FLUFF AIR
cycle, or line dry. Failure to do so
could result In flre or damaged
i items.
The dryer does not heat when the
Cycle Control Knob is on FLUFF AIR.
This cycle can be used to fluff or air
dry bedding, plastic tablecloths, foam
rubber pillows, stuffed toys, sneakers,
etc.
1. Turn the Cycle Control Knob to the
desired number of minutes you
want in the FLUFF AIR Cycle.
2. Push the Start Button.
Operating lnstructlons
Continued
Using TUMBLEPRESS”
The TUMBLE PRESS setting removes
wrinkles from clothing that has been
packed in a suitcase or closet, and
from items not removed from the dryer
al the end of a cycle.
1. Set the Cycle Control Knob on
TUMBLE PRESS.
2. Push the Start Button.
The bad will tumble in heated air for
10 minutes. Then the dryer will tumble
the clothes for 10 more minutes
without heat.
For best results, put only a few
ifems at a time in this cycle. As soon
as the dryer stops, put the items on
hangers or fold them.
Using DAMPDRY
Use this setting to dry damp items that
do not require an entire drying cycle,
or to dry items to damp level. (Two
examples are heavy cottons, such as
ieans, which you do not want to
become stiff, or cctton clothes which
are easier to press when damp.)
1. Set the Cycle Control Knob on
DAMP DRY.
2. Push the Start Button.
The dryer tumbles the load with heat
for 20 minutes, then without heat for
10 minutes.
‘5
=P
/
\
3\
End-of-cyclesignal
The dryer sounds a signal to let you
know when the cycle is finished. The
signal cannot be turned off and is not
adjustable.
The signal is helpful when you are
drying permanent press, synthetic and
other items that should be taken out as
soon as the dryer stops.
Caring For Your Dryer
Do not run the dryer wlth the lint ecreen loose,
damaged, blocked or mleslng. Dolng so can
cause overheatlng and damage to both the
dryer and fabrics.
Cleaningthe lint screen
The lint screen is located under a lid
on top of the dryer. Clean It before
each load. A screen blocked by lint
can increase drying time.
1. Open the lid and pull the lint screen
straight out.
2. Roll lint off the screen with your
fingers. Do not rinse or wash the
screen to remove lint. Wet lint is
hard to remove.
3. Push the lint screen firmly back into
place and close the lid.
Lirit ScreenMaintenance
Laundry detergents and fabric
softeners can cause a residue build-up
on the lint screen. A clogged lint
screen can extend drying times. Clean
the lint screen every six months or
more frequently if it becomes clogged
due to a residue build-up. Use the
following method:
1. Wet both sides of lint screen with
hot water.
2. Wet a nylon brush with hot water
and liquid detergent.
3. Scrub lint screen with the brush
until all residue build-up is removed.
4. Rinse with hot water.
5. Thoroughly dry lint screen with a
clean towel and replace in dryer.
9
Carlng For Your Dryer
Contlnued
cleaning tne aryer interior
Electrlcal Shock and
Personal Injury Hazard
l Turn off the electrlcal
power
before cleaning the Interior.
l Make sure the dryer Is cool.
Failure to do so could result In
electrlcal shock or Injury.
Flre Hazard
l Use non-flammable
cleaner.
Failure to do so could result In an
explosion.
Garments which contain unstable dyes,
such as denim blue jeans or brightly
colored cotton items, may discolor the
dryer interior. If the interior is discolored, clean with one of the following
methods to avoid staining later load
items.
Powdered laundry detergent
Make a paste with detergent and very
warm water. Apply paste to a soft cloth
and scrub area until all excess dye is
removed. Wipe thoroughly with a damp
cloth. Tumble a bad of rags to dry.
-OR-
Llquld non-flammable
cleaner
household
Apply to stained area. Rub with a cloth
until all excess dye is removed. Tumble
a load of rags to dry.
To clean dryer exterior, wipe with a
soft, damp cloth.
10
Lint removal
Lint can gather inside the dryer and be
a fuel for fire. It is recommended the
lint be removed every 2 to 3 years, or
more often, depending on dryer usage.
Cleaning should be done by a qualified
person. if you have any questions.
please call our Consumer Assistance
Center at 1-800-253-l 301.
Electrical Shock and
Personal Injury Hazard
l Unplug the power supply
cord
or turn off the electrlcal power
before removlng Ilnt.
l Do not put hands lnslde the
cablnet
l Make sure the dryer Is cool.
Fallure to do so could result In
electrical shock, personal Injury
or damage.
Thermos~ts
Heat element
Electric dryers and gas dryers wlth
lower front access panel
Electric
dryer wlth back panel removed
lgnlter
Funnel
I
lb
I
Gas dryer with lower front
acoess panel removed
If your dryer is electric, or is gas and
has a lower front access panel:
1. Unplug the power supply cord or
turn off the electrical power.
2. Remove back panel (electric) or
bwer front access panel (gas).
3. Remove lint from boxed-in area
with a soft brush or vacuum
cleaner. Avoid damaging wires,
thermostats, funnel (gas models) or
igniter (gas models).
4. Replace panel; reconnect and
relevel dryer, if necessary.
NOTE: See page 12 if your dryer is
gas and does not have a lower front
access panel.
11
Carlng For Your
Contlnued
lgnlter
Gas dryer wlthout
panel (full-fmnl
12
Dryer
Funnel
lower front accem
pfinel removed)
-8
dryer8
wlthout
8cce88
panel
IOWW
front
tl your dryer is gas and does not have
a tower front access panel:
1. Unplug the power supply cord or
turn off the electrical power.
2. Remove lint screen.
3. Remove two screws from lint
screen area.
4. Open top by pulling forward and up
at each front comer (top is hinged
at rear).
5. Remove two internal screws from
front panel flanges (near top front
comers). Slightly lift panel off lower
clips and pull forward to disengage
..
from drum. Hold drum in place
when pulling panel forward to
prevent drum from dropping down.
6. Remove door switch wires, if
necessary. Note the wire/terminal
positions to assure proper
reassembly.
7. Remove lint from boxed-in area
with soft brush or vacuum cleaner.
Avoid damaging wires, thermostats,
funnel or igniter.
6. Reassemble in reverse order. Be
sure drum and drum seals are
positiined properly when
reassembling. Top and front panels
must be securely in place before
operating dryer.
9. Reconnect power and relevel dryer,
if necessary.
If You NeedServiceOrAssistance
We suggestyou follow
these steps:
1. Before calling for asslstancs...
Performance problems often result
from little things you can find and fix
yourself without tools of any kind.
If your dryer does not run:
l
l
l
l
Is the power supply plugged into a
live circuit with the proper voltage?
Is the door dosed tightly?
Did you push the Start Button?
Have you checked your home’s main
fuses or circuit breaker box?
If your dryer do88 not heat:
l
l
l
l
The FLUFF AIR cycle is without heat.
The last minutes of heat settings are
without heat.
If you have a gas dryer, is the gas
turned on? tf not, turn the Cycle
Control Knob to OFF. Turn on gas.
.Wait 5 minutes. Reset controls and
start.
An electric dryer circuit uses 2 breakers or 2 fuses. ff one breaker is
tripped or one fuse is blown, the
dryer may run, but not heat.
If drylng time seems too long:
l
l
l
Is the lint screen clean? See page 9
for cleaning instructions.
Is the exhaust duct clogged? Clean
exhaust duct.
See the Dryer Guide.
2. If you need assistance’...
Call Whlrlpool Consumer Assistance
Center telephone number. Dlal free
from anywhere In the U.S.:
1400-253-1301
and talk with one of our trained consultants. The consultant can instruct you in
how to obtain satisfactory operation from
your appliance or, if service is necessary, recommend a qualified service
company in your area
ff you prefer, write to:
Mr. Donald Skinner
Director of Consumer Relations
Whirlpool Corporation
2000 M-63
Benton Harbor, MI 49022
Please include a daytime phone number
in your correspondence.
3. If you need service’...
Whirlpool has a
nationwide network
of authorized
XMCE WhirlpoolSU service
w
companies.
Whirlpool service technicians are trained
to fulfill the product warranty and provide
after-warranty service, anywhere in the
United States. To locate the authorized
Whirlpool service company in your area,
call our Consumer Assistance Center
telephone number (see Step 2) or look in
your telephone directory Yellow Pages
under:
T
5. If you are not satlsfled wtth how
the problem was solved*...
4. If you need FSP
replacement parts*...
FSP is a registered trademark of
Whirlpool Corporation for quality parts.
Look for this symbol of quality
whenever you need a replacement part
for your Whirlpool appliance. FSP
replacement parts will fit right and work
right, because they are made to the
same exacting specifications used to
build every new Whirlpool appliance.
To locate FSP replacement parts in
your area, refer to Step 3 or call the
Whirlpool Consumer Assistance Center
number in Step 2.
l
l
l
Contact the Major Appliance
Consumer Action Panel (MACAP).
MACAP is a group of independent
cOnsumer experts that voices
cOnsumer views at the highest levels
of the major appliance industry.
Contact MACAP only when the
dealer, authorized servicer and
Whirlpool have failed to resolve
your problem.
Major Appliance Consumer
Action Panel
20 North Wacker Drive
Chicago, IL 60606
MACAP will in turn inform us of your
action.
‘When requesting assistance, please
provide: model number, serial
number, date of purchase, and a
complete description of the problem.
This information is ndeded in order
to better respond to your request.
14
Notes
WHIRLPOOL@
AutomaticDryer Warranty
DROO
LENGTH OF WARRANTY 1 WHIRLPOOL WlLL PAY FOR
FULL ONE-YEAR
WARRANTY
From Date of Purchase
FSP@ replacement parts and repair labor to
correct defects in materials or workmanship.
Service must be provided by an authorized
WhirlpooP”’ service company.
WHIRLPOOL WILL NOT PAY FOR
A. Service calls to:
1. Correct the installation of the dryer.
2. Instruct you how to use the dryer.
3. Replace house fuses or correct house wiring or plumbing.
4. Replace light bulbs.
B. Repairs when dryer is used in other than normal, single-family
household use.
C. Pickup and delivery. This product is designed to be repaired in the
home.
D. Damage to dryer caused by accident. misuse, fire, flood, acts of God
or use of products not approved by Whirlpool.
E. Repairs to parts or systems caused by unauthorized modifications
made to the appliance.
NHIRLPOOL CORPORATION-SHALL
NOT BE LIABLE FOR INCIDENTAL OR
CONSEQUENTIAL DAMAGES. Some states do not allow the exclusion or
limitation of incidental or ansequential
damages so this limitation or exclusion may
not apply to you. This warranty gives you specific legal rights, and you may also
have other rights which vary from state to state.
Outside the United States, a different warranty may apply. For details, please
contact your authorized Whirlpool distributor or military exchange.
ff you need service, first see the “Service and Assistance” section of this book.
After checking ‘Service and Assistance,’ additional help can be found by calling
our Consumer Assistance Center telephone number, l-800-253-1301,
from
anywhere in the U.S.
@ Registered
Trademark / SM Service Mark of Whirlpool Corporation
Part No. 3391374
01991 Whirlpool Corporation
Printed in U.S.A.