1
The Blending Station® Advance is pre-programmed with an Advance program which is
optimized for the Xtreme Performance (XP) container. The program can be customized by
using the Control Panel, or a programming chip or programmer software kit available from
Vita-Mix. Call your distibutor or Customer Service for more information.
Programming One of the Six Blending Station®
Advance PRE-SET Buttons
1. Press the OWNER CONTROLS button (Vita-Mix® logo). “MODE” will appear in the display
window. Press the PRE-SET buttons 1 and then 6. Then press the Vita-Mix logo three
more times. The display window will say “BUTTON SETUP.”
2. Press the SPEED ▲ or ▼ buttons to scroll thru the “Recipe” numbers until you reach the
one you want. (For a description of each recipe, see page 10.)
3. Press the PRE-SET button that you want to program for the recipe selected.
For Example: If you wanted to program button 1 with recipe #17:
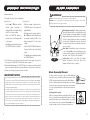
BUTTON SETUP
1. After pressing the OWNER CONTROLS button sequence as RECIPE 01
described above, the DISPLAY SCREEN will say “BUTTON SETUP.” BUTTON SETUP
RECIPE 17
2. Press the SPEED ▲ button until the screen displays “Recipe 17.”
BUTTON SETUP
3. Press the 1 button to apply Recipe 17.
RECIPE 17----->1
4. Either continue programming the other five buttons or press
READY
the OWNER CONTROLS button to exit and continue blending.
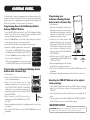
Programming your On-Counter Blending Station
Advance with a Custom Chip
1. Turn the machine on.
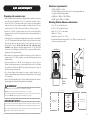
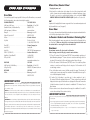
2. Remove the container and lift the front of the machine so that
you can see the programming port.
3. Facing the front of the machine, insert the custom
programmed chip (with the silver contact bars up and the
words,“THIS SIDE FACING TO THE FRONT OF THE MACHINE”
toward you) into the port located below the label area. Push
gently until chip engages into the port. The DISPLAY WINDOW
will read “NEW MODULE.”
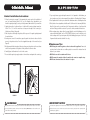
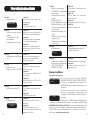
Custom
4. Within 10 seconds, the six PRE-SET buttons will be reProgrammed
programmed and the DISPLAY WINDOW will read “SAVED”
Chip
then “READY.”
5. Remove the programming chip, return it to the original package and store in a safe, easily
accessible spot.
6. Press one of the six PRE-SET buttons to reveal, in the DISPLAY WINDOW, the name of the
program/drink.
8
Programming your
In-Counter Blending Station
Advance with a Custom Chip
1. Turn the machine on.
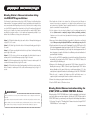
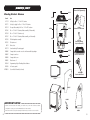
2. Remove the container and lift the machine from the
bottom edges to reveal the motor and housing area.
With the machine facing towards you, locate the slot
underneath on the right hand side of the machine
between the motor and the outer wall.
3. Facing the front of the machine, insert the custom
programmed chip (with the silver contact bars up
and the words,“THIS SIDE FACING TO THE FRONT
OF THE MACHINE” toward you) into the port located
below the label area. Push gently until the chip
engages into the port. The DISPLAY WINDOW will
read “NEW MODULE.”
4. Within 10 seconds, the six PRE-SET buttons will be
In-Counter
Custom
re-programmed and the DISPLAY WINDOW will read
Hole
Programmed
“SAVED” then “READY.”
Chip
5. Remove the programming chip, return it to the original
package and store in a safe, easily accessible spot.
6. Press one of the six PRE-SET buttons to reveal, in the DISPLAY WINDOW, the name of the
program/drink.
8. Carefully place the Blending Station Advance motor back into the hole in the counter.
Resetting the PRE-SET Buttons to the original
factory settings
1. Press the OWNER CONTROLS button (Vita-Mix logo). “MODE” will appear in the display
window. Press the PRE-SET buttons 1 and then 6. The display window will say “COUNT
TEMP TOTAL.”
2. Press the Vita-Mix logo two more times to reveal the instructions on resetting the PRE-SET
buttons.
3. Press and hold button 4 until the DISPLAY WINDOW reads “RESTORING PLEASE WAIT.”
The PRE-SET buttons are now reset to the original factory settings.
IMPORTANT NOTES!
PROGRAMMING CHIP: If the above programming steps are taken and the custom programming
does not appear with the first blend cycle, turn the chip 180˚ (side-to-side) and try again.
9