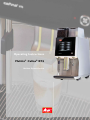
1
Operating Instructions Melitta® Cafina® XT6 Melitta SystemService Content 10.6 a) b) c) d) 1. Description ........................................................ 3 2. Intended Use ..................................................... 3 3. Technical data................................................... 3 a) b) c) d) Unit data ............................................................... 3 Operating data...................................................... 3 Connections ......................................................... 3 Optional accessories ............................................ 3 11. Cleaning........................................................... 18 11.1 a) b) 11.2 11.3 11.4 a) b) 11.5 a) b) c) 11.6 11.7 11.8 11.9 4. Accessories supplied....................................... 4 5. Safety Instructions ........................................... 4 6. Installation......................................................... 5 6.1 a) b) c) d) e) 6.2 Prerequisites ........................................................ 5 Prerequisites for water connection ....................... 5 Prerequisites for electrical connection .................. 5 Requirements on the personnel ........................... 5 Requirements on the installation location ............. 5 Requirements on the product material ................. 5 Canister operation ................................................ 5 7. Chip keys ........................................................... 6 8. Preparation........................................................ 7 8.1 a) b) 8.2 8.3 8.4 8.5 Filling .................................................................... 7 Filling up the coffee provision ............................... 7 Filling up the instant powder ................................. 7 Switching On ........................................................ 8 Switching Off ........................................................ 8 Confirming filling levels ......................................... 9 Emptying the grounds drawer............................... 9 Cleaning intervals .............................................. 18 Cleaning request ................................................ 18 Automatic dispensing lock.................................. 18 Cleaning agents ................................................. 18 If you are working with canisters ........................ 18 Daily cleaning ..................................................... 19 Cleaning the grounds drawer ............................. 19 Start the cleaning programme ............................ 19 Cleaning the instant system ............................... 21 Disassembling the mixer unit ............................. 21 Cleaning the mixer unit ...................................... 21 Assembling the mixer unit .................................. 21 Cleaning the coffee bean containers .................. 22 Cleaning the instant coffee containers ............... 22 Clean touch screen ............................................ 22 Cleaning the dispensing area ............................. 22 12. Preventive maintenance ................................ 23 12.1 Intervals ............................................................. 23 12.2 In case of defects ............................................... 23 13. Disposal ........................................................... 23 a) b) c) d) 9. Dispensing products ...................................... 10 9.1 9.2 9.3 a) b) 9.4 9.5 “Operation” menu item ....................................... 17 Consumption and product statistics ................... 17 Machine settings ................................................ 17 Event display ...................................................... 17 Exiting the Manager menu ................................. 17 Placing the vessel .............................................. 10 Dispensing a product in Self-service operation .. 10 Dispensing a product in Waiter operation ........... 10 Cancelling dispensing a product......................... 11 Preset batch ....................................................... 11 Dispensing products via product filters ............... 12 Manual coffee insertion ...................................... 12 Waste disposal ................................................... 23 Waste water disposal ......................................... 23 Disposal of cleaning agents ............................... 23 Disposal of the machine ..................................... 23 10. Settings ........................................................... 13 10.1 a) 10.2 a) b) c) d) e) f) g) 10.3 a) b) 10.4 a) 10.5 a) b) Calling up the Manager menu ............................ 13 Making entries .................................................... 13 “Select” menu item ............................................. 13 Product groups ................................................... 13 Creating product groups ..................................... 13 Deleting product groups ..................................... 14 Editing product groups ....................................... 14 Adding products to be dispensed ....................... 14 Deleting products to be dispensed ..................... 14 Sorting products to be dispensed ....................... 14 “Product filter” menu item ................................... 15 Adding/deleting main criteria .............................. 15 Editing the main criteria ...................................... 15 “Product” menu item ........................................... 15 Duplicating a product .......................................... 16 “Unit” menu item ................................................. 16 Changing filling levels to intermediate values ..... 16 “Maintenance” menu item ................................... 17 Translation of the original operating instructions Please keep it near the machine, so that it is available for the operating personnel at any time should any questions arise. Mach.No.: 10031401 www.poetter-dokumentation.de Mat-Nr.: 26646 – Stand 03/2014 2 1. Description 3. Technical data This machine is an automatic coffee machine for dispensing coffee and coffee/milk products for high daily consumption in the catering industry. Depending on the configuration of the machine, the following can be dispensed: Coffee and milk products, Instant products, Hot water and steam. a) Unit data Dimensions (WxDxH) ........... : Weight .................................. : Coffee bean container .......... : Instant container ................... : Grounds drawer capacity ..... : b) It is made from an aluminium housing and highquality plastics. The design of the machine enables compliance along with the operator duties to satisfy the ... HACCP hygiene guidelines, Accident prevention regulations for electrical safety in commercial applications. 300 x 580 x 715 mm 54 kg 1x / 2x 1000 g 1x / 2x 450 – 800 g approx. 50 portions Operating data Hourly capacity ..................... : 20-25 l Hot water Permitted ambient temperature : +5...30° C Permitted relative humidity ... : < 80% c) Connections Power supply ........................ : Power consumption .............. : Fuse protection in building ... : Connection ........................... : see type plate 2,8 kW max. 16 A required Power cable 1.5 with grounded line plug Freshwater connection ......... : min. 2.5 bar (250 kPa) (dynamic) at approx. 2 l/min.; if higher than 6 bar (600 kPa) a pressure reducer is required. Carbonate hardness tap water: 1 - 3° dKH no action required, from 4° dKH decarboniser (Brita Purity) required, below 1° dKH consult manufacturer Waste water connection ....... : mind. DN 25 - NW 1" Noise level ............................ : < 70 dB(A) The machine is operated using a touchscreen. 2. Intended Use This machine is intended … for operation by instructed personnel, for unattended self-service operation, for fixed water connection, for pressureless operation using fresh water and waste water canisters, for stationary setup within dry, enclosed rooms. This machine is not intended to be used ... in areas with high relative humidity (e.g. areas with heavy steam development) or outside, on board of vehicles or in mobile rooms (please consult the manufacturer). d) Optional accessories Cup warmer: ......................... : Refrigerator .......................... : Grounds discharge ............... : Supply container................... : The type plate is located behind the drawer (see 8.5). 3 XT6 CW XT6 MC18 Container drop Lockable coffee bean container m Do not continue using the machine if damage is visible or apparent malfunction occurs. Important safety functions may be disturbed in this case. It is recommended that the coffee machine is first inspected and, if necessary, repaired by the customer service. Examples are: if the housing is damaged or covers do not close properly, if the power cord or power plug are damaged or if the fuse for the circuit of the machine trips repeatedly, if water escapes from the machine, if error messages appear on the display or if the machine does not function normally, if unusual odours can be detected or heat development on the housing is apparent (the housing is normally only warm to the touch during operation). In all of these cases, remove the plug from the power socket and turn off the water. Then notify customer service. m Comply with all intervals for cleaning, inspection and maintenance, as specified in the instruction manual. Otherwise, the safety, functional reliability and durability may be impaired. 4. Accessories supplied This machine is supplied with the following accessories: 2 green user chip keys 1 yellow manager chip key 1 cleaning container 1 extraction tool 1 microfibre cloth 1 Melitta® Cafina® Combi tablet 10 Melitta® Cafina® AMC cleaners 1 6-g coffee measuring scoop 1 operating instructions 5. Safety Instructions These safety instructions refer only to the machine itself. Apart from that there myay be legal obligations of the operator, e.g. concerning food hygiene as well as health and safety. m In the beverage dispensing area there is danger of scalding when hot liquids are dispensed. This is the case … m during heating up after switching on, when beverages are being dispensed, during automatic cleaning, during the flushing process after switching off. m Danger of crushing if somebody reaches into the provision container while the machine is operational. m There may be danger to life caused by electrical shock as well as risk of injury due to hot or moving parts when housing parts or covers are opened. Make sure that no person reaches into the machine while it is still switched on. Never open any housing parts or covers unless instructed to do so. There are no operator elements inside the machine. m Protect the machine from humidity! There may be danger to life through electrical shock if water reaches machine parts other than those specifically intended for contact with water. You should … never operate the machine outdoors, never hose down the machine with water, never hose down the installation area with water, e.g. using a hose or high-pressure cleaner. 4 cause of their physical, sensory or mental abilities or their lack of experience or subject knowledge. 6. Installation Customer service will install and commission the coffee machine ready for operation. Due to the associated hazards, changes to the installation or setup of the coffee machine should only be completed by customer service. d) The machine must only be installed and used in closed dry rooms, it must not be operated outdoors! The effects of humidity and temperature may adversely affect the function and safety of the machine. The machine may only be installed or stored at locations safe from freezing. The installation area must offer a sufficient amount of free space – 10 cm at the back because of the heat development, 20 cm at the top to be able to fill the machine. For self-service operation the machine must be installed in such a way, that it can be permanently monitored by instructed personnel. The machine must be in horizontal position and free of vibration. Adjustable bases are available for alignment on slightly uneven surfaces 6.1 Prerequisites Make sure that the following prerequisites are met before you use the machine: a) Prerequisites for water connection The water connection must be easy to turn off at any time during operation (stop valve) and must meet the requirements of EN 61770. As specified in the technical data, the values for water pressure and carbonate hardness must compy. The water supply must generally be equipped with a fine filter. Only use the new hose kit! Old, previously used hose sets must not be connected. The waste water drain must be installed as a fixed connection with odour trap, protected against backwater and backflow, in order to protect the machine against contamination from back flowing waste water. b) e) Requirements on the product material Coffee beans must be suitable for use in commercial coffee machines. Extraneous matter such as pieces of wood, stones or metal, etc should be removed to prevent damage to the grinding burrs. Coffee powder or instant powder must be suitable for use in automatic coffee machines. Only use dry and loose, but no clumped material. Use ultra heat treated milk (UHT milk) cooled down to approx. 4°C for the best possible quality cold milk foam. Prerequisites for electrical connection The supply voltage must match the specifications on the type plate. The supply line must be fuse-protected by the customer using a fault current circuit breaker (FCCB) (max. 30 mA). When connected via a power plug, the outlet must be easily accessible during operation to be able to disconnect the plug in case of malfunction. Due to the high load, a single socket is required for the machine and each accessory. c) Requirements on the installation location 6.2 Canister operation If your machine is not permanently connected to the fresh and waste water system, you can also operate it with 2 canisters. In this case also observe the limiting values for the water carbonate hardness. The freshwater canister may need to be filled through the water filter (Brita). Requirements on the personnel Adjustments, cleaning and preparations on the machine must only be performed by the installer or by persons instructed by customer service.. Any repair and maintenance work must only be performed by customer service or by professional personnel authorized by the manufacturer. The machine must only be operated (in the selfservice or waiter operation) by persons familiar with the general use of heat-generating appliances in the catering industry. Without supervision or appropriate instructions the machine must not be used by children or persons unable to safely use the unit be- 5 7. Chip keys The machine is supplied with two green user chip keys and one yellow manager chip key. The green user chip keys allow you to: switch the machine on/off (see 8.2), change the filling levels (see 8.4), carry out a complete cleaning programme on the machine (see chapter 11) and ... clean the touchscreen (see 11.8). The yellow manager chip key provides you with the same options as the user chip key. In addition to this, the manager chip key also allows you to: make settings on the machine (see chapter 10), edit the products to be dispensed (see 10.2), create/edit product groups (see 10.2 a) and ... display consumption and product statistics (see 10.6 a). 1 Without a chip key, in Waiter operation, you can: dispense preset products (see chapter 9), dispense steam, switch the machine off (see 8.3), change the filling levels (see 8.4), carry out a complete cleaning cycle on the machine (see chapter 11) and ... 2 clean the touchscreen (see 11.8). Without a chip key in Self-service operation, you can only dispense preset products. Plug the quick release coupling from ... (1) the supply hose onto the connection on the fresh water canister, (2) the drain hose onto the connection on the waste water canister. Always keep the connections clean and free of burrs to prevent the seal ring on the coupling from being damaged. You can loosen these connections again by simply sliding the ring on the quick-plug coupling back. Caution: Canister operation requires the highest attention with regard to hygiene. Please observe the information under11.3. 6 8. Preparation 2 3 Initial commissioning is carried out by customer service. If you wish to put the machine back into operation yourself after a period of inactivity ... carry out a cleaning programme as described in chapter 11. 8.1 Filling Check first if the water tap has been opened. (1) If your machine has a milk system, place the milk container into the milk cooler e.g. XT6 MC18 (optional milk cooler) and fill with cooled milk. Insert the milk suction tube into the milk. 1 Caution: The cover of the instant coffee container cannot be removed. Do not use force as this may damage the housing. (4) Open the cover of the instant coffee container with the key and ... lift it upwards. a) Filling up the coffee provision Open the cover of the coffee bean container. If your machine is equipped with two bean containers, the … (2) Espresso beans go in container 1 (front left) and ... (3) Coffee beans go in container 2 (back left). b) Filling up the instant powder Note: The instant coffee container must be inserted before the machine is switched on as otherwise no products can be dispensed. 4 7 Fill all containers completely – but without compressing the powder. Then lower the cover back down and lock it with the key. Once switched on, the machine will heat up and begin a components test. It takes a few minutes for the machine to be ready to dispense products. The machine signals that it has heated up with a red LED next to the chip key contact area. If a reminder to clean the machine appears after it has been switched on, carry out this process as described under 11.4. 8.2 Switching On Open the grounds waste door as described under 8.5. The machine can be completely switched off (e.g. for long periods of inactivity) via the main switch on the left. 5 8.3 Switching Off Note: It is only possible to switch the machine off from Self-service operation using a chip key. You can switch the machine off from Waiter operation by ... (6) touching the “Unit” button on the display and then ... (7) “Clean and switch off full system” if you wish to clean the machine before switching it off or ... (8) “Switch off” if you wish to switch the machine off immediately. However, for every day operation it is sufficient to switch the machine on and off only by the menu on the display. In preset Waiter operation, touch the display. 7 (5) In preset Self-service operation, hold one of the chip keys in front of the contact area at the front of the machine so that it touches the contacts exactly. The question “Switch on unit?” will appear on the display. Confirm this with “Yes”. 8 8 6 8.4 Confirming filling levels Each complete filling of a provision container must be confirmed via the basic menu. If you have called up the user interface in Waiter operation, as described under 8.2 … (1) select “Unit” and then ... (2) the “filling level” symbol. is 75% filled, this is just enough for a few brewing processes, is 100% full, only those products that do not produce any grounds can now be dispensed. All other products are greyed out and cannot be selected. 8 3 4 5 9 6 10 7 1 2 Empty the grounds drawer into the normal household rubbish. To do this, (8) swivel the steam wand (optional) forwards and ... (9) push the coffee outlet right to the top. (10) Then, press lightly on the grounds waste door until it springs open. If the grounds drawer has been pulled out for more than 3 seconds, the display asks whether the grounds drawer has been emptied after it is reinserted. Respond by the "Yes" or "No" button. The grounds drawer appears in the display as long as it is removed and has not been properly reinserted. Touch the button above the displays ... (3) for coffee bean container 1 (front left), (4) for coffee bean container 2 (bottom left), (5) for the left instant coffee container or … (6) for the right instant coffee container to mark the container as full or … (7) set the exact filling level by dragging the relevant bar. Always save your changes using the “Save” button. Otherwise, you will be asked whether you wish to discard the changes or go back to save the changes. You can exit these settings and return to the previous menu by ... touching “Select” in Waiter operation or … “Logout” in the Manager menu. 8.5 Emptying the grounds drawer If the grounds are not discharged into the optional container, but into the grounds drawer: Whenever you fill the bean containers, you should also empty the grounds drawer. The symbol "Empty grounds drawer" appears if the grounds drawer … 9 9. Dispensing products 5 As soon as the machine is heated up, the products that can be currently dispensed are shown in the display. If products are unavailable (because they have run out, for example) they are greyed out. 3 9.3 Dispensing a product in Waiter operation To dispense a coffee/milk product or hot water, touch the product shown on the display. In Waiter operation, related products can be sorted into groups. You can select products to be dispensed by touching the predefined group to open it, which then gives you access to the product you wish to dispense. Products to be dispensed and product groups are identified using the following symbols: (6) : This is a product group. Open this by briefly touching the group. (7) X: This product is dispensed by touching the button once. After dispensing, the machine returns to the start screen. (8) : This product is dispensed for as long as you touch the button on the display. Once it has finished dispensing, return to the start screen by pressing the “Overview” button. (9) You can cancel a preselection at any time by touching the “Overview” button. The machine then returns to the start screen. 4 1 2 9.1 Placing the vessel You can place the individual cups centrally under the spout for coffee/milk products, or you can stand two cups next to each other. Note: If a hot water wand has not been installed, hot water is also dispensed through the outlet for coffee/milk products. (1) Place cups, pots or glasses on the drip grill. (3) The height of the coffee outlet can be adjusted by pushing it. (2) To dispense hot water, place the small and large containers on the drip grill under the hot water wand (optional). (4) To dispense steam, hold the corresponding vessel for manual milk frothing, under the steam wand. 9.2 Dispensing a product in Self-service operation To dispense a coffee/milk product or hot water, touch the product shown on the display. (5) Select your preferred display language by touching the language selection field. 10 6 9 8 a) 12 As soon as a product has been dispensed from the batch, remove it and place a suitable vessel for the next product under the appropriate nozzle. 7 Cancelling dispensing a product (12) Touch the “X ” button to continue dispensing the product. Once all products from the batch have been dispensed, the machine returns to dispensing standby. (10) Depending on the product presetting, you can cancel the current dispensing of a product by touching the cancel button “X” while it is dispensing. b) 11 Preset batch With the preset batch, you can preselect multiple products and dispense them one after the other. (11) Depending on the presetting in the Manager menu (10.6 b), the Batch order setting is switched on or off by default. To switch Preset batch on or off manually, touch the Preset batch bar on the right of the display. When Preset Batch is switched on, touch the selected products one after the other. (12) Start dispensing the first product by touching the start button “X”. 10 13 12 (13) To add or remove products from the batch while a product is being dispensed, touch “Batch order”. Delete the products from the dispensing batch by selecting the product on the display and touch the cancel button “X” ... briefly to delete a product or ... hold it down to delete all products in a group. 11 11 of coffee powder in the chute and ... 9.4 Dispensing products via product filters Dispensing a product via product filters involves selecting the desired product using various selection criteria. You may choose from the following criteria: (13) Size: You can set the preselectable size of portion. (14) Coffee: You can set whether a product is to be preselected with/without coffee or with decaffeinated coffee. (15) Milk: You can set whether a product is to be preselected with/without milk. (16) Syrup: You can set whether a product is to be preselected with/without syrup. (17) Milk temperature: You can set whether a product is to be preselected with cold/warm milk. (18) Milk consistency: You can set whether a product is to be preselected with milk or milk foam. (19) confirm this on the display. 13 14 15 16 17 18 After you have set the product to be dispensed using the preselected product criteria … touch the product on the display to dispense it. 9.5 Manual coffee insertion You have the option to insert coffee powder (e.g. decaffeinated coffee) into the machine yourself. If you select this option, the machine does not take beans from the coffee bean containers, but waits for coffee powder to be inserted with the measuring spoon. Select a preprogrammed product with manual coffee insertion to be dispensed. As soon as the machine prompts you to insert the coffee powder, place a heaped spoon (approx. 8-9 g) 19 Make sure you do not insert too much coffee powder in the chute as if you do the machine will interrupt the process with an error message and eject the coffee powder into the grounds drawer. 12 (4) toggle between upper and lower case using the “Case” key, (5) cancel what you have entered using the “Cancel” key. 10. Settings The machine is preset so that it can be used immediately in the normal operating mode. The functions described here can only be accessed if they have been enabled by customer service. 10.1 Some keys are also assigned special characters (e.g. the “S” key). Hold these keys down to access the special characters. Calling up the Manager menu Hold the Manager chip key just in front of the contact area at the front of the machine so that it touches the contacts exactly. The Manager menu appears on the display. Exit the menu by touching “Logout”. 1 2 5 The Manager menu allows you access to various machine setting options. Touch ... “Select” to release products for dispensing, create product groups or for administration (see 10.2), “Product filter” to edit selection criteria for the product filter in the Waiter menu (see 10.3), “Product” to edit products to be dispensed (see 10.4), “Unit” to clean or switch off the machine and to change the filling levels (see 10.5), “Operation” to make settings on the machine or display the dispensing statistics and important events (see 10.6). a) 10.2 4 3 “Select” menu item You can specify which preprogrammed products are to be displayed for dispensing or collect products together into product groups. a) Product groups You can collect related products into groups so that more than 10 products can be dispensed in order in Waiter operation. b) Creating product groups To create a new product group ... (6) touch the “Create new group” button on the display. A new product field, “Edit group”, appears on the display. You can choose any name you like for the product group by touching the group to select it and ... (7) touching the “1st group description” or “2nd group description” button. Change the description using the on-screen keyboard, as described under 10.1 a). (8) Release the group you have created for dispensing by touching the “Release” button, as other- Making entries The machine allows you to enter names and quantities using the on-screen keyboard. When the on-screen keyboard appears on the display, you can ... (1) write using the letter field/numeric keyboard, (2) delete the characters you have entered using the “” key, (3) save what you have entered using the “Enter” key, 13 wise it will not be displayed on the dispensing user interface. c) e) Note: If you have only entered one product to a product group, only this product will be displayed during dispensing and not the product group. Select the product group which you wish to add a product for dispensing to and ... open it by pressing the symbol again. (11) Touch “Create new product” on the display. A new product field, “Select product”, appears on the display. Touch this symbol to open the product list. Select the desired product to be dispensed by touching it. (8) Release the product you have created for dispensing by touching the “Release” button, as otherwise it will not be displayed on the dispensing user interface. Deleting product groups You can delete displayed product groups, including the products they contain for dispensing by touching the product group to select it and ... (10) touching the “X” button. You are prompted to confirm the deletion. Touch ... “Cancel” if you wish to cancel the deletion process or ... “Delete” to confirm the deletion. Note: Only the display on the screen is deleted. The products are still saved in the machine. 6 7 Adding products to be dispensed f) 8 Deleting products to be dispensed You can delete displayed products to be dispensed by touching the product to select it and ... (10) touching the “X” button. You are prompted to confirm the deletion. Touch ... “Cancel” if you wish to cancel the deletion process or ... “Delete” to confirm the deletion. Note: Only the display on the screen is deleted. The products are still saved in the machine. g) 11 d) 10 Sorting products to be dispensed You can sort products to be dispensed however you like by touching the product to select it and ... (9) moving products to be dispensed downward by pressing “Down”. 9 Editing product groups Always save your changes using the “Save” button. Otherwise, you will be asked whether you wish to discard the changes or go back to save the changes. If you touch ... “Release”, you can release/block the selected group for dispensing. “Display price”, you can display/hide the price for the selected group in Self-service operation. “Display receptacle”, you can display/hide a symbol for the recommended dispensing receptacle for dispensing. Always save your changes using the “Save” button. Otherwise, you will be asked whether you wish to discard the changes or go back to save the changes. 14 10.3 If you wish to delete a main criterion (e.g. coffee) from the selection ... (2) select the criterion to be deleted in the selection and ... (3) select the entry “---”. (6) Always save your changes using the “Save” button. Otherwise, you will be asked whether you wish to discard the changes or go back to save the changes. “Product filter” menu item You can specify which selection criteria should be available for filtering products to be dispensed in Waiter operation. 2 3 4 b) 1 5 You can edit the main criteria by allocating various filters. (2) Select the main criterion which you wish to edit (e.g. coffee). (4) Under the “Configuration” menu item, select the filter which you wish to release for preselection in Waiter operation (e.g. no coffee, coffee, decaffeinated coffee). Select “---” to prevent this filter from being released in Waiter operation. (5) Set which filter should be preselected by default in Waiter operation (e.g. coffee). (6) Always save your changes using the “Save” button. Otherwise, you will be asked whether you wish to discard the changes or go back to save the changes. 6 The following main criteria can be preset: Size: You can set the preselectable size of portion. Coffee: You can set whether a product is to be preselected with/without coffee or with decaffeinated coffee. Type of milk: You can set whether a product is to be preselected with/without milk, or what type of milk it is to be preselected with. Heat milk: You can set whether a product is to be preselected with warm or cold milk. Preparation: You can set whether a product is to be preselected with milk or milk foam. Foam consistency: You can set whether a product is to be preselected with normal foam or stiff foam. a) Editing the main criteria 10.4 “Product” menu item You can change the product component values as long as this is permitted by customer service. Select the “Products” function to display a list of all products. Drag the list with the S T buttons to display all programmed products. Touch a product to edit it. Switch between the different setting options using the S T buttons. Select the component (e.g. coarseness of grounds) or value (e.g. price, item number) to be changed. You can now change the values for this product using the on-screen keyboard. Adding/deleting main criteria If you wish to add a main criteria (e.g. size) to the selection ... (1) touch an empty entry and ... (3) select the criteria. If all possible criteria have already been added, you cannot add any more criteria. 15 10.5 1 “Unit” menu item This menu item can be used to clean the machine and adjust the filling levels. a) Changing filling levels to intermediate values In addition to the option described under 8.4 for confirming the coffee bean containers as full, you can also set intermediate values for the filling levels: (2) Select the “Filling” function. (5) You can now use the S button to change the filling level to 100% or ... (4) set the exact filling level by dragging the bar. (3) You can change the name of the beans and the instant coffee container using the on-screen keyboard. Note: Products which have a * in their ID cannot be edited. These products are preprogrammed in the machine's basic settings. 5 6 7 Always save your changes using the “Save” button. Otherwise, you will be asked whether you wish to discard the changes or go back to save the changes. a) Duplicating a product To use an existing product as the base product for a new product, select the desired product from the product list and ... (1) touch “Duplicate product”. The question “Duplicate product?” will appear on the display. Confirm this with “Duplicate”. You can now alter the various values for the duplicated product. Proceed as described under 10.4. 4 3 2 A warning is issued on the display as soon as the filling level of a consumable falls below a specified value. (6) Enter a percentage value for the filling level below which a warning should be issued. Always save your changes using the “Save” button. Otherwise, you will be asked whether you wish to discard the changes or go back to save the changes. Always save your changes using the “Save” button. Otherwise, you will be asked whether you wish to discard the changes or go back to save the changes. 16 b) “Maintenance” menu item b) This menu item can be used to clean the machine (see chapter 11), switch it off and see when the last cleaning programme was carried out, the time to the next clean and the time the next cleaning reminder will be displayed. (7) Select the “Maintenance” menu and touch ... “Clean full system” if you wish to have the milk and brewing system cleaned and then continue to operate the machine. “Clean and switch off full system” if you wish to have the milk and brewing system cleaned and then switch the machine off. “Switch off” if you wish to switch the machine off. 10.6 (8) Select the “Settings” symbol to display and edit the machine's basic settings. Drag the list with the S T buttons to display all setting options. You may choose from the following settings: “Current language”: You can set the current display language. “Default language”: You can set the default language for the machine. “Basic operation without login”: You can set the default operating mode for the machine. Choose between Self-service operation and Waiter operation (see chapter 9). “Waiter operation”: You can set whether bulk processing is activated by default in Waiter operation (see 9.3 b) and whether the product filter should be available in Waiter operation. “Date”: You can set the current date using the on-screen keyboard. “Time”: You can set the current time using the on-screen keyboard. “Summertime”: You have a choice between the settings “Automatic” and “No”. “Cleaning time”: Select cleaning time “1” or “2” if you wish to set the times for automatic cleaning reminders on the display (see 11.1 a). If only one cleaning time is to be programmed, cleaning times 1 and 2 must be identical. “Display contrast”: You can set the contrast of the display. “Display brightness”: You can set the brightness of the display. “Display brightness (standby)”: You can set the brightness of the display in standby mode. “Lighting output”: You can set the brightness of the lighting output. “Front light colour”: You can set the colour of the front lighting. “Change style”: You can select the visual style of the display from various templates. “Operation” menu item This menu item can be used to read the consumption and product statistics and make settings on the machine. 7 10 a) 8 Machine settings 6 9 Consumption and product statistics c) (6) Select the “Consumption” symbol to read statistics on the consumption of individual machine components (e.g. ground coffee level). (7) Select the “Product counter” symbol to read how often each product has been dispensed. Drag the list with the S T buttons to display all programmed products. Event display (9) Select the “Process” symbol to display important events or error messages for the machine. d) Exiting the Manager menu (10) Exit the Manager menu by touching “Logout”. 17 11.2 Cleaning agents 11. Cleaning Clean the coffee machine carefully in compliance with the following instructions to maintain the value and hygiene of the unit. Use only cleaning solutions mentioned in the instruction manual, because these have been optimally matched to the automatic cleaning program: Melitta® Cafina® Combi tablets Melitta® Cafina® AMC 11.1 Cleaning intervals a) Daily cleaning of all systems (brewing, milk and instant system), which have been used at least once, and emptying the grounds drawer is mandatory. If the coffee machine or a system has not been used longer than 7 days, cleaning must be performed before the machine is taken into operation again. Housing parts and strainer in the fresh water supply (if present) must be cleaned on a monthly basis. Before switching off, we recommend that you clean all the systems you have used. Caution when using cleaning agents! m Cleaning agents may be a health hazard when swallowed, inhaled and in contact with skin. Make sure that … Cleaning request This flashes on the display, if … one of the cleaning intervals programmed under 10.6 b) has been exceeded ... and the machine has been operating for at least 1 hour since the last cleaning cycle … and at least 1 product has been dispensed. During the cleaning request the products partly remain visible in the background and can still be dispensed for a short period of time. 11.3 If you are working with canisters b) Do not feed or insert cleaning solutions into containers other than the ones described in these instructions, any information on cleaning agents must be easily accessible also in emergency situations. If you are using the agents recommended by Melitta this information is enclosed with each of the solutions. Keep cleaning solutions out of the reach of children. Wear suitable protective gloves. Follow the warning notes on the cleaning solutions containers. Automatic dispensing lock The products are no longer displayed and dispensing is blocked until the next cleaning, if ... more than 50 products have been dispensed or more than 3 hours have passed since the appearance of the cleaning request, or if more than one week has passed since the last cleaning of the system. The corresponding systems must first be cleaned, before the cleaning request or dispensing lock can be reset. 18 Empty both canisters daily! Do not leave any residual water in them; fresh water can quickly contaminate with mould spores. Also observe the water carbonate hardness limit values with canister operation! The freshwater canister may need to be filled through the water filter (Brita). Clean the fresh water container and its lid area with a conventional dish washing agent and thoroughly rinse off any cleaner residues before each filling. Also clean the waste water container daily with dish washing agent to avoid the development of odours caused by organic residues in the waste water. Clean also the strainer in the fresh water hose – this is necessary with every machine maintenance, but at least once every year. For this purpose unscrew the front cap and rinse out the strainer. Ensure that the fresh water container is filled with enough water and that the waste water container is empty before you begin the cleaning programme. b) Warning! Start the cleaning programme The machine's cleaning programme runs largely automatically. (1) Replace the milk container with an empty cleaning container. When performing the cleaning activities, make sure that the machine … is never subjected to pouring water and it is never spray clean with a hose. Also, do not spray clean the installation area, e.g. with a water hose or high-pressure cleaner. m Danger to life from electrical shock may otherwise occur from water entering the unit and touching live parts. m Risk of scalding! Do not reach into the dispensing area during automatic cleaning. 1 First pull out the power plug and allow the machine to cool down before performing cleaning work on the machine by hand. m You thereby prevent the risk of injury from accidentally touching hot or moving parts during cleaning. 11.4 Daily cleaning It is not possible to dispense products during cleaning. Product dispensing can only be continued once all containers have been reinserted. a) Wipe the outside of the milk hose, which protrudes from the machine, with a damp cloth. Clean the interior of the refrigerator (if present) as well as the door and the door seals with a conventional domestic cleaning agent. Leave the door open during the whole cleaning process. Otherwise, condensation will build up which can lead to an adverse effect on the function. Cleaning the grounds drawer If the grounds are not discharged into the optional container, but into the grounds drawer: Open the grounds drawer door and pull out the drawer located behind it as illustrated under 8.5. Empty it into the regular domestic refuse. Remove lose dirt, also from inside the slot of the grounds drawer. You may otherwise not be able to insert it properly and a malfunction may occur. In case of persistent dirt the grounds drawer can be cleaned in a dish washer. (2) Touch the “Unit” button on the display and then ... “Clean and switch off full system” if you wish to have the milk and brewing system cleaned and then switch the machine off. “Clean full system” if you wish to have the milk and brewing system cleaned and then continue to operate the machine. If the grounds drawer has been removed or has not been correctly inserted, the display will show a corresponding message. If this was the case for longer than 3 seconds, you will be asked whether the grounds drawer is empty: Press the "Yes" button if the grounds drawer has been emptied. 2 19 If you are prompted to first clean the instant system, carry this out (see 11.5) and then confirm that the system has been fully reassembled by touching “Instant system has been cleaned” and then “Instant system mounted”. (5) remove the tablet retainer by turning it a quarter of a turn anti-clockwise. 5 As soon as “Milk system cleaning agent” appears on the display ... (3) place a cleaning tablet in the prepared cleaning container and ... 3 (6) Place a cleaning tablet in the tablet retainer and ... 6 7 confirm that you have inserted the cleaning tablet by touching “Cleaning agent has been added” on the display. As soon as “Brewing system cleaning agent” appears on the display ... (4) open the unit door with the supplied key and ... (7) turn the tablet retainer a quarter of a turn clockwise so that it is tight again in the machine and close the unit door. Confirm that you have inserted the cleaning tablet by touching “Cleaning agent has been inserted” on the display. The machine only starts the automatic cleaning programme once both cleaning tablets have been inserted. As soon as the automatic cleaning programme is complete, clean the dispensing area as described under 11.9. 4 20 Once cleaning g has bee en comple eted, the machine e hes itself off again n or returns to standby for disswitch pensing – dep pending o on the sellection. Iff you wish h to contiinue to operate th he machin ne, p place a co ontainer o of milk in n a fridge (e.g. the e XT6 M MC18 fridge, which h is available as an a option) and in nsert the milk suc ction tub be in the milk m conttaine er. Note e: Replace the ccleaning tablet on nce a we eek with AMC po owder in order to o preventt premature blocking. This provide es acidic cleaning g of the milk m component. 11.5 Cleanin ng the in nstant sy ystem 6 Daily cleaning g is required when the insttant syste em is used. O Open the machine e door witth the keyy. a) D Disassem mbling th he mixerr unit b) Cleanin ng the miixer unit Thoroug ghly clean n all partss with hott water an nd a milk pro oduct compatible e cleanin ng agent – or in the dissh washe er. Subse equently rinse r all parts p with clea ar water. Complettely dry all a parts to o avoid agglutination of instant powder. p Clean th he area around the e axis witth a damp p cloth. Th his is whe ere you re emoved the t mixerr impeller. Also clea an the mixer cham mber care efully. c) Assemb bling the e mixer unit u 1 2 5 4 Now w you can n reassem mble all parts p in re everse orrder. Plea ase take care: c (6) Place the mixer impellerr on the axis a so that its es up with h the ma arking (arrrow tapered side line m impeller). on the mixer 3 2 (1) M Move the powder chutes fforwards. R Remove the instan nt coffee e contain ner by liftting it up and ou ut. (2) P Pull off the e instantt beverag ge hose,, from the e m mixer hou using and d the beve erage spout. (3) T Turn the mixer m fla ange anti--clockwisse until th he a arrow is pointing p to o the “ope en lock” symbol. s (4) N Now you can c pull tthe comp plete mix xer hous sing fo orward and out. (5) R Remove the t coverr of the m mixer houssing. (6) R Remove the t mixerr impelle er from th he axle us sing th he supplied extracction tooll. 7 2 21 (5) Replace the cover of the mixer housing. (4) Insert the mixer housing. (3) Turn the mixer flange clockwise (the arrow points to the “closed lock” symbol) to tighten it. (2) Push the instant drink hose fully on to the connections on the mixer unit and the nozzle. (1) Plug on the powder chutes. Do not reach with your fingers into the previously cleaned powder chutes! Ensure that the powder chutes are pointing into the mixer container. 11.7 Cleaning the instant coffee containers Open the cover of the instant coffee containers as described under 8.1 b) and ... remove the inner transparent instant coffee container by lifting it up and out. Clean these parts in hot water with regular dish washing liquid or in the dish washer. Dry all parts completely and reassemble them. 11.8 Clean touch screen This is necessary in case of visible contamination. Select “Unit” in Waiter operation and then ... “Clean touchscreen” to lock the display against input. Clean the touchscreen with the microfibre cloth provided or an appropriate damp cloth. Ensure the touchscreen is completely dried and streak free if a damp cloth has been used. After cleaning unlock the display by successively touching the numbers 1 – 4 in the corners of the display. 11.6 Cleaning the coffee bean containers Switch off the machine as described under 8.3 and allow it to cool down. Open the cover of the coffee bean container. (8) Turn the lever anti-clockwise to release the coffee bean containers and remove the containers. Clean the bean container in hot water with a regular dish washing liquid or in the dish washer. Dry all parts completely and reassemble them. (8) Turn the lever clockwise to lock the coffee bean containers back into place and attach the cover. 11.9 Cleaning the dispensing area Wipe plastic parts, painted surfaces and stainless steel parts regularly with a wet cloth. Do not use any abrasive agents or sharp objects. 8 10 Note: The lids of the bean containers can only be put back into place, if the bean containers are properly locked. 9 (9) Remove the drip grill as soon as soiling is visible. (10) Then wipe out the drip tray with a damp cloth. 22 12. Preventive maintenance 13. Disposal m Due to the associated dangers, repairs and preventive maintenance activities must only be performed by customer service or professionals authorized by the manufacturer for this purpose. The machine has been designed and manufactured to facilitate environmentally friendly disposal. a) Waste disposal The waste generated by brewing is purely organic and may therefore be disposed off with the regular domestic refuse. 12.1 Intervals Always after 30.000 cups or 12 months of operation (whichever occurs first), a major maintenance of the machine must be carried out by the customer service (chargeable service). Take care to make such an appointment early on to avoid unnecessary wear. Monitor your upstream water filters for effectiveness, as described in their documents. Replace all water filters no later than every 12 months to prevent germ formation and water contamination. Upon request, customer service will offer a comprehensive maintenance contract which also ensures the observation of all inspection and service intervals. The inspection – legally required for commercial operators – of the system every 4 years by an authorized electrician for proper condition must be performed and documented. This can be done and certified by the customer service (no additional inspection is required before the initial commissioning). b) Waste water disposal The waste water generated by brewing and cleaning corresponds to the properties of general domestic waste water and therefore may by discharged through the normal sewer system. c) Disposal of cleaning agents The cleaning agents recommended in these instructions comply with the legal stipulations if used as instructed and may therefore be discharged with the waste water through the normal sewer system without additional measures. d) Disposal of the machine This coffee machine contains valuable raw materials which should be directed to recycling. 12.2 In case of defects Do not dispose off the machine through the domestic waste! Make sure to follow the applicable national and regional legislation and guidelines regarding disposal. m First have malfunctions or damages inspected and, if necessary repaired, by the customer service before you continue using the machine. m In all of these cases, pull the plug out of the socket and turn off the water. 23 SERVICE-Scheckheft SERVICE Confirmations Maschinen Nr. / machine-no.: Wartungsvertrag abgeschlossen Service contract existing ja / yes nein / no 1. Inspektion / Wartung 1th Service / Maintenance Unterschrift und Stempel Kundendienst Signature and stamp Service Technician Datum der Erstinstallation / date of first installation am: Date INSPEKTION / WARTUNG MAINTENANCE Arbeiten durchgeführt bei: SERVICE been effected Nächste Inspektion / Wartung bei: Next Service / Maintenance Datum: Date Datum: Date Arbeiten gemäß Checkliste ausgeführt works been carried out according to check list Wasserfilter ersetzt Waterfilter been replaced Verschleißteile ersetzt wearing parts been replaced Maschine eingestellt und Funktion überprüft machine been adjusted and function been checked Name: Name Sonstige Arbeiten: other works INSPEKTION / WARTUNG MAINTENANCE Arbeiten gemäß Checkliste ausgeführt works been carried out according to check list Wasserfilter ersetzt Waterfilter been replaced Verschleißteile ersetzt wearing parts been replaced Maschine eingestellt und Funktion überprüft machine been adjusted and function been checked Arbeiten durchgeführt bei: SERVICE been effected Nächste Inspektion / Wartung bei: Next Service / Maintenance Datum: Date Datum: Date Name: Name Sonstige Arbeiten: other works INSPEKTION / WARTUNG MAINTENANCE Arbeiten gemäß Checkliste ausgeführt works been carried out according to check list Wasserfilter ersetzt Waterfilter been replaced Verschleißteile ersetzt wearing parts been replaced Maschine eingestellt und Funktion überprüft machine been adjusted and function been checked Arbeiten durchgeführt bei: SERVICE been effected Nächste Inspektion / Wartung bei: Next Service / Maintenance Datum: Date Datum: Date Name: Name Sonstige Arbeiten: other works INSPEKTION / WARTUNG MAINTENANCE Arbeiten gemäß Checkliste ausgeführt works been carried out according to check list Wasserfilter ersetzt Waterfilter been replaced Verschleißteile ersetzt wearing parts been replaced Maschine eingestellt und Funktion überprüft machine been adjusted and function been checked Sonstige Arbeiten: other works Arbeiten durchgeführt bei: SERVICE been effected Nächste Inspektion / Wartung bei: Next Service / Maintenance Datum: Date Datum: Date Name: Name SERVICE-Scheckheft SERVICE Confirmations Maschinen Nr. / machine-no.: Wartungsvertrag abgeschlossen Service contract existing ja / yes nein / no 1. Inspektion / Wartung 1th Service / Maintenance Unterschrift und Stempel Kundendienst Signature and stamp Service Technician Datum der Erstinstallation / date of first installation am: Date INSPEKTION / WARTUNG MAINTENANCE Arbeiten durchgeführt bei: SERVICE been effected Nächste Inspektion / Wartung bei: Next Service / Maintenance Datum: Date Datum: Date Arbeiten gemäß Checkliste ausgeführt works been carried out according to check list Wasserfilter ersetzt Waterfilter been replaced Verschleißteile ersetzt wearing parts been replaced Maschine eingestellt und Funktion überprüft machine been adjusted and function been checked Name: Name Sonstige Arbeiten: other works INSPEKTION / WARTUNG MAINTENANCE Arbeiten gemäß Checkliste ausgeführt works been carried out according to check list Wasserfilter ersetzt Waterfilter been replaced Verschleißteile ersetzt wearing parts been replaced Maschine eingestellt und Funktion überprüft machine been adjusted and function been checked Arbeiten durchgeführt bei: SERVICE been effected Nächste Inspektion / Wartung bei: Next Service / Maintenance Datum: Date Datum: Date Name: Name Sonstige Arbeiten: other works INSPEKTION / WARTUNG MAINTENANCE Arbeiten gemäß Checkliste ausgeführt works been carried out according to check list Wasserfilter ersetzt Waterfilter been replaced Verschleißteile ersetzt wearing parts been replaced Maschine eingestellt und Funktion überprüft machine been adjusted and function been checked Arbeiten durchgeführt bei: SERVICE been effected Nächste Inspektion / Wartung bei: Next Service / Maintenance Datum: Date Datum: Date Name: Name Sonstige Arbeiten: other works INSPEKTION / WARTUNG MAINTENANCE Arbeiten gemäß Checkliste ausgeführt works been carried out according to check list Wasserfilter ersetzt Waterfilter been replaced Verschleißteile ersetzt wearing parts been replaced Maschine eingestellt und Funktion überprüft machine been adjusted and function been checked Sonstige Arbeiten: other works Arbeiten durchgeführt bei: SERVICE been effected Nächste Inspektion / Wartung bei: Next Service / Maintenance Datum: Date Datum: Date Name: Name SERVICE-Scheckheft SERVICE Confirmations Maschinen Nr. / machine-no.: Wartungsvertrag abgeschlossen Service contract existing ja / yes nein / no 1. Inspektion / Wartung 1th Service / Maintenance Unterschrift und Stempel Kundendienst Signature and stamp Service Technician Datum der Erstinstallation / date of first installation am: Date INSPEKTION / WARTUNG MAINTENANCE Arbeiten durchgeführt bei: SERVICE been effected Nächste Inspektion / Wartung bei: Next Service / Maintenance Datum: Date Datum: Date Arbeiten gemäß Checkliste ausgeführt works been carried out according to check list Wasserfilter ersetzt Waterfilter been replaced Verschleißteile ersetzt wearing parts been replaced Maschine eingestellt und Funktion überprüft machine been adjusted and function been checked Name: Name Sonstige Arbeiten: other works INSPEKTION / WARTUNG MAINTENANCE Arbeiten gemäß Checkliste ausgeführt works been carried out according to check list Wasserfilter ersetzt Waterfilter been replaced Verschleißteile ersetzt wearing parts been replaced Maschine eingestellt und Funktion überprüft machine been adjusted and function been checked Arbeiten durchgeführt bei: SERVICE been effected Nächste Inspektion / Wartung bei: Next Service / Maintenance Datum: Date Datum: Date Name: Name Sonstige Arbeiten: other works INSPEKTION / WARTUNG MAINTENANCE Arbeiten gemäß Checkliste ausgeführt works been carried out according to check list Wasserfilter ersetzt Waterfilter been replaced Verschleißteile ersetzt wearing parts been replaced Maschine eingestellt und Funktion überprüft machine been adjusted and function been checked Arbeiten durchgeführt bei: SERVICE been effected Nächste Inspektion / Wartung bei: Next Service / Maintenance Datum: Date Datum: Date Name: Name Sonstige Arbeiten: other works INSPEKTION / WARTUNG MAINTENANCE Arbeiten gemäß Checkliste ausgeführt works been carried out according to check list Wasserfilter ersetzt Waterfilter been replaced Verschleißteile ersetzt wearing parts been replaced Maschine eingestellt und Funktion überprüft machine been adjusted and function been checked Sonstige Arbeiten: other works Arbeiten durchgeführt bei: SERVICE been effected Nächste Inspektion / Wartung bei: Next Service / Maintenance Datum: Date Datum: Date Name: Name SERVICE-Scheckheft SERVICE Confirmations Maschinen Nr. / machine-no.: Wartungsvertrag abgeschlossen Service contract existing ja / yes nein / no 1. Inspektion / Wartung 1th Service / Maintenance Unterschrift und Stempel Kundendienst Signature and stamp Service Technician Datum der Erstinstallation / date of first installation am: Date INSPEKTION / WARTUNG MAINTENANCE Arbeiten durchgeführt bei: SERVICE been effected Nächste Inspektion / Wartung bei: Next Service / Maintenance Datum: Date Datum: Date Arbeiten gemäß Checkliste ausgeführt works been carried out according to check list Wasserfilter ersetzt Waterfilter been replaced Verschleißteile ersetzt wearing parts been replaced Maschine eingestellt und Funktion überprüft machine been adjusted and function been checked Name: Name Sonstige Arbeiten: other works INSPEKTION / WARTUNG MAINTENANCE Arbeiten gemäß Checkliste ausgeführt works been carried out according to check list Wasserfilter ersetzt Waterfilter been replaced Verschleißteile ersetzt wearing parts been replaced Maschine eingestellt und Funktion überprüft machine been adjusted and function been checked Arbeiten durchgeführt bei: SERVICE been effected Nächste Inspektion / Wartung bei: Next Service / Maintenance Datum: Date Datum: Date Name: Name Sonstige Arbeiten: other works INSPEKTION / WARTUNG MAINTENANCE Arbeiten gemäß Checkliste ausgeführt works been carried out according to check list Wasserfilter ersetzt Waterfilter been replaced Verschleißteile ersetzt wearing parts been replaced Maschine eingestellt und Funktion überprüft machine been adjusted and function been checked Arbeiten durchgeführt bei: SERVICE been effected Nächste Inspektion / Wartung bei: Next Service / Maintenance Datum: Date Datum: Date Name: Name Sonstige Arbeiten: other works INSPEKTION / WARTUNG MAINTENANCE Arbeiten gemäß Checkliste ausgeführt works been carried out according to check list Wasserfilter ersetzt Waterfilter been replaced Verschleißteile ersetzt wearing parts been replaced Maschine eingestellt und Funktion überprüft machine been adjusted and function been checked Sonstige Arbeiten: other works Arbeiten durchgeführt bei: SERVICE been effected Nächste Inspektion / Wartung bei: Next Service / Maintenance Datum: Date Datum: Date Name: Name Melitta SystemService GmbH & Co KG • Postfach 13 26 • D-32373 Minden • Telefon 05 71 / 50 49 – 0 • Fax: 05 71 / 50 49 233 • E-Mail: [email protected] • www.melittasystemservice.de ® Registrierte Marke eines Unternehmens der Melitta Gruppe • 03/2014 Melitta macht Kaffee zum Genuss®