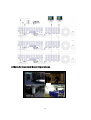
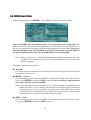
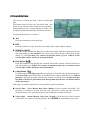
1
16 INPUTS STANDALONE
H264 DIGITAL VIDEO RECORDER
ART. 49136
Please read this manual thoroughly before use
and keep it for future reference.
Via Don Arrigoni, 5 24020 Rovetta S. Lorenzo (Bergamo)
http://www.comelit.it – E mail: [email protected]
1
WARNING
RISK OF ELECTRIC SHOCK
DO NOT OPEN
WARNING: TO REDUCE THE RISK OF ELECTRIC SHOCK,
DO NOT REMOVE COVER (OR BACK).
NO USER-SERVICEABLE PARTS INSIDE.
REFER SERVICING TO QUALIFIED
SERVICE PERSONNEL.
The lightning flash with arrowhead symbol, within an equilateral triangle, is intended to alert the user to
the presence of uninsulated "dangerous voltage" within the product’s enclosure that may be of sufficient
magnitude to constitute a risk of electric shock.
The exclamation point within an equilateral triangle is intended to alert the user to the presence of important
operating and maintenance (servicing) instructions in the literature accompanying the appliance.
COMPLIANCE NOTICE OF FCC:
THIS EQUIPMENT HAS BEEN TESTED AND FOUND TO COMPLY WITH THE LIMITS FOR A CLASS A DIGITAL
DEVICE, PURSUANT TO PART 15 OF THE FCC RULES. THESE LIMITS ARE DESIGNED TO PROVIDE
REASONABLE PROTECTION AGAINST HARMFUL INTERFERENCE WHEN THE EQUIPMENT IS OPERATED
IN A COMMERCIAL ENVIRONMENT. THIS EQUIPMENT GENERATES, USES, AND CAN RADIATE RADIO
FREQUENCY ENERGY AND IF NOT INSTALLED AND USED IN ACCORDANCE WITH THE INSTRUCTION
MANUAL, MAY CAUSE HARMFUL INTERFERENCE TO RADIO COMMUNICATIONS. OPERATION OF THIS
EQUIPMENT IN A RESIDENTIAL AREA IS LIKELY TO CAUSE HARMFUL INTERFERENCE, IN WHICH CASE
USERS WILL BE REQUIRED TO CORRECT THE INTERFERENCE AT THEIR OWN EXPENSE.
WARNING: CHANGES OR MODIFICATIONS NOT EXPRESSLY APPROVED BY THE PARTY RESPONSIBLE
FOR COMPLIANCE COULD VOID THE USER’S AUTHORITY TO OPERATE THE EQUIPMENT.
THIS CLASS OF DIGITAL APPARATUS MEETS ALL REQUIREMENTS OF THE CANADIAN INTERFERENCECAUSING EQUIPMENT REGULATIONS.
CE COMPLIANCE STATEMENT
WARNING:
THIS IS A CLASS A DIGITAL DEVICE. IN A DOMESTIC ENVIRONMENT THIS PRODUCT MAY CAUSE
RADIO INTERFERENCE, IN WHICH CASE THE USER MAY BE REQUIRED TO TAKE ADEQUATE
MEASURES.
The information in this manual is believed to be accurate as of the date of publication. Comelit Group S.p.A.. is not responsible for
any problems resulting from the use thereof. The information contained herein is subject to change without notice. Revisions or
new editions to this publication may be issued to incorporate such changes.
2
Important Safeguards
1. Read Instructions
All the safety and operating instructions should be read before the
appliance is operated.
2. Retain Instructions
The safety and operating instructions should be retained for future
reference.
3. Cleaning
Unplug this equipment from the wall outlet before cleaning it.
Do not use liquid aerosol cleaners. Use a damp soft cloth for
cleaning.
4. Attachments
Never add any attachments and/or equipment without the
approval of the manufacturer as such additions may result in the
risk of fire, electric shock or other personal injury.
5. Water and/or Moisture
Do not use this equipment near water or in contact with water.
6. Ventilation
Place this equipment only in an upright position. This equipment
has an open-frame Switching Mode Power Supply (SMPS), which
can cause a fire or electric shock if anything is inserted through
the ventilation holes on the side of the equipment.
7. Accessories
Do not place this equipment on an unstable cart, stand or table.
The equipment may fall, causing serious injury to a child or adult,
and serious damage to the equipment. Wall or shelf mounting
should follow the manufacturer's instructions, and should use a
mounting kit approved by the manufacturer.
14. Damage requiring Service
Unplug this equipment from the wall outlet and refer servicing to
qualified service personnel under the following conditions:
A. When the power-supply cord or the plug has been damaged.
B. If liquid is spilled, or objects have fallen into the equipment.
C. If the equipment has been exposed to rain or water.
D. If the equipment does not operate normally by following the
operating instructions, adjust only those controls that are
covered by the operating instructions as an improper adjustment
of other controls may result in damage and will often require
extensive work by a qualified technician to restore the
equipment to its normal operation.
E. If the equipment has been dropped, or the cabinet damaged.
F. When the equipment exhibits a distinct change in performance
─ this indicates a need for service.
15. Replacement Parts
When replacement parts are required, be sure the service
technician has used replacement parts specified by the
manufacturer or that have the same characteristics as the original
part. Unauthorized substitutions may result in fire, electric
shock or other hazards.
16. Safety Check
Upon completion of any service or repairs to this equipment, ask
the service technician to perform safety checks to determine that
the equipment is in proper operating condition.
17. Field Installation
This installation should be made by a qualified service person and
should conform to all local codes.
18. Correct Batteries
Warning: Risk of explosion if battery is replaced by an incorrect
type. Dispose of used batteries according to the instructions.
This equipment and cart combination should be moved with care.
Quick stops, excessive force, and uneven surfaces may cause the
equipment and cart combination to overturn.
8. Power Sources
This equipment should be operated only from the type of power
source indicated on the marking label. If you are not sure of the
type of power, please consult your equipment dealer or local power
company.
9. Power Cords
Operator or installer must remove power and TNT connections
before handling the equipment.
10. Lightning
For added protection for this equipment during a lightning storm, or
when it is left unattended and unused for long periods of time,
unplug it from the wall outlet and disconnect the antenna or cable
system. This will prevent damage to the equipment due to
lightning and power-line surges.
11. Overloading
Do not overload wall outlets and extension cords as this can result
in the risk of fire or electric shock.
12. Objects and Liquids
Never push objects of any kind through openings of this
equipment as they may touch dangerous voltage points or short
out parts that could result in a fire or electric shock. Never spill
liquid of any kind on the equipment.
13. Servicing
Do not attempt to service this equipment yourself.
servicing to qualified service personnel.
19. Tmra
A manufacturer’s maximum recommended ambient temperature
(Tmra) for the equipment must be specified so that the customer
and installer may determine a suitable maximum operating
environment for the equipment.
20. Elevated Operating Ambient Temperature
If installed in a closed or multi-unit rack assembly, the operating
ambient temperature of the rack environment may be greater than
room ambient. Therefore, consideration should be given to
installing the equipment in an environment compatible with the
manufacturer’s maximum rated ambient temperature (Tmra).
21. Reduced Air Flow
Installation of the equipment in the rack should be such that the
amount of airflow required for safe operation of the equipment is not
compromised.
22. Mechanical Loading
Mounting of the equipment in the rack should be such that a
hazardous condition is not caused by uneven mechanical loading.
23. Circuit Overloading
Consideration should be given to connection of the equipment to
supply circuit and the effect that overloading of circuits might have
on over current protection and supply wiring. Appropriate
consideration of equipment nameplate ratings should be used
when addressing this concern.
24. Reliable Earthing (Grounding)
Reliable grounding of rack mounted equipment should be
maintained. Particular attention should be given to supply
connections other than direct connections to the branch circuit (e.g.,
use of power strips).
Refer all
WEEE (Waste Electrical & Electronic Equipment)
Correct Disposal of This Product
(Applicable in the European Union and other European countries with separate collection systems)
This marking shown on the product or its literature, indicates that it should not be disposed with other household wastes at
the end of its working life. To prevent possible harm to the environment or human health from uncontrolled waste disposal,
please separate this from other types of wastes and recycle it responsibly to promote the sustainable reuse of material
resources.
Household users should contact either the retailer where they purchased this product, or their local government office, for
details of where and how they can take this item for environmentally safe recycling.
Business users should contact their supplier and check the terms and conditions of the purchase contract. This product
should not be mixed with other commercial wastes for disposal.
3
Table of Contents
1. Product Overview················································································ 6
1.1 Features·························································································· 6
2. Panels And Remote Controller····························································· 7
2.1 Front Panel······················································································ 7
2.2 Back Panel······················································································ 10
2.3 Remote Controller············································································ 12
3. Installations························································································· 12
3.1 Basic Connections············································································ 12
3.2 Optional Connections······································································· 13
4. Main Screen And Basic Operations······················································· 16
4.1 Text Input························································································ 17
4.2 Login And Logout············································································ 18
4.3 Basic Operations·············································································· 18
4.4 Digital Zoom··················································································· 20
5. Menu Display······················································································· 21
5.1 Status Display·················································································· 22
5.2 Volume Control··············································································· 22
5.3 Video Adjustment············································································ 23
5.4 VGA Display·················································································· 24
5.5 Backup Device················································································ 25
5.6 Software Upgrade (Administrator) ···················································· 27
5.7 System Shutdown (Administrator) ···················································· 28
6. Setup (Administrator) ········································································· 28
6.1 Pre-Camera Setup············································································ 29
6.2 Camera Setup·················································································· 31
6.2.1 Video Loss Setup······································································ 33
6.2.2 Motion Setup··········································································· 34
6.3 Alarm Setup···················································································· 37
6.4 SEQ Display Setup·········································································· 39
6.5 Scheduled Record Setup··································································· 41
6.6 HDD Setup······················································································ 42
6.6.1 HDD Format/Clear··································································· 44
6.7 Password Setup················································································ 45
6.8 System Setup··················································································· 47
6.9 RS-232/422/485 Setup······································································ 48
6.10 Network Setup··············································································· 49
6.10.1 E-mail Setup·········································································· 51
4
6.10.2 Advanced Network Setup························································ 52
7. PTZ Control························································································· 53
8. Search/Playback/Archive (Administrator/Supervisor) ························· 54
8.1 Search By Time··············································································· 55
8.2 Search By Event / Log Display·························································· 56
8.3 Search Archived Files······································································· 57
8.4 Playback/Archive For Search By Time··············································· 58
8.5 Playback/Archive For Search By Event·············································· 60
8.6 Playback For Archived Files····························································· 60
9. Remote Access······················································································ 61
10. PDA/Mobile Phone Remote Access····················································· 67
Appendix A – MS-Windows HEM player···················································· 68
Appendix B – The mouse operation interface reference································· 70
Appendix C – Specifications······································································· 74
Appendix D – Recording Table··································································· 76
5
1. Product Overview
The H264 digital video/audio recorders are designed for use within a surveillance system and
are a combination of a hard disk recorder, a video multiplexer, and a web server. To achieve
the highest inter-connectivity and inter-operability, this series of digital video/audio recorders
are all based on industry-leading front-end to back-end surveillance infrastructure. With
state-of-the-art system architecture, powerful hardware compression/decompression engine,
and intelligent recording algorithms, sixfold operation can be easily achieved without
sacrificing the increasing demands of functionality, performance, reliability, and availability
in the surveillance industry.
1.1 Features
16 color and/or B/W cameras can be connected
H264 Baseline Profile video compression/decompression with configurable quality
Hardware ADPCM audio compression/decompression -2 stereo audio input,2 audio
output
Real sixfold operation - simultaneous record, live, playback, backup, control, & remote
access
Record capabilities –
Full-D1: up to 60 (NTSC) / 50 (PAL) IPS,
Half-D1: up to 120 (NTSC) / 100 (PAL) IPS,
CIF:
up to 240 (NTSC) / 200 (PAL) IPS,
Live display, 30 (NTSC) / 25 (PAL) IPS, for each channel
Event recording, time-lapse recording or both
Playback search by time or event (alarm, motion, & video loss)
Versatile display formats: full-screen, 4, 7, 9, 10, 13, and 16 split windows
Digital zoom, X2 & X4
Intelligent motion detection with programmable area and sensitivity
Powerful alarm processor with configurable triggering conditions and reactions
Up to 2 HDD 3.5” SATA type (1 x 250 GB in equipment)
Video/audio backup to USB2.0 storage devices, including pen drive, DVD+RW, DVD+R,
and DVD-R
Ethernet interface for remote access through web browser or proprietary remote software,
remote alarm notification, remote setup and remote software upgrade
PTZ control capabilities
Multi-lingual support
Multi-level password to ensure high degree of security
6
2. Panels and Remote Controller
2.1 Front Panel
1. Front Door
Conceal Hard Disk Tray (for IDE HDD only).
2. USB connector (USB)
Connect to USB 2.0 compatible storage device, such as USB 2.0 disk drive, DVD+RW,
card reader, etc.
3. DVR ID Switch
Used to set the DVR ID (1-4) of this unit.
4. Alpha-numeric Buttons (1-9, 0, *, #)
Press these buttons for camera selection in most circumstances. These buttons can also be
used to enter text and number in the way similar to most of the mobile phones.
5. X2/GOTO Button
In PTZ control, press this button to move the camera to the preset position. In full screen
display, press this button for Digital Zoom (X2/X4).
6. MUTE/NEXT Button
In PTZ control, press this button for the next miscellaneous control. In the other screens,
press this button to mute the audio.
7. Alarm Reset Button
Press this button to cancel alarm activation and return the system to the condition before
the alarm was activated.
8. SEARCH Button
Press this button to display the search menu in main screen display. In some dialogs, this
button is used as a miscellaneous function key.
7
9. CALL Button
Press this button to switch to or return from full screen display of the focus camera in
main screen display. In some dialogs, this button is used as a miscellaneous function key.
10. SEQ Button
Press this button to switch to or return from SEQ display mode in main screen display.
In some dialogs, this button is used as a miscellaneous function key.
11. MODE Button
Press this button to toggle between live mode and playback mode in main screen display.
In some dialogs, this button is used as a miscellaneous function key.
12. LEDs
Indicators for POWER, Normal Recording, Alarm Recording, Net Link and Net Active.
)
13. Copy Button (
Press this button to copy the playback images to the storage device connected to the USB
port. Press this button again to stop copying.
14. REC Button
Press this button to force manual recording. To stop manual recording, press it again.
15. ESC/PTZ Button
In main screen display, press this button to enter/exit PTZ control if the focus camera is a
PTZ camera. In the other displays, press this button to escape to the upper level display.
16. MENU Button
Press this button to display the main menu.
17. ENTER Button
This button is used as “enter” key in most circumstances. In PTZ control, this button is
used to start/stop the selected PTZ control mode.
18. Left/Right Buttons (◄,►)
In PTZ control, press these buttons to pan the camera. In the other screens, press this
button to move the cursor or focus window.
19. Up/BS Button (▲/BS)
Press this button to move the cursor or focus window in most circumstances. In PTZ
control, press this button to tilt up the camera. In text editing mode, this button is used as
“backspace” key.
20. Down/DEL Button (▼/DEL)
Press this button to move the cursor or focus window in most circumstances. In PTZ
control, press this button to tilt down the camera. In text editing mode, this button is used
as “Delete” key.
8
21. Fast Backward Button (
)
Press this button for fast backward playback.
22. Play/Pause Button (
)
Press this button to play the recorded images or pause the playback.
23. Stop Button ( )
Press this button to stop the playback.
24. Single Step Button ( )
Press this button to play the recorded images frame by frame.
25. Fast Forward Button (
)
Press this button for fast forward playback.
/
/ )
26. (Vol/Zoom) +/- Buttons (
Press these buttons to change the volume in most circumstances. In PTZ control, press
these buttons to zoom in/out the camera.
27. (Split Windows) +/- Buttons ( )
In split-window display, press these buttons for next/previous split-window display. In the
others, press these buttons to change the contents.
28. Power Button
29. IR Window
This receives the IR signal from the remote control. Please make sure nothing is blocking
this window to ensure proper operation of your remote control.
9
2.2 Back Panel
1. Video Input Connectors (1-16)
Connect system cameras to these BNC connectors. The corresponding 75Ω termination
(see # 5)must be made unless the video output terminal is connected.
2. Video Output Connectors (1-16)
Connect these BNC connectors for looping the corresponding camera video inputs.
3. Stereo Audio Input Connectors (AUDIO IN 1-4)
These RCA connectors accept 2 stereo line-in audio signals supplied from external
devices such as microphone amplifiers.
4. Audio Output Connectors (AUDIO OUT 1-2)
These connectors supply 2 line-out audio signals to external devices such as speakers.
Recorded audio will be supplied from AUDIO OUT during playback.
5. 75Ω
Ω termination
Set each of the DIP switches to ON unless the corresponding video output terminal is
connected.
6. PS/2 port
For mouse connection.
7. MAIN-AUX Connectors (MAIN-AUX IN/OUT)
Used to daisy-chain to CCTV monitor. MAIN-AUX OUT has the same output as MAIN
OUT, but can be switched off through virtual keyboard control.
8. Call Monitor Output Connector (CALL OUT)
Connect CCTV monitor to this BNC connector for call monitor display.
9. CALL-AUX Connectors (CALL-AUX IN/OUT)
Used to daisy-chain to CCTV monitor. CALL-AUX OUT has the same output as CALL
OUT, but can be switched off through virtual keyboard control.
10. RS-232 Connector
Connect this connector to PTZ camera(s).
10
11. RS-422/485 Selector Switch
Used to select RS-422/485 4-line or 2-line.
12. RS-422/485 Connector
Connect this connector to RS-422/485 compatible PTZ camera(s). Please set the Selector
Switch correctly. Please refer to the manuals that come with the RS-422/485 compatible
devices for the correct settings.
13. Alarm Input Connectors (ALARM IN 1-16)
Connect these connectors to external devices such as sensors or door switches.
14. Alarm Output Connectors (ALARM OUT 1-4)
Connect these connectors to 2 Normally Closed (NC) alarm outputs (1-2) and 2 Normally
Open (NO) alarm outputs (3-4).
15. Ethernet Connector
Connect this unit to a 10/100Base-T Ethernet network through this port.
16. NTSC/PAL Selector Switch
Set this unit to NTSC or PAL according to the local TV system.
17. USB Connector (USB)
Connect this port to USB 2.0 compatible storage device, such as USB 2.0 disk drive,
DVD+RW, card reader, etc.
18. Cooling Fan
The cooling fan of the internal SPS (Switching Power Supply).
19. Power Cord Inlet (AC IN)
Connect a power cord to this inlet. It accepts 90~264 VAC, 47~63 Hz power source.
20. VGA Connector
Connect VGA monitor to the VGA connector for main monitor display.
11
2.3 Remote Controller
The remote controller is an accessory to ease the user’s operations. You can do all the
operations by the remote controller instead of the buttons on the front panel. The effective
distance is about 10 meters without any obstacle.
The Buttons
Each of these buttons corresponds to one of those buttons on the front panel. Please refer
to the descriptions in Section 2.1.
3. Installations
The installations described below should be made by qualified service personnel or system
installers.
3.1 Basic Connections
Please refer to the following diagram for the connections.
Please make sure to set the NTSC/PAL Selector Switch on the back panel according to
the local TV system for the digital video/audio recorder to work correctly.
12
Cameras
Connect the camera video input connectors to the video outputs from system cameras or
other composite video sources via coaxial cables.
Main monitor
Connect the main monitor output connector (BNC) to a surveillance CCTV monitor.
The CCTV monitor displays selected live or recorded cameras in any available split
window format.
Hard disk drive(s)
Make sure to install at least one hard disk drive inside the hard disk tray.
Note: Each of the HDDs must be formatted before it can be used to record
video/audio. Please refer to Section 6.6.1 HDD Format/Clear to format the
HDDs.
Before connection
After connection
Power
Plug 115 VAC or 230 VAC power source into the power socket.
3.2 Optional Connections
Audio inputs
Connect the audio input connectors to the audio line-outs from system cameras or other
audio sources. Please make sure to associate the audio inputs with the cameras in Camera
Setup as described in Section 6.2 accordingly.
Audio outputs
Connect the audio output connectors to the audio line-ins from speakers.
Alarm inputs
Each alarm input should have 2 or 3 wires. Those with 2 wires will either be Normally
Open (NO) or Normally Closed (NC). Those with 3 wires will allow the user to
choose. Connect two of those wires to the alarm input connector in the pairs. Direction
does not matter. There is availability for 16 possible alarm inputs. When the alarm input
has been connected, please configure the software system accordingly as per Alarm Setup
as described in Section 6.3.
13
Alarm outputs
Connect the alarm outputs 1-2 to NC type of alarm signals, alarm outputs 3-4 to NO type
of alarm signals.
Ethernet
Connect the Ethernet connector to a standard twisted-pair Ethernet cable for remote
access via LAN or internet. Please make sure to setup the related configurations as
described in Section 6.10 Network Setup.
USB 2.0 disk drives, DVD+RW, card reader, etc.
If the user wants to use USB2.0 peripheral device to retrieve important recorded images
and/or audio, please connect it to the USB port connectors (one on the front panel, the
other on the back panel).
I/R remote controller
The user may use I/R remote controller to control the digital video/audio recorder.
Call monitor
Connect the call monitor output connector to a surveillance CCTV monitor. This monitor
displays the full screen images of the cameras associated with the events (alarm or motion)
or the images from the installed cameras sequentially according to the SEQ Display Setup
(Section 6.4) for call monitor.
PTZ Cameras
Connect the RS-422/485 connector to PTZ camera(s) via the appropriate cable. The
system supports a variety of different PTZ cameras, including Pelco D and Samsung
SCC-641P protocol Dome. But different PTZ cameras can coexist in a system only if they
support the same protocol. Please make sure to set the PTZ ID of the camera(s) and setup
the camera (Section 6.1) and RS-422/485 (Section 6.9) accordingly. Please also make sure
to set the RS-422/RS-485 Selector Switch if you are using the RS-422/485 port.
RS-485
Please refer to the following diagram for the pin definitions of the RS-422/485 connector.
Please make sure to set the RS-422/RS485 Selector Switch and setup the RS-422/485
configurations as described in Section 6.9 accordingly.
14
N/C
N/C
GND
RxD+
RxDTxD+
TxDGND
Set this unit to 2-line
For PTZ cameras
DVR
Devices
GND
TxDTxD+
RxDRxD+
GND
RS485RS485+
MAIN-AUX monitor
Please refer to the diagram below to connect the MAIN-AUX monitor output connector to
a surveillance CCTV monitor or the MAIN-AUX monitor input connector of another
digital video/audio recorder. The MAIN-AUX monitor, if enabled, has the same output
display as the main monitor and is typically used with virtual keyboard controller for
distant monitoring and control (e.g. in central control room).
CALL-AUX monitor
Please refer to the diagram below to connect the CALL-AUX monitor output connector to
a surveillance CCTV monitor or the CALL-AUX monitor input connector of another
digital video/audio recorder. The CALL-AUX monitor, if enabled, has the same output
display as the call monitor and is typically used with virtual keyboard controller for
distant monitoring and control (e.g. in central control room).
15
4.Main Screen And Basic Operations
36%
16
The split-window screen, as shown above, is the main screen after system startup. There are
several types of split-window screens, including 1-Window, 4-Window, 7-Window,
9-Window, 10-Window, 13-Window and 16-Window. The system will remember the last one
before normal shutdown (as described in Section 5.7) of the system. In addition to the split
windows, the system time is displayed on the lower-left corner, the system state on the
lower-right corner and the rolling screen messages, if shown while certain event occurs, on
the lower corner.
The system state, from right to left, are described as the followings:
(1) Normal recording percentage,
(2) Alarm recording percentage,
(3) X2 state – X1, X2 or X4,
(4) Manual record ON/OFF – red circle shown for ON,
(5) Backup state – backup icon shown for backup,
(6) SEQ display ON/OFF or playback state – SEQ icon shown for SEQ display ON, other
icons for different playback states.
4.1 Text Input
There are certain circumstances where the system requires the user to enter text, such as
system login, camera title setup, and so on. Please follow the steps below to enter text:
(1) Press ENTER to edit the highlighted option. The flashing cursor will be shown to indicate
the editing point.
(2) Press ◄► to move the cursor to the left/right.
(3) Press code in text editing mode to change text case. (If this entry can accept number only,
pressing code will have no effects.) Indicators on the screen show the current setting:
123 = Number only
abc = No capital letters
ABC = All capital letters
CODE = Internal code for the selected language, such as Chinese, Japanese, etc.
(4) Press a number key (1-9, 0) repeatedly until the character you want appears (1 for 1 or
space, 2 for 2, a/A, b/B, or c/C, the others as shown on the keypad).
(5) Press mark to bring up a list of punctuation marks and special characters. The highlighted
character in the list shows the selected one. Press ▲▼◄► to change the selection.
(6) If you make a mistake, press BS to remove the character to the left of the cursor or press
DEL to delete the character at the current cursor position.
(7) In text editing mode, internal code box and mark list, press ENTER to exit and save
changes, press ESC to exit without making changes.
17
4.2 Login And Logout
There are three password levels in the system, including Administrator (highest),
Supervisor, and Operator (lowest). If the user does not login the system, he/she will be
treated as “Guest” and can only view live video display.
The system allows up to 18 user accounts. The administrator can set up the login name and
password for each user (please refer to Section 6.7 for Password Setup.)
The Operator can operate live video display, the Supervisor live video display, image
playback and archive and the Administrator everything.
To login/logout the system, press MENU in
split-window display to call up Menu display and
then press ENTER when the highlighted option is
Login/Logout to enter Login/Logout display as
shown.
In Login/Logout display, follow the Text Input
method described in Section 4.1 to enter the Login name and Password, press ▲▼ to
highlight and select Login option and then press ENTER to login the system. If the user
wants to logout the system, just press ▲▼ to highlight and select Logout option and then
press ENTER. Press ESC to exit without making changes.
There is one factory-preset login name (aa) and password (11) at Administrator level. The
user can use it to login the system for the first time.
Should the user have forgotten all the administrator-level passwords, please contact the
local dealer or installer to recover from it.
4.3 Basic Operations
The basic user’s operations after he/she has logged into the system are described below:
Numeric (ENTER)
Press these buttons to change the camera for the focus window. If the camera already
exists in the other window, the focus window will exchange with that window for the
cameras.
Alarm Reset
Press this button to cancel alarm activation, i.e. reset the alarm outputs and silence the
buzzer.
MODE (Administrator/Supervisor)
In split-window display, press this button to change circularly the live/playback mode for
the focus window and the other windows that form a rectangle on the screen. Please note
that the rectangle can contain at most 16/9 split windows.
18
SEQ
Press this button to switch to or return from SEQ display mode. In SEQ display mode,
each page in the sequence will be shown for the preset page dwelling time sequentially
and SEQ icon will be shown on the lower-right corner of the screen.
CALL
In split-window display, press this button to switch to or return from full screen display of
the focus camera.
SEARCH (Administrator/Supervisor)
In split-window display, press this button to display the search menu. The system will
remember the last one the user chose.
REC
Press this button to force manual recording. To stop manual recording, press it again.
All cameras will be recorded as if the scheduled record is A/V and REC will be shown on
the lower-right corner of the screen if manual recording is ON.
MENU
In split-window display, press this button to display the main menu.
PTZ
In split-window display, press this button to enter PTZ control mode if the focus camera is
a PTZ camera.
X2
In full screen display, press this button to enter Digital Zoom mode. Please refer to
Section 4.4 Digital Zoom for the detailed operations in Digital Zoom mode.
▲▼◄►
Press these buttons to move focus. The title of the camera for the focus window is
highlighted as shown on the screen.
Vol+/- (
/
), MUTE
Press these buttons to control the volume.
+/Press these buttons to circulate up/down among the available split-window displays.
19
4.4 Digital Zoom
The system supports X2/X4 Digital Zoom function. To use this function, press X2 button in
full screen display to enter Digital Zoom mode. There will be a zoom window shown in the
video window as shown. The zoom window (a) will always be shown at zoom factor X1, (b)
can be shown or hidden at zoom factor X2 and (c) will never be shown at zoom factor X4.
The operations in Digital Zoom mode are as below:
▲▼◄►
Press these buttons to
(a) move the zoom window if it’s shown in the video window, or
(b) navigate the video window around if the zoom factor is X2 or X4.
ENTER
Press this button to zoom in the zoom window, from X1 to X2 or from X2 to X4, if the
zoom window is shown in the video window.
X2
Press this button to
(a) show/hide the zoom window if the current zoom factor is X1/X2, or
(b) zoom out the video window back to zoom factor X1 if the current zoom factor is X4.
ESC
Press this button to escape from Digital Zoom mode and return to normal full screen
display. The video window will always return to zoom factor X1.
20
5. Menu Display
In split-window display, press MENU to call up
Menu display as shown.
There are a variety of displays under Menu
display. In Menu display and all the subsequent
displays, the items enabled are shown in
black-colored text and those disabled in
white-colored text. Please refer to Section 4.2
for Login/Logout display.
The user’s operations are described as the
followings:
▲▼
Press these buttons to change the highlighted item.
ENTER
Press this button to enter the detailed display of the highlighted option. For the details of
each option, please refer to the following sections.
ESC
Press this button to escape from Menu display and return to split-window display.
21
5.1 Status Display
In Menu display, press ▲▼ to change the highlighted option to Status and then press
ENTER to call up Status display as shown.
Status display includes Alarm Recording Status, Normal Recording Status, Camera Status,
Alarm Input Status, Product Serial Number and Product Version Number. Press ESC to
escape from Status display and return to Menu display.
5.2 Volume Control
In Menu display, press ▲▼ to change the
highlighted option to Volume and then press
ENTER to call up Volume Control display as
shown.
The general operations are as below:
▲▼◄►
Press these buttons to select the items.
ESC
Press this button to escape from this screen and return to Menu display. If the contents
have been modified, a Save dialog will be shown to ask the user to save the changes,
press ENTER to exit and save, ESC to exit without saving.
Following is a brief description for each item and its specific operations:
Mute – to mute the selected audio channel. Press ENTER to check/uncheck this item.
The default setting is “--” - unchecked.
Volume – the volume of the selected audio channel. Press +/- buttons to change the value
(1-20).
22
5.3 Video Adjustment
In Menu display, press ▲▼ to change the highlighted option to Video Adjustment and then
press ENTER to call up Video Adjustment display as shown.
There are 4 items which can be adjusted, including Brightness, Contrast, Hue, and Saturation.
The operations are as below:
▲▼
Press these buttons to select the items.
Numeric
Press these buttons to change the camera.
+/Press these buttons to adjust the selected item.
SEQ
Press this button to reset the settings for this camera to factory default values.
CALL
Press this button to reset the settings for all cameras to factory default values.
MODE
Press this button to restore the values.
ESC
Press this button to escape from this screen and return to Menu display. The settings will
be saved for future reference.
23
5.4 VGA Display
In Menu display, press ▲▼ to change the highlighted option to VGA Display and then press
ENTER to call up VGA Display dialog as shown.
There are 5 items which can be adjusted, including Resolution (1280x1024, 1024x768,
800x600, 640x480), Brightness, Contrast, Hue, and Saturation. The operations are as below:
▲▼
Press these buttons to select the items.
+/Press these buttons to adjust the selected item.
MODE
Press this button to restore Brightness, Contrast, Hue, and Saturation to factory default
values.
ESC
Press this button to escape from this screen and return to Menu display. If the contents
have been modified, a Save dialog will be shown to ask the user to save the changes,
press ENTER to exit and save, ESC to exit without saving.
24
5.5 Backup Device
In Menu display, press ▲▼ to change the highlighted option to Backup Device and then
press ENTER to call up Backup Device display as shown below.
The system supports a variety of USB 2.0 storage devices, including Storage Disk such as
USB 2.0 storage disk drives and DVD Disc (including DVD+RW, DVD+R, and DVD-R)
(DVD-RW is not supported). The operations are as below:
▲▼◄►
Press these buttons to select the items.
ESC
Press this button to escape from this screen and return to previous display.
Connect/Disconnect – If the specific backup device is disconnected (as shown in Current
Status), please plug the USB device in one of the USB ports of the system and/or insert a
DVD for DVD device and then press ENTER to command the system to connect with the
device. If the specific device is already connected (EX. Read/write, as shown in Current
Status), please press ENTER to command the system software to disconnect with the
device and then unplug the backup device from the backup port.
Note 1: Please DO NOT format the DVD disc for better performance and compatibility.
Note 2: Before using USB pen drive, please format it to FAT32 file system by
MS-Windows.
Note 3: The backup device has to be connected by the system software before it can be
used to read/write.
Note 4: Some backup devices may have compatibility problems. Please contact your
local dealer or installer for the supported devices.
Backup
Press ENTER when this item is selected to backup the configurations of this unit to the
corresponding USB device.
25
Restore
Press ENTER when this item is selected to restore the configuration files in the
corresponding USB device to this unit.
Some USB 2.0 Devices Tested
USB-Storage Enclosures 5.25” –
Macpower’s Alumni Prefect USB 2.0 - PF-U2MS.
USB-Disk Storage –
Transcend’s JetFlash 150/V60 Series,
Apacer’s Handy Steno AH220,
Pretec’s i-Disk Wave 512M-Black
Kingston’s DataTraveler USB Flash Driver(DTI/512FE)
SanDisk’s Cruzer micro USB Flash Driver
Sony’s MICRO VAULT Classic Series
DVD Writer –
Asus DRW-1608P Series,
Pioneer DVR-A11 Series, DVR-116BXL
LITEON Light Scribe DVD Writer Model SHM-165H6S Series, DH-20A4P39C
Sony DVD/CD Rewritable Drive Model DRX-810UL Series, DRU-V200A-BR
NEC DVD/CD Rewritable Drive Model ND-4550A Series.
HP dvd9404e External 18X Super Multi DVD Writer Series.
Some DVD Discs Tested – Only single-side, single-layer disc is supported
Infomedia DVD+R 16X
Mitsubishi DVD+RW 1-4X
Philips DVD+RW 1-4X
Ritek DVD-R 8X
Ritek DVD+RW 1-4X
Verbatim DVD+RW 1-4X
26
5.6 Software Upgrade (Administrator)
In Menu display, press ▲▼ to change the highlighted option to Software Upgrade and then
press ENTER to call up Software Upgrade display as shown.
The operations are as below:
▲▼◄►
Press these buttons to select the items.
ESC
Press this button to escape from this screen and return to Menu display.
Following is a brief description for each item and its specific operations:
USB Device – press ENTER to call up USB Device dialog (if there’s no USB device
connected).
Disk Storage – to select the disk storage to upgrade. Press +/- buttons to select the
available storage.
Upgrade File – press ENTER to start the upgrade process when the highlighted file is a
correct upgrade file. A confirmation dialog will be shown on the screen, press ENTER to
confirm to upgrade the system software.
Note : After the software is upgraded, the system will restart immediately. The split
window display will be shown after restart, please wait a moment.
27
5.7 System Shutdown (Administrator)
In Menu display, press ▲▼ to change the highlighted option to Shutdown and then press
ENTER to shutdown the system. A confirmation dialog will be shown on the screen, press
ENTER to confirm the shutdown. The system will save all the files and all the states and then
display a power-off message in the rolling screen message area. The user may power off the
system safely when the power-off message is shown.
6. Setup (Administrator)
In Menu display, press ▲▼ to change the highlighted option to Setup and then press
ENTER to call up Setup Menu display as shown (to enter Setup Menu display of the system,
please login as Administrator first).
The user’s operations are described as the
followings:
▲▼
Press these buttons to change the highlighted
item.
ENTER
Press this button to enter the setup of the
highlighted option. For the details of each
option, please refer to the following sections.
ESC
Press this button to escape from Setup Menu display
and return to Menu display.
28
If the user wants to reset all the settings to factory default values, he/she may press ▲▼ to
change the highlighted option to Factory Defaults and then press ENTER. A confirmation
dialog will be shown, press ENTER again to make the changes, ESC to not do it.
6.1 Pre-Camera Setup
In Setup Menu display, press ▲▼ to change the highlighted option to Pre-Camera and then
press ENTER to call up Pre-Camera Setup display as shown.
There are up to 16 cameras which can be connected to the system. The Pre-Camera Setup
allows the administrator to define some fundamental attributes, which may relate one camera
to the others, for all the installed cameras.
The general operations are as below:
▲▼◄►
Press these buttons to select the items. The display will scroll up/down if the selected item
is not shown on the screen.
Numeric (ENTER)
Press these buttons to select the camera.
ESC
Press this button to escape from this screen and return to Setup Menu display. If the
contents have been modified, a Save dialog will be shown to ask the user to save the
changes, press ENTER to exit and save, ESC to exit without saving.
Following is a brief description for each item and its specific operations:
REC Resolution – the record resolution for all the cameras in the system. For NTSC, it
can be 720x480, 720x240, or 360x240; for PAL, 720x576, 720x288, or 360x288. Press
+/- buttons to select the resolution.
Watermark – press ENTER buttons to change the value
29
Installed – whether this camera is installed or not. If installed, the following items will be
ˇ” - checked.
settable. Press ENTER to check/uncheck this item. The default setting is “ˇ
PTZ ID – the PTZ ID of this camera if it’s a PTZ camera. The PTZ ID has to be
consistent with the setting of this camera. Please refer to the manual of the camera for the
ID setting. Press +/- buttons to change the value (N/A or 0-255). The default setting is
“N/A” – Not Available, which means that it’s not a PTZ camera.
Group – the group which the camera belongs to if its record resolution is 360x240 or
360x288. It’s used to maximize the record capacity of the system. Please refer to the table
below for the maximum number of cameras in a group. None-selectable groups will be
disabled and grayed. Please press ▲▼◄► buttons to highlight the group and then press
ENTER to select the group of the camera.
TV system
NTSC
PAL
Record
Resolution
720x480
720x240
360x240
720x576
720x288
360x288
Max. number of cameras
in a group
N/A
N/A
2
N/A
N/A
2
Please note that the cameras in the same group will have the same record attributes such
as record quality, record IPS, etc.
30
6.2 Camera Setup
In Setup Menu display, press ▲▼ to change the highlighted option to Camera and then
press ENTER to call up Camera Setup display as shown.
The Camera Setup allows the administrator to define the attributes for each camera. There are
up to 16 cameras which can be connected to the system.
The general operations are as below:
▲▼◄►
Press these buttons to select the items. The display will scroll left/right if the selected item
is not shown on the screen.
Numeric (ENTER)
Press these buttons to select the camera.
COPY (
)
Press this button to copy all the settings - excluding detailed Motion settings, Video Loss
settings, Title/Audio - of the focus camera to all the following cameras (EX. focus camera
is 5, its settings will be copied to those of cameras 6-16).
ESC
Press this button to escape from this screen and return to Setup Menu display. If the Save
dialog is shown, press ENTER to exit and save, ESC to exit without saving.
Following is a brief description for each item and its specific operations:
Title – The title (max. 8 characters) of this camera. Please follow the Text Input method
described in Section 4.1 to modify this item.
31
Video Loss Settings.. – used to setup the action settings when video loss is detected for
this camera. Press ENTER in Settings.. to call up Video Loss Setup display for the
camera. Please refer to Section 6.2.1 for the details.
Motion Detection – whether the motion detection of this camera is enabled or not.
ˇ” - checked.
Press ENTER to check/uncheck this item. The default setting is “ˇ
Motion Settings.. – used to setup the Motion Detection setting, for this camera. Press
ENTER in Settings.. to call up Motion Setup display for the camera. Please refer to
Section 6.2.2 for the details.
Covert – covert or not. If the camera is covert, the video of this camera can only be seen
if the user has logged in as Administrator. Press ENTER to check/uncheck this item. The
–” - unchecked.
default setting is “–
Call By Event – whether to switch the call monitor to the video of this camera if certain
event occurs for this camera. There are 4 options, including Off, Motion, Alarm and
(Motion & Alarm). Press +/- buttons to select one.
Dwell Time – the dwell time if Call By Event is set to Motion, Alarm or Both. Press +/buttons to adjust the value (3-60 seconds, discrete).
Audio – the AUDIO IN corresponding to this camera. The audio data for the selected
AUDIO IN will be recorded with the video data for this camera. Press +/- buttons to
select none (N/A) or AUDIO Inputs (1/2, 3/4). The default setting is “N/A”.
Record Quality – the record quality for this camera. Press +/- buttons to select the value
(1-9, with 1 the lowest (rough) quality, 9 the highest (fine) quality).
Event Record IPS – the IPS (Images Per Second) for this camera if certain event
(Motion, Alarm) occurs for this camera. This camera will be recorded at this rate for
Post-record time since the event occurs (please refer to the following sections for
Post-record time). Press +/- buttons to select the value (0 – 25 (PAL) / 30 (NTSC),
discrete).
Pre-record IPS – the pre-record IPS for this camera if certain event (Video Loss, Motion,
Alarm) occurs for this camera. This camera is recorded at this rate for Pre-record time
before the event occurs (please refer to the following sections for Pre-record time).
Press +/- buttons to select the value (0 – Event Record IPS for this camera, discrete).
Normal Record IPS – the normal record IPS for this camera. This camera will be
recorded at this rate if no event occurs. Press +/- buttons to select the value (0 –
Pre-record IPS for this camera, discrete).
32
6.2.1 Video Loss Setup
In Camera Setup, press ENTER to call up Video Loss Setup of the selected camera as shown
when the highlighted option is Video Loss Settings.. of the camera to setup. The Video Loss
Setup allows the administrator to define how the system responds to the detected video loss
for the camera.
The general operations are as below:
▲▼
Press these buttons to select the items.
Numeric (ENTER)
Press these buttons to select the camera.
COPY (
)
Press this button to copy the Video Loss settings of the focus camera to all the following
cameras (EX. focus camera is 5, its Video Loss settings will be copied to those of cameras
6-16).
ESC
Press this button to escape from this screen and return to Camera Setup display. If the
Save dialog is shown, press ENTER to exit and save, ESC to exit without saving.
Following is a brief description for each item and its specific operations:
Duration – response duration to define at most how long (in seconds) the Alarm Out
relay and the Buzzer will keep being triggered after video loss is detected for this camera.
However, the Alarm Out relay and the Buzzer will be reset immediately once the camera
returns to normal. Press +/- buttons to adjust the value (3 seconds - 60 minutes, discrete,
‘-‘ for ‘Forever’).
Pre-record – to define how long before video loss is detected this camera shall be
intensively recorded at Pre-record IPS. Press +/- buttons to adjust the value (0-60 seconds,
discrete). Please note that the actual pre-record time may be shorter than the value set if
the total size of the pre-record pictures exceeds the pre-record buffer size of the system.
33
Alarm Out – to define which Alarm Output will be triggered when video loss of this
camera is detected. Press +/- buttons to select none (N/A) or one of the Alarm Outputs
(1-4).
Buzzer – to activate the internal Buzzer or not when video loss of this camera is detected.
Press ENTER to check/uncheck this item. The default setting is “ˇ
ˇ” - checked.
Log – to log to event logs or not. Press ENTER to check/uncheck this item. The default
setting is “ˇ
ˇ” - checked.
Screen Message – to display the event message on the screen or not. Press ENTER to
ˇ” - checked.
check/uncheck this item. The default setting is “ˇ
E-mail – to send the event e-mail to remote station or not. The e-mail will be sent to the
predefined receivers at the moment when the event is triggered. Press ENTER to
–” - unchecked.
check/uncheck this item. The default setting is “–
6.2.2 Motion Setup
In Camera Setup, press ENTER to call up Motion Setup as shown when the highlighted
option is Motion Settings.. of the camera to setup. The Motion setup allows the administrator
to define how the system responds to the detected motion for the camera.
The general operations are as below:
▲▼◄►
Press these buttons to select the items.
Numeric (ENTER)
Press these buttons to select the camera.
COPY (
)
Press this button to copy the Motion settings, including Detection settings, of the focus
camera to all the following cameras (EX. focus camera is 5, its Motion settings will be
copied to those of cameras 6-16).
34
ESC
Press this button to escape from this screen and return to Camera Setup display. If the
Save dialog is shown, press ENTER to exit and save, ESC to exit without saving.
Following is a brief description for each item and its specific operations:
Duration – response duration to define at most how long (in seconds) the Alarm Out
relay and the Buzzer will keep being triggered after motion is detected for this camera.
However, the Alarm Out relay and the Buzzer will be reset immediately once the camera
returns to normal. Press +/- buttons to adjust the value (3 seconds - 60 minutes, discrete,
‘-‘ for ‘Forever’).
Goto Preset – to define the preset position to go to if motion is detected and this camera
is a PTZ camera. For more details about preset locations, please refer to Chapter 7 PTZ
Control.
Pre-record – to define how long before motion is detected this camera shall be
intensively recorded at Pre-record IPS. Press +/- buttons to adjust the value (0-60 seconds,
discrete). Please note that the actual pre-record time may be shorter than the value set if
the total size of the pre-record pictures exceeds the pre-record buffer size of the system.
Post-record – to define how long after motion is detected this camera shall be intensively
recorded at Event Record IPS. Press +/- buttons to adjust the value (0 second - 60 minutes,
discrete).
Alarm Out – to define which Alarm Output will be triggered when motion of this camera
is detected. Press +/- buttons to select none (N/A) or one of the Alarm Outputs (1-4).
Buzzer – to activate the internal Buzzer or not when motion of this camera is detected.
ˇ” - checked.
Press ENTER to check/uncheck this item. The default setting is “ˇ
Log – to log to event logs or not. Press ENTER to check/uncheck this item. The default
setting is “ˇ
ˇ” - checked.
Screen Message – to display the event message on the screen or not. Press ENTER to
check/uncheck this item. The default setting is “ˇ
ˇ” - checked.
E-mail – to send the event e-mail to remote station or not. The e-mail will be sent to the
predefined receivers when the event is triggered. Press ENTER to check/uncheck this
item. The default setting is “–
–” - unchecked.
Detection Settings.. – used to setup the motion detection settings, including detection
area and sensitivity, when motion is detected for this camera. Press ENTER in Settings..
to call up Motion Detection Setup (as shown) for this camera. In Motion Detection Setup,
the video area is divided into many small grids and the area with transparent grids is the
area which will be detected for motion, while gray grids not detected for motion.
Besides, there is a (green) Mask window.
35
Following is a brief description for the operations:
Numeric
Press these buttons to select the camera.
▲▼◄►
Press these buttons to move the Mask window.
+/Press these buttons to resize the Mask window.
ENTER
Press this button to set/reset the area under the Mask window.
MODE
Press this button to set/reset the whole video area.
SEQ
Press this button to decrease the sensitivity, from 10 – 1, for the motion detection of
this camera.
CALL
Press this button to increase the sensitivity, from 1 – 10, for the motion detection of
this camera.
SEARCH
Press this button to test the motion detection of this camera. The detected motion will
be shown on the screen. Press this button again to stop testing.
ESC
Press this button to escape from Motion Detection Setup and return to Motion Setup.
36
6.3 Alarm Setup
In Setup Menu display, press ▲▼ to change the highlighted option to Alarm and then press
ENTER to call up Alarm Setup display as shown. The Alarm Setup allows the
administrator to define the attributes for each alarm input and the actions if it’s triggered.
There are up to 16 alarm inputs which can be connected to the system.
The general operations are as below:
▲▼◄►
Press these buttons to select the items. The display will scroll left/right if the selected item
is not shown on the screen.
Numeric (ENTER)
Press these buttons to select the alarm input.
)
COPY (
Press this button to copy the settings of the focus alarm input to all the following alarm
inputs (EX. focus alarm input is 5, its settings will be copied to those of alarm inputs
6-16).
ESC
Press this button to escape from this screen and return to Setup Menu display. If the Save
dialog is shown, press ENTER to exit and save, ESC to exit without saving.
Following is a brief description for each item and its specific operations:
Normal State – press +/- buttons to select N/A, Close or Open. Please check the signal
type, normally close or normally open, connected to the alarm input terminal on the rear
panel of the system. If there’s no signal connected, please select N/A – Not Available –
and the following items will not be settable. The default setting is Open.
Focus Camera – the camera corresponding to this alarm input.
37
Duration – response duration to define at most how long (in seconds) the Alarm Out
relay and the Buzzer will keep being triggered after this alarm input is triggered.
However, the Alarm Out relay and the Buzzer will be reset immediately once this alarm
input returns to normal. Press +/- buttons to adjust the value (3 seconds - 60 minutes,
discrete, ‘-‘ for ‘Forever’).
Goto Preset – to define the preset position to go to for the Focus Camera if this alarm
input is triggered and the Focus Camera is a PTZ camera. For more details about preset
locations, please refer to Chapter 7 PTZ Control.
Pre-record – to define how long before this alarm input is triggered the Focus Camera
shall be intensively recorded at Pre-record IPS. Press +/- buttons to adjust the value (0-60
seconds, discrete). Please note that the actual pre-record time may be shorter than the
value set if the total size of the pre-record pictures exceeds the pre-record buffer size of
the system.
Post-record – to define how long after this alarm input is triggered the Focus Camera
shall be intensively recorded at Event Record IPS. Press +/- buttons to adjust the value (0
second - 60 minutes, discrete).
Alarm Out – to define which Alarm Output will be triggered when this alarm input is
triggered. Press +/- buttons to select none (N/A) or one of the Alarm Outputs (1-4).
Buzzer – to activate the internal Buzzer or not when this alarm input is triggered. Press
ENTER or +/- to check/uncheck this item. The default setting is “ˇ
ˇ” - checked.
Log – to log to event logs or not. Press ENTER to check/uncheck this item. The default
ˇ” - checked.
setting is “ˇ
Screen Message – to display the event message on the screen or not. Press ENTER to
ˇ” - checked.
check/uncheck this item. The default setting is “ˇ
E-mail – to send the event e-mail to remote station or not. The e-mail will be sent to the
predefined receivers when the event is triggered. Press ENTER to check/uncheck this
item. The default setting is “–
–” - unchecked.
38
6.4 SEQ Display Setup
In Setup Menu display, press ▲▼ to change the highlighted option to SEQ Display and
then press ENTER to call up SEQ Display Setup as shown.
The SEQ Display Setup allows the administrator to define the display pages in SEQ Display
for main monitor and call monitor. There are up to 7 display types - 1-Window, 4-Window,
7-Window, 9-Window, 10-Window, 13-Window and 16-Window - for main monitor and 1
display type for call monitor.
The general operations are as below:
▲▼◄►
Press these buttons to select the items.
ESC
Press this button to escape from this screen and return to Setup Menu display. If the Save
dialog is shown, press ENTER to exit and save, ESC to exit without saving.
Following is a brief description for each item and its specific operations:
Total Pages – total pages for this SEQ Display Type. The maximum number varies
according to the display type. Press +/- buttons to select the desired number from the
available list.
Dwell Time – the dwell time (3 ~ 60 seconds, discrete) for each page of this display type.
Press +/- buttons to change the value.
Page Settings.. – used to set the camera in each viewing window for each page of this
SEQ Display Type. Press ENTER to call up Display Page Setup as shown.
39
In Display Page Setup, the split window display for the current page is shown and the title
of the camera for the focus window is highlighted. Following is a brief description for the
operations:
▲▼◄►
Press these buttons to move the focus window.
Numeric (ENTER)
Press these buttons to change the camera for the focus window.
+/Press these buttons to change the current page for this SEQ Display Type.
ESC
Press this button to escape from Display Page Setup and return to SEQ Display Setup.
40
6.5 Scheduled Record Setup
In Setup Menu display, press ▲▼ to change the highlighted option to Scheduled Record
and then press ENTER to call up Scheduled Record Setup as shown.
The Scheduled Record Setup allows the administrator to define when and how to record for
the system. There are up to 16 time segments (T1 – T16) for each weekday.
The general operations are as below:
▲▼◄►
Press these buttons to select the items. The display will scroll left/right if the selected item
is not shown on the screen.
)
COPY (
Press this button to copy the settings of the focus weekday to all the following weekdays
(EX. focus weekday is TUE, its settings will be copied to those of weekdays WED-SAT).
ESC
Press this button to escape from this screen and return to Setup Menu display. If the Save
dialog is shown, press ENTER to exit and save, ESC to exit without saving.
Following is a brief description for each item and its specific operations:
Start – the start time of this time segment, increment at 30 minutes (the end time of this
time segment is implicitly set as the start time of next time segment or the start time of the
first time segment of the same weekday if it’s the last one). Press +/- buttons to select the
desired start time.
Example: If the user sets the start time of T1/MON as 9:00, T2/MON as 18:00,
T3-T16/MON as N/A (Not Available), then T1/MON is 9:00-18:00, T2/MON is
0:00-9:00, and 18:00-24:00.
Alarm – record mode (No, Video or Audio/Video) when certain alarm input is triggered.
Press +/- buttons to change the value.
41
Motion – record mode (No, Video or Audio/Video) when motion is detected for certain
camera. Press +/- buttons to change the value.
Normal – normal record mode, including No, V (Video only) or A/V (Audio/Video).
Press +/- buttons to change the value.
6.6 HDD Setup
In Setup Menu display, press ▲▼ to change the highlighted option to HDD and then press
ENTER to call up HDD Setup as shown.
In the surveillance applications, alarm video/audio is much more important than normal
video/audio. So, this digital video/audio recorder is designed to allow the user to divide each
HDD into alarm partition and normal partition. Alarm video/audio will be recorded in alarm
partition, normal video/audio in normal partition.
The HDD Setup allows the administrator to format/clear each HDD, set Alarm Record size
and Normal Record size of each HDD and define the behaviors for Alarm Record and Normal
Record if it reaches the end of the last HDD in the system.
The general operations are as below:
▲▼◄►
Press these buttons to select the items.
MODE => Format/Clear
Press this button to format/clear the HDDs as described in Section 6.6.1.
ESC
Press this button to escape from this screen and return to Setup Menu display. If the Save
dialog is shown, press ENTER to exit and save, ESC to exit without saving.
42
Following is a brief description for each item and its specific operations:
Size (GB) – the total HDD storage in GB (Giga-Byte) for Alarm Record and Normal
Record respectively. This item is just for information. Please refer to Section 6.6.1 for
more detailed information and setup of each individual HDD.
Auto Overwrite – automatic overwrite of the recorded video/audio from HDD#1 when
the Alarm/Normal Record disk drive capacity reaches the end of the last HDD. If Auto
Overwrite is disabled and the Alarm/Normal Record disk drive capacity reaches the end,
the system will not overwrite the recorded video/audio and hence not record
Alarm/Normal video/audio, until the user presses the Alarm Reset button. Press
ˇ” - checked.
ENTER to check/uncheck this item. The default setting is “ˇ
HDD Full Action – actions when Alarm/Normal Record disk drive capacity reaches the
end of the last HDD. Press ENTER to check/uncheck this item. The default setting is
“ˇ
ˇ” - checked.
Duration – response duration to define at most how long (in seconds) the Alarm Out
relay and the Buzzer will keep being triggered after the corresponding partition, Alarm
Record or Normal Record, is full. Press +/- buttons to adjust the value (3 seconds - 60
minutes, discrete, ‘-‘ for ‘Forever’).
Alarm Out – to define which Alarm Output will be triggered when the corresponding
partition, Alarm Record or Normal Record, is full. Press +/- buttons to select none (N/A)
or one of the Alarm Outputs (1-4).
Buzzer – to activate the internal Buzzer or not when the corresponding partition, Alarm
Record or Normal Record, is full. Press ENTER to check/uncheck this item. The default
ˇ” - checked.
setting is “ˇ
Log – to log to event logs or not. Press ENTER to check/uncheck this item. The default
setting is “ˇ
ˇ” - checked.
E-mail – to send the event e-mail to remote station or not. The e-mail will be sent to the
predefined receivers when the event is triggered. Press ENTER to check/uncheck this
item. The default setting is “–
–” - unchecked.
43
6.6.1 HDD Format/Clear
In HDD Setup display, press MODE to call up HDD Format/Clear screen as shown.
Each of the HDDs must be formatted before it can be used to record video/audio. The
HDD Format/Clear screen allows the administrator to format and/or clear each HDD and set
the size for Alarm Record partition and Normal Record partition for each HDD. Please note
that the HDD IDs for the internal HDDs in the DVR start from ID 1 and the HDDs in
the farthest Hard Disk Box have the lowest HDD ID next to internal HDDs.
Note:When re-set the size of Alarm Record partition and Normal Record partition, only
one HDD can be changed every time. It’s not allowed that two or more than two
HDDs be changed.
The general operations are as below:
▲▼◄►
Press these buttons to select the items. The display will scroll left/right if the selected item
is not shown on the screen.
MODE => Format
Press this button to format the selected HDD. A confirmation dialog will be shown on the
screen, press ENTER to confirm or ESC to cancel. Please note that it would take about
40 seconds to format a brand new HDD.
Note: If the HDD has not been formatted yet, it will be formatted and partitioned with
default record size, 30% for Alarm record and 70% for Normal record. If it has been
formatted before, it will be formatted according to the Alarm REC Size (%) and
Normal REC Size (%) displayed on the screen, but the previously recorded contents
within the new size won’t be cleared and will be accessible.
SEQ => Clear
Press this button to clear the selected HDD. A confirmation dialog will be shown on the
screen, press ENTER to confirm or ESC to cancel.
44
Note: If the HDD has not been formatted yet, it will be formatted and partitioned with
default record size, 30% for Alarm record and 70% for Normal record. If it has been
formatted (and recorded) before, it will be partitioned according to the Alarm
Record Size (%) and Normal Record Size (%) displayed on the screen and the
previously recorded contents will all be cleared.
CALL => Physical Format
Press this button to physically format the selected HDD. A confirmation dialog will be
shown on the screen, press ENTER to confirm or ESC to cancel. Please note that the
recording will be always optimized for performance & lifetime no matter it’s for the
first time or for the one hundredth time. The formatting would take less than 1
minute. We strongly recommend that the user use this physical format function to
format the HDD for the first time.
Note: The HDD will be physically formatted and partitioned with default record size,
30% for Alarm record and 70% for Normal record. All the previously recorded
contents will be cleared.
ESC
Press this button to escape from this screen and return to HDD Setup display. If the Save
dialog is shown, press ENTER to exit and save, ESC to exit without saving.
Following is a brief description for each item and its specific operations:
Alarm Recording HDD – the current HDD for alarm recording. This item is just for
information.
Normal Recording HDD – the current HDD for normal recording. This item is just for
information.
Size (GB) – the total storage in GB (Giga-Byte) for this HDD if it has been formatted.
This item is just for information.
Alarm Record(%) – Alarm Record Size (in percentage) for this HDD. Please follow the
Text Input method described in Section 4.1 to change the value.
Normal Record(%) – Normal Record Size (in percentage) for this HDD. It equals to
(100% - Alarm Record Size). This item is just for information.
6.7 Password Setup
In Setup Menu display, press ▲▼ to change the highlighted option to Password and then
press ENTER to call up Password Setup as shown.
45
The Password Setup allows the administrator to add new users, delete existing ones and/or
modify the user’s name, password and/or level.
There are three password levels in the system, including Administrator (highest),
Supervisor and Operator (lowest). The Operator can operate live video display, the
Supervisor live video display, image playback and archive and the Administrator everything.
The system allows up to 18 user accounts.
There is one factory-preset login name (aa) and password (11) at Administrator level. The
user can use it to login the system for the first time.
The general operations are as below:
▲▼◄►
Press these buttons to select the items. The display will scroll up/down if the selected item
is not shown on the screen.
MODE => Select/Deselect as default
Press this button to select this user as the default one at login or deselect if this user is the
default login user. An asterisk (*) will be shown preceding the number for the default
login user and this login name/password will be the default one each time the login dialog
is shown, so the user doesn’t need to enter the text to login the system.
ESC
Press this button to escape from this screen and return to Setup Menu display. If the Save
dialog is shown, press ENTER to exit and save, ESC to exit without saving.
Following is a brief description for each item and its specific operations:
Login Name – please follow the Text Input method described in Section 4.1 to modify
this item.
Password – this item accepts numbers only. Please follow the Text Input method
described in Section 4.1 to modify this item.
Level – the password level (Administrator, Supervisor, or Operator) for this user.
Press +/- buttons to change the level.
46
6.8 System Setup
In Setup Menu display, press ▲▼ to change the highlighted option to System and then press
ENTER to call up System Setup as shown.
The System Setup allows the administrator to set the system time, time zone, time
synchronization, language, etc.
The general operations are as below:
▲▼◄►
Press these buttons to select the items.
ESC
Press this button to escape from this screen and return to Setup Menu display. If the Save
dialog is shown, press ENTER to exit and save, ESC to exit without saving. Please
note that if the selected language is changed, the user will be asked to reboot the
system for the newly selected language to take effect.
Following is a brief description for each item and its specific operations:
Time Zone – press +/- buttons to select the time zone for the system.
Daylight Saving Time – press ENTER to check/uncheck this item. The default value is
set by selecting a different time zone, but the user may check/uncheck this item if the
default setting is checked.
System Time
Synchronization – time synchronized with TSP Server or not. Press ENTER to
check/uncheck this item. The default setting is “–
–” - unchecked.
47
TSP Server – TSP (Time Synchronization Protocol) server name if Time
Synchronization is enabled. The system will try to do time synchronization with the
specified TSP server at the system preset interval. Please follow the Text Input method
described in Section 4.1 to modify this item.
Date – system date. Press +/- buttons to modify each of these items.
Time – system time. Press +/- buttons to modify each of these items.
Display Format – format used for the system time displayed on the lower-left corner
of the main screen. Press +/- buttons to select the desired format.
Language – press +/- buttons to select the language for the system. The languages
supported include: English, Russian, Simplified Chinese, Italian, etc.
6.9 RS-232/422/485 Setup
In Setup Menu display, press ▲▼ to change the highlighted option to RS-232/422/485 and
then press ENTER to call up RS-232/422/485 Setup as shown.
The RS-232/422/485 Setup allows the administrator to setup RS-232 control port and RS422
or RS-485 control port. Please refer to the manuals for the connected devices - PTZ
cameras – to set these items in RS-232/422/485 Setup.
The general operations are as below:
▲▼◄►
Press these buttons to select the items.
ESC
Press this button to escape from this screen and return to Setup Menu display. If the Save
dialog is shown, press ENTER to exit and save, ESC to exit without saving.
48
Following is a brief description for each item and its specific operations:
Baud Rate – press +/- buttons to change the value.
Data Bit – press +/- buttons to change the value.
Stop Bit – press +/- buttons to change the value.
Parity – (Odd, Even, or None). Press +/- buttons to change the value.
6.10 Network Setup
In Setup Menu display, press ▲▼ to change the highlighted option to Network and then
press ENTER to call up Network Setup as shown.
The Network Setup allows the administrator to setup all Ethernet network related parameters.
Please check with your network administrator to set these parameters correctly.
The general operations are as below:
▲▼◄►
Press these buttons to select the items.
ESC
Press this button to escape from this screen and return to Setup Menu display. If the Save
dialog is shown, press ENTER to exit and save, ESC to exit without saving.
Following is a brief description for each item and its specific operations:
Net Type – Static IP, PPPoE or DHCP. DHCP can only be used for intranet (LAN) access,
while Static IP and PPPoE can be used for both internet & intranet access. Press +/buttons to change the Net Type.
IP Address – Ethernet IP address for the system. To get the static IP address, please
contact your local ISP (Internet Service Provider). Please follow the Text Input method
described in Section 4.1 to modify these items.
49
Net Mask – Net Mask for the IP address. Please follow the Text Input method described
in Section 4.1 to modify these items.
Gateway – Gateway IP address for the system. Please follow the Text Input method
described in Section 4.1 to modify these items.
DNS – DNS (Domain Name Server) IP address for the system. Please follow the Text
Input method described in Section 4.1 to modify these items.
Username – PPPoE username for the system if PPPoE is used. Please follow the Text
Input method described in Section 4.1 to modify this item.
Password – PPPoE password for the system if PPPoE is used. Please follow the Text
Input method described in Section 4.1 to modify this item.
DDNS Type – Dynamic, Static or Custom DDNS (Dynamic Domain Name Server) type.
Please contact your local DDNS Service Provider to get the DDNS URL, username and
password. Press +/- buttons to change this item.
URL – the URL (Uniform Resource Locators) for the system if PPPoE is used. Please
follow the Text Input method described in Section 4.1 to modify this item.
DDNS Username – DDNS username for the system if PPPoE is used. Please follow the
Text Input method described in Section 4.1 to modify this item.
DDNS Password – DDNS password for the system if PPPoE is used. Please follow the
Text Input method described in Section 4.1 to modify this item.
E-mail – press ENTER to call up E-mail Setup. Please refer to Section 6.10.1 for the
details.
Adv. – press ENTER to call up Advanced Network Setup. Please refer to Section 6.10.2
for the details.
50
6.10.1 E-mail Setup
In Network Setup, press ENTER to call up E-mail Setup as shown when the highlighted
option is E-mail.
The E-mail Setup allows the administrator to set e-mail related parameters. When an event
occurs and E-mail is enabled for the corresponding action, an e-mail will be sent based on the
parameters set here.
The general operations are as below:
▲▼
Press these buttons to select the items.
ESC
Press this button to escape from this screen and return to Network Setup display. If the
Save dialog is shown, press ENTER to exit and save, ESC to exit without saving.
Following is a brief description for each item and its specific operations:
SMTP Server – SMTP mail server name. Please follow the Text Input method described
in Section 4.1 to modify this item.
Authentication – whether the SMTP mail server requires authentication. Press ENTER
to check/uncheck this item.
Username – username if the SMTP mail server requires authentication. Please follow the
Text Input method described in Section 4.1 to modify this item.
Password – password if the SMTP mail server requires authentication. Please follow the
Text Input method described in Section 4.1 to modify this item.
Mail From – the e-mail address of this DVR unit, i.e. the sender of the e-mails originated
from the triggered events. Please follow the Text Input method described in Section 4.1 to
modify this item.
51
Mail To #1-5 – the receivers’ e-mail addresses. The system can send the e-mails
originated from the triggered events to up to 5 different receivers. Please follow the Text
Input method described in Section 4.1 to modify these items.
6.10.2 Advanced Network Setup
In Network Setup, press ENTER to call up Advanced Network Setup as shown when the
highlighted option is Adv..
The Advanced Network Setup allows the administrator to set advanced network parameters.
If the user is not familiar with network administration, please DO NOT modify the
items in this dialog.
The general operations are as below:
▲▼
Press these buttons to select the items.
ESC
Press this button to escape from this screen and return to Network Setup display. If the
Save dialog is shown, press ENTER to exit and save, ESC to exit without saving.
Following is a brief description for each item and its specific operations:
Control Port – the control port for remote access. The default value is 67. Please follow
the Text Input method described in Section 4.1 to modify this item.
Data Port – the data port for remote access. The default value is 68. Please follow the
Text Input method described in Section 4.1 to modify this item.
HTTP Port – the HTTP (web page) port for remote access. The default value is 80.
Please follow the Text Input method described in Section 4.1 to modify this item.
WAP Picture quality – (this machine support cellular phone long range interview).
Please press +/-. The key changes initial value.
MAC Address – the DVR MAC Address
Note: If the Control Port or Data Port is not available or accessible during remote access,
the system will reset the ports to their default values, i.e. 67/68.
52
7. PTZ Control
The digital video/audio recorder supports a variety of PTZ cameras. The user can easily
control the PTZ cameras through the operations described in this Chapter if those PTZ
cameras have been connected and setup correctly. Please refer to Section 3.2 Optional
Connections for the connections. Please refer to Section 6.1 Pre-Camera Setup to set the PTZ
ID of each PTZ camera and Section 6.9 RS-232/422/485 Setup to setup the control port.
If a camera is also a PTZ camera, there will be an asterisk (*) preceding its title in its video
window in split-window display. Please press PTZ button to enter PTZ control mode if the
focus camera is a PTZ camera. The asterisk (*) will be blinked to indicate that the camera is
now in PTZ control mode.
In PTZ control mode, the user’s operations can be divided into general operations and
miscellaneous function specific operations and are described as the followings:
General operations:
PTZ
Press this button to exit PTZ control mode. The asterisk (*) will be changed back to
normal.
▲▼
Press these buttons to tilt the camera up/down.
◄►
Press these buttons to pan the camera left/right.
ZOOM ( ) +/Press these buttons to zoom in/out the camera.
GOTO
Press this button to move the camera to the preset position. Press numeric buttons 00-99
to enter the number of the preset position to move the camera to.
NEXT
Press this button for the next miscellaneous function. The miscellaneous functions include
Focus, Iris, Auto PAN, SEQ, Preset, and Pan Speed and the active one will be shown on
the lower right corner of the screen. The miscellaneous function specific operations are
described in the following table.
53
Miscellaneous function specific operations:
Active function
Focus
Iris
Auto Pan (3)
Operations
+/ENTER
+/+/ENTER
*
#
SEQ (5 sec.)
+/-, NUMBER
ENTER
Preset (1)
+/-, NUMBER
ENTER
Pan Speed (3)
+/-
Descriptions
focus far/near
auto focus
Iris increase/decrease
Auto pan speed is shown in parenthesis
increase/decrease speed
start/stop Auto Pan
set start position
set end position
SEQ dwell time is shown in parenthesis.
If SEQ mode is on, the camera will
preset position 0-9 (or 1-10) sequentially.
change dwell time
start/stop SEQ mode, an asterisk (*) will
be shown if SEQ mode is on
Preset location is shown in parenthesis
change Preset location
set Preset location
Manual pan speed is shown in parenthesis
increase/decrease speed
8. Search/Playback/Archive (Administrator, Supervisor)
There are 3 ways to search the recorded video/audio for playback:
(a) Search by time,
(b) Search by event,
(c) Search archived files
In split-window display, press SEARCH button to call up Search Menu display as shown.
The user’s operations are described as the followings:
▲▼
Press these buttons to change the highlighted
item.
ENTER
Press this button to enter the corresponding Search display of the highlighted item. The
Search displays and their operations are described in the following sections, followed by
the playback operations of the searched video/audio.
ESC
Press this button to escape from Search Menu display and return to split-window display.
54
8.1 Search By Time
The screen for Search By Time is shown on the right
side.
The Status field will show the ‘Recorded from’ time
based on the selected Video/Audio before searching alarm partition if any of Alarm, Motion or Video Loss,
is checked and normal partition if Normal is checked.
The general operations are as below:
▲▼
Press these buttons to select the items.
ESC
Press this button to escape from this screen and return to split-window display.
SEARCH / MODE
Press this button to start searching the recorded video/audio with the selected search time
and video/audio type for playback. The search result will be shown on the bottom of this
dialog if it failed. If there’s no camera in playback mode, up to 4 cameras in the
current split window will be set to playback mode.
Play Button (
)
Press this button to start playing the recorded video/audio with the selected search time
and video/audio type. If there’s no camera in playback mode, up to 4 cameras in the
current split window will be set to playback mode.
Copy Button (
)
Press this button to backup (copy) the selected type of recorded video/audio starting from
the Search Time (described below) in the HDD to the connected backup device without
playback. The Backup display (described in Section 8.4) will be shown. Please note that
this kind of backup is performed in the background and the user can still do almost
all the operations.
Following is a brief description for each item and its specific operations:
Search Time – (Year, Month, Date, Hour, Minute) for the recorded video/audio. The
playback (or backup) will start from the time entered here when the user press the
playback buttons (or Copy button) later. Press +/- buttons to modify each item.
Video/Audio – (Alarm, Motion, Video Loss, Normal). Check the types of the recorded
video/audio you want to search for playback. Press ENTER to check/uncheck each item.
55
8.2 Search By Event / Log Display
The screen for Search By Event - Log display, is shown below:
There are four different types of event logs, including Alarm, Motion, Video Loss and System.
Up to 3000 most recent event logs can be stored in the system.
The general operations are as below:
▲▼◄►
Press these buttons to select the items.
ESC
Press this button to escape from this screen and return to split-window display.
MODE => Refresh
Press this button to refresh the log display. If there are new event logs after the screen is
last updated, the log list shown will be updated accordingly.
SEQ => Page Up
CALL => Page Down
Press SEQ/CALL to Page Up/Down the Log display.
Numeric (ENTER)
Press these buttons to select the display page of the event logs, the log list will also be
updated.
56
Following is a brief description for each item and its specific operations:
Event Type – the type of the events (Record, Alarm, Motion, Video Loss, System) to
be shown in the log list. The Event Type “System” includes all system related events,
such as power on/off and will not trigger recording. Press ENTER or to check/uncheck
the event type for the log list.
Source ID – the source which triggered the event. For Alarm, it’s the alarm input number;
for Motion and Video Loss, it’s the camera number. It’s used to filter the events to be
shown in the log list. Press ENTER to check/uncheck each item.
Log List – the event logs according to the Event Type and Source ID selected. The user
may (1) press ENTER to enter Event Playback display of the selected event log in this list,
(2) press Play Buttons (
,
) to playback it directly or (3) press Copy Button
(
) to backup (copy) the selected recorded video/audio to the connected backup device
without playback. The Backup display (described in Section 8.4) will be shown. Please
note that this kind of backup is performed in the background and the user can still
do almost all the operations. Please refer to Section 8.5 Playback For Search By Event
for the detailed operations for event playback.
8.3 Search Archived Files
The screen for Search Archived Files is shown below:
The operations are as below:
▲▼◄►
Press these buttons to select the items.
ESC
Press this button to escape from this screen and return to split-window display.
57
Following is a brief description for each item and its specific operations:
USB Device – press ENTER to call up USB Device dialog (if there’s no USB device
connected).
Disk Storage – to select the disk storage to search the archived files. Press +/- buttons to
select the available storage.
Archived File List – the archived files in the selected Disk Storage. Please select the file
and then press ENTER to enter Archived File Playback display of the selected file in this
list or press Play Buttons (
,
) to playback it directly. Please refer to Section 8.6
Playback For Archived Files for the detailed operations. Besides, you may press MODE
to delete the selected file.
Note : The format of the filename is camNN-YYYYMMDD-hhmmss.h264, where NN
stands for camera number, YYYY year, MM month, DD date, hh hour, mm
minute and ss second.
8.4 Playback/Archive For Search By Time
In split-window display, press MODE button to change circularly the live/playback mode for
the focus window and the other windows that form a rectangle on the screen. The video
windows for the windows in playback mode are grayed, while those in live mode display live
video.
Please refer to Section 4.3 Basic Operations for how to change the camera(s) in the playback
windows(s). After the playback windows and cameras are all set as you want, you may use
the following buttons to control the playback:
Play/Pause Button (
)
Press this button to play the recorded video/audio searched at forward speed 1X or pause
the playback. If the playback is paused, press this button again to resume playing. Note
that audio can only be played at forward speed 1X.
Stop Button ( )
Press this button to stop playing the recorded video/audio. If the user press
later, the playback will start from the beginning.
button
Fast Forward Button (
)
Press this button for fast forward playback. Each time this button is pressed, the forward
playback speed will become faster, from 2X, 4X, 8X, up to 64X and then back to 2X.
58
Fast Backward Button (
)
Press this button for fast backward playback. Each time this button is pressed, the
backward playback speed will become faster, from 2X, 4X, 8X, up to 64X and then back
to 2X.
Single Step Button ( )
Press this button to play the recorded images frame by frame.
Copy Button (
)
Press this button to copy or stop copying the playback video/audio to the storage device
connected to the USB port or internal DVD. The Backup display will be shown as below.
Following is a brief description for the operations in Backup display:
▲▼◄►
Press these buttons to select the items.
Copy Button (
)
Press this button to start backup (copy) or apply the revised settings if it’s copying and
return to the previous display. There will be a Copy icon on the lower-right corner
indicating that the selected video/audio is being archived to the storage device. For
DVD disc, the files won’t be written to the disc until the storage size reaches 1 GB
or the user stop copying. Writing to the disc may take more than 1 minute for
every 100 MB (depending on the disc type).
Stop ( )
Press this button to stop copying and return to the previous display. The Copy icon
will be disappeared.
ESC
Press this button to cancel and return to the previous display.
The description for each item and its specific operations is as below:
Backup Device – the backup device connected to the system. Press ENTER on the
left button to call up Backup Device dialog if there’s no backup device connected.
Press +/- buttons on the right selection to select the connected device. Please follow
the steps described in Section 5.5 Backup Device to connect the backup device
before copying.
59
Backup Speed – 1-9, with 1 the lowest speed, 9 the highest speed. Press +/- buttons
to select the value.
Directory – the directory in the backup device to store the archived files. Please
follow the Text Input method described in Section 4.1 to input the directory.
Cameras – the video/audio of the cameras to be archived. Press ENTER or +/- to
select/deselect each of the selectable cameras.
End Time – (Year, Month, Date, Hour, Minute) for the recorded video/audio for the
backup without playback of Search By Time. The files will be backup from the
start time to the end time entered here when the user press the COPY button to start
copying. Press +/- buttons to modify each item.
Except the playback buttons, the user can still do all the other operations in split-window
display as if there is no playback. Please refer to Section 4.3 Basic Operations for the
operations of the other buttons.
8.5 Playback/Archive For Search By Event
In Log display, press ENTER to enter Event Playback display of the selected event log, or
,
) to playback it directly. This display is the same as full
press Play Buttons (
screen display of the main display, and the playback buttons are effective.
The operations are as below:
Playback Buttons (
, ,
,
, ,
,ENTER)
These buttons are all the same as in Section 8.4 Playback/Archive For Search By Time.
The Other Buttons
All the other buttons are the same as in Section 4.3 Basic Operations.
8.6 Playback For Archived Files
In Search Archived Files display, press ENTER to enter Archived File Playback display of
the selected file or press Play Buttons (
,
) to playback it directly. This display is the
same as full screen display of the main display and the playback buttons are effective.
The operations are as below:
Playback Buttons (
, ,
,
, ,ENTER)
These buttons are all the same as in Section 8.4 Playback/Archive For Search By Time.
Please note that COPY button (
) is not effective in this display.
60
The Other Buttons
All the other buttons are the same as in Section 4.3 Basic Operations.
9. Remote Access
The digital video/audio recorder can be accessed by using a web browser installed on a PC if
this unit is connected to a network, either internet or intranet.
Before Logging On
Before accessing this unit through web browser, please make sure the followings (for most
PCs, only step 3 & 6 is needed!):
1. This unit is connected to the network correctly and the configurations are all setup correctly.
Please refer to Section 6.10 Network Setup for the detailed configurations.
2. DirectX® End-User Runtime 9.0 or above has been installed in your PC successfully. If
not, please logon to http://www.microsoft.com to get the free download of it.
3. The domain name or IP address of the digital video/audio recorder has been set as trusted
web site in your PC and the (https:) server verification for trusted web site is
unchecked. If not, please go to Tools->Options->Security in your I.E. to do the settings.
For I.E. 7, please set the Security level for this zone to Low.
4. The ActiveX control in your PC is not disabled. If you are not sure, please go to
Tools->Options->Security->Custom in your I.E. to enable ActiveX control.
5. Port 67 (control port) or port 68 (data port) is not blocked out by your router or ISP
(Internet Service Provider).
6. If the PC has used I.E. to access earlier software version of DVR, please go to
Tools->Options->General in your I.E. to delete “Temporary Internet files” and all
offline contents.
7. To have better look-&-feel for your PC, please go to Start->Setup->Control and select
Display->Visual Style->Windows XP Style.
8. Please go to Start->Setup->Control, select Display->Settings and set the Screen Resolution
to at least 1024x768 and Color to 32-bit.
61
Logon
After the above-mentioned items have been done correctly, restart your web browser and
enter the domain name or IP address of the digital video/audio recorder in the
Location/Address field of the web browser. The plug-in software in the system will be
downloaded and run automatically in the web browser. Please note that up to 5 users can
logon this DVR simultaneously.
Remote Display and Operations
After the plug-in software is downloaded and run in the web browser, you will be asked for
ActiveX control to interact with your PC. Please select Yes and the remote login display will
be shown. For some PCs, it may be necessary to click in the window with the message in red
color, but outside the Login Dialog before the next step. Please enter the correct login name
and password (and control port & data port if they have been changed) for the digital
video/audio recorder to login the system and the main remote display will be shown as below.
The video images can be displayed in several types of split-window screens, including
1/4/9/16-Window, and the focus window is surrounded by a frame border. In addition to the
video windows, there are different icons on the lower corner and the right corner of the screen
for status display and control (the “.L” following the camera title stands for Live display, “.P”
for Playback and the camera title with white background has detected motion).
Note 1: The frame rate is limited by the bandwidth of the network and the pre-record
IPS of the camera (Section 6.2).
Note 2: The picture quality depends on the recording resolution and recording quality of
the camera (Section 6.2).
When the user leaves I.E., he/she may be asked to save changes to files, please click on OK
or Yes to save the changes. The operations and descriptions for these icons are as below:
62
In video window, right-click the mouse button to call up Camera/Playback/Print Dialog.
(Left) click on Playback or Camera number to change the window to the corresponding
camera and live/playback mode. The user may also click on the “Print” button to print the
video to the printer.
Click on these icons for 1/4/9/16-Window display.
Click on this icon to switch to or return from SEQ display mode.
Click on this icon to toggle between live mode and playback mode for all the video windows.
Click on this icon to freeze/unfreeze the video images for all the video windows.
Click on this icon to enable/mute the audio input from the PC, button down for enable, button
up for mute. If enabled, the audio input from the PC will be sent to the DVR. The default
setting is ‘mute’.
Click on this icon to enable/mute the audio output from the camera for the focus window,
button down for enable, button up for mute. The default setting is ‘mute’.
Playback panel for playback buttons, including Fast Backward, Fast Forward, Single Step,
Play, Pause, Stop and Copy (from left to right). Please note that the Copy function can be
used to archive both live and playback streams. Please check/uncheck the cameras to be
archived when the Copy Dialog is shown and then click on OK or Apply button. If the user
click on Apply button and select & highlight one of the cameras, the current copying status
for that camera will be shown in the dialog.
63
PTZ control panel. If the camera in the focus window is a PTZ camera, these buttons in the
PTZ control panel can be used for PTZ control. The operations include Tilt Up/Down, Pan
Left/Right, Zoom In/Out, Focus Near, Focus Far, Iris – (darker), Iris + (brighter).
Camera
/
Status indicators for cameras 1-16 (GREEN for normal, RED for motion) for the DVR. Click
on any of these icons to select the corresponding camera of the DVR to be displayed in the
focus window.
Alarm In
/
Status indicators for alarm inputs 1-4 (GREEN for normal, RED for alarm) for the DVR.
Alarm Out
/
Alarm outputs 1-2 (GREEN for normal state, RED for triggered state) for the DVR. For
Administrator, click on any of these icons to control the corresponding alarm output from
normal to triggered or from triggered back to normal.
Click on this icon to call up Search-by-time dialog. Please select the time (Year, Month, Date,
Hour and Minute) and recorded video/audio type (Alarm, Motion, Video Loss and Normal) to
search for playback. Click on Search button to start the search of the recorded video/audio (if
it failed, the result will be shown on the title of the dialog). Now, you may use the playback
buttons to play the recorded video/audio. Please note that there must be some cameras in
playback mode for the search to succeed.
Click on this icon to call up Search-by-event dialog. The event logs will be shown on the
screen. Please select the event type and source ID to search for the event logs. Click on
Refresh, Up, or Down to update the event logs. Click on the desired event log to highlight and
64
select it. Click on the OK button to search the recorded video/audio for the highlighted event
log. Now, you may use the playback buttons to play the recorded video/audio.
Click on this icon to call up search-PC-video dialog. Please select the file and then click on
Open. Now, you may use the playback buttons to play the recorded video/audio in the file.
Click on this icon to show/hide full PTZ control panel. The user can click on the PTZ Panel
(but outside of any object in it) (to call up the Context menu) to move it.
Click on this icon to call up Setup dialog. Following is a brief description for each item:
Device Name – any meaningful name for the (DVR) device.
Address – IP address or URL domain name for the (DVR) device. It should be the same
as the IP address (for Static IP) or URL (for PPPoE) in Network Setup for the (DVR)
device.
Control Port – the control port for the (DVR) device. The default value is 67.
Data Port – the data port for the (DVR) device. The default value is 68.
User Name – the login user name for the (DVR) device. It must be in the list in
Password Setup for the (DVR) device. Please note that different levels of users have
different available operations.
Password – the corresponding password for the login user name for the (DVR) device.
Auto Connection – whether the user wants to connect automatically to this (DVR)
device.
Connected – whether this PC is connected with the (DVR) device now.
The other properties in the dialog are similar to those described in Chapter 6. Please refer to
Chapter 6 for the detailed descriptions. Besides, the user can download/upload the
configurations from/to the connected DVR or open/save the configurations from/to the
designated directory.
65
Click on this icon to call up remote Software Upgrade dialog. Please select the DVR device
and upgrade file in the PC and then click on Start button to start the software upgrade process.
The Upgrade status will be updated according to the progress. When the upgrade file is
uploading, the user may click on Stop/Close button to stop the upgrade process.
Note : There must be at least one formatted HDD in the DVR for the remote upgrade to
succeed. After the software in the DVR is upgraded, the DVR will restart immediately
and the PC will be disconnected from the DVR. Please do step 7 in Before Logging On
and then re-run the Internet Explorer to connect to the DVR again.
System Requirements of Remote PC
It is recommended to access the digital video/audio recorder using a PC that meets the
following system requirements. If you use a PC that does not meet the following system
requirements, it may cause problems such as slow imaging or the browser unable to operate.
PC
IBM PC/AT compatible.
CPU
Intel® Pentium® 4, 1.4 GHz or above.
OS
MicroSoft® Windows® XP or Windows® 2000 with SP4.
Monitor
1024 x 768 or above.
Memory (DRAM)
512MB.
Network Interface
Ethernet, 10/100 Base-T.
Web Browser
MicroSoft® Internet Explorer® 6.0 or above.
DirectX
MicroSoft® DirectX® 9.0 or above.
66
10. PDA/Mobile Phone Remote Access
The digital video/audio recorder can also be remotely accessed by using a web browser
installed on a PDA or mobile phone that (1) supports xHTML and MJPEG file format and
(2) has screen resolution at 320x240 or above.
Please enter the domain name or IP address of the digital video/audio recorder in the
Location/Address field of the web browser and the remote login display will be shown (for
most of the mobile devices, the DVR will automatically redirect to the correct web page, EX.
http://192.168.1.120/wap.htm for IP address http://192.168.1.120. If not, please enter the full
address with /wap.htm. The user may need to enter http://192.168.1.120:800/wap.htm if
HTTP port has been changed to 800). Please enter the correct login name and password for
the digital video/audio recorder to login the system and the screen will be shown as below.
Following is a brief description for each item and its specific operations:
Click on this button to submit the content to the digital video/audio recorder. The new
settings will take effect and the screen will refresh.
Selection of Quad (Q1-Q4) or 1-Window (1-16) display.
Alarm outputs 1-4 (unchecked for normal, checked for triggered). Administrator can
check to trigger the alarm output, uncheck for back to normal.
Status indicators for alarm inputs 1-5 (top row), 6-10 and 11-16
(unchecked for normal, checked for alarm).
67
Appendix A--MS-Windows HemPlayer
There are several MS-Windows utility programs in the bundled CD, HemPlayer, KCtrl
Simulator and AVI Converter. The HemPlayer is meant to play archived/backed up files on
local PC. The AVI Converter utility converts H.264 files to standard *.AVI files.
Please insert the CD in the CD-ROM or DVD-ROM drive in your PC and then double click on
Setup.exe and vcredist_x86.exe to install the utility programs. Please follow the instructions
on the screen to install the software in the default directory “Program Files\Hyper Electronics
Mappers” or the directory entered by the user. For this model, please refer to the manual for
HemPlayer. For the other utility programs, please refer to the following paragraphs.
HemPlayer
Before running HemPlayer in your PC, please make sure the followings:
1. DirectX® End-User Runtime 9.0 or above has been installed in your PC successfully. If not,
please logon to http://www.microsoft.com to get the free download of it.
2. Please go to Start->Setup->Control, select Display->Settings and set the Screen Resolution to
at least 1024x768 and Color to 32-bit.
To run the HemPlayer under Microsoft® Windows® XP or Windows® 2000, please select
Start->Programs->Hyper Electronics Mappers->HemPlayer and the screen will be shown as
below.
Since this utility is a free player utility for archived files, from USB backup or remote backup,
some of the functions are disabled. The mouse cursor will change to “Hand” type if it’s on those
enabled function icons. The operations and their descriptions are the same as in Chapter 9.
Remote Access.
68
To select an archived file for playback, please click on File menu and then select Open. After an
archived file is opened, the user may click on the player buttons to play the file.
The following diagram shows the screen after the Play button is pressed.
The user may print the whole player screen (including the current video image) or the current
video image by selecting File menu and then select Print or Print Video respectively.
KCtrl Simulator
To run the Keyboard Control Simulator under MS-Windows, please select
Start->Programs->Hyper Electronics Mappers->KCtrlSimulator and the screen will be shown as
below.
Please note that most of the buttons correspond to the keypads on the front panel. If you connect
the PC through RS-232 and use an RS-232/RS-485 converter to connect to multiple DVRs, you
would be able to control multiple DVRs via the simulation software. Please refer to Section 3.2
Optional Connections to connect/cascade the DVRs to the PC.
69
To select the DVR to control, please click on the button as circled in the above diagram to set the
corresponding DVR ID. Please note that the RS-232/422/485 setup (Section 6.9), including the
DVR ID, in the DVRs must be configured correctly (Model must be set as Control Protocol).
Please use the buttons MAIN-AUX ON, MAIN-AUX OFF, CALL-AUX ON, CALL-AUX OFF
to switch on/off the output of the controlled DVR.
Note: UP-LEFT, UP-RIGHT, DOWN-LEFT and DOWN-RIGHT are newly added to control
the PTZ cameras diagonally.
AVI Converter
To run the M4V/H.264 to AVI Conversion Utility under MS-Windows, please select
Start->Programs->Hyper Electronics Mappers->M4V2AVI or double-click on the file
AVI_Converter.EXE and the screen will be shown as below.
Please select the source files –.H264 files archived from DVR, remote I.E., HemPlayer, select
the target directory to save the converted files and then click on OK to do the conversion. The
converted .AVI files can be played by Windows Media Player H264 decoder is installed in the
PC.
Appendix B--The mouse operation interface reference
When you make use of the mouse operation the DVR please move the cursor to screen below,
you will see the icons of mouse function displayed, pressing the diagram mark to hint an
operation of choose your demand then. Control mode in the PTZ under, please pick out to
install channel of camera, put the mouse to you to hope turn to move of the direction press
left key of mouse and can immediately turn to move. The diagram object function and the
front panel key or the remote control key function are basic and similar, the function shows as
follows:
70
Menu
Search
Escape
Sequence
Fold tools
Fast backward
Fast forward
Step forward
Unfold tools
Play/Pause
Stop
Copy
Alarm reset
Live/Playback
PTZ
Full screen
Volume
Page up
Page down
Close
Motion detection setup
Move the cursor to Menu->
-> Setup->
-> Camera->
-> Motion setting-> Detection setting.
Move the cursor to screen below, the icons of motion detection will be displayed.
71
Set/Reset
Set/Reset
highlighted area
whole area
Sensitivity
Test
PTZ setup
The function is as follows in the PTZ controls the appearance
Go to
Figure down
Zoom
Figure up
Preset
Focus
Auto Focus
Iris
Auto pan
Speed
Mark
position
SEQ
Video adjustment icons
This camera default
All camera default
72
Default
Common icons
Up
Down
Enter
Code
Left
Right
Delete
Back space
Confirmed
Space
Mark
Reduce/Add
Numeral key
73
Appendix C – Specifications
O.S.
System
Multiplex
Certification
Format
Input
Main monitor
Video
Main-AUX
Call monitor
Call-AUX
Loop-through
Loss detection
Motion detection
Input
Audio
Output
Compression
Record
Display
Playback
Frame rate (IPS)
& Resolution
Mode
Pre-record time
Post-record time
Resolution
Split windows
Frame rate
Freeze
Sequential switch
Digital Zoom
Frame rate (IPS)
& Resolution
Search
Operation
HDD
Storage
Partitions
Backup
Embedded Linux 2.6
Sixfold operation - simultaneous record, live,
playback, backup, control, & remote access
FCC, CE, LVDS
NTSC/EIA or PAL/CCIR
16-CH, BNC, 1Vp-p/75ohm
BNC x 1, S-video x 1, 1Vp-p/75ohm
Optional VGA D-SUB 15-pin connector
BNC x 2 (Input x 1, Output x 1), 1Vp-p/75ohm
BNC x 1, 1Vp-p/75ohm
BNC x 2 (Input x 1, Output x 1), 1Vp-p/75ohm
16-CH, BNC, 1Vp-p/75ohm
Yes
Yes, with configurable detection area & sensitivity
2 Stereo Audio - 4 RCA-jack connectors, line-in level
(100mV-2Vrms)
2 Audio – 2 RCA-jack connectors, line-out level (up
to 2Vrms)
Video: H.264
Audio: ADPCM
NTSC – 60 / 720*480, 120 / 720*240, 240 / 360*240
PAL – 50 / 720*576, 100 / 720*288, 200 / 360*288
Manual/Schedule/Alarm/Motion
0 – 60 seconds
0 - 60 minutes
NTSC – 720*480, PAL – 720*576
1/4//7/9/10/13/16
Up to 30 (NTSC) / 25 (PAL) IPS per display window
Yes
User adjustable
X2, X4
NTSC – 30 / 720*480, 60 / 720*240, 120 / 360*240
PAL – 25 / 720*576, 50 / 720*288, 100 / 360*288
Date/time, Camera, Alarm, Motion, & Video Loss
Play, Fast Forward, Backward, Pause, Stop, etc.
Remote I.E. and HEM can also Print, Snapshot
Up to 2 sets of 3.5” SATA type HDDs, max 500GB
storage size for each HDD (250GB in equipment)
Configurable alarm partition size
Configurable auto-overwrite or not
2 USB 2.0 ports for USB 2.0 disk drives, DVD+RW,
DVD+R, DVD-R, card readers, HDD, etc.
74
Alarm
Network
Control
Setup
Reliability
Input
Output
Buzzer
Triggered by
Event log
Ethernet
Web
E-mail
Video
Audio
Protocol
Remote users
Bandwidth
Remote stations
I/R
RS-232
RS-485 / RS-422
Local
Remote
Multi-lingual
System recovery
Timer
Watch Dog
Security
Weights & Dimension
Measures
Weight
Source
Power
Consumption
Operating Temperature
16 contact or TTL/CMOS signal, polarity selectable
2 Normally Open, 2 Normally Closed relay output
Yes
Sensor input, Video loss, & Motion
Yes
1 RJ-45 10/100BaseT Ethernet connector
Remote setup, monitoring, backup, alarm notification,
1 Internet Exlporer for up to 4 DVRs
Alarm notification to stationary or mobile devices
1/4/9/16 split-window & SEQ
Bidirectional
TCP/IP, HTTP, PPPoE, DHCP, DDNS, TSP
Up to 5 users simultaneously
TCP/IP type dynamic sliding window control
PC
1 I/R remote controller
1 D-type female connector for PTZ
1 RJ-45 connector for PTZ control
On screen setup via keypad, I/R remote controller
Setup & upload via Windows application software
Yes
Auto power on after power loss recovery
Built-in real time clock
Yes
Multi-level password (3 levels, up to 18 accounts)
protection with authentication key for remote access
430(W) x 330(D) x 88(H)mm
5.0 KG (without HDD)
90~264 VAC, 47~63 Hz
110W Max.
0oC ~ +45oC
75
Appendix D – Recording Table
NTSC Recording Time (in Hour) - For Reference Only
System Storage (GB): 200
Average
Resolution
Recording Rate (IPS)
Quality
Picture Size (KB)*
120 60
30
15
10
5
720x480
9
32.2
58
115
173
345
(Full D1)
8
27.7
67
134
201
401
7
21.0
88
176
265
529
6
18.4
101
201
302
604
5
14.0
132
265
397
794
4
11.3
164
328
492
983
3
7.7
241
481
722
1443
2
5.6
331
661
992
1984
1
3.6
514 1029 1543
3086
720x240
9
16.1
58
115
230
345
690
(Half D1)
8
13.9
67
133
266
400
799
7
10.5
88
176
353
529
1058
6
9.2
101 201
403
604
1208
5
7.0
132 265
529
794
1587
4
5.7
162 325
650
975
1949
3
3.9
237 475
950 1425
2849
2
2.8
331 661 1323 1984
3968
1
1.8
514 1029 2058 3086
6173
360x240
9
8.0
58
115 230
463
694
1389
(CIF)
8
7.0
67
133 266
529
794
1587
7
5.2
88
176 353
712 1068
2137
6
4.6
101 201 403
805 1208
2415
5
3.5
132 265 529 1058 1587
3175
4
2.9
162 325 650 1277 1916
3831
3
2.0
237 475 950 1852 2778
5556
2
1.4
331 661 1323 2646 3968
7937
1
0.9
514 1029 2058 4115 6173
12346
* Average Picture Size is estimated based on typical camera scene, and averaged by H.264 I/P/P frames.
76
PAL Recording Time (in Hour) - For Reference Only
System Storage (GB): 200
Average
Resolution
Recording Rate (IPS)
Quality
Picture Size (KB)*
100
50
25
12.5
8
4
720x576
9
42.0
53
106
165
331
(Full D1)
8
36.0
62
123
193
386
7
27.3
81
163
254
509
6
21.3
104
209
326
652
5
18.3
121
243
379
759
4
14.7
151
302
472
945
3
10.0
222
444
694
1389
2
7.3
304
609
951
1903
1
4.7
473
946
1478
2955
720x288
9
21.0
53
106
212
331
661
(Half D1)
8
18.0
62
123
247
386
772
7
13.6
82
163
327
511
1021
6
10.7
104 208
415
649
1298
5
9.2
121 242
483
755
1510
4
7.4
150 300
601
938
1877
3
5.0
222 444
889
1389
2778
2
3.7
300 601 1201 1877
3754
1
2.4
463 926 1852 2894
5787
360x288
9
10.5
53
106 212
423
661
1323
(CIF)
8
8.5
62
123 247
494
772
1543
7
7.2
82
163 327
654
1021
2042
6
5.7
103 206 412
823
1286
2572
5
5.0
121 242 483
966
1510
3019
4
4.0
150 300 601 1201 1877
3754
3
2.8
222 444 889 1778 2778
5556
2
2.2
292 585 1170 2339 3655
7310
1
1.4
463 926 1852 3704 5787
11574
* Average Picture Size is estimated based on typical camera scene, and averaged by H.264 I/P/P frames.
77
78
79
Via Don Arrigoni, 5 24020 Rovetta S. Lorenzo (Bergamo)
http://www.comelit.it – E mail: [email protected]
80