1
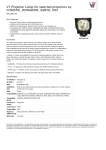
Lamp and Filter Replacement Instructions
Introduction
Use the following instructions when replacing the lamps or filters in any of the projectors
listed in Table 1, below. The lamp is located at the rear of the projector and can be
accessed by releasing the lamp door cover Use only a Christie approved Lamp and Filter
Kit for the specific projector model.
Table 1. Projector Models
Projector Model
Model Number
Lamp/Filter Kit Required
Vivid White
38-VIV401-01
03-900472-01P
Matrix 3500
38-MX3001-01
03-000749-01P
RoadRunner L8
38-RS1002-XX
03-900472-01P
RoadRunner LX100
38-VIV402-01
03-000709-01P
Christie LU77
38-VIV403-01
03-000709-01P
LX120
38-VIV402-01
003-120183-01
Warnings
Lamp replacement MUST be performed by a qualified service technician.
Cool the lamp completely and handle by the housing only.
Install the correct wattage lamp, supplied by Christie (Refer to Table 1. Projector
Models) and read the Lamp Replacement Procedure in its entirety before proceeding.
Do not touch the glass surface of the lamp. Fingerprints left on the surface can lead
to an intense accumulation of heat known as a “hotspot”, which could potentially
cause the lamp to shatter. It is recommended to wear clean, lint-free gloves and a
face shield when working with the lamp.
013-100369-01
1 of 6 Pages
Lamp and Filter Replacement Instructions
Lamp Replacement Procedure
Please read before proceeding.
WARNING
Do not operate the projector when the lamp is removed. Operating
the projector without a lamp may result in malfunctions, fire
hazards, or other accidents.
WARNING
Always power down and unplug the projector prior to servicing.
Allow the lamps to cool before handling.
NOTE
To maintain picture quality we recommend replacing
all four lamps at the same time. Refer to the manual
shipped with the projector for all other lamp related issues.
STEP 1 – LAMP REPLACEMENT
(a) From the Lamp Status Display check
which lamp requires replacing. It is
recommended that all four lamps are
replaced at the same time.
(b) Turn the projector off and disconnect the
AC power cord. Allow the projector to
cool for at least 45 minutes.
(c) Remove the two screws from the lamp
cover and press the designated button to
open the cover. Refer to Figure 1.
(d) Loosen the two screws inside the cover
and pull out the lamp assembly to be
replaced by grasping the handle. Refer to
Figure 1.
(e) Replace the lamp assembly and tighten
both screws to secure it.
(f) Close the lamp cover and tighten both
screws.
54-003698-04P
2 of 6 Pages
Figure 1. Lamp Cover and
Lamp Assembly Removal
Lamp and Filter Replacement Instructions
NOTE
If the air filter becomes clogged with dust particles the effectiveness of the
cooling fan is reduced and may result in internal heat build-up and reduced lamp life.
We recommend cleaning the air filter after the projection lamp is replaced.
Refer to the Air Filter Care and Cleaning procedure, outlined on page 5.
(g) Connect the AC power cord to the projector and turn the projector on.
(h) Reset the Lamp Replacement Counter. For more information, refer to Step 2 — Reset the
Lamp Replacement Counter, outlined below.
STEP 2 – RESET THE LAMP REPLACEMENT COUNTER
NOTE
Only reset the Lamp Replacement Counter when the lamp is replaced.
(a) Turn the projector on and press the MENU
button to access the onscreen menu.
(b) Press the POINT LEFT/RIGHT button(s) to move
the red frame pointer to the SETTING menu
icon.
(c) Press the POINT DOWN button to move the
pointer to the
LAMP COUNTER RESET icon
and then press the SELECT button. Refer to
Figure 2.
(d) Move the arrow to select the lamp to be
replaced (lamp 1, lamp 2, lamp 3 or lamp 4)
and then press the SELECT button. The
message, “Lamp replace counter reset?” is
displayed. Refer to Figure 2.
(e) Move the pointer to [Yes] and then press the
SELECT button.
NOTE
The LAMP REPLACE indicator remains on
if the correct lamp number is not reset.
(f)
Another confirmation dialog box appears.
Select [Yes] to reset the Lamp Replacement
Counter.
(g) Select the
Figure 2. Onscreen Lamp Selection
QUIT icon to close the SETTING
menu.
For further information, refer to the manual supplied with the projector.
54-003698-04P
3 of 6 Pages
Lamp and Filter Replacement Instructions
STEP 3 – CHECK THE LAMP REPLACEMENT COUNTER
The Lamp Replacement indicator illuminates when the Lamp Replacement Counter
reaches 1000 hours. When this occurs it indicates that the lamp must be replaced.
To check lamp hours (applicable to
most models):
(a) Press and hold the UP pointer on
the projector for more than 20
seconds.*
(b) The Lamp Replacement Counter,
as illustrated in
Figure 3, will
briefly appear on the top-left
corner of the screen.
Figure 3. Lamp Replacement Counter Data
Warning Temperature Indicator Maintenance
The WARNING TEMPERATURE indicator flashes red when the internal temperature of the
projector exceeds the normal temperature. The indicator stops flashing when the
temperature of the projector returns to normal. If the WARNING TEMPERATURE indicator
continues to flash, check the items listed below:
1. Check the projector ventilation slots. If they are blocked reposition the projector so the
slots are not obstructed.
2. Check the air filter for dust particles. If the filter is clogged complete the Air Filter Care
and Cleaning procedure, outlined on page 5.
3. Check the WARNING TEMPERATURE indicator. If the indicator is still on after the
above steps are checked the cooling fans or internal circuits may be malfunctioning.
Contact service personnel from an authorized dealer or service center.
54-003698-04P
4 of 6 Pages
Lamp and Filter Replacement Instructions
Air Filter Care and Cleaning
NOTE
If the air filter becomes clogged with dust particles the effectiveness of the
cooling fan is reduced and may result in internal heat build-up and reduced lamp life.
It is recommended the air filter is cleaned every 250 hours of
operation or when the projection lamp is replaced.
The air filter prevents dust from accumulating on the surface of the optical assemblies.
Should the air filter become clogged with dust particles, the effectiveness of the cooling fan
is reduced. This may result in internal heat build-up and adversely affect the life of the
projector.
Available Filters (order separately):
• Vivid White and original L8: Filter #10-A6102834680
• LU77, L8(FLC), LX100, LX120 and Matrix 3500: Filter #10-A6103014814
To clean the air filter:
NOTE
The following procedure should be undertaken
immediately after Step 1(F) of the Lamp Replacement
Procedure or any other time where it is required.
(a) Turn the projector off and disconnect the AC
Power Cord from the AC outlet.
(b) Remove the air filter from the projector. Refer to
Figure 4.
(c) Pull up the center frame to separate the top of the
air filter and
Refer to Figure 4.
sponge
from
the
base.
(d) Use a brush to clean each part or wash the dust
build-up off. Ensure all components dry before
reassembling.
(e) Reassemble the sponge and air filter.
Figure 4. Air Filter Removal
(f) Reinsert the air filter into the projector.
CAUTION
To avoid dust accumulation on the LCD Panel and Projection Mirror do not operate the
projector with the air filter removed. Failure to do so degrades picture quality.
Do not push small parts into the air intake vents. It may result in projector malfunction.
When operating in poor environments dust may accumulate on the lens, the liquid crystal
panels, or the optical elements inside the projector. These conditions may degrade the
quality of the projected image. When the above symptoms are noticed, contact an
authorized dealer or service center.
54-003698-04P
5 of 6 Pages
Lamp and Filter Replacement Instructions
Technical Support
NORTH AMERICA
CHRISTIE Digital Systems, Inc.
CHRISTIE Digital Systems, Inc.
809 Wellington St. North
Kitchener, Ontario, Canada N2G 4Y7
Tel. 519-744-8005 (General)
Toll Free 1-800-221-8025 (Technical Support)
10550 Camden Drive
Cypress, CA 90630
USA
Tel. 714-236-8610 (General)
Toll Free 1-800-221-8025 (Technical Support)
Fax 519-749-3302 (Service)
Fax 519-749-3302 (Service)
EUROPE
CHRISTIE Digital Systems, Inc.
CHRISTIE Digital Systems, Inc.
View Point
200 Ashville Way
Wokingham, Berkshire RG41 2PL
United Kingdom
Tel. +44-118-977-8111
Fax +44-118-977-8112
Willicher Damm 129
D-41061 Mönchengladbach
Germany
Tel. +49-2161-664540
Fax +49-2161-664546
CHRISTIE Digital Systems, Inc.
7, av Georges Pompidou
92593 Levallois-Perret Cedex
France
Tel. +33-(0)1-47-48-28-07
Fax +33-(0)1-47-48-26-06
ASIA-PACIFIC / OTHER
CHRISTIE Digital Systems, Inc.
CHRISTIE Digital Systems, Inc.
627A Aljunied Road
# 05-02 Biz Tech Centre
Singapore 389842
Tel. 65-6877-8737
Fax 65-6877-8747
Rm. 1109-1116 Shartex Plaza
No. 88 Zun Yi South Road
Shanghai, 200336
People’s Republic of China
Tel. +86-21-6278-7708
Fax +86-21-6270-5816
CHRISTIE Sales (Canada)
Tel. 1-800-265-2171
Fax 519-749-3136
54-003698-04P
CHRISTIE Sales (U.S.)
Tel. 1-800-407-7727 or 1-866-880-4462
Fax 714-503-3375
6 of 6 Pages