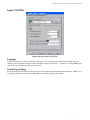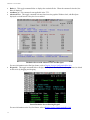
1
YEStablet 7375 Wireless Digital Tablet User Guide Affirmative Computer Products 202 South River Drive, Tempe AZ 85281 Phone (480) 946-1444 Fax (480) 946-9250 Web Site: www.affirmative.net January 2004 YEStablet 7375 User Guide TABLE OF CONTENTS CERTIFICATIONS AND LIMITED WARRANTY ..............................................................................V Compliance Certifications.........................................................................................................................................v Regulatory Notices ....................................................................................................................................................v FCC Class B Radio Frequency Interference Statement.........................................................................................v CE (EU) Declaration of Conformity .....................................................................................................................v Modifications.........................................................................................................................................................v Limited Warranty ......................................................................................................................................................v Warranty Coverage...............................................................................................................................................vi Software Warranty................................................................................................................................................vi Exclusions.............................................................................................................................................................vi COPYRIGHTS AND TRADEMARKS .................................................................................................VII Copyright Notice .....................................................................................................................................................vii Trademarks Notice ..................................................................................................................................................vii CAUTION: FAILURE TO COMPLY MAY RESULT IN SERIOUS INJURY ............................ VIII Special Battery Cautions ....................................................................................................................................... viii Rechargeable Lithium-ion battery disposal........................................................................................................... viii 7375 Enclosure ...................................................................................................................................................... viii CARING FOR THE 7375......................................................................................................................... IX Guidelines for Travel................................................................................................................................................ix Operating Temperatures and Environments.............................................................................................................ix GETTING STARTED WITH THE 7375 TABLET .................................................................................1 Precautions ................................................................................................................................................................1 Package Contents ......................................................................................................................................................1 Unpacking the 7375...................................................................................................................................................1 TECHNICAL SPECIFICATIONS AND PORTS OF THE 7375 TABLET ..........................................3 Hardware Specifications............................................................................................................................................3 7375 Power Source................................................................................................................................................3 7375 Display Screen..............................................................................................................................................3 Other Input Devices...............................................................................................................................................4 7375 Recommended Accessory Device (Partial) List ...........................................................................................4 Front-View Layout ....................................................................................................................................................5 Button Function (Default) .....................................................................................................................................5 REQUIREMENTS.......................................................................................................................................7 OPERATION ...............................................................................................................................................9 Power ON and OFF...................................................................................................................................................9 Start Up .....................................................................................................................................................................9 Calibration .................................................................................................................................................................9 Configuring your tablet ...........................................................................................................................................10 Reading and Sending E-mail ...................................................................................................................................11 Accessing the Internet with the Internet Explorer ...................................................................................................11 Operating the 7375 together with Cradle ................................................................................................................12 Other Features of Interest ........................................................................................................................................13 OPERATION NOTES ...............................................................................................................................17 Wireless Network Card and Antenna System .........................................................................................................17 Battery and Power Management .............................................................................................................................17 Power (Reset)/Suspend Button................................................................................................................................17 File Transfer and Storage ........................................................................................................................................18 Web Download....................................................................................................................................................19 Email Attachment ................................................................................................................................................19 CompactFlash Storage.........................................................................................................................................19 USB-Attached Storage ........................................................................................................................................19 i YEStablet 7375 User Guide Shared Network Storage......................................................................................................................................19 ActiveSync ..........................................................................................................................................................20 Software Installation................................................................................................................................................20 Software Update ......................................................................................................................................................21 Tablet Registry ........................................................................................................................................................22 YESTERM IP TERMINAL EMULATION ............................................................................................23 TN5250e Emulation ................................................................................................................................................23 AS/400 Requirements..........................................................................................................................................23 iSeries Requirements ...........................................................................................................................................23 YESterm IP Administrator ......................................................................................................................................23 Display Session Characteristics...............................................................................................................................24 Printer Session Characteristics ................................................................................................................................24 Display Session Setup .............................................................................................................................................24 Display Session Configuration ................................................................................................................................26 Connection...........................................................................................................................................................27 General ................................................................................................................................................................27 Code Page ........................................................................................................................................................28 Keyboard Language .........................................................................................................................................28 Keyboard Type ................................................................................................................................................28 Edit ...............................................................................................................................................................28 Default..........................................................................................................................................................29 Options .........................................................................................................................................................29 Font ..................................................................................................................................................................29 Print Screen......................................................................................................................................................29 Cursor...............................................................................................................................................................29 Miscellaneous ..................................................................................................................................................29 Attributes .............................................................................................................................................................30 Default View....................................................................................................................................................30 Attribute Settings (Standard View Only).........................................................................................................32 Hot Spot...............................................................................................................................................................32 Key Pad ...............................................................................................................................................................35 Sign On (TN5250e Only) ....................................................................................................................................37 Advanced.............................................................................................................................................................38 Appearance ......................................................................................................................................................38 Security Configuration.....................................................................................................................................38 Host Device Connection ..................................................................................................................................39 Miscellaneous ..................................................................................................................................................39 Finale ...................................................................................................................................................................39 Printer Session Setup...............................................................................................................................................40 Printer Session Configuration .................................................................................................................................42 Connection (TN5250e) ........................................................................................................................................42 Connection (TN3270e) ........................................................................................................................................43 Input (TN5250e)..................................................................................................................................................44 Language..........................................................................................................................................................44 Page Layout .....................................................................................................................................................44 Overrides..........................................................................................................................................................44 Input (TN3270e)..................................................................................................................................................45 Language..........................................................................................................................................................45 Default Page Settings.......................................................................................................................................45 Output ..................................................................................................................................................................46 Time Out ..........................................................................................................................................................46 Printer Driver ...................................................................................................................................................46 ii YEStablet 7375 User Guide Printer Port.......................................................................................................................................................47 LAN Printer..................................................................................................................................................47 Hex Passthrough (HPT) (TN5250e Only) ...........................................................................................................48 Advanced (TN5250e Only) .................................................................................................................................49 Miscellaneous ......................................................................................................................................................50 Finale ...................................................................................................................................................................50 Display Session Operation ......................................................................................................................................51 Menu Bar .............................................................................................................................................................51 File (Alt) ..........................................................................................................................................................51 Edit...................................................................................................................................................................51 Tools ................................................................................................................................................................52 View.................................................................................................................................................................53 ?........................................................................................................................................................................55 Button Bar ...........................................................................................................................................................55 Printer Session Operation........................................................................................................................................58 Menu Bar .............................................................................................................................................................58 File (Alt) ..........................................................................................................................................................58 Tools ................................................................................................................................................................58 ?........................................................................................................................................................................58 Button Bar ...........................................................................................................................................................59 How To …...............................................................................................................................................................60 Create a Custom Keyboard Map .........................................................................................................................60 Record a Keystrokes Sequence (Macro) .............................................................................................................61 Play a Recorded Keystrokes Sequence (Macro)..................................................................................................61 Modify a Printer Passthrough Driver...................................................................................................................62 General.............................................................................................................................................................62 Transcode Table...............................................................................................................................................63 Escape Sequences ............................................................................................................................................64 Euro..................................................................................................................................................................65 Font ID.............................................................................................................................................................66 APPENDIX 1. APPENDIX 2. APPENDIX 3. APPENDIX 4. APPENDIX 5. APPENDIX 6. CISCO AIRONET WLAN ADAPTER .........................................................................67 LIST OF 7375 ACCESSORIES .....................................................................................71 OPTIONAL EXTERNAL BATTERY PACK..............................................................73 OPTIONAL EXTERNAL BATTERY CHARGER KIT ............................................75 COMPACTFLASH BAR CODE SCANNER...............................................................77 USING THE WALL-MOUNT AND VEHICLE-MOUNT ACCESSORIES ............79 Wall-Mount Cradle..................................................................................................................................................79 Vehicle-Mount Stand ..............................................................................................................................................80 APPENDIX 7. USING THE CUSTOM CARRYING POUCH ............................................................81 APPENDIX 8. USING THE SCREEN PROTECTORS .......................................................................83 APPENDIX 9. FREQUENTLY ASKED QUESTIONS & TROUBLESHOOTING GUIDE ...........85 Starting Up ..............................................................................................................................................................86 Powering On/Off .....................................................................................................................................................88 Battery .....................................................................................................................................................................89 Applications ............................................................................................................................................................91 Peripherals and Accessories ....................................................................................................................................93 Features ...................................................................................................................................................................93 Care and Support .....................................................................................................................................................96 INDEX.........................................................................................................................................................97 iii YEStablet 7375 User Guide © 2003 Affirmative Computer Products. All Rights Reserved Information in this document is subject to change without notice. No part of this document may be reproduced or transmitted in any form or by any means, mechanical or electronic, for any purpose, without the expressed written consent of Affirmative Computer Products. Affirmative Computer Products may have patents or pending patent applications, trademarks, copyrights, or other intellectual property rights covering subject matter in this document. All rights relating to intellectual property, copyright and trademarks are expressly reserved by Affirmative Computer Products. This document is provided for informational purposes only. Except for the limited warranty section contained herein, this document is not intended as a warranty or to create any other contractual obligations between Affirmative Computer Products and the user. This device is not designed for operation in an explosive environment. If the user is in an explosive environment, the unit should be removed from the area immediately. Interface Warning: This computing device is not manufactured to any specific software suite. There are various software packages and add-on hardware options available on the market; however, because the computer industry lacks standards in these areas, Affirmative Computer Products does not and cannot make any warranty or representation with respect to the performance of this product with any particular software packages and/or nonAffirmative Computer Products add-on hardware options. Therefore, Affirmative Computer Products hereby disclaims any representations or warranty that this product is compatible with any combination of products you may choose to connect. While Affirmative Computer Products representatives or Affirmative Computer Products authorized dealers may be able to assist you, and may make recommendations, they are NOT authorized to vary or waive this disclaimer. Affirmative Computer Products 202 South River Drive Tempe, AZ 85281 iv YEStablet 7375 User Guide CERTIFICATIONS AND LIMITED WARRANTY Compliance Certifications The Affirmative Computer Products 7375 tablet computing device and any Affirmative Computer Products branded peripherals are subjected to testing and quality controls to ensure that the devices will perform as set forth in the published specifications. All Affirmative Computer Products 7375 tablets have been tested and designed to comply with the identified information technology standards. Regulatory Notices This device complies with Part 15 of the FCC Rules. Operation is subject to the following two conditions: (1) this device may not cause harmful interference, and (2) this device must accept any interference received, including interference that may cause undesired operation. To identify this device, refer to the part, series, or model number on the product. FCC Class B Radio Frequency Interference Statement This equipment has been tested and found to comply with the limits for a Class B digital device, pursuant to part 15 of FCC Rules. These limits are designed to provide reasonable protection against harmful interference in a residential installation. This equipment generates, uses, and can radiate radio frequency energy and, if not installed and used in accordance with the instructions, may cause harmful interference with radio communications. However, there is no guarantee that interference will not occur in a particular installation. If this equipment does cause harmful interference to radio or television reception, which can be determined by turning the equipment off and on, the user is encouraged to try to correct the interference as follows: • Reorient or relocate the receiving antenna. • Increase the separation between the equipment and receiver. • Plug the equipment into an outlet on a circuit different from the one connected to the receiver. • Consult the dealer or an experienced radio or television technician. CE (EU) Declaration of Conformity This product conforms to the essential protection requirements of the European Council Directive 89/336/EEC that relates to electromagnetic compatibility, EN55022:1998, Class B; and EN61000- 3-2, 3-3, 4-2, 4-3, 4-4, 4-5, 4-6, 48, and 4-11. Modifications he FCC requires the user to be notified that any changes or modifications made to this device that are not expressly approved by Affirmative Computer Products can invalidate FCC approval. Limited Warranty Affirmative Computer Products warrants that the 7375 YEStablet will be free of defects in materials and workmanship for a period of one year from date of invoice. This warranty is provided only to the original purchaser of the 7375 YEStablet including those end-users that purchase directly from an authorized Affirmative Computer Products reseller. Should the product fail to conform to this warranty during the period set forth herein, Affirmative Computer Products will, at its option, repair or replace the product at no additional charge. As such, Affirmative Computer Products may exchange the product with a product that is new or that has been manufactured from new, reconditioned, or re-manufactured parts. v YEStablet 7375 User Guide Affirmative Computer Products may, at its option, use new, reconditioned or re-manufactured replacement parts. All replacement products and parts either will assume the remaining warranty of the original product or be covered under warranty for 90 days, whichever period is longer. To obtain service under this Agreement, owner should obtain a Return Material Authorization number (RMA#) from the Technical Support Department. (Contact 888-353-5250 or 480-946-1444 or [email protected]). Notice of warranty claims must be received before the expiration of the warranty period. If replacement or repair is necessary under the warranty, purchaser must return the unit within one year of the date of purchase. All products returned for repair or replacement under these warranty provisions must be accompanied by original purchaser’s proof-of-purchase. Customer is responsible to pay shipping to Affirmative Computer Products on units being returned for warranty repair or replacement. Should Affirmative Computer Products determine that equipment returned for warranty repair/replacement has been damaged or is malfunctioning as a result of misuse or reasons other than that covered by this warranty, Affirmative Computer Products will not repair or replace such equipment unless or until receipt of prepayment for repair/replacement costs and fees is received from the customer. Warranty Coverage This warranty does not cover damage due to disassembly of product other than by an authorized Affirmative Computer Products technician; external causes including accident, abuse, neglect or misuse; problems with electrical power; servicing not authorized by Affirmative Computer Products; use not in accordance with product instructions or specifications and problems caused by components or parts not supplied by Affirmative Computer Products. This warranty does not cover any items that are in one or more of the following categories: software not designed or manufactured by Affirmative Computer Products, accessories not manufactured by Affirmative Computer Products, including but not limited to memory and components which are covered by third party manufacturer’s warranties. Affirmative Computer Products will pass on to the original purchaser all transferable, third party manufacturer’s warranties Affirmative Computer Products obtains on products purchased. Software Warranty Affirmative Computer Products warrants that, for a period of ninety (90) days from the date of purchase by the End User, its Software Products shall conform to its published specifications under normal usage. AFFIRMATIVE COMPUTER PRODUCTS DOES NOT WARRANT THAT THE OPERATION OF THE SOFTWARE WILL BE UNINTERRUPTED OR ERROR FREE, OR THAT ALL SOFTWARE DEFECTS WILL BE CORRECTED. In the event that a Software Product fails to comply with the warranty set forth above, Affirmative Computer Products will replace the product. End User must, however, return all copies of the Software, along with proof of purchase, to Affirmative Computer Products within 90 days from the Software purchase date. Exclusions This Limited Warranty is made to the original purchaser only and is voided if the Product is resold unless purchased directly from an authorized Affirmative Computer Products reseller. Affirmative Computer Products will not be liable for alteration or loss of software programs, operating systems, or data stored on equipment brought in for repair or upgrade. Before returning the product, it is purchaser /owner’s responsibility to keep, where applicable, a separate backup copy of the system software, application software, and data, and disable any security passwords. Purchaser/Owner will be responsible for reinstalling all such software, data, and passwords. Items attached to, or installed in the Affirmative Computer Products product when returned for service will be removed at the Technician’s discretion prior to service. This Limited Warranty does not cover labor performed for configuring software and virus detection. Removal and performance of such services will be subject to non-Warranty diagnostic and repair fees. Affirmative Computer Products is not responsible for repairs or defect testing of non-covered items. THIS LIMITED WARRANTY GIVES YOU SPECIFIC LEGAL RIGHTS THAT VARY FROM STATE TO STATE. AFFIRMATIVE COMPUTER PRODUCTS’S RESPONSIBILITY FOR MALFUNCTIONS AND DEFECTS IN HARDWARE AND SOFTWARE IS LIMITED TO REPAIR AND REPLACEMENT AS SET FORTH IN THIS WARRANTY STATEMENT. ALL EXPRESS WARRANTIES ARE LIMITED TO THE vi YEStablet 7375 User Guide TERMS CONTAINED IN THIS STATEMENT. ALL IMPLIED WARRANTIES, INCLUDING BUT NOT LIMITED TO ANY IMPLIED WARRANTIES OF AND CONDITIONS OF MERCHANTABILITY AND FITNESS FOR A PARTICULAR PURPOSE ARE EXPRESSLY EXCLUDED. AFFIRMATIVE COMPUTER PRODUCTS DOES NOT ACCEPT LIABILITY BEYOND THE REMEDIES SET FORTH IN THIS LIMITED WARRANTY STATEMENT OR LIABILITY FOR INCIDENTAL OR CONSEQUENTIAL DAMAGES, INCLUDING WITHOUT LIMITATIONS ANY LIABILITY FOR PRODUCTS NOT BEING AVAILABLE FOR USE OR FOR LOST DATA OR SOFTWARE. SOME STATES DO NOT ALLOW THE EXCLUSION OR LIMITATION OF INCIDENTAL OR CONSEQUENTIAL DAMAGES, SO THE ABOVE EXCLUSION OR LIMITATION MAY NOT APPLY TO YOU. The employees and agents of Affirmative Computer Products are not authorized to make modifications to warranties, or offer additional warranties binding on Affirmative Computer Products; accordingly, additional statements, whether oral or written, do not constitute warranties and should not be relied upon by the Purchaser. The warranties set forth in the warranty statement allocate the risk of Product failure between seller and buyer as authorized by the Uniform Commercial Code and other applicable law. Affirmative Computer Products reserves the right to change its warranty policy at any time. Such new warranty shall immediately take effect and apply to products sold and distributed after the date of such change in warranty. COPYRIGHTS AND TRADEMARKS Copyright Notice This manual, as well as the software described in it, is furnished under license. No part of this publication may be reproduced, transmitted, stored in a retrieval system, or translated into any human or computer language, in any form or by any means, electronic, mechanical, magnetic, optical, chemical, manual or otherwise, without the prior written permission of the copyright owner. Note: Information in this document is subject to change without notice. Trademarks Notice • YESmanager® is a registered trademark of Affirmative Computer Products®. • YEStablet™ is a trademark of Affirmative Computer Products®. • YESterm/IP® is a trademark of Affirmative Computer Products®. • Microsoft® is a registered trademark of Microsoft® Corporation. • Windows® is a registered trademark of Microsoft® Corporation. • Windows CE® is a registered trademark of Microsoft® Corporation • Intel® is a registered trademark of Intel Corporation Other company and brand, product and service names are trademarks or registered trademarks of their respective holders. vii YEStablet 7375 User Guide CAUTION: FAILURE TO COMPLY MAY RESULT IN SERIOUS INJURY Please review the following material carefully. Failure to follow the instructions or failure to heed the warnings contained herein could lead to serious injury. Special Battery Cautions The following are special precautions you should take when using and handling batteries. • Do not expose batteries to direct sunlight or extreme heat • Do not submerge batteries in liquid • Do not incinerate batteries • Do not handle damaged or leaking battery packs. • Do not attempt to discharge batteries by short-circuiting them. • Do not attempt to charge batteries with a charger other than one approved for use with the 7375. • Do not leave or operate the 7375 or 7375 batteries in an excessively hot environment such as a closed vehicle under hot sunshine or beside a fire, heater, or blow dryer. Do not leave 7375 exposed to excessive heat for any period of time. Excessive heat exposure may result in melting, or cause the electronics/battery to overheat resulting in fire. • Use only the supplied batteries and AC Adapter. Failure to follow this instruction may result in battery burst or liquid leak, and may cause fire, or injury. • Store and Dispose of all batteries in accordance with the instructions contained herein. Never dispose of the battery by burning. Any such action may result in excessive heating, explosion, or fire. • Do not disassemble, modify, puncture, or strike any battery with force or allow batteries to become wet. Any such action may result in excessive heat, explosion, or ignition. • If at anytime the 7375 batteries should smell, heat up, become discolored, leak fluid, change shape, or experience an abnormal occurrence, remove the battery from the 7375 and do not use it. • Should leaking fluid from the battery make contact with skin, eyes or clothes, flush immediately with water. If there is contact with eyes, seek medical treatment immediately. Failure to follow these instructions may result in skin rash or significant eye damage. CAUTION Danger of explosion if battery is incorrectly replaced. Replace only with the same type recommended by the manufacturer. Dispose of used batteries according to the manufacturer’s instructions. Rechargeable Lithium-ion battery disposal Unwanted lithium ion battery packs may be returned to the battery manufacturer for disposal. 7375 Enclosure Dismantling or opening the device enclosure or case will void warranty and may possibly cause electric shock. Avoid wet environments. viii YEStablet 7375 User Guide CARING FOR THE 7375 It is important to properly care for your 7375 tablet. Follow these guidelines to ensure your tablet is preserved and protected. • Avoid scratching the screen by always using the supplied stylus or a plastic-tipped pen intended for use with touch sensitive screens. • Do not expose 7375 to rain, liquids, or moisture for an extended period of time. • Do not expose 7375 to temperature extremes. • Do not place any objects on top of the 7375 to prevent screen damage. • Clean 7375’s screen with a soft cloth moistened with water or very mild or highly diluted glass cleaning solution. Guidelines for Travel • • • • Avoid exposing your 7375 wireless tablet to magnetic detectors and security magnetic wands. X-ray screening devices should not harm the 7375. Place the 7375 in a protective case and take it with your carry-on luggage if traveling by airplane. Make sure to disconnect all peripheral devices. As the tablet may still emit radio waves even when you are working offline, do not use the 7375 while on an airplane, unless you are certain that the WLAN adapter has been disabled or removed. Operating Temperatures and Environments • • Operating Temperature: 0-40 degrees Celsius (32-104 degrees Fahrenheit) Humidity: 0-90% CAUTION: Loss of Product Warranty Warning. Removing the back cover can void product warranty. Do not attempt to remove the back cover of your 7375; contact Affirmative Computer Products for service assistance. ix YEStablet 7375 User Guide THIS PAGE INTENTIONALLY LEFT BLANK x YEStablet 7375 User Guide GETTING STARTED WITH THE 7375 TABLET Thank you for purchasing the Affirmative Computer Products YEStablet Model 7375. Before you use this device, please read this manual for setup procedures, safety precautions, and other important information. Please review the Contents even if you are an experienced user. If you have any problems, contact Customer support at [email protected]. Featuring a robust magnesium alloy enclosure, the sub-2-lb 7375 with 8.4” TFT display is powered by the Intel XScale processor providing “instant-on” capability with extended use between battery recharge. An external battery expansion option will provide an additional 3-4 hours of battery operation. The operating software is Windows CE.net bringing with it numerous applications, including support for handwriting recognition, advanced thin client/server computing client software (RDP and ICA), Windows Media Player, local email client, word processing, and the YESterm IP terminal emulator. Precautions Always exercise care when operating and handling the 7375. Do not apply excessive pressure to the display screen. Do not touch the display screen directly with your fingers. You may damage the screen, and oil from your skin may be difficult to remove. Please use the Stylus provided. Avoid exposing the tablet screen to direct sunlight or other heat source. Where possible, the 7375 should be facing away from direct lighting to reduce glare. If the AC-DC power adapter is used to recharge or power the tablet, DO NOT use any AC-DC adapter other than the one provided with the tablet or acquired from the manufacturer or its distributors. In the unlikely event that smoke, abnormal noise, or strange odor is present, immediately power the 7375 off. Please report the problem to your tablet provider immediately. Never attempt to disassemble the 7375. You will lose any product warranty on the 7375. Package Contents • • • • • • • • 7375 (with internal Battery Pack) and Stylus Protective Jacket with Shoulder Strap AC-DC Power Adapter – DO NOT use any other AC-DC adapter Desktop Cradle with USB slave port and DC-in Power Jack Power Cord (USA Type) USB Cable Options, depending on configuration: • External Battery Pack • External Battery Charger Kit • Embedded wireless LAN adapter with antenna • Carrying pouch This document Unpacking the 7375 As you unpack your 7375, please check the box to make sure that all the items you ordered are present and in good condition. If any item is missing or damaged, contact your authorized dealer, or contact Affirmative Computer Products through http://www.affirmative.net/. 1 YEStablet 7375 User Guide THIS PAGE INTENTIONALLY LEFT BLANK 2 YEStablet 7375 User Guide--Requirements TECHNICAL SPECIFICATIONS AND PORTS OF THE 7375 TABLET The 7375 runs on a high-performance, 400MHz Intel PXA255 XScale processor. It is available with 32 MB of Flash ROM memory, 128 MB of SDRAM, and operates on Windows CE .net. It features an 8.4" SVGA (800x600) “high brightness”, touch-enabled display, and, including an optional external battery, weighs in at just over 2 pounds. The 7375 also contains ports to connect proprietary peripheral modules as well as industry-standard peripheral devices, such as bar code scanners, flash memory cards, or digital video cameras. Hardware Specifications Processor: SDRAM: Flash Memory: Expansion Slots: Display: Audio: Communications: Battery: USB: Desktop Cradle: Size: Weight: Intel PXA255 XScale 128 MB 32 MB One Type II CompactFlash™ Slot; One Type II PCMCIA Slot 8.4" 800x600 “high-brightness” with touch screen Internal speakers and microphone with external jack for headphone Built-in IEEE 802.11b WLAN (occupies the PCMCIA Slot) One Lithium-ion internal battery, optional external battery One (Host) port for various input devices Pass through charging, USB connection for ActiveSync with PC or Laptop (H x W x D) 7.9" x 9.4" x 0.75" 1.9 lbs; 2.3 lbs, including external battery 7375 Power Source The primary sources of the 7375’s power are the internal and optional external battery packs. A DC-in jack connects the AC-DC adapter with the 7375 to recharge the battery pack. Both the 7375 and the charging cradle are equipped with a DC-in jack. The AC-DC adapter can be connected directly to the 7375 for charging and operation or connected to the cradle so the battery packs may charge while the 7375 is docked in the cradle. Follow all precautions listed in this manual when using, charging or disposing of batteries. CAUTION: FIRE AND BURNING WARNING. Severe personal injury and equipment damage can result by not following proper charging procedures. Recharge the tablet using only the AC-DC adapter designated for the 7375. 7375 Display Screen The 7375’s specially enhanced display screen makes it the premium choice in both wireless displays and wireless web tablets. It provides SVGA (800x600) resolution on a high brightness transmissive display with touch screen, while keeping power draw to a minimum. The stylus for the 7375’s touch screen is located in the upper right corner of the tablet. Instead of relying on a mouse, the 7375 emphasizes the touch screen. CAUTION: LCD SCREEN DAMAGE WARNING. Touching with non-recommended objects and exposing to moisture may damage screen. Use only the provided stylus to operate the touch screen; avoid touching with your fingers, as oil from your skin can be difficult to remove. 3 YEStablet 7375 User Guide Other Input Devices In addition to using the touch screen and virtual keyboard, the 7375 is also compatible with most USB mouse, keyboard, and barcode scanning devices. Please refer to the list of recommended accessories below to see some of the devices that will best operate with the 7375. 7375 Recommended Accessory Device (Partial) List • PCMCIA Wireless LAN Cards: • Samsung SWL-2100 Wireless LAN PC Card (may be included with the 7375) • ZCOM XI-325 Wireless LAN Card (may be included with the 7375) • Cisco Aironet 350 Card • Compact Flash Memory Cards: • Memorex Compact Flash Memory Cards • SanDisk Compact Flash Memory Cards • Lexar Media Compact Flash Memory Cards • Lexar Media High-Speed Series Compact Flash Memory Cards • USB Keyboard/Mice: • (All USB devices that are HID-compliant are expected to work with the 7375) • Microsoft IntelliMouse USB Compatible • Logitech USB Optical Mouse • Logitech Internet Navigator Keyboard USB • IBM KB-9930 PS/2 Keyboard (with USB adapter) • Bar Code Scanners: • Symbol 1902 • (Any bar code scanner with a USB keyboard output is expected to work with the 7375—except Metro Logic) • Transparent Protective Screen Cover NOTE: Due to the customizable nature of the 7375, it may be possible to integrate other devices not included in this list with the unit. Contact Affirmative Computer Products for more information. 4 YEStablet 7375 User Guide--Requirements Front-View Layout PC Card Slot Record LED CF Card Slot Microphone 9 10 Headphone Jack Battery LED Network LED 3 11 1 2 4 5 USB Port (Host) 6 7 8 Cradle Interface DC-IN Jack (to-AC-DC) Button Function (Default) Button 1 Description Volume Down 2 3 4 5 6 Volume Up Brightness Up Brightness Down Soft keyboard Cradle USB (ActiveSync) interface Enable 7 8 9 Remote Desktop Connection Desktop Suspend or Power/Reset 10 11 “Record” (Right-Edge) Button Undefined (Rear Cover) Default Action Push on left edge of oval button. (Internet Explorer: Back) Push on right edge of oval button. (IE: Forward) Push on upper edge of oval button. (IE: Scroll Up) Push on lower edge of oval button. (IE: Scroll Down) Toggle: Launch/Close Soft keyboard (Fixed). Push to Enable USB (ActiveSync) link between PC and Cradle with tablet secure on Cradle (Fixed for most software configurations). Launch Remote Desktop Connection application. Minimize current application and return to Desktop. - Quick Push enters or exits Suspend Mode. - Push and Hold to Power Off (hold for 4+ seconds until display goes off) the tablet; then Push to restart and complete (Cold) Boot process None Inactive The actions for all buttons except Buttons 9 and 11 can be changed from the default if desired. See OPERATION|Other Features of Interest for more information. 5 YEStablet 7375 User Guide THIS PAGE INTENTIONALLY LEFT BLANK 6 YEStablet 7375 User Guide--Requirements REQUIREMENTS The 7375 features a CompactFlash (CF) slot and a PCMCIA slot. It is anticipated that the PCMCIA interface will be mostly used to provide the wireless LAN connectivity using either an 802.11b wireless LAN adapter or a Sierra wireless cellular adapter. The 7375 may also support dialup modem, tethered Ethernet connectivity, and wireless WAN access. The 7375 supports offline applications and deployment. However, you may choose to have (as base stations) 802.11b wireless Access Points or Gateways with network (Internet, Intranet, etc.) access to experience the full capability of the 7375. If your 7375 does not come with a wireless LAN (802.11b) adapter (see OPERATION NOTES), the 7375 should be used together with an approved wireless network adapter for network access. Please check with your tablet provider for the appropriate solution. NOTE: If you elect to use a WLAN adapter where the vendor offers a driver to operate under Windows CE .NET on an ARM/XScale processor-based platform, you should be able to install the driver onto the 7375 by referring to the “Software Installation, Development, Synchronization” section in this document. However, software drivers installed in this manner will need to be re-installed should you clear the system’s volatile memory during a Cold Reboot process. Notes for setting up the 802.11b-based wireless communication • Under the zero configuration design of the wireless 802.11b LAN support under CE .NET, the 7375 will detect all 802.11b base stations in the vicinity for you to select the base station of your choice for connection. • The ESSID and WEP Key (if enabled) on the 7375 and the base stations have to match. Zero configuration will guide the ESSID setup. WEP is “Disabled” as default on the 7375 – it is recommended that you enable WEP encryption for secure access. • Click on the wireless LAN icon (see figures below) on the Windows CE Taskbar, to configure the wireless adapter in the 7375. • Refer to the base station operating manuals for setting up the 802.11b base stations. • NOTE: The WLAN network connectivity icon changes appearance as in the following: Connection Established (Blinking icon indicates activity) • Connection Lost NOTE: You will not see any of the icons above in the Taskbar if the network adapter is not detected or supported by the 7375. 7 YEStablet 7375 User Guide Wireless network adapter > Wireless Information tab > Advanced button > Wireless Networks tab. Wireless network adapter > IP Information tab > Details button. 8 YEStablet 7375 User Guide--Operation OPERATION Power ON and OFF NOTE: • The battery shipped with your tablet should be low in power – please be prepared to use the AC-DC adapter with the 7375 in setting up the tablet for the first time and to fully charge the internal battery pack. • Depending on the origin of your tablet, the 7375 is generally delivered in a “Power Off” state. To start (Cold Boot or “Power On”) the 7375 for the first time, push briefly on the Suspend or Power/Reset button (#9 per Button Function Table) located at the upper left edge of the tablet with the AC-DC adapter connected to the tablet. You may refer to the sections on Operation Notes and Appendix on FAQ and Troubleshooting for more details and scenarios. • Please use (push and quick release) the Suspend button to “sleep” the tablet while not in use. Pushing briefly on the Suspend button will wake up the system within 1-2 seconds. In general, to activate the 7375, push and quickly release the Suspend button to the left of the front bezel. The display will come on in about 1-2 seconds. To move the 7375 into Suspend mode and conserve power, push and quickly release the Suspend button. In the Suspend mode, the tablet continues to consume (a minimum amount of) power. • If you are putting the tablet away for an extended period of time (e.g., travel or absence), you may elect to power off the tablet completely to conserve battery life. This way, you will have power in your battery when you arrive at your destination or return from your absence. However you will need to properly save your work content (e.g., to external CompactFlash card in CF slot) and tablet settings (e.g., by Registries Save/Restore utility in Control Panel) prior to the procedure. To power off the tablet, push and hold in the Suspend button for over 4 seconds – the display will turn off and all LEDs will be dark. • DO NOT use the Power Off function as part of normal tablet operation – you may lose all software settings and information you may have established through your pattern of usage. It is designed to reset the tablet in the unlikely event that the tablet enters an unresponsive state or to meet the power conserving objective cited in the previous paragraph. Pushing briefly on the Suspend button will initiate the Power On process if the battery is in good condition; otherwise make sure the AC-DC adapter is connected. Start Up 1. After power up (from Suspend or otherwise), the Windows CE Desktop will be displayed after a launch sequence of several seconds OR within 2-4 seconds if recovering from Suspend. 2. The wireless LAN adapter may take 10-15 seconds to be (re-)established. 3. Choose from any of the displayed icons on the Desktop to activate the corresponding application. Calibration The Calibration Properties screen will appear before the Windows CE desktop, if this is a new or reset tablet. When the 7375 prompts you to calibrate the touch-screen, use the Stylus (stored in the upper right surface of the 7375) and tap where indicated on the touch-screen in accordance with the displayed instructions. (This document refers to “clicking” or “tapping” interchangeably. The latter is applicable when the touch-screen is utilized). NOTE: You can recalibrate at anytime using Start” Æ “Settings” Æ “Control Panel” Æ “Stylus” or holding the "soft keyboard" button (the left-most one on the bottom side of your tablet) AND the "left-edge" button of the 4way navigation switch (located at the front right of your tablet) simultaneously. 9 YEStablet 7375 User Guide Accessing the Control Panel. Configuring your tablet 1. Click “Start” on the Windows CE Taskbar, select “Settings”, and then click on “Control Panel”. 2. The Control Panel displays several icons associated with utilities for configuring the 7375. Many of these are self-explanatory. Some major ones are discussed below. a) Display Quality/Properties set up i) Click on “Display” icon. The Display Properties window will appear. You can use choose to configure parameters associated with configuration of the display Background, Appearance and Backlight. ii) Click on “Brightness” icon to adjust the brightness of the display. b) Network Configuration Double-click on “Network and Dialup Connections” icon. The displayed window will guide the configuration or provide information largely identical to accessing the Network icon displayed in the Taskbar when a supported network adapter is inserted and detected into the 7375. In general, for an “Adapter” selected, click on “Properties”. i) You have two options: “Obtain an IP address via DHCP” or “Specify an IP address”. ii) When you select “Obtain an IP address via DHCP”, you are expecting that an IP address can be automatically assigned to this tablet. iii) When you select “Specify an IP address”; you have to ask your network administrator for an address and type it in the space provided (IP Address, Subnet Mask, and Default Gateway). In addition to that you have to specify additional “WINS” or “DNS” in “Name Servers”, then click on “OK” at the top of the window for confirmation. c) Stylus Setup and Calibration i) Double-click “Stylus”; the Stylus Properties window will appear. ii) You can test “Double-Tap” function; you have to follow the instructions to double click the two squares right of the Window. If it is correct, then click on “OK” at the top of the window for confirmation. iii) If you want to recalibrate or your tablet is not responding properly to your taps, select “Calibration”, follow the instruction to recalibrate. When you are done, click on “OK” to continue. 10 YEStablet 7375 User Guide--Operation d) System Properties Set Up Click on “System”; the System Properties window will appear. i) Click on “General”, the System information will be displayed. Then click on “OK” at the top of the window for confirmation. ii) Click on “Memory”, you can adjust the allocation of unused RAM to run programs or for storage (by moving the arrow to right or left). After changes, click on “OK” at the top of the window for confirmation. iii) Click on “Device Name”, you can provide a unique name to the tablet as identification for network resource access such as file sharing, etc. Reading and Sending E-mail You may choose to use the local email client (Inbox) instead of web-based email solution. Inbox Configuration 3. Open the Inbox program. 4. Go to Services tab and select “Options”. After you click on “Options” you will see, in a new window, five tabs: “Services”, “Compose”, “Read”, “Delete”, and “Storage”. 5. Select “Services”, click “Add”, choose which type of email service you have, “IMAP” or “POP3”, and select one. 6. In the Setup Mail definition (IMAP or POP3) you must provide the required information: “Connection”, “Server”, “User ID”, and “Password”. If you do not have this information, contact your Network Administrator. 7. Click “Next”. 8. In this window you will configure the “Connections Settings”. There are several options – use the default values and click “Next”. 9. The last window is the “Mail Inbox Preferences”. Select the options more suitable to your needs – you either need to get the full-copy messages or the headers only. NOTE: Files in .TXT, .DOC, .DOT, .RTF, HTML, .GIF and .JPG formats may be read. Accessing the Internet with the Internet Explorer 1. When you want to surf the web, click on “Internet Explorer” in the Desktop screen – the 7375 will display the default web site (for example, www.cnn.com). You can change the default web site by using IE browser, View in menu bar, Internet Options. 2. If you want to leave the Internet to go to Windows CE desktop yet you want to keep the web browser open, just “minimize” the browser window. You can click on the Windows CE Taskbar any time to return to the browser. 3. The IE browser in CE .NET is based on the IE 5.5 engine. 4. You may wish to examine and manipulate your browser configuration options through Internet Explorer > View > Internet Options to optimize your experience. 11 YEStablet 7375 User Guide Operating the 7375 together with Cradle The 7375 is complemented by a desktop Cradle for support; pass-through charging; connection of selected USB peripherals, and communication with a PC. On the cradle, you will find a DC-in jack for the AC-DC adapter and a USB (Type B) port for a USB cable connection to PC or laptop. Please always seat the 7375 securely onto the cradle and use the procedure cited in this section to activate and verify the connection between the tablet and the cradle. The cradle may be deployed as a desktop, benchtop, or vehicle-mount accessory. 1. You may charge the battery pack on the 7375 by connecting the AC-DC adapter directly to the DC-in port on the 7375 or through the DC-in port on the Cradle while the 7375 is docked on the Cradle. Desktop Cradle DC-in Port and Cradle Connector Tablet and Cradle in Vehicle Mount USB Slave (Type B) Port & Cradle Connector 2. The USB Type B port on the cradle is used for connection between a desktop computer and the 7375 when the tablet is docked on the Cradle. This connection may be used for software installation, software update, and software development purposes, where applicable. The ActiveSync software also leverages this connection for synchronization between a PC and the 7375. NOTE: You will need to engage a pre-programmed button (usually #6) on the front bezel (see Buttons definition) to enable the USB Type B (Slave) port (e.g., ActiveSync operation) operation on the Cradle. Removing the unit from this cradle or Suspending the unit is designed to cause the connection to be lost. 12 YEStablet 7375 User Guide--Operation Other Features of Interest Depending on the software configuration, your 7375 tablet may come bundled with the following software features. • Terminal Clients: ICA and RDP You may use the 7375 to connect to Citrix and Microsoft Terminal Servers. 1. “Start” Æ “Programs” Æ “Terminal Client” Æ “Citrix ICA” OR activate Desktop icon (Citrix ICA) to connect to a Citrix Terminal Server. 2. Activate “Remote Desktop Connection” from the Desktop to connect to a Microsoft Terminal Server (2000 or 2003) or to a PC running Microsoft Windows XP Pro. 13 YEStablet 7375 User Guide • Word Processing Windows CE .net provides the WordPad (similar to Pocket Word) word processing application. This is included with the 7375. • Voice Recorder A Voice Recorder application and its recording function will be activated if the Record button is pushed. Pushing the button again will stop the recording action. Subsequent pushes toggle between record and stop. The application may only be closed manually. • Documents and Pictures Viewer A viewer application suite for Microsoft Office and PDF documents as well as images enhances the user experience by facilitating the display of corresponding content via the browser or in standalone mode. • Right-Mouse Click The right-mouse click function has been added to the Windows CE Taskbar. Select the mouse icon on System Tray to enter Right-mouse mode. The system will automatically switch back to Left-mouse mode after a single use in Right-Mouse Button mode or by selecting the mouse icon again on the Taskbar. • YESterm IP Terminal Emulation Invoke YESterm IP Administrator from the Windows CE Desktop to connect to local or remote IBM host computers. 14 YEStablet 7375 User Guide--Operation • Programmable Buttons The user is able to program most of the buttons (#1-4, 6(or 7)-8, 10, per Front Layout diagram) to operate per tabulated functions or user scripts. Refer to Start > Settings > Control Panel > Button Settings icon to use this feature. Double-tap on the icon to select a button and associated functions. 15 YEStablet 7375 User Guide THIS PAGE INTENTIONALLY LEFT BLANK 16 YEStablet 7375 User Guide—Operation Notes OPERATION NOTES Wireless Network Card and Antenna System The 7375 has a PC Card slot along the upper left edge. This slot normally houses a wireless LAN adapter or Sierra wireless cellular adapter. In certain configurations, the slot is left open for the user to insert a supported network adapter. In the standard configuration, the 7375 is delivered with an embedded PC card 802.11b wireless LAN adapter with a custom antenna in a snap-type housing. In this case, the user has the choice of leaving the antenna in the snap-on position (A) or of pulling the antenna tip off the retainer snap and trying to obtain better wireless connectivity through varying orientations up to near-vertical (B). Note: If the antenna is unsnapped, it becomes vulnerable to damage. Any such damage is not covered by the tablet’s limited warranty. (A) (B) Battery and Power Management The 7375 is equipped with an internal Li-Ion battery pack that is capable of supporting approximately 2.5 hours of continuous operation. The period of continuous operation can be extended to approximately 6 hours with the aid of an optional external battery pack that clips onto the back of the tablet. The period between battery recharge can be significantly lengthened by putting the tablet into Suspend mode through the Suspend button (see Button Function Table) whenever the tablet is not in use. The 7375 may also be configured to automatically enter into power-saving modes after user-definable periods of tablet idle – see Start > Settings > Control Panel > Power Properties. NOTE: Both the internal and external 7375 battery packs may be recharged with the accompanying AC-DC adapter connected directly to the DC-in jack on the tablet or connected to the tablet Cradle. The external pack can also be charged in the optional auxiliary battery charger cradle (see APPENDIX 4). Power (Reset)/Suspend Button The Power (Reset) and Suspend (Resume) button resides, slightly recessed, along the upper left edge of the 7375. Suspend/Resume A brief push/release of the Suspend button toggles between Suspend and Resume – with adequate intervening time. The system cannot enter into Suspend mode again within 15 seconds after Resuming. COLD Boot/Power On-Off/Reset You may use the Suspend button to Cold Boot or Restart the 7375 in the unlikely event of tablet lock-up. To execute, push on the button for over 4 seconds to “Power Off” the tablet. The tablet will be turned off. This Reset/Power Off will clear your software settings and data if they are not properly saved to flash memory (See Appendix on FAQ for reference). Push again on Suspend Button for a brief moment to restart/reboot the tablet. 17 YEStablet 7375 User Guide Low Battery Condition A warning message will be generated during a Low Battery situation and the 7375 will shortly thereafter be placed into (Forced) Suspend mode if operation continues without external supply of power. After the 7375 enters the (Forced) Suspend mode due to the Low Battery condition: • The Suspend/Resume button will not be able to reactivate the machine unless an AC-DC adapter or a good external battery is connected when the Suspend button is briefly engaged. If recovery is performed within 2-4 hours, the machine will return to its previous state. • CAUTION: If over 2-4 hours elapse without using the AC-DC adapter or the external battery pack to resume system operation or recharge the battery, the battery power will drain entirely. If the 7375 is re-activated then, the machine is reset and the process amounts to a Cold Boot. Reactivation of the system is also by means of briefly engaging the Suspend button in the presence of a connected AC-DC adapter or good external battery. SUMMARY Use the Suspend button to: 1. Enter and Exit Suspend mode (triggered upon button release within 0-4 seconds); 2. Engage Full Power Off (preceding Cold boot) by pressing/holding for over 4 seconds; 3. Exit Forced Suspend mode; • Note: The tablet automatically enters Forced Suspend mode (from Active or Suspend) when the internal battery pack reaches a low level. This supports a graceful shutdown and also extends the time where information is retained in volatile memory. • Connect the AC-DC adapter or external battery pack of good capacity to the 7375 and briefly engage the Suspend button (recover original state entering Suspend/Forced Suspend). 4. Cold boot (from Power off or Total battery drain). • Connect AC-DC adapter or an external battery pack of good capacity to the 7375 and briefly engage the Suspend button (splash screen will appear after a few seconds - Cold (Re-)Boot has taken place). NOTE: States (3) and (4) are manifested by "dark display and dark LEDs with no system response when the Suspend button is pushed without an AC-DC adapter connected to the 7375". The next step is to connect up the AC-DC and engage the Suspend button again. The type of response – splash (bootup) screen or recovery into previous state - indicates whether the tablet is undergoing Cold (Re-)Boot or is simply exiting Forced Suspend mode. File Transfer and Storage There are several methods that can be used for transferring files in or out of the 7375 file system: • Web download • Email attachment. • CompactFlash storage. • USB-attached storage. • Shared network storage. • ActiveSync with a USB-attached PC. Regardless of the transfer method, there is only one way to save files internally in the 7375 flash memory in the event of a Full Power Off. To save files internally: • Save the files to My Computer\Internal Storage or to a subfolder. • If you want to save any files that are not in the Internal Storage folder, you will have to transfer them out of the 7375 before executing the Power Off. 18 YEStablet 7375 User Guide—Operation Notes There is no drag and drop capability between storage folders in the My Computer root. If you want to move files among internal root folders, or from external storage to an internal folder, or vice versa, use Cut, Copy, and Paste from the Edit menu of My Computer. Web Download File downloads from the Web are done in the familiar Web download manner: 1. You are asked if you want to save or open. 2. Choose Save. 3. Browse to the folder where the new file should be stored. • If you have external CompactFlash or USB storage, you can save directly to that external storage. 4. Tap Go or the PC Enter key. 5. The file will be downloaded to the designated folder. Email Attachment When you configure Inbox, attached files in incoming email are stored in the My Computer\Internal Storage folder by default. Your only other option here is, if you have external CF or USB storage, to send the attachments to that external storage as follows: 1. Click on the Inbox icon on the Desktop. 2. Open the Services menu. 3. Click on Options. The Options window will open in the Services tab. 4. Click on the Storage tab. 5. Select the External Storage Card radio button. 6. Select the external storage media from the drop-down list 7. Click OK. 8. Enter a folder name for attachments in the resulting dialog box. 9. OK out of Inbox. 10. Save these settings by executing a Registry Save. CompactFlash Storage NOTE: Always do a complete Power Off before inserting or removing a CompactFlash card. If you install a CompactFlash storage card in your 7375, it will appear in the file system as My Computer\Storage Card. Whenever you are given a storage browse option, this folder will be available. You can, of course, create subfolders if you wish. USB-Attached Storage If you attach any type of USB storage to your tablet, it will appear in My Computer with type Removable Storage. The name will depend upon the type of storage. Whenever you are given a storage browse option, this folder will be available. You can, of course, create subfolders if you wish. Shared Network Storage • • From My Computer on the Windows CE desktop, you are able to view shared content on Windows PCs (Windows 95 and above) connected to the same network subnet as your tablet. This is facilitated by the viewing utilities or applications resident on your 7375. Please make sure that the appropriate folders on the PCs have Sharing enabled. On the 7375, in the address field of My Computer, enter the name of the target PC: \\<target_PC_name>. You may be prompted for username and password if the sharing is password-protected. After any authentication is processed successfully, the shared folders should be displayed. NOTE: It is not possible for PC users to view or access content on your 7375, except via ActiveSync. 19 YEStablet 7375 User Guide ActiveSync ActiveSync uses a USB connection between the host PC and the USB Slave port on the cradle of the 7375. It also requires the installation of the Microsoft ActiveSync utility on the host PC. The procedure is: 1. Install ActiveSync 3.5 or higher on host PC. E.g., http://www.microsoft.com/mobile/pocketpc/downloads/activesync37.asp 2. Securely seat the 7375 on the Cradle. 3. Connect the USB cable between the 7375’s Cradle and the host PC. 4. Enable the USB connection by engaging the appropriate (#6, per Button Function Table) button on the 7375. The PC’s Connection window should appear indicating connection status or be accessible via the corresponding icon on the PC System Tray. 5. Use the ActiveSync application to select and initiate the files/software transfer. 6. You may initiate the disconnect process by unplugging the USB cable. NOTE: Suspend/Resume or removing 7375 from Cradle turns off the connection between the 7375 and the host PC. The Cradle Enable button (#6) must be used again to re-establish the connection. Software Installation Software installation files can be moved to the 7375 using any of the file transfer method discussed in File Transfer and Storage. However, any files not located in the Internal Storage folder will be lost if a Power Off is executed. Therefore, installing files in this fashion is best suited to testing new applications or utilities in the 7375 environment. For permanent availability and usage of new software, contact Affirmative Computer Products to arrange a custom firmware build including your new software. 20 YEStablet 7375 User Guide—Operation Notes Software Update The software on the 7375 may be subject to occasional updates. NOTE: You will lose all configuration information and user files during Update. There are two means to facilitate this process. (i) Through network adapter or local storage under OS 1. Obtain the new firmware image file from Affirmative Computer Products and place it in an FTP server or in local storage. 2. Go to My Computer>Control Panel>Update; the Update window will appear. 3. Select from the FTP or Local tabs depending on the location of the updating content. “Local” storage includes CompactFlash (CF), USB storage in the USB port, and shared network storage. 4. Provide appropriate information in the blank fields. 5. Click on Update, and the tablet will be updated with the specified software from a specified FTP server or local locations automatically. Please follow any displayed instructions carefully. 6. After completion of the loading process, click on OK in the window for confirmation. CAUTION for “Update” Function To avoid system crashes and irrecoverable states, you MUST: • Use AC power instead of Battery power when the tablet software is being updated. • NOT turn the system OFF when the tablet software is being updated. The use of an uninterruptible power supply (UPS) is recommended. (ii) Through Cradle USB Port This method can also often be used to recover from corrupted flash memory in the tablet. The following describes the procedure for updating firmware through the Cradle-USB port: • Client (7375) side 1. Place the 7375 on the Cradle; making sure that the mounting is physically secure. 2. Connect a USB cable from a Windows 2000 or Windows XP system to the cradle. 3. Press and hold the Suspend button for more than 4 seconds to completely turn off the power. 4. Press the Suspend button again to turn on the power and quickly (BEFORE the display shows the Splash Screen; you have about 1-3 seconds. If you miss this, then repeat Step c) press and hold the soft keyboard button (Button #5) AND the Cradle USB button (Button #6) simultaneously. You should be able to see a text-based Menu on the screen. Use the 4-way navigation button to move up and down through the Menu and the soft keyboard button to Select. 21 YEStablet 7375 User Guide 5. Move the cursor down to the USB Update line item and Select. An "Update OS image via USB port" message will appear and the 7375 is now ready to begin accepting an OS image from a server through the USB port. The download will commence pending the initiation from the host system. 6. The OS update process will be done automatically after the OS image has been successfully downloaded. • Host (e.g., PC running Windows 2000 or XP) side 1. Download and install Microsoft ActiveSync as discussed in File Transfer and Storage\ActiveSync. 2. Obtain (from Affirmative Computer Products) and install the 7375 USB update utility. 3. Obtain the new firmware image file from Affirmative Computer Products and place it in the host. 4. Before updating, temporarily disable the Microsoft ActiveSync USB connection by executing the following instructions: a. Right-click on the icon of ActiveSync, which is located in the Taskbar System Tray. b. Select Connection Settings .... c. Uncheck the box Allow USB connection with this desktop computer. 5. Run the 7375 USB Update utility and then click Select to browse for and select the OS image file (xxx.dtr). Make sure that the host and client are connected: a "… USB Devices Connected" message can be seen at the bottom of the Update utility window. 6. Click Update to start the transfer of the OS image assuming that the 7375 has been properly set up per the preceding instructions. 7. The OS update process will be done automatically after the OS image has been successfully transferred. Tablet Registry The tablet registry characterizes the tablet, defining supported device components and peripherals, applications and content. Many registry elements are being changed or updated during a typical session of operation. At the “battery low” event, prior to automatic entry into (Forced) Suspend mode, registry contents will be saved from volatile memory to flash ROM automatically, ensuring persistence of the registry settings, even after total power loss. A typical save process will take over 5 seconds. The Registries Save/Restore utility in Windows CE Control Panel can be used to manually save registry contents to ROM as well. NOTE: In the event that the file structure of the 7375 becomes corrupted, it may become necessary to clear the user-accessible file system (and all registry elements) of the tablet to return the 7375 to a fresh and useable state. To clear the file system, follow the instructions as listed under the “Software Update – Through Cradle USB Port – Client (7375) side” section presented earlier under the section on Software Update. When presented with the text-based Menu, choose “…Clear Registry …” or “…Clear File Structure …”. In the former, settings such as wireless network configuration and browser configurations will be cleared. In the latter, an additional cleansing of the user-accessible flash-based file system also takes place. 22 YEStablet 7375 User Guide—YESterm IP Terminal Emulation YESterm IP TERMINAL EMULATION YESterm IP terminal emulation provides powerful Telnet TN5250e and TN3270e TCP/IP display and printer solutions developed by Affirmative Computer Products. These emulations provide YEStablet 7375 users with the capability to connect to AS/400, iSeries, 3290, and zSeries host computers via the TCP/IP protocol over Local Area Networks and Wide Area Networks. Up to four YESterm IP emulation sessions of any mix can be configured and activated at the same time, each to a different host if desired. The configuration of Telnet sessions is made simple by a Wizard application that guides the user during the configuration process. TN5250e Emulation The YESterm IP TN5250e emulation provides enhanced functions for a wide range of IBM terminals and a "true" IBM 3812 Printer emulation with the support of all the enhanced features normally available only on very expensive 5250 Printer Interfaces. In addition, YESterm IP TN5250e supports the "Enhanced Display Auto-Signon and Password Encryption" allowing a secure connection to the AS/400, with no need of any SSL option. AS/400 Requirements • OS/400 V3R2 or higher, with appropriate PTFs iSeries Requirements • No special requirements. YESterm IP Administrator The YESterm IP Administrator is used to add, delete, configure, and activate Telnet emulation sessions. It is opened automatically when a Cold Boot is executed on the 7375. You may see a pre-configured demo session in the Administrator. Please contact the Affirmative Computer Products Tech Support department at 888-353-5250 for information about this demo session. • • • • • • Add…. Click on this button to add a Telnet emulation session. A New Connection window will appear with a drop-down list containing four session types. Choose one of the four and then click on OK. You will then be guided through a Setup Wizard. The Setup Wizards are described under the sections on the individual session types. You can add up to four YESterm IP sessions of any mix, and each can be connected to a different host. Remove…. Click on this button to delete the highlighted session. You will be asked to confirm your decision. Edit…. The Setup Wizards provide a basic set of setup parameters. Highlight a session and then click on Edit to configure the complete set or to make changes to the existing configuration. Configuration details are described under the sections on the individual session types. Start. Click on this button to open a highlighted session. End. Click on this button to close a highlighted session. A session can also be closed from the session screen. …. Click on this button to open the Administrator Properties window. • Enable Administrator Password. Check this box to enable a password that will be invoked whenever someone tries to add, remove, or edit a session, or tries to open the Administrator Properties window. Enter a password and confirm it in the provided fields. • Administrator Autostart. This check box has no effect, since the Administrator is always automatically started on a Cold Boot. 23 YEStablet 7375 User Guide Display Session Characteristics • • • • • • • • • • IBM emulations supported: 5251, 5291, 3180-2, 3196, 3278/9, 3477-FC/FG, 5251, 5291. Includes numerous resident national keyboard templates and Code Pages. Includes enhanced keyboard mapping and customization, using Shift, Caps Lock, Alt, Ctrl, function keys, etc. Euro (€) symbol supported. Includes enhanced copy and paste options. Includes tools for keyboard mapping and attributes editing. Includes enhanced customizable Hot Spot feature. Includes enhanced Record/Playback feature. Supports "Enhanced Display Auto-Signon and Password Encryption" allowing a secure connection to the AS/400. Choice of Windows or 5250 Text presentation modes Printer Session Characteristics • • • • • • IBM Emulation supported: 3287, 3812. Support for continuous forms, multi drawers, envelope, manual feeders, simplex/duplex, auto page orientation, and COR (Computer Output Reduction). Supports CPI, LPI Override and LQ, NLQ. Supports Host Print Transform (TN5250e only). Supports Hex Passthrough (HPT), with customizable leading and ending sequences and support of "nonprintable characters". Supports the Euro symbol (€). Display Session Setup Setup and configuration are initiated from the YESterm IP Administrator window. Click on Add. You are faced with a choice of four emulation types. After choosing either TN3270e Display or TN5250e Display, a wizard will guide you through setup. You can have a maximum of four display and/or printer emulation sessions, with any mixture of 5250 and 3270 emulations. Each session may have a unique host, if desired. A Setup Wizard will take you through three screens. Activate Next to go to the next screen, Back to return to the previous screen, and Cancel or the Esc key to abort the process. 24 YEStablet 7375 User Guide—YESterm IP Terminal Emulation Display Setup Screen #1 • • Host Name/IP Address: If you have a local DNS or WINS server, you can type in the host network name. Otherwise, type in the IP address of the host. Port Number: Use the default of 23 unless directed to do otherwise by your network administrator. Display Setup Screen #2 • • • Connection Name: This is the friendly name that will appear in the YESterm IP Administrator screen. Device Type: Select one from the drop-down list. The default 3477-FC works well for TN5250e emulation, unless you have special needs. If you are adding a TN3270e session, you will see a choice of 3278/9 terminal types here. Device Name: If you are using named sessions, enter the session name here. 25 YEStablet 7375 User Guide Final Display Setup Screen • • Host Code Page: Choose the applicable country from the drop-down list. Keyboard Type: It is recommended that you choose the default 101 Terminal keyboard type. This concludes the setup parameters covered by the wizard. However, you can configure many more parameters in each Display Session by highlighting the connection name in the YESterm IP Administrator window and activating Edit. Display Session Configuration The screen shots you see in this section are TN5250e editing screens. There are very few differences between the 5250 and 3270 screens, and any significant differences for TN3270e sessions will be discussed in the text. Open YESterm IP Administrator, highlight a display session, and click on Edit. For TN5250e sessions, you will see a Displays Sessions Properties sheet with seven property tabs. For TN3270e sessions, you will see a Displays Sessions Properties sheet with six property tabs. The opening view is of the Connections tab and property sheet. 26 YEStablet 7375 User Guide—YESterm IP Terminal Emulation Connection Connection Properties Sheet Five of the seven properties on this property sheet were already configured in the Setup Wizard, although you can change them here if you wish. The other two properties are: • Encryption Level. If you want to use sign-on encryption, choose an appropriate encryption level from the drop-down list. Your host must also be configured for this encryption level. • Automatic Startup (not shown above). Check this square if you wish the session to automatically start when the YESterm IP Administrator window is opened. Note: Typically the session will report a failed connection after a Cold Boot because it takes several seconds after bootup for the wireless adapter to connect to an access port. You will have to reconnect the session after the adapter has connected to the access port. . General General Properties Sheet 27 YEStablet 7375 User Guide Code Page YESterm IP supports numerous language Code Pages. The Code Page selected here from the drop-down list should be the same one configured on the host for this specific device. Ignore the Code Page Edit button, since Code Page editing is not supported in the 7375. Keyboard Language YESterm IP supports several non-English keyboard languages. If you wish to use one of them, select it from the drop-down list. Keyboard Type YESterm IP supports three different keyboard types (101 PC, 101 Terminal, and 122 Key), but 101 Terminal is recommended for an experienced 5250 user on the YEStablet virtual keyboard. It is also possible to create a custom keyboard map, if desired. Activate Edit to get to the keyboard map page. Keyboard Map Page for 101 Terminal U.S. English Keyboard You can check the current mapping in one of two ways: • Scan Codes. The keyboard sends a unique scan code to the terminal when a key is pressed. If you want to see what key is associated with a specific scan code, type that code in the Edit box, shown highlighted in the above figure. The associated key will highlight, and any command mapped to that key will show in the Action boxes. Of course, most people couldn’t care less about scan codes, so this method may be of little use to you. • Stylus Clicks. Position the cursor over the key of interest and click. The scan code for that key will show in the Edit box, and any mapped command will show in the Action boxes. If you want to see the effect of that key plus a modifier key (Shift, Alt, Ctrl), click on the modifier key and then on the action key. Note: Since the virtual keyboard does not support a RightControl key, it is recommended that the Enter command be remapped to the End keys even though this is not the default. Typically, this remapping will already be done when you receive a new YEStablet 7375. Edit Activate this button to initiate custom keyboard mapping. See: How To …|Create a Custom Keyboard Map for the mapping procedure. 28 YEStablet 7375 User Guide—YESterm IP Terminal Emulation Default This button will erase any custom mapping that exists in this map. Everything goes back to defaults. Obviously, you want to be very careful around this key if you have done much custom mapping. Options Keyboard Options Dialog Box This button opens a special dialog box where you can specify the Host Keyboard Language Option, and enable the Multinational character set. Keyboard ID is not used in the 7375. Font Select one of two Font styles to be used as the default Font for the Display Session. The default terminal font is easy to read, but slower to refresh than the Courier font. Print Screen From the drop-down list, select how the Print Screen function is to be performed: • Local Direct Print. This selection is not valid in the 7375, since there is no LPT1 port. • Through the Host. Make this selection if you wish to print to a remote printer through the host. • Extended Local Print. This selection provides local printing on steroids. To use it, you must create a printer emulation session. This session is used only for LAN printing, and it allows you to format your print output to the LAN printer. See Printer Emulation for more information. • Function Disabled. Screens cannot be printed. The Print Screen function can be activated from: • Emulator Button bar. • Emulator Menu bar (File|Print) • Keyboard, if a key has been remapped to the Print command. • Key Pad, if it contains a corresponding button. Cursor Select the type of cursor you want to use. Miscellaneous • • • Euro Support. When this option is enabled, you will enter the Euro symbol when you activate Alt+E. Keyboard Buffer. This option enables Typeahead, but this option is of little use with a virtual keyboard. Keyboard Clicker. If this option is enabled, you can hear an enhanced click every time you tap a key on the keyboard. 29 YEStablet 7375 User Guide • • • Error Message Beep. If this option is enabled, you can hear a "Beep" when an input error is made. System Message Beep. If this option is enabled, you can hear a "Beep" when a message is received from the Host. Lock NumLock. This option has no effect since there is no NumPad in the virtual keyboard. Attributes This properties sheet allows extensive editing of your screen appearance. At the lower right corner of this sheet are two radio buttons allowing you to make these edits global for all sessions, or restrict their use to this session only. Attributes Properties Sheet Default View • 30 Advanced (Recommended). This default selection provides a “graphics” appearance for your session screens, resembling a Windows application. All the Hot Spots are shown as raised buttons. Advanced View is the most productive way to operate in YEStablet emulation sessions since all menu items, Function Keys, sub-file options, and custom hot spots are always visible and accessible as raised buttons. The use of custom Hot Spot keywords, which can be linked to keyboard commands, often eliminates the need to use the virtual keyboard and reduces the number of screen taps required to run applications. YEStablet 7375 User Guide—YESterm IP Terminal Emulation Display Emulation Screen with Advanced View and Hot Spots • Standard (Not Recommended). This selection provides the standard green screen “text” appearance for your session screens, duplicating terminal screens. Hot Spots are invisible unless the mouse cursor is placed over one of them, and then only that one Hot Spot is visible. Obviously, operating within the Standard view can become tedious if you have any custom Hot Spots or are unfamiliar with the default Function Key and Option Hot Spots. Display Emulation Screen with Standard View and Hot Spots Either view can be overridden from the emulation screen Toolbars if desired. 31 YEStablet 7375 User Guide Attribute Settings (Standard View Only) Set the appearance of the attribute font on the screen. This includes properties such as foreground and background color, blinking, underscore, and the use of column separators. You will see a preview of the “new look” in the Sample field. Be careful with the colors you choose; a wrong choice can cause text or fields to be invisible on the screen because of lack of color contrast. • Edit (Column Separator). Activate this button to invoke this dialog box. Edit Column Separator Dialog Box Make your choices and view them in the Sample field. Hot Spot Changes made in this property sheet affect all sessions. There is only one Hot Spot configuration per emulator, not one per session. Hot Spot Properties Sheet 32 YEStablet 7375 User Guide—YESterm IP Terminal Emulation A Hot Spot is an area of the session window on which you can tap to execute a command or function. Actually, a Hot Spot is the result of a text search by the emulator for the specified Keyword on the screen. The Function Key and Numeric fields (from 1 to 255 followed by a "period" or "space" followed by text) Hot Spots are active by default; tapping on the numeric or alpha area of a Numeric field will send the numeral followed by the 5250 Enter key. You can also add other Hot Spot keys and/or edit/remove them. A Hot Spot can be used to: • Simulate a function key. • Execute a Recorded Sequence that has the same name as the word that you select on the screen. • Execute a command that you select. To enable the use of Hot Spots, you must check the Enable Hot Spots box. Advanced View (Default) Hot Spots are displayed as raised buttons if the Advanced View option is selected in the Attributes tab or the emulation screen Toolbars. Advanced View is the most productive way to operate in YEStablet emulation sessions since all menu items, Function Keys, sub-file options, and custom hot spots are always visible and accessible as raised buttons. The use of custom Hot Spot keywords, which can be linked to keyboard commands, often eliminates the need to use the virtual keyboard and reduces the number of screen taps required to run applications. Emulation Screen with Advanced View and Hot Spots Standard View (Not Recommended) If Standard View is selected in the Advanced tab or the emulation screen Toolbars, Hot Spots are invisible until the stylus cursor is dragged over them, and then only the one under the stylus cursor becomes visible. 33 YEStablet 7375 User Guide Emulation Screen with Standard View and Hot Spots NOTE: Standard View is not recommended because, in Standard View, Hot Spots are visible only when the stylus is positioned directly over the Hot Spot. Advanced View connects Hot Spots to full-time visible buttons, making the Hot Spot feature more intuitive and easier to use. To Edit a Hot Spot: 1. Select the Function Key you want to modify. 2. Click on Edit. 3. If you want to send a Text String to the host every time you tap the Function key, type it into the Text String field. 4. Select the Action from the Drop-Down List 5. From the drop-down list, select the command or the Recorded sequence that you want to associate to the Hot Spot key. 6. In c.80, specify where, in an 80-column screen, the text search engine should start looking for the specified Keyword. For example, the default start for the word “More” is column 68. So if there is a word “More” to the left of that column, it will not be defined as a Keyword or Hot Spot. 7. In c.132, specify where, in a 132-column screen, the text search engine should start looking for the specified Keyword. 8. Click on Accept. 9. Click on Apply. To Remove a pre-defined Hot Spot: 1. Select the Function Key. 2. Click on Remove. . To Add a Hot Spot: 1. Click on Add. 2. Type the Hot Spot Key Word you want to detect. If you want to send a Text String to the host, type it into the Text String field. 3. Select the Action from the Drop-Down List 34 YEStablet 7375 User Guide—YESterm IP Terminal Emulation 4. From the drop-down list, select the command or the Recorded sequence that you want to associate to the Hot Spot. 5. Specify the text search start columns in c.80 and c.132. 6. Click on Accept. 7. Click on Apply. Key Pad A Key Pad is a small window with several customizable push buttons, each having an assigned function. You can make it visible on the screen by clicking on the Key Pad button on the Buttons toolbar, or selecting View/Key Pad from the Menu bar. You can choose a function from the Key Pad with your stylus instead of typing the equivalent command, pressing a key, or running a Recorded Sequence. Emulation Screen with Key Pad The Key Pad tab allows you to change the characteristics of the pop-up Key Pad. Changes made in this property sheet affect all sessions. There is only one Key Pad configuration per emulator, not one per session. 35 YEStablet 7375 User Guide Key Pad Properties Sheet To Edit a Key Pad button: 1. Select the Function Key you want to modify from the Button Label list. 2. Click on Edit. 3. If you want to send a Text String to the host every time you press the Function key, type it into the Text String field. 4. Select the Action from the Drop-Down list 5. Select the command or the Recorded sequence from the Drop-Down list that you want to associate to the Hot Spot key. 6. Click on Accept. Click on Apply. To Remove a Key Pad button: 1. Select the Function Key you want to remove. 2. Click on Remove. To Add a Key Pad button: 1. Click on Add. 2. In the Name field, type the text you want to associate to the button when you pop up the Key Pad. The button name with the greatest number of characters will determine the width of all the buttons. 3. If you want to add a Text String to be sent to the host, type it into the Text String field. 4. Select the Action from the Drop-Down List. 5. From the Drop-Down list, select the command or the Recorded sequence that you want to associate to the Key Pad button. 6. Click on Accept. 7. Click on Apply. 36 YEStablet 7375 User Guide—YESterm IP Terminal Emulation Sign On (TN5250e Only) The Sign On feature of the emulator uses the "Enhanced Display Auto-Signon and Password Encryption" feature of the AS/400 to allow a secure connection to the AS/400 without using SSL. Sign On Properties Sheet (TN5250e Only) For this feature to work to your benefit, the "Remote Signon" parameter of the AS/400 configuration should be enabled. To verify if this parameter is enabled, use the WRKSYSVAL command. To enable this parameter, you may use the following command: CHGSYSVAL SYSVAL(QRMTSIGN) VALUE('*VERIFY') 37 YEStablet 7375 User Guide Advanced The Advanced property sheet allows enabling/disabling of several useful features. Advanced Properties Sheet Appearance • • Show Menu and Toolbar. If you want to eliminate the “Windows” look, uncheck this box. In addition to changing the appearance, this will also prevent the user from using Hot Spots or Key Pad, and from viewing the keyboard mapping. Status Bar type. o Classic 5250. Provides the classic “green screen” look in the status bar. o Graphic. Provides the “Windows” look to the status bar and displays the connection name. Security Configuration YESterm IP provides extreme flexibility in allowing, or prohibiting, the user to view and change the characteristics of the display screen. If you choose to show the Menu and Tool bars in Appearance above, you can choose to individually enable or hide every option item shown in the Menu bar, and its corresponding button in the Buttons bar. The default is that all options except Properties are enabled. 1. Select the appropriate item from the drop-down list 2. Click on the Enable… check box. to insert a check in the check box, or to remove one that is already there. 38 YEStablet 7375 User Guide—YESterm IP Terminal Emulation Host Device Connection When using named devices, careless name assignment or unusual session activation circumstances, such as a power failure/reconnect, can cause two sessions to request the same name. In such a case, the host will not open the second session. Checking the Allow request of…. box will cause the emulator to request a virtual assignment for the second session if it is rejected because of name conflict. This doesn’t fix the basic problem, but at least the session can be opened. IBM recommends setting the host “Keep Alive Timeout” to 40 seconds in order to facilitate reconnection of named sessions. On an AS/400, the command CHGTELNA, executed from an AS/400 green screen, followed by the F4 key will display the screen that controls the setting of this parameter. Miscellaneous None of these items are applicable in the 7375. Finale Don’t forget to save the session and all these configuration properties by executing a Registries Save from the Control Panel before your next Cold Boot. 39 YEStablet 7375 User Guide Printer Session Setup You can have multiple local printers, either physically attached via USB or virtually attached over the TCP/IP network, but you must create a printer session for each one. Setup and configuration are initiated from the YESterm IP Administrator window. Click on Add. You are faced with a choice of four emulation types. After choosing TN3270e Printer or TN5250e Printer, a wizard will guide you through setup. You can have a maximum of four printer and/or display emulation sessions, with any mixture of 5250 and 3270 emulations. Each session may have a unique host and/or a unique printer, if desired. If you want to create a session for extended local Print Screens (see Display Session Configuration|General|Print Screen), you can create it here, but you will have to edit it later (see Printer Session Configuration) since the default is for standard host printing. A Setup Wizard will take you through three screens. 1. Printer Setup Screen #1 • • 40 Host Name/IP Address: If you have a local DNS server, you can type in the AS/400 host network name. Otherwise, type in the IP address of the AS/400 server. If you are creating this session for Extended Local Printing, an IP address is irrelevant, but you must enter at least one character to satisfy the Wizard. Port Number: Use the default of 23 unless directed otherwise by your network administrator. YEStablet 7375 User Guide—YESterm IP Terminal Emulation 2. Printer Screen #2 • • • Connection Name: This is the friendly name that will appear in the Terminal Connection Manager screen. Device Type: Only 3812 (TN5250e) or 3287 (TN3270e is available for TCP/IP devices. Device Name: If you are using named sessions, enter the session name here. 3. Final Printer Setup Screen • • Host Code Page: Choose the applicable country from the drop-down list. Printer Driver: If you are doing extended local Print Screens, or if you are not using the AS/400 Host Print Transform, choose a driver here that is compatible with the target printer. If you can’t find one in the list, try Empty Driver. This concludes the configuration parameters covered by the wizard. However, you can customize many more parameters in each Printer Session by highlighting the connection name in the YESterm IP Administrator and activating Edit. 41 YEStablet 7375 User Guide Printer Session Configuration Open YESterm IP Administrator, highlight a printer session, and click on Edit. For TN5250e sessions, you will see a Printer Sessions Properties sheet with six properties tabs. For TN3270e sessions, you will see a Printer Sessions Properties sheet with four properties tabs. The opening view is of the Connections tab and properties sheet. Connection (TN5250e) Connection Properties Sheet for TN5250e Five of the eight parameters on this property sheet were already configured in the Setup Wizard, although you can change them here if you wish. The additional three parameters are: • Encryption Level. If you want to encrypt the network traffic with the host, choose an appropriate encryption level from the drop-down list. Your AS/400 must also be configured for this encryption level. • Use this session to support…. If this session is used for Extended Local Printing, check this box. • Automatic Startup (not shown above). Check this square if you wish the session to automatically start after a Cold Boot. But you may find this of little value, since typically the session will report a failed connection because it takes several seconds after bootup for the wireless adapter to connect to an access port. 42 YEStablet 7375 User Guide—YESterm IP Terminal Emulation Connection (TN3270e) Connection Properties Sheet for TN3270e Six of the nine parameters on this property sheet were already configured in the Setup Wizard, although you can change them here if you wish. The additional parameters are: • Use this session to support…. If this session is used for Print Screen Extended Local Printing, check this box. • Associate device. Usually a printer session is associated with a specific printer device name. However, there are some mainframe configurations with no "free" printer devices, but only printer devices associated to specific display devices. In this case, you have to specify a display session name to which a printer is associated. • Automatic Startup (not shown above). Check this square if you wish the session to automatically start after a Cold Boot. But you may find this of little value, since typically the session will report a failed connection because it takes several seconds after bootup for the wireless adapter to connect to an access port. 43 YEStablet 7375 User Guide Input (TN5250e) The Input tab allows you to define specific parameters that affect the appearance of the printed page. Note: If you are using Host Print Transform (see Advanced), the Input settings do not apply. Input Properties Sheet for TN5250e Language YESterm IP supports a number of different Code Pages. The Code Page selected here should be the same as that configured on the AS/400 for the specific device. Ignore the Code Page Edit button, since Code Page editing is not supported in the 7375. Page Layout Set the Default Page layout. Parameters are: • Page Orientation. Select from Portrait, Landscape, and COR (Computer Output Reduction). Note: If you are using an impact dot-matrix printer, Portrait is recommended. • Automatic Page Orientation. This option is enabled by Default. Note: If you are using an impact dot-matrix printer, it is recommended that this be Disabled. • COR Line Spacing Reduction. This feature solves the problem of nonprintable margin area on the printer. Note: It is recommended that this feature be used only with laser printers. • COR Override. This function corresponds to the IBM 3812 configuration parameter and defines that a job with draft quality is printed in COR. Overrides If you wish to override the host system output settings, you can do so here. Note: If you are using an impact dot-matrix printer, it is recommended that you set Print Quality to Force Draft. 44 YEStablet 7375 User Guide—YESterm IP Terminal Emulation Input (TN3270e) Input Properties Sheet for TN3270e Language YESterm/IP supports a number of different Code Pages. The Code Page selected here from the drop-down list should be the same as that configured on the mainframe for the specific device. Ignore the Code Page Edit button, since Code Page editing is not supported in the 7375. Default Page Settings Select the desired default settings from the drop-down lists and enter the maximum print parameters. Note: If you are using an impact dot-matrix printer, Portrait is recommended for Page Orientation. 45 YEStablet 7375 User Guide Output The Output properties define the communication with the printer. Output Properties Sheet Time Out This parameter defines a timer (in seconds) that starts to count down every time, during a printing job, that the host system stops sending data. If no more data are received within the timeout value selected, the Printer Session will assume that the print job is finished, and a Form Feed command is sent to the printer. Printer Driver The Passthrough Drivers offered here, specifically developed by Affirmative Computer Products, generate a standard text data stream. This means that everything is sent to the printer in text mode allowing better control of the printer and better performance. • Select a PassThrough Driver…. YESterm IP provides a drop-down list of pre-configured Printer Profiles for your selection and use. Even if your printer is not on this list, it probably emulates one of the listed printers. Note: There are two HP PCL drivers. It is recommended that you use HP PCL (Standard COR) for U.S. operation and HP PCL Laser Emulation for European operation. • Euro. If your printer is Euro ready, you may wish to bypass the PassThrough Euro sequence. To do so, activate the Euro button to bring up the Euro Mode dialog box. Make your selection and choose a Code Page character. 46 YEStablet 7375 User Guide—YESterm IP Terminal Emulation Euro Mode Dialog Box • Driver Configuration. If you wish, you can modify parameters of a listed driver. For more information on how to customize or create a new Passthrough Printer Driver, refer to: How To…..|Modify the Passthrough Driver. . Printer Port Ignore the Parallel Port and COM1/2 radio buttons, even though they are not grayed out. Only LAN or USB printers can be used with the YEStablet 7375, since there are no LPT or COM ports. No configuration is necessary here for a USB printer, but you must configure LAN printers. LAN Printer Activate the LAN Configuration button to open the LAN Printer Configuration dialog box. LAN Printer Configuration Dialog Box 47 YEStablet 7375 User Guide • • • LPR printer. If there is an LPD printer on your network, you can make this selection and enter the appropriate parameters. RAW printer. If you have a network printer that can take direct print stream input without being LPD-ready, make this selection and enter the appropriate parameters SMB printer. If your network printer is accessed through a print server, make this selection and enter the appropriate parameters. Hex Passthrough (HPT) (TN5250e Only) Hex Passthrough allows portions of a data stream to be sent directly from the host to the printer. There is no modification done to these portions by the emulator driver. In order for the emulator to recognize these inviolate data stream portions, they must be identified at the beginning and end by escape sequences – a combination of special characters that the emulator can identify. Hex Passthrough Properties Sheet for TN5250e • • 48 Sequences. Enter the Leading Sequence and the Trailing Sequence you want to use. The default sequences are %&, %&. You can enter up to 4 characters for each sequence. HPT Mode. Select one of four modes to define rather or not HPT prints spaces and rather or not it updates the column counter. YEStablet 7375 User Guide—YESterm IP Terminal Emulation Advanced (TN5250e Only) The Advanced Tab allows you to set Default parameters and enable the Host Transform feature. Advanced Properties Sheet for TN5250e • • • • Message Queue Name. Default is QSYSOPR. Message Queue Library. Default is *LIBL. Default Font. Default is 011. Host Transform. When Host Print Transform is enabled, the host does the EBCDIC-to-ASCII conversion of the print stream, and the local Passthrough Driver is not used. • Printer. You must choose a compatible model from the drop-down list. Your AS/400 may have a more extensive list of compatible printers. If your printer is on the AS/400 list, but not on our list, you can type in the printer model here as it appears in the AS/400 list; be sure to put an asterisk in front of the model name. • Drawer # 1. Choose an input print media size if applicable. • Drawer # 2. Choose an input print media size if applicable. • Envelope. Choose an envelope size if applicable. • Customizing Object Name. Enter the object name here if you have chosen *WSCTS from the Printer drop-down list. • Customizing Object Library. Enter the object library name here if you have chosen *WSCTS from the Printer drop-down list. 49 YEStablet 7375 User Guide Miscellaneous Miscellaneous Properties Sheet • • Security Configuration. Default mode is to hide the Properties entries from the Tool bar and the Menu bar so that the user cannot make configuration changes. Check this box if you wish to provide user access to the configuration parameters. Debug Trace. This is not applicable in the 7370. Finale Don’t forget to save the session and all these configuration properties by executing a Registries Save from the Control Panel before your next Cold Boot. 50 YEStablet 7375 User Guide—YESterm IP Terminal Emulation Display Session Operation Menu Bar Menu bar commands of the Display Session window consist of commands and functions that are unique for each window (session). Display Session Menu Bar The system administrator may disable any or all of the Menu bar commands. See Display Session Configuration|Advanced|Security Configuration. Open the desired menu by clicking on the menu name File (Alt) Display File Menu • • • • • • Connect (n). A display session typically comes up in the connected state. But if, for some reason, the session is not connected, this command will attempt to connect the Display Session to the host. Disconnect (d). This command disconnects the Display Session from the host. It is recommended that you disconnect only from the Sign-On screen. Properties (p)… This command allows you to edit/modify the Properties of the Display Session in use. For more information on this function, please refer to Display Session Configuration. When you change properties here, most changes are effective immediately. . Print (r). This command prints the contents of the display screen to the printer designated in Display Session Configuration|General|Print Screen. Close All (a). This command closes all active sessions, including printer sessions. Close (c). This command closes the Display Session in use. Edit Display Edit Menu • Copy (c). This command copies, into the Clipboard, data contained in the selected area without removing (clearing) it from the display. The copy process is: 3. Use the stylus cursor to draw a box around the area to be copied. Be precise when you draw the box, or else the paste process may try to copy the data into a restricted area. The selected area will be highlighted in white. 51 YEStablet 7375 User Guide • 4. Open the Edit menu. 5. Activate Copy. Note: Copy does not duplicate host attributes such as color and intensity. 6. Return the stylus cursor to the green screen and click. The white highlight will disappear. Paste (p). This command pastes the current contents of the Clipboard onto the session window, starting at the current cursor position. If the contents of the clipboard are larger than the space available in the presentation space (screen), they may be clipped. Paste does not overlay the clipboard contents onto areas that are protected by the host application. Note: Copy and Paste only work within emulation sessions. You cannot move text between Windows applications and emulation sessions. Tools Display Tools Menu Tools commands allow you to work with the Record/Playback function. If you regularly do the same things when you work with a host system, it is convenient to record the keystrokes you make and have YESterm IP play them back when you want to do the same job again. Record/Playback allows you to do this. All your keystrokes can be saved in a macro file; when you play the file back (Playback), everything that happened will be reproduced exactly. Any macro that you create is available in all display emulation sessions. For more information on how to work with Record/Playback, refer to How To…|Record a Keystrokes Sequence. • • Start Recording (s). This command starts the Keystrokes Recording process. Stop Recording (r). This command stops the Keystrokes Recording process. Macro Recording Dialog Box • 52 When you Stop Recording, the Macro Recording dialog box will be displayed, allowing you to save the recorded keystrokes into a named file for subsequent playback. Pause Recording (p). Including a Pause command into a recorded sequence will cause the Playback operation to pause at this point in the sequence. This pause is typically used to enter variable data during Playback. YEStablet 7375 User Guide—YESterm IP Terminal Emulation • Delete Macro (d). This command will bring up the Recorded Macro Delete dialog box. Recorded Macro Delete Dialog Box • In this box will be a list of the available macros for this session. Select the one to be deleted and activate OK. This macro will now be deleted from all display emulation sessions. Playback. No, you don’t see an actual Playback command. But, at the bottom of the Tools menu below the line, you will see a list of the available macros. Click on the one to be played, and that macro will then be executed. View Commands in the View menu are used to manipulate the Emulator display window. View Menu • Toolbar (t). This toggle command hides or displays the Menu and Button toolbars. When the bars are hidden, you will see a Menu button in the upper left corner. Click on this button to reveal the toolbars again. 53 YEStablet 7375 User Guide • • • Ruler (r). This toggle command hides or displays the crosshairs Ruler. When the command is checked, the Ruler is displayed. Attributes (a). This command is not applicable in the 7375. Advanced View. This toggle command activates/deactivates the graphics Windows look, with Hot Spots displayed as raised buttons if they have been enabled. Emulation Screen with Advanced View and Hot Spots • For more information on the Hot Spot feature, refer to Display Session Configuration|Hot Spot. Keypad (k). This toggle command hides or displays the Key Pad. The Key Pad can be repositioned as desired on the screen by dragging and dropping. Partial Emulation Screen Showing Keypad For more information on the Key Pad feature, refer to Display Session Configuration|Key Pad 54 YEStablet 7375 User Guide—YESterm IP Terminal Emulation ? ? Drop-Down Menu • • • Contents (c). This command is not used in the 7375. Keyboard Help…(k). This command displays the keyboard map in use. You can see the mapping, but you cannot edit it from this screen. This display can be used in two ways: 1. If you click on a key to which a command has been mapped, you will see that command highlighted in the List Box. 2. If you highlight a command in the List Box, the key or key combination that executes that command will be highlighted on the keyboard graphic. Some commands can be executed from several different key combinations. In that case, you will see the notation (x of y), which indicates that this is the xth sequence out of y possibilities. To cycle through the combinations for that command, click on Next Sequence. About… (a). This command displays detailed information on the YESterm IP program such as version, copyrights, and other useful information. Button Bar The Button bar is displayed across the top of the application window to the right of the Menu bar. The Button bar provides quick access to commands you use on a regular basis. If you do not need it, you can hide it and the Menu bar to increase the size of your display window. When the toolbar is displayed, a check mark appears next to the Toolbar option in the View menu. Display Emulation Screen Buttons Bar The system administrator may disable any or all of the Menu bar commands. See Display Session Configuration|Advanced|Security Configuration The command/button definitions are: Connect. Duplicates the function of the menu File|Connect command. Disconnect. Duplicates the function of the menu File|Disconnect command. Print. Duplicates the function of the menu File|Print command. 55 YEStablet 7375 User Guide Properties. Duplicates the function of the menu File|Properties command. Start Recording. Duplicates the function of the menu Tools|Start Recording command. In fact, if you use the menu version, you will see that this button is also depressed. Pause. Duplicates the function of the menu Tools|Pause command. If you use the menu version, you will see that this button is also depressed. Stop Recording. Duplicates the function of the menu Tools|Stop Recording command. Play. When this button is pressed, a list of recorded macros is shown. Click on the desired macro to execute the corresponding recorded key sequence. Playback. Displays a list of available macros. Click on the one to be played, and that macro will then be executed. Ruler. Duplicates the function of the menu View|Ruler command. Attributes. Duplicates the non-function of the menu View|Attributes command. Hot Spots. Duplicates the function of the menu View|Advanced View command. Keypad. Duplicates the function of the menu View|Keypad command. Keyboard Help. Duplicates the function of the menu ?|Keyboard Help command. Contents. Duplicates the function of the menu ?|Contents command. 56 YEStablet 7375 User Guide—YESterm IP Terminal Emulation I, II, III, IV. These buttons correspond to the emulation sessions shown in order in the YESterm IP Administrator window. Inactive sessions will have corresponding grayed-out buttons, while buttons for active sessions will not be grayed-out. To jump to another active session, just click on the button for that session. 57 YEStablet 7375 User Guide Printer Session Operation Menu Bar Menu commands of the Printer Session window consist of commands and functions that are unique for each printer window (session). Open the desired menu by clicking on the menu name. You can also view the File menu by pressing and releasing the Alt key. Printer Session Menu Bar File (Alt) Printer File Menu Connect (n). A Printer Session typically comes up in the connected state. But if, for some reason, the session is not connected, this command will attempt to connect the Printer Session to the host. • Disconnect (d). This command disconnects the Printer Session from the host. Properties… (p). This command allows you to view/edit/modify the Properties of the Printer Session in use. It will be grayed out and inactive unless it has been enabled in Printer Session Configuration|Miscellaneous. For more information on Properties, please refer to Printer Session Configuration. When you change properties here, most changes are effective immediately. Close (c). This command closes the Printer Session. Tools Printer Tools Menu 1. Abort Print Job (a). This command aborts the print job in process. Clear Document List (c). This command clears the Document List. The Document List contains a history of all documents printed since the session was started. . ? Printer Help Menu Contents (c). This command is not used. 58 YEStablet 7375 User Guide—YESterm IP Terminal Emulation About… (a). This command displays detailed information on the YESterm IP program such as version, copyrights, and other useful information. Button Bar The Button bar is displayed across the top of the application window to the right of the Menu bar. The Button bar provides quick access to commands you use on a regular basis. The command/button definitions are: Connect. Duplicates the function of the menu File|Connect command. Disconnect. Duplicates the function of the menu File|Disconnect command. Properties. Duplicates the function of the menu File|Properties command. Contents. Duplicates the function of the menu ?|Contents command. I, II, III, IV. These buttons correspond to the emulation sessions shown in order in the YESterm IP Administrator window. Inactive sessions will have corresponding grayed-out buttons, while buttons for active sessions will not be grayed-out. To jump to another active session, just click on the button for that session. 59 YEStablet 7375 User Guide How To …. Create a Custom Keyboard Map To do this, select, in Display Session Configuration|General, one of the available Keyboard Layouts (the one that best matches the one you want to create) and click on Edit. Assuming that you chose the 101 terminal keyboard for U.S. English, the following screen will appear. 101 Terminal Keyboard Map Page Select the key, or key plus modifier (Ctrl, Alt, Shift) to which you want to associate a specific action. On the upper half of the window, you can see the keyboard Scan-Code and the default associated action. To modify the action, click on Edit. The following dialog box will appear: Edit Scancode Map Dialog Box 60 YEStablet 7375 User Guide—YESterm IP Terminal Emulation From the Action drop-down list, you can select the action that you want to associate with the selected key from among the following options: No operation. No action will be performed when you press the key. Command. Choose the desired command function from the lower drop-down list. Recorded Sequence. If you have previously recorded one or more key sequences, you will see their names in the lower drop-down list. Choose the desired Recorded Sequence from this list. EBCDIC Characters Sequence. Enter the Scan-Code sequence you want to associate to the key. Although you can use this to enter multiple characters, like a Recorded Sequence, this option is typically used to access some special character not normally seen on a keyboard. Note: Typically, the two End keys in the 101 terminal keyboard will already be mapped to the 5250 Enter command. Record a Keystrokes Sequence (Macro) If you regularly do the same things when you work with a host system, it is convenient to record the keystrokes you make and have YESterm IP play them back when you want to do the same job again. Record/Playback allows you to do this. All your keystrokes can be saved in a file; when you play the file back (Playback), everything that happened will be reproduced Any macro that you create is available in all display emulation sessions. The procedure for creating a Keystroke sequence is: 1. Open a display session. 2. Place the cursor in the field where you wish to start the sequence. 3. Activate Tools|Start Recording or click on the corresponding button. 4. Key the data and cursor movements that you want to record. 5. Stop the Recording by activating Tools|Stop Recording or clicking on the corresponding button. 6. Name the recorded Keystroke sequence in the resulting Macro Recording window. There are no naming restrictions. Example: Assume you want to record the CL command to display the description of a specific device. The command is WRKDEVD PRTXXXX, where PRTXXXX identifies a specific Printer. So, the procedure is: 1. Place the cursor. 2. Activate Start the Recording. 3. Type WRKDEVD 4. Activate Pause. 5. Type PRTXXXX (the name of the device) and press Enter. 6. Activate Stop the Recording. When you stop, you will be prompted to save the recorded keystrokes to a file. Note: The Pause function will automatically end when you press the Enter key. Play a Recorded Keystrokes Sequence (Macro) In order to play a recorded keystrokes sequence in a graphics display session, you have to: 1. Place the cursor on the screen where you want to play the sequence. 2. Click on Tools in the File menu, or click on the Playback button. 3. You will see a list of available macros. Click on the one you wish, and the sequence will be executed. If you have assigned a sequence to a key as part of a custom keyboard map, you can also play the sequence as follows: 1. Place the cursor on the screen where you want to play the sequence. 2. Press the designated key. The sequence will be executed. 61 YEStablet 7375 User Guide Modify a Printer Passthrough Driver Any Passthrough Driver in the Printer Session Configuration|Output|Printer Driver drop-down list can be customized, and it is also possible to create a new Driver. To edit an existing Passthrough Driver, do the following: 1. Highlight the connection name in the Configure tab of Connection Manager and activate Edit. 2. Select the Driver from the drop-down list and activate Driver Configuration in the Output. You will see a screen with five tabs. General Driver General Properties Sheet This sheet allows you to select: Variable Line Spacing. If you enable this function you must enter the Inch fractions. Default Tray. Permanent Save. You must check this box if you wish to save the driver changes. New Driver Name. This name will appear in the Passthrough Driver drop-down list if you check Permanent Save. The default new name is User- in front of the selected driver name. But you can enter a completely new name if you wish. 62 YEStablet 7375 User Guide—YESterm IP Terminal Emulation Transcode Table Driver Transcode Properties Sheet This sheet allows you to: Define the Default Code Page. Pick your desired code page from the Code drop-down list. Customize the Escape sequence used to call the Code Page. Select the Code Page from the list, activate Edit, and an Edit Passthrough Sequence dialog box will appear where you can enter the new value. Transcode Edit Passthrough Sequence Dialog Box The Edit Code Page button is not applicable in the YEStablet 7375. 63 YEStablet 7375 User Guide Escape Sequences Driver Escape Sequences Properties Sheet This sheet allows you to customize all the Escape commands used to perform specific functions. Select a function, activate Edit, and an Edit Passthrough Sequence dialog box will appear. Make your changes there. Edit Passthrough Sequence Dialog Box 64 YEStablet 7375 User Guide—YESterm IP Terminal Emulation Euro Driver Euro Properties Sheet This sheet allows you to customize the Escape command used to print the Euro symbol. This special function allows you to print the Euro symbol even on those printers that are not Euro ready. Select the command you wish to customize, then activate Edit, and an Edit Passthrough Sequence dialog box will appear where you can enter the new value. Edit Passthrough Sequence Dialog Box 65 YEStablet 7375 User Guide Font ID Driver Font ID Properties Sheet This sheet allows you to customize the Escape commands used to call a Printer Font that has been associated with a Host System Font ID. To edit a Font ID, select the item, activate Edit, and an Edit Font ID and Sequence dialog box will appear where you can enter the new value. Edit Font ID and Sequence Dialog Box You can also remove a font or add a new font to the list. If you activate Add, an Edit Font ID and Sequence dialog box will appear where you can enter the new values. 66 YEStablet 7375 User Guide—Cisco Aironet WLAN Adapter APPENDIX 1. CISCO AIRONET WLAN ADAPTER In general, when the WLAN network adapter is detected, the 802.1x, zero-configuration support offered by Windows CE .NET invokes a set of windows to define and invoke the wireless link. While convenient and functional, this method does not always offer comprehensive monitoring and configuration of the WLAN environment for maximum utility. Under most software configurations, the 7375 is equipped with full support for the Cisco Aironet WLAN adapter, beyond the features offered by the 802.1x, zeroconfiguration support native to Windows CE .NET. When the above applies, and if a Cisco Aironet WLAN PC Card adapter is used with the 7375, then the adapter would have to be configured using the utilities available through the Aironet-specific set of drivers installed into the 7375. The result is a more-detailed adaptation to the network, including the ability to have the 7375 operate within EAP/LEAP-secured networks. When the Aironet adapter is detected, the network icon (identical to that for tethered networking) in the System Tray is displayed. If the network is not accessible, an “X” appears across the icon, as shown here. The network adapter is configured for network access through the Aironet Client Utility accessible via Start > Programs > Cisco > ACU. The ACU offers a rich set of configurable parameters and monitoring tools. The WLAN adapter in general may be disabled. This is done by accessing Start > Settings > Control Panel > Network and Dialup Connections to display the adapter in question. Right click over the adapter icon and select Disable. The network icon will disappear from the System Tray. To re-enable the adapter, right click over the icon and select Enable. There may be a wait of up to a minute for the network adapter to be re-enabled and the icon to re-appear in the System Tray. The following figures highlight the access to the utilities, the parameters that are configurable, and the features that may be monitored. Invoking the ACU or Aironet Client Utility 67 YEStablet 7375 User Guide ACU Status Tab Adapter Profile Setup 68 YEStablet 7375 User Guide—Cisco Aironet WLAN Adapter Adapter’s Network Connection Information Disabling the Network Adapter 69 YEStablet 7375 User Guide THIS PAGE INTENTIONALLY LEFT BLANK 70 YEStablet 7375 User Guide—List of Accessories APPENDIX 2. LIST OF 7375 ACCESSORIES Part Number Description 9370 Stylus Proper tool to operate the Tablet's touch display. Available in kits only; 3 pieces per kit. 9371 Wall-Mount Cradle Assembly VESA-compatible, Wall- and Desk-Mountable structure offers Tablet storage, security, and connectivity to power, USB accessories, and PCs. 9373 9374 Internal Battery Pack (Li-Ion, 14W) Replacement or backup spare for internal battery pack. External Battery Pack (Li-Ion, 20W) External, snap-on, hot-swappable battery pack - more than doubles duration of mobile operation. External Battery Charger Kit (with AC Adapter & Power Cord) Recharges external battery pack "offline" without affecting usage of tablet. 9375 9376 9377 AC-DC Power Adapter (12V, 3.5A, 42W) with Power Cord Facilitates battery recharge or Tablet operation through direct connection to the Tablet or via the Power Jack in the tablet Cradle. (Choice of US, UK or EU power cord.) Protective Jacket and Shoulder Strap Custom designed and fitted to protect your Tablet, and for convenience in mobile operation Vehicle Mounting Stand Vehicle- and platform-mountable structure offers tablet storage and security. 9379 9381 Automobile Power Adapter (12V) Use with power outlets in vehicles to facilitate tablet usage and/or battery recharge. 71 YEStablet 7375 User Guide Part Number 9384 New New New 72 Description Screen Protectors for 8.4" Display (10 sheets per package) Replaceable custom-fitted screen protectors shield your display screen from fingerprints, scratches and dust, while maintaining comfortable input. SOCKET "CF In-Hand" Bar-Code Scanner CompactFlash card-based scanner offers convenient operation especially in conjunction with programmable buttons on the Tablet. Enhanced Cradle Assembly Tablet storage and support with ports to DC power and PC systems. Carrying Pouch Professionally designed and custom fitted for light protection and handling of the Tablet. YEStablet 7375 User Guide—Optional External Battery Pack APPENDIX 3. OPTIONAL EXTERNAL BATTERY PACK The external battery pack (Figure 1) for the 7375 is intended to add at least 130% to the battery capacity of the internal battery pack. It is hot-swappable and attaches to the upper rear of the 7375 in the area around the corresponding electrical contact pins. Figure 1 Figure 2 To attach the battery pack, align (and insert) the two lower tabs on the external battery pack with the two grooves in the designated area (Figure 2). After insertion into the grooves, squeeze the two tabs at the sides of the battery pack while pushing it flat against the rear surface of the 7375. Release the two tabs and verify that the battery pack is secure and flush against the 7375. To detach the battery pack, squeeze on the two side-tabs of the battery pack simultaneously and pull the battery pack up (to clear the rear grooves) and away from the rear surface of the 7375. Since the external battery pack is hot-swappable, you may attach or detach the external battery pack while the 7375 is operational. When the external battery pack is in place, - the 7375 will draw power from the external battery pack first; - if the AC-DC adapter is applied to the system, both the internal and external battery packs will be charged simultaneously. 73 7375 Operation Guide THIS PAGE INTENTIONALLY LEFT BLANK 74 375V0503.0123 YEStablet 7375 User Guide—Optional External Battery Charger Kit APPENDIX 4. OPTIONAL EXTERNAL BATTERY CHARGER KIT The External Battery Charger Kit is available for use with the optional external battery pack of the 7375. The Kit comprises a battery cradle (Figure 1) and a matching AC-DC adapter and power cord. Figure 1: External Battery Charger Kit – Battery Cradle, AC-DC Adapter, and Power Cord. The battery cradle features: • a DC-input jack • two connector interfaces with protective covers • two LEDs – as power and charging indicators Application: 1. Connect the AC-DC adapter cable to the DC-input jack (Figure 2). Figure 2 Figure 3: Battery Cradle with protective patches removed. 2. The power (Green) LED lights up and stays solid to indicate that power is supplied to the cradle. 3. Remove the protective patch on the cradle to expose the connector interface that matches with the battery pack to be charged (Figure 3). 75 YEStablet 7375 User Guide 4. Attach the battery pack to the battery cradle (Figure 4). Figure 4: Insertion of 7375 External Battery Pack. 5. 6. 7. 8. The charging (Yellow) LED lights up if the battery pack is being recharged. When charging is complete or if the battery pack is fully charged, the LED will show solid Green. If the charging LED does not light up at all, the battery is bad. The battery warranty is ninety days. Do not forget to replace the protective rubber patch after the battery pack has been removed. NOTE: The cradle and battery pack are designed to be held together with the cradle placed horizontally. When the battery pack is seated on the cradle, do not orient the package in a non-horizontal position. 76 YEStablet 7375 User Guide—CompactFlash Bar Code Scanner APPENDIX 5. COMPACTFLASH BAR CODE SCANNER The “In-Hand™ Scan Card” bar code scanner by Socket Communications is offered as an optional accessory to the 7375 tablet. This 7375 option is customized to fit intuitively into the CompactFlash® slot along the top edge of the tablet. A hard button on the tablet can be programmed (see Button Settings in Control Panel) or may already be pre-programmed to trigger the scanner function. Button #10 is a popular choice. NOTE: Although this Appendix highlights the CF bar code scanner, the 7375 also supports a wide range of USB-based scanners which may be more readily available and more cost-effective. The support for these USB-based scanners is also likely to be “plug-and-play”, without any need for custom device drivers. 77 7375 Operation Guide THIS PAGE INTENTIONALLY LEFT BLANK 78 375V0503.0123 YEStablet 7375 User Guide—Using the Wall-Mount and Vehicle-Mount Accessories APPENDIX 6. USING THE WALL-MOUNT AND VEHICLE-MOUNT ACCESSORIES The optional wall- and vehicle-mount accessories for the 7375 are designed to complement the bundled desktop cradle in offering support and connectivity for the tablet in a broader range of deployments. Wall-Mount Cradle The cradle is characterized by: • VESA-compatible mounting holes for attachment to VESA-compliant arms or mounts (75mm and 100mm pitch; screws provided; VESA arms not included); • Openings for wall-mounting (screws not provided); • A set of extension brackets (screws provided) for routing and storage of connection cables; • Flip-down retainer for electrical interface activation and mechanical security and lockdown features; • Connector interface for 12V Power input, USB Host/Client and Ethernet (RJ45) connectivity; • Power LED indicating engagement of micro-switch and activation of cradle-to-tablet interface. Application: 1. Choose and implement the mounting method. 2. Supply power to the cradle. This may be accomplished by connecting the 12V power input on the cradle (i) TO the AC-DC adapter provided with the tablet/cradle; OR (ii) TO a DC-DC adapter connected to a DC power source. In addition, the cradle’s electrical interface can be powered by the seated 7375 with adequate internal or external battery capacity and in the absence of (i) and (ii). 3. NOTE: An optional 12-24V to 12V DC-DC adapter that fits into an automobile cigarette-lighter plug or power outlet is available. 4. Make sure the protective jacket for the 7375 is in place over the tablet. In this manner, the tablet will fit snugly within the side arms of the cradle. 5. With the tablet seated in the cradle, flip the retainer cap down from the top. 6. The Power LED light should come on indicating that the cradle-to-tablet electrical interface has been activated. 7. From now on, all the interface ports (unless disabled by tablet provider) should be enabled for usage. 8. Apply a locking device on the retainer cap if desired. 9. To remove the tablet for mobile usage, flip up the retainer cap (remove any locking device first) and disengage the tablet from the connector firmly but carefully. Application Notes: Prevailing implementation of the mountable cradle is such that: • For any of the interface ports to function, the flip-down retainer has to be engaged, so as to have power supplied to the interface electronics as reflected in the glowing Power LED. If this condition is not met, the cradle will function only as storage and support for the tablet. • Power will NOT be drawn from the 7375 if there is power being supplied to the cradle’s DC-in port. • Use the USB Type A or Host port on the cradle for keyboard/mouse input devices, printers, or external storage.. The functionality with other USB peripherals may be subject to validation on a case-by-case basis. Please also consider the USB port on the 7375 tablet as an available and effective option. 79 YEStablet 7375 User Guide Assembly Notes: The Mountable Cradle may be bundled with a set of lower extension brackets to offer added elegance and convenience in the deployment of the 7375. Its use is optional. This kit comprises front (A) and rear (B) brackets with matching screws provided. (A) (B) The assembly process is as follows: 1. Connect the applicable cables to the ports on the cradle bottom; 2. Attach front bracket (A) to the cradle body – flat surface facing front and screw holes aligned; cables routed within – and secure with 2 screws provided; 3. NOTE: you may store the AC-DC adapter in the front bracket cavity if you choose (this space may not be large enough for other adapters in general, say, DC-DC); 4. NOTE: for wall mounting, the rear bracket (B) is unnecessary; you may stop here and secure the assembly to the wall through the 4-6 openings available (screws not provided); 5. To mount the rear bracket, first remove and save the lower row of (2) screws from the rear of the cradle body; 6. Slip the rear bracket partially over the rear with screw holes aligned with the exposed holes from the previous step; make sure the cables stay properly routed and the lower edge snaps into matching elements on the front bracket; 7. Re-secure the lower row of screws onto the main body with the rear bracket now included. 8. The completed assembly is now ready for assembly onto any applicable VESA arms. Vehicle-Mount Stand • • • • 80 The vehicle-mount stand is designed for support only. No connectivity is offered through the stand itself, and there is no provision for a locking device. The height and orientation of the stand can be adjusted. The standard cradle must be used with the stand to provide connectivity and proper fit. The tablet can be mounted either with or without the standard protective rubber jacket. YEStablet 7375 User Guide—Using the Custom Carrying Pouch APPENDIX 7. USING THE CUSTOM CARRYING POUCH The custom carrying pouch for the 7375 is developed to provide fit and functionality with the tablet inserted. The current design features a retainer section with a fold down cover. The elastic-bound retainer features cutouts on a hard cover for operation with the tablet in place. The fold-down cover doubles as a stand – fold the cover over in the opposite direction and secure in place with the tab latch. The strap on the outer surface of the retainer section offers the option of securing the palm or fingers of a hand holding the pouch while operating the 7375 tablet. The carrying pouch cannot be used with the external battery pack or the protective jacket in place. 81 YEStablet 7375 User Guide THIS PAGE INTENTIONALLY LEFT BLANK 82 YEStablet 7375 User Guide—Using the Screen Protectors APPENDIX 8. USING THE SCREEN PROTECTORS Custom-fitted screen protectors are offered as an accessory for the 7375. These are designed to preserve user experience while offering the user peace of mind in using the touch display. Application: 1. Peel off backing starting from any of the 4 notched corners and discard. 2. Apply the screen protector to the display surface, oriented as shown below 3. The protected surface of the screen protector should face inward 4. The tabs on the protector should fit between bezel and display 83 YEStablet 7375 User Guide THIS PAGE INTENTIONALLY LEFT BLANK 84 YEStablet 7375 User Guide—FAQ & Troubleshooting Guide APPENDIX 9. FREQUENTLY ASKED QUESTIONS & TROUBLESHOOTING GUIDE STARTING UP What is the first thing I should do with the 7375? Why doesn’t the 7375 come charged so that I can turn it on right away? Do I need to load any software to get started? Is there anything I should NOT do with the tablet while I am learning to use it? Is there anything I need to assemble before I turn it on? How do I begin to use the 7375 immediately? POWERING ON/OFF In general, how do I turn it on? How do I turn the unit off? My 7375 will not turn ON. My 7375 will not turn OFF. How do I power the 7375 on after the unit enters Suspend mode and turns the screen off? I changed my mind immediately after recovering from Suspend mode and wish to put the tablet into Suspend again. Why is it that the Suspend button appears non-responsive? BATTERY How do I set the 7375 so that it saves power? How do I know if the battery is fully charged? How long does it take to fully charge the battery pack? What are the possible tablet states and how do they relate to the battery status? How long will the batteries last? How can I check the battery status? What do I do if the battery runs down and the tablet turns off? What are some ways to extend battery life? Is there an advised practice for charging the tablet battery packs? Can I charge or power the 7375 from a vehicle power outlet? I have acquired an optional external battery pack; what should I know and how should I make optimal use of it? How can I charge the external battery pack? What is the best way to store a tablet for travel or transport to conserve battery life? APPLICATIONS The 7375 display goes dark while I am playing media content or downloading my email messages. The power to the 7375 is adequate. What happened? How do I get onto the Internet? What else can I do other than access the Internet? How do I check my e-mail? How can I share or access information in a PC? How can I update the software on my tablet? PERIPHERALS AND ACCESSORIES Can I use an external storage device with the 7375? Can I use a mouse or a keyboard with the 7375? Why won’t my CompactFlash Cards work? What can I do with the CompactFlash (CF) card slot? The tablet comes with a protective jacket and a shoulder strap – what do they offer and how do I use them? The tablet comes with a desktop cradle – what are its functions? 85 YEStablet 7375 User Guide FEATURES What do all the buttons do? What do all the lights mean? How do I perform a ‘right-click’ function? What other hardware/software can I use with the 7375? The Virtual Keyboard won’t show up or go away. Where is the stylus and how do I use it to navigate? How do I do anything without a keyboard and mouse? Is there a way to scroll down without using the stylus? How do you adjust the volume? How do I make the display brighter/darker? How could I calibrate at any time without having to access the Control Panel? Can I program the tablet hard buttons? How can I save critical documents or data to avoid being lost due to power loss? How can I ensure that changes I made to the configuration of the 7375 are persistent over power loss? What are my options on the wireless LAN network adapter? The tablet I have comes with an embedded wireless LAN card – where is the antenna located and how do I use it to obtain the most effective network access? Can the 7375 support 802.11g and/or 802.11a wireless LAN adapters? Can the 7375 work with wireless WAN network adapters? CARE AND SUPPORT How do I wipe fingerprints off the screen without damaging it? Is there any way I can carry the tablet about without using the protective jacket? Whom do I call if I have customer service questions? ___________________________________________________________________________________________ Starting Up What is the first thing I should do with the 7375? • You need to charge the battery. Connect the AC-DC adapter provided with the tablet directly to the power input jack of the 7375 or to the power input jack on the tablet cradle with the 7375 securely seated. Use only the AC-DC adapter provided with the tablet or purchased as a specific accessory; your tablet may not operate and may be damaged if you use the incorrect AC-DC adapter. • When the tablet battery is being charged, the battery LED near the top of the front face of the 7375 will blink slowly in Green. • When the tablet battery is fully charged, the battery LED will show a steady Green. NOTE: While it is charging, you can use and configure the 7375. Why doesn’t the 7375 come charged so that I can turn it on right away? General shipping restrictions discourage your tablet provider from shipping any equipment with fully charged batteries. You will need to attach the 7375 system to A/C power to charge the batteries after receiving it. Use the AC-DC adapter provided with the tablet. You can still use the 7375 while it is charging. Do I need to load any software to get started? The 7375 comes pre-installed with all the software you will need to surf the Internet, set up email, run local applications, and interact with servers and PCs. The 7375 does provide a means to install new software that may enhance the function and value of the tablet. See OPERATION NOTES|Software Installation… for more information. 86 YEStablet 7375 User Guide—FAQ & Troubleshooting Guide Is there anything I should NOT do with the tablet while I am learning to use it? • The touch screen is made of glass, and is therefore fragile. Treat it as you would a piece of glass. Please use the stylus provided with the 7375 or another stylus designed for use with touch-panels. Do not use a sharp object to touch the screen; you may introduce scratches onto the screen. • Do not spill liquid onto the tablet, especially if the tablet is powered on. In general, do not operate without reading all cautions and directions in the users manual. Optional screen protectors are available. Is there anything I need to assemble before I turn it on? The 7375 tablet comes fully assembled. You will only need to charge the battery by connecting the A/C adapter to the unit, and plugging it into a wall socket. For an enhanced handling experience, the tablet comes with accessories such as a protective jacket that you will have to slip over the 7375 and a shoulder strap to attach to openings on the jacket. How do I begin to use the 7375 immediately? Powering On: Depending on how you received the tablet, your 7375 tablet may be in a Suspend state or in a Power Off state. Connect the AC-DC adapter provided with the tablet directly to the power input jack of the 7375 or to the power input jack on the cradle for the tablet with the 7375 securely seated. Use only the AC-DC adapter provided with the tablet or purchased as a specific accessory; your tablet may not operate and may be damaged if you use the incorrect AC-DC adapter. With the AC-DC adapter connected: - press firmly but briefly on the Suspend button on the left edge of the tablet. Wait a few seconds; if the display does not light up, make sure that all power connections are in place and try again. Wait a few seconds; if the display still does not light up then try the following: - If the optional external battery pack is attached to the tablet, detach it and repeat the step above, OR, - If you have been using the Cradle, then connect the power directly to the tablet instead, and repeat the option above, OR, - With the AC-DC adapter still connected, push on the Suspend button located along the left edge and hold on for over 4 seconds. Release the Suspend button. Then push on the Suspend button briefly. If all the steps above fail to turn on the tablet then you should contact Affirmative Computer Products for further guidance. After the tablet turns on, you should charge the tablet battery with the AC-DC adapter. You may continue to use the tablet while the charging process is proceeding. Configuration: While it is charging, you can use and configure the 7375 tablet. The charging cradle charges the battery and provides power for normal operation. When you first turn on the 7375, you will see an Affirmative Computer Products logo screen that will be shortly followed by a Microsoft Windows CE.net desktop. It is very similar to the desktops found on Microsoft Windows 98, 2000, or XP. There are icons on the desktop, and the familiar Start button brings up a menu of familiar options including Settings that leads you to the Control Panel where you can change many configuration settings. You should probably set up wireless networking first. You will need to have network identification and encryption information provided by your IT department or your Internet service provider. You will also need a wireless 802.11b access point connected to the Internet. To enter the network settings, use the stylus to tap Start > Settings > Control Panel. Double-tap the Network and Dial-up Connections icon. Double-tap the icon corresponding to your wireless adapter. From the resulting window, you can make the necessary changes to IP addresses, DNS servers, and encryption settings. While the unit is charging, you can start to familiarize yourself with the other applications on the unit. You will find that Microsoft Pocket Word and the other applications are familiar, but limited, in function. 87 YEStablet 7375 User Guide Powering On/Off In general, how do I turn it on? The Suspend button is on the left side of the 7375. Press the Suspend button momentarily, and release. The 7375 display will come on almost immediately. The following exceptions apply: If this is the first time you are powering on the 7375: - you will need to connect up the AC-DC adapter and briefly press the Suspend button. If the tablet has been left idle for many hours or days without charging and pressing the Suspend button without the AC-DC does not activate the tablet: - you will need to connect up the AC-DC adapter and briefly press the Suspend button. NOTE: The displayed state depends on whether the tablet is being turned on from (Forced) Suspend or Power Off mode. In the former, the preserved state of the tablet is displayed. In the latter, the tablet splash (logo) screen will appear prior to the eventual display of the default startup (desktop) screen. See OPERATION for more information. How do I turn the unit off? You can turn off the unit by pressing the Suspend button on the left hand side of the unit. The screen will go dark almost immediately, and all open applications will be retained for the next time you power on. Do not hold on to the Suspend button for too long (4 seconds or more) under normal operating conditions, as this will power the unit off. You may lose valuable user data and tablet information. My 7375 will not turn ON. Verify that you had pressed the Suspend button briefly. Ensure that the 7375 has power. Plug the 7375 into the AC power adapter that shipped with the tablet, and plug the unit into a wall outlet. Watch the battery LED to ensure that it blinks slowly in Green color to indicate charging of the battery (the LED may also glow steady Green if the battery is fully charged). Press the Suspend button on the left side of the tablet. When the 7375 turns on, the displayed state depends on whether the tablet is being turned on from (Forced) Suspend or Power Off mode. If you continue to have trouble, contact Affirmative Computer Products for support. My 7375 will not turn OFF. You may turn off the tablet in two ways – Suspend or Power Off (Reset). • To properly enter Suspend mode, press and release the Suspend button on the left side of the 7375. If you engage the Suspend button within 15 seconds of pressing it a previous time, the Suspend function will not occur until the 15 seconds have elapsed. • If the screen remains on, you may need to perform a Power Off or Reset to shut the tablet down. Hold the Suspend button in until the screen goes dark – it should take over 4 seconds. The 7375 is now powered off. You will need to press the Suspend button again briefly to power the unit back on. If you continue to have problems turning the tablet off, contact Affirmative Computer Products for support. NOTE: The Reset/Power Off and subsequent restart of the tablet by briefly engaging the Suspend button is often referred to as Cold Boot of the tablet. During this process, you may lose tablet settings or user data that have not been properly saved in the 7375. To ensure that settings such as profiles, dates, etc. are properly saved, you should engage the Save Registries function via Start > Settings > Control Panel > Registries Save/Restore icon after you made any modifications. To properly save user data, you should save the information or files to external flash memory, e.g., My Computer > Storage Card and its sub-folders. NOTE: All settings are also automatically saved if the tablet battery level drains down – past system warnings – to lead to tablet shutdown. 88 YEStablet 7375 User Guide—FAQ & Troubleshooting Guide How do I power the 7375 on after the unit enters Suspend mode and turns the screen off? To wake the 7375 from Suspend mode, press briefly on the Suspend button on the left side of the 7375. The screen will turn back on within a couple of seconds, and you can resume using the unit. I changed my mind immediately after recovering from Suspend mode and wish to put the tablet into Suspend again. Why is it that the Suspend button appears non-responsive? Each time you recover from Suspend mode, it takes 10-15 seconds for the system to totally recover, although you can see the display and use the system within 1-2 seconds. During this recovery period of 10-15 seconds, the system cannot process any request to re-enter Suspend mode. As soon as the system has fully recovered, a single Suspend request will be processed if a single or multiple Suspend requests were made during the recovery period. Battery How do I set the 7375 so that it saves power? • From the Control Panel (Start > Settings > Control Panel), double-tap on the Power icon. Choose the Schemes tab. Set the time to enter Suspend mode in this window. The time menus are effective in a consecutive or sequential manner. • You can also put the unit in Suspend mode manually by pressing the Suspend button momentarily and letting go. In a few seconds, the 7375 will enter Suspend mode. NOTE: Place the 7375 in Suspend mode when not using the unit. This will conserve battery power. Power (Management) Schemes Window How do I know if the battery is fully charged? If the unit is plugged in, and charging, you will know when the battery is fully charged by the Battery LED. When the Battery LED stops flashing and stays steadily on, the battery is fully charged. You can view the current battery charge level by disconnecting the tablet from the AC power adapter and tapping on Start>Settings>Control Panel>Power>Battery. How long does it take to fully charge the battery pack? If the tablet is in Suspend or Power Shutdown state, the internal battery pack takes about 2 to 3 hours to fully recharge from a depleted state. The optional external battery pack takes about 3 to 4 hours to fully recharge from a depleted state. You will have a longer charging time if the tablet is active or if the display is left on. 89 YEStablet 7375 User Guide What are the possible tablet states and how do they relate to the battery status? Refer to the following Battery LED and Status Table. Battery Status Battery LED Fully Charged Charging Fully Charged or Good Green Slow Blinking Green Green AC-DC adapter connected AC-DC adapter connected Under Battery operation only Low Steady Amber Under Battery operation only Critically Low Fast Blinking Amber System enters Forced Suspend mode within minutes Dark Forced Suspend - Duration of state is about 2.5-4 hours without re-charge. Dark Total Discharge - System transitions from Forced Suspend to Power Off mode. Comments Notes Suspend button enters/exits Suspend mode Suspend button enters/exits Suspend mode Suspend button enters/exits Suspend mode Suspend button exits Forced Suspend mode only with AC-DC connected. System exits Power Off mode only with AC-DC connected and push of Suspend button. How long will the batteries last? The length of operation of the batteries, between recharge, will depend on how intensely you use the 7375. With average use, the 7375’s internal battery pack will last approximately 2-3 hours. The optional, hot-swappable and snap-on, external battery pack will support, approximately, an additional 4 hours of normal use. How can I check the battery status? Look in Start > Settings > Control Panel>Power. The battery status is displayed if the AC-DC adapter is not connected. What do I do if the battery runs down and the tablet turns off? You will have to connect the tablet to AC-DC power or charge the battery before you can use the tablet again. If the 7375 runs out of battery power, when you power the unit on again, the 7375 may not remember the programs that were in operation and any data you may have saved when you lost power. To avoid this, make sure that you heed the low battery warnings and you supply AC power to the 7375 before it loses battery power completely. You will receive warnings from the system when the tablet battery level is at critically low level. Within minutes thereafter, the system will enter Forced Suspend mode. In this mode, the tablet can only be recovered with AC-DC connected and Suspend button engaged. If the tablet is not revived within the next 2-4 hours, (depending on tablet loading) the system will enter the Power Off mode due to battery depletion. To revive the system, you will need to connect up the AC-DC and engage the Suspend button at the side of the tablet. During this process, you may lose tablet settings or user data that have not been properly saved in the 7375. To ensure that settings such as profiles, dates, etc. are properly saved, you should engage the Save Registries function via Start > Settings > Control Panel > Registries Save/Restore soon after you make any modifications. To properly save user data, you should save the information or files to external flash memory such as My Computer > Storage Card and its sub-folders. What are some ways to extend battery life? When you are not using the tablet, give the Suspend button a quick press to put the unit into Suspend mode. With the tablet in Suspend mode, the battery life will be greatly extended. Also, when possible, do not use the highest screen brightness setting. More battery power is used as the screen brightness increases. It is important to put the unit into Suspend mode whenever you are not going to use it for more than a few seconds. It is possible to manage 90 YEStablet 7375 User Guide—FAQ & Troubleshooting Guide the timed entry by the tablet into power saving modes. Go to Control Panel > Power > Schemes and choose timings based on Battery Power or AC Power schemes. Is there an advised practice for charging the tablet battery packs? The battery packs are constructed with Lithium-ion cells. There is no memory effect and you can charge these batteries at your convenience without waiting for them to drain completely and without affecting the capacity of the cells. However, it is still advisable to charge only when needed to conserve the number of charge/discharge cycles for the battery packs since such cycles will affect the useful life of the batteries. Can I charge or power the 7375 from a vehicle power outlet? Yes. There are optional kits comprising a power cord and a DC-DC adapter to feed and charge the tablet from vehicle power outlets. NOTE: Refer to the power adapter label specifications if the vehicle power outlet is not 12V. I have acquired an optional external battery pack; what should I know and how should I make optimal use of it? The external battery pack has a capacity exceeding that of the internal battery pack. It adds about 4 hours of usage time to the 2.5 hours of the internal battery. The custom housing readily snaps on and off the rear of the 7375. It is also designed to be hot-swappable with the system which means that one does not need to power off the tablet prior to detaching or attaching the battery pack. How can I charge the external battery pack? The external battery pack can be charged as part of the 7375 with the AC-DC adapter connected directly or through the cradle. Alternatively, the external battery pack may be charged with an optional external battery charging kit and an AC-DC adapter. NOTE: When both are connected to the 7375, the external and internal battery packs are charged simultaneously. What is the best way to store a tablet for travel or transport to conserve battery life? If you properly save tablet configuration settings (Control Panel > Registries Save/Restore) and user data (My Computer > Storage Card (and sub-folders)) for persistence (as needed) over power cycling, you can perform a full power shutdown on the tablet. For this purpose, engage and hold the Suspend button for over 4 seconds until the display and LEDs go dark. There should no further power drain from the battery. A brief push of the Suspend button should revive the system with an un-depleted battery pack for immediate mobile use. Applications The 7375 display goes dark while I am playing media content or downloading my email messages. The power to the 7375 is adequate. What happened? The tablet may have entered Suspend mode, depending on how the power savings scheme has been set up. In the 7375, the “idle” definition refers to no user input (screen taps, mouse clicks, etc.) – having only network activity may also be construed as being “idle”. Therefore it is possible for the tablet to enter power savings modes while you are playing or downloading content. To avoid complications or confusion, you could consider setting very long delays (or “Never”) from the scheduling menus in the Control Panel > Power > Schemes window. 91 YEStablet 7375 User Guide How do I get onto the Internet? You need the following: • (Wireless) connection to network • Network connection to Internet Service Provider (ISP) • 7375 configuration In general, the 7375 has to be configured to communicate to a wireless Access Point on the local network which in turn has to have a (broadband or dialup) modem connected to the Internet as supported by the ISP. The key in the set up is to obtain a valid IP (Internet Protocol) address for the 7375. See REQUIREMENTS for information on setting up the wireless connection for the 7375. After you have set up a connection, simply double-tap the Internet Explorer icon on the desktop, and you will be free to surf the Internet. What else can I do other than access the Internet? You can connect the 7375 to any system supporting Microsoft RDP or Citrix MetaFrame or WinFrame using Citrix ICA. The 7375 has other uses and applications, as well. One may invoke YESterm IP from Windows CE Desktop to connect to remote IBM host computers. It can be used as a display with other Windows systems and can access many applications through its standard Web Browser. It also has a small collection of Windows CE .NET applications loaded for local (offline) use when not connected to any network. An embedded Java Virtual Machine (JVM) also facilitates the execution and access of Java applications and applets both locally and over the network. How do I check my e-mail? Read the section entitled OPERATION|Reading and Sending Email for a description of reading and sending email with the tablet. How can I share or access information in a PC? There are two general approaches with different requirements and user experience. (a) From My Computer on the Windows CE desktop, you are able to view shared content on Windows PCs (Windows 95 and above) connected to the same subnet of a data network. This is facilitated by the viewing utilities or applications resident on your 7375. Please make sure that the appropriate folders have Sharing enabled on the PCs. • On the 7375 and in the address field of My Computer, enter the name of the target PC: \\<target_PC_name>. You may be prompted for username and password if the sharing is password-protected. After any authentication is processed successfully, the shared folders should be displayed. NOTE: It is not possible for PC users to view or access content on your 7375, except via ActiveSync. (b) The 7375 is loaded with the Remote Desktop Control (RDC) utility. This is typically displayed on the Desktop and under Start>Programs. The RDC allows you to access a Windows XP Professional system on the same subnet in a powerful way with full access to applications and data on the PC system. When you do so, the PC system will be locked out to ensure that you will be the sole user. 1. On the Windows XP Pro system side, make sure that you have the various user(s) privileges and configurations properly set up. 2. On the tablet side, activate the Remote Desktop Connection application and enter the appropriate remote computer information such as Name or IP address. If the system is available, you may be prompted with confirmation and login queries to the host system. 3. After the authentication or login is successful, the Desktop meeting your login profile of the XP Pro system will be displayed and any other user’s access to the system would have been terminated. 4. To terminate the link, just Logout of the remote system as you would do locally to the tablet. How can I update the software on my tablet? 1. Use the Update utility under Start > Settings > Control Panel > Update. With this utility, you can update over the network from an FTP server, or you can update from local USB or CompactFlash storage. See OPERATION NOTES|Software Update for more information 2. Use a USB connection between a PC with ActiveSync and the tablet Cradle with the tablet firmly seated. 92 YEStablet 7375 User Guide—FAQ & Troubleshooting Guide Peripherals and Accessories Can I use an external storage device with the 7375? 5. The CompactFlash slot on the top of the 7375 supports most standard CompactFlash memory devices. There are many off-the-shelf memory cards that can be bought at a local computer or camera store. Advanced users may want to make sure that the CompactFlash cards are FAT-based. 6. The USB port on the tablet will also support USB-based storage devices. These range from solid-state memory cards to some HDD and FDD devices. Can I use a mouse or a keyboard with 7375? Yes. The 7375 offers a type-A USB port on the left side of the tablet. Simply plug in a USB mouse or keyboard. The 7375 recognizes keyboards or pointing devices that register as a standard Human Interface Device. Most track-balls, mice, and keyboards work without problems. Please consult Affirmative Computer Products if you wish to know if other specific USB peripherals or accessories work with the 7375. Why won’t my CompactFlash Cards work? The 7375 comes pre-installed with certain basic drivers that support a basic set of devices. This includes some devices in CompactFlash format. In order for other CompactFlash, PCMCIA, or USB devices to work, you will need to obtain drivers, assuming they are available from the respective vendor for the Windows CE .NET and Intel Xscale platform, and load them onto the 7375. You can install drivers for devices using ActiveSync, but they will be lost if you do a Cold Boot. See OPERATION NOTES|Software Update for instructions on setting up ActiveSync. NOTE: For storage application, you may have to make sure that the CompactFlash cards are FAT-based. What can I do with the CompactFlash (CF) card slot? The CF card slot can support storage cards as well as peripherals such as network adapters (wireless or otherwise), and barcode scanners, provided the appropriate drivers exist. The tablet comes with a protective jacket and a shoulder strap – what do they offer and how do I use them? 1. The protective jacket, when properly secured around the tablet, offers an enhanced handling experience with protection against bumps and knocks, up to a 3-foot drop. 2. Use the shoulder strap hooked onto the protective jacket for hands-free portability. The jacket has 4 slots to allow flexibility in connection to the shoulder strap. The tablet comes with a desktop cradle – what are its functions? The cradle for the 7375 offers: support; charging pass-through; and USB slave (1) ports. The USB slave port facilitates connection to PCs for software transfer, synchronization, and installation. Refer to the section on OPERATION|Operating the 7375 together with Cradle for more details. Features What do all the buttons do? See TECHNICAL SPECIFICATIONS…|Front-View Layout for the button layout. The four buttons at the bottom of the tablet have useful functions. When text input into the 7375 is needed, press the left-most button, and a virtual keyboard will appear on the screen. Tap the desired letters to enter text. Press the button again to make the keyboard disappear. The second button (immediately to the right of the virtual keyboard button) is factory programmed to initiate an ActiveSync connection with a laptop or PC. The third and fourth buttons may come with default functions but are user-programmable. This is facilitated by the Buttons utility in the 7375, accessible through Start > Settings > Control Panel > Buttons. Some examples of their use include initiating a Remote Desktop Session with a PC or server AND as a Show Desktop button which will minimize all open windows and display the desktop. The button on the right face of the 7375 is a 4-way navigator, and can be user-programmed 93 YEStablet 7375 User Guide (Start > Settings > Control Panel > Buttons) to scroll up, down, left, or right through menu selections, Web Pages, or other items supported by the software operating system. What do all the lights mean? There are three LEDs on the 7375. The symbols above the LEDs reflect the corresponding features of the 7375 tablet. • The record LED (the left-most LED) is accessible by applications at the factory level. It will be ON and showing steady green when the 7375 is recording from its internal microphone. • The network LED (middle LED) glows a steady color when the network adapter is detected and functional. It is not an indicator of when the 7375 is sending or receiving network information. • The battery LED (right-most LED) has several different states. • When the battery LED is solid green, it means that the batteries are fully charged. • When the battery LED is blinking amber, this indicates that the battery is charging. This will only happen when the 7375 is plugged into A/C power. • In the absence of A/C power, the steady Green state indicates a full or good battery level. • When the battery charge is low, it will glow steady Amber. • When the battery level is critically low, it will blink in Amber rapidly. How do I perform a ‘right-click’ function? Depending on the software configuration of your tablet, there may be a right-click icon in the System Tray. Tap the icon that looks like a mouse with the left-button colored yellow. Click on this icon, and then click on the area of the screen on which you wish to perform a right-click. The right-click mode will only be in effect for a single click. Alternatively, you can program any one of the available hard buttons on the tablet to be used to engage the rightclick mode. Refer to Start > Settings > Control Panel > Buttons settings. What other hardware/software can I use with the 7375? Any hardware peripherals or software applications that may be used with the 7375 depends on the compatibility of such hardware or software with the 7375 system platform, i.e., Windows CE .NET (not Pocket PC) and Intel Xscale. If a third-party peripheral or software is determined to be compatible with (or independent of) said platform, that hardware/software may work out-of-the box or have drivers that are suitable for use on the 7375. You can install drivers and applications through ActiveSync or (in some cases) copy applications over to the file structure of the 7375. NOTE: Software installed in this manner will be lost if the tablet is completely powered off and restarted with a Cold Boot. In general, the 7375 comes pre-installed with software and hardware drivers that will enable you to use different network cards to access the Internet, email, and Local Area Networks (LANs). If you have made a specific request for Affirmative Computer Products to install a particular type of driver or a particular piece of software, it will already be installed on your 7375 when it ships to you. This feature ensures that if there are any problems with the 7375 at any time, you will not have to reload the software on the machine, but simply reset the unit. You will need to contact Affirmative Computer Products to determine if it is possible to have additional software or hardware drivers pre-loaded on the 7375. The Virtual Keyboard will not show up or go away. Sometimes when the 7375 is busy processing commands or running other programs, it may not display/remove the virtual keyboard the moment that you press the keyboard button. Simply hold the button down, or press the keyboard button again, and in a few seconds the keyboard should appear/disappear. Where is the stylus and how do I use it to navigate? How do I do anything without a keyboard and mouse? The stylus for the 7375’s touch screen is located in the upper right corner of the tablet inside the rubber pad on the side. Pull out the stylus and use it to tap the screen. The 7375 uses a touch screen and stylus for normal input. You can select anything on the screen by just tapping the icon, or touching a point on the screen with the stylus. For example, to open My Computer, simply double-tap on the My Computer icon, just as you would double click with a regular mouse. Instead of a desktop keyboard, the 7375 provides a Virtual Keyboard. To type, press the left94 YEStablet 7375 User Guide—FAQ & Troubleshooting Guide most hard button from the set of four in the lower front of the tablet, labeled with a keyboard icon. A keyboard will appear on the screen, and you can select the letters by tapping them. Press the keyboard button again to make the keyboard disappear off the screen. If you like, you can attach a USB pointing device (mouse, track ball, touch pad) to the 7375 and use that for navigation. Is there a way to scroll down without using the stylus? Yes. In general, the software on the 7375 allows you to program most of the buttons on the 7375 to perform functions of your choice. Use Start > Settings > Control Panel > Button Settings. For example, you can use the 4-way navigation button on the front right side of the 7375 tablet to scroll the window of Internet Explorer, or other applications, and also to scroll between menu choices or icons. You can also use this button to navigate backward and forward in Internet Explorer. How do you adjust the volume? Go to Start > Settings > Control Panel>Volumes & Sounds. Tap on the Loud and Soft buttons to adjust the volume. Tap OK to save your changes. You can also program some of the hard buttons on the tablet to perform this function (Start > Settings > Control Panel > Button Settings). How do I make the display brighter/darker? Go to Start > Settings > Control Panel>Brightness. Choose the Brightness tab and tap on the Bright and Dark buttons to increase or decrease the brightness of the display. You can also program some of the hard buttons on the tablet to perform this function (Start > Settings > Control Panel > Button Settings). How can I calibrate at any time without having to access the Control Panel? You may recalibrate the cursor on the touch display when the tablet is powered on by either accessing Start > Settings > Control Panel > Stylus or by engaging the virtual keyboard button (leftmost of front set of four buttons) and the Left button on the 4-way navigation button on the right front face of the tablet, simultaneously. This is very useful when the current calibration is way off so as to affect ability to use the touch display to access the software utility. Can I program the tablet hard buttons? Many of the buttons on the 7375 are user-programmable. Exceptions are the Suspend button and the Virtual Keyboard button. Depending on software configuration, the button next to the Virtual Keyboard button may also be reserved for ActiveSync activation. To program the other buttons, access Start > Settings > Control Panel > Button Settings. In the resulting window, you will see a panel indicating the current function for each button. There is another panel on the same window that lists the functions that are available for association. To associate a different function with a particular button: select the button from the first panel; select (double tap) the new function from the other panel. If that button is programmable, the new function should be associated. Advanced users have the option to program these buttons with scripts in addition to the pre-determined functions, or to point to an executable file in the tablet file structure. How can I save critical documents or data to avoid being lost due to power loss? There are several methods of saving data external to the tablet: • My Computer > Storage Card, if you have an installed CompactFlash storage card. • Attached USB storage. • An attached PC using Active Sync. • Shared network storage on a PC (Windows 95 and above) on the same subnet as the tablet. • Attached file to Inbox email. See OPERATION NOTES|File Transfer and Storage for details. NOTE: To save files in local or network storage, use Edit>Copy/Paste in the My Computer view. NOTE: All settings, but not user data, are automatically saved if the tablet battery level drains down - past system warnings - to lead to tablet shutdown. 95 YEStablet 7375 User Guide How can I ensure that changes I made to the configuration of the 7375 are persistent over power loss? The Hard Reset and subsequent restart of the tablet by briefly engaging the reset button is often referred to as Cold Reboot of the tablet. During this process, you may lose tablet settings or user data that have not been properly saved in the 7375. To ensure that settings such as profiles, dates, etc. are properly saved, you should engage the Save Registries function via Start > Settings > Control Panel > Registries Save/Restore soon after you made any modifications. NOTE: All settings, but not user data, are automatically saved if the tablet battery level drains down - past system warnings - to lead to tablet shutdown. What are my options on the wireless LAN network adapter? Your tablet can come without a network adapter or with wireless LAN adapters pre-installed. In the former case, you are free to use any WLAN network adapter you choose provided the corresponding and compatible driver is pre-installed or you install the appropriate driver. The 802.11b WLAN drivers that are pre-installed with the tablet may include those for adapters from ZCOM, Samsung, Agere, and Cisco Aironet, depending on software configuration. The tablet I have comes with an embedded wireless LAN card – where is the antenna located and how do I use it to obtain the most effective network access? The custom antenna is enclosed in the plastic tongue snapped onto the tablet housing covering the PC card slot along the top edge of the 7375. Refer to OPERATION NOTES|Wireless Network… for details. The antenna should function adequately in the snapped-on configuration, but you can extract the antenna holder to try to obtain better range or signal strength. Can the 7375 support 802.11g and/or 802.11a wireless LAN adapters? No. At this time, the combination of hardware and software characterizing the 7375 is not capable of supporting 802.11a or 802.11g network adapters. Affirmative Computer Products may be able to advise you of alternative or pending solutions that may offer such support. Can the 7375 work with wireless WAN network adapters? Yes. The 7375 may support wireless WAN (wide area network) adapters that connect to subscription-based data networks (e.g., Sprint, Verizon, T-Mobile and AT&T Wireless). The drivers for these supported PC Card slotbased cards might not be bundled with the 7375, depending on software configuration. You should contact Affirmative Computer Products if you need the support for these adapters. Care and Support How do I wipe fingerprints off the screen without damaging it? In general, you may use a cloth dampened with a small amount of cleaning solution. Ensure that the tablet is powered off beforehand. Can I carry the tablet about without using the protective jacket? Other than in its bare form, you can carry the 7375 in an optional custom carrying pouch with cutouts for display, buttons, LEDs, speakers, and microphone. Whom do I call if I have customer service questions? Affirmative Computer Products offers Technical Support services for all the Affirmative products. You can access Affirmative Technical Support in one of the following ways: via Phone (6:00am to 6:00pm Mountain Time) 480-946-1444 888-353-5250 (Toll Free) via Fax 480-946-9250 via E-mail [email protected] 96 YEStablet 7375 User Guide—FAQ & Troubleshooting Guide INDEX 7375 care, ix cautions, 1 device registry, 22 getting started, 1 layout, 5 power source, 3 specifications, 3 travel, ix 802.11b Wireless LAN ESSID, 7 WEP, 7 Accessories list, 71 ActiveSync, 3, 5, 12, 18, 19, 20, 22, 92, 93, 94, 95 Bar code scanners, 4 CompactFlash, 77 USB-based, 77 Battery Cautions, viii LED and Status, 90 Battery pack capacity, 90 charging, 86, 91 extend battery life, 90 external, 17, 91 internal, 17 low battery condition, 18 recharge time(s), 90 recharging, 17 Recovery from total discharge, 90 status check, 90 Brightness control, 95 Buttons hard, 93 programming, 15 table of default functions, 5 Calibration, 95 activation, 9 touchscreen, 9 Carrying pouch, 96 CF card slot, 93 Cisco Aironet WLAN, 67 Cleaning, 96 CompactFlash, 3, 7, 9, 18, 19, 21, 72, 77, 85, 92, 93, 95 Configuration loss, 96 Cradle desktop, 12 mountable assembly notes, 80 wall mount, 79 Custom carrying pouch, 81 Data loss, 95 DC-DC adapter, 79 Device configuration, 10 Control Panel, 10 display, 10 network, 10 system properties, 11 E-mail, 11, 92 Ethernet (RJ45), 79 External Battery Charger Kit, 75 External battery pack, 73 File structure clear file system, 22 clear registry, 22 corruption recovery, 22 transfer, 18 Internet access, 11, 92 Java Virtual Machine, 92 LED indicators record, network, battery, 94 Operation Notes, 17 PC and Laptop information access, 92 PCMCIA, 3, 4, 7, 93 Power management Backlight off, 89 power saving modes, 17 Power On/Off, 9 Cold Boot, 9, 17, 18, 23, 27, 39, 42, 43, 50, 88, 93, 94 Reset, 17 Reset button, 17 Suspend, 5, 9, 17, 18, 20, 21, 22, 85, 87, 88, 89, 90, 91, 95 Processor XScale, 1, 3, 7 Programming hard buttons, 95 Protective jacket, 93 Remote Desktop Control, 92 Right-mouse click, 14, 94 Saving critical settings, 96 Screen Cover, 4 Shoulder strap, 93 Soft keyboard, 94 97 Software development support, 20 installation, 20 synchronization, 20 update/upgrade, 21 caution, 21 through Cradle USB, 21 through network adapter, 21 Storage external, 19, 79, 85, 93 internal, 19 network, 18, 21, 95 USB, 19, 21, 95 Storage for transport, 91 Stylus, 94 Support Customer Service, 96 Return Material Authorization, vi Suspend mode Forced, 18 Terminal clients emulation, 14 ICA, 13 RDP, 13 USB Host port on device, 3 input ievices, 4 scanners, 77 slave port, 12 Vehicle power outlet, 91 Viewer documents, 14 images, 14 Voice recorder, 14 Volume adjustment, 95 Warranty, vii coverage, vi exclusions, vi limited, v loss, viii, ix, 1 Software, vi Windows XP Pro, 92 Wireless network adapter antenna, 17 Wireless WAN adapters, 96 WLAN adapter antenna, 96 WLAN adapters, 96 Word Processing WordPad, 14 YESterm IP Administrator, 14, 23, 24, 25, 26, 27, 40, 41, 42, 57, 59 Add, 23 Edit, 23 Remove, 23 Characteristics Display Session:, 24 Printer Session, 24 Code Page, 26, 28, 41, 44, 45, 46, 63 Computer Output Reduction, 24, 44 Connection Name, 25, 41 Device Name, 25, 41 Device Type, 25, 41 Euro, 24, 29, 46, 47, 65 Hex Passthrough, 24, 48 Host Name, 25, 40 Host Print Transform, 24, 41, 49 Hot Spot, 24, 30, 31, 32, 33, 34, 35, 36, 54 Playback, 24, 52, 53, 56, 61 Port Number, 25, 40 Record, 24, 52, 61 Setup Display Session, 24 Printer Session, 40 TN3270e, 23, 24, 25, 26, 40, 41, 42, 43, 45 TN5250e, 23, 24, 25, 26, 37, 40, 41, 42, 44, 48, 49 Requirements, 23