1
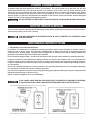
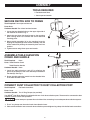
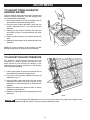
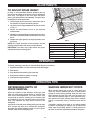
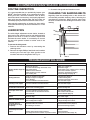
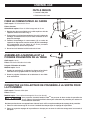
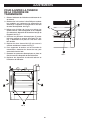
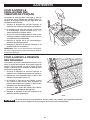
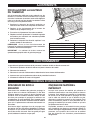
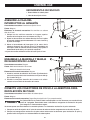
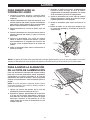
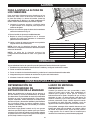
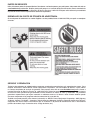
ASSEMBLY
Tools Required
• Flat head screw driver
• 10mm open-end wrench
SECURE SWITCH BOX TO FRAME
Tools Required: 10mm open-end wrench
Parts: None
Hardware Needed: Two 10mm hex head screws
1. Locate the two threaded holes on the upper right side of
the machine as shown in Fig. 2.
2. Attach the two 10mm hex head screws to the mounting
plate, leaving about 1/8” between the screw head and
mounting plate.
3. Mount switch assembly (A) to the machine frame by
aligning the keyholes (B) in the switch assembly over the
screw heads and pushing the assembly back and into
position.
4. Tighten screws using 10mm open-end wrench.
Fig. 2
ASSEMBLE TABLE ELEVATION
CRANK AND HANDLE
Tools Required: None
Parts: Table Elevation Crank
Table Elevation Handle
Hardware Needed: None
1. Install the table elevation crank (C) by aligning the
groove in the bottom of the crank with the pin located on
the shaft (D). See Fig. 3.
2. Screw the table elevation handle into the threaded hole
in the table elevation crank.
Fig. 3
CONNECT DUST COLLECTOR TO DUST COLLECTION PORT
Tools Required: Flat head screwdriver
Parts: None
Hardware Needed: Two 4” Ring Clamps (not provided)
Your Delta® Dual Drum Sander is equipped with two 4-inch dust collection ports. These must be connected to dust
collector hoses to ensure safe operation.
Do not attempt to operate this tool without first connecting it to an adequate dust collection system.
1. Fit a 4” ring clamp over the end of each dust collection hose.
2. Place a dust collection hose over each dust collection port and tighten ring clamp with the flat head screwdriver.
8