1
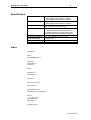
MERIDIAN 519 USER MANUAL
© 1992, 1993, 1995
Version 2: March 1996
Contents
2
Contents
Sales and service in the UK ...................2
Sales and service in the USA.................2
Designed & manufactured in the
UK by..................................................2
Acknowledgements ................................2
Introduction ............................................3
About the 500 Series ..............................3
Unpacking the 519..................................3
Installing your 519 ..................................3
General precautions ............................3
Siting ...................................................3
Connections ........................................4
Starting off with 519 ...............................5
Checking .............................................5
Switching on ........................................5
If there is no light .................................5
Basic operation of 519 ...........................5
Sales and service in the UK
Meridian Audio Ltd
Stonehill
Huntingdon
Cambs. PE18 6ED
England
Tel (0) 1480 52144
Fax (0) 1480 459934
Jumper Options ..................................... 6
Opening the Case ............................... 6
Locating the Jumper Positions............. 6
Jumper 1............................................. 6
Jumper 2............................................. 6
Jumpers 3-5........................................ 6
Help! ....................................................... 7
Yellow power light not lit ...................... 7
Red lock light not lit ............................. 7
No audio from AC-3 Decoder .............. 7
No audio when playing a Laser
Disc which is not AC-3
encoded ......................................... 7
Radio interference............................... 8
Cleaning ................................................. 8
Maintenance & Service .......................... 8
Specification .......................................... 9
Index ....................................................... 9
Sales and service in the USA
Meridian America Inc.
3800 Camp Creek Parkway
Building 2400, Suite 112
Atlanta, GA 30331
Tel. (404) 344-7111
Fax (404) 346-7111
Designed & manufactured in the UK by
Digital Gramophone & Wireless Ltd
Stonehill
Huntingdon
Cambs. PE18 6ED
England
Copyright © 1992,1993,1995 Digital Gramophone & Wireless Ltd
Acknowledgements
Trademarks etc.
Boothroyd|Stuart Meridian and Meridian are registered trademarks of Meridian Audio Ltd.
AC-3 is a trademark of Dolby Laboratories Licensing Corporation.
Author: Richard Hollinshead.
519 User Guide
Installation
3
Introduction
The Meridian 519 Laser Demodulator is part of the 500 Series of
advanced high-fidelity equipment.
In purchasing a Meridian 519 Laser Demodulator, you have acquired a refined piece of equipment that will continue to bring you listening pleasure
for many years. This manual will enable you to get the most from it.
About the 500 Series
The Meridian 500 Series is a unique system of digital, analogue and video
components designed to meet the demand for absolute quality, ease of
use and lasting value.
The flexibility of the Meridian 500 Series is such that you can assemble a
system as simple or as complex as you need, perfectly suited to your
requirements, and with the ability to add to it or change it at a later date
should those requirements change.
The Meridian 500 Series includes a sophisticated communications link, to
ensure that any configuration of units will work together as a fully
integrated system.
Unpacking the 519
On opening the carton, you should have found the following parts:
• Meridian 519 Laser Demodulator
• Power cord
• Meridian Comms lead
• This manual
If any of these items is missing, please contact your dealer. We suggest
that you retain the packing carefully as it provides maximum protection for
the unit in transit.
Installing your 519
General precautions
Before carrying out any installation, you should ensure that the 519 is
marked with the correct voltage for your local AC supply. Should this not
be the case, do not proceed – but contact your dealer.
As a general rule, you should not make any connections to the 519, or to
any other component in your system, whilst the AC power supply is connected and switched on.
Siting
We recommend the following guidelines for location.
• The 519 should not be placed on top of a power amplifier.
• Avoid sites where it would be subjected to direct sunlight or where it is
near a heat source, e.g. a central heating radiator
• Avoid sites where the 519 could be subjected to strong magnetic radiation, like near a power amplifier.
• Not too close to a television, or where connecting cables may be subject to, or cause, interference.
519 User Guide
Installation
4
Connections
There are five types of connection that may be made to the 519:
• power
• Laser Disc RF
• electrical digital audio
• optical digital audio
• communications.
Digital audio and RF connections need to be made to other components
in your system. Communication connections have to be made to most of
the other Meridian components in your system in order for them to act as
one system. The connections to your 519 are very important and care
should be taken in deciding which connections to make.
A typical installation would be:
75Ω
Optical
RF Input
RF Out
Laser Disc
Player
Optical Out
Meridian 519
Optical
Optical Out
Optical In
Meridian
Meridian
562 or 565
Comms
Optical In
Comms
Comms
Note Electrical digital audio connections may be used in place of the
optical connections.
Tip In common with all digital products, the 519 emits some radio-frequency signals. For this reason, try to keep all power cables and Comms
leads away from audio, antenna and loudspeaker cables. Some time
spent laying out the cables carefully will repay you with the best possible
performance later.
519 User Guide
Using 519
5
Starting off with 519
Checking
Before turning on the power, check once again that you have made all the
connections correctly.
The 519 is designed to be left connected to AC power at all times and can
be run continuously.
Switching on
The power switch is located directly next to the power inlet on the rear of
the 519. Turn on the power switch at the rear of the unit. The yellow light
on the front of the 519 will now be illuminated.
If there is no light
Check the power connections, including any fuses in the supply. If the
light is still not illuminated, contact your dealer for help.
Basic operation of 519
The 519 Laser Demodulator takes the RF output of a Laser Disc player
and extracts the AC-3 data stream. This stream is transmitted via the
SPDIF digital audio interface to an AC-3 decoder to be decoded into
discrete audio channels.
The 519 will also take the digital audio output of the Laser Disc player,
and switch to it when the Laser Disc is not AC-3 encoded. AC-3
decoding is indicated by the red lock light.
The 519 has connections for the Meridian 500 Series Comms system.
These connections are used only to communicate with other Meridian
equipment. The 519 itself uses these connections only to suppress clicks
as it switches between AC-3 decoding and regular digital audio.
Note The Meridian 519 can be used with or without other Meridian
equipment. However an AC-3 decoder must be used to obtain an audio
output.
519 User Guide
Jumper Options
6
Jumper Options
The 519 may be fitted with up to five internal jumpers which will change
the way it operates. IN ALMOST ALL INSTALLATIONS NONE OF
THESE JUMPERS WILL BE NEEDED. The unit is supplied with no
jumpers fitted. It is recommended that the jumpers are fitted only by your
dealer.
Opening the Case
WARNING: BEFORE OPENING THE CASE DISCONNECT THE 519
FROM THE AC SUPPLY. BEFORE RECONNECTING THE SUPPLY
ENSURE THAT THE CASE IS FULLY REASSEMBLED.
To open the case remove the four screws at the corners of the rear of the
519 and the four screws at the corners of the base of the 519.
Locating the Jumper Positions
There are five sets of two pins each which may be fitted with jumpers.
Jumper number 1 is located on the left of the 519 when viewed from the
front.
Jumper 1
The Laser Disc RF output signal normally provides an 5 Volt DC signal to
indicate that the Disc is playing. When jumper 1 is not fitted the Laser
Disc 5 Volt signal is used by the 519 to enable AC-3 demodulation or
switching to regular digital audio If your Laser Disc player does not give
the 5 Volt signal fit jumper 1.
Jumper 2
In normal use the 519 will switch to regular digital audio if it is unable to
demodulate AC-3. This allows both AC-3 encoded and non AC-3
encoded discs to be replayed with no change of settings by the user.
However, fitting jumper 2 tells the 519 not to switch to regular digital
audio. In this case, if AC-3 cannot be decoded, the 519 will produce a
silent digital audio output at 48kHz sampling rate.
Jumpers 3-5
These jumpers allow the system address for the Meridian 500 Series
Comms to be changed:
System Address
1
2
3
4
5
6
7
8
Jumper 3
Jumper 4
Jumper 5
519 User Guide
Help!
7
Help!
Yellow power light not lit
Check the following:
1. There is AC power connected to the socket on the rear of the 519.
2. The power switch on the rear panel of the 519 is turned on.
If the yellow light will still not illuminate, check any fuses in your power
supply and the fuse in the inlet of the 519. If these are all intact, contact
your dealer.
Red lock light not lit
Check the following:
1. The Laser Disc RF output is connected to the RF input of the
demodulator
2. The Laser Disc is playing.
3. The Laser Disc is AC-3 encoded.
If the Laser Disc player in use does not produce a 5V DC signal, this will
prevent the 519 from decoding AC-3. To overcome this fit jumper 1.
No audio from AC-3 Decoder
Check the following:
1. The yellow and red lights are lit on the 519 (see above).
2. The audio system is able to replay non AC-3 sources (e.g. CD).
3. The 519 digital audio output (either cable or optical) is connected to
the AC-3 decoder.
4. The correct physical input of the AC-3 decoder is selected.
No audio when playing a Laser Disc which is not AC3 encoded
Check the following:
1. The yellow light is lit on the 519.
2. The audio system is able to replay non AC-3 sources (e.g. CD).
3. The 519 digital audio input (either cable or optical) is connected to the
Laser Disc player.
4. The 519 digital audio output (either cable or optical) is connected to
the AC-3 decoder.
5. The correct physical input of the AC-3 decoder is selected.
6. Jumper 2 is not fitted.
If the Laser Disc player in use does not produce a 5V DC signal, this will
prevent the 519 from selecting its digital audio inputs. To overcome this
fit a jumper in position 1.
Audible clicks or thumps when pressing play, stop or
pause on the Laser Disc
If you are using a Meridian AC-3 decoder or Meridian Digital speakers, the
500 Comms system will help to reduce any clicks. Check that the Comms
lead is in place.
If you are not using a Meridian 565 decoder, there may be some clicks as
the 519 switches to and from its digital audio inputs. If the digital audio
inputs are not in use, fit Jumper 2 to reduce the clicks.
519 User Guide
Help!
8
Radio interference
NOTE 519 is a digital audio and computing device which has been designed to very high standards of electromagnetic compatibility.
FCC WARNING: This equipment generates and can radiate radio frequency energy and if not installed and used correctly in accordance with
our instructions may cause interference to radio communications or radio
and television reception. It has been type-tested and complies with the
limits set out in Subpart J, Part 15 of FCC rules for a Class B computing
device. These limits are intended to provide reasonable protection against
such interference in home installations.
If this equipment does cause or suffer from interference to/from radio or
television reception then the following measures should be tried:
1. Reorient the receiving aerial (or antenna) or route the antenna cable of
the receiver as far as possible from the 519 and its cabling.
2. Ensure that the receiver uses well-screened antenna cable.
3. Relocate the receiver with respect to the 519.
4. Connect the receiver and this product to different AC outlets.
5. If the problem persists contact your dealer.
EEC This product has been designed to comply with the limits set out in
EN55013 and EN55020C.
REMEMBER to switch all units off before changing any connections.
Cleaning
Disconnect the power cord before cleaning the unit.
Note Do not use abrasive cleaners on any part of the 519.
Maintenance & Service
The Meridian 500 Series of hi-fi components have been carefully designed to give years of untroubled service, and there are no user-serviceable parts inside the case, nor do the units require any form of maintenance.
In the unlikely event that your 519 fails to function correctly, it should be
returned, in its original packing, to your Meridian dealer. In case of difficulty within the UK or USA please contact our sales and service offices
shown on page 2.
Outside the UK: contact the importing agent for the territory. A list of
Meridian agents abroad is available from the above address.
No responsibility can be accepted for the 519 whilst in transit to the factory or an agent and customers are, therefore, advised to insure the unit.
519 User Guide
Specification and Index
9
Specification
Inputs
Outputs
Indicators
User Options
1 Laser Disc RF 75 Ω 0.5V p-p nominal
1 cable digital serial interface to SPDIF
1 optical digital serial interface to SPDIF
1 cable digital serial interface to SPDIF
1 optical digital serial interface to SPDIF
Yellow LED for Power
Red lock LED for AC-3 decoding
Jumper Options to:
1. Disable 5V DC detection on RF input
2. Disable switching to digital audio inputs
3. Set Meridian Comms System Address
Dimensions (WxDxH)
246 x170 x 58mm, (9.7x 6.7 x 2.3")
Unpacked Weight
1.5 kg (3.3 lb.)
Packed Weight
Power Consumption
2 kg (4.4 lb.)
6 VA Maximum
Index
500-Series, 3
AC3, 5
Acknowledgements, 2
Cleaning, 8
Connections, 4
Contents, 2
Help!, 7
Installation, 3
Introduction, 3
Jumpers, 6
Opening the case, 6
Power switch, 5
Radio interference, 8
Repacking 519. see Unpacking
Service
where to get, 8
Specifications, 9
Switching on, 5
Unpacking 519, 3
519 User Guide