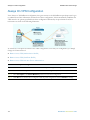
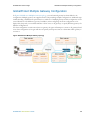
1
Palo Alto Networks ® GlobalProtect Administrator’s Guide Version 6.0 Contact Information Corporate Headquarters: Palo Alto Networks 4401 Great America Parkway Santa Clara, CA 95054 http://www.paloaltonetworks.com/contact/contact/ About this Guide This guide takes you through the configuration and maintenance of your GlobalProtect infrastructure. For additional information, refer to the following resources: For information on the additional capabilities and for instructions on configuring the features on the firewall, refer to https://www.paloaltonetworks.com/documentation. For access to the knowledge base, complete documentation set, discussion forums, and videos, refer to https://live.paloaltonetworks.com. For contacting support, for information on the support programs, or to manage your account or devices, refer to https://support.paloaltonetworks.com For the latest release notes, go to the software downloads page at https://support.paloaltonetworks.com/Updates/SoftwareUpdates. To provide feedback on the documentation, please write to us at: [email protected]. Palo Alto Networks, Inc. www.paloaltonetworks.com © 2014 Palo Alto Networks. All rights reserved. Palo Alto Networks and PAN-OS are registered trademarks of Palo Alto Networks, Inc. Revision Date: September 18, 2014 ii Table of Contents GlobalProtect Overview . . . . . . . . . . . . . . . . . . . . . . . . . . . . . . . . . . . . . . . . . .1 About the GlobalProtect Components . . . . . . . . . . . . . . . . . . . . . . . . . . . . . . . . . . . . . . . . . . . . . . . . . . . . . . . 2 GlobalProtect Portal . . . . . . . . . . . . . . . . . . . . . . . . . . . . . . . . . . . . . . . . . . . . . . . . . . . . . . . . . . . . . . . . . . 2 GlobalProtect Gateways . . . . . . . . . . . . . . . . . . . . . . . . . . . . . . . . . . . . . . . . . . . . . . . . . . . . . . . . . . . . . . . 2 GlobalProtect Client . . . . . . . . . . . . . . . . . . . . . . . . . . . . . . . . . . . . . . . . . . . . . . . . . . . . . . . . . . . . . . . . . . 3 GlobalProtect Mobile Security Manager . . . . . . . . . . . . . . . . . . . . . . . . . . . . . . . . . . . . . . . . . . . . . . . . . . 4 What Client OS Version are Supported with GlobalProtect? . . . . . . . . . . . . . . . . . . . . . . . . . . . . . . . . . . . . . 5 About GlobalProtect Licenses . . . . . . . . . . . . . . . . . . . . . . . . . . . . . . . . . . . . . . . . . . . . . . . . . . . . . . . . . . . . . . 6 Set Up the GlobalProtect Infrastructure . . . . . . . . . . . . . . . . . . . . . . . . . . . . . .7 Create Interfaces and Zones for GlobalProtect . . . . . . . . . . . . . . . . . . . . . . . . . . . . . . . . . . . . . . . . . . . . . . . . 8 Enable SSL Between GlobalProtect Components . . . . . . . . . . . . . . . . . . . . . . . . . . . . . . . . . . . . . . . . . . . . . 10 About GlobalProtect Certificate Deployment. . . . . . . . . . . . . . . . . . . . . . . . . . . . . . . . . . . . . . . . . . . . . 10 GlobalProtect Certificate Best Practices . . . . . . . . . . . . . . . . . . . . . . . . . . . . . . . . . . . . . . . . . . . . . . . . . 10 Deploy Server Certificates to the GlobalProtect Components . . . . . . . . . . . . . . . . . . . . . . . . . . . . . . . 13 Set Up GlobalProtect User Authentication. . . . . . . . . . . . . . . . . . . . . . . . . . . . . . . . . . . . . . . . . . . . . . . . . . . 15 About GlobalProtect User Authentication . . . . . . . . . . . . . . . . . . . . . . . . . . . . . . . . . . . . . . . . . . . . . . . 15 Set Up External Authentication . . . . . . . . . . . . . . . . . . . . . . . . . . . . . . . . . . . . . . . . . . . . . . . . . . . . . . . . 18 Set Up Client Certificate Authentication . . . . . . . . . . . . . . . . . . . . . . . . . . . . . . . . . . . . . . . . . . . . . . . . . 19 Set up Two-Factor Authentication . . . . . . . . . . . . . . . . . . . . . . . . . . . . . . . . . . . . . . . . . . . . . . . . . . . . . 23 Enable Group Mapping . . . . . . . . . . . . . . . . . . . . . . . . . . . . . . . . . . . . . . . . . . . . . . . . . . . . . . . . . . . . . . . . . . 29 Configure GlobalProtect Gateways . . . . . . . . . . . . . . . . . . . . . . . . . . . . . . . . . . . . . . . . . . . . . . . . . . . . . . . . . 32 Prerequisite Tasks for Configuring the GlobalProtect Gateway . . . . . . . . . . . . . . . . . . . . . . . . . . . . . . 32 Configure a GlobalProtect Gateway . . . . . . . . . . . . . . . . . . . . . . . . . . . . . . . . . . . . . . . . . . . . . . . . . . . . 32 Configure the GlobalProtect Portal. . . . . . . . . . . . . . . . . . . . . . . . . . . . . . . . . . . . . . . . . . . . . . . . . . . . . . . . . 36 Prerequisite Tasks for Configuring the GlobalProtect Portal. . . . . . . . . . . . . . . . . . . . . . . . . . . . . . . . . 36 Set Up Access to the GlobalProtect Portal . . . . . . . . . . . . . . . . . . . . . . . . . . . . . . . . . . . . . . . . . . . . . . . 36 Define the GlobalProtect Client Configurations. . . . . . . . . . . . . . . . . . . . . . . . . . . . . . . . . . . . . . . . . . . 37 Customize the GlobalProtect Agent . . . . . . . . . . . . . . . . . . . . . . . . . . . . . . . . . . . . . . . . . . . . . . . . . . . . 42 Customize the GlobalProtect Portal Login, Welcome, and Help Pages . . . . . . . . . . . . . . . . . . . . . . . . 46 Deploy the GlobalProtect Client Software . . . . . . . . . . . . . . . . . . . . . . . . . . . . . . . . . . . . . . . . . . . . . . . . . . . 48 Deploy the GlobalProtect Agent Software . . . . . . . . . . . . . . . . . . . . . . . . . . . . . . . . . . . . . . . . . . . . . . . 48 Deploy Agent Settings Transparently . . . . . . . . . . . . . . . . . . . . . . . . . . . . . . . . . . . . . . . . . . . . . . . . . . . 53 Download and Install the GlobalProtect Mobile App . . . . . . . . . . . . . . . . . . . . . . . . . . . . . . . . . . . . . . 55 Reference: GlobalProtect Agent Cryptographic Functions . . . . . . . . . . . . . . . . . . . . . . . . . . . . . . . . . . . . . . 57 GlobalProtect Administrator’s Guide iii Set Up the GlobalProtect Mobile Security Manager . . . . . . . . . . . . . . . . . . . 59 Mobile Security Manager Deployment Best Practices . . . . . . . . . . . . . . . . . . . . . . . . . . . . . . . . . . . . . . . . . . 60 Set Up Management Access to the Mobile Security Manager . . . . . . . . . . . . . . . . . . . . . . . . . . . . . . . . . . . . 61 Register, License, and Update the Mobile Security Manager . . . . . . . . . . . . . . . . . . . . . . . . . . . . . . . . . . . . . Register the GP-100 Appliance . . . . . . . . . . . . . . . . . . . . . . . . . . . . . . . . . . . . . . . . . . . . . . . . . . . . . . . . Activate/Retrieve the Licenses . . . . . . . . . . . . . . . . . . . . . . . . . . . . . . . . . . . . . . . . . . . . . . . . . . . . . . . . Install Content and Software Updates. . . . . . . . . . . . . . . . . . . . . . . . . . . . . . . . . . . . . . . . . . . . . . . . . . . 64 64 65 66 Set Up the Mobile Security Manager for Device Management . . . . . . . . . . . . . . . . . . . . . . . . . . . . . . . . . . . 68 Configure the Mobile Security Manager for Device Check-in . . . . . . . . . . . . . . . . . . . . . . . . . . . . . . . . 68 Configure the Mobile Security Manager for Enrollment . . . . . . . . . . . . . . . . . . . . . . . . . . . . . . . . . . . . 73 Enable Gateway Access to the Mobile Security Manager . . . . . . . . . . . . . . . . . . . . . . . . . . . . . . . . . . . . . . . 77 Define Deployment Policies . . . . . . . . . . . . . . . . . . . . . . . . . . . . . . . . . . . . . . . . . . . . . . . . . . . . . . . . . . . . . . 80 About Mobile Security Manager Policy Deployment . . . . . . . . . . . . . . . . . . . . . . . . . . . . . . . . . . . . . . . 80 Mobile Security Manager Policy Best Practices . . . . . . . . . . . . . . . . . . . . . . . . . . . . . . . . . . . . . . . . . . . 83 Integrate the Mobile Security Manager with your LDAP Directory . . . . . . . . . . . . . . . . . . . . . . . . . . . 85 Define HIP Objects and HIP Profiles . . . . . . . . . . . . . . . . . . . . . . . . . . . . . . . . . . . . . . . . . . . . . . . . . . 86 Create Configuration Profiles . . . . . . . . . . . . . . . . . . . . . . . . . . . . . . . . . . . . . . . . . . . . . . . . . . . . . . . . . 89 Create Deployment Policies. . . . . . . . . . . . . . . . . . . . . . . . . . . . . . . . . . . . . . . . . . . . . . . . . . . . . . . . . . 101 Verify the Mobile Security Manager Configuration . . . . . . . . . . . . . . . . . . . . . . . . . . . . . . . . . . . . . . . . . . . 104 Set Up Administrative Access to the Mobile Security Manager . . . . . . . . . . . . . . . . . . . . . . . . . . . . . . . . . 107 Set Up Administrative Authentication . . . . . . . . . . . . . . . . . . . . . . . . . . . . . . . . . . . . . . . . . . . . . . . . . 107 Create an Administrative Account . . . . . . . . . . . . . . . . . . . . . . . . . . . . . . . . . . . . . . . . . . . . . . . . . . . . 111 Manage Mobile Devices . . . . . . . . . . . . . . . . . . . . . . . . . . . . . . . . . . . . . . . 115 Group Devices by Tag for Simplified Device Administration . . . . . . . . . . . . . . . . . . . . . . . . . . . . . . . . . . 116 Manually Tag Devices . . . . . . . . . . . . . . . . . . . . . . . . . . . . . . . . . . . . . . . . . . . . . . . . . . . . . . . . . . . . . . 116 Pre-Tag Devices . . . . . . . . . . . . . . . . . . . . . . . . . . . . . . . . . . . . . . . . . . . . . . . . . . . . . . . . . . . . . . . . . . . 117 Monitor Mobile Devices . . . . . . . . . . . . . . . . . . . . . . . . . . . . . . . . . . . . . . . . . . . . . . . . . . . . . . . . . . . . . . . . 119 Administer Remote Devices . . . . . . . . . . . . . . . . . . . . . . . . . . . . . . . . . . . . . . . . . . . . . . . . . . . . . . . . . . . . . Interact With Devices . . . . . . . . . . . . . . . . . . . . . . . . . . . . . . . . . . . . . . . . . . . . . . . . . . . . . . . . . . . . . . Take Action on a Lost or Stolen Device. . . . . . . . . . . . . . . . . . . . . . . . . . . . . . . . . . . . . . . . . . . . . . . . Remove Devices. . . . . . . . . . . . . . . . . . . . . . . . . . . . . . . . . . . . . . . . . . . . . . . . . . . . . . . . . . . . . . . . . . . 123 123 124 125 Create Security Policies for Mobile Device Traffic Enforcement . . . . . . . . . . . . . . . . . . . . . . . . . . . . . . . . 126 Use Host Information in Policy Enforcement. . . . . . . . . . . . . . . . . . . . . . . . 129 About Host Information . . . . . . . . . . . . . . . . . . . . . . . . . . . . . . . . . . . . . . . . . . . . . . . . . . . . . . . . . . . . . . . . What Data Does the GlobalProtect Agent Collect?. . . . . . . . . . . . . . . . . . . . . . . . . . . . . . . . . . . . . . . How Does the Gateway Use the Host Information to Enforce Policy?. . . . . . . . . . . . . . . . . . . . . . . How Do Users Know if Their Systems are Compliant? . . . . . . . . . . . . . . . . . . . . . . . . . . . . . . . . . . . 130 130 132 132 Configure HIP-Based Policy Enforcement . . . . . . . . . . . . . . . . . . . . . . . . . . . . . . . . . . . . . . . . . . . . . . . . . 134 iv GlobalProtect Administrator’s Guide GlobalProtect Quick Configs . . . . . . . . . . . . . . . . . . . . . . . . . . . . . . . . . . . . 143 Remote Access VPN (Authentication Profile) . . . . . . . . . . . . . . . . . . . . . . . . . . . . . . . . . . . . . . . . . . . . . . . 144 Remote Access VPN (Certificate Profile) . . . . . . . . . . . . . . . . . . . . . . . . . . . . . . . . . . . . . . . . . . . . . . . . . . . 147 Remote Access VPN with Two-Factor Authentication . . . . . . . . . . . . . . . . . . . . . . . . . . . . . . . . . . . . . . . . 150 Always On VPN Configuration. . . . . . . . . . . . . . . . . . . . . . . . . . . . . . . . . . . . . . . . . . . . . . . . . . . . . . . . . . . 154 Remote Access VPN with Pre-Logon. . . . . . . . . . . . . . . . . . . . . . . . . . . . . . . . . . . . . . . . . . . . . . . . . . . . . . 155 GlobalProtect Multiple Gateway Configuration . . . . . . . . . . . . . . . . . . . . . . . . . . . . . . . . . . . . . . . . . . . . . . 159 GlobalProtect for Internal HIP Checking and User-Based Access . . . . . . . . . . . . . . . . . . . . . . . . . . . . . . . 163 Mixed Internal and External Gateway Configuration. . . . . . . . . . . . . . . . . . . . . . . . . . . . . . . . . . . . . . . . . . 168 GlobalProtect Administrator’s Guide v vi GlobalProtect Administrator’s Guide GlobalProtect Overview Whether checking email from home or updating corporate documents from the airport, the majority of today's employees work outside the physical corporate boundaries. This increased workforce mobility brings increased productivity and flexibility while simultaneously introducing significant security risks. Every time users leave the building with their laptops or mobile devices they are bypassing the corporate firewall and associated policies that are designed to protect both the user and the network. GlobalProtect solves the security challenges introduced by roaming users by extending the same next-generation firewall-based policies that are enforced within the physical perimeter to all users, no matter where they are located. The following sections provide conceptual information about the Palo Alto Networks GlobalProtect offering and describe the components of GlobalProtect and the various deployment scenarios: About the GlobalProtect Components What Client OS Version are Supported with GlobalProtect? About GlobalProtect Licenses GlobalProtect Administrator’s Guide 1 About the GlobalProtect Components GlobalProtect Overview About the GlobalProtect Components GlobalProtect provides a complete infrastructure for managing your mobile workforce to enable secure access for all your users, regardless of what devices they are using or where they are located. This infrastructure includes the following components: GlobalProtect Portal GlobalProtect Gateways GlobalProtect Client GlobalProtect Mobile Security Manager GlobalProtect Portal The GlobalProtect portal provides the management functions for your GlobalProtect infrastructure. Every client system that participates in the GlobalProtect network receives configuration information from the portal, including information about available gateways as well as any client certificates that may be required to connect to the GlobalProtect gateway(s) and/or the Mobile Security Manager. In addition, the portal controls the behavior and distribution of the GlobalProtect agent software to both Mac and Windows laptops. (On mobile devices, the GlobalProtect app is distributed through the Apple App Store for iOS devices or through Google Play for Android devices.) If you are using the Host Information Profile (HIP) feature, the portal also defines what information to collect from the host, including any custom information you require. You Configure the GlobalProtect Portal on an interface on any Palo Alto Networks next-generation firewall. GlobalProtect Gateways GlobalProtect gateways provide security enforcement for traffic from GlobalProtect agents/apps. Additionally, if the HIP feature is enabled, the gateway generates a HIP report from the raw host data the clients submit and can use this information in policy enforcement. External gateways—Provide security enforcement and/or virtual private network (VPN) access for your remote users. Internal gateways—An interface on the internal network configured as a GlobalProtect gateway for applying security policy for access to internal resources. When used in conjunction with User-ID and/or HIP checks, an internal gateway can be used to provide a secure, accurate method of identifying and controlling traffic by user and/or device state. Internal gateways are useful in sensitive environments where authenticated access to critical resources is required. You can configure an internal gateway in either tunnel mode or non-tunnel mode. You Configure GlobalProtect Gateways on an interface on any Palo Alto Networks next-generation firewall. You can run both a gateway and a portal on the same firewall, or you can have multiple, distributed gateways throughout your enterprise. 2 GlobalProtect Administrator’s Guide GlobalProtect Overview About the GlobalProtect Components GlobalProtect Client The GlobalProtect client software runs on end user systems and enables access to your network resources via the GlobalProtect portals and gateways you have deployed. There are two types of GlobalProtect clients: The GlobalProtect Agent—Runs on Windows and Mac OS systems and is deployed from the GlobalProtect portal. You configure the behavior of the agent—for example, which tabs the users can see, whether or not users can uninstall the agent—in the client configuration(s) you define on the portal. See Define the GlobalProtect Client Configurations, Customize the GlobalProtect Agent, and Deploy the GlobalProtect Agent Software for details. The GlobalProtect App—Runs on iOS and Android devices. Users must obtain the GlobalProtect app from the Apple App Store (for iOS) or Google Play (for Android). See What Client OS Version are Supported with GlobalProtect? for more details. The following diagram illustrates how the GlobalProtect portals, gateways, and agents/apps work together to enable secure access for all your users, regardless of what devices they are using or where they are located. GlobalProtect Administrator’s Guide 3 About the GlobalProtect Components GlobalProtect Overview GlobalProtect Mobile Security Manager The GlobalProtect Mobile Security Manager provides management, visibility, and automated configuration deployment for mobile devices—either company provisioned or employee owned—on your network. Because the Mobile Security Manager is part of the integrated GlobalProtect mobile solution, the GlobalProtect gateway can leverage information about managed devices and use the extended host information collected by the Mobile Security Manager to provide enhanced security policy enforcement for managed devices. Gateways retrieve the extended HIP profiles from the Mobile Security Manager and use the information to enforce security policies for devices that connect to your network. The deployment policies you create on the Mobile Security Manager provide simplified account provisioning to mobile device users for access to your corporate applications (such as email and VPN configurations). You can also perform certain actions such as locking the device, sounding an alarm to help locate the device, or even wiping a device that has been compromised. To communicate with a device, the Mobile Security Manager sends a push notification over the air (OTA). For iOS devices, it sends push notifications over the Apple Push Notification service (APNs) and for Android devices it sends them using the Google Cloud Messaging (GCM). When a device receives a push notification, it checks in by establishing an HTTPS connection to the device check-in interface on the Mobile Security Manager. When a device checks in with the Mobile Security Manager, it submits host information that includes additional information beyond what the GlobalProtect gateway collects, including a list of all installed apps, the location of the device at the time of check-in (this can be disabled), whether the device has a passcode set, and/or whether it is rooted/jailbroken. In addition, if the Mobile Security Manager has a WildFire subscription, it can detect whether a device has Malware (Android devices only). By leveraging the extended HIP data that the Mobile Security Manager collects, you can create a very granular security policy for mobile device users on your GlobalProtect gateways. See Set Up the GlobalProtect Mobile Security Manager for more information. 4 GlobalProtect Administrator’s Guide GlobalProtect Overview What Client OS Version are Supported with GlobalProtect? What Client OS Version are Supported with GlobalProtect? The following table summarizes the supported GlobalProtect following desktop, laptop, and mobile devices and the minimum PAN-OS and GlobalProtect agent/app versions required to support each one: Supported Client OS Versions Minimum Agent/App Version Minimum PAN-OS Version Apple Mac OS 10.6 1.1 4.1.0 or later Apple Mac OS 10.7 1.1 Apple Mac OS 10.8 1.1.6 Apple Mac OS 10.9 1.2 Windows XP (32-bit) 1.0 Windows Vista (32-bit and 64-bit) 1.0 Windows 7 (32-bit and 64-bit) 1.0 Windows 8 (32-bit and 64-bit) 1.2 Windows 8.1 (32-bit and 64-bit) 1.2 Windows Surface Pro 1.2 Apple iOS 6.0 or later* 1.3 app 4.1.0 or later Google Android 4.0.3 or later* 1.3 app 4.1.6 or later Third-party X-Auth IPsec Clients: N/A 5.0 or later 4.0 or later • VPNC on Ubuntu Linux 10.04 and CentOS 6 • iOS built-in IPsec client • Android built-in IPsec client * The 2.0 app is required for a device to be managed by the GlobalProtect Mobile Security Manager and the firewall must be running PAN-OS 6.0. Users must obtain the GlobalProtect app from the Apple App Store (for iOS) or Google Play (for Android). For information on how to distribute the GlobalProtect agent, see Deploy the GlobalProtect Agent Software GlobalProtect Administrator’s Guide 5 About GlobalProtect Licenses GlobalProtect Overview About GlobalProtect Licenses If you simply want to use GlobalProtect to provide a secure, remote access or virtual private network (VPN) solution via a single, external gateway, you do not need any GlobalProtect licenses. However, to use some of the more advanced features, such as multiple gateways, mobile apps, mobile security management, host information checks, or internal gateways, you may need to purchase one or more of the following licenses: Portal license—A one-time perpetual license that must be installed on the firewall running the portal to enable internal gateway support, multiple gateways (internal or external), and/or HIP checks. Gateway subscription—An annual subscription that enables HIP checks and associated content updates. This license must be installed on each firewall running a gateway(s) that performs HIP checks. In addition, the gateway license enables support for the GlobalProtect mobile app for iOS and Android. GlobalProtect Mobile Security Manager Capacity License on the GP-100 appliance—A one-time perpetual license for the Mobile Security Manager based on the number of mobile devices to be managed. This license is only required if you plan to manage more than 500 mobile devices. Perpetual licenses are available for up to 1,000, 2,000, 5,000, 10,000, 25,000, 50,000, or 100,000 mobile devices. GlobalProtect Mobile Security Manager WildFire subscription on the GP-100 appliance—Used with GlobalProtect Mobile Security Manager for detecting APK malware on managed Android devices. To enable malware detection for use with the GlobalProtect Mobile Security Manager, you must purchase a WildFire subscription that matches the capacity of your GlobalProtect Mobile Security Manager license. See Activate Licenses for information on installing licenses on the firewall. See Activate/Retrieve the Licenses for information on installing licenses on the Mobile Security Manager. 6 GlobalProtect Administrator’s Guide Set Up the GlobalProtect Infrastructure In order for GlobalProtect to work, you must set up the basic infrastructure that allows all of the components to communicate. At a basic level, this means setting up the interfaces and zones that the GlobalProtect end users will connect to in order to access the portal and gateways. Because the GlobalProtect components communicate over secure channels, you must acquire and deploy all of the required SSL certificates on the various components. The following sections walk you through the basic steps to set up the GlobalProtect infrastructure: Create Interfaces and Zones for GlobalProtect Enable SSL Between GlobalProtect Components Set Up GlobalProtect User Authentication Enable Group Mapping Configure GlobalProtect Gateways Configure the GlobalProtect Portal Deploy the GlobalProtect Client Software Reference: GlobalProtect Agent Cryptographic Functions GlobalProtect Administrator’s Guide 7 Create Interfaces and Zones for GlobalProtect Set Up the GlobalProtect Infrastructure Create Interfaces and Zones for GlobalProtect You must configure the following interfaces and zones for your GlobalProtect infrastructure: GlobalProtect portal—Requires a Layer 3 or loopback interface for GlobalProtect clients to connect to. If the portal and gateway are on the same firewall, they can use the same interface. The portal must be in a zone that is accessible from outside your network, for example: untrust. GlobalProtect gateways—The interface and zone requirements for the gateway depend on whether you are configuring an external gateway or an internal gateway as follows: – External gateways—Requires a Layer 3 or loopback interface and a logical tunnel interface for the client to connect to in order to establish a VPN tunnel. The Layer 3/loopback interface must be in an external zone, such as untrust. The tunnel interface can either be in the same zone as the interface connecting to your internal resources, for example trust, or, for added security and better visibility, you can create a separate zone, such as corp-vpn. If you create a separate zone for your tunnel interface, you will need to create security policies to enable traffic to flow between the VPN zone and the trust zone. – Internal gateways—Requires a Layer 3 or loopback interface in your trust zone. You can also create a tunnel interface for access to your internal gateways, but this is not required. For tips on how to use a loopback interface to provide access to GlobalProtect on different ports and addresses, refer to Can GlobalProtect Portal Page be Configured to be Accessed on any Port? For more information about portals and gateways, see About the GlobalProtect Components. Set Up Interfaces and Zones for GlobalProtect Step 1 1. Configure a Layer 3 interface for each portal and/or gateway you plan to deploy. If the gateway and portal are on the same firewall, you can use a single 2. interface for both. As a best practice use static IP addresses for the portal and gateway. 3. Select Network > Interfaces > Ethernet or Network > Interfaces > Loopback and then select the interface you want to configure for GlobalProtect. In this example, we are configuring ethernet1/1 as the portal interface. (Ethernet only) Select Layer3 from the Interface Type drop-down. On the Config tab, select the zone to which the portal or gateway interface belongs as follows: • Place portals and external gateways in an untrust zone for access by hosts outside your network, such as l3-untrust. • Place internal gateways in an internal zone, such as l3-trust. • If you have not yet created the zone, select New Zone from the Security Zone drop-down. In the Zone dialog, define a Name for the new zone and then click OK. 4. In the Virtual Router drop-down, select default. 5. To assign an IP address to the interface, select the IPv4 tab, click Add in the IP section, and enter the IP address and network mask to assign to the interface, for example 208.80.56.100/24. 6. 8 To save the interface configuration, click OK. GlobalProtect Administrator’s Guide Set Up the GlobalProtect Infrastructure Create Interfaces and Zones for GlobalProtect Set Up Interfaces and Zones for GlobalProtect (Continued) Step 2 On the firewall(s) hosting GlobalProtect 1. gateway(s), configure the logical tunnel 2. interface that will terminate VPN tunnels 3. established by the GlobalProtect agents. IP addresses are not required on the tunnel interface unless you require dynamic routing. In addition, assigning an IP address to the tunnel interface can be useful for troubleshooting connectivity issues. Select Network > Interfaces > Tunnel and click Add. In the Interface Name field, specify a numeric suffix, such as .2. On the Config tab, expand the Security Zone drop-down to define the zone as follows: • To use your trust zone as the termination point for the tunnel, select the zone from the drop-down. Make sure to enable User-ID in the 4. zone where the VPN tunnels 5. terminate. 6. • (Recommended) To create a separate zone for VPN tunnel termination, click New Zone. In the Zone dialog, define a Name for new zone (for example vpn-corp), select the Enable User Identification check box, and then click OK. In the Virtual Router drop-down, select default. (Optional) If you want to assign an IP address to the tunnel interface, select the IPv4 tab, click Add in the IP section, and enter the IP address and network mask to assign to the interface, for example 10.31.32.1/32. To save the interface configuration, click OK. Step 3 If you created a separate zone for tunnel For example, the following policy rule enables traffic between the termination of VPN connections, create a corp-vpn zone and the l3-trust zone. security policy to enable traffic flow between the VPN zone and your trust zone. Step 4 Save the configuration. Click Commit. If you enabled management access to the interface hosting the portal, you must add a :4443 to the URL. For example, to access the web interface for the portal configured in this example, you would enter the following: https://208.80.56.100:4443 Or, if you configured a DNS record for the FQDN, such as gp.acme.com, you would enter: https://gp.acme.com:4443 GlobalProtect Administrator’s Guide 9 Enable SSL Between GlobalProtect Components Set Up the GlobalProtect Infrastructure Enable SSL Between GlobalProtect Components All interaction between the GlobalProtect components occurs over an SSL connection. Therefore, you must generate and/or install the required certificates before configuring each component so that you can reference the appropriate certificate(s) in the configurations. The following sections describe the supported methods of certificate deployment, descriptions and best practice guidelines for the various GlobalProtect certificates, and provide instructions for generating and deploying the required certificates: About GlobalProtect Certificate Deployment GlobalProtect Certificate Best Practices Deploy Server Certificates to the GlobalProtect Components About GlobalProtect Certificate Deployment There are three basic approaches to Deploy Server Certificates to the GlobalProtect Components: (Recommended) Combination of third-party certificates and self-signed certificates—Because the end clients will be accessing the portal prior to GlobalProtect configuration, the client must trust the certificate to establish an HTTPS connection. Similarly, if you are using GlobalProtect Mobile Security Manager, the same is true for mobile devices accessing the Mobile Security Manager for enrollment. Therefore, the recommended approach is to purchase the portal server certificate and the server certificate for the Mobile Security Manager device check-in interface from a trusted CA that most end clients will already trust in order to prevent certificate errors. After successfully connecting, the portal can push any other required certificates (for example, the root CA certificate for the gateway) to the end client. Enterprise Certificate Authority—If you already have your own enterprise certificate authority, you can use this internal CA to issue certificates for each of the GlobalProtect components and then import them onto the firewalls hosting your portal and gateway(s) and onto the Mobile Security Manager. In this case, you must also ensure that the end user systems/mobile devices trust the root CA certificate used to issue the certificates for the GlobalProtect services to which they must connect. Self-Signed Certificates—You can generate a self-signed CA certificate on the portal and use it to issue certificates for all of the GlobalProtect components. However, this solution is less secure than the other options and is therefore not recommended. If you do choose this option, end users will see a certificate error the first time they connect to the portal. To prevent this, you can deploy the self-signed root CA certificate to all end user systems manually or using some sort of centralized deployment, such as an Active Directory Group Policy Object (GPO). GlobalProtect Certificate Best Practices The following table summarizes the SSL certificates you will need, depending on which features you plan to use: 10 GlobalProtect Administrator’s Guide Set Up the GlobalProtect Infrastructure Enable SSL Between GlobalProtect Components Table: GlobalProtect Certificate Requirements Certificate Usage Issuing Process/Best Practices CA certificate Used to sign certificates issued to the GlobalProtect components. If you plan to use self-signed certificates, it is a best practice to generate a CA certificate on the portal and then use that certificate to issue the required GlobalProtect certificates. Portal server certificate Enables GlobalProtect • As a best practice, use a certificate issued by a well-known, third-party CA. This is the most secure option and it ensures that the end clients will be able to establish a trust relationship with the portal without requiring you to deploy the root CA certificate. The Common Name (CN) and, if applicable, the Subject • If you do not use a well-known, public CA, you should export Alternative Name (SAN) fields the root CA certificate used to generate the portal server of the certificate must exactly certificate to all client systems that will run GlobalProtect to match the IP address or fully prevent the end users from seeing certificate warnings during qualified domain name (FQDN) the initial portal connection. of the interface hosting the • If you are deploying a single gateway and portal on the same portal. interface/IP address for basic VPN access, you must use a single server certificate for both components. agents/apps to establish an HTTPS connection with the portal. Gateway server certificate Enables GlobalProtect agents/apps to establish an HTTPS connection with the gateway. • Each gateway must have its own server certificate. • As a best practice, generate a CA certificate on the portal and use that CA certificate to generate all gateway certificates. • The portal can distribute the gateway root CA certificate to The Common Name (CN) and, agents in the client configuration, so the gateway certificates if applicable, the Subject do not need to be issued by a public CA. Alternative Name (SAN) fields • If you are deploying a single gateway and portal on the same of the certificate must exactly interface/IP address for basic VPN access, you must use a match the FQDN or IP address single server certificate for both components. As a best of the interface where you plan practice, use a certificate from a public CA. to configure the gateway. (Optional) Client certificate • For simplified deployment of client certificates, configure the portal to deploy the client certificate to the agents upon successful login. In this configuration, a single client certificate is shared across all GlobalProtect agents using the same configuration; the purpose of this certificate is to ensure In addition to enabling mutual that only clients from your organization are allowed to authentication in establishing an connect. HTTPS session between the client and the portal/gateway, • You can use other mechanisms to deploy unique client you can also use client certificates to each client system for use in authenticating the certificates to authenticate end end user. users. • Consider testing your configuration without the client certificate first, and then add the client certificate after you are sure that all other configuration settings are correct. Used to enable mutual authentication between the GlobalProtect agents and the gateways/portal. GlobalProtect Administrator’s Guide 11 Enable SSL Between GlobalProtect Components Set Up the GlobalProtect Infrastructure Certificate Usage Issuing Process/Best Practices (Optional) Machine certificates Ensures that only trusted machines can connect to GlobalProtect. In addition, machine certificates are required for use of the pre-logon connect method, which allows for establishment of VPN tunnels before the user logs in. If you plan to use the pre-logon feature, you must use your own PKI infrastructure to deploy machine certificates to each client system prior to enabling GlobalProtect access. For more information, see Remote Access VPN with Pre-Logon. Mobile Security Manager server certificate(s) • Because mobile devices must trust the Mobile Security • Enables mobile devices to Manager in order to enroll, as a best practice purchase a establish HTTPS sessions certificate for the Mobile Security Manager device check-in with the Mobile Security interface from a well-known, trusted CA. If you do not use a Manager, for enrollment and trusted CA to issue certificates for the Mobile Security check-in. Manager device check-in interface, you will have to deploy the • Enables gateways to connect Mobile Security Manager root CA certificate to the mobile to the Mobile Security devices via the portal configuration (to enable the device to Manager to retrieve HIP establish an SSL connection with the Mobile Security reports for managed mobile Manager for enrollment). devices. • If the device check-in interface is on a different interface than • The Common Name (CN) the interface where gateways connect for HIP retrieval, you and, if applicable, the Subject will need separate server certificates for each interface. Alternative Name (SAN) fields of the certificate must For detailed instructions, see Set Up the GlobalProtect Mobile exactly match the IP address Security Manager. or fully qualified domain name (FQDN) of the interface. Apple Push Notification service (APNs) Mobile Security Manager certificate Allows the Mobile Security Manager to send push notifications to managed iOS devices. • You must generate the certificate signing request (CSR) for this certificate on the Mobile Security Manager and then send it to the Apple iOS Provisioning Portal (login required) for signing. • Apple only supports CSRs signed using the SHA 1 message digest and 2048 bit keys. See Configure the Mobile Security Manager for Device Check-in for details on how to set this up. Identity certificates Enables the Mobile Security Manager and optionally the gateway to establish mutually authenticated SSL sessions with mobile devices. The Mobile Security Manager manages the deployment of identity certificates for the devices it manages. See Configure the Mobile Security Manager for Enrollment for details on how to set this up. For details about the types of keys used to establish secure communication between the GlobalProtect agent and the portals and gateways, see Reference: GlobalProtect Agent Cryptographic Functions. 12 GlobalProtect Administrator’s Guide Set Up the GlobalProtect Infrastructure Enable SSL Between GlobalProtect Components Deploy Server Certificates to the GlobalProtect Components The following workflow shows the best practice steps for deploying SSL certificates to the GlobalProtect components: Deploy SSL Server Certificates to the GlobalProtect Components To import a certificate and private key from a public CA, make sure the certificate and key files are accessible from your management system and that you have the passphrase to decrypt the private key Use a server certificate from a well-known, and then complete the following steps: third-party CA for the GlobalProtect portal and Mobile Security Manager. This 1. Select Device > Certificate Management > Certificates > Device Certificates. ensures that the end clients will be able to 2. Click Import and enter a Certificate Name. establish an HTTPS connection without receiving certificate warnings. 3. Enter the path and name to the Certificate File received from The Common Name (CN) and, if the CA, or Browse to find the file. applicable, the Subject Alternative Name 4. Select Encrypted Private Key and Certificate (PKCS12) as the (SAN) fields of the certificate must match File Format. the fully qualified domain name (FQDN) 5. Select the Import private key check box. or IP address or of the interface where you 6. Enter the path and name to the PKCS#12 file in the Key File plan to configure the portal and/or the field or Browse to find it. device check-in interface on the Mobile Security Manager. Wildcard matches are 7. Enter and re-enter the Passphrase that was used to encrypt the supported. private key and then click OK to import the certificate and key. • Import a server certificate from a well-known, third-party CA. To use self-signed certificates, you must first create the root CA certificate that will be used to sign the certificates for the GlobalProtect components as follows: 1. To create a root CA certificate, select Device > Certificate Create the Root CA certificate on the Management > Certificates > Device Certificates and then portal and use it to issue server certificates click Generate. for the gateways and optionally for clients. 2. Enter a Certificate Name, such as GlobalProtect_CA. The certificate name cannot contain any spaces. • Create the root CA certificate for issuing self-signed certificates for the GlobalProtect components. GlobalProtect Administrator’s Guide 3. Do not select a value in the Signed By field (this is what indicates that it is self-signed). 4. Select the Certificate Authority check box and then click OK to generate the certificate. 13 Enable SSL Between GlobalProtect Components Set Up the GlobalProtect Infrastructure Deploy SSL Server Certificates to the GlobalProtect Components (Continued) • Generate a self-signed server certificate. Use the root CA on the portal to generate server certificates for each gateway you plan to deploy and optionally for the Mobile Security Manager management interface (if this is the interface the gateways will use to retrieve HIP reports). In the gateway server certificates, the values in the Common Name (CN) and Subject Alternative Name (SAN) fields of the certificate must be identical or the GlobalProtect agent will detect the mismatch when it checks the certificate chain of trust and will not trust the certificate. Self-signed certificates will only contain a SAN field if you add a Host Name certificate attribute. • Deploy the self-signed server certificates. 1. Select Device > Certificate Management > Certificates > Device Certificates and then click Generate. 2. Enter a Certificate Name. The Certificate Name cannot contain any spaces. 3. Enter the FQDN (recommended) or IP address of the interface where you plan to configure the gateway in the Common Name field. 4. In the Signed By field, select the GlobalProtect_CA you created previously. 5. In the Certificate Attributes section, click Add and define the attributes to uniquely identify the gateway. Keep in mind that if you add a Host Name attribute (which populates the SAN field of the certificate), it must exactly match the value you defined for the Common Name. 6. Click OK to generate the certificate. 7. Commit your changes. 1. On the portal, select Device > Certificate Management > Certificates > Device Certificates, select the gateway certificate you want to deploy, and click Export. Best Practices: • Export the self-signed server certificates 2. issued by the root CA on the portal and import them onto the gateways. 3. • Be sure to issue a unique server certificate for each gateway. • When using self-signed certificates, you must distribute the Root CA certificate to the end clients in the portal client configurations. 4. Select Encrypted Private Key and Certificate (PKCS12) from the File Format drop-down. Enter (and re-enter) a Passphrase to encrypt the private key and then click OK to download the PKCS12 file to your computer. On the gateway, select Device > Certificate Management > Certificates > Device Certificates and click Import. 5. Enter a Certificate Name. 6. Enter the path and name to the Certificate File you just downloaded from the portal, or Browse to find the file. 7. Select Encrypted Private Key and Certificate (PKCS12) as the File Format. 8. Enter the path and name to the PKCS12 file in the Key File field or Browse to find it. 9. Enter and re-enter the Passphrase you used to encrypt the private key when you exported it from the portal and then click OK to import the certificate and key. 10. Commit the changes to the gateway. 14 GlobalProtect Administrator’s Guide Set Up the GlobalProtect Infrastructure Set Up GlobalProtect User Authentication Set Up GlobalProtect User Authentication The portal and gateway require the end-user authentication credentials before the GlobalProtect agent/app will be allowed access to GlobalProtect resources. Because the portal and gateway configurations require you to specify which authentication mechanisms to use, you must configure authentication before continuing with the portal and gateway setup. The following sections detail the supported authentication mechanisms and how to configure them: About GlobalProtect User Authentication Set Up External Authentication Set Up Client Certificate Authentication Set up Two-Factor Authentication About GlobalProtect User Authentication The first time a GlobalProtect agent/app connects to the portal, the user is prompted to authenticate to the portal in order to download the GlobalProtect configuration, which includes the list of gateways the agent can connect to, the location of the Mobile Security Manager, and optionally a client certificate for connecting to the gateways. After successfully downloading and caching the configuration, the agent/app attempts to connect to one of the gateways specified in the configuration and/or to the specified Mobile Security Manager. Because these components provide access to your network resources and settings, they also require the end user to authenticate. The level of security required on the portal, Mobile Security Manager, and the gateways (and even from gateway to gateway) varies depending on the sensitivity of the resources each protects; GlobalProtect provides a flexible authentication framework that allows you to choose the authentication profile and/or certificate profile that is appropriate on each component. The following sections describe the authentication features available on the portal and the gateway. For details on how to set up authentication on the Mobile Security Manager, see Configure the Mobile Security Manager for Enrollment. GlobalProtect Administrator’s Guide 15 Set Up GlobalProtect User Authentication Set Up the GlobalProtect Infrastructure Supported GlobalProtect Authentication Methods Authentication Method Description Local Authentication Both the user account credentials and the authentication mechanisms are local to the firewall. This authentication mechanism is not scalable because it requires an account for every GlobalProtect end user and is therefore only recommended in very small deployments. External authentication The user authentication functions are offloaded to an existing LDAP, Kerberos, or RADIUS service (including support for two-factor token-based authentication mechanisms such as one-time password (OTP) authentication). To enable external authentication, you must first create a server profile that defines access settings for the external authentication service and then create an authentication profile referencing the server profile. You then reference the authentication profile in the portal, gateway, and/or Mobile Security Manager configurations. You can use different authentication profiles for each GlobalProtect component. See Set Up External Authentication for instructions on setting this up. See Remote Access VPN (Authentication Profile) for an example configuration. Client certificate authentication The portal or the gateway uses a client certificate to obtain the username and authenticate the user before granting access to the system. With this type of authentication, you must issue a client certificate to each end user; the certificates you issue must contain the username in one of the certificate fields, such as the Subject Name field. If a certificate profile is configured on the GlobalProtect portal, the client must present a certificate in order to connect. This means that certificates must be pre-deployed to the end clients before their initial portal connection. In addition, the certificate profile specifies which certificate field to obtain the username from. If the certificate profile specifies Subject in the Username Field, the certificate presented by the client must contain a common-name in order to connect. If the certificate profile specifies a Subject-Alt with an Email or Principal Name as the Username Field, the certificate presented by the client must contain the corresponding fields, which will be used as the username when the GlobalProtect agent authenticates to the portal or gateway. GlobalProtect also supports common access card (CAC) and smart card-based authentication, which rely on a certificate profile. In this case, the certificate profile must contain the root CA certificate that issued the certificate in the smart card/CAC. If you are using client certificate authentication, you should not configure a client certificate in the portal configuration as the client system will provide it when the end user connects. For an example of how to configure client certificate authentication, see Remote Access VPN (Certificate Profile). 16 GlobalProtect Administrator’s Guide Set Up the GlobalProtect Infrastructure Set Up GlobalProtect User Authentication Authentication Method Description Two-factor authentication You can enable two-factor authentication by configuring both a certificate profile and an authentication profile and adding them both to the portal and/or gateway configuration. Keep in mind that with two-factor authentication, the client must successfully authenticate via both mechanisms in order to gain access to the system. In addition, if the certificate profile specifies a Username Field from which to obtain the username from the certificate, the username will automatically be used for authenticating to the external authentication service specified in the authentication profile. For example, if the Username Field in the certificate profile is set to Subject, the value in the common-name field of the certificate will by default be used as the username when the user attempts to authenticate to the authentication server. If you do not want to force users to authenticate with a username from the certificate, make sure the certificate profile is set to None for the Username Field. See Remote Access VPN with Two-Factor Authentication for an example configuration. How Does the Agent Know What Credentials to Supply to the Portal and Gateway? By default, the GlobalProtect agent attempts to use the same login credentials for the gateway that it used for portal login. In the simplest case, where the gateway and the portal use the same authentication profile and/or certificate profile, the agent will connect to the gateway transparently. However, if the portal and the gateway require different credentials (such as unique OTPs), this default behavior would cause delays in connecting to the gateway because the gateway would not prompt the user to authenticate until after it tried and failed to authenticate using the portal credentials the agent supplied. There are two options for modifying the default agent authentication behavior on a per-client configuration basis: Cookie authentication on the portal—The agent uses an encrypted cookie to authenticate to the portal when refreshing a configuration that has already been cached (the user will always be required to authenticate for the initial configuration download and upon cookie expiration). This simplifies the authentication process for end users because they will no longer be required to log in to both the portal and the gateway in succession or enter multiple OTPs for authenticating to each. In addition, this enables use of a temporary password to re-enable VPN access after password expiration. Disable forwarding of credentials to some or all gateways—The agent will not attempt to use its portal credentials for gateway login, enabling the gateway to immediately prompt for its own set of credentials. This option speeds up the authentication process when the portal and the gateway require different credentials (either different OTPs or different login credentials entirely). Or, you can choose to use a different password on manual gateways only. With this option, the agent will forward credentials to automatic gateways but not to manual gateways, allowing you to have the same security on your portals and automatic gateways, while requiring a second factor OTP or a different password for access to those gateways that provide access to your most sensitive resources. For an example of how to use these options, see Enable Two-Factor Authentication Using One-Time Passwords (OTPs). GlobalProtect Administrator’s Guide 17 Set Up GlobalProtect User Authentication Set Up the GlobalProtect Infrastructure Set Up External Authentication The following workflow describes how to set up the portal and/or gateway to authenticate users against an existing authentication service. GlobalProtect supports external authentication using LDAP, Kerberos, or RADIUS. GlobalProtect also supports local authentication. To use this authentication method create a local user database that contains the users and groups you want allow into the VPN (Device > Local User Database) and then reference it in the authentication profile. For more information, see Supported GlobalProtect Authentication Methods or watch a video. Set Up External User Authentication Step 1 Create a server profile. 1. The server profile instructs the firewall 2. how to connect to an external authentication service and access the authentication credentials for your users. 3. If you are using LDAP to connect to Active Directory (AD), you must 4. create a separate LDAP server profile for every AD domain. 5. Select Device > Server Profiles and select type of profile (LDAP, Kerberos, or RADIUS). Click Add and enter a Name for the profile, such as GP-User-Auth. (LDAP only) Select the Type of LDAP server you are connecting to. Click Add in the Servers section and then enter information required to connect to the authentication service, including the server Name, IP Address (or FQDN), and Port. (RADIUS and LDAP only) Specify settings to enable the firewall to authenticate to the authentication service as follows: • RADIUS—Enter the shared Secret when adding the server entry. • LDAP—Enter the Bind DN and Bind Password. 6. (LDAP and Kerberos only) Specify where to search for users in the directory service: • LDAP—The Base DN specifies where in the LDAP tree to begin searching for users and groups. This field should populate automatically when you enter the server address and port. If it doesn’t, check the service route to the LDAP server. • Kerberos—Enter the Kerberos Realm name. 18 7. Specify the Domain name (without dots, for example acme not acme.com). This value will be appended to the username in the IP address to username mappings for User-ID. 8. Click OK to save the server profile. GlobalProtect Administrator’s Guide Set Up the GlobalProtect Infrastructure Set Up GlobalProtect User Authentication Set Up External User Authentication (Continued) Step 2 Create an authentication profile. 1. The authentication profile specifies which server profile to use to authenticate users. 2. You can attach an authentication profile to a portal or gateway configuration. 3. Enter a Name for the profile and then select the Authentication type (LDAP, Kerberos, or RADIUS). Select the Server Profile you created in Step 1. 4. (LDAP AD) Enter sAMAccountName as the Login Attribute. • To enable users to connect and change 5. their own expired passwords without administrative intervention, consider using the pre-logon connect method. See Remote Access VPN with Pre-Logon for details. • If users allow their passwords to 6. expire, you may assign a temporary LDAP password to enable them to log in to the VPN. In this case, the temporary password may be used to authenticate to the portal, but the gateway login may fail because the same temporary password cannot be re-used. To prevent this, set the Authentication Modifier in the portal configuration (Network > GlobalProtect > Portal) to Cookie authentication for config refresh to enable the agent to use a cookie to authenticate to the portal and the temporary password to authenticate the gateway. (LDAP) Set the Password Expiry Warning, which indicates the number of days before password expiration that users will be notified. By default, users will be notified seven days prior to password expiration. Because users must change their passwords before they expire to ensure continued access to the VPN, make sure you provide a notification period that is adequate for your user base. Best Practices: Step 3 Select Device > Authentication Profile and click Add. a new profile. Save the configuration. Click OK. Click Commit. Set Up Client Certificate Authentication With client certificate authentication, the agent/app must present a client certificate in order to connect to the GlobalProtect portal and/or gateway. The following workflow shows how to set up this configuration. For more information, see About GlobalProtect User Authentication. For an example configuration, see Remote Access VPN (Certificate Profile). GlobalProtect Administrator’s Guide 19 Set Up GlobalProtect User Authentication Set Up the GlobalProtect Infrastructure Set Up Client Certificate Authentication Step 1 To issue unique certificates for individual clients or machines, use your enterprise CA or a public CA. However, if you want to use client certificates to validate that the user belongs to your organization, The method for issuing client certificates generate a self-signed client certificate as follows: depends on how you are using client 1. Create the root CA certificate for issuing self-signed certificates authentication: for the GlobalProtect components. • To authenticate individual users— 2. Select Device > Certificate Management > Certificates > You must issue a unique client Device Certificates and then click Generate. certificate to each GlobalProtect user and deploy them to the client systems 3. Enter a Certificate Name. The certificate name cannot contain any spaces. prior to enabling GlobalProtect. Issue client certificates to GlobalProtect users/machines. • To validate that the client system belongs to your organization—Use your own public-key infrastructure (PKI) to issue and distribute machine certificates to each client system (recommended) or generate a self-signed machine certificate for export. This is required for pre-logon. This option requires that you also configure an authentication profile in order to authenticate the user. See Two-factor authentication. • To validate that a user belongs to your organization—In this case you can use a single client certificate for all agents, or generate separate certificates for to be deployed with a particular client configuration. Use the procedure in this step to issue self-signed client certificates for this purpose. 20 4. In the Common Name field enter a name to identify this certificate as an agent certificate, for example GP_Windows_clients. Because this same certificate will be deployed to all agents using the same configuration, it does not need to uniquely identify a specific end user or system. 5. (Optional) In the Certificate Attributes section, click Add and define the attributes to identify the GlobalProtect clients as belonging to your organization if required as part of your security requirements. 6. In the Signed By field, select your root CA. 7. Click OK to generate the certificate. GlobalProtect Administrator’s Guide Set Up the GlobalProtect Infrastructure Set Up GlobalProtect User Authentication Set Up Client Certificate Authentication (Continued) Step 2 For example, to install a certificate on a Windows system using the Microsoft Management Console: 1. From the command prompt, enter mmc to launch the console. If you are using unique user certificates or machine certificates, each certificate must 2. Select File > Add/Remove Snap-in. be installed in the personal certificate 3. Select Certificates, click Add and then select one of the store on the client system prior to the first following, depending on what type of certificate you are portal/gateway connection. Install importing: machine certificates to the Local • Computer account— Select this option if you are importing Computer certificate store on Windows a machine certificate. and in the System Keychain on Mac OS. • My user account— Select this option if you are importing a Install user certificates to the Current user certificate. User certificate store on Windows and in Install certificates in the personal certificate store on the client systems. the Personal Keychain on Mac OS. GlobalProtect Administrator’s Guide 4. Expand Certificates and select Personal and then in the Actions column select Personal > More Actions > All Tasks > Import. and follow the steps in the Certificate Import Wizard to import the PKCS file you got from the CA. 5. Browse to the .p12 certificate file to import (select Personal Information Exchange as the file type to browse for) and enter the Password that you used to encrypt the private key. Select Personal as the Certificate store. 21 Set Up GlobalProtect User Authentication Set Up the GlobalProtect Infrastructure Set Up Client Certificate Authentication (Continued) Step 3 Verify that the certificate has been added Look to see that the certificate you just installed is there. to the personal certificate store. Step 4 Import the root CA certificate used to issue the client certificates onto the firewall. 1. Download the root CA certificate used to issue the client certificates (Base64 format). 2. Import the root CA certificate from the CA that generated the client certificates onto the firewall: This step is only required if the client certificates were issued by an external CA, such as a public CA or an enterprise PKI CA. If you are using self-signed certificates, the root CA is already trusted by the portal/gateway. a. Select Device > Certificate Management > Certificates > Device Certificates and click Import. b. Enter a Certificate Name that identifies the certificate as your client CA certificate. c. Browse to the Certificate File you downloaded from the CA. d. Select Base64 Encoded Certificate (PEM) as the File Format and then click OK. e. Select the certificate you just imported on the Device Certificates tab to open it. f. Select Trusted Root CA and then click OK. 1. Step 5 Create a client certificate profile. Note If you setting up the portal and/or gateway for two-factor authentication, the 2. username from the client certificate will be used as the username when 3. authenticating the user to your external authentication service. This ensures that the user who is logging is in is actually the user to whom the certificate was issued. Step 6 22 Save the configuration. Select Device > Certificates > Certificate Management > Certificate Profile and click Add and enter a profile Name. Select a value for the Username Field to specify which field in the certificate will contain the user’s identity information. In the CA Certificates field, click Add, select the Trusted Root CA certificate you imported in Step 4 and then click OK. Click Commit. GlobalProtect Administrator’s Guide Set Up the GlobalProtect Infrastructure Set Up GlobalProtect User Authentication Set up Two-Factor Authentication If you require strong authentication in order to protect your sensitive resources and/or comply with regulatory requirements—such as PCI, SDX, or HIPAA—configure GlobalProtect to use an authentication service that uses a two-factor authentication scheme such as one-time passwords (OTPs), tokens, smart cards, or a combination of external authentication and client certificate authentication. A two-factor authentication scheme requires two things: something the end user knows (such as a PIN or password) and something the end user has (a hardware or software token/OTP, smart card, or certificate). The following sections provide examples for how to set up two-factor authentication on GlobalProtect: Enable Two-Factor Authentication Enable Two-Factor Authentication Using One-Time Passwords (OTPs) Enable Two-Factor Authentication Using Smart Cards Enable Two-Factor Authentication The following workflow shows how to configure GlobalProtect client authentication requiring the user to authenticate both to a certificate profile and an authentication profile. The user must successfully authenticate using both methods in order to connect to the portal/gateway. For more details on this configuration, see Remote Access VPN with Two-Factor Authentication. GlobalProtect Administrator’s Guide 23 Set Up GlobalProtect User Authentication Set Up the GlobalProtect Infrastructure Enable Two-Factor Authentication Step 1 Note Create a server profile. 1. Select Device > Server Profiles and select type of profile (LDAP, Kerberos, or RADIUS). The server profile instructs the firewall 2. how to connect to an external authentication service and access the authentication credentials for your users. 3. Click Add and enter a Name for the profile, such as GP-User-Auth. If you are using LDAP to connect to Active Directory (AD), you must create a 4. separate LDAP server profile for every AD domain. 5. Click Add in the Servers section and then enter information required to connect to the authentication service, including the server Name, IP Address (or FQDN), and Port. (LDAP only) Select the Type of LDAP server you are connecting to. (RADIUS and LDAP only) Specify settings to enable the firewall to authenticate to the authentication service as follows: • RADIUS—Enter the shared Secret when adding the server entry. • LDAP—Enter the Bind DN and Bind Password. 6. (LDAP and Kerberos only) Specify where to search for users in the directory service: • LDAP—The Base DN specifies where in the LDAP tree to begin searching for users and groups. This field should populate automatically when you enter the server address and port. If it doesn’t, check the service route to the LDAP server. • Kerberos—Enter the Kerberos Realm name. Step 2 Create an authentication profile. 7. Specify the Domain name (without dots, for example acme not acme.com). This value will be appended to the username in the IP address to username mappings for User-ID. 8. Click OK to save the server profile. 1. Select Device > Authentication Profile and click Add. a new profile. The authentication profile specifies which server profile to use to authenticate users. 2. You can attach an authentication profile to a portal or gateway configuration. 3. 24 Enter a Name for the profile and then select the Authentication type (LDAP, Kerberos, or RADIUS). Select the Server Profile you created in Step 1. 4. (LDAP AD) Enter sAMAccountName as the Login Attribute. 5. Click OK. GlobalProtect Administrator’s Guide Set Up the GlobalProtect Infrastructure Set Up GlobalProtect User Authentication Enable Two-Factor Authentication (Continued) 1. Step 3 Create a client certificate profile. Note If you setting up the portal and/or gateway for two-factor authentication, if 2. the client certificate contains a username field, the username value from the certificate will be used as the username when authenticating the user to your external authentication service. This ensures that the user who is logging is in is actually the user to whom the certificate was issued. Step 4 Step 5 (Optional) Issue client certificates to GlobalProtect users/machines. Save the GlobalProtect configuration. Select Device > Certificates > Certificate Management > Certificate Profile and click Add and enter a profile Name. Select a value for the Username Field: • If you are deploying the client certificate from the portal, leave this field set to None. • If you are setting up a certificate profile for use with pre-logon, leave the field set to None. • If you are using the client certificate to authenticate individual users (including smart card users), select the certificate field that will contain the user’s identity information. 3. In the CA Certificates field, click Add, select the Trusted Root CA certificate you just imported and then click OK. 1. Use your enterprise PKI or a public CA to issue a unique client certificate to each GlobalProtect user. 2. Install certificates in the personal certificate store on the client systems. Click Commit. Enable Two-Factor Authentication Using One-Time Passwords (OTPs) On the firewall, the process for setting up access to a two-factor authentication service is similar to setting up any other type of authentication: create a server profile (usually to a RADIUS server), add the server profile to an authentication profile, and then reference that authentication profile in the configuration for the device that will be enforcing the authentication—in this case, the GlobalProtect portal and/or gateway. By default, the agent will supply the same credentials it used to log in to the portal and to the gateway. In the case of OTP authentication, this behavior will cause the authentication to initially fail on the gateway and, because of the delay this causes in prompting the user for a login, the user’s OTP may expire. To prevent this, the portal allows for modification of this behavior on a per-client configuration basis—either by allowing the portal to authenticate using an encrypted cookie or by preventing the agent from using the same credentials it used for the portal on the gateway. Both of these options solve this problem by enabling the gateway to immediately prompt for the appropriate credentials. Enable OTP Support Step 1 For specific instructions, refer to the documentation for your RADIUS server. In most cases, you will need to set up an authentication agent and a client configuration on the RADIUS This procedure assumes that your server to enable communication between the firewall and the RADIUS service is already configured for RADIUS server. You will also define the shared secret that will be OTP or token-based authentication and used to encrypt sessions between the firewall and the RADIUS that necessary devices (such as hardware server. tokens) have been deployed to users. Set up your RADIUS server to interact with the firewall. GlobalProtect Administrator’s Guide 25 Set Up GlobalProtect User Authentication Set Up the GlobalProtect Infrastructure Enable OTP Support (Continued) Step 2 1. On the firewall that will act as your gateway and/or portal, create a RADIUS server profile. 2. Select Device > Server Profiles > RADIUS, click Add and enter a Name for the profile. Best Practice: To add a RADIUS server entry, click Add in the Servers section and then enter the following information: 3. When creating the RADIUS server profile, always enter a Domain name because this value will be used as the default domain for User-ID mapping if users don’t supply one upon login. Enter the RADIUS Domain name. • A descriptive name to identify this RADIUS Server • The IP Address of the RADIUS Server • The shared Secret used to encrypt sessions between the firewall and the RADIUS server • The Port number on which the RADIUS server will listen for authentication requests (default 1812) Step 3 Create an authentication profile. 4. Click OK to save the profile. 1. Select Device > Authentication Profile, click Add, and enter a Name for the profile. The authentication profile name cannot contain any spaces. Step 4 Step 5 2. Select RADIUS from the Authentication drop-down. 3. Select the Server Profile you created for accessing your RADIUS server. 4. Click OK to save the authentication profile. Assign the authentication profile to the GlobalProtect gateway(s) and/or portal. 1. Select Network > GlobalProtect > Gateways or Portals and select the configuration (or Add one). This section only describes how to add the authentication profile to the gateway or portal configuration. For details on setting up these components, see Configure GlobalProtect Gateways and Configure the GlobalProtect Portal. 2. On the General tab (on the gateway) or the Portal Configuration tab (on the portal), select the Authentication Profile you just created. 3. Enter an Authentication Message to guide users as to which authentication credentials to use. 4. Click OK to save the configuration. 1. Select Network > GlobalProtect > Gateways or Portals and select the configuration (or Add one). 2. This section only describes how to modify the portal authentication behavior. For more details, see Define the 3. GlobalProtect Client Configurations. Select the Client Configuration tab and then select or Add a client configuration. (Optional) Modify the default authentication behavior on the portal. On the General tab, select one of the following values from the Authentication Modifier field: • Cookie authentication for config refresh—Enables the portal to use an encrypted cookie to authenticate users so they don’t have to enter multiple OTPs or credentials. • Different password for external gateway—Prevents the agent from forwarding the user credentials it used for portal authentication on to the gateway to prevent OTP authentication failures. 4. 26 Click OK twice to save the configuration. GlobalProtect Administrator’s Guide Set Up the GlobalProtect Infrastructure Set Up GlobalProtect User Authentication Enable OTP Support (Continued) Step 6 Save the configuration. Step 7 Verify the configuration. Click Commit. From a client system running the GlobalProtect agent, try to connect to a gateway or portal on which you enabled OTP authentication. This step assumes that your gateway and You should see two prompts similar to the following: portal are already configured. For details The first will prompt you for a PIN (either a user- or on setting up these components, see Configure GlobalProtect Gateways and system-generated PIN): Configure the GlobalProtect Portal. The second will prompt you for your token or OTP: Enable Two-Factor Authentication Using Smart Cards If you want to enable your end users to authenticate using a smart card or common access card (CAC), you must import the Root CA certificate that issued the certificates contained on the end user CAC/smart cards onto the portal/gateway. You can then create a certificate profile that includes that Root CA and apply it to your portal and/or gateway configurations to enable use of the smart card in the authentication process. Enable Smart Card Authentication Step 1 Set up your smart card infrastructure. This procedure assumes that you have deployed smart cards and smart card readers to your end users. GlobalProtect Administrator’s Guide For specific instructions, refer to the documentation for the user authentication provider software. In most cases, setting up the smart card infrastructure requires generating certificates for end users and for the servers participating in the system, which are the GlobalProtect portal and/or gateway(s) in this case. The certificates for the users and the portal/gateway(s) must all be issued by the same Root CA. 27 Set Up GlobalProtect User Authentication Set Up the GlobalProtect Infrastructure Enable Smart Card Authentication (Continued) Step 2 Import the Root CA certificate that issued Make sure the certificate and key files are accessible from your the client certificates contained on the management system and that you have the passphrase to decrypt the end user smart cards. private key and then complete the following steps: 1. Select Device > Certificate Management > Certificates > Device Certificates. Step 3 Create the certificate profile. Note For details on other certificate profile fields, such as whether to use CRL or OCSP, refer to the online help. Step 4 2. Click Import and enter a Certificate Name. 3. Enter the path and name to the Certificate File received from the CA, or Browse to find the file. 4. Select Encrypted Private Key and Certificate (PKCS12) as the File Format. 5. Select the Import private key check box. 6. Enter the path and name to the PKCS#12 file in the Key File field or Browse to find it. 7. Enter and re-enter the Passphrase that was used to encrypt the private key and then click OK to import the certificate and key. Create the certificate profile on each portal/gateway on which you plan to use CAC/smart card authentication: 1. Select Device > Certificate Management > Certificate Profile and click Add and enter a profile Name. 2. Make sure the Username Field is set to None. 3. In the CA Certificates field, click Add, select the trusted root CA Certificate you imported in Step 2 and then click OK. 4. Click OK to save the certificate profile. Assign the certificate profile to the GlobalProtect gateway(s) and/or portal. 1. Select Network > GlobalProtect > Gateways or Portals and select the configuration (or click Add to add one). This section only describes how to add the certificate profile to the gateway or portal configuration. For details on setting up these components, see Configure GlobalProtect Gateways and Configure the GlobalProtect Portal. 2. On the General tab (on the gateway) or the Portal Configuration tab (on the portal), select the Certificate Profile you just created. 3. Enter an Authentication Message to guide users as to which authentication credentials to use. 4. Click OK to save the configuration. Step 5 Save the configuration. Click Commit. Step 6 Verify the configuration. From a client system running the GlobalProtect agent, try to connect to a gateway or portal on which you set up smart card-enabled authentication. When prompted, insert your smart card and verify that you can successfully authenticate to GlobalProtect. 28 GlobalProtect Administrator’s Guide Set Up the GlobalProtect Infrastructure Enable Group Mapping Enable Group Mapping Because the agent or app running on your end-user systems requires the user to successfully authenticate before being granted access to GlobalProtect, the identity of each GlobalProtect user is known. However, if you want to be able to define GlobalProtect configurations and/or security policies based on group membership, the firewall must retrieve the list of groups and the corresponding list of members from your directory server. This is known as group mapping. To enable this functionality, you must create an LDAP server profile that instructs the firewall how to connect and authenticate to the directory server and how to search the directory for the user and group information. After the firewall successfully connects to the LDAP server retrieves the group mappings, you will be able to select groups when defining your client configurations and security policies. The firewall supports a variety of LDAP directory servers, including Microsoft Active Directory (AD), Novell eDirectory, and Sun ONE Directory Server. Use the following procedure to connect to your LDAP directory to enable the firewall to retrieve user-to-group mapping information: GlobalProtect Administrator’s Guide 29 Enable Group Mapping Set Up the GlobalProtect Infrastructure Map Users to Groups Step 1 1. Create an LDAP Server Profile that specifies how to connect to the directory 2. servers to which the firewall should 3. connect to obtain group mapping information. 4. Select Device > Server Profiles > LDAP. Click Add and then enter a Name for the profile. (Optional) Select the virtual system to which this profile applies from the Location drop-down. Click Add to add a new LDAP server entry and then enter a Server name to identify the server (1-31 characters) and the IP Address and Port number the firewall should use to connect to the LDAP server (default=389 for LDAP; 636 for LDAP over SSL). You can add up to four LDAP servers to the profile, however, all the servers you add to a profile must be of the same type. For redundancy you should add at least two servers. 5. Enter the LDAP Domain name to prepend to all objects learned from the server. The value you enter here depends on your deployment: • If you are using Active Directory, you must enter the NetBIOS domain name; NOT a FQDN (for example, enter acme, not acme.com). Note that if you need to collect data from multiple domains you must create a separate server profile for each domain. Although the domain name can be determined automatically, it is a best practice to enter the domain name whenever possible. • If you are using a global catalog server, leave this field blank. 30 6. Select the Type of LDAP server you are connecting to. The group mapping values will automatically be populated based on your selection. However, if you have customized your LDAP schema you may need to modify the default settings. 7. In the Base field, specify the point where you want the firewall to begin its search for user and group information within the LDAP tree. 8. Enter the authentication credentials for binding to the LDAP tree in the Bind DN, Bind Password, and Confirm Bind Password fields. The Bind DN can be in either User Principal Name (UPN) format (i.e. [email protected]) or it can be a fully qualified LDAP name (i.e. cn=administrator,cn=users,dc=acme,dc=local). 9. If you want the firewall to communicate with the LDAP server(s) over a secure connection, select the SSL check box. If you enable SSL, make sure that you have also specified the appropriate port number. GlobalProtect Administrator’s Guide Set Up the GlobalProtect Infrastructure Enable Group Mapping Map Users to Groups (Continued) Step 2 Step 3 Add the LDAP server profile to the User-ID Group Mapping configuration. Save the configuration. GlobalProtect Administrator’s Guide 1. Select Device > User Identification > Group Mapping Settings and click Add. 2. Enter a Name for the configuration. 3. Select the Server Profile you just created. 4. Make sure the Enabled check box is selected. 5. (Optional) If you want to limit which groups are displayed within security policy, select the Group Include List tab and then browse through the LDAP tree to locate the groups you want to be able to use in policy. For each group you want to include, select it in the Available Groups list and click the add icon to move it to the Included Groups list. Repeat this step for every group you want to be able to use in your policies. 6. Click OK to save the settings. Click Commit. 31 Configure GlobalProtect Gateways Set Up the GlobalProtect Infrastructure Configure GlobalProtect Gateways Because the GlobalProtect configuration that the portal delivers to the agents includes the list of gateways the client can connect to, it is a good idea to configure the gateways before configuring the portal. The GlobalProtect Gateways can be configured to provide two main functions: Enforce security policy for the GlobalProtect agents and apps that connect to it. You can also enable HIP collection on the gateway for enhanced security policy granularity. For more information on enabling HIP checks, see Use Host Information in Policy Enforcement. Provide virtual private network (VPN) access to your internal network. VPN access is provided through an IPSec or SSL tunnel between the client and a tunnel interface on the gateway firewall. Prerequisite Tasks for Configuring the GlobalProtect Gateway Before you can configure the GlobalProtect gateway, you must have completed the following tasks: Created the interfaces (and zones) for the interface where you plan to configure each gateway. For gateways that require tunnel connections you must configure both the physical interface and the virtual tunnel interface. See Create Interfaces and Zones for GlobalProtect. Set up the gateway server certificates required for the GlobalProtect agent to establish an SSL connection with the gateway. See Enable SSL Between GlobalProtect Components. Defined the authentication profiles and/or certificate profiles that will be used to authenticate GlobalProtect users. See Set Up GlobalProtect User Authentication. Configure a GlobalProtect Gateway After you have completed the prerequisite tasks, configure the GlobalProtect Gateways as follows: Configure the Gateway Step 1 32 Add a gateway. 1. Select Network > GlobalProtect > Gateways and click Add. 2. On the General tab, enter a Name for the gateway. The gateway name should not contain any spaces and as a best practice it should include the location or other descriptive information that will help users and other administrators identify the gateway. 3. (Optional) Select the virtual system to which this gateway belongs from the Location field. GlobalProtect Administrator’s Guide Set Up the GlobalProtect Infrastructure Configure GlobalProtect Gateways Configure the Gateway (Continued) Step 2 Specify the network information to enable agents to connect to the gateway. 1. Select the Interface that agents will use for ingress access to the gateway. If you have not yet created the network 2. Select the IP Address for the gateway web service. interface for the gateway, see Create 3. Select the Server Certificate for the gateway from the Interfaces and Zones for drop-down. GlobalProtectfor instructions. If you Note The Common Name (CN) and, if applicable, the Subject haven’t yet created a server certificate for Alternative Name (SAN) fields of the certificate must the gateway, see Deploy Server match the IP address or fully qualified domain name Certificates to the GlobalProtect (FQDN) of the interface where you configure the gateway. Components. Step 3 Specify how the gateway will authenticate • To authenticate users using a local user database or an external authentication service such as LDAP, Kerberos, or RADIUS end users. (including OTP), select the corresponding Authentication Profile. If you have not yet set up the authentication profiles and/or certificate • To provide help to users as to what login credentials to supply, enter an Authentication Message. profiles, see Set Up GlobalProtect User Authentication for instructions. • To authenticate users based on a client certificate or smart card, select the corresponding Certificate Profile. • To use two-factor authentication, select both an authentication profile and an certificate profile. Keep in mind that the user must successfully authenticate using both methods to be granted access. Step 4 Configure the tunnel parameters and enable tunneling. 1. The tunnel parameters are required if you 2. are setting up an external gateway. If you 3. are configuring an internal gateway, they are optional. 4. If you want to force use of SSL-VPN tunnel mode, clear the Enable IPSec check box. By default, SSL-VPN will only be used if the client fails to establish an IPSec tunnel. Extended authentication (X-Auth) is only supported on IPSec tunnels. GlobalProtect Administrator’s Guide On the GlobalProtect Gateway dialog, select Client Configuration > Tunnel Settings. Select the Tunnel Mode check box to enable tunneling. Select the Tunnel Interface you defined in Step 2 in Create Interfaces and Zones for GlobalProtect. (Optional) Select Enable X-Auth Support if you have end clients that need to connect to the gateway using a third-party VPN client, such as a VPNC client running on Linux. If you enable X-Auth you also must provide the Group name and Group Password if required by the client. Although X-Auth access is supported on iOS and Android devices, it provides limited GlobalProtect functionality. Instead use the GlobalProtect app for simplified access to the full security feature set GlobalProtect provides on iOS and Android devices. The GlobalProtect app for iOS is available from the AppStore and the GlobalProtect app for Android is available from Google Play. 33 Configure GlobalProtect Gateways Set Up the GlobalProtect Infrastructure Configure the Gateway (Continued) Step 5 (Tunnel Mode only) Configure the network settings to assign the clients’ virtual network adapter when an agent establishes a tunnel with the gateway. 1. On the GlobalProtect Gateway dialog, select Client Configuration > Network Settings. 2. Network settings are not required in internal gateway configurations in non-tunnel mode because in this case agents use the network settings assigned to the physical network adapter. Specify the network configuration settings for the clients in one of the following ways: • You can manually assign the DNS server(s) and suffix, and WINS servers by completing the corresponding fields. • If the firewall has an interface that is configured as a DHCP client, you can set the Inheritance Source to that interface and the GlobalProtect agent will be assigned the same settings received by the DHCP client. 3. To specify the IP Pool to use to assign client IP addresses, click Add and then specify the IP address range to use. As a best practice, use a different range of IP addresses from those assigned to clients that are physically connected to your LAN to ensure proper routing back to the gateway. 4. To define what destination subnets to route through the tunnel click Add in the Access Route area and then enter the routes as follows: • To route all client traffic GlobalProtect (full-tunneling), enter 0.0.0.0/0 as the access route. You will then need to use security policy to define what zones the client can access (including untrust zones). The benefit of this configuration is that you have visibility into all client traffic and you can ensure that clients are secured according to your policy even when they are not physically connected to the LAN. Note that in this configuration traffic destined for the local subnet goes through the physical adapter, rather than being tunneled to the gateway. • To route only some traffic—likely traffic destined for your LAN—to GlobalProtect (split-tunneling), specify the destination subnets that must be tunneled. In this case, traffic that is not destined for a specified access route will be routed through the client’s physical adapter rather than through the virtual adapter (the tunnel). The firewall supports up to 100 access routes. 34 GlobalProtect Administrator’s Guide Set Up the GlobalProtect Infrastructure Configure GlobalProtect Gateways Configure the Gateway (Continued) Step 6 (Optional) Define the notification messages end users will see when a security rule with a host information profile (HIP) is enforced. 1. On the Client Configuration > HIP Notification tab, click Add. 2. Select the HIP Profile this message applies to from the drop-down. 3. This step only applies if you have created host information profiles and added them to your security policies. For details on configuring the HIP feature and for more detailed information about creating HIP notification messages, see Use Host 4. Information in Policy Enforcement. Select Match Message or Not Match Message, depending on whether you want to display the message when the corresponding HIP profile is matched in policy or when it is not matched. In some cases you might want to create messages for both a match and a non-match, depending on what objects you are matching on and what your objectives are for the policy. Select the Enable check box and select whether you want to display the message as a Pop Up Message or as a System Tray Balloon. 5. Enter the text of your message in the Template text box and then click OK. 6. Repeat these steps for each message you want to define. Step 7 Save the gateway configuration. Click OK to save the settings and close the GlobalProtect Gateway dialog. Step 8 (Optional) Set up access to the Mobile Security Manager. 1. Select Network > GlobalProtect > MDM and click Add. 2. Enter a Name for the Mobile Security Manager. This step is required if you are using the 3. GlobalProtect Mobile Security Manager to manage end user devices and you are using HIP-enabled policy enforcement. 4. This configuration allows the gateway to communicate with the Mobile Security Manager to retrieve the HIP reports for 5. managed mobile devices. For more details, see Enable Gateway Access to the Mobile Security Manager. Step 9 Save the configuration. GlobalProtect Administrator’s Guide (Optional) Select the virtual system to which this Mobile Security Manager configuration belongs from the Location field. Enter the IP address or FQDN of the Mobile Security Manager Server interface where the gateway will connect to retrieve HIP reports. (Optional) Set the Connection Port on which the Mobile Security Manager will be listening for HIP retrieval requests. This value must match the value set on the Mobile Security Manager. By default, this port is set to 5008, which is the port that the GlobalProtect Mobile Security Manager listens on. 6. If the Mobile Security Manager requires the gateway to present a certificate to establish an HTTPS connection, select the Client Certificate to use. 7. If the gateway does not trust the Mobile Security Manager certificate for the interface where it will be connecting, click Add in the Trusted Root CA section and select or Import the root CA certificate that was used to issue the Mobile Security Manager server certificate. 8. Click OK to save the Mobile Security Manager settings. Commit your changes. 35 Configure the GlobalProtect Portal Set Up the GlobalProtect Infrastructure Configure the GlobalProtect Portal The GlobalProtect Portal provides the management functions for your GlobalProtect infrastructure. Every client system that participates in the GlobalProtect network receives configuration information from the portal, including information about available gateways as well as any client certificates that may be required to connect to the gateways. In addition, the portal controls the behavior and distribution of the GlobalProtect agent software to both Mac and Windows laptops. The portal does not distribute the GlobalProtect app for use on mobile devices. To get the GlobalProtect app for iOS, end users must download it from the App Store. To get the GlobalProtect app for Android, end users must down load it from Google Play. However, the client configurations that get deployed to mobile app users does control what gateway(s) the mobile devices have access to and if the mobile device is required to enroll with the GlobalProtect Mobile Security Manager. For more details on supported versions, see What Client OS Version are Supported with GlobalProtect? The following sections provide procedures for setting up the portal: Prerequisite Tasks for Configuring the GlobalProtect Portal Set Up Access to the GlobalProtect Portal Define the GlobalProtect Client Configurations Customize the GlobalProtect Agent Customize the GlobalProtect Portal Login, Welcome, and Help Pages Prerequisite Tasks for Configuring the GlobalProtect Portal Before you can configure the GlobalProtect Portal, you must have completed the following tasks: Created the interfaces (and zones) for the firewall interface where you plan to configure the portal. See Create Interfaces and Zones for GlobalProtect. Set up the portal server certificate, gateway server certificate, and, optionally, any client certificates to be deployed to end users to enable mutual SSL connections to the GlobalProtect services. See Enable SSL Between GlobalProtect Components. Defined the authentication profiles and/or certificate profiles that will be used to authenticate GlobalProtect users. See Set Up GlobalProtect User Authentication. Configured the global protect gateways. See Configure GlobalProtect Gateways. Set Up Access to the GlobalProtect Portal After you have completed the prerequisite tasks, configure the GlobalProtect Portal as follows: 36 GlobalProtect Administrator’s Guide Set Up the GlobalProtect Infrastructure Configure the GlobalProtect Portal Set Up Access to the Portal Step 1 Step 2 Add the portal. Specify the network information to enable agents to connect to the portal. 1. Select Network > GlobalProtect > Portals and click Add. 2. On the Portal Configuration tab, enter a Name for the portal. The portal name should not contain any spaces. 3. (Optional) Select the virtual system to which this portal belongs from the Location field. 1. Select the Interface that agents will use for ingress access to the portal. If you have not yet created the network 2. 3. interface for the portal, see Create Interfaces and Zones for GlobalProtect for instructions. If you haven’t yet created a server certificate for the portal and issued gateway certificates, see Deploy Server Certificates to the GlobalProtect Components. Step 3 Specify how the portal will authenticate end users. Select the IP Address for the portal web service. Select the Server Certificate for the portal from the drop-down. The Common Name (CN) and, if applicable, the Subject Alternative Name (SAN) fields of the certificate must exactly match the IP address or fully qualified domain name (FQDN) of the interface where you configure the portal or HTTPS connections to the portal will fail. • To authenticate users using a local user database or an external authentication service (including OTP authentication), select the corresponding Authentication Profile. If you have not yet set up the authentication profiles and/or certificate • Enter an Authentication Message to guide users as to which authentication credentials to use. profiles, see Set Up GlobalProtect User Authentication for instructions. • To authenticate users based on a client certificate or a smart card/CAC, select the corresponding Certificate Profile. • To use two-factor authentication, select both an authentication profile and a certificate profile. Keep in mind that the user must successfully authenticate using both methods to be granted access. Step 4 Save the portal configuration. 1. Click OK to save the settings and close the GlobalProtect Gateway dialog. 2. Commit your changes. Define the GlobalProtect Client Configurations When a GlobalProtect agent/app connects and successfully authenticates to the GlobalProtect portal, the portal delivers the GlobalProtect client configuration to the agent/app based on the settings you defined. If you have different classes of users requiring different configurations, you can create a separate client configuration for each. The portal will then use the username/group name and or OS of the client to determine which client configuration to deploy. As with security rule evaluation, the portal looks for a match starting from the top of the list. When it finds a match, it delivers the corresponding configuration to the agent/app. The configuration may include the following: A list of gateways the agent/app can connect to, and whether the user can establish manual connections with those gateways. GlobalProtect Administrator’s Guide 37 Configure the GlobalProtect Portal Set Up the GlobalProtect Infrastructure The root CA certificate required to enable the agent/app to establish an SSL connection with the GlobalProtect gateway(s) and/or the Mobile Security Manager. The client certificate that agent should present to the gateway when it connects. This is only required if mutual authentication is required between the agent and the gateway. The settings the agent uses to determine whether it is connected to the local network or to an external network. Agent configuration settings, such as what agent views the end users can see, whether users can save their GlobalProtect passwords, and whether users are prompted to upgrade the agent software. If the portal is down or unreachable, the agent will use the cached version of its client configuration from its last successful portal connection to obtain settings, including which gateway(s) to connect to, what root CA certificate(s) to use to establish secure communication with the gateway(s), and what connect method to use. Use the following procedure to create a client configuration. Create a GlobalProtect Client Configuration Step 1 Add the Root CA certificates that will be 1. required for the agent/app to establish an SSL connection with the GlobalProtect gateway(s) and/or the Mobile Security Manager. This step is only required if you are not using certificates issued by a 2. trusted CA on your gateways and/or Mobile Security Manager. The portal will deploy the root CA certificates you add here to all agents as part of the client 3. configuration so that they can establish an SSL connection with the gateways/Mobile Security Manager. If you are still in the GlobalProtect gateway dialog, select the Client Configuration tab. Otherwise, select Network > GlobalProtect > Portals and select the portal configuration for which you want to add a client configuration and then select the Client Configuration tab. In the Trusted Root CA field, click Add and then select the CA certificate that was used to issue the gateway server certificates. As a best practice, all of your gateways should use the same issuer. (Optional) If your Mobile Security Manager server certificate was not issued by a well-known CA (that is, it is not trusted by the devices that will need to connect to it to enroll), click Add in the Trusted Root CA field and then select the CA certificate that was used to issue the Mobile Security Manager server certificate. If the root CA certificate used to issue your gateway and/or Mobile Security Manager server certificates is not on the portal, you can Import it now. See Enable SSL Between GlobalProtect Components for SSL best practices. Step 2 Add a client configuration. The client configuration specifies the GlobalProtect configuration settings to deploy to the connecting agents/apps. You must define at least one client configuration. 38 In the Client Configuration section, click Add and enter a Name for the configuration. If you plan to create multiple configurations, make sure the name you define for each is descriptive enough to allow you to distinguish them. GlobalProtect Administrator’s Guide Set Up the GlobalProtect Infrastructure Configure the GlobalProtect Portal Create a GlobalProtect Client Configuration (Continued) Step 3 Step 4 If you do not require the GlobalProtect agent to establish tunnel connections when on the internal network, enable internal host detection. 1. Select the Internal Host Detection check box. 2. Enter the IP Address of a host that can only be reached from the internal network. 3. Enter the DNS Hostname that corresponds to the IP address you entered. Agents attempting to connect to GlobalProtect will attempt to do a reverse DNS lookup on the specified address; if the lookup fails, the agent will determine that it is on the external network and begin trying to establish tunnel connections with the external gateways on its list. Specify how the agent will connect to GlobalProtect. 1. Select a Connect Method: • on-demand—Users will have to manually launch the agent to connect to GlobalProtect. Use this connect method for external gateways only. Best Practices: •Only use the on-demand option if you are using GlobalProtect for VPN access to external gateways. • Do not use the on-demand option if you plan to run the GlobalProtect agent in hidden mode. See Customize the GlobalProtect Agent. • For faster connection times, use internal host detection in configurations where you have enabled SSO. Step 5 Set up access to the Mobile Security Manager. • user-logon—GlobalProtect will automatically connect as soon as the user logs in to the machine (or domain). When used in conjunction with SSO (Windows users only), GlobalProtect login is transparent to the end user. • pre-logon—Authenticates the user and establishes the VPN tunnel to the GlobalProtect gateway using a pre-installed machine certificate before the user has logged in to the machine. This option requires that you deploy machine certificates to each end user system using an external PKI solution. See Remote Access VPN with Pre-Logon for more details on setting up this option. 2. (Configurations for Windows users only) Select Use single sign-on to enable GlobalProtect to use the Windows login credentials to automatically authenticate the user upon login to Active Directory. 1. Enter the IP address or FQDN of the Mobile Security Manager device check-in interface. The value you enter here This step is required if the mobile devices using this configuration will be managed by the GlobalProtect Mobile Security Manager. All devices will initially connect 2. to the portal and, if Mobile Security Manager is configured on the corresponding portal client configuration, the device will be redirected to it for enrollment. For more information, see Set Up the GlobalProtect Mobile Security Manager. GlobalProtect Administrator’s Guide must exactly match the value in the CN field of Mobile Security Manager server certificate associated with the device check-in interface. Specify the Enrollment Port on which the Mobile Security Manager will be listening for enrollment requests. This value must match the value set on the Mobile Security Manager (default=443). For more details, see Set Up the Mobile Security Manager for Device Management. 39 Configure the GlobalProtect Portal Set Up the GlobalProtect Infrastructure Create a GlobalProtect Client Configuration (Continued) Step 6 Specify which users to deploy this configuration to. There are two ways to specify who will get the configuration: by user/group name and/or the operating system the agent is running on. Select the User/User Group tab and then specify the user/user groups and/or operating systems to which this configuration should apply: • To restrict this configuration to a specific user or group, click Add in the User/User Group section of the window and then select the user or group you want to receive this configuration from the drop-down. Repeat this step for each user/group you want to add. The portal uses the User/User Group settings you specify to determine which configuration to deliver to the • To restrict the configuration to users who have not yet logged in GlobalProtect agents that connect. to their systems, select pre-logon from the User/User Group Therefore, if you have multiple drop-down. configurations, you must make sure to • To deliver this configuration to agents or apps running on specific order them properly. As soon as the operating systems, click Add in the OS section of the window and portal finds a match, it will deliver the then select the OS (Android, iOS, Mac, or Windows) to which this configuration. Therefore, more specific configuration applies. configurations must precede more general ones. See Step 11 for instructions on ordering the list of client configurations. Before you can restrict the configuration to specific groups, you must map users to groups as described in Enable Group Mapping. Step 7 40 Customize the behavior of the GlobalProtect agent for users with this configuration. Select the Agent tab and then modify the agent settings as desired. For more details about each option, see Customize the GlobalProtect Agent. GlobalProtect Administrator’s Guide Set Up the GlobalProtect Infrastructure Configure the GlobalProtect Portal Create a GlobalProtect Client Configuration (Continued) Step 8 Specify the gateways that users with this configuration can connect to. 1. Best Practices: 2. •If you are adding both internal and external gateways to the same configuration, make sure to enable Internal Host Detection. See Step 3 in 3. Define the GlobalProtect Client Configurations for instructions. • Make sure you do not use on-demand as the connect method if your 4. configuration includes internal gateways. On the Gateways tab, click Add in the section for Internal Gateways or External Gateways, depending on which type of gateway you are adding. Enter a descriptive Name for the gateway. The name you enter here should match the name you defined when you configured the gateway and should be descriptive enough for users to know the location of the gateway they are connected to. Enter the FQDN or IP address of the interface where the gateway is configured in the Address field. The address you specify must exactly match the Common Name (CN) in the gateway server certificate. (External gateways only) Set the Priority of the gateway by clicking in the field and selecting a value: • If you have only one external gateway, you can leave the value set to Highest (the default). • If you have multiple external gateways, you can modify the priority values (ranging from Highest to Lowest) to indicate a preference for the specific user group to which this configuration applies. For example, if you prefer that the user group connects to a local gateway you would set the priority higher than that of more geographically distant gateways. The priority value is then used to weight the agent’s gateway selection algorithm. • If you do not want agents to automatically establish tunnel connections with the gateway, select Manual only. This setting is useful in testing environments. 5. Step 9 (Optional) Define any custom host information profile (HIP) data that you want the agent to collect and/or exclude HIP categories from collection. (External gateways only) Select the Manual check box if you want to allow users to be able to manually switch to the gateway. • Select Data Collection > Custom Checks and then define any custom data you want to collect from hosts running this client configuration. For more details, see Step 2 in Configure HIP-Based Policy Enforcement. This step only applies if you plan to use • Select Data Collection > Exclude Categories and then click Add to exclude specific categories and/or vendors, applications, or the HIP feature and there is information versions within a category. For more details, see Step 3 in you want to collect that cannot be Configure HIP-Based Policy Enforcement. collected using the standard HIP objects or if there is HIP information that you are not interested in collecting. See Use Host Information in Policy Enforcement for details on setting up and using the HIP feature. Step 10 Save the client configuration. GlobalProtect Administrator’s Guide 1. Click OK to save the settings and close the Configs dialog. 2. If you want to add another client configuration, repeat Step 2 through Step 10. 41 Configure the GlobalProtect Portal Set Up the GlobalProtect Infrastructure Create a GlobalProtect Client Configuration (Continued) Step 11 Arrange the client configurations so that the proper configuration is deployed to each agent. When an agent connects, the portal will compare the source information in the packet against the client configurations you have defined. As with security rule evaluation, the portal looks for a match starting from the top of the list. When it finds a match, it delivers the corresponding configuration to the agent or app. Step 12 Save the portal configuration. • To move a client configuration up on the list of configurations, select the configuration and click Move Up. • To move a client configuration down on the list of configurations, select the configuration and click Move Down. 1. Click OK to save the settings and close the GlobalProtect Portal dialog. 2. Commit your changes. Customize the GlobalProtect Agent The portal client configuration allows you to customize how your end users interact with the GlobalProtect agents installed on their systems or the GlobalProtect app installed on their mobile devices. You can define different agent settings for the different GlobalProtect client configurations you create. For more information on client system requirements, see What Client OS Version are Supported with GlobalProtect? You can customize: What menus and views the users can access. Whether or not the users can save their passwords within the agent. Whether the users can disable the agent (applies to the user-logon Connect Method only). Whether to display a welcome page upon successful login. You can also create custom welcome pages and help pages that direct your users on how to use GlobalProtect within your environment. See Customize the GlobalProtect Portal Login, Welcome, and Help Pages. Whether agent upgrades will happen automatically or whether the users will be prompted to upgrade. You can also define agent settings directly from the Windows registry or the global Mac plist. For Windows clients you can also define agent settings directly from the Windows installer (MSIEXEC). Settings defined in the portal client configurations in the web interface take precedence over settings defined in the Windows registry/MSIEXEC or the Mac plist. For more details, see Deploy Agent Settings Transparently. 42 GlobalProtect Administrator’s Guide Set Up the GlobalProtect Infrastructure Configure the GlobalProtect Portal Customize the Agent Step 1 Go to the Agent tab in the client configuration you want to customize. GlobalProtect Administrator’s Guide 1. Select Network > GlobalProtect > Portals and select the portal configuration for which you want to add a client configuration (or click Add to add a new configuration). 2. Select the Client Configuration tab and select the client configuration you want to modify (or click Add to add a new configuration). 3. Select the Agent tab. 43 Configure the GlobalProtect Portal Set Up the GlobalProtect Infrastructure Customize the Agent (Continued) Step 2 Define what the end users with this configuration can do from the agent. By default, the agent functionality is fully enabled (meaning all check boxes are selected). To remove functionality, clear the corresponding check box for any or all of the following options: The settings on the Agent tab can also be configured in the end client • If you want users to only be able to see basic status information from within the application, clear the Enable advanced view via group policy by adding settings to the check box. By default, the advanced view is enabled, which allows Windows Registry/Mac plist. On end users to see detailed statistical, host, and troubleshooting Windows systems, you can also set them information and perform tasks such as changing their passwords. using the msiexec utility from the command line during the agent • If you want hide the GlobalProtect agent on the end user systems, installation. However, settings defined in clear the Show GlobalProtect icon check box. When the icon is the web interface or the CLI take hidden, users cannot perform other tasks such as changing precedence over Registry/plist settings. passwords, rediscovering the network, resubmitting host See Deploy Agent Settings Transparently information, viewing troubleshooting information, or performing for details. an on-demand connection. However, HIP notification messages, login prompts, and certificate dialogs will still display as necessary Another option for specifying for interacting with the end user. whether the agent should prompt the end user for credentials if Windows • Clear the Allow user to change portal address check box to SSO fails is available through the disable the Portal field on the Settings tab in the GlobalProtect Windows command line (MSIEXEC) or agent. Because the user will then be unable to specify a portal to Windows Registry only. By default this which to connect, you must supply the default portal address in Registry setting— the Windows Registry: (HKEY_LOCAL_MACHINE\SOFTWARE\Palo can-prompt-user-credential—is set Alto Networks\GlobalProtect\PanSetup with key Portal) or to yes. To modify this behavior, you must the Mac plist (/Library/Preferences/com. change the value in the Registry or during paloaltonetworks.GlobalProtect.pansetup.plist with key the agent installation via MSIEXEC: Portal under dictionary PanSetup). For more information, see msiexec.exe /i GlobalProtect.msi Deploy Agent Settings Transparently. CANPROMPTUSERCREDENTIAL="no" For more information, see Deploy Agent Settings Transparently. • If you do not want users to be able to save their passwords on the agent (that is, you want to force them to provide the password— either transparently via the user agent or by manually entering one—each time they connect), clear the Allow user to save password check box. • To prevent users from performing a network rediscovery, clear the Enable Rediscover Network option check box. • To prevent users from manually resubmitting HIP data to the gateway, clear the Enable Resubmit Host Profile option check box. This option is enabled by default, and is useful in cases where HIP-based security policy prevents users from accessing resources because it allows the user to fix the compliance issue on the computer and then resubmit the HIP. • If you do not want the agent to establish a connection with the portal if the portal certificate is not valid, clear the Allow user to continue if portal certificate is invalid check box. Keep in mind that the portal provides the agent configuration only; it does not provide network access and therefore security to the portal is less critical than security to the gateway. However, if you have deployed a trusted server certificate for the portal, deselecting this option can help prevent man in the middle (MITM) attacks. 44 GlobalProtect Administrator’s Guide Set Up the GlobalProtect Infrastructure Configure the GlobalProtect Portal Customize the Agent (Continued) Step 3 Specify whether users can disconnect from GlobalProtect. • To prevent users in user-logon mode from disconnecting, select disabled from the Agent User Override drop-down. This only applies to client configurations • To allow users to disconnect if they provide a passcode, select with-passcode from the Agent User Override drop-down and that have the Connect Method (on the then enter (and confirm) the Passcode that the end users must General tab) set to user-logon. In supply. user-logon mode, the agent automatically connects to GlobalProtect as soon as the • To allow users to disconnect if they provide a ticket, select user logs in to the system. This mode is with-ticket from the Agent User Override drop-down. In this sometimes referred to as “always on,” case, the disconnect action triggers the agent to generate a Request which is why the user must override this Number. The end user must then communicate the Request behavior in order to disconnect. Number to the administrator. The administrator then clicks Generate Ticket on the Network > GlobalProtect > Portals page By default, users in user-logon mode will and enters the Request Number from the end user to generate the be prompted to provide a comment in ticket. The administrator then provides the ticket to the end user, order to disconnect (Agent User who enters it into the Disable GlobalProtect dialog to enable the Override set to with-comment). agent to disconnect. If the agent icon is not displayed, users will not be able to disconnect. See Step 2 for details. • To restrict how long the user may be disconnected, enter a value (in minutes) in the Agent User Override Timeout field. A value of 0 (the default) indicates that there is no restriction as to how long the user may remain disconnected. • To limit the number of times the user may disconnect, enter a value in the Agent User Overrides field. A value of 0 (the default) indicates that the user disconnect is not limited. GlobalProtect Administrator’s Guide 45 Configure the GlobalProtect Portal Set Up the GlobalProtect Infrastructure Customize the Agent (Continued) Step 4 Specify how GlobalProtect agent upgrades will occur. By default, the Agent Upgrade field is set to prompt the end user to upgrade. To modify this behavior, select one of the following options: If you want to control when users can upgrade, for example if you want to test a • If you want upgrades to occur automatically without interaction with the user, select transparent. release on a small group of users before deploying it to your entire user base, you • To prevent agent upgrades, select disable. can customize the agent upgrade behavior on a per-configuration basis. In this case, • To allow end users to initiate agent upgrades, select manual. In this case, the user would select the Check Version option in the you could create a configuration that agent to determine if there is a new agent version and then applies to users in your IT group only to upgrade if desired. Note that this option will not work if the allow them to upgrade and test and GlobalProtect agent is hidden from the user. See Step 2 for disable upgrade in all other user/group details. configurations. Then, after you have thoroughly tested the new version, you could modify the agent configurations for the rest of your users to allow the upgrade. By default, the only indication that the agent has successfully connected to GlobalProtect is a balloon message that displays in the system tray/menubar. You can also opt to display a welcome page in A welcome page can be a useful way to the client browser upon successful login as follows: direct users to internal resources that they 1. Select the Display welcome page check box. can only access when connected to GlobalProtect, such as your Intranet or 2. Select which Welcome Page to display from the drop-down. By default, there is one welcome page named factory-default. other internal servers. However, you can define one or more custom welcome pages that provide information specific to your users, or to a specific group of users (based on which portal configuration gets deployed). For details on creating custom pages, see Customize the GlobalProtect Portal Login, Welcome, and Help Pages. Step 5 Specify whether to display a welcome page upon successful login. Step 6 Save the agent configuration settings. 1. If you are done creating client configurations, click OK to close the Configs dialog. Otherwise, for instructions on completing the client configurations, return to Define the GlobalProtect Client Configurations. 2. If you are done configuring the portal, click OK to close the GlobalProtect Portal dialog. 3. When you finish the portal configuration, Commit your changes. Customize the GlobalProtect Portal Login, Welcome, and Help Pages GlobalProtect provides default login, welcome, and/or help pages. However, you can create your own custom pages with your corporate branding, acceptable use policies, and links to your internal resources as follows: 46 GlobalProtect Administrator’s Guide Set Up the GlobalProtect Infrastructure Configure the GlobalProtect Portal Customize the Portal Login Page Step 1 Step 2 Export the default portal login page. Edit the exported page. 1. Select Device > Response Pages. 2. Select the GlobalProtect Portal Login Page link. 3. Select the Default predefined page and click Export. 1. Using the HTML text editor of your choice, edit the page. 2. If you want to edit the logo image that is displayed, host the new logo image on a web server that is accessible from the remote GlobalProtect clients. For example, edit the following line in the HTML to point to the new logo image: <img src="http://cdn.slidesharecdn.com/ Acme-logo-96x96.jpg?1382722588"/> Step 3 Step 4 Step 5 Import the new login page. 3. Save the edited page with a new filename. Make sure that the page retains its UTF-8 encoding. 1. Select Device > Response Pages. 2. Select the GlobalProtect Portal Login Page link. 3. Click Import and then enter the path and filename in the Import File field or Browse to locate the file. 4. (Optional) Select the virtual system on which this login page will be used from the Destination drop-down or select shared to make it available to all virtual systems. 5. Click OK to import the file. Configure the portal to use the new login 1. page. Select Network > GlobalProtect > Portals and select the portal you want to add the login page to. 2. On the Portal Configuration tab, select the new page from the Custom Login Page drop-down. 3. Click OK to save the portal configuration. 4. Commit your changes. Verify that the new login page displays. From a browser, go to the URL for your portal (be sure you do not add the :4443 port number to the end of the URL or you will be directed to the web interface for the firewall). For example, enter https://myportal rather than https://myportal:4443. The portal login page will display. GlobalProtect Administrator’s Guide 47 Deploy the GlobalProtect Client Software Set Up the GlobalProtect Infrastructure Deploy the GlobalProtect Client Software In order to connect to GlobalProtect, an end host must be running GlobalProtect client software. The software deployment method depends on the type of client as follows: Mac OS and Microsoft Windows hosts—Require the GlobalProtect agent software, which is distributed by the GlobalProtect portal. To enable the software for distribution, you must download the version you want the hosts in your network to use to the firewall hosting your GlobalProtect portal and then activate the software for download. For instructions on download and activating the agent software on the firewall, see Deploy the GlobalProtect Agent Software. iOS and Android devices—Require the GlobalProtect app. As with other mobile device apps, the end user must download the GlobalProtect app either from the Apple AppStore (iOS devices) or from Google Play (Android devices). Download and Install the GlobalProtect Mobile App. For more details, see What Client OS Version are Supported with GlobalProtect? Deploy the GlobalProtect Agent Software There are several ways to deploy the GlobalProtect agent software: Directly from the portal—Download the agent software to the firewall hosting the portal and activate it so that end users can install the updates when they connect to the portal. This option provides flexibility in that it allows you to control how and when end users receive updates based on the client configuration settings you define for each user, group, and/or operating system. However, if you have a large number of agents that require updates, it could put extra load on your portal. See Host Agent Updates on the Portal for instructions. From a web server—If you have a large number of hosts that will need to upgrade the agent simultaneously, consider hosting the agent updates on a web server to reduce the load on the firewall. See Host Agent Updates on a Web Server for instructions. Transparently from the command line—For Windows clients, you can automatically deploy agent settings in the Windows Installer (MSIEXEC). However, to upgrade to a later agent version using MSIEXEC, you must first uninstall the existing agent. In addition, MSIEXEC allows for deployment of agent settings directly on the client systems by setting values in the Windows registry or Mac plist. See Deploy Agent Settings Transparently. Using group policy rules—In Active Directory environments, the GlobalProtect Agent can also be distributed to end users, using active directory group policy. AD Group policies allow modification of Windows host computer settings and software automatically. Refer to the article at http://support.microsoft.com/kb/816102 for more information on how to use Group Policy to automatically distribute programs to host computers or users. 48 GlobalProtect Administrator’s Guide Set Up the GlobalProtect Infrastructure Deploy the GlobalProtect Client Software Host Agent Updates on the Portal The simplest way to deploy the GlobalProtect agent software is to download the new agent installation package to the firewall that is hosting your portal and then activate the software for download to the agents connecting to the portal. To do this automatically, the firewall must have a service route that enables it to access the Palo Alto Networks Update Server. If the firewall does not have access to the Internet, you can manually download the agent software package from the Palo Alto Networks Software Updates support site using an Internet-connected computer and then manually upload it to the firewall. You define how the agent software updates are deployed in the client configurations you define on the portal— whether they happen automatically when the agent connects to the portal, whether the user is prompted to upgrade the agent, or whether the end user can manually check for and download a new agent version. For details on creating a client configuration, see Define the GlobalProtect Client Configurations. Host the GlobalProtect Agent on the Portal Step 1 Launch the web interface on the firewall hosting the GlobalProtect portal and go to the GlobalProtect Client page. Select Device > GlobalProtect Client. Step 2 Check for new agent software images. • If the firewall has access to the Update Server, click Check Now to check for the latest updates. If the value in the Action column is Download it indicates that an update is available. • If the firewall does not have access to the Update Server, go to the Palo Alto Networks Software Updates support site and Download the file to your computer. Then go back to the firewall to manually Upload the file. Step 3 Download the agent software image. If your firewall does not have Internet access from the management port, you can download the agent update from the Palo Alto Networks Support Site (https://support.paloaltonetworks.com). You can then manually Upload the update your firewall and then activate it by clicking Activate From File. Step 4 Locate the agent version you want and then click Download. When the download completes, the value in the Action column changes to Activate. If you manually uploaded the agent software as detailed in Step 2, the Action column will not update. Continue to the next step for instructions on activating an image that was manually uploaded. Activate the agent software image so that • If you downloaded the image automatically from the Update Server, click Activate. end users can download it from the portal. • If you manually uploaded the image to the firewall, click Activate From File and then select the GlobalProtect Client File you Only one version of agent software uploaded from the drop-down. Click OK to activate the selected image can be activated at a time. If image. You may need to refresh the screen before the version you activate a new version, but have displays as Currently Activated. some agents that require a previously activated version, you will have to activate the required version again to enable it for download. GlobalProtect Administrator’s Guide 49 Deploy the GlobalProtect Client Software Set Up the GlobalProtect Infrastructure Host Agent Updates on a Web Server If you have a large number of client systems that will need to install and/or update the GlobalProtect agent software, consider hosting the GlobalProtect agent software images on an external web server. This helps reduce the load on the firewall when users connect to download the agent. To use this feature, the firewall hosting the portal must be running PAN-OS 4.1.7 or later. Host GlobalProtect Agent Images on a Web Server Step 1 Follow the steps for downloading and activating the agent software Download the version of the GlobalProtect agent that you plan to host on the firewall as described in Host the GlobalProtect Agent on the Portal. on the web server to the firewall and activate it. Step 2 Download the GlobalProtect agent image From a browser, go to the Palo Alto Networks Software Updates site and Download the file to your computer. you want to host on your web server. You should download the same image that you activated on the portal. Step 3 Publish the files to your web server. Upload the image file(s) to your web server. Step 4 Redirect the end users to the web server. On the firewall hosting the portal, log in to the CLI and enter the following operational mode commands: > set global-protect redirect on > set global-protect redirect location <path> where <path> is the path is the URL to the folder hosting the image, for example https://acme/GP. Step 5 Test the redirect. 1. Launch your web browser and go to the following URL: https://<portal address or name> For example, https://gp.acme.com. 2. 50 On the portal login page, enter your user Name and Password and then click Login. After successful login, the portal should redirect you to the download. GlobalProtect Administrator’s Guide Set Up the GlobalProtect Infrastructure Deploy the GlobalProtect Client Software Test the Agent Installation Use the following procedure to test the agent installation. Test the Agent Installation Step 1 Create a client configuration for testing the agent installation. As a best practice, create a client configuration that is limited to a small group of users, such as administrators in the IT department responsible for administering the firewall: 1. Select Network > GlobalProtect > Portals and select the portal configuration to edit. When initially installing the GlobalProtect agent software on the client system, the end user must be logged in to the system using an 2. account that has administrative privileges. Subsequent agent software updates do not require 3. administrative privileges. Step 2 Log in to the GlobalProtect portal. Select the Client Configuration tab and either select an existing configuration or click Add to add a new configuration to deploy to the test users/group. On the User/User Group tab, click Add in the User/User Group section and then select the user or group who will be testing the agent. 4. On the Agent tab, make sure Agent Upgrade is set to prompt and then click OK to save the configuration. 5. (Optional) Select the client configuration you just created/modified and click Move Up so that it is before any more generic configurations you have created. 6. Commit the changes. 1. Launch your web browser and go to the following URL: https://<portal address or name> For example, https://gp.acme.com. 2. GlobalProtect Administrator’s Guide On the portal login page, enter your user Name and Password and then click Login. 51 Deploy the GlobalProtect Client Software Set Up the GlobalProtect Infrastructure Test the Agent Installation (Continued) Step 3 Download the agent. 1. Click the link that corresponds to the operating system you are running on your computer to begin the download. 2. When prompted to run or save the software, click Run. 3. When prompted, click Run to launch the GlobalProtect Setup Wizard. Note Step 4 Step 5 Complete the GlobalProtect agent setup. 1. Log in to GlobalProtect. When initially installing the GlobalProtect agent software on the client system, the end user must be logged in to the system using an account that has administrative privileges. Subsequent agent software updates do not require administrative privileges. From the GlobalProtect Setup Wizard, click Next. 2. Click Next to accept the default installation folder (C:\Program Files\Palo Alto Networks\GlobalProtect) or Browse to choose a new location and then click Next twice. 3. After the installation successfully completes, click Close. The GlobalProtect agent will automatically start. When prompted, enter your User Name and Password and then click Apply. If authentication is successful, the agent will connect to GlobalProtect. Use the agent to access resources on the corporate network as well as external resources, as defined in the corresponding security polices. To deploy the agent to end users, create client configurations for the user groups for which you want to enable access and set the Agent Upgrade settings appropriately and then communicate the portal address. See Define the GlobalProtect Client Configurations for details on setting up client configurations. 52 GlobalProtect Administrator’s Guide Set Up the GlobalProtect Infrastructure Deploy the GlobalProtect Client Software Deploy Agent Settings Transparently As an alternative to deploying agent settings from the portal configuration, you can define them directly from the Windows registry or global MAC plist or—on Windows clients only—from the MSIEXEC installer. The benefit of this is that it enables deployment of GlobalProtect agent settings to client systems prior to their first connection to the GlobalProtect portal. Settings defined in the portal configuration always override settings defined in the Windows Registry or Mac plist. This means that if you define settings in the Registry or plist, but the portal configuration specifies different settings, the settings the agent receives from the portal will override the settings defined on the client. This includes login-related settings such as whether to connect on-demand, whether to use SSO, and whether the agent can connect if the portal certificate is invalid. Therefore, make sure that you do not define conflicting settings. In addition, the portal configuration is cached on the client system and this cached configuration will be used if the GlobalProtect agent is restarted or the machine is rebooted. The following sections describe how to deploy agent settings transparently: Set the Portal Name Customizable Agent Settings Deploy Agent Settings from MSIEXEC Deploy Agent Settings in the Windows Registry or Mac plist Set the Portal Name If you do not want the user to manually enter the portal address even for the first connection, you can pre-deploy the portal address through the Windows Registry: (HKEY_LOCAL_MACHINE\SOFTWARE\Palo Alto Networks\GlobalProtect\PanSetup with key Portal) or the Mac plist (/Library/Preferences/com. paloaltonetworks.GlobalProtect.settings.plist and configure key Portal under dictionary PanSetup): GlobalProtect Administrator’s Guide 53 Deploy the GlobalProtect Client Software Set Up the GlobalProtect Infrastructure Customizable Agent Settings In addition to pre-deploying the portal address, you can also define the agent configuration settings. Table: Customizable Agent Settings describes each customizable agent settings. Settings defined in the GlobalProtect portal client configuration take precedence over settings defined in the Windows Registry or the Mac plist. However, one setting—can-prompt-user-credential—is not available in the portal client configuration and must be set through the Windows Registry (applicable to Windows clients only). This setting is used in conjunction with single sign-on and indicates whether or not to prompt the user for credentials if SSO fails. Table: Customizable Agent Settings Portal Client Configuration Windows Registry/ Mac plist MSIEXEC Parameter Default Enable advanced view enable-advanced-view yes | no ENABLEADVANCEDVIEW=”yes|no” yes Show GlobalProtect icon show-agent-icon yes | no SHOWAGENTICON=”yes|no” yes Allow users to change portal address can-change-portal yes | no CANCHANGEPORTAL=”yes|no” yes Allow user to save password can-save-password yes | no CANSAVEPASSWORD=”yes|no” yes Enable rediscover network option rediscover-network yes | no REDISCOVERNETWORK=”yes|no” yes Enable Resubmit Host Profile option resubmit-host-info yes | no RESUBMITHOSTINFO=”yes|no” yes Allow user to continue if portal server certificate is invalid can-continue-if-portal-certinvalid yes | no CANCONTINUEIFPORTALCERTINVALID=”y es|no” yes Use single sign-on use-sso yes | no USESSO=”yes|no” yes Config Refresh Interval (hours) refresh-config-interval <hours> REFRESHCONFIGINTERVAL=”<hours>” 24 Connect Method connect-method on-demand | pre-logon | user-logon CONNECTMETHOD=”on-demand | pre-logon | user-logon” user-logon Windows only/not in portal can-prompt-user-credential yes | no CANPROMPTUSERCREDENTIAL=”yes | no” yes Deploy Agent Settings from MSIEXEC On Windows clients you have the option to deploy both the agent and the settings automatically from the Windows Installer (MSIEXEC) using the following syntax: msiexec.exe /i GlobalProtect.msi <SETTING>="<value>" For example, to prevent users from connecting to the portal if the certificate is not valid, you would change setting as follows: msiexec.exe /i GlobalProtect.msi CANCONTINUEIFPORTALCERTINVALID="no" For a complete list of settings and the corresponding default values, see Table: Customizable Agent Settings. 54 GlobalProtect Administrator’s Guide Set Up the GlobalProtect Infrastructure Deploy the GlobalProtect Client Software Deploy Agent Settings in the Windows Registry or Mac plist You can set the GlobalProtect agent customization settings in the Windows registry (HKEY_LOCAL_MACHINE\SOFTWARE\Palo Alto Networks\GlobalProtect\Settings\) or the Mac global plist file (/Library/Preferences/com.paloaltonetworks.GlobalProtect.settings.plist). This enables deployment of GlobalProtect agent settings to client systems prior to their first connection to the GlobalProtect portal. For a list of commands and values, see Table: Customizable Agent Settings. Download and Install the GlobalProtect Mobile App The GlobalProtect app provides a simple way to extend the enterprise security policies out to mobile devices. As with other remote hosts running the GlobalProtect agent, the mobile app provides secure access to your corporate network over an IPSec or SSL VPN tunnel. The app will automatically connect to the gateway that is closest to the end user’s current location. In addition, traffic to and from the mobile device is automatically subject to the same security policy enforcement as other hosts on your corporate network. Like the GlobalProtect agent, the app collects information about the host configuration and can use this information for enhanced HIP-based security policy enforcement. For a more complete mobile device security solution, you can leverage the GlobalProtect Mobile Security Manger as well. This service provides for automated provisioning of mobile device configurations, device security compliance enforcement, and centralized management and visibility into the mobile devices accessing your network. In addition, GlobalProtect Mobile Security Manager seamlessly integrates with the other GlobalProtect services on your network, enabling secure access to your network resources from any location and granular policy enforcement based on HIP profiles. For details, see Set Up the GlobalProtect Mobile Security Manager. Use the following procedure to install the GlobalProtect mobile app. Test the App Installation Step 1 Create a client configuration for testing the app installation. GlobalProtect Administrator’s Guide As a best practice, create a client configuration that is limited to a small group of users, such as administrators in the IT department responsible for administering the firewall: 1. Select Network > GlobalProtect > Portals and select the portal configuration to edit. 2. Select the Client Configuration tab and either select an existing configuration or click Add to add a new configuration to deploy to the test users/group. 3. On the User/User Group tab, click Add in the User/User Group section and then select the user or group who will be testing the agent. 4. In the OS section, select the app you are testing (iOS or Android). 5. (Optional) Select the client configuration you just created/modified and click Move Up so that it is before any more generic configurations you have created. 6. Commit the changes. 55 Deploy the GlobalProtect Client Software Set Up the GlobalProtect Infrastructure Test the App Installation (Continued) Step 2 From the mobile device, follow the • On Android devices, search for the app on Google Play prompts to download and install the app. • On iOS devices, search for the app at the App Store Step 3 Launch the app. When successfully installed, the GlobalProtect app icon displays on the device’s Home screen. To launch the app, tap the icon.When prompted to enable GlobalProtect VPN functionality, tap OK. Step 4 Connect to the portal. 1. When prompted, enter the Portal name or address, Username, and Password. The portal name must be a fully qualified domain name (FQDN) and it should not include the https:// at the beginning. 2. Tap Connect and verify that the app successfully establishes a VPN connection to GlobalProtect. If GlobalProtect Mobile Security Manager is configured, the app will prompt you to enroll. See Verify the Mobile Security Manager Configuration for more details on verifying that configuration. 56 GlobalProtect Administrator’s Guide Set Up the GlobalProtect Infrastructure Reference: GlobalProtect Agent Cryptographic Functions Reference: GlobalProtect Agent Cryptographic Functions The GlobalProtect agent uses the OpenSSL library 0.9.8p to establish secure communication with the GlobalProtect portal and GlobalProtect gateways. The following table lists each GlobalProtect agent function that requires a cryptographic function and details the cryptographic keys the GlobalProtect agent uses: Crypto Function Key Usage Winhttp (Windows) and NSURLConnection (MAC) AES256-SHA Dynamic key negotiated between the GlobalProtect agent and the GlobalProtect portal and/or gateway for establishing the HTTPS connection. Used to establish the HTTPS connection between the GlobalProtect agent and the GlobalProtect portal and GlobalProtect gateway for authentication. OpenSSL AES256-SHA Dynamic key negotiated between the GlobalProtect agent and the GlobalProtect gateway during the SSL handshake. Used to establish the SSL connection between the GlobalProtect agent and the GlobalProtect gateway for HIP report submission, SSL tunnel negotiation, and network discovery. IPsec encryption and authentication AES128-SHA1 The session key sent from the GlobalProtect gateway. Used to establish the IPsec tunnel between the GlobalProtect agent and the GlobalProtect gateway. GlobalProtect Administrator’s Guide 57 Reference: GlobalProtect Agent Cryptographic Functions 58 Set Up the GlobalProtect Infrastructure GlobalProtect Administrator’s Guide Set Up the GlobalProtect Mobile Security Manager As mobile devices become more powerful, end users increasingly rely on them to perform business tasks. However, these same devices that are accessing your corporate network are also connecting to the Internet without protection against threats and vulnerabilities. The GlobalProtect Mobile Security Manager provides mechanisms to configure device settings and accounts and perform device actions, such as locking and/or wiping lost or stolen mobile devices. The Mobile Security Manager also publishes the state of the device to GlobalProtect gateways (in the form of HIP reports) so that you can create granular access policies, for example, allowing you to deny access to devices that are rooted/jailbroken. The following topics describe the GlobalProtect Mobile Security Manager service and walk you through the basic steps to get your Mobile Security Manager set up for device management. Mobile Security Manager Deployment Best Practices Set Up Management Access to the Mobile Security Manager Register, License, and Update the Mobile Security Manager Set Up the Mobile Security Manager for Device Management Enable Gateway Access to the Mobile Security Manager Define Deployment Policies Verify the Mobile Security Manager Configuration Set Up Administrative Access to the Mobile Security Manager GlobalProtect Administrator’s Guide 59 Mobile Security Manager Deployment Best Practices Set Up the GlobalProtect Mobile Security Manager Mobile Security Manager Deployment Best Practices GlobalProtect Mobile Security Manager (running on the GP-100 appliance) works in concert with the rest of the GlobalProtect infrastructure to ensure a complete mobile security solution. A Mobile Security Manager deployment requires connectivity between the following components: Palo Alto Updates—The Mobile Security Manager retrieves WildFire signature updates that enable it to detect malware on managed Android devices. By default, the Mobile Security Manager retrieves WildFire updates from the Palo Alto Networks Update server over its MGT interface. However, if your management network does not provide access to the Internet, you will have to modify the service route for the Palo Alto Updates service to use the ethernet1 interface. GlobalProtect Gateways—To Configure HIP-Based Policy Enforcement for managed devices, the GlobalProtect gateways retrieve the mobile device HIP reports from the Mobile Security Manager. The best practice deployment is to enable the GlobalProtect Gateways management service on ethernet1. Push Notification Services—Because the Mobile Security Manager cannot directly connect to the mobile devices it manages, it must send push notifications over the Apple Push Notification service (APNs) or Google Cloud Messaging (GCM) services whenever it needs to interact with a device, for example to send a check-in request or perform an action such as sending a message or pushing a new policy. The best practice is to configure the Push Notification service route to use the ethernet1 interface. Mobile Devices—Mobile devices connect from the external network initially for enrollment and then to check in and receive deployment policy. The best practice is to use ethernet1 for device enrollment and check-in, but to use separate listening ports. To prevent the end user from seeing certificate warnings, use port 443 (the default) for enrollment and use a different port (configurable to 7443 or 8443) for check-in. Warning: Because the device check-in port is pushed to the device upon enrollment, changing it after initial configuration will require devices to re-enroll with the Mobile Security Manager. Figure: Mobile Security Manager best practice deployment 60 GlobalProtect Administrator’s Guide Set Up the GlobalProtect Mobile Security Manager Set Up Management Access to the Mobile Security Manager Set Up Management Access to the Mobile Security Manager By default, the management port (MGT) on the GP-100 appliance (also called the Mobile Security Manager) has an IP address of 192.168.1.1 and a username/password of admin/admin. For security reasons, you must change these settings before continuing with other Mobile Security Manager configuration. These initial configuration tasks must be performed using a direct physical connection to the appliance (either a serial connection to the Console port or an RJ-45 connection to the MGT interface). During initial configuration, you will assign the network settings that will allow you to connect to the appliance’s web interface for all subsequent configuration tasks. Set Up Network Access to the GP-100 Appliance Step 1 Rack mount the GP-100 appliance. Refer to the GP-100 Appliance Hardware Reference Guide for instructions. Step 2 Obtain the required network settings for the MGT interface. • IP address for MGT port • Netmask • Default gateway • DNS server address Step 3 Connect your computer to the GP-100 appliance. Connect to the appliance in one of the following ways: • Connect a serial cable from your computer to the Console port and connect to the appliance using terminal emulation software (9600-8-N-1). Wait a few minutes for the boot-up sequence to complete; when the appliance is ready, the login prompt displays. • Connect an RJ-45 Ethernet cable from your computer to the MGT port on the appliance. From a browser, go to https://192.168.1.1. If necessary, change the IP address on your computer to an address in the 192.168.1.0/24 network, such as 192.168.1.2, in order to access this URL. Step 4 When prompted, log in to the appliance. Log in using the default username and password (admin/admin). The appliance will begin to initialize. Step 5 Define the network settings and services 1. to allow on the MGT interface. GlobalProtect Administrator’s Guide Select Setup > Settings and then click the Edit icon in the Management Interface Settings section of the screen. Enter the IP Address, Netmask, and Default Gateway to enable network access on the MGT interface. 2. Make sure Speed is set to auto-negotiate. 3. Select which management services to allow on the interface. At a minimum, select HTTPS, SSH and Ping. 4. (Optional) To restrict Mobile Security Manager management access to specific IP addresses, enter the Permitted IP Addresses. 5. Click OK. 61 Set Up Management Access to the Mobile Security Manager Set Up the GlobalProtect Mobile Security Manager Set Up Network Access to the GP-100 Appliance (Continued) Step 6 (Optional) Configure general appliance settings. 1. Select Setup > Settings > Management and click the Edit icon in the General Settings section of the screen. 2. Enter a Hostname for the appliance and enter your network Domain name. The domain name is just a label; it will not be used to join the domain. Step 7 Step 8 Configure DNS and optionally set up access to an NTP server. Set a secure password for the admin account. 3. Enter any informative text you want to display to administrators at login in the Login Banner field. 4. Select the Time Zone and, if you do not plan to use NTP, enter the Date and Time. 5. Click OK. 1. Select Setup > Settings > Services and click the Edit icon the Services section of the screen. 2. Enter the IP address of the Primary DNS Server and optionally the Secondary DNS Server. 3. To use the virtual cluster of time servers on the Internet, enter the hostname ntp.pool.org as the Primary NTP Server or add the IP address of your Primary NTP Server and optionally your Secondary NTP Server. 4. Click OK. 1. Select Setup > Administrators. 2. Select the admin role. 3. For instructions on adding additional administrative accounts, 4. see Set Up Administrative Access to the Mobile Security Manager. Step 9 Commit your changes. When the configuration changes are saved, the web interface will lose connectivity to the appliance because the IP address will have changed. Step 10 Connect the appliance to your network. 62 in Enter the current default password and the new password. Click OK to save your settings. Click Commit. The appliance may take up to 90 seconds to save your changes. 1. Disconnect the appliance from your computer. 2. Connect the MGT port to a switch port on your management network using an RJ-45 Ethernet cable. Make sure that the switch port you cable the appliance to is configured for auto-negotiation. GlobalProtect Administrator’s Guide Set Up the GlobalProtect Mobile Security Manager Set Up Management Access to the Mobile Security Manager Set Up Network Access to the GP-100 Appliance (Continued) Step 11 Open an SSH management session to the Using a terminal emulation software, such as PuTTY, launch an SSH GP-100 appliance. session to the appliance using the new IP address you assigned to it: 1. Enter the IP address you assigned to the MGT port in the SSH client. 2. Use port 22. 3. Enter your administrative access credentials when prompted. After successfully logging in, the CLI prompt displays in operational mode. For example: admin@GP-100> Step 12 Verify network access to external services Verify that you have access to and from the appliance by using the required for appliance management, such ping utility from the CLI. Make sure you have connectivity to the as the Palo Alto Networks Update Server. default gateway, DNS server, and the Palo Alto Networks Update Server as shown in the following example: admin@GP-100> ping host updates.paloaltonetworks.com PING updates.paloaltonetworks.com (67.192.236.252) 56(84) bytes of data. 64 bytes from 67.192.236.252 : icmp_seq=1 ttl=243 time=40.5 ms 64 bytes from 67.192.236.252 : icmp_seq=1 ttl=243 time=53.6 ms 64 bytes from 67.192.236.252 : icmp_seq=1 ttl=243 time=79.5 ms Note Step 13 Log in to the Mobile Security Manager web interface. 1. After you have verified connectivity, press Ctrl+C to stop the pings. Open a browser window and navigate to the following URL: https://<IP_Address> where <IP_Address> is the address you just assigned to the For instructions on creating MGT interface. additional administrative accounts, see Set Up Administrative Access to Note If you enable device check-in on the MGT interface, you the Mobile Security Manager. must include the port number 4443 in the URL in order to access the web interface as follows: https://<IP_Address>:4443 2. GlobalProtect Administrator’s Guide Log in using the new password you assigned to the admin account. 63 Register, License, and Update the Mobile Security Manager Set Up the GlobalProtect Mobile Security Manager Register, License, and Update the Mobile Security Manager Before you can begin using the Mobile Security Manager to manage mobile devices, you must register the GP-100 appliance and retrieve the licenses. If you plan to manage more than 500 mobile devices you must purchase a one-time GlobalProtect Mobile Security Manager perpetual license based on number of mobile devices to be managed. In addition, the appliance comes with 90-days of free support. However, after the 90-day period is up, you must purchase a support license to enable the Mobile Security Manager to retrieve software updates and dynamic content updates. The following sections describe the registration, licensing, and update processes: Register the GP-100 Appliance Activate/Retrieve the Licenses Install Content and Software Updates Register the GP-100 Appliance To manage all the assets purchased from Palo Alto Networks, create an account and register the serial numbers with the account as follows. Register the GP-100 Appliance Step 1 Log in to the Mobile Security Manager web interface. Step 2 Locate the serial number and copy it to the clipboard. Using a secure connection (https) from a web browser, log in using the IP address and password assigned during initial configuration (https://<IP address> or https://<IP address>:4443 if device check-in is enabled on the interface). The serial number for the GP-100 appliance displays on the Dashboard; locate the Serial Number in the General Information section of the screen. Step 3 Step 4 Go to the Palo Alto Networks Support site. Select Setup > Support > Links and click the link to Support Home. If your appliance does not have Internet connectivity from the MGT interface, in a new browser tab or window, go to https://support.paloaltonetworks.com. Register the GP-100 appliance. The steps • If this is the first Palo Alto Networks appliance you are registering for registering depend on whether you and you do not yet have a login, click Register on the right side of already have a login to the support site. the page. To register, provide your email address and the serial number for the Mobile Security Manager (which you can paste from your clipboard). When prompted, set up a username and password for access to the Palo Alto Networks support community. • If you already have a support account, log in and then click My Devices. Scroll down to Register Device section at the bottom of the screen and enter the serial number for the Mobile Security Manager (which you can paste from your clipboard), your city and postal code and then click Register Device. 64 GlobalProtect Administrator’s Guide Set Up the GlobalProtect Mobile Security Manager Register, License, and Update the Mobile Security Manager Activate/Retrieve the Licenses The Mobile Security Manager requires a valid support license, enabling it to retrieve software updates and dynamic content updates. The appliance comes with 90-days of free support; however, you must purchase a support license to continue receiving updates after this introductory period. If you plan to manage more than 500 mobile devices, a GlobalProtect Mobile Security Manager license is required. This one-time perpetual license enables management of up to 1,000, 2,000, 5,000, 10,000, 25,000, 50,000, or 100,000 mobile devices. You can purchase a WildFire subscription for the Mobile Security Manager to enable dynamic updates containing malware signatures created as a result of the analysis done by the WildFire cloud. By keeping malware updates current, you can prevent managed Android devices containing malware-infected apps from connecting to your network resources. You must purchase a WildFire subscription that supports the same number of devices that your Mobile Security Manager license supports. For example, if you have a Mobile Security Manager perpetual license for 10,000 devices and you want to enable support for detecting the latest malware you would need to purchase a WildFire subscription for 10,000 devices. To purchase licenses, contact your Palo Alto Networks Systems Engineer or reseller. For information licensing requirements, see About GlobalProtect Licenses. After obtaining a license, navigate to Setup > Licenses to perform the following tasks depending on how you receive your licenses: Retrieve license keys from license server—Use this option if the license has been activated on the support portal. Activate feature using authorization code—Use the authorization code to activate a license that has not been previously activated on the support portal. Manually upload license key—Use this option if the GP-100 MGT interface does not have connectivity to the Palo Alto Networks update server. In this case, first download the license key file from the support site to an Internet-connected computer and then upload it to the appliance. Activate the Licenses Step 1 Locate the authorization codes for the product/subscription you purchased. GlobalProtect Administrator’s Guide Locate the email from Palo Alto Networks customer support listing the authorization code associated with the license(s) you purchased. If you cannot locate this email, contact customer support to obtain the codes before proceeding. 65 Register, License, and Update the Mobile Security Manager Set Up the GlobalProtect Mobile Security Manager Activate the Licenses (Continued) Step 2 Activate the license(s). 1. If the Mobile Security Manager will manage more than 500 mobile devices, a 2. GlobalProtect Mobile Security Manager perpetual license is required. 3. Note Step 3 If the management port (MGT) on the Mobile Security Manager does not have Internet access, manually download the license files from the support site and upload it to the appliance using the Manually upload license key option. (Not required if you completed Step 2) Retrieve license keys from the license server. To activate your support subscription (required after 90 days), select Setup > Support. Select Activate feature using authorization code. Enter the Authorization Code and then click OK. Verify that the subscription was successfully activated. 4. In the Setup > Licenses tab, select Activate feature using authorization code. 5. When prompted, enter the Authorization Code for the Mobile Security Manager license and click OK. 6. Verify that the license was successfully activated and that it displays support for the appropriate number of devices: Use the Retrieve license keys from the license server option if you have activated the license keys on the Support portal. Select Setup > Support, and select Retrieve license keys from the license server. Install Content and Software Updates Use the following procedure to download the latest Android Package (APK) malware updates and/or upgrade the Mobile Security Manager software. By keeping APK updates current, you can prevent managed Android devices containing malware-infected apps from connecting to your network resources. Get Software and Content Updates Step 1 Launch the Mobile Security Manager web 1. interface and go to the dynamic updates page. Before updating the software, install the latest dynamic updates supported in the release. 66 2. Using a secure connection (https) from a web browser, log in using the IP address and password you assigned during initial configuration (https://<IP address> or https://<IP address>:4443 if device check in is enabled on the interface). Select Setup > Dynamic Updates. GlobalProtect Administrator’s Guide Set Up the GlobalProtect Mobile Security Manager Register, License, and Update the Mobile Security Manager Get Software and Content Updates (Continued) Step 2 Step 3 Step 4 Check for, download, and install the latest 1. Mobile Security Manager content update. The Mobile Security Manager content updates include all Android application package (APK) malware signatures, including new malware detected by WildFire. 2. Click Download to obtain the desired version. 3. Click the Install link in the Action column. When the installation completes, a check mark displays in the Currently Installed column. Check for software updates. 1. Select Setup > Software. 2. Click Check Now to check for the latest updates. If the value in the Action column is Download it indicates that an update is available. Download the update. If the Mobile Security Manager does not have Internet access from the management port, you can download the software update from the Palo Alto Networks Support Site. You can then manually Upload it to the Mobile Security Manager. Step 5 Click Check Now to check for the latest updates. If the value in the Action column is Download it indicates that an update is available. Install the update. Locate the version you want to upgrade to, and click Download. When the download completes, the value in the Action column changes to Install. 1. Click Install. 2. Reboot the appliance: • If prompted to reboot, click Yes. • If you are not prompted to reboot, select Setup > Settings > Operations and click Reboot Device in the Device Operations section of the screen. GlobalProtect Administrator’s Guide 67 Set Up the Mobile Security Manager for Device Management Set Up the GlobalProtect Mobile Security Manager Set Up the Mobile Security Manager for Device Management Before you can begin using the Mobile Security Manager to manage mobile devices, you must set up the device management infrastructure. This includes configuring an interface for device check-in, obtaining the certificates required for the Mobile Security Manager to send push notifications to devices over-the-air (OTA), defining how to authenticate users/devices before allowing enrollment, and how to issue identity certificates to each device. Configure the Mobile Security Manager for Device Check-in Configure the Mobile Security Manager for Enrollment Configure the Mobile Security Manager for Device Check-in Every hour (by default), the Mobile Security Manager sends a notification message to the devices it manages requesting that they check in. To send these messages—called push notifications—the Mobile Security Manager must connect to the devices over-the-air (OTA). To send push notifications to iOS devices, the Mobile Security Manager must use the Apple Push Notification Service (APNs); for Android devices it must use the Google Cloud Messaging (GCM) service. The best practice is to configure the ethernet1 interface on the Mobile Security Manager as an external-facing interface for mobile device and gateway access. Therefore, to configure the Mobile Security Manager for device check-in, you must configure the ethernet1 interface and enable it for device check-in. In addition, you must configure the Mobile Security Manager to send push notifications via APNs/GCM. The following procedure details how to set up this recommended configuration: Set Up the Mobile Security Manager for Device Check-In Step 1 Configure the device check-in interface. 1. Although you could use the MGT 2. interface for device check-in, configuring a separate interface allows you to separate management 3. traffic from data traffic. If you are using the MGT interface for device check-in, skip to Step 4. 68 Select Setup > Network > ethernet1 to open the Network Interface settings dialog. Define the network access settings for the interface, including the IP Address, Netmask, and Default Gateway. Enable the services to allow on this interface by selecting the corresponding check boxes. At a minimum, select Mobile Device Check-in. You may also want to select Ping to aid in testing connectivity. 4. To save the interface settings, click OK. 5. Connect the ethernet1 port (labeled 1 on the front panel of the appliance) to your network using an RJ-45 Ethernet cable. Make sure that the switch port you cable the interface to is configured for auto-negotiation. 6. (Optional) Add a DNS “A” record to your DNS server to associate the IP address of this interface with a hostname. GlobalProtect Administrator’s Guide Set Up the GlobalProtect Mobile Security Manager Set Up the Mobile Security Manager for Device Management Set Up the Mobile Security Manager for Device Check-In (Continued) Step 2 Step 3 (Optional) Modify the device check-in settings. 1. Select Setup > Settings > Server and then click the Edit in the Device Check-in Settings section. icon By default, the Mobile Security Manager 2. listens on port 443 for both enrollment requests and check-in requests. As a best practice, you should keep the enrollment port set to 443 and use a different port number for device check-in. The device check-in process requires a client 3. certificate to establish the SSL session whereas enrollment does not. If both services are running on the same port, the mobile device will erroneously pop-up certificate prompts during the enrollment 4. process, which may be confusing to the end users. Set the Check-in Port the Mobile Security Manager will listen on for device check-in requests. By default, the port is set to 443. However, as a best practice, you should change the device check-in port to 7443 or 8443 and enrollment to prevent users from sometimes being prompted for a client certificate when enrolling. 1. (Optional) If the MGT port on the Mobile Security Manager does not have access to the Internet, configure service 2. routes to enable access from the device 3. check-in interface to the required external resources, such as the Apple Push Notification Service (APNs) and the Google Cloud Messaging (GCM) service for sending push notifications. Select Setup > Settings > Services > Service Route Configuration. GlobalProtect Administrator’s Guide By default, the Mobile Security Manager will send push notifications to the devices it manages every 60 minutes to request check-in. To change this interval, enter a new Device Check-in Notification Interval (range: 30 minutes to 1440 minutes). Click OK to save the settings. Click the Select radio button. Click in the Interface column that corresponds to the service for which you want to change the service route and then select the ethernet1 interface. 4. Repeat these steps for each service you want to modify. For the purposes of setting up the ethernet1 interface for device check-in, you will want to change the service route for Push Notification. If you do not have Internet access from the MGT interface, you must change all service routes to this interface. 5. Click OK to save the settings. 69 Set Up the Mobile Security Manager for Device Management Set Up the GlobalProtect Mobile Security Manager Set Up the Mobile Security Manager for Device Check-In (Continued) Step 4 Import a server certificate for the Mobile To import a certificate and private key, download the certificate and key file from the CA and then make sure they are accessible from Security Manager device check-in your management system and that you have the passphrase to interface. decrypt the private key. Then complete the following steps on the The Common Name (CN) and, if Mobile Security Manager: applicable, the Subject Alternative Name 1. Select Setup > Certificate Management > Certificates > Device (SAN) fields of the Mobile Security Certificates. Manager certificate must match the IP 2. address or fully qualified domain name (FQDN) of the device check-in interface 3. (wildcard certificates are supported). Click Import and enter a Certificate Name. Enter the path and name to the Certificate File received from the CA, or Browse to find the file. Although you could generate a self-signed 4. server certificate for the Mobile Security Manager device check-in interface (Setup 5. Select Encrypted Private Key and Certificate (PKCS12) as the File Format. > Certificate Management > Certificates 6. > Generate), it is a best practice to use a Enter the path and name to the PKCS#12 file in the Key File field or Browse to find it. certificate from a public CA, such as VeriSign or Go Daddy, to ensure that the 7. end devices will be able to connect for enrollment. If you do not use a certificate 8. that is trusted by the devices, you must add the root CA certificate to both Mobile Security Manager configuration and to the corresponding portal client configuration so that the portal can deploy the certificate to the devices as described in Define the GlobalProtect Client Configurations. Select the Import private key check box. Enter and re-enter the Passphrase that was used to encrypt the private key and then click OK to import the certificate and key. To configure the Mobile Security Manager to use this certificate for device check-in: a. Select Setup > Settings > Server and then click the Edit icon in the SSL Server Settings section. b. Select the certificate you just imported from the MDM Server Certificate drop-down. c. (Optional) If the certificate was not issued by a well-known CA, select the root CA certificate for the issuer from the Certificate Authority drop-down, or Import it now. d. Click OK to save the settings. 70 GlobalProtect Administrator’s Guide Set Up the GlobalProtect Mobile Security Manager Set Up the Mobile Security Manager for Device Management Set Up the Mobile Security Manager for Device Check-In (Continued) Step 5 Obtain a certificate for the Apple Push Notification Service (APNs). 1. To create the CSR, select Setup > Certificate Management > Certificates and then click Generate. The APNs certificate is required for the Mobile Security Manager to be able to send push notifications to the iOS devices it manages. To obtain the certificate, you must create a certificate signing request (CSR) on the Mobile Security Manager, send it to the Palo Alto Networks signing server for signing and then send the request to Apple. 2. Enter a Certificate Name and a Common Name that identifies your organization. 3. In the Number of Bits field, select 2048. 4. In the Signed By field, select External Authority (CSR). 5. For the Digest, select sha1 and then click Generate. Create a shared Apple ID for your organization to ensure that you always have access to your certificates. 6. Select the CSR from the certificate list and then click Export. 7. In the Export CSR dialog, select Sign CSR for Apple Push Notification Service from the File Format drop-down and then click OK. The Mobile Security Manager automatically sends the CSR to the Palo Alto Networks signing server, which returns a signed CSR (.csr), which you should save to your local disk. 8. Open a new browser window and navigate to the Apple Push Certificates Portal at the following URL: https://identity.apple.com/pushcert 9. Sign in using your Apple ID and password and then click Create a Certificate. If this is your first login, you must Accept the Terms of Use before you can create a certificate. 10. Click Choose File to browse to the location of the CSR you generated and then click Upload. After the certificate is successfully generated, a confirmation displays. 11. Click Download to save the certificate to your local computer. 12. On the Mobile Security Manager, select Setup > Certificate Management > Certificates > Device Certificates and click Import. 13. In the Certificate Name field, enter the same name you used when you created the CSR. 14. In the Certificate File field, enter the path and name to the certificate (.pem) you downloaded from Apple, or Browse to locate the file. 15. Select Base64 Encoded Certificate (PEM) as the File Format and then click OK. The CSR entry on the certificate list changes to a certificate with the Issuer Apple Application Integration Certification Authority and a Status of valid. GlobalProtect Administrator’s Guide 71 Set Up the Mobile Security Manager for Device Management Set Up the GlobalProtect Mobile Security Manager Set Up the Mobile Security Manager for Device Check-In (Continued) Step 6 1. Obtain a key and sender ID for the Google Cloud Messaging (GCM) service. Open a new browser window and navigate to the Google APIs console at the following URL: The GCM key and sender ID are required for the Mobile Security Manager to send 2. push notifications to the Android devices 3. it manages. https://cloud.google.com/console Click CREATE PROJECT. The New Project page displays. Enter a Project name and a Project ID and then click Create. If this is your first project, you must Accept the Terms of APIs Service before you can create the project. 4. Select APIs & auth from the menu on the left side of the page. 5. On the APIs page, scroll down to Google Cloud Messaging for Android and toggle the setting to ON. 6. Select Credentials from the APIs & auth menu on the left. 7. In the Public API access section of the page, click CREATE NEW KEY. 8. On the Create a new key dialog, click Server key. 9. In the Accept requests from these server IP addresses text box, enter the IP address of the Mobile Security Manager’s device check-in interface and then click Create. The new API key will display This is the key that identifies your Mobile Security Manager application. You will need this key to configure push notifications on the Mobile Security Manager. 10. To get your sender ID, select Overview from the menu on the left side of the screen. The sender ID is also displayed as the Project Number. You will need this ID to configure push notifications on the Mobile Security Manager. Step 7 Step 8 72 Configure the push notification settings on the Mobile Security Manager. Save the configuration. 1. Select Setup > Settings > Server and then click the Edit in the Push Notification Settings section. 2. To enable push notifications for iOS devices, select the iOS APNs Certificate you generated in Step 5. 3. To enable GCM push notifications, select the Google Cloud Messaging check box and then enter the Android GCM API Key and Android GCM Sender ID you obtained in Step 6 4. Click OK to save the settings. icon Click Commit. GlobalProtect Administrator’s Guide Set Up the GlobalProtect Mobile Security Manager Set Up the Mobile Security Manager for Device Management Configure the Mobile Security Manager for Enrollment In order for a mobile device to be managed by the GlobalProtect Mobile Security Manager, it must be enrolled with the service. There are two phases to enrollment: Authentication—Before a mobile device can be enrolled, the device user must authenticate to the Mobile Security Manager so that you can determine the identity of the user and ensure that he/she is a part of your organization.The GlobalProtect Mobile Security Manager supports the same authentication methods that are supported on the other GlobalProtect components: local authentication, external authentication to an existing LDAP, Kerberos, or RADIUS service (including support for two-factor OTP authentication). For details on these methods, see About GlobalProtect User Authentication. Identity Certificate Generation—After successfully authenticating the end user, the Mobile Security Manager will issue an identity certificate to the device. To enable the Mobile Security Manager to issue identity certificates, generate a self-signed CA certificate to use for signing. In addition, if you have an enterprise Simple Certificate Enrollment Protocol (SCEP) server such as the Microsoft SCEP server, you can configure the Mobile Security Manager to use the SCEP server to issue certificates for iOS devices. After enrollment, the Mobile Security Manager will use the identity certificate to authenticate the mobile device when it checks in. In order for Android devices to receive push notifications from the Mobile Security Manager, you must also ensure that your firewall has connectivity with GCM services. If you are using a Palo Alto Networks firewall, configure a security policy to allow google-cloud-messaging application traffic (on your firewall, select Policies > Security). If you are using a firewall with port management, open ports 5228, 5229, and 5230 on the firewall for GCM to use and also set the firewall to accept outgoing connections to all IP addresses contained in the IP blocks listed in Google’s ASN of 15169. Refer to Google Cloud Messaging for Android for more information. Use the following procedure to set up the enrollment infrastructure on the Mobile Security Manager: Set Up the Mobile Security Manager for Enrollment Step 1 Create an authentication profile for authenticating device users when they connect to the Mobile Security Manager for enrollment. 1. As a best practice, use the same authentication service that is used to authenticate end users for access to corporate resources, such as email and Wi-Fi. This allows the Mobile Security Manager to capture the credentials for use in the configuration profiles it deploys to the devices. For example, the Mobile Security Manager can automatically 2. deploy configurations that include the credentials required to access corporate resources, such email and Wi-Fi, from the device. GlobalProtect Administrator’s Guide Configure the Mobile Security Manager to connect to the authentication service you plan to use so that it can access the authentication credentials. • If you plan to authenticate using LDAP, Kerberos, or RADIUS you must create a server profile that instructs the Mobile Security Manager how to connect to the service and access the authentication credentials for your users. Select Setup > Server Profiles and add a new profile for the specific service you will be accessing. • If you plan to use local database authentication, you must first create the local database. Select Setup > User Database > Local Users and add the users to be authenticated. Create an authentication profile that references the server profile or local user database you just created. Select Setup > Authentication Profile and add a new profile. The authentication profile name cannot contain any spaces. 73 Set Up the Mobile Security Manager for Device Management Set Up the GlobalProtect Mobile Security Manager Set Up the Mobile Security Manager for Enrollment (Continued) Step 2 Step 3 Configure the Mobile Security Manager to use the authentication profile for device enrollment. 1. Select Setup > Settings > Server and then click the Edit in the Authentication Settings section. icon 2. Select the Authentication Profile from the drop-down. 3. (Optional) If you want the Mobile Security Manager to save the password the mobile device user enters when authenticating, make sure the Save User Password On Server check box is selected. If you choose to save the password, the Mobile Security Manager will be able to automatically configure the user credentials in the configuration settings it pushes to the device. For example, it can use the saved credentials (the username is always saved on the server) to automatically configure the email profile that gets pushed to the device so that the end user does not have to manually set them. Define which CA root certificate the Mobile Security Manager should use to issue identity certificates to Android devices and, if not using SCEP, to iOS devices. If you are using an enterprise CA, import Although the Mobile Security the root CA certificate and the associated private key (Setup > Manager can issue identity Certificate Management > Certificates > Import). Otherwise, certificates to all authenticated generate a self-signed root CA certificate: mobile devices, you may choose to leverage an existing SCEP server to 1. To create a self-signed root CA certificate on the Mobile Security Manager, select Setup > Certificate Management > issue identity certificates for your Certificates > Device Certificates and then click Generate. iOS devices as described in the next 2. Enter a Certificate Name, such as Mobility_CA. The certificate step. Android devices cannot use name cannot contain any spaces. SCEP and therefore you must configure the Mobile Security 3. Do not select a value in the Signed By field (this is what Manager to issue identity indicates that it is self-signed). certificates for all Android devices. 4. Select the Certificate Authority check box and then click OK to Set up the Mobile Security Manager to issue identity certificates. generate the certificate. The Mobile Security Manager will automatically use this signing certificate to issue identity certificates for devices during enrollment. 74 GlobalProtect Administrator’s Guide Set Up the GlobalProtect Mobile Security Manager Set Up the Mobile Security Manager for Device Management Set Up the Mobile Security Manager for Enrollment (Continued) Step 4 (Optional) Configure the Mobile Security 1. Manager to integrate with an existing enterprise SCEP server for issuing identity certificates to iOS devices. The benefit of SCEP is that the private key never leaves the mobile device. 2. Configure the Mobile Security Manager to access the SCEP server and define the certificate properties to use when issuing identity certificates as described in Set Up a SCEP Configuration. Enable SCEP on the Mobile Security Manager: a. Select Setup > Settings > Server and then click the Edit icon in the SCEP Settings section. If you plan to use SCEP to issue identity certificates, make sure that the iOS devices that will be enrolling have the proper CA root certificates to enable them to establish a connection with your SCEP server. b. Select the SCEP check box to enable SCEP. c. Select the SCEP configuration you just created from the Enrollment drop-down. d. (Optional) If you want the Mobile Security Manager to verify the client certificate the SCEP server issued to the device before completing the enrollment process, you must import the SCEP server’s root CA certificate and create a corresponding Certificate Profile. e. Click OK to save the settings. Step 5 Configure the enrollment settings. 1. Select Setup > Settings > Server and then click the Edit in the Enrollment Settings section. 2. Enter the Host Name of the device check-in interface (FQDN or IP address; it must match what is in the CN field of the Mobile Security Manager certificate associated with the device check-in interface). 3. (Optional) Set the Enrollment Port the Mobile Security Manager will listen on for enrollment requests. By default, it is set to 443 and it is recommended that you leave it set to this value and use a different port number for the device check-in port. 4. Enter the Organization Identifier and optionally an Organization Name to be displayed on the configuration 5. (Optional) Enter a Consent Message that lets users know that they are enrolling in your device management service. Note that this message will not be displayed on devices running iOS 5.1. 6. Select the CA certificate the Mobile Security Manager should use to issue the certificates from the Certificate Authority drop-down and optionally modify the Identity Certificate Expiration value (default 365 days; range 60 to 3650 days). 7. Click OK to save the settings. icon profiles that the Mobile Security Manager pushes to the devices. GlobalProtect Administrator’s Guide 75 Set Up the Mobile Security Manager for Device Management Set Up the GlobalProtect Mobile Security Manager Set Up the Mobile Security Manager for Enrollment (Continued) Step 6 (Optional) Force device users to re-enroll To force mobile device users to re-enroll when certificates expire: upon identity certificate expiry. 1. Select Setup > Settings > Server and then click the Edit icon in the Enrollment Renewal Settings section. By default, mobile device users are not required to manually re-enroll when the identity certificate expires; the Mobile Security Manager will automatically re-issue the identity certificates and re-enroll the devices. 2. Select the Require Re-Enroll check box. 3. (Optional) Customize the Renewal Message that will display on the mobile devices to alert the end users that they will need to unenroll and then re-enroll before the certificate expires in order to continue with the Mobile Security Manager device management service. The {DAYS} variable will be replaced with the actual number of days until certificate expiration when the message is sent to the device. 4. Click OK to save the renewal settings. Step 7 Save the configuration. Click Commit. Step 8 Configure the GlobalProtect portal to redirect mobile devices to the Mobile Security Manager for enrollment. Perform the following steps on the firewall hosting your GlobalProtect portal: 1. Select Network > GlobalProtect > Portals and select the portal configuration to modify. For more detailed instructions, see Configure the GlobalProtect Portal. 76 2. Select the Client Configuration tab and select the client configuration to enable for Mobile Security Management. 3. On the General tab, enter the IP address or FQDN of the device check-in interface on the GlobalProtect MDM Mobile Security Manager. 4. (Optional) Set the GlobalProtect MDM Enrollment Port on which the Mobile Security Manager will be listening for enrollment requests. This value must match the value set on the Mobile Security Manager. 5. Click OK twice to save the portal configuration. 6. Commit the changes. GlobalProtect Administrator’s Guide Set Up the GlobalProtect Mobile Security Manager Enable Gateway Access to the Mobile Security Manager Enable Gateway Access to the Mobile Security Manager If you plan to Configure HIP-Based Policy Enforcement on your firewalls, you can configure the GlobalProtect gateways to retrieve the HIP reports for the mobile devices managed by the Mobile Security Manager. To enable the gateway to retrieve HIP reports from the Mobile Security Manager, you must enable an interface for gateway access and then configure the gateways to connect to it as follows: Enable Gateway Access to Mobile Security Manager Step 1 Decide which Mobile Security Manager interface to use for HIP retrieval and enable the gateway service on the interface. Although you can configure the gateways to connect to either the MGT interface or the ethernet1 interface, as a best practice consider using the ethernet1 interface to ensure that your remote gateways have access to the appliance. Step 2 (Optional) Import a server certificate for the Mobile Security Manager MGT interface to enable GlobalProtect gateways to connect to this interface. This certificate is required only if the gateways will connect to the MGT interface instead of ethernet1 for HIP retrieval. • (Recommended) To use the ethernet1 interface for gateway access, select Setup > Network > ethernet1. Select the GlobalProtect Gateways check box and then click OK. • To use the MGT interface for gateway access, select Setup > Settings > Management and then click the Edit icon in the Management Interface Settings section of the screen. Select the GlobalProtect Gateways check box and then click OK. If this interface is not yet configured, you must supply the network settings (IP address, netmask, and default gateway) and physically connect the Ethernet port to your network. See Configure the Mobile Security Manager for Device Check-in for details. As a best practice, use the same CA certificate used to issue self-signed certificates to the other GlobalProtect components. See Deploy Server Certificates to the GlobalProtect Components for details on the recommended workflow. After generating a server certificate for the Mobile Security Manager, import it as follows: 1. Select Setup > Certificate Management > Certificates > Device Certificates and click Import. The Common Name (CN) and, if applicable, the Subject Alternative Name 2. (SAN) fields of the Mobile Security 3. Manager certificate must match the IP address or fully qualified domain name 4. (FQDN) of the interface (wildcard certificates are supported). 5. 6. GlobalProtect Administrator’s Guide Enter a Certificate Name. Enter the path and name to the Certificate File, or Browse to find the file. Select Encrypted Private Key and Certificate (PKCS12) as the File Format. Enter the path and name to the PKCS12 file in the Key File field or Browse to find it. Enter and re-enter the Passphrase you used to encrypt the private key when you exported it from the portal and then click OK to import the certificate and key. 77 Enable Gateway Access to the Mobile Security Manager Set Up the GlobalProtect Mobile Security Manager Enable Gateway Access to Mobile Security Manager (Continued) Step 3 Step 4 Specify which server certificate the Mobile Security Manager should use enable the gateway establish an HTTPS connection for HIP retrieval. (Optional) Create a certificate profile on the Mobile Security Manager to enable the gateway(s) to establish a mutual SSL connection with the Mobile Security Manager for HIP report retrieval. 1. Select Setup > Settings > Server and then click the Edit in the GlobalProtect Gateway Settings section. 2. Select the HIP Report Retrieval check box to enable gateway access to the Mobile Security Manager. 3. Select the certificate you just imported from the MDM Server Certificate drop-down and then click OK. icon To enable mutual authentication between the gateway and the Mobile Security Manager, create a client certificate for the gateway and then import the root CA that issued the client certificate onto the Mobile Security Manager. Use the following procedure to import the client certificate onto the Mobile Security Manager and define a certificate profile: 1. Download the CA certificate that was used to generate the gateway certificates (in the recommended workflow, the CA certificate is on the portal). a. Select Device > Certificate Management > Certificates > Device Certificates. b. Select the CA certificate, and click Export. c. Select Base64 Encoded Certificate (PEM) from the File Format drop-down and click OK to download the certificate. (You do not need to export the private key.) 2. On the Mobile Security Manager, import the certificate by selecting Device > Certificate Management > Certificates > Device Certificates, clicking Import and browsing to the certificate you just downloaded. Click OK to import the certificate. 3. Select Device > Certificates > Certificate Management > Certificate Profile and click Add and enter a Name to uniquely identify the profile, such as GPgateways. 4. In the CA Certificates field, click Add, select the CA certificate you just imported and then click OK. 5. Click OK to save the profile. 6. Configure the Mobile Security Manager to use this certificate profile to establish an HTTPS connection with the gateways: a. Select Setup > Settings > Server and then click the Edit icon in the GlobalProtect Gateway Settings section. b. Select the certificate profile you just created from the Certificate Profile drop-down. c. Click OK to save the settings. 7. 78 Commit the changes to the Mobile Security Manager. GlobalProtect Administrator’s Guide Set Up the GlobalProtect Mobile Security Manager Enable Gateway Access to the Mobile Security Manager Enable Gateway Access to Mobile Security Manager (Continued) Step 5 Configure the gateways to access the Mobile Security Manager. GlobalProtect Administrator’s Guide From each firewall hosting a GlobalProtect gateway, do the following: 1. Select Network > GlobalProtect > MDM and then click Add to add the Mobile Security Manager. 2. Enter a Name for the Mobile Security Manager and specify which virtual system it belongs to from the Location field (if applicable). 3. Enter the Server IP address or FQDN of the interface on the Mobile Security Manager where the gateway will connect to retrieve HIP reports. The value must match the CN (and, if applicable the SAN) field in the Mobile Security Manager certificate associated with the interface. 4. (Optional) If you want to use mutual authentication between the gateway and the Mobile Security Manager, select the Client Certificate the gateway will present when establishing a connection with the Mobile Security Manager. 5. In the Trusted Root CA field, click Add and select the root CA certificate that was used to issue the Mobile Security Manager certificate for the interface where the gateway will connect to retrieve HIP reports. 6. Click OK to save the settings and then Commit the changes. 79 Define Deployment Policies Set Up the GlobalProtect Mobile Security Manager Define Deployment Policies After a mobile device successfully enrolls with the GlobalProtect Mobile Security Manager, it checks in with the Mobile Security Manager to submit its host data at regular intervals (every hour by default). The Mobile Security Manager uses deployment policy rules you define to determine what configuration profiles to push to the device. This allows you to have granular control over what configuration profiles, if any, get deployed to and/or removed from the device. For example, you could create different configurations for different user groups with varying access needs. Or you could create policy rules that only allow configurations to be pushed to devices that are security compliant. The following sections provide information about how to plan your Mobile Security Management strategy and instructions for setting up your policies and profiles: About Mobile Security Manager Policy Deployment Mobile Security Manager Policy Best Practices Integrate the Mobile Security Manager with your LDAP Directory Define HIP Objects and HIP Profiles Create Configuration Profiles Create Deployment Policies About Mobile Security Manager Policy Deployment After a mobile device enrolls with the GlobalProtect Mobile Security Manager, it checks in with the Mobile Security Manager at regular intervals. The check-in process includes four parts: Authentication—In order to connect to the Mobile Security Manager for check-in, the mobile device presents the identity certificate that was issued to it during enrollment. If you have enabled access to your LDAP server, the Mobile Security Manager can use the authenticated username to determine a policy match based on user or group membership. See Integrate the Mobile Security Manager with your LDAP Directory. Collection of device data—The mobile device provides HIP data, which the Mobile Security Manager processes in order to create a full HIP Report for the device. The HIP report provides identifying information about the device, information about the device state (such as whether it is jailbroken/rooted, if encryption is enabled, and if a passcode is set), and a listing of all apps installed on the device. For Android devices, the Mobile Security Manager computes a hash for each app and uses this data to determine if any of the installed apps are known to have malware based on the latest APK content updates. For more information about HIP data collection, see Collection of Device Data. Policy deployment—Each Mobile Security Manager policy rule is composed of two parts: match criteria and configurations. When a device checks in, the Mobile Security Manager compares the user information associated with the device and the HIP data collected from the device against the match criteria. When it finds the first matching rule, it pushes the corresponding configuration(s) to the device. – 80 Match Criteria—The Mobile Security Manager uses the username of the device user and/or HIP matching to determine a policy match. Using the username allows you to deploy policy based on group membership. See About User and Group Matching. Using HIP matching allows you to push deployment policies based on the security compliance of the device and/or using other identifying GlobalProtect Administrator’s Guide Set Up the GlobalProtect Mobile Security Manager Define Deployment Policies characteristics of the device, such as OS version, tag, or device model. See About HIP Matching. – Configurations—Contain the configuration settings, certificates, provisioning profiles (iOS only), and device restrictions to push to the devices that match the corresponding policy rule. Because the iOS and Android operating systems support different settings and use different syntax, you must create separate configurations to push to each OS; you can attach both an iOS and an Android configuration to the same policy rule and the Mobile Security Manager will automatically push the correct configuration to the device. For details on how to create configurations, see Create Configuration Profiles. Notification of Non-Compliance—In some cases, a device may not match any of the policy rules you have defined due to non-compliance. For example, suppose you create a HIP profile that only matches devices that are security compliant (that is, they are encrypted and are not rooted/jailbroken) and attach it to your deployment policy rules. In this case, configurations are only pushed to devices that match the HIP profile. You could then define a HIP notification message to send to devices that do not match the profile, specifying the reason that they are not receiving any configuration. For more details, see About HIP Notification. Collection of Device Data The Mobile Security Manager collects the following information (as applicable) from a mobile device each time it checks in: Category Data Collected Host Info Information about the device itself, including the OS and OS version, the GlobalProtect app version, the device name and model, and identifying information including the phone number, International Mobile Equipment Identity (IMEI) number, and serial number. In addition, if you have assigned any tags to the device, this information is reported also. Settings Information about the security state of the device, including whether or not it is rooted/jailbroken, whether the device date is encrypted, and if the user has set a passcode on the device. Apps Includes a listing of all app packages that are installed on the device. if it contains apps that are known to have malware (Android devices only), and, optionally, the GPS location of the device. GPS Location Includes the GPS location of the device if location services are enabled on it. However, for privacy reasons you can configure the Mobile Security Manager to exclude this information from collection. About User and Group Matching In order to define mobile device deployment policies based on user or group, the Mobile Security Manager must retrieve the list of groups and the corresponding list of members from your directory server. To enable this functionality, you must create an LDAP server profile that instructs the Mobile Security Manager how to connect and authenticate to the LDAP server and how to search the directory for the user and group information. After the Mobile Security Manager is successfully integrated with the directory server, you will be able to select users or groups when defining mobile device deployment policies. The Mobile Security Manager GlobalProtect Administrator’s Guide 81 Define Deployment Policies Set Up the GlobalProtect Mobile Security Manager supports a variety of LDAP directory servers, including Microsoft Active Directory (AD), Novell eDirectory, and Sun ONE Directory Server. See Integrate the Mobile Security Manager with your LDAP Directory for instructions on setting up user and group matching. About HIP Matching You define which device attributes you are interested in monitoring and/or using for policy deployment by creating HIP objects and HIP profiles on the Mobile Security Manager: HIP Objects—Provide the matching criteria to filter out the host information you are interested in using to enforce policy. For example, if you want to identify a device that has a vulnerability you might want to create HIP objects that would match each device state that you consider to be a vulnerability. For example, you might create one HIP object that matches devices that are jailbroken/rooted, another that matches devices that are not encrypted, and a third that matches devices that contain malware. HIP Profiles—A collection of HIP objects that are to be evaluated together using Boolean logic such that when HIP data is evaluated against the resulting HIP profile it will either match or not match. For example, if you want to deploy configuration profiles only to devices that do not have a vulnerability, you might create a HIP profile to attach to your policy that matches only if the device is not rooted/jailbroken and is encrypted and does not have malware. For instructions on setting up HIP matching, see Define HIP Objects and HIP Profiles. About HIP Notification By default, end users are not given any information about policy decisions that were made as a result of enforcement of a HIP-enabled deployment policy. However, you can enable this functionality by defining HIP notification messages to display when a particular HIP profile is matched and/or not matched. The decision as to when to display a message (that is, whether to display it when the device matches a HIP profile in the policy or when it doesn’t match it), depends largely on the policy and what a HIP match (or non-match) means for the user. That is, does a match mean that the corresponding configuration profiles are pushed to the device? Or does it mean that the device will not receive a configuration profile until it is compliant? For example, consider the following scenarios: You create a HIP profile that matches if the device OS version is greater than or equal to a specific version number. In this case, you might want to create a HIP notification message for devices that do not match the HIP profile instructing the device users they must upgrade the device OS in order to receive the corporate configuration profiles. You create a HIP profile that matches if the device OS version is less than a specific version number. In this case, you might instead create the message for devices that match the profile. The Mobile Security Manager policies you deploy enable you to ensure that the devices accessing your network are in compliance with your acceptable use and security policies, provide a mechanism for pushing as well as simplifying the deployment of configuration settings, certificate, and provisioning profiles required to access your corporate resources. 82 GlobalProtect Administrator’s Guide Set Up the GlobalProtect Mobile Security Manager Define Deployment Policies The way you choose to manage and configure to the mobile devices depends on the particular requirements in your company and the sensitivity of the resources to which the configurations provide access. For details on setting up HIP notification messages, see Define HIP Objects and HIP Profiles. Mobile Security Manager Policy Best Practices Before defining the configuration profiles, provisioning profiles, and device restrictions to push to managed devices, consider the following best practices: Create a default policy rule that checks for device vulnerabilities— Because of their utility, mobile devices—even those that are corporate owned— are used for a variety of uses beyond business, which can leave them open to vulnerabilities and theft. Just as you would want to ensure that the laptops and computers that access your network are properly maintained and secured, so should you ensure that the mobile devices accessing your corporate systems are free from known vulnerabilities. By using HIP profiles that check for device compliance to the standards you define, you can ensure that configuration profiles that enable access to your corporate resources are only pushed based on whether or not the device has known vulnerabilities, such as whether or not it is jailbroken/rooted or whether it contains apps that are known to have malware. The best way to do this is to create a default policy rule that matches devices that contain a vulnerability, based on HIP match. For devices that match the rule, the policy would either deliver an empty profile (that is, you would not attach any profiles to it) or deliver a profile that contains a password requirement only (in case the vulnerable device contains any corporate data or has access to corporate systems). In this case you would also want to make sure to create a HIP Match notification to inform users as to why they are not receiving their account settings. Require complex passcodes and data encryption— Due to their portable nature, mobile devices are easy to lose and easy to steal. If a device without a passcode gets into the wrong hands, any corporate systems that are accessible from the device are then at risk. Therefore, you should always require a passcode on the devices you manage. In addition, because Android devices do not automatically encrypt data upon setting a passcode like iOS devices do, you should also always require managed Android devices to have data encryption enabled. Although there are a couple of ways to enforce these requirements, the easiest way is to include the passcode and encryption requirements in every configuration profile you push. Including the device requirements within the configuration profiles that enable access to your corporate resources—such as email, VPN, or Wi-Fi— forces the mobile device user to set a passcode that meets your requirements and to enable data encryption before the profile is installed, which prevents the end users from accessing the corresponding account until the device is in compliance. GlobalProtect Administrator’s Guide 83 Define Deployment Policies Set Up the GlobalProtect Mobile Security Manager Push a GlobalProtect VPN configuration profile to simplify deployment—To simplify the deployment of the GlobalProtect agent settings to the iOS devices you manage, create an iOS configuration profile and configure the VPN settings so that the device will automatically be able to connect to your GlobalProtect VPN upon deployment of the corresponding policy. Create separate configuration profiles for access to different accounts—Although you can create configuration profiles that push settings for multiple accounts, you can simplify administration and enhance usability by creating separate configuration profiles for each service. This allows users to delete profiles for accounts that they do not need or want. Similarly, when user access needs to a particular service change, you can simply change the policy deployment settings so that the profile is automatically removed from or added to user devices as appropriate. In addition, by segregating the account configurations into separate files, you can more easily create policies that are tailored to the access needs of your user groups. Use iOS provisioning profiles to simplify deployment of enterprise apps—Provisioning profiles provide a convenient and automated method for distributing internally-developed enterprise apps to the managed iOS devices on your network. Although the Mobile Security Manager simplifies the deployment of provisioning profiles to a large number of mobile devices, there are some security factors to consider. When revoking access to an app that has been enabled via a provisioning profile, the app will continue to run on the device until the next power cycle even if the Mobile Security Manager policy removes the profile. In addition, because provisioning profiles are synchronized with iTunes, the profile may get re-installed the next time the end user syncs the device with iTunes. Consider the following best practice recommendations: 84 – Require authentication to use the app. This prevents access to users who are not longer authorized to use the app, but still have the provisioning profile installed on their devices. – To ensure that corporate app data is not backed up to iCloud or iTunes where it could be accessed by unauthorized users, make sure the apps you develop internally us the application’s Caches folder to store data because this folder is excluded from backup. – When removing a user’s access privileges to the app, do not rely solely on removal of the provisioning profile from the Mobile Security Manager policy, but also deactivate the user’s account on your internal servers. – Make sure that you have the ability to erase the local app data on the mobile device when user access to the app is removed. GlobalProtect Administrator’s Guide Set Up the GlobalProtect Mobile Security Manager Define Deployment Policies Integrate the Mobile Security Manager with your LDAP Directory Use the following procedure to connect to your LDAP directory to enable the Mobile Security Manager to retrieve user and group information: Integrate with the Directory Server Step 1 Create an LDAP Server Profile that specifies how to connect to the directory servers you want the Mobile Security Manager to use to obtain user and group information. 1. Select Setup > Server Profiles > LDAP. 2. Click Add and then enter a Name for the profile. 3. Click Add to add a new LDAP server entry and then enter a Server name to identify the server (1-31 characters) and the IP Address and Port number the firewall should use to connect to the LDAP server (default=389 for LDAP; 636 for LDAP over SSL). You can add up to four LDAP servers to the profile, however, all the servers you add to a profile must be of the same type. For redundancy you should add at least two servers. 4. Enter the LDAP Domain name to prepend to all objects learned from the server. The value you enter here depends on your deployment: • If you are using Active Directory, you must enter the NetBIOS domain name; NOT a FQDN (for example, enter acme, not acme.com). If you need to collect data from multiple domains you must create separate server profiles. Although the domain name can be determined automatically, it is a best practice to enter the domain name whenever possible. • If you are using a global catalog server, leave this field blank. 5. Select the Type of LDAP server you are connecting to. The group mapping values will automatically be populated based on your selection. However, if you have customized your LDAP schema you may need to modify the default settings. 6. In the Base field, specify the point where you want the Mobile Security Manager to begin its search for user and group information within the LDAP tree. 7. Enter the authentication credentials for binding to the LDAP tree in the Bind DN, Bind Password, and Confirm Bind Password fields. The Bind DN can be in either User Principal Name (UPN) format (i.e. [email protected]) or it can be a fully qualified LDAP name (i.e. cn=administrator,cn=users,dc=acme,dc=local). 8. If you want the Mobile Security Manager to communicate with the LDAP server(s) over a secure connection, select the SSL check box. If you enable SSL, make sure that you have also specified the appropriate port number. GlobalProtect Administrator’s Guide 85 Define Deployment Policies Set Up the GlobalProtect Mobile Security Manager Integrate with the Directory Server (Continued) Step 2 Add the LDAP server profile to the directory integration configuration. 1. Select Setup > User Database > Directory Integration and click Add. 2. Select the Server Profile you just created. 3. Make sure the Enabled check box is selected. 4. (Optional) If you want to limit which groups are displayed within deployment policy, select the Group Include List tab and then browse through the LDAP tree to locate the groups you want to be able to use in policy. For each group you want to include, select it in the Available Groups list and click the add icon to move it to the Included Groups list. Repeat this step for every group you want to be able to use in your policies. 5. Click OK to save the settings. Step 3 Click Commit to save the configuration. Define HIP Objects and HIP Profiles Using HIP profiles in Mobile Security Manager policy enables granular deployment of configurations and ensures that the mobile devices are in compliance with corporate security requirements in order to receive the configuration profile(s) that enable access to your corporate resources. For example, before pushing configurations that enable access to your corporate systems, you might want to ensure that the device data is encrypted and that the devices are not jailbroken/rooted. To do this, you would create a HIP profile that matches devices that meet this criteria and attach it to your deployment policy rules. 86 GlobalProtect Administrator’s Guide Set Up the GlobalProtect Mobile Security Manager Define Deployment Policies Create HIP Objects and HIP Profiles Step 1 Create the HIP objects to filter the data reported by the device. 1. Select Policies > Host Information > HIP Objects and click Add. 2. On the General tab, enter a Name and optionally a Description for the object. The tag feature allows you to create custom labels for the devices you 3. manage for easy grouping. For example, you could create tags to distinguish personal devices from company provisioned devices. You could then create HIP objects that match specific tags, providing endless possibilities as to how you can group managed devices for configuration deployment. For more information on creating tags, see Group Devices by Tag for Simplified Device Administration. For details on a specific HIP object field, refer to the online help. A HIP match will occur if any one of the apps on the list is installed on the device. Define the match criteria for the HIP object as follows: • To match on identifying characteristics of the mobile device, such as OS, GlobalProtect app version, or phone number select the Host Info check box and then set values to match on. For each item to match on, select an operator from the drop-down that indicates whether to match if the specified value Is, Is Not, or Contains the value you enter or select. For example, if you will use this object to build a profile for use in policies to be deployed to iOS devices, select Is and iOS from the drop-downs in the OS field. • To match on the state of the device, such as whether it is jailbroken/rooted or has a passcode set, select the Settings tab and then select Yes or No to determine how to match the setting. For example, if you want the object to match devices that do not have a passcode set, select No in the Passcode field. • To match based on specific apps installed on the device, select the Apps > Include and click Add to specify one or more App packages to match. The app list you define can either be a black list or a white list, depending on how you set up the HIP profile to match the object For example, to create an app black list, you would add a list of apps here and then set up the HIP profile to NOT match the object. • (Android devices only) To match on whether or not the device has malware-infected apps installed, select Apps > Criteria and then select a value from the Has Malware drop-down. Or, to allow specific apps that WildFire has determined contain malware, select Yes and then click Add and then specify the app packages to exclude from being designated as malware. GlobalProtect Administrator’s Guide 4. Click OK to save the HIP object. 5. Repeat these steps to create each additional HIP objects you require. 87 Define Deployment Policies Set Up the GlobalProtect Mobile Security Manager Create HIP Objects and HIP Profiles (Continued) Step 2 Create the HIP profiles that you plan to use in your policies. 1. 2. When you create your HIP profiles, you can combine the HIP objects you 3. previously created (as well as other HIP profiles) using Boolean logic such that 4. when a traffic flow is evaluated against the resulting HIP profile it will either match or not match. If there is a match, the corresponding policy rule will be enforced; if there is not a match, the flow will be evaluated against the next rule, as with any other policy matching criteria. Step 3 Step 4 88 Enter a descriptive Name for the profile and optionally a Description. Click Add Match Criteria to open the HIP Objects/Profiles Builder. Select the first HIP object or profile you want to use as match criteria and then click add to move it over to the Match text box on the HIP Profile dialog. Keep in mind that if you want the HIP profile to evaluate the object as a match only when the criteria in the object is not true for a flow, select the NOT check box before adding the object. 5. Continue adding match criteria as appropriate for the profile you are building, making sure to select the appropriate Boolean operator radio button (AND or OR) between each addition (and, again, using the NOT check box when appropriate). 6. If you are creating a complex Boolean expression, you must manually add the parenthesis in the proper places in the Match text box to ensure that the HIP profile is evaluated using the logic you intend. 7. When you are done adding match criteria, click OK to save the profile. 8. Repeat these steps to create each additional HIP profile you require. (Optional) For privacy reasons, the GPS 1. location of the mobile device is not included in the HIP data the app reports 2. by default. However, you can enable collection of the GPS location if you require this information for policy deployment. Verify that the HIP objects and HIP profiles you created are matching managed devices as expected. Select Policies > Host Information > HIP Profiles and click Add. Select Policies > Host Information > Data Collection and then click the Edit icon in the Data Collection section. Clear the Exclude GPS Location check box and then click OK. Select Monitor > Logs > HIP Match. This log shows all of the matches the Mobile Security Manager identified when evaluating the device data reported by the app against the defined HIP objects and HIP profiles. GlobalProtect Administrator’s Guide Set Up the GlobalProtect Mobile Security Manager Define Deployment Policies Create HIP Objects and HIP Profiles (Continued) Step 5 Define the notification messages device users will see when a policy rule with a HIP profile is enforced. 1. Select Policies > Host Information > Notifications and then click Add. 2. Select the HIP Profile this message applies to from the drop-down. The decision as to when to display a message (that is, whether to display it 3. when the user’s configuration matches a HIP profile in the policy or when it doesn’t match it), depends largely on your policy and what a HIP match (or non-match) means for the user. That is, does a match mean they are granted full 4. access to your network resources? Or does it mean they have limited access due to a non-compliance issue? 5. For example, suppose you create a HIP profile that matches if the device data is 6. not encrypted as required by corporate 7. policy. In this case, you might want to create a HIP notification message for users who match the HIP profile telling them that they need to enable disk encryption before they can receive the configuration profiles that enable access to corporate resources. Alternatively, if your HIP profile matches devices that do have disk encryption enabled, you might instead want to create the message for users who do not match the profile. Step 6 Save the HIP configuration. Select Match Message or Not Match Message, depending on whether you want to display the message when the corresponding HIP profile is matched in policy or when it is not matched. In some cases you might want to create messages for both a match and a non-match, depending on what objects you are matching on and what your objectives are for the policy. (Match messages only) Select the Include App List check box to indicate what app(s) triggered the HIP match in the notification message. Select the Enable check box and then enter the text of your message in the Template text box. Click OK to save the HIP notification message. Repeat this procedure for each message you want to define. Click Commit. Create Configuration Profiles Mobile Security Manager configuration profiles provide a simplified mechanism for pushing configurations and restrictions to groups of managed devices. Because the configuration profiles you define are pushed to mobile devices based on policy matches, you can define very specific or very broad configurations and then deploy them to specific users and groups and/or based on the state of the device and its compliance with your corporate security requirements. In addition, you can use configuration profiles to enforce security restrictions, such as forcing the use of a passcode or restricting device functionalities (such as the use of the camera). Web Clip Icons—If you plan to deploy web clips to provide shortcuts to web sites or web-based applications, you must import the associated web clip icons before creating the corresponding configuration policies. See Import Web Clip Icons. GlobalProtect Administrator’s Guide 89 Define Deployment Policies Set Up the GlobalProtect Mobile Security Manager Configuration Profiles—Contain the configuration settings, restrictions, and web clips to be pushed to managed devices upon check-in. You must create separate configuration profiles for iOS and Android devices due to differences in OS functionality. For details on creating the profiles, see Create an Android Configuration Profile and Create an iOS Configuration Profile. You can also use the iOS configuration profile to automate the process of configuring mobile devices to connect to the GlobalProtect VPN. See Define a GlobalProtect VPN Configuration for specific instructions on this configuration. iOS Provisioning Profiles—To enable iOS users to launch internally-developed enterprise apps you must deploy a provisioning profile. You can create configurations that allow you to automatically deploy provisioning profiles to devices as described in Import an iOS Provisioning Profile. SCEP Configurations—Configurations that allow iOS devices to use the simple certificate enrollment protocol (SCEP) to obtain certificates from a SCEP-enabled CA, such as the Microsoft SCEP Server. SCEP can be used to issue the identity certificates that the Mobile Security Manager requires, or it can be used to issue certificates for other services required on the device. For details, see Set Up a SCEP Configuration. After you create the configuration profiles you need for the devices the Mobile Security Manager manages, you must create the deployment policies to ensure that the configurations get pushed to the proper devices. See Create Deployment Policies for details. Import Web Clip Icons Web clips provide shortcuts to web sites or web-based applications. When the user taps a web clip icon, it automatically opens the associated URL. The Mobile Security Manager can automatically deploy web clips to managed devices to provide shortcuts that provide users with quick access to internal systems, such as internal bug tracking databases, the Intranet, or HR systems. If you plan to include web clips in the configurations you deploy, you may want to create associated icons to display on the home screen. You must import the web clip icons onto the Mobile Security Manager as follows before creating configuration profiles that include web clips. If you do not associate an icon with a web clip, a white square will display instead. 90 GlobalProtect Administrator’s Guide Set Up the GlobalProtect Mobile Security Manager Define Deployment Policies Create Web Clip Icons Step 1 Create the image files you want to use as Android Icon Guidelines your web clip icons. Use 32-bit PNG files with an alpha channel for transparency. Use The icons you create for use with different dimensions for different screen densities as follows: your web clips must meet specific image and naming criteria in order for the OS to display them properly. For best practices on creating icons for Android devices, refer to the following document on the Android Developers site: Icon Design Guidelines. For best practices on creating web clip icons for iOS devices, refer to the following document in the iOS Developer Library: Custom Icon and Image Creation Guidelines. • Low density 36x36 px • Medium density 48x48 px • High density 72x72 px • Extra-high density 96x96 px Note If the image is larger than 96 px, it will automatically scale to 96x96 px on the device. iOS Icon Guidelines Use non-interlaced PNG files. If you want iOS to add its standard effects (rounded corners, drop shadow, and reflective shine), make sure the image has 90 degree corners and does not have any shine or gloss. Create different images with different dimensions for different iOS platforms as follows: • For iPhone and iPod touch: 57x57 px (114x114 px for high resolution) • For iPad: 72x72 px (144x144 px for high resolution) Step 2 Step 3 Import each web clip icon onto the Mobile Security Manager. Save your changes. 1. Select Policies > Configuration > Web Clip Icons and click Add. 2. Enter a Name and a Description for the icon. 3. Browse to the location of the web clip icon and then click Open. The path and file name display in the File field. 4. Click OK. Click Commit. Create an iOS Configuration Profile The iOS configuration profile contains the configuration settings, certificates, web clips, and restrictions to push down to a specific group of iOS devices. If you have groups of iOS device users that need access to varying services or that require different levels of restrictions, you must create a separate iOS configuration profile for each. Create an iOS Configuration Profile Step 1 Add a configuration profile. GlobalProtect Administrator’s Guide 1. Select Policies > Configuration > iOS and then click Add. 91 Define Deployment Policies Set Up the GlobalProtect Mobile Security Manager Create an iOS Configuration Profile (Continued) Step 2 Step 3 Step 4 Enter identifying information for the configuration. 1. On the General tab, enter a Name to display for the configuration in the Mobile Security Manager web interface. 2. Enter a Display Name to show on the Detail/Profiles screen on the mobile device as well as on the device HIP report. 3. Enter an Identifier for the configuration in reverse-DNS style format. For example, if this profile will be used to push a base iOS configuration to devices, you might name the configuration something like com.acme.iosprofile. 4. (Optional) Enter a Description to display on the Detail screen of the mobile device. (Optional) Define how the profile can be 1. modified. By default, the user can remove a configuration profile from the device. To prevent users from removing this configuration, select Never from the User Can Remove Profile drop-down. To require a password for removal, select With Authorization and then set the Authorization Password. 2. (iOS 6.0 and later) By default, the profile will not get removed automatically. However, you can select a value from the Automatically Remove Profile drop-down to have the profile automatically removed after a specified number of days or on a specific date. 1. If you want to force device users receiving this configuration to use a passcode on the device, select the Passcode tab and then select the Passcode check box to enable the restriction. Simply enabling this field will force use of a passcode with a minimum of 4 characters, without imposing any additional requirements. 2. (Optional) Specify any additional passcode requirements to enforce, such as length or complexity requirements, the frequency at which the user must change the passcode, or whether to force the device to automatically lock after a specified number of minutes. 1. Select the Restrictions tab and then select the Restrictions check box to enable the configuration control what the user can do with the mobile device. 2. Select or clear check boxes on the Device Functionality, Applications, iCloud, Security and Privacy, and/or Content Ratings tabs to define the desired device restrictions. For example, if you don’t want users to be able to use the camera, clear the Allow use of camera check box. Specify passcode requirements for the devices. If you specify passcode requirements, the device users will be forced to adhere to the passcode settings you define. Step 5 92 Set restrictions on what the user can do with the device. GlobalProtect Administrator’s Guide Set Up the GlobalProtect Mobile Security Manager Define Deployment Policies Create an iOS Configuration Profile (Continued) Step 6 Provide configuration settings that enable device access to one or more of the following services: • Wi-Fi • VPN (GlobalProtect) • Email • Exchange Active Sync • LDAP To enable configuration settings for a specific type of resource: 1. Select the tab and the corresponding check box to enable the configuration. For example, to enable a Wi-Fi configuration, you would select the Wi-Fi tab and then select the Wi-Fi check box. 2. Click Add to open the configuration dialog. 3. Complete the fields as necessary to allow the mobile devices to access the service (fields with a yellow background are required). Refer to the online help for information on what to enter in a specific field. Repeat this step for each service you want to push settings for in this configuration 4. profile. You can even define multiple configurations for the same service type, for example if you wanted to push settings for joining multiple Wi-Fi networks. For specific instructions on how to create a 5. GlobalProtect VPN configuration, see Define a GlobalProtect VPN Configuration. For configurations that require a Username, the configuration will by default use the username the end user provided when authenticating to the Mobile Security Manager during enrollment (Use Saved). To specify a different username, select Fixed and then enter a username in the text box. For configurations that require a Password, the configuration will use a password that the user sets on the mobile device (Set On Device) by default. To use the password the end user provided when authenticating to the Mobile Security Manager during enrollment (Use Saved). Or, to specify a different password, select Fixed and then enter the password in the text boxes. On Wi-Fi configurations there is an additional password setting—Set Per Connection—which requires the device user to enter the password upon re-joining the network. Step 7 1. Create shortcuts to web sites or web-based applications—called web 2. clips—to display on the Home screen of the device. 3. Web clips are useful for providing quick 4. access to sites your mobile users will need 5. access to, such as your Intranet or internal bug tracking system. Before creating a configuration that includes a web clip, you 6. must import the associated icon to display on the device screen. See Import Web 7. Clip Icons for instructions. Due to a known iOS bug, modifying or removing a web clip 8. from a configuration will leave an artifact on the device Home screen 9. until the next device reboot. GlobalProtect Administrator’s Guide Select the Web Clips tab and then click Add. Enter a Name for the web clip to be used within the Mobile Security Manager. Enter a Label for the web clip to display on the Home screen. Enter the URL that will load when the user taps the web clip. Select an Icon that you previously imported or click Icon from the drop-down menu to import one now. To restrict users from removing the web clip from the Home screen, clear the Removable check box. If you want to prevent iOS from adding its standard effects to the icon (rounded corners, drop shadow, and reflective shine), select the Precomposed check box. If you want the web page to display in full-screen mode rather than launching Safari to display the content, select Full Screen. Click OK to save the web clip. 93 Define Deployment Policies Set Up the GlobalProtect Mobile Security Manager Create an iOS Configuration Profile (Continued) Step 8 Step 9 1. Add certificates to push to the mobile devices. These can either be certificates 2. that you generated on the Mobile Security Manager, or certificates that you import 3. from a different CA. You can push any certificate the device will need to connect to your internal applications and services. Set up an access point name (APN) for 1. the mobile device to use to present to the carrier to identify the type of network 2. connection to supply. Step 10 Save the configuration profile. Select the Certificates tab and then click Add. Select an existing certificate from the list, or Import a certificate generated by a different CA. If the certificate contains a private key, you must also enter the Password to be used to decrypt the key. Select the APN tab and then select the APN check box to enable the service on the managed devices. Enter the Access Point Name for the packet data network (PDN) or other service, such as a wireless application protocol (WAP) server or multimedia messaging service (MMS) to allow the mobile devices to communicate with. 1. Click OK to save the configuration settings you defined and close the iOS Configuration dialog. 2. Commit your changes. Define a GlobalProtect VPN Configuration While the GlobalProtect Mobile Security Manager allows you to push configuration settings that allow access to your corporate resources and provides a mechanism for enforcing device restrictions, it does not secure the connection between the mobile device and services it connects to. To enable the client to establish secure tunnel connections, you must enable VPN support on the device. For simplified GlobalProtect VPN setup on iOS devices, you can push the GlobalProtect VPN configuration settings to the device in the configuration profile as described in the following procedure. For general configuration profile information, see Create an iOS Configuration Profile. Create a GlobalProtect VPN Configuration Step 1 Select or add an iOS configuration profile Select Policies > Configuration > iOS and then click Add or select an to which to add the GlobalProtect VPN existing configuration to which to add the VPN settings. configuration settings. If this is a new configuration profile, enter identifying information for the profile and define other configuration settings and restrictions as appropriate. See Create an iOS Configuration Profile for details. Step 2 Define the GlobalProtect VPN connection settings. 94 1. Select the VPN tab and click Add to open the VPN dialog. 2. Enter a Name to identify this configuration on the Mobile Security Manager. 3. Enter a Connection Name to display on the device. 4. Enter the FQDN or IP address of the GlobalProtect portal in the Server field. The value you enter must match the CN field in the portal server certificate. 5. Make sure Connection Type is set to Palo Alto Networks GlobalProtect. GlobalProtect Administrator’s Guide Set Up the GlobalProtect Mobile Security Manager Define Deployment Policies Create a GlobalProtect VPN Configuration (Continued) Step 3 Step 4 Specify how to populate the VPN 1. account username and password settings. Specify where to get the VPN username by selecting a value from the Account drop-down. By default, the GlobalProtect VPN configuration is set to Use Saved, allowing it to use the user name the device user provided during enrollment. You can also specify a Fixed user name to use for all devices using this configuration, or allow the device user to define the account user name by selecting Set on Device. 2. By default, the VPN Password will be Set On Device by the device user. However, if you want to use the password that the device user supplied when authenticating during enrollment, select Use Saved, or set a Fixed password to be used by all devices using this configuration. 3. (Optional) By default, when an Mobile Security Manager policy gets pushed to a mobile device, all profiles that were previously pushed by Mobile Security Manager that are not attached to the matching policy rule are automatically removed from the device. However, the Mobile Security Manager does not remove VPN profiles pushed to the device by the GlobalProtect portal, allowing the user to manually switch profiles. To enable Mobile Security Manager to remove any existing GlobalProtect VPN profiles, clear the Allow Portal Profile check box. (Optional) Specify a client certificate for the mobile devices to use to authenticate to the GlobalProtect gateway(s) during establishment of the VPN tunnel. If you want to push a client certificate to the devices from the portal client configuration instead or if you are not using certificate authentication on your gateways, you can skip this step. To use the identity certificate issued to the mobile device during enrollment: a. Select None in the Credential field. To use client certificates issued by your enterprise SCEP server: a. Select SCEP from the Credential field. b. Set Up a SCEP Configuration. To use a client certificate issued by the Mobile Security This feature is useful for preventing Manager: devices that are not managed by the a. Import a client certificate to push to the mobile devices onto Mobile Security Manager from the Mobile Security Manager or generate a self-signed connecting to the GlobalProtect VPN. certificate on the Mobile Security Manager. This option is However, by rejecting connections from similar to the option to deploy client certificates from the non-managed devices you lose visibility GlobalProtect portal. In this configuration, you specify a into that traffic. As a best practice for single client certificate to use for all mobile devices using this controlling traffic from non-managed iOS configuration profile. mobile devices, create a HIP profile that b. Select Certificate and then select the client certificate to use matches based on whether or not the from the drop-down. device is managed and attach it to your security policies. See Use Host If you specify a Credential in this configuration, make Information in Policy Enforcement for sure that the client configuration that the portal will more details on creating HIP-enabled deploy to the corresponding mobile devices does not also security policies. contain a client certificate or the certificate in the portal configuration will override the certificate specified here. GlobalProtect Administrator’s Guide 95 Define Deployment Policies Set Up the GlobalProtect Mobile Security Manager Create a GlobalProtect VPN Configuration (Continued) Step 5 (Optional) Specify what device traffic to 4. tunnel through the VPN. By default, the GlobalProtect app will tunnel all traffic as specified in its corresponding portal client configuration. However, you can override the portal tunnel configuration by defining VPN on Demand setting in the Mobile Security Manager configuration. To override the settings defined in the portal configuration, select the VPN On Demand check box and then click Add to define exceptions as follows: • Enter an IP address, hostname, domain name or subnet in the Domain field to specify a tunnel destination. • Select a corresponding Action to specify when to tunnel traffic to the specified Domain (always, never, or ondemand to allow the end user to manually invoke the VPN). • Repeat this step for each tunnel destination for which you want to create an override. Step 6 Step 7 Save the configuration profile. 5. Click OK to save the configuration. 1. Click OK to save the VPN configuration settings. 2. Click OK to save the iOS configuration profile. 3. Commit your changes. Complete the following steps on each gateway: Configure the gateways to use the specified client certificate to enable the 1. Import the root CA certificate that was used to issue the mobile mobile devices using this configuration to device certificates (either the identity certificate issuer, the establish HTTPS connections. SCEP server CA, or the self-signed CA certificate from the Mobile Security Manager depending on which type of client certificate you are using) onto gateway(s). 2. Add the CA certificate to the certificate profile used in the gateway configuration. Create an Android Configuration Profile The Android configuration profile contains the configuration settings, certificates, web clips, and restrictions to push down to a specific group of Android devices. If you have groups of Android device users that need access to varying services or that require different levels of restrictions, you must create a separate Android configuration profile for each. Create an Android Configuration Profile Step 1 Add a configuration profile. 1. Select Policies > Configuration > Android and then click Add. Step 2 Enter identifying information for the configuration. 1. On the General tab, enter a Name to display for the configuration in the Mobile Security Manager web interface. 2. Enter a Display Name to show on the Detail/Profiles screen on the mobile device as well as on the device HIP report. 3. Enter an Identifier for the configuration in reverse-DNS style format. For example, if this profile will be used to push a base configuration to devices, you might name the configuration something like com.acme.androidprofile. 4. (Optional) Enter a Description to display on the Detail screen of the mobile device. 96 GlobalProtect Administrator’s Guide Set Up the GlobalProtect Mobile Security Manager Define Deployment Policies Create an Android Configuration Profile (Continued) Step 3 Specify passcode requirements for the devices. If you specify passcode requirements, the device users will be forced to adhere to the passcode settings you define. Step 4 Set restrictions on what the user can do with the device. 1. If you want to force device users receiving this configuration to use a passcode on the device, select the Passcode tab and then select the Passcode check box to enable the restriction. Simply enabling this field will force use of a passcode with a minimum of 4 characters, without imposing any additional requirements. 2. (Optional) Specify any additional passcode requirements to enforce, such as length requirements or whether to force the device to automatically lock after a specified number of minutes. 1. Select the Restrictions tab and then select the Restrictions check box to enable the configuration control what the user can do with the mobile device. 2. Modify the default restriction settings as desired: • If you don’t want users with this configuration to be able to use the camera, clear the Allow use of camera check box. • If you want to ensure that data on the mobile devices is encrypted, select the Require encryption of stored data check box. GlobalProtect Administrator’s Guide 97 Define Deployment Policies Set Up the GlobalProtect Mobile Security Manager Create an Android Configuration Profile (Continued) Step 5 Provide configuration settings that enable 1. device access to one or more Wi-Fi 2. networks. Select the Wi-Fi tab and then click Add. On the Settings tab, enter a Name to identify this Wi-Fi configuration on the Mobile Security Manager. For detailed information about each field, 3. refer to the online help. Enter the Service Set Identifier (SSID) for the wireless network. The SSID is the broadcast name of the Wi-Fi network; it is usually a friendly name that allows users to identify what network they are connecting to. If you do not broadcast your SSID, select the Hidden Network check box. 4. By default, devices that get this configuration automatically join the network when the device is in range; to change this behavior clear the Auto Join check box. 5. On the Security tab, select the Security Type in use on the wireless network. Depending on what security type you select, additional fields display to allow you to provide the settings required to connect, such the password, protocol, and/or certificate to use. 6. For security types that require end user credentials (Enterprise security types), select from the following: • Username—The configuration will by default use the username the end user provided when authenticating to the Mobile Security Manager during enrollment (Use Saved). To specify a different username, select Fixed and then enter a username in the text box. • Password—The configuration will use a password that the user sets on the mobile device (Set On Device) by default. To use the password the end user provided when authenticating to the Mobile Security Manager during enrollment (Use Saved). Or, to specify a different password, select Fixed and then enter the password in the text boxes. 7. Step 6 1. Create shortcuts to web sites or web-based applications—called web 2. clips—to display on the Home screen of the device. 3. Web clips are useful for providing quick 4. access to sites your mobile users will need 5. access to, such as your Intranet or internal bug tracking system. Before creating a configuration that includes a web clip, you 6. Click OK to save the configuration. Select the Web Clips tab and then click Add. Enter a Name for the web clip to be used within the Mobile Security Manager. Enter a Label for the web clip to display on the Home screen. Enter the URL that will load when the user taps the web clip. Select an Icon that you previously imported or click Icon from the drop-down menu to import one now. Click OK to save the web clip. must import the associated icon to display on the device screen. See Import Web Clip Icons for instructions. Step 7 98 Save the configuration profile. 1. Click OK to save the configuration settings you defined and close the Android Configuration dialog. 2. Commit your changes. GlobalProtect Administrator’s Guide Set Up the GlobalProtect Mobile Security Manager Define Deployment Policies Import an iOS Provisioning Profile To prevent the propagation of potentially malicious apps, iOS only allows users to install apps from approved sources via the App Store. To enable users to install internally-developed apps on their iOS devices, you must obtain a provisioning profile from the iOS Developer Enterprise Program (iDEP). You can then deploy the provisioning profile to the authorized end devices to allow them to install the app. To simplify the process of distributing deployment profiles, import the profiles onto the Mobile Security Manager and then deploy them to managed devices through policy. Although the Mobile Security Manager simplifies the deployment of provisioning profiles to a large number of mobile devices, there are some security factors to consider. When revoking access to an app that has been enabled via a provisioning profile, the app will continue to run on the device until the next power cycle even if the Mobile Security Manager policy removes the profile. In addition, because provisioning profiles are synchronized with iTunes, the profile may get re-installed the next time the end user syncs the device with iTunes. Use the following procedure to import an iOS provisioning profile onto the Mobile Security Manager: Import an iOS Provisioning Profile Step 1 Obtain the provisioning files you need to For more information about how to create provisioning profiles and enable device users to install your deploy internally-developed apps, go to the following URL: internally-developed iOS apps. http://www.apple.com/business/accelerator/deploy/ Step 2 After you have your signed provisioning 1. profile, import it onto the Mobile Security Manager. 2. Step 3 Save your changes. Select Policies > Configuration > iOS Provisioning Profiles and click Add. Enter a Name for the profile. 3. Browse to the location of the provisioning profile and then click Open. The path and file name display in the File field. 4. Click OK. Click Commit. Set Up a SCEP Configuration The simple certificate enrollment protocol (SCEP) provides a mechanism for issuing certificates to a large number of iOS devices. On the Mobile Security Manager, you can enable SCEP for issuing identity certificates to the devices during the enrollment process. You can also use SCEP to obtain certificates required for other configurations. Use the following procedure to create a SCEP configuration, either for use in Mobile Security Manager enrollment, or for use with other iOS configurations. Set Up a SCEP Configuration Step 1 Configure the Mobile Security Manager to integrate with an existing enterprise SCEP server for issuing identity certificates to iOS devices. GlobalProtect Administrator’s Guide 1. Select Policies > Configuration > SCEP, click Add. 2. Enter a Name to identify the CA, such as Enrollment_CA. This name distinguishes this SCEP instance from other instances you may use in configuration profiles. 99 Define Deployment Policies Set Up the GlobalProtect Mobile Security Manager Set Up a SCEP Configuration (Continued) Step 2 Step 3 Specify the type of challenge to use. The challenge is the one-time password (OTP) that is shared between the Mobile Security Manager and the SCEP server. The Mobile Security Manager includes the OTP in the SCEP configuration it sends to the mobile device, and the device uses it to authenticate itself to the SCEP server. Specify how to connect to the SCEP server. Select one of the following SCEP Challenge options: • None—The SCEP server issues the certificate without an OTP. • Fixed—The Mobile Security Manager will provide a static OTP that is used for all mobile devices. Get the OTP from the SCEP server and enter it in the text box. You will also need to set the UseSinglePassword registry value on the SCEP server to force it to use a single password for all client certificate enrollments. • Dynamic—The Mobile Security Manager will get a unique OTP from the SCEP server for each mobile device during enrollment using an NTLM challenge-response exchange between the two servers. If you select this option, you must configure the Server Path where the Mobile Security Manager can connect to the SCEP server and enter the credentials that it should use to log in. In addition, you can select the SSL check box to require an HTTPS connection for the challenge request. If you enable SSL, you must select the SCEP server’s root CA Certificate. Optionally enable mutual SSL authentication between the SCEP server and the Mobile Security Manager by selecting a Client Certificate. 1. Specify the Server URL that the mobile device should use to reach the SCEP server. For example, http://<hostname>/certsrv/mscep_admin/mscep.dll 2. 100 Enter a string (up to 255 characters in length) to identify the SCEP server in the CA-IDENT Name field. GlobalProtect Administrator’s Guide Set Up the GlobalProtect Mobile Security Manager Define Deployment Policies Set Up a SCEP Configuration (Continued) Step 4 Specify attributes of the certificates to be 1. generated. Enter a Subject name for the certificates generated by the SCEP server. The subject must be a distinguished name in the <attribute>=<value> format and must include the common name (CN) key. There are two ways to specify the CN: • (Recommended) Token-based CN—Enter one of the supported tokens—$USERNAME or $UDID—in place of the CN portion of the subject name. When the Mobile Security Manager pushes the SCEP settings to the device, the CN portion of the subject name will be replaced with the actual username or device UDID of the certificate owner. This method ensures that each certificate that the SCEP server generates is unique for the specific user or device. For example, O=acme,CN=$USERNAME. • Static CN—The CN you specify will be used as the subject for all certificates issued by the SCEP server. For example, O=acme,CN=acmescep. 2. (Optional) Define any certificate extensions you want to include in the certificates: • Subject Alternative Name Type—If you plan to supply a subject alternative name (SAN), specify the format of the SAN by selecting one of the following values: rfc822Name, dnsName, or uniformResourceIdentifier. • Subject Alternative Name Value—The SAN value to include in the certificate, in the format specified above. • NT Principal Name—A user object for the device that can be used to match the user certificate to an account. Step 5 Save the SCEP profile. 3. Set the Key Size to match the key size defined in the certificate template on the SCEP server. 4. (Optional) If the mobile device will obtain its certificate over HTTP, enter the CA certificate Fingerprint (SHA1 or MD5) for the device to use to authenticate the SCEP server. The Fingerprint must match the Thumbprint value on the SCEP server. 1. Click OK to save the configuration settings you defined and close the iOS Configuration dialog. 2. Commit your changes. Create Deployment Policies After a device successfully enrolls and checks in, the Mobile Security Manager uses the username of the device user and/or the reported HIP data to match a deployment policy. GlobalProtect Administrator’s Guide 101 Define Deployment Policies Set Up the GlobalProtect Mobile Security Manager Create Deployment Policies Step 1 Step 2 Create a new policy rule. 1. Select Policies > Policies and click Add. 2. Enter a descriptive Name to identify the policy rule. Select the Users/HIP Profiles tab and then specify how to determine Specify which mobile device users to deploy this configuration to. There are a configuration match for this policy rule: two ways to specify which managed • To deploy this configuration to a specific user or group, click Add devices will get the configuration: by in the User section of the window and then select the user or user/group name and/or by HIP match. group you want to receive this configuration from the drop-down. Repeat this step for each user/group you want to add. The Mobile Security Manager uses the Users/HIP Profiles settings you specify • To deploy this configuration to devices that match a specific HIP to determine which configuration to profile, click Add in the HIP Profiles section of the window and deploy to a device upon check-in. then select a HIP profile. Therefore, if you have multiple It is a good idea to test you deployment policies before configurations, you must make sure to pushing them out to your entire mobile user base. Consider order them properly. As soon as the initially creating a configuration that applies to users in your Mobile Security Manager finds a match, it IT group only to allow them enroll with Mobile Security will deliver the configuration. Therefore, Manager and test the deployment policies. Then, after you more specific configurations must have thoroughly tested the configuration, you could modify precede more general ones. See Step 4 for the deployment policy to push the deployments out to instructions on ordering the list of rules. mobile users. Before you can create policy rules to deploy configurations to specific users or groups, you configure the Mobile Security Manager to access your user directory as described in Integrate the Mobile Security Manager with your LDAP Directory. Step 3 Specify which configuration profiles to deploy to devices that match the user/HIP profile criteria you defined. 1. Attach configuration profiles to the policy rule. If your rule is designed to match both iOS and Android devices, you must attach separate configuration profiles as follows: • To add an iOS configuration profile or an iOS provisioning profile, click Add in the iOS section and then select the profile to add. Repeat this step for each iOS profile to deploy to devices matching this rule. • To add an Android configuration profile, click Add in the Android section and then select the profile to add to the rule. Repeat this step for each configuration profile to deploy to devices matching this rule. 102 2. Click OK to save the policy rule. 3. Repeat Step 1 through Step 3 for each policy rule you need. GlobalProtect Administrator’s Guide Set Up the GlobalProtect Mobile Security Manager Define Deployment Policies Create Deployment Policies (Continued) Step 4 Arrange the deployment policy rules so • To move a deployment policy rule up on the list of rules, select the rule and click Move Up. that the proper configuration is deployed to each device upon check-in. • To move a deployment policy rule down on the list of rules, select the rule and click Move Down. When an device checks in, the Mobile Security Manager will compare the username and the HIP data the device provided against the policies you have defined. As with security rule evaluation on the firewall, the Mobile Security Manager looks for a match starting from the top of the list. When it finds a match, it pushes the corresponding configuration(s) to the device. Step 5 Save the deployment policy rules. GlobalProtect Administrator’s Guide Commit your changes. 103 Verify the Mobile Security Manager Configuration Set Up the GlobalProtect Mobile Security Manager Verify the Mobile Security Manager Configuration After you finish setting up the Mobile Security Manager (configuring the device check-in interface, enabling enrollment, and defining configuration and deployment profiles) and setting up the GlobalProtect portal with the URL for device check-in interface, you should verify that you can successfully enroll a device and that the Mobile Security Manager profile is successfully installed and enforced. Verify the Mobile Security Manager Configuration Step 1 Step 2 Set up the deployment policies to be pushed to the test users. Download and install the GlobalProtect app and navigate to the GlobalProtect portal. As a best practice, begin by deploying policies to a small group of users, such as administrators in the IT department responsible for administering the Mobile Security Manager: 1. Select Policies > Policies and select the deployment policy to edit. 2. On the Users/HIP Profiles tab, click Add in the User/User Group section and then select the user or group who will be testing the policy. 3. (Optional) Select the deployment policy rule you just created/modified and click Move Up so that it is before any more generic rules you have created. 4. Commit the changes. 1. Download the app: • From Android devices, download the app from Google Play. • From iOS devices, download the app from the App Store. 2. Tap the GlobalProtect icon on the Home screen to launch the app. 3. Tap OK to enable VPN functionality on the device. 4. On the GlobalProtect Settings screen, enter the Portal name or address, Username, and Password and then tap Connect. The portal name you enter must be a fully qualified domain name (FQDN) and it should not include the https:// at the beginning. If Mobile Security Manager has been configured on the portal, the device will automatically be redirected to the enrollment screen after successfully authenticating to the portal. In order to complete the enrollment process the mobile device must have Internet connectivity. 104 GlobalProtect Administrator’s Guide Set Up the GlobalProtect Mobile Security Manager Verify the Mobile Security Manager Configuration Verify the Mobile Security Manager Configuration (Continued) Step 3 Step 4 Enroll the mobile device with the GlobalProtect Mobile Security Manager. Verify that the expected configuration profiles were pushed to your device. 1. When prompted to enroll with the GlobalProtect Mobile Device Management, tap Enroll. 2. When prompted to receive push notifications from GlobalProtect, tap OK. 3. If the certificate on the device check-in interface was not issued by a trusted CA, you must Install the CA certificate before you can proceed with enrollment. If you have a passcode on the device, you must enter it before you can install the certificate. 4. On the Install Profile screen, tap Install to install the profile and then tap Install Now to acknowledge that enrollment will change settings on the iPad. If you have a passcode on the device, you must enter it before you can install the profile. On the Warning screen tap Install to continue. 5. When the profile is successfully installed, tap Done. If you are collecting GPS location information, the app will prompt you to let GlobalProtect use your current location. For example: • If you pushed a passcode requirement to the device, you should be prompted to set a new password within 60 minutes. Tap Continue to change/set the passcode. Enter your current passcode and then enter/re-enter the New passcode when prompted and then tap Save. The dialog box should display any requirements that your new passcode must meet. • If you pushed an Exchange Active Sync configuration to the device, verify that you can connect to the Exchange server and send and receive mail. • If you pushed a GlobalProtect VPN configuration, verify that the device can establish a VPN connection. • Test any web clips you pushed to the device and verify that you can connect to the associated URLs. • If you pushed restrictions to the device, verify that you cannot perform the restricted actions. GlobalProtect Administrator’s Guide 105 Verify the Mobile Security Manager Configuration Set Up the GlobalProtect Mobile Security Manager Verify the Mobile Security Manager Configuration (Continued) Step 5 Step 6 106 From the Mobile Security Manager, test that push notifications are working. 1. Select Devices and locate and select your device on the list. 2. Click Message and enter text to send to the device in the Message Body text box and then click OK. 3. Verify that you receive the message on your device. Push policies to the rest of your user base. After you verify that your Mobile Security Manager configuration and policies are working as expected, update your policies for deployment to the rest of your user base. GlobalProtect Administrator’s Guide Set Up the GlobalProtect Mobile Security Manager Set Up Administrative Access to the Mobile Security Manager Set Up Administrative Access to the Mobile Security Manager By default, the GlobalProtect Mobile Security Manager comes preconfigured with a default administrative account (admin), which provides full read-write access (also known as superuser access) to the appliance. As a best practice, you should create a separate administrative account for each person who needs access to the administrative or reporting functions of the appliance. This prevents unauthorized configuration (or modification) and enables logging of the actions of each individual administrator. There are two steps to setting up administrative access: Set Up Administrative Authentication Create an Administrative Account Set Up Administrative Authentication There are three ways to authenticate administrative users: Local administrator account with local authentication—Both the administrator account credentials and the authentication mechanisms are local to the appliance. You can further secure the local administrator account by creating a password profile that defines a validity period for passwords and by setting device-wide password complexity settings. With this type of account you do not need to perform any configuration tasks before creating the administrative account. Continue to Create an Administrative Account. Local administrator account with external authentication—The administrator accounts are managed on the local firewall, but the authentication functions are offloaded to an existing LDAP, Kerberos, or RADIUS service. To configure this type of account, you must first create an authentication profile that defines how to access the external authentication service and then create an account for each administrator that references the profile. See Create an Authentication Profile for instructions on setting up access to external authentication services. Local administrator account with certificate-based authentication—With this option, you create the administrator accounts on the appliance, but authentication is based on SSH certificates (for CLI access) or client certificates/common access cards (for the web interface). See Enable Certificate-Based Authentication for the Web Interface and/or Enable SSH Certificate-Based Authentication for the Command Line Interface for instructions. Create an Authentication Profile An authentication profile specifies the authentication service that validates the administrator’s credentials and defines how to access that authentication service. You must create a server profile first so that the Mobile Security Manager can access to a RADIUS, Kerberos, or an LDAP authentication server. GlobalProtect Administrator’s Guide 107 Set Up Administrative Access to the Mobile Security Manager Set Up the GlobalProtect Mobile Security Manager Create an Authentication Profile Step 1 Step 2 Step 3 Create a server profile that defines how to connect to the authentication server. Create an authentication profile. Commit your changes. 1. Select Setup > Server Profiles and then select the type of authentication service to connect to (LDAP, RADIUS, or Kerberos). 2. Click Add and then enter a Name for the profile. 3. Select the Administrator Use Only check box, if appropriate. 4. Click Add to add a new server entry and enter the information required to connect to the service. For details on required field values for each type of service, refer to the online help. 5. Click OK to save the server profile. 1. Select Setup > Authentication Profile and then click Add. 2. Enter a user Name to identify the authentication profile. 3. In the Authentication drop-down, select the type of authentication to use. 4. Select the Server Profile you created in Step 1. Click Commit. Enable Certificate-Based Authentication for the Web Interface As a more secure alternative to using a password to authenticate an administrative user, enable certificate-based authentication for securing access to the Mobile Security Manager. With certificate-based authentication a digital signature is exchanged and verified, in lieu of a password. Use the following instructions to enable certificate-based authentication. Enable Certificate-Based Authentication Step 1 Generate a CA certificate on the Mobile Security Manager. To generate a CA certificate on the Mobile Security Manager: 1. Log in to the Mobile Security Manager web interface. If you want to use certificates from 2. a trusted third-party or enterprise CA, you must import that CA 3. certificate into the Mobile Security Manager so that it can trust the client certificates that you generate. 108 Select Setup > Certificate Management > Certificates and click Generate. Enter a Certificate Name, and add the IP address or FQDN that needs to be listed on the certificate in the Common Name field. Optionally, you can change the cryptographic settings, and define certificate options such as country, organization, or state etc. 4. Make sure to leave the Signed By option blank and select the Certificate Authority option. 5. Click Generate to create the certificate using the details you specified above. GlobalProtect Administrator’s Guide Set Up the GlobalProtect Mobile Security Manager Set Up Administrative Access to the Mobile Security Manager Enable Certificate-Based Authentication (Continued) Step 2 Step 3 Step 4 Step 5 Create the Client Certificate Profile that 1. will be used for securing access to the web interface. 2. Configure the Mobile Security Manager to use the client certificate profile for admin authentication. Create or modify an administrator account to enable client certificate authentication on the account. Create and export the client certificate that will be used to authenticate an administrator. Select Setup > Certificate Management > Certificate Profile and click Add. Enter a name for the certificate profile and in the Username Field select Subject. 3. Select Add in the CA Certificates section and from the CA Certificate drop-down, select the CA certificate you created in Step 1. 1. On the Setup > Settings tab, click the Edit icon in the Authentication Settings section of the screen. 2. In the Certificate Profile field, select the client certificate profile you created in Step 2. 3. Click OK to save your changes. 1. Select Setup > Administrators and then click Add. 2. Enter a login name for the administrator; the name is case-sensitive. 3. Select Use only client certificate authentication (Web) to enable the use of the certificate for authentication. 4. Select the Role to assign to this administrator. You can either select one of the predefined dynamic roles or select a custom role and attach an authentication profile that specifies the access privileges for this administrator. 5. (Optional) For custom roles, select the device groups, templates and the device context that the administrative user can modify. 6. Click OK to save the account settings. 1. Use the CA certificate to generate a client certificate for the each administrative user. a. Select Setup > Certificate Management > Certificates and click Generate. b. In the Common Name field, enter the name of the administrator for whom you are generating the certificate. The name syntax should match the format used by the local or external authentication mechanism. c. In the Signed by field, select the same CA certificate that you created in Step 1. d. Click Generate to create the certificate using the details you specified above. 2. Export the client certificate you just generated. a. Select the certificate that you just created and click Export. b. To encrypt the private key, select PKCS12 as the File Format. c. Enter a passphrase to encrypt the private key and confirm your entry. d. Click OK to export the certificate. GlobalProtect Administrator’s Guide 109 Set Up Administrative Access to the Mobile Security Manager Set Up the GlobalProtect Mobile Security Manager Enable Certificate-Based Authentication (Continued) Step 6 Save your configuration changes. Click Commit. You will be logged out of the web interface. Step 7 Step 8 Import the administrator's client certificate into the web browser of the client that the administrator will use to access the Mobile Security Manager web interface. Log in to the Mobile Security Manager web interface. For example, in Firefox: 1. Select the Tools >Options >Advanced menu. 2. Click the View Certificates button 3. Select the Your Certificates tab and click Import. Browse to the location where you saved the client certificate. 4. When prompted, enter the passphrase to decrypt the private key. 1. Access the IP address or hostname of the Mobile Security Manager. 2. When prompted, select the client certificate you imported in Step 7. A certificate warning will display. 3. Add the certificate to the exception list and log in to the Mobile Security Manager web interface. Enable SSH Certificate-Based Authentication for the Command Line Interface To enable SSH certificate-based authentication, complete the following workflow for every administrative user: Enable SSH (Public-Key Based) Authentication Step 1 110 Use an SSH key generation tool to create For the commands required to generate the keypair, refer to the product documentation for your SSH client. an asymmetric keypair on the client machine. The public key and private key are two separate files; save both the public key and the private key to a location that can be accessed by The supported key formats are: IETF the Mobile Security Manager. For added security, enter a passphrase SECSH and Open SSH; the supported algorithms are: DSA (1024 bits) and RSA to encrypt the private key. You will be prompted for this passphrase when you log in to the Mobile Security Manager. (768-4096 bits). GlobalProtect Administrator’s Guide Set Up the GlobalProtect Mobile Security Manager Set Up Administrative Access to the Mobile Security Manager Enable SSH (Public-Key Based) Authentication (Continued) Step 2 Create an account for the administrator and enable certificate-based authentication. 1. Select Setup > Administrators and then click Add. 2. Enter a user Name and Password for the administrator. You will need to configure a password. Make sure to enter a strong/complex password and record it in safe location; you will only be prompted for this password in the event that the certificates are corrupted or a system failure occurs. 3. (Optional) Select an Authentication Profile. 4. Enable Use Public Key Authentication (SSH). 5. Click Import Key and browse to import the public key you saved in Step 1. 6. Select the Role to assign to this administrator. You can either select one of the predefined Dynamic roles or a custom Role-Based profile. 7. Click OK to save the account. Step 3 Commit your changes. Click Commit. Step 4 Verify that the SSH client uses its private 1. key to authenticate to the public key, which is presented by the Mobile Security 2. Manager. Configure the SSH client to use the private key to authenticate to the Mobile Security Manager. Log in to the CLI on the Mobile Security Manager. Create an Administrative Account After defining the authentication mechanisms for authenticating administrative users, you must create an account for each administrator. When creating an account, you must define how to authenticate the user. In addition, you must specify a role for the administrator. A role defines the type of access the associated administrator has to the system. There are two types of roles you can assign: Dynamic Roles—Built-in roles that provide Superuser, Superuser (read-only), or Device administrator, Device administrator access to the Mobile Security Manager. With dynamic roles, you don’t have to worry about updating the role definitions as new features are added because the roles automatically update. Admin Role Profiles—Allow you to create your own role definitions in order to provide more granular access control to the various functional areas of the web interface, CLI and/or XML API. For example, you could create an Admin Role Profile for your operations staff that provides access to the network configuration areas of the web interface and a separate profile for your IT administrators that provides access to policy definition, mobile security management functions, logs, and reports. Keep in mind that with Admin Role Profiles you must update the profiles to explicitly assign privileges for new features/components that are added to the product. The following example shows how to create a local administrator account with local authentication: GlobalProtect Administrator’s Guide 111 Set Up Administrative Access to the Mobile Security Manager Set Up the GlobalProtect Mobile Security Manager Create an Administrator Account Step 1 Step 2 Complete the following steps for each role you want to create: If you plan to use Admin Role Profiles rather than Dynamic Roles, create the 1. Select Setup > Admin Roles and then click Add. profiles that define what type of access, if 2. On the Web UI and/or XML API tabs, set the access levels— any, to give to the different sections of Enable , Read Only , Disable —for each functional area the web interface, CLI, and XML API for of the interface by clicking the icon to toggle it to the desired each administrator assigned to the role. setting. As a best practice, be sure to restrict the device wipe action to just one or two administrators who are very familiar with Mobile Security Manager to ensure that end user devices do not get wiped accidentally. (Optional) Set requirements for local user-defined passwords. 3. On the Command Line tab, specify the type of access to allow to the CLI: superuser, superreader, deviceadmin, devicereader or None to disable CLI access entirely. 4. Enter a Name for the profile and then click OK to save it. • Create Password Profiles—Define how often administrators must change their passwords. You can create multiple password profiles and apply them to administrator accounts as needed to enforce the desired security. To create a password profile, select Setup > Password Profiles and then click the Add. • Configure minimum password complexity settings—Define rules that govern password complexity, allowing you to force administrators to create passwords that are harder to guess, crack, or compromise. Unlike password profiles, which can be applied to individual accounts, these rules are device wide and apply to all passwords. To configure the settings, select Setup > Settings > Management and then click the Edit icon in the Minimum Password Complexity section. 112 GlobalProtect Administrator’s Guide Set Up the GlobalProtect Mobile Security Manager Set Up Administrative Access to the Mobile Security Manager Create an Administrator Account (Continued) Step 3 Create an account for each administrator. 1. Select Setup > Administrators and then click Add. 2. Enter a user Name for the administrator. 3. Specify how to authenticate the administrator: • To use local authentication, enter a Password and then Confirm Password. • To use external authentication, select an Authentication Profile. • To use certificate/key based authentication, select the Use only client certificate authentication (Web) check box (for access to the web interface and select Use Public Key Authentication (SSH) for access to the CLI. You must also enter a Password, which will only be required in the event that the certificates are corrupted or a system failure occurs. Step 4 Commit your changes. GlobalProtect Administrator’s Guide 4. Select the Role to assign to this administrator. You can either select one of the predefined Dynamic roles or a custom Role Based profile if you created one in Step 1. 5. (Optional) Select a Password Profile. 6. Click OK to save the account. Click Commit. 113 Set Up Administrative Access to the Mobile Security Manager 114 Set Up the GlobalProtect Mobile Security Manager GlobalProtect Administrator’s Guide Manage Mobile Devices After your mobile device users enroll with the GlobalProtect Mobile Security Manager, you can monitor the devices and ensure that they are maintained to your standards for protecting your corporate resources and data integrity standards. Although GlobalProtect Mobile Security Manager simplifies the administration of mobile devices, enabling you to automatically deploy your corporate account configuration settings to compliant devices, you can also use Mobile Security Manager for remediation of security breaches by interacting with a device that has been compromised. This protects both corporate data as well as personal end user data. For example, if an end user loses a device, you can send an over-the-air (OTA) request to the device to sound an alarm to help the user locate it. Or, if an end user reports a lost or stolen device, you can remotely lock the device from the Mobile Security Manager or even wipe the device (either completely or selectively). In addition to the account provisioning and remote device management functions that the Mobile Security Manager provides, when integrated with your existing GlobalProtect VPN infrastructure, you can use host information that the device reports to the Mobile Security Manager to enforce security policies for access to applications through the GlobalProtect gateway and use the monitoring tools that are built into the Palo Alto next-generation firewall to monitor mobile device traffic and application usage. This chapter describes how to manage mobile devices from the Mobile Security Manager and how to integrate information learned by the Mobile Security Manager into your network security infrastructure: Group Devices by Tag for Simplified Device Administration Monitor Mobile Devices Administer Remote Devices Create Security Policies for Mobile Device Traffic Enforcement GlobalProtect Administrator’s Guide 115 Group Devices by Tag for Simplified Device Administration Manage Mobile Devices Group Devices by Tag for Simplified Device Administration A tag is a text label that you can assign to a managed mobile device to simplify device administration by enabling grouping of devices. The tags you define can be used to identify a group of devices to which to apply similar policies, to interact with OTA—for example to push a new policy or send a message. After assigning a tag to a device, the tag is included in the host information profile (HIP) for the device. Because the HIP profile is also shared with the GlobalProtect gateway, you can then create HIP profiles on the gateway to enable you to enforce security policy based on tag value. Because you can manually create the tags, they provide a flexible mechanism for achieving any type of device provisioning or security enforcement that you require. For example, you could create tags to distinguish personal devices from company provisioned devices. You could then create HIP objects that match specific tags, providing endless possibilities as to how you can group managed devices for configuration deployment. Or, if you want to be able to approve devices before you deploy policy to them, you could assign a tag to approved devices and then create a HIP profile to only push policy to devices with the approved tag. There are a couple of different ways to assign tags to mobile devices: Manually Tag Devices Pre-Tag Devices Manually Tag Devices To manually tag devices, you would create the tags you need on the Mobile Security Manager and then assign them to the devices after enrollment as described in the following workflow: Create Tags and Assign them to Managed Devices Step 1 116 Define the tags you need for monitoring 1. devices, pushing deployment policies, or 2. enforcing security policy on the GlobalProtect gateway. Select Setup > Tags and then click Add. Enter a descriptive tag Name for the tag. This will be the name that you will match on when creating HIP objects/profiles for deployment and/or security policy. 3. (Optional) Enter a comment (up to 63 alpha-numeric characters, including special characters) that describes how you plan to use the tag. 4. Click OK to save the tag. GlobalProtect Administrator’s Guide Manage Mobile Devices Group Devices by Tag for Simplified Device Administration Create Tags and Assign them to Managed Devices (Continued) 1. Go to the Devices tab. Step 2 Assign tags to managed mobile devices. Note 2. You can also use this procedure to remove tags from devices, selecting the tags you want to remove and then clicking Untag. 3. Select the devices you want to assign the tag to by clicking in the row that corresponds to the device entry. To simplify this process, you can sort the devices by any of the column headers or use one of the pre-defined Filters in the left pane. 4. Associate tags with the selected device(s) in one of the following ways: Click . • Click Add to display the list of tags you have created so that you can click one, or click New Tags to define a new tag on the fly. • To browse through the list of tags you have created, click Browse and then locate the tags you want to associate with the selected devices, clicking the to add each tag to the list of tags associated with the selected device(s). Repeat this step for each tag to associate with the selected device(s). 5. Step 3 Save the configuration. Click Tag to save the tag associations. Click Commit. Pre-Tag Devices To simplify administration of policies for corporate-provisioned devices, you can automatically pre-tag corporate devices by compiling a list of serial numbers for the devices to be provisioned in a comma-separated values (CSV) file and then importing them into the Mobile Security Manager. By default, imported devices are assigned the tag “Imported.” Optionally you can add a second column to your CSV/XLS file for the tag name if you want to specify any additional tags to assign to imported devices, for example if you have different levels of access for different groups of users receiving corporately provisioned devices. You do not have to assign the same tag to all imported devices. Import a Batch of Devices Step 1 Create a comma-separated values (CSV) Create the CSV file in two columns without adding column headers file or Microsoft Excel spreadsheet that as follows and then save it to your local computer or network share: contains the list of device serial numbers in the first column and, optionally, a list of tags to assign to devices in the second column. GlobalProtect Administrator’s Guide 117 Group Devices by Tag for Simplified Device Administration Manage Mobile Devices Import a Batch of Devices (Continued) Step 2 Step 3 118 Import the device list. 1. Go to the Devices tab and click . 2. Enter the path and name of the CSV or XLS File you created or Browse to it. 3. Click OK to import the device list and associate the Imported tag with the devices, along with any other tags you defined per-device within the file. Verify that device import was successful. On the Devices tab, click View Imported. Verify that the devices you just imported appear on the list. Notice that device serial numbers As soon as a device on the imported list for which you did not specify a tag value get the tag imported only, enrolls, the tags you associated with the whereas device serial numbers that you specified one or more tag serial number will automatically be values for contain those tags in addition to the imported tag: assigned to the device. GlobalProtect Administrator’s Guide Manage Mobile Devices Monitor Mobile Devices Monitor Mobile Devices One of the problems with allowing mobile device access to your corporate resources is the lack of visibility into the state of the devices and the identifying information that is required in order to track down devices that pose a threat to your network and your applications. Monitor Mobile Devices • Use the Dashboard for at-a-glance information The Dashboard tab provides a collection of widgets that display about managed devices. information about the Mobile Security Manager status as well as information about the mobile devices it is managing. You can customize the which widgets display and where each one appears on the screen. The dashboard allows you to monitor mobile device information in the following categories: • Device Trends—Show quick device counts over the past week for newly enrolled and unenrolled devices, devices that did and did not check in, and the total number of devices under management each day. You can click into each graph to see up-to-the minute statistics. • Device Summary—Show pie charts that allow you to see the managed device mix by device model, Android model, iOS model, and operating system. • Device Compliance—Allow you to quickly see counts of devices that may pose a threat, such as devices infected with malware, devices that don’t have a passcode set, or that are rooted/jailbroken. Click into a widget to see detailed statistics about the non-compliant devices The Devices tab displays information about the devices that the • Use the Devices tab to see detailed device statistics about managed (or previously managed) Mobile Security Manager currently manages and the mobile devices devices. it has previously managed. Tips: • Select a pre-defined filter from the Filters list. • Manually enter a filter in the filter text box. For example, to view all Nexus devices, you would enter (model contains 'Nexus') and then click the Apply Filter button. • Modify which columns are displayed by hovering over a column name and clicking the down-arrow icon. • To perform an action on a device or group of devices, select the device(s) and then click an action button at the bottom of the page. For details, see Administer Remote Devices. GlobalProtect Administrator’s Guide 119 Monitor Mobile Devices Manage Mobile Devices Monitor Mobile Devices (Continued) From the Mobile Security Manager web interface, select Monitor > • Monitor the MDM logs for a information on Logs > MDM. device activities, such as check-ins, cloud messages, and broadcast of HIP reports to gateways. The MDM log will also alert you to high severity events such as a device reporting a rooted/jailbroken status. Additionally, the MDM log provides insight as to which device users are manually disconnecting from the GlobalProtect VPN. Click the log details icon to view the complete HIP report for the device associated with the log entry. The HIP report collected by the Mobile Security Manager is an extended version of the HIP report, and includes detailed information including identifying information about the device such as the serial number, phone number (if applicable), and IMEI, device status information, and a list of all apps installed on the device, including a list of apps that are known to contain malware. 120 GlobalProtect Administrator’s Guide Manage Mobile Devices Monitor Mobile Devices Monitor Mobile Devices (Continued) • Monitor the HIP Match logs on the Mobile Security Manager From the Mobile Security Manager web interface, select Monitor > Logs > HIP Match. Click a column header to choose which columns to display. • Monitor HIP Match logs on the GlobalProtect From the web interface on the firewall hosting the GlobalProtect gateway, select Monitor > Logs > HIP Match. gateway. On the gateway, a HIP match log is generated each time the gateway receives a HIP report from a GlobalProtect client that matches the criteria in a HIP object and/or HIP profile defined on the gateway. On the gateway, the HIP profiles are used in security policy enforcement for traffic initiated by the client. Or, monitor the HIP Match logs on Panorama for an aggregated view of HIP match data across all managed GlobalProtect gateways. • View the built-in reports or build custom reports. Select Monitor > Reports. To view the reports, click the report The Mobile Security Manager provides various names on the right side of the page (App Reports, Device Reports, “top 50” reports of the device statistics for the and PDF Summary Reports). previous day or a selected day in the previous week. By default, all reports are displayed for the previous calendar day. To view reports for any of the previous days, select a report generation date from the calendar at the bottom of the page. The reports are listed in sections. You can view the information in each report for the selected time period. To export the log in CSV format, click Export to CSV. To open the log information in PDF format, click Export to PDF. The PDF file opens in a new window. Click the icons at the top of the window to print or save the file. GlobalProtect Administrator’s Guide 121 Monitor Mobile Devices Manage Mobile Devices Monitor Mobile Devices (Continued) From the web interface on the firewall hosting the GlobalProtect • Monitor the ACC on the firewall hosting the GlobalProtect gateway. Or, monitor the ACC on gateway, select ACC and view the HIP Matches section. Panorama for an aggregated view of HIP match data across all managed GlobalProtect gateways. 122 GlobalProtect Administrator’s Guide Manage Mobile Devices Administer Remote Devices Administer Remote Devices One of the most powerful features of GlobalProtect Mobile Security Manager is the ability to administer managed devices—wherever they are in the world—by sending push notifications over-the-air (OTA). For iOS devices, the Mobile Security Manager sends messages over the Apple Push Notification service (APNs). For Android devices, the Mobile Security Manager sends messages over Google Cloud Messaging (GCM). This enables you to take action quickly if you suspect that a device is compromised or if an employee leaves your organization and you want to ensure that access to your corporate systems is disabled, or if you want to send a message to a specific group of mobile device users. Interact With Devices Take Action on a Lost or Stolen Device Remove Devices Interact With Devices Any time you want to interact with a mobile device, you select the mobile device or group of devices from the Devices tab and then click one of the buttons at the bottom of the page as follows: Perform an Action on a Remote Device Step 1 Select the devices you want to interact with. 1. Select the Devices tab. 2. Select the devices to interact with in one of the following ways: • Select a pre-defined filter from the Filters list. You can select multiple filters to display a customized view of the mobile devices that have enrolled with the Mobile Security Manager. • Manually enter a filter in the filter text box. For example, to view all Nexus devices running Android 4.1.2, you would enter (model contains 'Nexus') and (os-version eq button. You '4.1.2') and then click the Apply Filter can also add filters to the text box by clicking a field in one of the device entries. For example, clicking on and entry Android in the OS column automatically adds the filter (os eq 'android'). • To build a filter using the user interface, click the Add Filter button, build the filter by adding attribute-value pairs, separated by operators, and then click to apply the filter. GlobalProtect Administrator’s Guide 123 Administer Remote Devices Manage Mobile Devices Perform an Action on a Remote Device (Continued) Step 2 Select an action. Click one of the buttons at the bottom of the screen to perform the corresponding action on the selected device(s). For example: • To send a message to the end users who own the selected device(s), click , enter the Message Body, and then click OK. • To request a device check-in, for example on filtered list of devices that have not checked in within the last day (last-checkin-time to leq '2013/09/09'), select the devices and then click send a push notification to the devices requesting that they check in with the Mobile Security Manager. • To remotely unlock a mobile device (for example, if the end user has forgotten the passcode), select the device and then click . The device will unlock and the user will be prompted to set a new passcode. Take Action on a Lost or Stolen Device If an end user reports that a managed device has been lost or stolen, you should take immediate action to ensure that the data on the device is not compromised. Select the device on the Devices tab and then take one or more of the following actions as appropriate to the situation: Secure a Lost or Stolen Device • Lock the device. As soon as a user reports that a device is lost or stolen, you should lock it to ensure that the data on the device cannot be accessed if it is in the wrong hands. Select the device and then click to immediately lock the device. To access the apps and the data on the device, the device user must re-enter the passcode. • Try to locate the device. Select the device and then click • Remove access to corporate systems. This is known as a selective wipe. If you believe that a device may be in the wrong hands, but the user does not want you to wipe the personal data, you can “selectively wipe the device” by creating a deployment policy that returns an empty profile to the device and then click . When the new “empty” policy is pushed to the device, all profiles that enabled access to your corporate systems will be removed, including any data that was associated with those applications. See Define Deployment Policies for best practices and instructions for creating profiles. to sound an alarm. • Erase all device data. This is known as a wipe To protect both the corporate data on the device and the end user’s because it removes all device data, not just access personal data, the end user may request that you wipe all data on the device. To do this, select the device and then click . to corporate systems. 124 GlobalProtect Administrator’s Guide Manage Mobile Devices Administer Remote Devices Remove Devices Although end users can manually unenroll from GlobalProtect Mobile Security Manager directly from the GlobalProtect app, as administrator you can also unenroll devices OTA. This is useful in cases where an employee has left the company without unenrolling from the Mobile Security Manager on a personal device. To unenroll devices, select the devices you want to remove on the Devices tab and then use one of the following two options: Remove Devices from Management • Unenroll devices. To remove a device from the GlobalProtect Mobile Security Manager, but leave its device entry in the Mobile Security Manager, select the device and then click . This is a good option if the end user is still employed by your company, but the device will either permanently or temporarily be unmanaged. By leaving the device entry on the Mobile Security Manager you can still view information about the device, including historical HIP match logs, reports, and device statistics. • Delete devices. To remove a mobile device from management and remove its device entry from the Mobile Security Manager, select the device and then click . This is a good option if you want to clean up the database to remove entries for users who are no longer with the company or to remove devices that have been replaced. Note, however, that this action will permanently remove the device record from the database. Additionally, if the device is enrolled at the time that you perform the Delete action, the device will be unenrolled and then the record will be deleted from the Mobile Security Manager database. GlobalProtect Administrator’s Guide 125 Create Security Policies for Mobile Device Traffic Enforcement Manage Mobile Devices Create Security Policies for Mobile Device Traffic Enforcement The deployment policies you create on the GlobalProtect Mobile Security Manager provide simplified account provisioning for access to your corporate applications for mobile device users. Although you have granular control over which users get polices that enable access to which applications—based on user/group and or device compliance—the Mobile Security Manager does not provide traffic enforcement of mobile device traffic. While the GlobalProtect gateway already has the ability to enforce security policy for GlobalProtect app users, the offering of HIP match information for mobile devices is somewhat limited. However, because the Mobile Security Manager collects comprehensive HIP data from the devices it manages, by leveraging the HIP data that the Mobile Security Manager collects, you can create very granular security policies on your GlobalProtect gateways that enable you to take into account device compliance and tags from the Mobile Security Manager. For example, you could create one security policy on the gateway allowing mobile devices with the tag “company-provisioned” full access to your network, and provide a second security policy for allowing mobile devices with the tag “personal-device” access to the Internet only. Create Security Policy for Managed Devices on the GlobalProtect Gateway Step 1 Configure the GlobalProtect gateways to See Enable Gateway Access to the Mobile Security Manager for detailed instructions. retrieve HIP reports from the Mobile Security Manager. Although the Connection Port value is configurable on the gateway, the Mobile Security Manager requires that you leave the value set to 5008. The option to configure this value is provided to enable integration with third-party MDM solutions. 126 GlobalProtect Administrator’s Guide Manage Mobile Devices Create Security Policies for Mobile Device Traffic Enforcement Create Security Policy for Managed Devices on the GlobalProtect Gateway (Continued) Step 2 See Group Devices by Tag for Simplified Device Administration for (Optional) On the Mobile Security Manager, define the tags you want to use detailed instructions. for security policy enforcement on the gateway and assign them to managed mobile devices. Step 3 See Configure HIP-Based Policy Enforcement for detailed On the GlobalProtect gateways, create the HIP objects and HIP profiles you will instructions. need for enforcement of mobile device traffic policies. Step 4 Attach the HIP profile to the security policy and then Commit the changes on the gateway. GlobalProtect Administrator’s Guide 127 Create Security Policies for Mobile Device Traffic Enforcement 128 Manage Mobile Devices GlobalProtect Administrator’s Guide Use Host Information in Policy Enforcement Although you may have stringent security at your corporate network border, your network is really only as secure as the end devices that are accessing it. With today’s workforce becoming more and more mobile, often requiring access to corporate resources from a variety of locations—airports, coffee shops, hotels—and from a variety of devices—both company-provisioned and personal—you must logically extend your network’s security out to your endpoints to ensure comprehensive and consistent security enforcement. The GlobalProtect Host Information Profile (HIP) feature enables you to collect information about the security status of your end hosts—such as whether they have the latest security patches and antivirus definitions installed, whether they have disk encryption enabled, whether the device is jailbroken or rooted (mobile devices only), or whether it is running specific software you require within your organization, including custom applications—and base the decision as to whether to allow or deny access to a specific host based on adherence to the host policies you define. This chapter provides information about the use of host information in policy enforcement. It includes the following sections: About Host Information Configure HIP-Based Policy Enforcement GlobalProtect Administrator’s Guide 129 About Host Information Use Host Information in Policy Enforcement About Host Information One of the jobs of the GlobalProtect agent is to collect information about the host it is running on. The agent then submits this host information to the GlobalProtect gateway upon successfully connecting. The gateway matches this raw host information submitted by the agent against any HIP objects and HIP profiles you have defined. If it finds a match, it generates an entry in the HIP Match log. Additionally, if it finds a HIP profile match in a policy rule, it enforces the corresponding security policy. Using host information profiles for policy enforcement enables granular security that ensures that the remote hosts accessing your critical resources are adequately maintained and in adherence with your security standards before they are allowed access to your network resources. For example, before allowing access to your most sensitive data systems, you might want to ensure that the hosts accessing the data have encryption enabled on their hard drives. You can enforce this policy by creating a security rule that only allows access to the application if the client system has encryption enabled. In addition, for clients that are not in compliance with this rule, you could create a notification message that alerts users as to why they have been denied access and links them to the file share where they can access the installation program for the missing encryption software (of course, to allow the user to access that file share you would have to create a corresponding security rule allowing access to the particular share for hosts with that specific HIP profile match). What Data Does the GlobalProtect Agent Collect? How Does the Gateway Use the Host Information to Enforce Policy? How Do Users Know if Their Systems are Compliant? What Data Does the GlobalProtect Agent Collect? By default, he GlobalProtect agent collects vendor-specific data about the end user security packages that are running on the computer (as compiled by the OPSWAT global partnership program) and reports this data to the GlobalProtect gateway for use in policy enforcement. Because security software must continually evolve to ensure end user protection, your GlobalProtect portal and gateway licenses also enable you to get dynamic updates for the GlobalProtect data file with the latest patch and software versions available for each package. While the agent collects a comprehensive amount of data about the host it is running on, you may have additional software that you require your end-users to run in order to connect to your network or to access certain resources. In this case, you can define custom checks that instruct the agent to collect specific registry information (on Windows clients), preference list (plist) information (on Mac OS clients), or to collect information about whether or not specific services are running on the host. The agent collects data about the following categories of information by default, to help to identify the security state of the host: Table: Data Collection Categories Category Data Collected General Information about the host itself, including the hostname, logon domain, operating system, client version, and, for Windows systems, the domain to which the machine belongs. 130 GlobalProtect Administrator’s Guide Use Host Information in Policy Enforcement About Host Information Category Data Collected Mobile Devices Identifying information about the mobile device, including the hostname, operating system, and client version. Patch Management Information about any patch management software that is enabled and/or installed on the host and whether there are any missing patches. Firewall Information about any client firewalls that are installed and/or enabled on the host. Antivirus Information about any antivirus software that is enabled and/or installed on the host, whether or not real-time protection is enabled, the virus definition version, last scan time, the vendor and product name. Anti-Spyware Information about any anti-spyware software that is enabled and/or installed on the host, whether or not real-time protection is enabled, the virus definition version, last scan time, the vendor and product name. Disk Backup Information about whether disk backup software is installed, the last backup time, and the vendor and product name of the software. Disk Encryption Information about whether disk encryption software is installed, which drives and/or paths are configured for encryption, and the vendor and product name of the software. Data Loss Prevention Information about whether data loss prevention (DLP) software is installed and/or enabled for the prevention sensitive corporate information from leaving the corporate network or from being stored on a potentially insecure device. This information is only collected from Windows clients. Mobile Devices Identifying information about the mobile device, such as the model number, phone number, serial number and International Mobile Equipment Identity (IMEI) number. In addition, the agent collects information about specific settings on the device, such as whether or not a passcode is set, whether the device is jailbroken, and even if it contains apps that are known to have malware (Android devices only), and, optionally, the GPS location of the device. Note that for iOS devices, some information is collected by the GlobalProtect app and some information is reported directly by the operating system. If you are using the GlobalProtect Mobile Security Manager, it collects extended HIP information from enrolled mobile devices and shares it with the gateways for use in policy enforcement. See Enable Gateway Access to the Mobile Security Manager for details. You can also exclude certain categories of information from being collected on certain hosts (to save CPU cycles and improve client response time). To do this, you create a client configuration on the portal excluding the categories you are not interested in. For example, if you do not plan to create policy based on whether or not client systems run disk backup software, you can exclude that category and the agent will not collect any information about disk backup. GlobalProtect Administrator’s Guide 131 About Host Information Use Host Information in Policy Enforcement How Does the Gateway Use the Host Information to Enforce Policy? While the agent gets the information about what information to collect from the client configuration downloaded from the portal, you define which host attributes you are interested in monitoring and/or using for policy enforcement by creating HIP objects and HIP profiles on the gateway(s): HIP Objects—Provide the matching criteria to filter out the host information you are interested in using to enforce policy from the raw data reported by the agent. For example, while the raw host data may include information about several antivirus packages that are installed on the client you may only be interested in one particular application that you require within your organization. In this case, you would create a HIP object to match the specific application you are interested in enforcing. The best way to determine what HIP objects you need is to determine how you will use the host information you collect to enforce policy. Keep in mind that the HIP objects themselves are merely building blocks that allow you to create the HIP profiles that are used in your security policies. Therefore, you may want to keep your objects simple, matching on one thing, such as the presence of a particular type of required software, membership in a specific domain, or the presence of a specific client OS. By doing this, you will have the flexibility to create a very granular (and very powerful) HIP-augmented policy. HIP Profiles—A collection of HIP objects that are to be evaluated together, either for monitoring or for security policy enforcement. When you create your HIP profiles, you can combine the HIP objects you previously created (as well as other HIP profiles) using Boolean logic such that when a traffic flow is evaluated against the resulting HIP profile it will either match or not match. If there is a match, the corresponding policy rule will be enforced; if there is not a match, the flow will be evaluated against the next rule, as with any other policy matching criteria. Unlike a traffic log—which only creates a log entry if there is a policy match—the HIP Match log generates an entry whenever the raw data submitted by an agent matches a HIP object and/or a HIP profile you have defined. This makes the HIP Match log a good resource for monitoring the state of the hosts on your network over time—before attaching your HIP profiles to security policies—in order to help you determine exactly what policies you believe need enforcement. See Configure HIP-Based Policy Enforcement for details on how to create HIP objects and HIP profiles and use them as policy match criteria. How Do Users Know if Their Systems are Compliant? By default, end users are not given any information about policy decisions that were made as a result of enforcement of a HIP-enabled security rule. However, you can enable this functionality by defining HIP notification messages to display when a particular HIP profile is matched and/or not matched. The decision as to when to display a message (that is, whether to display it when the user’s configuration matches a HIP profile in the policy or when it doesn’t match it), depends largely on your policy and what a HIP match (or non-match) means for the user. That is, does a match mean they are granted full access to your network resources? Or does it mean they have limited access due to a non-compliance issue? For example, consider the following scenarios: 132 GlobalProtect Administrator’s Guide Use Host Information in Policy Enforcement About Host Information You create a HIP profile that matches if the required corporate antivirus and anti-spyware software packages are not installed. In this case, you might want to create a HIP notification message for users who match the HIP profile telling them that they need to install the software (and, optionally, providing a link to the file share where they can access the installer for the corresponding software). You create a HIP profile that matches if those same applications are installed, you might want to create the message for users who do not match the profile, and direct them to the location of the install package. See Configure HIP-Based Policy Enforcement for details on how to create HIP objects and HIP profiles and use in defining HIP notification messages. GlobalProtect Administrator’s Guide 133 Configure HIP-Based Policy Enforcement Use Host Information in Policy Enforcement Configure HIP-Based Policy Enforcement To enable the use of host information in policy enforcement you must complete the following steps. For more information on the HIP feature, see About Host Information. Enable HIP Checking Step 1 Verify proper licensing for HIP checks. To use the HIP feature, you must have purchased and installed a GlobalProtect Portal license on the firewall where your portal is configured and a GlobalProtect Gateway subscription license on each gateway that will perform HIP checks. To verify the status of your licenses on each portal and gateway, select Device > Licenses. Contact your Palo Alto Networks Sales Engineer or Reseller if you do not have the required licenses. For more information on licensing, see About GlobalProtect Licenses. Step 2 (Optional) Define any custom host information that you want the agent to collect. For example, if you have any required applications that are not included in the Vendor and/or Product lists for creating HIP objects, you could create a custom check that will allow you to determine whether that application is installed (has a corresponding registry or plist key) or is running (has a corresponding running process). 1. On the firewall that is hosting your GlobalProtect portal, select Network > GlobalProtect > Portals. 2. Select your portal configuration to open the GlobalProtect Portal dialog. 3. On the Client Configuration tab, select the Client Configuration to which you want to add a custom HIP check, or click Add to create a new client configuration. 4. Select Data Collection > Custom Checks and then define the data you want to collect from hosts running this client configuration as follows: • To collect information about running processes: Select the appropriate tab (Windows or Mac) and then click Add in the Process List section. Enter the name of the process that you want the agent to collect information about. Step 2 and Step 3 assume that you have already created a Portal Configuration. If you have not yet configured your portal, see Configure the GlobalProtect Portal for instructions. • To collect information about specific registry keys: On the Windows tab, click Add in the Registry Key section. Enter the Registry Key for which to collect data. Optionally, click Add to restrict the data collection to a specific Registry Value or values. Click OK to save the settings. • To collect information about specific property lists: On the Mac tab, click Add in the Plist section. Enter the Plist for which to collect data. Optionally, click Add to restrict the data collection to specific Key values. Click OK to save the settings. 134 5. If this is a new client configuration, complete the rest of the configuration as desired. For instructions, see Define the GlobalProtect Client Configurations. 6. Click OK to save the client configuration. 7. Commit your changes. GlobalProtect Administrator’s Guide Use Host Information in Policy Enforcement Configure HIP-Based Policy Enforcement Enable HIP Checking (Continued) Step 3 (Optional) Exclude categories from collection. 1. On the firewall that is hosting your GlobalProtect portal, select Network > GlobalProtect > Portals. 2. Select your portal configuration to open the GlobalProtect Portal dialog. 3. On the Client Configuration tab, select the Client Configuration from which to exclude categories, or click Add to create a new client configuration. 4. Select Data Collection > Exclude Categories and then click Add. The Edit Exclude Category dialog displays. 5. Select the Category you want to exclude from the drop-down list. 6. (Optional) If you want to exclude specific vendors and/or products from collection within the selected category rather than excluding the entire category, click Add. You can then select the Vendor to exclude from the drop-down on the Edit Vendor dialog and, optionally, click Add to exclude specific products from that vendor. When you are done defining that vendor, click OK. You can add multiple vendors and products to the exclude list. 7. Repeat Step 5 and Step 6 for each category you want to exclude. 8. If this is a new client configuration, complete the rest of the configuration as desired. For more information on defining client configurations, see Define the GlobalProtect Client Configurations. 9. Click OK to save the client configuration. 10. Commit your changes. GlobalProtect Administrator’s Guide 135 Configure HIP-Based Policy Enforcement Use Host Information in Policy Enforcement Enable HIP Checking (Continued) Step 4 Create the HIP objects to filter the raw host data collected by the agents. 1. The best way to determine what HIP objects you need is to determine how you 2. will use the host information you collect 3. to enforce policy. Keep in mind that the HIP objects themselves are merely building blocks that allow you to create the HIP profiles that are used in your security policies. Therefore, you may want to keep your objects simple, matching on one thing, such as the presence of a particular type of required software, membership in a specific domain, or the presence of a specific client OS. By doing this, you will have the flexibility to create a very granular (and very powerful) HIP-augmented policy. On the gateway (or on Panorama if you plan to share the HIP objects among multiple gateways), select Objects > GlobalProtect > HIP Objects and click Add. On the General tab, enter a Name for the object. Select the tab that corresponds to the category of host information you are interested in matching against and select the check box to enable the object to match against the category. For example, to create an object that looks for information about Antivirus software, select the Antivirus tab and then select the Antivirus check box to enable the corresponding fields. Complete the fields to define the desired matching criteria. For example, the following screenshot shows how to create an object that will match if the Symantec Norton AntiVirus 2004 Professional application is installed, has Real Time Protection enabled, and has virus definitions that have been updated within the last 5 days. For details on a specific HIP category or field, refer to the online help. Repeat this step for each category you want to match against in this object. For more information, see Table: Data Collection Categories. 136 4. Click OK to save the HIP object. 5. Repeat these steps to create each additional HIP object you require. 6. Commit your changes. GlobalProtect Administrator’s Guide Use Host Information in Policy Enforcement Configure HIP-Based Policy Enforcement Enable HIP Checking (Continued) Step 5 Create the HIP profiles that you plan to use in your policies. 1. When you create your HIP profiles, you 2. can combine the HIP objects you previously created (as well as other HIP profiles) using Boolean logic such that 3. when a traffic flow is evaluated against the resulting HIP profile it will either match 4. or not match. If there is a match, the corresponding policy rule will be enforced; if there is not a match, the flow will be evaluated against the next rule, as with any other policy matching criteria. GlobalProtect Administrator’s Guide On the gateway (or on Panorama if you plan to share the HIP profiles among multiple gateways), select Objects > GlobalProtect > HIP Profiles and click Add. Enter a descriptive Name for the profile and optionally a Description. Click Add Match Criteria to open the HIP Objects/Profiles Builder. Select the first HIP object or profile you want to use as match criteria and then click add to move it over to the Match text box on the HIP Profile dialog. Keep in mind that if you want the HIP profile to evaluate the object as a match only when the criteria in the object is not true for a flow, select the NOT check box before adding the object. 5. Continue adding match criteria as appropriate for the profile you are building, making sure to select the appropriate Boolean operator radio button (AND or OR) between each addition (and, again, using the NOT check box when appropriate). 6. If you are creating a complex Boolean expression, you must manually add the parenthesis in the proper places in the Match text box to ensure that the HIP profile is evaluated using the logic you intend. For example, the following HIP profile will match traffic from a host that has either FileVault disk encryption (for Mac OS systems) or TrueCrypt disk encryption (for Windows systems) and also belongs to the required Domain, and has a Symantec antivirus client installed: 7. When you are done adding match criteria, click OK to save the profile. 8. Repeat these steps to create each additional HIP profile you require. 9. Commit your changes. 137 Configure HIP-Based Policy Enforcement Use Host Information in Policy Enforcement Enable HIP Checking (Continued) Step 6 Note Step 7 Step 8 On the gateway(s) that your GlobalProtect users are connecting to, select Monitor > Logs > HIP Match. This log shows all of the matches the gateway identified when evaluating the raw HIP data reported by the agents against the defined HIP objects and HIP profiles. Unlike Consider monitoring HIP objects and profiles as a means to monitor the security other logs, a HIP match does not require a security policy match in state and activity of your host endpoints. order to be logged. By monitoring the host information over time you will be better able to understand where your security and compliance issues are and you can use this information to guide you in creating useful policy. Verify that the HIP objects and HIP profiles you created are matching your GlobalProtect client traffic as expected. Enable User-ID on the source zones that 1. contain the GlobalProtect users that will 2. be sending requests that require HIP-based access controls. You must 3. enable User-ID even if you don’t plan on using the user identification feature or the firewall will not generate any HIP Match logs entries. (Optional) Configure the gateways to collect HIP reports from the Mobile Security Manager. Select Network > Zones. Click on the Name of the zone in which you want to enable User-ID to open the Zone dialog. Select the Enable User Identification check box and then click OK. See Enable Gateway Access to the Mobile Security Manager for instructions. This step only applies if you are using the GlobalProtect Mobile Security Manager to manage mobile devices and you want to use the extended HIP data that the Mobile Security Manager collects in security policy enforcement on the gateway. 138 GlobalProtect Administrator’s Guide Use Host Information in Policy Enforcement Configure HIP-Based Policy Enforcement Enable HIP Checking (Continued) Step 9 Create the HIP-enabled security rules on Add the HIP profiles to your security rules: your gateway(s). 1. Select Policies > Security and select the rule to which you want to add a HIP profile. As a best practice, you should create your security rules and test that they match the 2. expected flows based on the source and destination criteria as expected before 3. adding your HIP profiles. By doing this you will also be better able to determine the proper placement of the HIP-enabled 4. rules within the policy. 5. GlobalProtect Administrator’s Guide On the Source tab, make sure the Source Zone is a zone for which you enabled User-ID in Step 7. On the User tab, click Add in the HIP Profiles section and select the HIP profile(s) you want to add to the rule (you can add up to 63 HIP profiles to a rule). Click OK to save the rule. Commit your changes. 139 Configure HIP-Based Policy Enforcement Use Host Information in Policy Enforcement Enable HIP Checking (Continued) Step 10 Define the notification messages end users will see when a security rule with a HIP profile is enforced. 1. On the firewall that is hosting your GlobalProtect gateway(s), select Network > GlobalProtect > Gateways. 2. Select a previously-defined gateway configuration to open the GlobalProtect Gateway dialog. The decision as to when to display a message (that is, whether to display it 3. when the user’s configuration matches a HIP profile in the policy or when it 4. doesn’t match it), depends largely on your policy and what a HIP match (or 5. non-match) means for the user. That is, does a match mean they are granted full access to your network resources? Or does it mean they have limited access due to a non-compliance issue? For example, suppose you create a HIP profile that matches if the required corporate antivirus and anti-spyware software packages are not installed. In this 6. case, you might want to create a HIP notification message for users who match the HIP profile telling them that they 7. need to install the software. Alternatively, if your HIP profile matched if those same applications are installed, you might want to create the message for users who do not match the profile. 140 Select Client Configuration > HIP Notification and then click Add. Select the HIP Profile this message applies to from the drop-down. Select Match Message or Not Match Message, depending on whether you want to display the message when the corresponding HIP profile is matched in policy or when it is not matched. In some cases you might want to create messages for both a match and a non-match, depending on what objects you are matching on and what your objectives are for the policy. For the Match Message, you can also enable the option to Include matched application list in message to indicate what applications triggered the HIP match. Select the Enable check box and select whether you want to display the message as a Pop Up Message or as a System Tray Balloon. Enter the text of your message in the Template text box and then click OK. The text box provides both a WYSIWYG view of the text and an HTML source view, which you can toggle between using the Source Edit icon. The toolbar also provides many options for formatting your text and for creating hyperlinks to external documents, for example to link users directly to the download URL for a required software program. 8. Repeat this procedure for each message you want to define. 9. Commit your changes. GlobalProtect Administrator’s Guide Use Host Information in Policy Enforcement Configure HIP-Based Policy Enforcement Enable HIP Checking (Continued) Step 11 Verify that your HIP profiles are working You can monitor what traffic is hitting your HIP-enabled policies as expected. using the Traffic log as follows: 1. From the gateway, select Monitor > Logs > Traffic. 2. GlobalProtect Administrator’s Guide Filter the log to display only traffic that matches the rule that has the HIP profile you are interested in monitoring attached. For example, to search for traffic that matches a security rule named “iOS Apps” you would enter ( rule eq 'iOS Apps' ) in the filter text box as follows: 141 Configure HIP-Based Policy Enforcement 142 Use Host Information in Policy Enforcement GlobalProtect Administrator’s Guide GlobalProtect Quick Configs The following sections provide step-by-step instructions for configuring some common GlobalProtect deployments: Remote Access VPN (Authentication Profile) Remote Access VPN (Certificate Profile) Remote Access VPN with Two-Factor Authentication Always On VPN Configuration Remote Access VPN with Pre-Logon GlobalProtect Multiple Gateway Configuration GlobalProtect for Internal HIP Checking and User-Based Access Mixed Internal and External Gateway Configuration GlobalProtect Administrator’s Guide 143 Remote Access VPN (Authentication Profile) GlobalProtect Quick Configs Remote Access VPN (Authentication Profile) In the Figure: GlobalProtect VPN for Remote Access, the GlobalProtect portal and gateway are both configured on ethernet1/2 and this is the physical interface where GlobalProtect clients connect. After the clients connect and successfully authenticate to the portal and gateway, the agent establishes a VPN tunnel from its virtual adapter, which has been assigned an address in the IP address pool associated with the gateway tunnel.2 configuration—10.31.32.3-10.31.32.118 in this example. Because GlobalProtect VPN tunnels terminate in a separate corp-vpn zone you have visibility into the VPN traffic as well as the ability to tailor security policy for remote users. Watch the video. Figure: GlobalProtect VPN for Remote Access The following procedure provides the configuration steps for this example. You can also watch the video. Quick Config: VPN Remote Access Step 1 • Select Network > Interfaces > Ethernet and configure ethernet1/2 as a Layer 3 Ethernet interface with IP address 199.21.7.42 and assign it to the l3-untrust zone and the default Use the default virtual router for all virtual router. interface configurations to avoid having to create inter-zone routing. • Create a DNS “A” record that maps IP address 199.21.7.42 to gp.acme.com. Create Interfaces and Zones for GlobalProtect. • Select Network > Interfaces > Tunnel and add the tunnel.2 interface and add it to a new zone called corp-vpn. Assign it to the default virtual router. • Enable User Identification on the corp-vpn zone. 144 GlobalProtect Administrator’s Guide GlobalProtect Quick Configs Remote Access VPN (Authentication Profile) Quick Config: VPN Remote Access (Continued) Step 2 1. Create security policy to enable traffic flow between the corp-vpn zone and the 2. l3-trust zone to enable access to your internal resources. Select Policies > Security and then click Add to add a new rule. For this example, you would define the rule with the following settings: • Name—VPN Access • Source Zone—corp-vpn • Destination Zone—l3-trust Step 3 Step 4 Obtain a server certificate for the interface hosting the GlobalProtect portal and gateway using one of the following methods: • (Recommended) Import a server certificate from a well-known, third-party CA. • Generate a self-signed server certificate. Select Device > Certificate Management > Certificates to manage certificates as follows: • Obtain a server certificate. Because the portal and gateway are on the same interface, the same server certificate can be used for both components. • The CN of the certificate must match the FQDN, gp.acme.com. • To enable clients to connect to the portal without receiving certificate errors, use a server certificate from a public CA. Create a server profile. Create the server profile for connecting to the LDAP server: Device The server profile instructs the firewall how to connect to the authentication service. Local, RADIUS, Kerberos, and LDAP authentication methods are supported. This example shows an LDAP authentication profile for authenticating users against the Active Directory. > Server Profiles > LDAP GlobalProtect Administrator’s Guide 145 Remote Access VPN (Authentication Profile) GlobalProtect Quick Configs Quick Config: VPN Remote Access (Continued) Step 5 Create an authentication profile. Attach the server profile to an authentication profile: Device > Authentication Profile. Step 6 Configure a GlobalProtect Gateway. Select Network > GlobalProtect > Portals and add the following configuration: Interface—ethernet1/2 IP Address—199.21.7.42 Server Certificate—GP-server-cert.pem issued by Go Daddy Authentication Profile—Corp-LDAP Tunnel Interface—tunnel.2 IP Pool—10.31.32.3 - 10.31.32.118 Step 7 Configure the GlobalProtect Portal. Select Network > GlobalProtect > Portals and add the following configuration: 1. Set Up Access to the GlobalProtect Portal. This example uses the following settings: Interface—ethernet1/2 IP Address—199.21.7.42 Server Certificate—GP-server-cert.pem issued by Go Daddy Authentication Profile—Corp-LDAP 2. Create a GlobalProtect Client Configuration using the following settings: Connect Method—on-demand External Gateway Address—gp.acme.com Step 8 Step 9 Deploy the GlobalProtect Agent Software. Select Device > GlobalProtect Client. (Optional) Enable use of the GlobalProtect mobile app. Purchase and install a GlobalProtect Gateway subscription (Device > Licenses) to enable use of the app. Step 10 Save the GlobalProtect configuration. 146 In this example, use the procedure to Host Agent Updates on the Portal. Click Commit. GlobalProtect Administrator’s Guide GlobalProtect Quick Configs Remote Access VPN (Certificate Profile) Remote Access VPN (Certificate Profile) When authenticating users with certificate authentication, the client must present a unique client certificate that identifies the end user in order to connect to GlobalProtect. When used as the only means of authentication, the certificate the client presents must contain the username in one of the certificate fields; typically the username corresponds to the common name (CN) in the Subject field of the certificate. Upon successful authentication, the GlobalProtect agent establishes a VPN tunnel with the gateway and is assigned an IP address from the IP pool in the gateway’s tunnel configuration. To enable user-based policy enforcement on sessions from the corp-vpn zone, the username from the certificate is mapped to the IP address assigned by the gateway. If a domain name is required for policy enforcement, the domain value specified in the certificate profile is appended to the username. Figure: GlobalProtect Client Certificate Authentication Configuration This quick configuration uses the same topology as Figure: GlobalProtect VPN for Remote Access. The only configuration difference is that instead of authenticating users against an external authentication server, this configuration uses client certificate authentication only. Quick Config: VPN Remote Access with Client Certificate Authentication Step 1 • Select Network > Interfaces > Ethernet and configure ethernet1/2 as a Layer 3 Ethernet interface with IP address 199.21.7.42 and assign it to the l3-untrust security zone and the Use the default virtual router for all default virtual router. interface configurations to avoid having to create inter-zone routing. • Create a DNS “A” record that maps IP address 199.21.7.42 to gp.acme.com. Create Interfaces and Zones for GlobalProtect. • Select Network > Interfaces > Tunnel and add the tunnel.2 interface and add it to a new zone called corp-vpn. Assign it to the default virtual router. • Enable User Identification on the corp-vpn zone. GlobalProtect Administrator’s Guide 147 Remote Access VPN (Certificate Profile) GlobalProtect Quick Configs Quick Config: VPN Remote Access with Client Certificate Authentication (Continued) Step 2 1. Create security policy to enable traffic flow between the corp-vpn zone and the 2. l3-trust zone to enable access to your internal resources. Select Policies > Security and then click Add to add a new rule. For this example, you would define the rule with the following settings: • Name—VPN Access • Source Zone—corp-vpn • Destination Zone—l3-trust Step 3 Step 4 Step 5 Step 6 Obtain a server certificate for the interface hosting the GlobalProtect portal and gateway using one of the following methods: • (Recommended) Import a server certificate from a well-known, third-party CA. • Generate a self-signed server certificate. Select Device > Certificate Management > Certificates to manage certificates as follows: Issue client certificates to GlobalProtect users/machines. 1. Use your enterprise PKI or a public CA to issue a unique client certificate to each GlobalProtect user. 2. Install certificates in the personal certificate store on the client systems. 1. Select Device > Certificate Management > Certificate Profile, click Add and enter a profile Name such as GP-client-cert. Create a client certificate profile. Configure a GlobalProtect Gateway. See the topology diagram shown in Figure: GlobalProtect VPN for Remote Access. • Obtain a server certificate. Because the portal and gateway are on the same interface, the same server certificate can be used for both components. • The CN of the certificate must match the FQDN, gp.acme.com. • To enable clients to connect to the portal without receiving certificate errors, use a server certificate from a public CA. 2. Select Subject from the Username Field drop-down. 3. Click Add in the CA Certificates section, select the CA Certificate that issued the client certificates, and click OK twice. Select Network > GlobalProtect > Gateways and add the following configuration: Interface—ethernet1/2 IP Address—199.21.7.42 Server Certificate—GP-server-cert.pem issued by Go Daddy Certificate Profile—GP-client-cert Tunnel Interface—tunnel.2 IP Pool—10.31.32.3 - 10.31.32.118 148 GlobalProtect Administrator’s Guide GlobalProtect Quick Configs Remote Access VPN (Certificate Profile) Quick Config: VPN Remote Access with Client Certificate Authentication (Continued) Step 7 Configure the GlobalProtect Portal. Select Network > GlobalProtect > Portals and add the following configuration: 1. Set Up Access to the Portal: Interface—ethernet1/2 IP Address—199.21.7.42 Server Certificate—GP-server-cert.pem issued by Go Daddy Certificate Profile—GP-client-cert 2. Create a GlobalProtect Client Configuration: Connect Method—on-demand External Gateway Address—gp.acme.com Step 8 Step 9 Deploy the GlobalProtect Agent Software. Select Device > GlobalProtect Client. (Optional) Enable use of the GlobalProtect mobile app. Purchase and install a GlobalProtect Gateway subscription (Device > Licenses) to enable use of the app. Step 10 Save the GlobalProtect configuration. GlobalProtect Administrator’s Guide In this example, use the procedure to Host Agent Updates on the Portal. Click Commit. 149 Remote Access VPN with Two-Factor Authentication GlobalProtect Quick Configs Remote Access VPN with Two-Factor Authentication When you configure a GlobalProtect portal and/or gateway with both an authentication profile and a certificate profile (called two-factor authentication), the end user will be required to successfully authenticate to both before being allowed access. For portal authentication, this means that certificates must be pre-deployed to the end clients before their initial portal connection. Additionally, the certificates presented by the clients must match what is defined in the certificate profile If the certificate profile does not specify a username field (that is, the Username Field it is set to None), the client certificate does not need to have a username. In this case, the client must provide the username when authenticating against the authentication profile. If the certificate profile specifies a username field, the certificate that the client presents must contain a username in the corresponding field. For example, if the certificate profile specifies that the username field is subject, the certificate presented by the client must contain a value in the common-name field or authentication will fail. In addition, when the username field is required, the value from the username field of the certificate will automatically be populated as the username when the user attempts to enter credentials for authenticating to the authentication profile. If you do not want force users to authenticate with a username from the certificate, do not specify a username field in the certificate profile. This quick configuration uses the same topology as Figure: GlobalProtect VPN for Remote Access. However, in this configuration the clients must authenticate against a certificate profile and an authentication profile. For more details on a specific type of two-factor authentication, see the following topics: Enable Two-Factor Authentication Enable Two-Factor Authentication Using One-Time Passwords (OTPs) Enable Two-Factor Authentication Using Smart Cards 150 GlobalProtect Administrator’s Guide GlobalProtect Quick Configs Remote Access VPN with Two-Factor Authentication Quick Config: VPN Remote Access with Two-Factor Authentication Step 1 • Select Network > Interfaces > Ethernet and configure ethernet1/2 as a Layer 3 Ethernet interface with IP address 199.21.7.42 and assign it to the l3-untrust security zone and the Use the default virtual router for all default virtual router. interface configurations to avoid having to create inter-zone routing. • Create a DNS “A” record that maps IP address 199.21.7.42 to gp.acme.com. Create Interfaces and Zones for GlobalProtect. • Select Network > Interfaces > Tunnel and add the tunnel.2 interface and add it to a new zone called corp-vpn. Assign it to the default virtual router. • Enable User Identification on the corp-vpn zone. Step 2 1. Create security policy to enable traffic flow between the corp-vpn zone and the 2. l3-trust zone to enable access to your internal resources. Select Policies > Security and then click Add to add a new rule. For this example, you would define the rule with the following settings: • Name—VPN Access • Source Zone—corp-vpn • Destination Zone—l3-trust Step 3 Step 4 Obtain a server certificate for the interface hosting the GlobalProtect portal and gateway using one of the following methods: • (Recommended) Import a server certificate from a well-known, third-party CA. • Generate a self-signed server certificate. Select Device > Certificate Management > Certificates to manage certificates as follows: Issue client certificates to GlobalProtect users/machines. 1. Use your enterprise PKI or a public CA to issue a unique client certificate to each GlobalProtect user. 2. Install certificates in the personal certificate store on the client systems. GlobalProtect Administrator’s Guide • Obtain a server certificate. Because the portal and gateway are on the same interface, the same server certificate can be used for both components. • The CN of the certificate must match the FQDN, gp.acme.com. • To enable clients to connect to the portal without receiving certificate errors, use a server certificate from a public CA. 151 Remote Access VPN with Two-Factor Authentication GlobalProtect Quick Configs Quick Config: VPN Remote Access with Two-Factor Authentication (Continued) Step 5 Create a client certificate profile. 1. Select Device > Certificate Management > Certificate Profile, click Add and enter a profile Name such as GP-client-cert. 2. Specify where to get the username that will be used to authenticate the end user: • From user—If you want the end user to supply a username when authenticating to the service specified in the authentication profile, select None as the Username Field. • From certificate—If you want to extract the username from the certificate, select Subject as the Username Field. If you use this option, the CN contained in the certificate will automatically populated the username field when the user is prompted to login to the portal/gateway and the user will be required to log in using that username. 3. Step 6 Step 7 Click Add in the CA Certificates section, select the CA Certificate that issued the client certificates, and click OK twice. Create a server profile. Create the server profile for connecting to the LDAP server: Device The server profile instructs the firewall how to connect to the authentication service. Local, RADIUS, Kerberos, and LDAP authentication methods are supported. This example shows an LDAP authentication profile for authenticating users against the Active Directory. > Server Profiles > LDAP Create an authentication profile. Attach the server profile to an authentication profile: Device > Authentication Profile. 152 GlobalProtect Administrator’s Guide GlobalProtect Quick Configs Remote Access VPN with Two-Factor Authentication Quick Config: VPN Remote Access with Two-Factor Authentication (Continued) Step 8 Configure a GlobalProtect Gateway. See the topology diagram shown in Figure: GlobalProtect VPN for Remote Access. Select Network > GlobalProtect > Gateways and add the following configuration: Interface—ethernet1/2 IP Address—199.21.7.42 Server Certificate—GP-server-cert.pem issued by Go Daddy Certificate Profile—GP-client-cert Authentication Profile—Corp-LDAP Tunnel Interface—tunnel.2 IP Pool—10.31.32.3 - 10.31.32.118 Step 9 Configure the GlobalProtect Portal. Select Network > GlobalProtect > Portals and add the following configuration: 1. Set Up Access to the Portal: Interface—ethernet1/2 IP Address—199.21.7.42 Server Certificate—GP-server-cert.pem issued by Go Daddy Certificate Profile—GP-client-cert Authentication Profile—Corp-LDAP 2. Create a GlobalProtect Client Configuration: Connect Method—on-demand External Gateway Address—gp.acme.com Step 10 Deploy the GlobalProtect Agent Software. Select Device > GlobalProtect Client. Step 11 (Optional) Enable use of the GlobalProtect mobile app. Purchase and install a GlobalProtect Gateway subscription (Device > Licenses) to enable use of the app. Step 12 Save the GlobalProtect configuration. Click Commit. GlobalProtect Administrator’s Guide In this example, use the procedure to Host Agent Updates on the Portal. 153 Always On VPN Configuration GlobalProtect Quick Configs Always On VPN Configuration In an “always on” GlobalProtect configuration, the agent connects to the GlobalProtect portal upon user logon to submit user and host information and receive the client configuration. It then automatically establishes the VPN tunnel to the gateway specified in the client configuration delivered by the portal without end user intervention as shown in the following illustration. To switch any of the previous remote access VPN configurations to an always-on configuration, you simply change the connect method: Remote Access VPN (Authentication Profile) Remote Access VPN (Certificate Profile) Remote Access VPN with Two-Factor Authentication Switch to an “Always On” Configuration Step 1 Select Network > GlobalProtect > Portals and select the portal configuration to open it. Step 2 Select the Client Configuration tab and then select the client configuration you want to modify. Step 3 Select user-logon as the Connect Method. Repeat this for each client configuration. Step 4 Click OK twice to save the client configuration and the portal configuration and then Commit the change. 154 GlobalProtect Administrator’s Guide GlobalProtect Quick Configs Remote Access VPN with Pre-Logon Remote Access VPN with Pre-Logon The GlobalProtect pre-logon connect method is a feature that enables GlobalProtect to authenticate the agent and establish the VPN tunnel to the GlobalProtect gateway using a pre-installed machine certificate before the user has logged in. Because the tunnel is already established, domain scripts can be executed when the user logs in instead of using cached credentials. Prior to user login there is no username associated with the traffic. Therefore, to enable the client system to access resources in the trust zone you must create security policies that match the pre-logon user. These policies should only allow access to basic services required to start up the system, such as DHCP, DNS, Active Directory (for example, to change an expired password), antivirus, and/or operating system update services. Then, after the user logs in to the system and authenticates, the VPN tunnel is renamed to include the username so that user- and group-based policy can be enforced. Windows systems and Mac systems behave differently in a pre-logon configuration. Unlike the Windows behavior described above, on Mac OS systems the tunnel is disconnected when the user logs in and then a new tunnel is established. With pre-logon, when an agent connects to the portal for the first time, the end user must authenticate (either via an authentication profile or a certificate profile configured to validate a client certificate containing a username). After authentication succeeds, the portal pushes the client configuration to the agent along with a cookie that will be used for portal authentication to receive a configuration refresh. Then, when a client system attempts to connect in pre-logon mode, it will use cookie to authenticate to the portal and receive its pre-logon client configuration. Then, it will connect to the gateway specified in the configuration and authenticate using its machine certificate (as specified in a certificate profile configured on the gateway) and establish the VPN tunnel. When the end user subsequently logs in to the machine, if single sign-on (SSO) is enabled in the client configuration, the username will immediately be reported to the gateway so that the tunnel can be renamed and user- and group-based policy can be enforced. If SSO is not enabled in the client configuration or of SSO is not supported on the client system (for example, it is a Mac OS system) the users’ credentials must be stored in the agent (that is, the Remember Me check box must be selected within the agent). GlobalProtect Administrator’s Guide 155 Remote Access VPN with Pre-Logon GlobalProtect Quick Configs This example uses the GlobalProtect topology shown in Figure: GlobalProtect VPN for Remote Access. Quick Config: Remote Access VPN with Pre-Logon Step 1 • Select Network > Interfaces > Ethernet and configure ethernet1/2 as a Layer 3 Ethernet interface with IP address 199.21.7.42 and assign it to the l3-untrust security zone and the Use the default virtual router for all default virtual router. interface configurations to avoid having to create inter-zone routing. • Create a DNS “A” record that maps IP address 199.21.7.42 to gp.acme.com. Create Interfaces and Zones for GlobalProtect. • Select Network > Interfaces > Tunnel and add the tunnel.2 interface and add it to a new zone called corp-vpn. Assign it to the default virtual router. • Enable User Identification on the corp-vpn zone. Step 2 Create the security policy rules. This configuration requires the following policies (Policies > Security): • First create a rule that enables the pre-logon user access to basic services that are required for the computer to come up, such as authentication services, DNS, DHCP, and Microsoft Updates. • Second create a rule to enable access between the corp-vpn zone and the l3-trust zone for any known user after the user successfully logs in. Step 3 Step 4 Obtain a server certificate for the interface hosting the GlobalProtect portal and gateway using one of the following methods: • (Recommended) Import a server certificate from a well-known, third-party CA. • Generate a self-signed server certificate. Select Device > Certificate Management > Certificates to manage certificates as follows: Generate a machine certificate for each client system that will connect to GlobalProtect and import them into the personal certificate store on each machine. 1. Issue client certificates to GlobalProtect users/machines. 2. Install certificates in the personal certificate store on the client systems. (Local Computer store on Windows or System Keychain on Mac OS) • Obtain a server certificate. Because the portal and gateway are on the same interface, the same server certificate can be used for both components. • The CN of the certificate must match the FQDN, gp.acme.com. • To enable clients to connect to the portal without receiving certificate errors, use a server certificate from a public CA. Although you could generate self-signed certificates for each client system, as a best practice use your own public-key infrastructure (PKI) to issue and distribute certificates to your clients. 156 GlobalProtect Administrator’s Guide GlobalProtect Quick Configs Remote Access VPN with Pre-Logon Quick Config: Remote Access VPN with Pre-Logon (Continued) Step 5 Import the trusted root CA certificate from the CA that issued the machine certificates onto the portal and gateway(s). 1. Download the CA certificate in Base64 format. 2. Import the certificate onto each firewall hosting a portal or gateway as follows: a. Select Device > Certificate Management > Certificates > Device Certificates and click Import. You do not have to import the private key. b. Enter a Certificate Name that identifies the certificate as your client CA certificate. c. Browse to the Certificate File you downloaded from the CA. d. Select Base64 Encoded Certificate (PEM) as the File Format and then click OK. e. Select the certificate you just imported on the Device Certificates tab to open it. f. Select Trusted Root CA and then click OK. Step 6 On each firewall hosting a GlobalProtect 1. gateway, create a certificate profile to identify which CA certificate to use to validate the client machine certificates. 2. Optionally, if you plan to use client 3. certificate authentication to authenticate users when they log in to the system, 4. make sure that the CA certificate that issues the client certificates is referenced in the certificate profile in addition to the CA certificate that issued the machine 5. certificates if they are different. Step 7 Configure a GlobalProtect Gateway. See the topology diagram shown in Figure: GlobalProtect VPN for Remote Access. Although you must create a certificate profile for pre-logon access to the gateway, you can use either client certificate authentication or authentication profile-based authentication for logged in users. In this example, the same LDAP profile is used that is used to authenticate users to the portal. GlobalProtect Administrator’s Guide Select Device > Certificates > Certificate Management > Certificate Profile and click Add and enter a Name to uniquely identify the profile, such as PreLogonCert. Set Username Field to None. In the CA Certificates field, click Add, select the Trusted Root CA certificate you imported in Step 5 and then click OK. (Optional) If you will also use client certificate authentication to authenticate users upon login, add the CA certificate that issued the client certificates if it is different from the one that issued the machine certificates. Click OK to save the profile. Select Network > GlobalProtect > Gateways and add the following configuration: Interface—ethernet1/2 IP Address—199.21.7.42 Server Certificate—GP-server-cert.pem issued by Go Daddy Certificate Profile—PreLogonCert Authentication Profile—Corp-LDAP Tunnel Interface—tunnel.2 IP Pool—10.31.32.3 - 10.31.32.118 Commit the gateway configuration. 157 Remote Access VPN with Pre-Logon GlobalProtect Quick Configs Quick Config: Remote Access VPN with Pre-Logon (Continued) Step 8 Configure the GlobalProtect Portal. Select Network > GlobalProtect > Portals and add the following configuration: 1. Set Up Access to the Portal: For this configuration, create two client configurations: one that will be pushed to the agent when the user is not logged in (User/User Group is pre-logon) and one that will be pushed when the user is logged in (User/User Group is any). You may want to limit gateway access to a single gateway for pre-logon users, while providing access to multiple gateways for 2. logged in users. Interface—ethernet1/2 IP Address—199.21.7.42 Server Certificate—GP-server-cert.pem issued by Go Daddy Certificate Profile—None Authentication Profile—Corp-LDAP Create a GlobalProtect Client Configuration for pre-logon users and for logged in users: First Client Configuration: As a best practice, enable SSO in the second client configuration to ensure that the correct username is reported to the gateway immediately when the user logs in to the machine. If SSO is not enabled the username saved in the GlobalProtect agent settings panel will be used. Connect Method—pre-logon External Gateway Address—gp.acme.com User/User Group—pre-logon Authentication Modifier—Cookie authentication for config refresh Second Client Configuration: Use single sign-on—enabled Connect Method—pre-logon External Gateway Address—gp.acme.com User/User Group—any Authentication Modifier—Cookie authentication for config refresh 3. Step 9 158 Save the GlobalProtect configuration. Make sure the pre-logon client configuration is first in the list of configurations. If it is not, select it and click Move Up. Click Commit. GlobalProtect Administrator’s Guide GlobalProtect Quick Configs GlobalProtect Multiple Gateway Configuration GlobalProtect Multiple Gateway Configuration In Figure: GlobalProtect Multiple Gateway Topology, a second external gateway has been added to the configuration. Multiple gateways are supported in all of the preceding example configurations. Additional steps include installing a GlobalProtect portal license to enable use of multiple gateways and the configuration of the second firewall as a GlobalProtect gateway. In addition, when configuring the client configurations to be deployed by the portal you can decide whether to allow access to all gateways, or specify different gateways for different configurations. If a client configuration contains more than one gateway, the agent will attempt to connect to all gateways listed in its client configuration. The agent will then use priority and response time as to determine which gateway to connect to. Figure: GlobalProtect Multiple Gateway Topology GlobalProtect Administrator’s Guide 159 GlobalProtect Multiple Gateway Configuration GlobalProtect Quick Configs Quick Config: GlobalProtect Multiple Gateway Configuration Step 1 Create Interfaces and Zones for GlobalProtect. In this configuration, you must set up interfaces on each firewall hosting a gateway. On the firewall hosting the portal/gateway (gw1): • Select Network > Interfaces > Ethernet and configure ethernet1/2 as a Layer 3 Ethernet interface with IP address 198.51.100.42 and assign it to the l3-untrust security zone and the default virtual router. Use the default virtual router for all • Create a DNS “A” record that maps IP address 198.51.100.42 to gp1.acme.com. interface configurations to avoid having to create inter-zone routing. • Select Network > Interfaces > Tunnel and add the tunnel.2 interface and add it to a new zone called corp-vpn. Assign it to the default virtual router. • Enable User Identification on the corp-vpn zone. On the firewall hosting the second gateway (gw2): • Select Network > Interfaces > Ethernet and configure ethernet1/5 as a Layer 3 Ethernet interface with IP address 192.0.2.4 and assign it to the l3-untrust security zone and the default virtual router. • Create a DNS “A” record that maps IP address 192.0.2.4 to gp2.acme.com. • Select Network > Interfaces > Tunnel and add the tunnel.1 interface and add it to a new zone called corp-vpn. Assign it to the default virtual router. • Enable User Identification on the corp-vpn zone. Step 2 Purchase and install a GlobalProtect Portal license on the firewall hosting the portal. This license is required to enable a multiple gateway configuration. After you purchase the portal license and receive your activation code, install the license on the firewall hosting the portal as follows: 1. Select Device > Licenses. 2. You will also need a GlobalProtect 3. gateway subscription on each gateway if you have users who will 4. be using the GlobalProtect app on their mobile devices or if you plan to use HIP-enabled security policy. Step 3 160 Select Activate feature using authorization code. When prompted, enter the Authorization Code and then click OK. Verify that the license was successfully activated. On each firewall hosting a GlobalProtect This configuration requires policy rules to enable traffic flow gateway, create security policy. between the corp-vpn zone and the l3-trust zone to enable access to your internal resources (Policies > Security). GlobalProtect Administrator’s Guide GlobalProtect Quick Configs GlobalProtect Multiple Gateway Configuration Quick Config: GlobalProtect Multiple Gateway Configuration (Continued) Step 4 Step 5 Obtain server certificates for the interfaces hosting your GlobalProtect portal and each of your GlobalProtect gateways using the following recommendations: • (On the firewall hosting the portal or portal/gateway) Import a server certificate from a well-known, third-party CA. • (On a firewall hosting only a gateway) Generate a self-signed server certificate. On each firewall hosting a portal/gateway or gateway, select Device > Certificate Management > Certificates to manage certificates as follows: • Obtain a server certificate for the portal/gw1. Because the portal and the gateway are on the same interface you must use the same server certificate. The CN of the certificate must match the FQDN, gp1.acme.com. To enable clients to connect to the portal without receiving certificate errors, use a server certificate from a public CA. • Obtain a server certificate for the interface hosting gw2. Because this interface hosts a gateway only you can use a self-signed certificate. The CN of the certificate must match the FQDN, gp2.acme.com. Define how you will authenticate users to You can use any combination of certificate profiles and/or the portal and the gateways. authentication profiles as necessary to ensure the security for your portal and gateways. Portals and individual gateways can also use different authentication schemes. See the following sections for step-by-step instructions: • Set Up External Authentication (authentication profile) • Set Up Client Certificate Authentication (certificate profile) • Set up Two-Factor Authentication (token- or OTP-based) You will then need to reference the certificate profile and/or authentication profiles you defined in the portal and gateway configurations you define. Step 6 Configure the gateways. This example shows the configuration for gp1 and gp2 shown in Figure: GlobalProtect Multiple Gateway Topology. See Configure a GlobalProtect Gateway for step-by-step instructions on creating the gateway configurations. On the firewall hosting gp1, configure the gateway On the firewall hosting gp2, configure the gateway settings as settings as follows: follows: Select Network > GlobalProtect > Gateways and add the following configuration: Select Network > GlobalProtect > Gateways and add the following configuration: Interface—ethernet1/2 Interface—ethernet1/2 IP Address—198.51.100.42 IP Address—192.0.2.4 Server Certificate—GP1-server-cert.pem issued Server Certificate—self-signed certificate, GP2-server-cert.pem by Go Daddy Tunnel Interface—tunnel.1 Tunnel Interface—tunnel.2 IP Pool—10.31.32.3 - 10.31.32.118 GlobalProtect Administrator’s Guide IP Pool—10.31.33.3 - 10.31.33.118 161 GlobalProtect Multiple Gateway Configuration GlobalProtect Quick Configs Quick Config: GlobalProtect Multiple Gateway Configuration (Continued) Step 7 Configure the GlobalProtect Portal. Select Network > GlobalProtect > Portals and add the following configuration: 1. Set Up Access to the Portal: Interface—ethernet1/2 IP Address—198.51.100.42 Server Certificate—GP1-server-cert.pem issued by Go Daddy 2. Create a GlobalProtect Client Configuration: The number of client configurations you create depends on your specific access requirements, including whether you require user/group-based policy and/or HIP-enabled policy enforcement. Step 8 Step 9 162 Deploy the GlobalProtect Agent Software. Save the GlobalProtect configuration. Select Device > GlobalProtect Client. In this example, use the procedure to Host Agent Updates on the Portal. Click Commit on the firewall hosting the portal and the gateway(s). GlobalProtect Administrator’s Guide GlobalProtect Quick Configs GlobalProtect for Internal HIP Checking and User-Based Access GlobalProtect for Internal HIP Checking and User-Based Access When used in conjunction with User-ID and/or HIP checks, an internal gateway can be used to provide a secure, accurate method of identifying and controlling traffic by user and/or device state, replacing other network access control (NAC) services. Internal gateways are useful in sensitive environments where authenticated access to critical resources is required. In a configuration with only internal gateways, all clients must be configured with user-logon; on-demand mode is not supported. In addition, it is recommended that you configure all client configurations to use single sign-on (SSO). Additionally, because internal hosts do not need to establish a tunnel connection with the gateway, the IP address of the physical network adapter on the client system is used. In this quick config, internal gateways are used to enforce group based policies that allow users in the Engineering group access to the internal source control and bug databases and users in the Finance group to the CRM applications. All authenticated users have access to internal web resources. In addition, HIP profiles configured on the gateway check each host to ensure compliance with internal maintenance requirements, such as whether the latest security patches and antivirus definitions are installed, whether disk encryption is enabled, or whether the required software is installed. Figure: GlobalProtect Internal Gateway Configuration GlobalProtect Administrator’s Guide 163 GlobalProtect for Internal HIP Checking and User-Based Access GlobalProtect Quick Configs Quick Config: GlobalProtect Internal Gateway Configuration Step 1 On each firewall hosting a portal/gateway: 1. Select an Ethernet port to host the portal/gateway and then configure a Layer3 interface with an IP address in the l3-trust In this configuration, you must set up security zone. (Network > Interfaces > Ethernet). interfaces on each firewall hosting a portal 2. Enable User Identification on the l3-trust zone. and/or a gateway. Because this configuration uses internal gateways only, you must configure the portal and gateways on interfaces on the internal network. Create Interfaces and Zones for GlobalProtect. Use the default virtual router for all interface configurations to avoid having to create inter-zone routing. Step 2 Purchase and install a GlobalProtect Portal license on the firewall hosting the portal and gateway subscriptions for each firewall hosting an internal gateway. This is required to enable an internal gateway configuration and enable HIP checks. After you purchase the portal license and receive your activation code, install the license on the firewall hosting the portal as follows: 1. Select Device > Licenses. 2. 3. Select Activate feature using authorization code. When prompted, enter the Authorization Code and then click OK. 4. Verify that the license was successfully activated. Contact your Palo Alto Networks Sales Engineer or Reseller if you do not have the required licenses. For more information on licensing, see About GlobalProtect Licenses. Step 3 Obtain server certificates for the GlobalProtect portal and each GlobalProtect gateway. The recommended workflow is as follows: 1. On the firewall hosting the portal: In order to connect to the portal for the first time, the end clients must trust the root CA certificate used to issue the portal server certificate. You can either use a self-signed certificate on the portal and deploy the root CA certificate to the end clients before the first portal 2. connection, or obtain a server certificate for the portal from a trusted CA. a. Import a server certificate from a well-known, third-party CA. b. Create the root CA certificate for issuing self-signed certificates for the GlobalProtect components. c. Generate a self-signed server certificate. Repeat this step for each gateway. On each firewall hosting an internal gateway: a. Deploy the self-signed server certificates. You can use self-signed certificates on the gateways. 164 GlobalProtect Administrator’s Guide GlobalProtect Quick Configs GlobalProtect for Internal HIP Checking and User-Based Access Quick Config: GlobalProtect Internal Gateway Configuration (Continued) Step 4 Define how you will authenticate users to You can use any combination of certificate profiles and/or the portal and the gateways. authentication profiles as necessary to ensure the security for your portal and gateways. Portals and individual gateways can also use different authentication schemes. See the following sections for step-by-step instructions: • Set Up External Authentication (authentication profile) • Set Up Client Certificate Authentication (certificate profile) • Set up Two-Factor Authentication (token- or OTP-based) You will then need to reference the certificate profile and/or authentication profiles you defined in the portal and gateway configurations you define. Step 5 Create the HIP profiles you will need to 1. enforce security policy on gateway access. See Use Host Information in Policy Enforcement for more information on HIP matching. 2. Create the HIP objects to filter the raw host data collected by the agents. For example, if you are interested in preventing users that are not up to date with required patches, you might create a HIP object to match on whether the patch management software is installed and that all patches with a given severity are up to date. Create the HIP profiles that you plan to use in your policies. For example, if you want to ensure that only Windows users with up-to-date patches can access your internal applications, you might attach the following HIP profile that will match hosts that do NOT have a missing patch: GlobalProtect Administrator’s Guide 165 GlobalProtect for Internal HIP Checking and User-Based Access GlobalProtect Quick Configs Quick Config: GlobalProtect Internal Gateway Configuration (Continued) Step 6 Configure the internal gateways. Select Network > GlobalProtect > Gateways and add the following settings: • Interface • IP Address • Server Certificate • Authentication Profile and/or Configuration Profile Notice that it is not necessary to configure the client configuration settings in the gateway configurations (unless you want to set up HIP notifications) because tunnel connections are not required. See Configure a GlobalProtect Gateway for step-by-step instructions on creating the gateway configurations. Step 7 Configure the GlobalProtect Portal. Although all of the previous configurations could use a Connect Method of user-logon or on-demand, an internal gateway configuration must always be on and therefore requires a Connect Method of user-logon. Select Network > GlobalProtect > Portals and add the following configuration: 1. Set Up Access to the Portal: Interface—ethernet1/2 IP Address—10.31.34.13 Server Certificate—GP-server-cert.pem issued by Go Daddy with CN=gp.acme.com 2. Create a GlobalProtect Client Configuration: Use single sign-on—enabled Connect Method—user-logon Internal Gateway Address—california.acme.com, newyork.acme.com User/User Group—any 3. Step 8 166 Deploy the GlobalProtect Agent Software. Commit the portal configuration. Select Device > GlobalProtect Client. In this example, use the procedure to Host Agent Updates on the Portal. GlobalProtect Administrator’s Guide GlobalProtect Quick Configs GlobalProtect for Internal HIP Checking and User-Based Access Quick Config: GlobalProtect Internal Gateway Configuration (Continued) Step 9 Create the HIP-enabled and/or user/group-based security rules on your gateway(s). Add the following security rules for this example: 1. Select Policies > Security and click Add. 2. On the Source tab, set the Source Zone to l3-trust. 3. On the User tab, add the HIP profile and user/group to match. • Click Add in the HIP Profiles section and select the HIP profile MissingPatch. • Click Add in the Source User section and select the group (Finance or Engineering depending on which rule you are creating). GlobalProtect Administrator’s Guide 4. Click OK to save the rule. 5. Commit the gateway configuration. 167 Mixed Internal and External Gateway Configuration GlobalProtect Quick Configs Mixed Internal and External Gateway Configuration In a GlobalProtect mixed internal and external gateway configuration, you configure separate gateways for VPN access and for access to your sensitive internal resources. With this configuration, agents perform internal host detection to determine if they are on the internal or external network. If the agent determines it is on the external network, it will attempt to connect to the external gateways listed in its client configuration and it will establish a VPN (tunnel) connection with the gateway with the highest priority and the shortest response time. Because security policies are defined separately on each gateway, you have granular control over which resources your external and internal users have access to. In addition, you also have granular control over which gateways users have access to by configuring the portal to deploy different client configurations based on user/group membership or based on HIP profile matching. In this example, the portals and all three gateways (one external and two internal) are deployed on separate firewalls. The external gateway at gpvpn.acme.com provides remote VPN access to the corporate network while the internal gateways provide granular access to sensitive datacenter resources based on group membership. In addition, HIP checks are used to ensure that hosts accessing the datacenter are up-to-date on security patches. Figure: GlobalProtect Deployment with Internal and External Gateways 168 GlobalProtect Administrator’s Guide GlobalProtect Quick Configs Mixed Internal and External Gateway Configuration Quick Config: GlobalProtect Mixed Internal & External Gateway Configuration Step 1 Create Interfaces and Zones for GlobalProtect. On the firewall hosting the portal gateway (gp.acme.com): • Select Network > Interfaces > Ethernet and configure ethernet1/2 as a Layer 3 Ethernet interface with IP address In this configuration, you must set up 198.51.100.42 and assign it to the l3-untrust security zone and the interfaces on the firewall hosting a portal default virtual router. and each firewall hosting a gateway. Use the default virtual router for all • Create a DNS “A” record that maps IP address 198.51.100.42 to gp.acme.com. interface configurations to avoid having to create inter-zone routing. • Select Network > Interfaces > Tunnel and add the tunnel.2 interface and add it to a new zone called corp-vpn. Assign it to the default virtual router. • Enable User Identification on the corp-vpn zone. On the firewall hosting the external gateway (gpvpn.acme.com): • Select Network > Interfaces > Ethernet and configure ethernet1/5 as a Layer 3 Ethernet interface with IP address 192.0.2.4 and assign it to the l3-untrust security zone and the default virtual router. • Create a DNS “A” record that maps IP address 192.0.2.4 to gpvpn.acme.com. • Select Network > Interfaces > Tunnel and add the tunnel.3 interface and add it to a new zone called corp-vpn. Assign it to the default virtual router. • Enable User Identification on the corp-vpn zone. On the firewall hosting the internal gateways (california.acme.com and newyork.acme.com): • Select Network > Interfaces > Ethernet and configure Layer 3 Ethernet interface with IP addresses on the internal network and assign them to the l3-trust security zone and the default virtual router. • Create a DNS “A” record that maps the internal IP addresses california.acme.com and newyork.acme.com. • Enable User Identification on the l3-trust zone. GlobalProtect Administrator’s Guide 169 Mixed Internal and External Gateway Configuration GlobalProtect Quick Configs Quick Config: GlobalProtect Mixed Internal & External Gateway Configuration (Continued) Step 2 Purchase and install a GlobalProtect Portal license on the firewall hosting the portal and gateway subscriptions for each firewall hosting a gateway (internal and external). After you purchase the portal license and gateway subscriptions and receive your activation code, install the license on the firewall hosting the portal and install the gateway subscriptions on the firewalls hosting your gateways as follows: 1. Select Device > Licenses. 2. 3. Select Activate feature using authorization code. When prompted, enter the Authorization Code and then click OK. 4. Verify that the license and subscriptions were successfully activated. Contact your Palo Alto Networks Sales Engineer or Reseller if you do not have the required licenses. For more information on licensing, see About GlobalProtect Licenses. Step 3 Obtain server certificates for the GlobalProtect portal and each GlobalProtect gateway. The recommended workflow is as follows: 1. On the firewall hosting the portal: a. Import a server certificate from a well-known, third-party CA. In order to connect to the portal for the first time, the end clients must trust the root CA certificate used to issue the portal server certificate. b. Create the root CA certificate for issuing self-signed certificates for the GlobalProtect components. You can use self-signed certificates on the gateways and deploy the root CA 2. certificate to the agents in the client configuration. The best practice is to generate all of the certificates on firewall hosting the portal and deploy them to the gateways. Step 4 c. Generate a self-signed server certificate. Repeat this step for each gateway. On each firewall hosting a gateway: a. Deploy the self-signed server certificates. Define how you will authenticate users to You can use any combination of certificate profiles and/or the portal and the gateways. authentication profiles as necessary to ensure the security for your portal and gateways. Portals and individual gateways can also use different authentication schemes. See the following sections for step-by-step instructions: • Set Up External Authentication (authentication profile) • Set Up Client Certificate Authentication (certificate profile) • Set up Two-Factor Authentication (token- or OTP-based) You will then need to reference the certificate profile and/or authentication profiles you defined in the portal and gateway configurations you define. 170 GlobalProtect Administrator’s Guide GlobalProtect Quick Configs Mixed Internal and External Gateway Configuration Quick Config: GlobalProtect Mixed Internal & External Gateway Configuration (Continued) Step 5 Create the HIP profiles you will need to 1. enforce security policy on gateway access. See Use Host Information in Policy Enforcement for more information on HIP matching. 2. Create the HIP objects to filter the raw host data collected by the agents. For example, if you are interested in preventing users that are not up to date with required patches, you might create a HIP object to match on whether the patch management software is installed and that all patches with a given severity are up to date. Create the HIP profiles that you plan to use in your policies. For example, if you want to ensure that only Windows users with up-to-date patches can access your internal applications, you might attach the following HIP profile that will match hosts that do NOT have a missing patch: Step 6 Configure the internal gateways. Select Network > GlobalProtect > Gateways and add the following settings: • Interface • IP Address • Server Certificate • Authentication Profile and/or Configuration Profile Notice that it is not necessary to configure the client configuration settings in the gateway configurations (unless you want to set up HIP notifications) because tunnel connections are not required. See Configure a GlobalProtect Gateway for step-by-step instructions on creating the gateway configurations. GlobalProtect Administrator’s Guide 171 Mixed Internal and External Gateway Configuration GlobalProtect Quick Configs Quick Config: GlobalProtect Mixed Internal & External Gateway Configuration (Continued) Step 7 Configure the GlobalProtect Portal. Select Network > GlobalProtect > Portals and add the following configuration: 1. Set Up Access to the Portal: Although this example shows how to create a single client configuration to be deployed to all agents, you could choose to create separate configurations for different uses and then deploy them based on user/group name and/or the operating system the agent/app is 2. running on (Android, iOS, Mac, or Windows). Interface—ethernet1/2 IP Address—10.31.34.13 Server Certificate—GP-server-cert.pem issued by Go Daddy with CN=gp.acme.com Create a GlobalProtect Client Configuration: Internal Host Detection—enabled Use single sign-on—enabled Connect Method—user-logon External Gateway Address—gpvpn.acme.com Internal Gateway Address—california.acme.com, newyork.acme.com User/User Group—any 3. Step 8 Step 9 Commit the portal configuration. Deploy the GlobalProtect Agent Software. Select Device > GlobalProtect Client. Create security policy rules on each gateway to safely enable access to applications for your VPN users. • Create security policy (Policies > Security) to enable traffic flow between the corp-vpn zone and the l3-trust zone. In this example, use the procedure to Host Agent Updates on the Portal. • Create HIP-enabled and user/group-based policy rules to enable granular access to your internal datacenter resources. • For visibility, create rules that allow all of your users web-browsing access to the l3-untrust zone, using the default security profiles to protect you from known threats. Step 10 Save the GlobalProtect configuration. 172 Click Commit on the portal and all gateways. GlobalProtect Administrator’s Guide