1
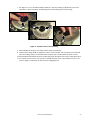
6. Close the lamp access cover and tighten the screw to secure the cover before reapplying power.
B
B
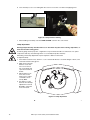
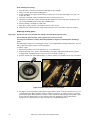
Figure 10: Lamp removal / refitting
7. After installing a new lamp, reset the LAMP ON TIME counter in the control menu.
Lamp adjustment
Warning! Adjust the lamp with the fixture cool. The fixture may become hot during adjustment, so
wear heat-resistant safety gloves.
As well as giving uneven projection, a significant hot-spot in the beam will focus extra heat onto optical
components and may cause damage that is not covered by the product warranty.
After fitting a new lamp, adjustment may be required to obtain an even beam.
To adjust the lamp:
1. If the fixture has been in use, allow it to cool for at least 30 minutes to avoid the danger of burns, and
wear heat-resistant safety gloves.
2. Apply power, allow the
fixture to reset, then
set zoom to narrow,
turn on the lamp and
open the mechanical
shutter.
OPEN
LOCKED
3. Aim the fixture at an
even surface and
make sure no further
commands can be
sent by DMX.
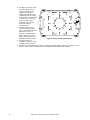
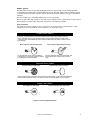
4. See Figure 11. Turn
the three Torx 20 lamp
adjustment screws C,
D and E to obtain the
most even beam.
D
C
E
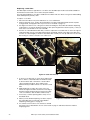
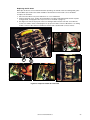
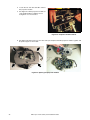
Figure 11: Lamp adjustment
16
MAC Viper Profile Safety and Installation Guide