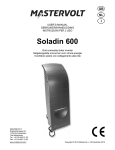
1
USER’S MANUAL / GEBRUIKERSHANDLEIDING / BETRIEBSANLEITING
MODE D’EMPLOI / MANUAL DE UTILIZACION / INSTRUZIONI PER L’USO
Soladin 600
Grid connected solar inverter / Netgekoppelde omvormer voor zonne-energie
Netzgekoppelter Solar-Wechselrichter / Convertisseur solaire relié au réseau électrique
Inversor solar de conexión a red / Invertitore solare con collegamento alla rete
MASTERVOLT
Snijdersbergweg 93,
1105 AN Amsterdam
The Netherlands
Tel.: +31-20-342 21 00
Fax: +31-20-697 10 06
www.mastervolt.com
v 2.2 March 2008
SOLADIN 600
• Ventilation openings
• Ventilatieopeningen
• Lüftungsöffnungen
• Orifices de ventilation
• Aberturas de ventilación
• Fori di ventilazione
• AC plug
• Netstekker
• Netzstecker
• Prise CA
• Enchufe de CA
• Spina CA
• LED indicator
• LED indicatie
• LED-Anzeige
• Voyant DEL
• Indicador luminoso
• LED
• AC wire
• Netsnoer
• Netzkabel
• Câble CA
• Cable de CA
• Cavo CA
• Ventilation opening
• Ventilatieopening
• Lüftungsöffnung
• Orifice de ventilation
• Abertura de ventilación
• Foro di ventilazione
• MultiContact plug +
• MultiContact stekker +
• MultiContact-Stecker +
• Prise MultiContact +
• Conector MultiContact +
• Presa MultiContact +
• Tab to release the mounting lock
• Lip voor ontgrendeling van de bevestigingsbeugel
• Auslöser der Montagesicherung
• Languette pour libérer le verrou de montage
• Pestaña para liberar el bloqueo de montaje
• Linguetta per aprire il blocco di montaggio
2
• MultiContact plug –
• MultiContact stekker –
• MultiContact-Stecker –
• Prise MultiContact –
• Conector MultiContact –
• Presa MultiContact –
• Communication port
• Communicatie-aansluiting
• Kommunikations-Anschluss
• Port de communication
• Puerto de comunicaciones
• Porta di comunicazione
SOLADIN 600
English
• Installation
• Users manual
Nederlands
• Installatie
• Gebruikershandleiding
Deutsch
• Installation
• Betriebsanleitung
Français
• Installation
• Mode d’emploi
Español
• Instalación
• Manual de utilizacion
Página 4-5
Página 22-25
Italiano
• Installazione
• Instruzioni per l’uso
Pagina 4-5
Pagina 26-29
Page 4-5
Page 6-9
Pagina 4-5
Pagina 10-13
Seite 4-5
Seite14-17
Page 4-5
Page 18-21
Specifications
Page 30
Dimensions
Page 31
CE declaration of conformity
Page 32
3
INSTALLATION – INSTALLATIE – INSTALACIÓN – INSTALLAZIONE
•
•
•
•
•
•
1
2
Read instructions on page 6 -9 prior to installation.
Lees vóór installatie eerst de instructies op pagina 10 t/m 13.
Lesen Sie vor der Installation zunächst die Anweisungen auf Seite 14 – 17.
Lire les instructions page 18-21 avant installation.
Lea las instrucciones en la página 22-25 antes de proceder a la instalación.
Prima dell’installazione, leggere le istruzioni a pagina 26-29.
• Mark the position of the two mounting spots A and B by using the
mounting bracket
• Markeer de plaats van de twee montagegaten A en B met behulp van de
montagebeugel.
• Markieren Sie die Position der beiden Montagestellen A und B mit Hilfe
des Montagebügels
• Déterminer la position des deux points de montage A et B à l'aide du
crochet de montage
• Marque la posición de los dos puntos de montaje A y B utilizando el
soporte
• Indicare la posizione dei due punti di riferimento A e B usando il supporto
di montaggio
A
B
3
A
•
•
•
•
•
•
If necessary, drill mounting holes at spots A and B
Boor, indien nodig, gaten op de posities A en B
Bohren Sie, falls erforderlich, Montagelöcher an den Positionen A und B
Si nécessaire, percer des trous de montage aux points A et B
Si fuera necesario, taladre orificios de montaje en los puntos A y B
Se necessario, eseguire dei fori per il montaggio sui punti A e B
•
•
•
•
•
•
Fix the mounting bracket to the wall
Monteer de montagebeugel op de wand
Befestigen Sie den Montagebügel an der Wand
Fixer le crochet de montage au mur
Fije el soporte a la pared
Fissare il supporto alla parete
B
4
A
B
5
4
• Place the Soladin 600 over the mounting bracket and then move it
downwards until it is locked by the mounting bracket
• Positioneer de Soladin 600 iets boven de montagebeugel en laat hem
vervolgens zakken totdat de Soladin vast klikt in de montagebeugel.
• Platzieren Sie den Soladin 600 über dem Montagebügel und schieben
Sie ihn dann nach unten, bis er im Montagebügel einrastet.
• Positionner le Soladin 600 sur le crochet de montage, puis le faire glisser
vers le bas jusqu'à ce qu'il soit bien emboîté sur le crochet de montage.
• Coloque el Soladin 600 sobre el soporte y muévalo hacia abajo hasta
que quede bloqueado por él
• Collocare l’apparecchio Soladin 600 sopra il supporto, quindi spostarlo
verso il basso finché non viene bloccato sul supporto di montaggio
INSTALLATION – INSTALLATIE – INSTALACIÓN – INSTALLAZIONE
•
•
•
•
•
•
6
Check whether the Soladin 600 is mounted in a secure way.
Controleer of de Soladin 600 stevig gemonteerd is.
Kontrollieren Sie, ob der Soladin 600 sicher montiert ist.
Vérifier que le Soladin 600 est installé de façon sécurisée.
Compruebe si el Soladin 600 está montado de un modo seguro.
Controllare che Soladin 600 sia montato in maniera sicura.
• Connect the string cabling to the Soladin 600. If solar irradiation is sufficient, the
LED indicator will illuminate red.
• Sluit de bedrading van de PV-string aan op de Soladin 600. Bij voldoende
zoninstraling zal de LED-indicatie rood oplichten
• Schließen Sie die String-Kabel an den Soladin 600 an. Wenn die
Sonneneinstrahlung ausreichend ist, leuchtet die LED-Anzeige rot auf.
• Connecter les câbles de connexion des chaînes au Soladin 600. Si la radiation
solaire est suffisante, le voyant DEL s'éclairera en rouge.
• Conecte el cableado de la cadena al Soladin 600. Si la irradiación solar es
suficiente, el indicador luminoso se iluminará de color rojo.
• Collegare i cavi al Soladin 600. Se l’irradiazione solare incidente è sufficiente, il
LED si illumina di rosso.
7
+
–
• Insert the AC plug into the wall socket. If solar irradiation is sufficient, the LEDindicator starts blinking red: the Soladin 600 is starting up. This may last a few
seconds up to 5 minutes
• Steek de netstekker in het stopcontact. Bij voldoende zoninstraling gaat de LEDindicatie rood knipperen: the Soladin 600 start op. Dit kan enkele seconden tot
maximaal 5 minuten duren
• Stecken Sie den Netzstecker in die Wand-Steckdose. Wenn die
Sonneneinstrahlung ausreichend ist, blinkt die LED-Anzeige rot: der Soladin 600
startet. Dies kann einige Sekunden bis maximal 5 Minuten dauern.
• Insérer la prise CA dans la prise murale. Si la radiation solaire est suffisante, le
voyant DEL commencera à clignoter en rouge : le Soladin 600 se met en marche.
La mise en marche de l'appareil peut durer jusqu'à 5 minutes.
• Conecte el enchufe de CA en la toma de corriente. Si la irradiación solar es
suficiente, el indicador luminoso empezará a parpadear en rojo: el Soladin 600 se
está poniendo en marcha. Esto puede durar desde unos pocos segundos hasta 5
minutos
• Inserire la spina CA alla presa a muro. Se l’irradiazione solare incidente è
sufficiente, il LED inizia a lampeggiare in rosso: il Soladin 600 si accende. Questo
processo potrebbe durare da qualche secondo ad un massimo di 5 minuti
8
9
·
e
•
•
•
•
•
•
After starting up, the LED-indicator starts blinking yellow.
Na het opstarten gaat de LED-indicatie geel knipperen.
Nach der Inbetriebnahme blinkt die LED-Anzeige gelb.
Après mise en marche, le voyant DEL commence à clignoter en jaune.
Tras la puesta en marcha, el indicador luminoso empieza a parpadear en amarilla.
Una volta acceso, il LED inizia a lampeggiare in gialla.
•
•
•
•
•
•
If solar irradiation is too low (at night), the indicator will extinguish
Bij onvoldoende zoninstraling (bijvoorbeeld ’s nachts) gaat de LED-indicatie uit.
Wenn die Sonneneinstrahlung zu niedrig ist (bei Nacht), geht die LED-Anzeige aus.
Si la radiation solaire est trop faible (de nuit), le voyant s'éteindra.
Si la irradiación solar es demasiado baja (por la noche), el indicador se apagará
Se l’irradiazione solare incidente è troppo bassa (di notte), la spia scompare
5
ENGLISH
Product description and application
Congratulations for choosing the Mastervolt Soladin
600. The Soladin 600, further mentioned as
“Soladin”, is a grid connected solar inverter, used for
the conversion and feed back into the utility grid of
the power generated by photovoltaic modules.
The Soladin is equipped with extensive safety
measures to ensure that it switches off immediately
as soon as the AC plug is removed from the wall
socket or the public grid fails in operation
The Soladin is only suitable for the feed back of
solar power into the public grid, not as a stand-alone
inverter.
Unpacking
The delivery consists of the following parts:
• The Soladin with mounting bracket
• This user’s manual
After unpacking, check the Soladin for possible
damage. Do not use the Soladin if it is damaged. If
in doubt, contact your supplier.
Safety
• Install the Soladin according to the instructions
stated in this manual.
• Be sure that the Soladin is disconnected from the
grid during installation. This can be done by
removing the AC-plug from the wall socket.
• Connections and safety features must be
executed according to the locally applicable
regulations
• The Soladin must be used in accordance with the
specifications as stated on page 30
• Never open the housing as high voltages may be
present inside!
6
USERS MANUAL SOLADIN 600
PV modules and strings
A solar system consists of several photovoltaic
(solar) modules, further mentioned as “PV
modules”. The PV-modules are connected in series
to form a so called “string”. These strings consist of
a positive (+) and a negative (–) connection which
can be connected directly to the Soladin. The
voltages present on these strings are not safe to
touch and cannot be switched off
Therefore the solar system should meet the
following specifications:
• Maximum open circuit string voltage at lowest
possible temperature of the PV modules: 155
VDC. See table 3 for typical configurations for the
Soladin.
• Double isolated PV-wiring
• All cables of the string should have double
isolation and must be fitted with pre-assembled
MultiContact connectors (Ø4mm). Consult an
installer for the availability of such cable
assemblies. Do not assemble these yourself!
• Depending on local applicable regulations the
use of additional DC switch may be mandatory
Contact an installer if the solar-system does not
comply with the above mentioned stipulations. Due
to possible high voltages installation and
modification may only be carried out by a qualified
electrician who is familiar applicable regulations and
standards.
Things you need to install the Soladin
Make sure you have all the parts you need to install
the Soladin:
• The Soladin (included)
• Two screws (with plugs) to mount the Soladin.
Maximum diameter: 4.5 mm. Use mounting
materials which are suitable to carry the weight of
the Soladin.
• Tools to fix the screws / bolts with plugs into the
wall (screwdriver, drilling machine, a set of drills,
a pencil)
USERS MANUAL SOLADIN 600
Choosing the location to install
Obey the following stipulations during installation:
• The Soladin is suited for indoor use only.
• Ambient temperature: -20 ... 50°C; (power
derating above 40°C), Humidity: 0-90% non
condensing
• Install the Soladin in the vicinity of a wall socket
• Do not install the Soladin in environments with
heavy dust development or humidity.
• If the Soladin is installed in the immediate vicinity
of living areas, take into account that it produces
a slight noise level when operating.
• Mount the Soladin vertically on a solid, nonresonating, wall.
• Mount the Soladin in such a way that obstruction
of the airflow through the ventilation openings is
prevented
ENGLISH
Directions for installation
The Soladin is equipped with a so called “antiislanding safety device”. It ensures immediate
switch off in case of grid failure. European countries
maintain different regulations with regard to antiislanding devices and the supply of energy back to
the utility grid in general. Check from the part
number on the type number plate whether the
version of the Soladin is appropriate to be
connected to the local utility grid. Refer to table 1.
Never connect the Soladin to a utility grid which is
not suitable for the use of the apparatus!
In the Netherlands only one Soladin may be
connected to an existing electricity branch circuit
which is fused with 16 Amp. In other countries
different restrictions apply. Please acquaint yourself
with the local regulations on this issue.
During installation you can check by means of the
LED-indicator whether the installation is done
properly. This check can only be carried out when
sufficient irradiation is present. Installation should
therefore be carried out during daytime only.
• No objects must be located within a distance of
20 cm around the Soladin.
Although the Soladin is protected against wrong
polarity, the positive (+) and negative (–) of the solar
connections should not be exchanged.
• Multiple Soladins must be mounted next to each
other, not above each other. Minimum spacing:
20 cm.
Install the product according to the instructions
stated on page 4 and 5.
Monitoring
The Soladin has a communication port that can be
connected to the COM-port (RS232) of a PC or
laptop. Use the optional “Mastervolt PC–link”
interface and cable to set up a connection.
Part number
130391030
Part
number
130000600
130000630
130000650
130000660
Table 1
Description
PC-link Soladin 600,
incl. communication cable, 2m
Description
Allowed to be used in:
Soladin 600 230V/50Hz QNS - EU
Europe, except Germany and the countries mentioned
below
Italy
Spain
England
Soladin 600 230V/50Hz QNS - IT
Soladin 600 230V/50Hz QNS - ES
Soladin 600 230V/50Hz QNS - UK
7
ENGLISH
USERS MANUAL SOLADIN 600
LED indicator
The operation mode of the Soladin is displayed by
means of a LED indicator at the front side of the
housing. In normal operation it flashes yellow: the
longer the LED illuminates yellow, the more power
is converted.
If the irradiation of the PV-modules is insufficient, for
instance at night, the Soladin switches off
automatically. When switched off, the LED indicator
is off.
Indication of the LED
Meaning
Insufficient irradiation
LED is off
No power from the
PV modules
LED is off
• • • • •
Yellow blinking
▬
▬
▬
Slow blinking long red
pulses
▬▬▬▬▬▬
Fast blinking long red
pulses
▬▬▬▬▬▬▬▬
Uninterrupted red
• • • • •
Red blinking 1 time
Reclosure time
Restart time lag
No grid voltage
Solar voltage too low
•• •• •• ••
Red blinking 2 times
••• ••• •••
Red blinking 3 times
•••• ••••
Red blinking 4 times
••••• •••••
Red blinking 5 times
••••••
Red blinking 6 times
Solar voltage too
high
AC grid voltage too
high
AC grid voltage too
low
Grid frequency too
high or too low
Internal temperature
too high
•••••••
Red blinking 7 times
NTC error
Table 2
8
Normal operation
Failures
As long as the indication LED isn’t illuminated red,
no failure is detected: the Soladin is operating
normally. If an error occurs, it is detected by the
apparatus itself: the LED indicator turns red. See
table 2.
Consult an installer, if you cannot solve the problem
by means of the table below.
NOTE: during sunrise or sunset a low Solar
voltage is detected by Soladin, indicated by
a red blinking LED indicator. This is a normal
situation
What to do?
Nothing. The Soladin operates normally, but irradiation of the PV
modules is insufficient (for instance during night time)
Consult an installer if the LED indicator is off during daytime.
The wiring between the PV modules and the Soladin might be
defective. Check for loose connections or incorrect polarity.
Nothing. The Soladin operates normally. The longer the LED
illuminates yellow, the more power is converted.
Nothing. After the Soladin was (re)connected to the AC grid, it checks
the quality of the AC grid before it starts operating normally. This may
take up to 5 minutes.
Nothing. A system check is carried out during sunrise. This may take
up to 15 seconds before the Soladin starts operating normally.
Plug the AC-plug of the Soladin into the wall socket; check the fuse in
the meter cupboard.
Nothing; normal condition during sunrise and sunset.
Consult an installer if the problem remains while irradiation of the PV
modules is sufficient.
Error in the PV installation. Are the specifications of the PV modules
in accordance with the Soladin?
Consult an installer. Error in the PV installation. Are the specifications
of the PV modules in according with the Soladin?
Check the grid connection.
Check the grid connection.
Check the grid connection.
Air flow of the Soladin may not be obstructed. If the problem remains,
switch off the Soladin by removing the AC-plug from the wall-socket
and consult an installer.
Consult an installer for repair of a defective safety device in the
Soladin.
USERS MANUAL SOLADIN 600
Operation
After installation the Soladin will switch on
automatically if solar irradiation is sufficient. The
Soladin operates automatically: there is no need for
adjustment or operation.
The Soladin has no ON/OFF switch; remove the AC
socket from the AC-outlet to switch it off. Do not
disconnect the MultiContact plugs during operation
of the Soladin!
No specific maintenance is required. If necessary,
use a soft clean cloth to clean the Soladin. Never
use any liquids, acids and/or scourers.
Decommissioning
First remove the AC plug from the wall socket
before you disconnect the MultiContact plugs.
Now the Soladin can be demounted in a safe way:
1. Push on the lower tab of the mounting bracket to
release the mounting lock.
2. Lift the Soladin upwards for approximately 1 cm.
3. Move the Soladin straight from the wall
ENGLISH
Guarantee terms
Mastervolt guarantees that this product was built
according to the legally applicable standards and
stipulations. During production and before delivery
all products are exhaustively tested and controlled.
If you fail to act in accordance with the regulations,
instructions and stipulations in this user’s manual,
damage can occur and/or the product will not fulfill
the specifications. This may mean that the
guarantee will become null and void.
The guarantee period is 5 years.
Liability
Mastervolt cannot be held liable for:
• Possible errors in this included manual and the
consequences of these.
• Use that is inconsistent with the purpose of the
product.
Summarized specifications Soladin 600 (refer to page 30 for extended specifications)
Maximum PV power:
700 Wp
MPP voltage:
45-125 V DC
Maximum input voltage U-oc @ -10°C:
155 V DC
Maximum MPP current:
8 A DC
PV module
36 cells
Uoc = 28V*
Umpp = 18V*
Power
75 Wp
100 Wp
125 Wp
150 Wp
One string
4 - 6 in series
4 - 6 in series
4 - 5 in series
4 (5) in series
Two strings in parallel**
4 in series
----
54 cells
Uoc = 32V*
Umpp = 27V*
75 Wp
100 Wp
125 Wp
150 Wp
175 Wp
3 - 4 in series
3 - 4 in series
3 - 4 in series
3 - 4 in series
3 - 4 in series
3 - 4 in series
3 in series
----
72 cells
Uoc = 43V*
Umpp = 36V*
75 Wp
100 Wp
125 Wp
150 Wp
175 Wp
2 - 3 in series
2 - 3 in series
2 - 3 in series
2 - 3 in series
2 - 3 in series
2 - 3 in series
2 - 3 in series
2 in series
2 in series
2 in series
* Approximate value; refer to the specifications of the manufacturer
** Configuration for one string is stated. Use MultiContact branch connectors to connect two strings in parallel.
MultiContact part numbers: PV-AZS4 (positive) and PV-AZB4 (negative)
Table 3: Typical string configurations for the Soladin 600
9
NEDERLANDS
GEBRUIKERSHANDLEIDING SOLADIN 600
De Soladin is uitgerust met diverse beveiligingen die
ervoor zorgen dat het apparaat onmiddellijk
uitschakelt zodra de stekker uit het stopcontact
wordt genomen of de netspanning uitvalt.
PV panelen en strings
Een zonne-energiesysteem bestaat uit meerdere
fotovoltaïsche
zonne-energiepanelen,
verder
aangeduid als “PV panelen”. Meerdere in serie
geschakelde PV panelen vormen samen een z.g.
string. Deze strings hebben een plus (+) en min (–)
aansluiting, die rechtstreeks op de Soladin
aangesloten kunnen worden.
De spanning op de bekabeling van deze strings is
niet aanraakveilig en kan niet afgeschakeld worden.
Daarom dient het zonne-energiesysteem aan de
volgende specificaties te voldoen:
De Soladin is uitsluitend geschikt voor het leveren
van in zonnepanelen opgewekte elektrische energie
aan het elektriciteitsnet. Zelfstandig gebruik zonder
het elektriciteitsnet is niet mogelijk.
• Maximale open klemspanning bij de laagst
mogelijke temperatuur van de PV-panelen: 155
VDC. Zie tabel 3 voor mogelijke samenstellingen
van PV panelen voor de Soladin.
Uitpakken
De levering omvat de volgende onderdelen:
• Dubbel geïsoleerde PV bedrading
Productbeschrijving en toepassing
Gefeliciteerd met uw keuze voor de Mastervolt
Soladin 600. De Soladin 600, verder aangeduid als
“Soladin”, is een netgekoppelde zonneomvormer
waarmee elektrische zonne-energie, opgewekt door
PV (photovoltaïsche) panelen, rechtstreeks aan het
openbare elektriciteitsnet geleverd kan worden.
• De Soladin met montagebeugel
• Deze gebruikershandleiding
Controleer na het uitpakken de Soladin op mogelijke
beschadigingen. In geval van beschadigingen moet
u de Soladin niet gebruiken Raadpleeg bij twijfel
altijd uw leverancier.
Veiligheid
• Installeer de Soladin met inachtneming van de
instructies in deze gebruikershandleiding.
• Tijdens installatie van de Soladin moet deze altijd
losgekoppeld zijn van het elektriciteitsnet. Dit
doet u door de netstekker uit het stopcontact te
halen.
• Aansluitingen en beveiligingen moeten in
overeenstemming met de plaatselijk geldende
voorschriften worden uitgevoerd.
• Gebruik de Soladin in overeenstemming met de
specificaties zoals aangegeven op pagina 30.
• In verband met de aanwezige hoge spanningen
mag u de behuizing nooit openen!
10
• Alle bedrading van de string dient te bestaan uit
kant-en-klare dubbelgeïsoleerde kabels die reeds
voorzien zijn van MultiContact connectors
(Ø4mm). Raadpleeg een installateur voor de
levering van dergelijke kabels. Assembleer deze
kabels niet zelf!
• Afhankelijk van de plaatselijk geldende
voorschriften kan het gebruik van een separate
DC schakelaar verplicht zijn.
Raadpleeg een installateur indien het zonneenergiesysteem niet aan de hierboven aangegeven
voorwaarden voldoet. In verband met de
aanwezigheid van hoge spanningen mogen
installatiewerkzaamheden
uitsluitend
worden
uitgevoerd door een daartoe gekwalificeerde
elektricien, die bekend is met de van toepassing
zijnde voorschriften en standaarden.
Benodigdheden voor installatie van de Soladin
Dit heeft u nodig voor de installatie van de Soladin:
• De Soladin (meegeleverd)
• Twee schroeven (met pluggen) om de Soladin te
monteren. Maximale diameter: 4,5 mm. Gebruik
montagematerialen die geschikt zijn voor het
gewicht van de Soladin.
• Gereedschappen om de schroeven en pluggen in
de wand te bevestigen (schroevendraaier,
boormachine, boortjes, een potlood)
GEBRUIKERSHANDLEIDING SOLADIN 600
Bepaal de plaats om de Soladin te installeren
Let hierbij op de volgende punten:
• De Soladin is uitsluitend geschikt voor gebruik
binnenshuis.
• Omgevingstemperatuur: -20 ... 50°C; (bij
temperaturen hoger dan 40°C wordt het
vermogen gereduceerd). Luchtvochtigheid: 090% niet condenserend.
• Installeer de Soladin in de nabijheid van een
stopcontact.
• Installeer de Soladin niet in een zeer stoffige of
vochtige omgeving.
• Bij installatie in de woning moet rekening worden
gehouden met een geringe geluidsproductie
tijdens de werking van het apparaat.
• De Soladin dient verticaal te worden gemonteerd
op een stevige, niet-resonerende wand.
• Het apparaat dient zodanig gemonteerd te
worden
dat
de
luchtstroom
door
de
ventilatieopeningen niet belemmerd wordt
• Rondom de Soladin moet een vrije ruimte van
minimaal 20 cm. worden aangehouden
• Bij installatie van meerdere Soladins moeten
deze naast elkaar gemonteerd worden, niet
boven elkaar. Minimale onderlinge afstand: 20
cm.
NEDERLANDS
Richtlijnen voor installatie
De Soladin is uitgerust met een beveiliging tegen
eilandbedrijf. Deze beveiliging schakelt de
uitgangsspanning van de omvormer onmiddellijk af
zodra de netspanning wegvalt. Europese landen
hanteren verschillende eisen ten aanzien van
eilandbeveiliging en teruglevering aan het
elektriciteitsnet in het algemeen
Controleer aan de hand van het artikelnummer op
de typenummerplaat of de versie van Soladin
geschikt is voor installatie op het plaatselijke
elektriciteitsnet. Zie tabel 1.
Sluit de Soladin nooit aan op een elektriciteitsnet
waarvoor het apparaat niet toegestaan is!
In Nederland mag per bestaande elektriciteitsgroep,
afgezekerd met een 16 Ampère zekering, maximaal
één Soladin worden aangesloten. In andere landen
zijn afwijkende voorschriften van toepassing.
Raadpleeg hierover de plaatselijk geldende
bepalingen.
U kunt aan de hand van de LED-indicatie
controleren of u de installatie juist heeft uitgevoerd.
Deze controle kan alleen worden uitgevoerd indien
er enige zonne-instraling is. Voer de installatie
daarom ook uitsluitend overdag uit.
Hoewel de Soladin tegen ompoling beveiligd is,
mogen de plus (+) en min (–) aansluiting van de
string niet verwisseld worden.
Installeer de Soladin zoals aangegeven in de
instructies op pagina 4 en 5.
Monitoring
De Soladin beschikt over een communicatie-uitgang
die u kunt aansluiten op de COM-port (RS232) van
een PC of laptop. Maak gebruik van de optionele
“Mastervolt PC–link” interface en kabel om deze
verbinding tot stand te brengen.
Artikelnummer Omschrijving
130391030
PC-link Soladin 600,
incl. communicatiiekabel, 2m
Artikel
nummer
130000600
130000630
130000650
130000660
Tabel 1
Omschrijving
Toegestaan voor gebruik in:
Soladin 600 230V/50Hz QNS - EU
Europa, met uitzondering van Duitsland en de
hieronder genoemde landen:
Italië
Spanje
Engeland
Soladin 600 230V/50Hz QNS - IT
Soladin 600 230V/50Hz QNS - ES
Soladin 600 230V/50Hz QNS - UK
11
NEDERLANDS
GEBRUIKERSHANDLEIDING SOLADIN 600
LED indicatie
De werking van de Soladin wordt weergegeven door
middel van een LED indicatie aan de voorzijde van
het apparaat. In normaal bedrijf knippert deze
indicatie geel: hoe langer de indicatie geel brandt,
hoe meer vermogen omgezet wordt.
Bij onvoldoende lichtinval van de zonnepanelen,
bijvoorbeeld ‘s nachts, schakelt de Soladin
automatisch uit. De LED-indicatie is dan ook uit.
Storingen
Zolang de LED-indicatie niet rood oplicht is er geen
sprake van een storing en werkt de Sunmaster
normaal.
Eventuele storingen worden door het apparaat zelf
gesignaleerd: de LED-indicatie licht rood op. Zie
tabel 2 voor de betekenis.
Raadpleeg een installateur indien u de storing niet
aan de hand van onderstaande tabel kunt
verhelpen.
OPMERKING: tijdens zonsopkomst en
zonsondergang detecteert de Sunmaster
een (te) lage spanning. Dit wordt aangeduid
door een rood knipperende LED-indicatie.
Dit is een normale situatie.
LED-indicatie
LED is uit
LED is uit
• • • • •
Geel knipperend
▬
▬
▬
Lang rood knipperend
Betekenis
Onvoldoende
instraling (’s nachts)
Geen vermogen van
de PV panelen
Normaal bedrijf
Controle van de
netspanning
Wat te doen?
Niets. De Soladin werkt normaal, maar krijgt onvoldoende energie uit
de PV panelen (bijvoorbeeld ’s nachts).
Raadpleeg een installateur indien de LED overdag uit is. Mogelijk is
de bedrading tussen de PV panelen en de Soladin defect. Controleer
op losse verbindingen en incorrecte polariteit (+ en – verwisseld).
Niets. De Soladin werkt normaal. Hoe langer de indicatie geel brandt,
hoe meer vermogen omgezet wordt.
Niets. Nadat de Soladin (weer) is aangesloten op het elektriciteitsnet
voert deze enkele testen uit. Dit kan maximaal 5 minuten duren.
Daarna wordt de Soladin ingeschakeld en gaat normaal werken.
Niets. Er wordt een systeemcontrole uitgevoerd tijdens zonsopkomst.
Dit duurt maximaal 15 sec. voordat de Soladin zichzelf inschakelt.
▬▬▬▬▬▬
Snel rood knipperend,
lang pulsen
▬▬▬▬▬▬▬▬
Constant rood
• • • • •
1x rood knipperend
Opstarten
•• •• •• ••
2x rood knipperend
Spanning van de PV
panelen te hoog
••• ••• •••
3x rood knipperend
•••• ••••
4x rood knipperend
••••• •••••
5x rood knipperend
••••••
6x rood knipperend
Netspanning te hoog
Steek de netstekker van de Soladin in het stopcontact. Controleer de
zekering in de meterkast.
Normale situatie tijdens zonsopkomst en zonsondergang.
Roep de hulp in van een installateur wanneer dit probleem zich
voordoet bij voldoende instraling van de PV-panelen.
Fout in het zonne-energiesysteem. Zijn de specificaties van de PV
panelen / string in overeenstemming met de Soladin?
Raadpleeg een installateur. Fout in het zonne-energiesysteem. Zijn
de specificaties van de PV panelen / string in overeenstemming met
de Soladin?
Controleer de netaansluiting.
Netspanning te laag
Controleer de netaansluiting.
Netfrequentie te
hoog of te laag
Interne temperatuur
te hoog
Controleer de netaansluiting.
•••••••
7x rood knipperend
NTC fout
Tabel 2
12
Geen netspanning
Spanning van de PV
panelen te laag
Luchtstroom door de Soladin mag niet geblokkeerd worden. Als het
probleem blijft aanhouden, haal dan de netstekker uit het stopcontact
en roep de hulp in van een installateur.
Roep de hulp van een installateur in voor reparatie van een defect
onderdeel in het veiligheidscircuit van de Soladin.
GEBRUIKERSHANDLEIDING SOLADIN 600
Bediening
Na het installeren zal de Soladin bij voldoende
zoninstraling inschakelen. De Soladin werkt geheel
automatisch; instellingen en bediening zijn daardoor
niet nodig.
De Soladin heeft geen aan/uit-schakelaar. Om de
Soladin uit te schakelen neemt u de netstekker uit
het stopcontact. Maak tijdens bedrijf van de Soladin
nooit de MultiContact connectoren los!
De Soladin is een onderhoudsvrij product. Gebruik
eventueel een zachte droge doek om de Soladin
schoon te maken. Gebruik nooit vloeibare, bijtende
of schurende middelen om de Soladin schoon te
maken.
Buiten bedrijf stellen
De Soladin kan alleen veilig buiten bedrijf worden
gesteld indien er geen vermogen wordt omgezet.
Neem daarom eerst de neststekker uit het
stopcontact alvorens de MultiContact stekkers los te
nemen. Pas dan kunt u de Soladin op veilige wijze
demonteren:
1. Druk op de lip voor ontgrendeling van de
bevestigingsbeugel.
2. Schuif de Soladin ongeveer 1 cm. omhoog.
3. Verwijder de Soladin van de muur.
NEDERLANDS
Garantiebepalingen
Mastervolt garandeert dat dit product is
geproduceerd volgens de wettelijk van toepassing
zijnde normen en bepalingen. Gedurende de
productie en voor aflevering zijn alle producten
uitvoerig getest en gecontroleerd. Wanneer niet
volgens de in deze handleiding gegeven
voorschriften, aanwijzingen en bepalingen wordt
gehandeld, kunnen beschadigingen ontstaan en/of
het apparaat zal niet aan de specificaties voldoen.
Een en ander kan inhouden dat de garantie komt te
vervallen
De garantietermijn is vijf jaar.
Aansprakelijkheid
Mastervolt kan niet aansprakelijk worden gesteld
voor:
• Eventuele fouten in bijbehorende handleiding en
de gevolgen daarvan,
• Ander gebruik geldend als niet conform de
bestemming van het product.
Verkorte specificaties Soladin 600 (zie pagina 30 voor uitgebreide specificaties)
Maximaal PV vermogen:
700 Wp
MPP spanningsbereik:
45-125 V DC
Maximale ingangsspanning U-oc bij -10°C:
155 V DC
Maximale MPP stroom:
8 A DC
PV paneel
36 cells
Uoc = 28V*
Umpp = 18V*
Vermogen
75 Wp
100 Wp
125 Wp
150 Wp
1 string
4 - 6 in serie
4 - 6 in serie
4 - 5 in serie
4 (5) in serie
2 strings parallel**
4 in serie
----
54 cells
Uoc = 32V*
Umpp = 27V*
75 Wp
100 Wp
125 Wp
150 Wp
175 Wp
3 - 4 in serie
3 - 4 in serie
3 - 4 in serie
3 - 4 in serie
3 - 4 in serie
3 - 4 in serie
3 in serie
----
72 cells
Uoc = 43V*
Umpp = 36V*
75 Wp
100 Wp
125 Wp
150 Wp
175 Wp
2 - 3 in serie
2 - 3 in serie
2 - 3 in serie
2 - 3 in serie
2 - 3 in serie
2 - 3 in serie
2 - 3 in serie
2 in serie
2 in serie
2 in serie
* Benadering van de werkelijke spanning; raadpleeg de specificaties van de producent
** Configuratie van 1 string is weergegeven. Met behulp van MultiContact koppelstukken kunt u twee strings
parallel schakelen. MultiContact bestelnummers: PV-AZS4 (plus) en PV-AZB4 (minus)
Tabel 3: Typische configuraties van PV-strings voor de Soladin 600
13
DEUTSCH
BETRIEBSANLEITUNG SOLADIN 600
Produktbeschreibung und Anwendung
Vielen Dank, dass Sie den Mastervolt Soladin 600
gewählt haben. Der Soladin 600, im weiteren Text
als “Soladin” bezeichnet, ist ein netzgekoppelter
Solar-Wechselrichter, der für die Umwandlung und
Rückleitung des durch die Photovoltaik-Module
erzeugten Stroms in das Versorgungsnetz
verwendet wird.
PV-Module und Strings
Ein
Solarsystem
besteht
aus
mehreren
Photovoltaik-(Solar-)Modulen, die im weiteren Text
als “PV-Module” bezeichnet werden. Die PV-Module
sind in Reihe geschaltet, um einen so genannten
“String” zu bilden. Diese Strings bestehen aus
einem Plus- (+) und einem Minus- (–) Anschluss,
die direkt an den Soladin angeschlossen werden
können. Die an diesen Strings vorhandenen
Spannungen sind nicht berührungssicher und
können nicht abgeschaltet werden.
Deshalb muss das Solarsystem den folgenden
Spezifikationen entsprechen:
Der Soladin ist mit weitreichenden Sicherheitsmerkmalen ausgestattet, um das sofortige
Ausschalten sicherzustellen, sobald der Netzstecker
aus der Wandsteckdose gezogen wird oder bei
einem Ausfall des öffentlichen Netzes.
Der Soladin ist nur für die Rückleitung des
Solarstroms in das öffentliche Netz geeignet, er
kann nicht als selbständiger Wechselrichter
eingesetzt werden.
• Maximale Leerlaufspannung des Strings bei der
niedrigsten möglichen Temperatur der PVModule: 155 VDC. Siehe Tabelle 3 für typische
Konfigurationen des Soladin.
• Doppelt isolierte PV-Verkabelung
Auspacken
Die Lieferung enthält die nachfolgenden Teile:
• den Soladin mit Montagebügel
• diese Betriebsanleitung
Prüfen Sie den Soladin nach dem Auspacken auf
mögliche Schäden. Verwenden Sie den Soladin
nicht, wenn er beschädigt ist. Wenn Sie Zweifel
haben, fragen Sie Ihren Lieferanten.
Sicherheit
• Installieren Sie den Soladin entsprechend den
Anweisungen in dieser Betriebsanleitung.
• Stellen Sie sicher, dass der Soladin während der
Installation nicht an das Netz angeschlossen ist.
Ziehen Sie dazu den Netzstecker aus der
Wandsteckdose.
• Anschlüsse
und
Sicherheitsvorkehrungen
müssen entsprechend den örtlich anwendbaren
Vorschriften erfolgen.
• Der Soladin muss in Übereinstimmungen mit den
Spezifikationen auf Seite 30 eingesetzt werden.
• Öffnen Sie niemals das Gehäuse, da hohe
Spannungen vorhanden sein können!
14
• Alle Kabel des Strings sollten doppelt isoliert sein
und müssen mit vormontierten MultiContactSteckern (Ø4mm) versehen sein. Nehmen Sie
Kontakt
mit
einem
Fachmann
zwecks
Verfügbarkeit solcher Kabel-Baugruppen auf.
Montieren Sie diese nicht selbst!
• Je nach den örtlich anwendbaren Vorschriften
kann die Verwendung eines zusätzlichen
Gleichstromschalters obligatorisch sein.
Nehmen Sie Kontakt mit einem Fachmann auf,
wenn das Solarsystem nicht den vorstehend
aufgeführten Vorschriften entspricht. Aufgrund
möglicher hoher Spannungen darf eine Installation
und Modifizierung nur durch einen qualifizierten
Elektriker ausgeführt werden, der mit den
anwendbaren Vorschriften und Standards vertraut
ist.
Sie benötigen die nachfolgenden Teile
Stellen Sie sicher, dass Sie alle für die Installation
des Soladin erforderlichen Teile haben:
• Soladin (enthalten)
• zwei Schrauben (mit Dübeln) zur Montage des
Soladin. Maximaler Durchmesser: 4,5 mm.
Verwenden Sie Montagematerialien, die für das
Gewicht des Soladin geeignet sind.
• Werkzeuge zur Befestigung der Schrauben /
Bolzen mit den Dübeln in der Wand
(Schraubenzieher, Bohrmaschine, ein Satz
Bohrer, ein Bleistift).
BETRIEBSANLEITUNG SOLADIN 600
Auswahl des Installationsortes
Beachten Sie während der Installation die folgenden
Bedingungen:
• Der Soladin ist nur für eine Verwendung in
Innenräumen geeignet.
• Umgebungstemperatur:
-20
...
50°C;
(Leistungsverlust
oberhalb
von
40°C),
Luftfeuchtigkeit: 0-90% nicht kondensierend
• Installieren Sie den Soladin in der Nähe einer
Wandsteckdose.
• Installieren Sie den Soladin nicht in einer
Umgebung mit hoher Staubentwicklung oder
hoher Luftfeuchtigkeit.
• Wenn der Soladin in unmittelbarer Nähe von
Wohnbereichen installiert wird, beachten Sie,
dass er bei dem Betrieb einen leichten
Geräuschpegel erzeugt.
• Montieren Sie den Soladin vertikal an einer
festen, nicht schwingenden Wand.
• Montieren Sie den Soladin so, dass keine
Behinderung
des
Luftstroms
durch
die
Lüftungsöffnungen erfolgt.
• Es dürfen sich in einem Abstand von 20 cm um
den Soladin herum keine Gegenstände befinden.
• Mehrere Soladin-Geräte müssen nebeneinander,
nicht übereinander montiert werden.
Teilenummer
130000600
130000630
130000650
130000660
Tabelle 1
DEUTSCH
Installationsanweisungen
Der Soladin ist mit einer so genannten
“Sicherheitsvorrichtung
zur
Vermeidung
von
Inselbildung” ausgestattet. Diese stellt das sofortige
Abschalten bei einem Netzausfall sicher. In den
europäischen Ländern gibt es unterschiedliche
Vorschriften für Geräte zur Vermeidung von
Inselbildung und Energierückeinspeisung in das
Versorgungsnetz.
Prüfen
Sie
anhand
der
Teilenummer auf dem Typenschild, ob die SoladinVersion für den Anschluss an das örtliche
Versorgungsnetz geeignet ist. Siehe Tabelle 1.
Schließen Sie den Soladin nie an ein
Versorgungsnetz an, das für die Verwendung des
Gerätes nicht geeignet ist!
In den Niederlanden darf nur ein Soladin an einen
vorhandenen Abzweig-Stromkreis angeschlossen
werden, der mit 16 Ampere abgesichert ist. In
anderen Ländern treffen andere Beschränkungen
zu. Bitte beachten Sie diesbezüglich die örtlichen
Vorschriften.
Sie können während der Installation mittels der
LED-Anzeige kontrollieren, ob die Installation
ordnungsgemäß
durchgeführt
wurde.
Diese
Kontrolle
kann
nur
bei
ausreichender
Sonneneinstrahlung erfolgen. Deshalb sollte die
Installation nur während des Tages durchgeführt
werden.
Obwohl der Soladin gegen Umpolung geschützt ist,
sollten Plus (+) und Minus (–) der Solaranschlüsse
nicht vertauscht werden.
Installieren Sie das Gerät entsprechend
Anweisungen auf Seite 4 und 5.
den
Beschreibung
Zulässige Verwendung in den folgenden Ländern:
Soladin 600 230V/50Hz QNS - EU
Europa, mit Ausnahme von Deutschland und den
nachstehend aufgeführten Ländern
Italien
Spanien
England
Soladin 600 230V/50Hz QNS - IT
Soladin 600 230V/50Hz QNS - ES
Soladin 600 230V/50Hz QNS - UK
15
DEUTSCH
BETRIEBSANLEITUNG SOLADIN 600
LED-Anzeige
Der Betriebsmodus des Soladin wird durch eine
LED-Anzeige auf der Vorderseite des Gehäuses
angezeigt. Bei normalem Betrieb blinkt diese gelb:
je länger die LED gelb leuchtet, umso mehr Strom
wird umgewandelt.
Fehler
Solange die LED-Anzeige nicht rot leuchtet, wird
kein Fehler festgestellt: der Soladin arbeitet normal.
Wenn ein Fehler auftritt, wird dieser von dem Gerät
selbst festgestellt: die LED-Anzeige leuchtet rot.
Siehe Tabelle 2.
Nehmen Sie Kontakt mit einem Fachmann auf,
wenn Sie das Problem nicht mittels der
nachstehenden Tabelle selbst beheben können.
Wenn
die
Einstrahlung
der
PV-Module
unzureichend ist, beispielsweise bei Nacht, schaltet
der Soladin automatisch ab. Wenn er abgeschaltet
ist, ist die LED-Anzeige aus.
Anzeige der LED
LED ist aus
Bedeutung
Unzureichende
Einstrahlung
Kein Strom von den
PV-Modulen
LED ist aus
• • • • •
Gelbes Blinken
▬
▬
▬
Langsames Blinken
lange rote Impulse
▬▬▬▬▬▬
Schnelles Blinken
lange rote Impulse
▬▬▬▬▬▬▬▬
Ununterbrochen rot
• • • • •
Rotes Blinken 1 Mal
Normaler Betrieb
•• •• •• ••
Rotes Blinken 2 Mal
••• ••• •••
Rotes Blinken 3 Mal
•••• ••••
Rotes Blinken 4 Mal
••••• •••••
Rotes Blinken 5 Mal
••••••
Rotes Blinken 6 Mal
Solarspannung zu
hoch
AC-Netzspannung zu
hoch
AC-Netzspannung zu
niedrig
Netzfrequenz zu
hoch oder zu niedrig
Innentemperatur zu
hoch
•••••••
Rotes Blinken 7 Mal
NTC Fehler
Tabelle 2
16
Wiedereinschalt-Zeit
Neustart
Zeitverzögerung
Keine Netzspannung
Solarspannung zu
niedrig
ANMERKUNG: Bei Sonnenaufgang oder
Sonnenuntergang
wird
eine
niedrige
Solarspannung vom Soladin ermittelt und
durch ein rotes Blinken der LED-Anzeige
angezeigt. Dies ist eine normale Situation.
Was ist zu tun?
Nichts. Normaler Betrieb des Soladin, aber die Sonneneinstrahlung
auf den PV-Modulen ist unzureichend (beispielsweise bei Nacht).
Konsultieren Sie einen Fachmann, wenn die LED-Anzeige während
des Tages aus ist.
Möglicherweise sind die Kabel zwischen den PV-Modulen und dem
Soladin defekt. Prüfen Sie auf lose Anschlüsse oder inkorrekte
Polarität.
Nichts. Normaler Betrieb des Soladin. Je schneller die Anzeige blinkt,
umso mehr Strom wird umgewandelt.
Nichts. Wenn der Soladin an das AC-Netz (wieder) angeschlossen
wird, kontrolliert er die Qualität des AC-Netzes bevor er mit dem
normalen Betrieb beginnt. Dies kann bis zu 5 Minuten dauern.
Nichts. Es wird bei Sonnenaufgang eine Systemprüfung
durchgeführt. Es kann bis zu 15 Sekunden dauern, bevor der Soladin
wieder den normalen Betrieb aufnimmt.
Stecken Sie den Netzstecker des Soladin in die Wandsteckdose;
prüfen Sie die Sicherung im Zählerschrank.
Normaler Zustand bei Sonnenaufgang und Sonnenuntergang.
Fragen Sie einen Fachmann, wenn das Problem weiter besteht,
obwohl die Sonneneinstrahlung auf die PV-Module ausreichend ist.
Fehler in der PV-Installation. Entsprechen die Spezifikationen der
PV-Module dem Soladin?
Fragen Sie einen Fachmann. Fehler in der PV-Installation.
Entsprechen die Spezifikationen der PV-Module dem Soladin?
Prüfen Sie den Netzanschluss.
Prüfen Sie den Netzanschluss.
Prüfen Sie den Netzanschluss.
Die Belüftung des Soladin darf nicht behindert werden. Wenn das
Problem weiter besteht, schalten Sie den Soladin aus, indem Sie den
Netzstecker aus der Wandsteckdose ziehen und konsultieren Sie
einen Fachmann.
Beauftragen Sie einen Fachmann mit der Reparatur eines defekten
Sicherheitsteils im Soladin.
BETRIEBSANLEITUNG SOLADIN 600
Betrieb
Nach der Installation schaltet sich der Soladin
automatisch an, wenn die Sonneneinstrahlung
ausreichend ist. Der Soladin arbeitet automatisch:
eine Einstellung oder Bedienung sind nicht
erforderlich.
Der Soladin hat keinen AN/AUS-Schalter; ziehen
Sie den Netzstecker aus der Steckdose, um ihn
auszuschalten. Entfernen Sie die MultiContactStecker nicht während des Betriebs des Soladin!
Eine spezifische Wartung ist nicht erforderlich.
Wenn erforderlich, verwenden Sie ein weiches
Tuch, um den Soladin zu reinigen. Verwenden Sie
niemals Flüssigkeiten, Säuren oder Scheuermittel.
Außerbetriebnahme
Ziehen Sie zuerst den Netzstecker aus der
Wandsteckdose, bevor Sie die MultiContact-Stecker
entfernen.
Jetzt kann der Soladin sicher demontiert werden:
1. Drücken Sie auf die untere Sicherung des
Montagebügels, um die Montagesperre zu
lösen.
2. Heben Sie den Soladin ungefähr 1 cm an.
3. Nehmen Sie den Soladin gerade von der Wand.
DEUTSCH
Garantiebedingungen
Mastervolt garantiert, dass dieses Produkt
entsprechend den rechtlich anwendbaren Standards
und Vorschriften hergestellt wurde. Während der
Herstellung und vor der Auslieferung werden alle
Produkte umfassenden Tests und Kontrollen
unterzogen. Wenn Sie nicht entsprechend den
Vorschriften, Anweisungen und Bedingungen in
dieser Betriebsanleitung vorgehen, kann dies zu
Schäden führen oder das Produkt erfüllt die
Spezifikationen nicht. Dies bedeutet, dass die
Garantie ungültig werden kann.
Der Garantiezeitraum beträgt 5 Jahre.
Haftung
Mastervolt ist nicht haftbar für:
• mögliche
Fehler
in
der
enthaltenen
Betriebsanleitung und deren Folgen.
• eine Verwendung, die nicht dem Zweck des
Produkts entspricht.
PV-Module
36 Zellen
Uoc = 28V*
Umpp = 18V*
Leistung
75 Wp
100 Wp
125 Wp
150 Wp
Ein String
4 - 6 in Reihe
4 - 6 in Reihe
4 - 5 in Reihe
4 (5) in Reihe
Zwei Strings parallel geschaltet**
4 in Reihe
----
54 Zellen
Uoc = 32V*
Umpp = 27V*
75 Wp
100 Wp
125 Wp
150 Wp
175 Wp
3 - 4 in Reihe
3 - 4 in Reihe
3 - 4 in Reihe
3 - 4 in Reihe
3 - 4 in Reihe
3 - 4 in Reihe
3 in Reihe
----
72 Zellen
Uoc = 43V*
Umpp = 36V*
75 Wp
100 Wp
125 Wp
150 Wp
175 Wp
2 - 3 in Reihe
2 - 3 in Reihe
2 - 3 in Reihe
2 - 3 in Reihe
2 - 3 in Reihe
2 - 3 in Reihe
2 - 3 in Reihe
2 in Reihe
2 in Reihe
2 in Reihe
* Ungefährer Wert; siehe Spezifikationen des Herstellers
** Die Konfiguration für einen String ist angegeben.
Tabelle 3: Typische String-Konfiguration für den Soladin 600
17
FRANÇAIS
Description de l'appareil et application
Nous vous félicitons d'avoir choisi le Soladin 600
Mastervolt. Le Soladin 600, mentionné ci-après en
tant que “Soladin”, est un convertisseur solaire relié
au réseau électrique, utilisé pour la conversion et le
renvoi au secteur de l'énergie générée par les
modules photovoltaïques.
Le Soladin possède des caractéristiques de sécurité
étendues permettant de s'assurer qu'il s'éteindra
immédiatement dès que la prise CA sera retirée de
la prise de courant murale ou que le réseau
électrique sera coupé ou présentera des
défaillances.
MODE D’EMPLOI SOLADIN 600
Modules photovoltaïques et chaînes
Un système solaire est composé de plusieurs
modules photovoltaïques (solaires), mentionnés ciaprès en tant que “modules PV”. Ces modules PV
sont connectés en série pour former ce qui est
appelé une “chaîne”. Ces chaînes se composent
d'une connexion plus (+) et d'une connexion moins
(–) qui peuvent être directement connectées au
Soladin. Les tensions présentes sur ces chaînes ne
sont pas sans danger pour l'utilisateur en cas de
contact et ne peuvent être coupées.
Le système solaire doit donc répondre aux
spécifications suivantes :
Le Soladin n'est pas un convertisseur autonome, il
n'est conçu que pour le renvoi de l'énergie solaire
au réseau électrique.
• Tension maximum des chaînes en circuit ouvert
aux températures les plus basses possibles des
modules PV : 155 VCC. Pour connaître les
configurations types du Soladin, se référer au
Tableau 3.
Déballage de l'appareil
La livraison comprend :
• Câblage PV à double isolation
• Le Soladin avec crochet de montage
• Ce manuel utilisateur
Après déballage de l'appareil, vérifier que le Soladin
n'a pas subit de dommages éventuels. S'il était
endommagé, ne pas utiliser le Soladin. En cas de
doute, contacter votre fournisseur.
Mesures de sécurité
• Installer le Soladin conformément aux directives
spécifiées dans ce manuel.
• Pendant l'installation, assurez-vous que le
Soladin n'est pas connecté au réseau électrique.
Il suffit de retirer la prise CA de la prise de
courant murale.
• Toutes les câbles de la chaîne doivent être à
double isolation et doivent être équipés de
connecteurs
MultiContact
(Ø4mm)
pré
assemblés. Consulter un installateur pour
connaître la disponibilité de tels câbles. Ne
jamais les assembler vous-même !
• En fonction des dispositions réglementaires
locales en vigueur, l'utilisation d'un interrupteur
CC supplémentaire peut être exigé.
Si le système solaire n'est pas conforme aux
conditions mentionnées ci-dessus, contacter un
installateur. En raison de tensions élevées
possibles, l'installation et les modifications
éventuelles de l'appareil ne doivent être effectuées
que par un électricien qualifié, ayant une
connaissance
approfondie
des
dispositions
réglementaires et normes en vigueur.
• Toutes les connexions et mesures de sécurité
doivent être effectuées conformément aux
dispositions réglementaires locales en vigueur.
Ce dont vous avez besoin pour installer le
Soladin
Assurez-vous d'avoir toutes les pièces dont vous
avez besoin pour installer le Soladin :
• Le Soladin doit être utilisé conformément aux
spécifications mentionnées page 30.
• Le Soladin (compris)
• Ne jamais ouvrir le boîtier, des tensions élevées
pouvant être présentes à l'intérieur !
• Deux vis (avec chevilles) pour monter le Soladin.
Diamètre maximum : 4,5 mm. Utiliser les pièces
de montage adaptées pour supporter le poids du
Soladin.
• Outils pour fixer les vis/boulons avec chevilles
dans le mur (tournevis, perceuse, un jeu de
mèches, un crayon).
18
MODE D’EMPLOI SOLADIN 600
Choix de l'emplacement pour installation
Pendant l'installation, suivre les directives
suivantes :
• Le Soladin n'est conçu que pour une utilisation à
l'intérieur.
• Température ambiante : de –20°C à +50°C ;
(déclassement de puissance si la température
excède
40°C),
Humidité :
0-90%,
non
condensante.
• Installer le Soladin à proximité d'une prise
murale.
• Ne pas installer le Soladin dans des endroits où il
y a beaucoup de poussière ou dans des endroits
humides.
• Si le Soladin est installé à proximité immédiate
d'espaces habitables, tenez compte du fait qu'il
produit un faible niveau sonore lorsqu'il
fonctionne.
• Monter le Soladin verticalement sur un mur
solide, sans résonance.
• Monter le Soladin de façon à ce qu'il n'obstrue
pas la circulation d'air par les orifices de
ventilation.
• Aucun objet ne doit être placé à moins de 20 cm
du Soladin.
• Si vous installez plusieurs Soladins, ils doivent
être installés l'un à côté de l'autre et non l'un sur
l'autre.
Référence
130000600
Description
Soladin 600 230V/50Hz QNS - EU
130000630
130000650
130000660
Tableau 1
Soladin 600 230V/50Hz QNS - IT
Soladin 600 230V/50Hz QNS - ES
Soladin 600 230V/50Hz QNS - UK
FRANÇAIS
Directives d'installation
Le Soladin est équipé d'un dispositif de sécurité
appelé “dispositif de protection contre l'îlotage”. Ce
dispositif permet de garantir que le Soladin s'éteint
immédiatement en cas de défaillance du réseau
électrique. Les pays européens ont des dispositions
réglementaires différentes en ce qui concerne les
dispositifs “de protection contre l'îlotage” et
l'alimentation en énergie vers le réseau, en général.
Vérifier sur la référence située sur la plaque
d'identification du Soladin, si la version du Soladin
peut être connectée au réseau électrique local. Se
référer au Tableau 1.
Ne jamais connecter le Soladin à un réseau
électrique qui n'est pas adapté à l'utilisation de
l'appareil !
Aux Pays-Bas, un seul Soladin peut être connecté à
un circuit électrique terminal existant, dont
l'ampérage est de 16A. Dans d'autres pays,
différentes mesures de restriction sont appliquées.
Renseignez-vous
sur
les
dispositions
réglementaires locales à ce sujet.
Pendant l'installation, vous pouvez vérifier à l'aide
du voyant DEL si l'installation est effectuée
correctement. Cette vérification ne peut avoir lieu
que s'il y a de la radiation solaire. L'installation ne
devrait donc être effectuée que pendant la journée.
Bien que le Soladin soit protégé contre une polarité
incorrecte, le plus (+) et le moins (–) des
connexions solaires ne doivent pas être inversés.
Installer l'appareil conformément aux directives
mentionnées pages 4 et 5.
Utilisation autorisée en :
Europe, à l'exception de l'Allemagne et des pays
mentionnés ci-dessous
Italie
Espagne
UK
19
FRANÇAIS
MODE D’EMPLOI SOLADIN 600
Voyant DEL
Le mode opérationnel du Soladin s'affiche au
moyen d'un voyant DEL situé à l'avant du boîtier.
Lorsque l'appareil fonctionne normalement, ce
voyant clignote en jaune : plus le voyant DEL
clignote en jaune, plus il y a d'énergie convertie.
Si la radiation des modules PV est insuffisante, de
nuit,
par
exemple,
le
Soladin
s'éteint
automatiquement. Lorsqu'il est éteint, le voyant DEL
est éteint.
Indication voyant DEL
DEL éteinte
DEL éteinte
Signification
radiation
insuffisante
Pas d'énergie
provenant des
modules PV
• • • • •
Clignote en jaune
▬
▬
▬
Clignotement faible,
longues impulsions en
rouge
▬▬▬▬▬▬
Clignotement rapide,
longues impulsions en
rouge
▬▬▬▬▬▬▬▬
Rouge ininterrompu
• • • • •
Clignotement en rouge 1
fois
Fonctionnement
normal
Temps de re
fermeture
•• •• •• ••
Clignotement en rouge 2
fois
••• ••• •••
Clignotement en rouge 3
fois
•••• ••••
Clignotement en rouge 4
fois
••••• •••••
Clignotement en rouge 5
fois
••••••
Clignotement en rouge 6
fois
•••••••
Clignotement en rouge 7
fois
Tension solaire trop
élevée
Tableau 2
20
Pannes
Si le voyant DEL ne clignote pas en rouge, cela
signifie qu'aucune panne n'est détectée : le Soladin
fonctionne normalement. Si une erreur se produit,
elle est détectée par l'appareil : le voyant DEL
devient rouge. Se référer au Tableau 2.
Si vous ne pouvez pas résoudre le problème à
l'aide du tableau ci-dessous, consulter un
installateur.
NOTE : au lever du jour ou au coucher du
soleil, le Soladin détecte une tension solaire
basse, celle-ci étant indiquée par un voyant
DEL clignotant en rouge, ce qui est normal.
Que faire ?
Rien. Le Soladin fonctionne normalement, mais la radiation des
modules PV est insuffisante (de nuit, par exemple)
Si le voyant DEL est éteint de jour, consulter un installateur.
Il est probable que le câblage entre les modules PV et le Soladin soit
défectueux. Vérifier si des connexions sont desserrées ou si la
polarité est incorrecte.
Rien. Le Soladin fonctionne normalement. Plus le voyant clignote
vite, plus il y a d'énergie convertie.
Rien. Après re(connexion) du Soladin au réseau CA, il vérifie la
qualité du réseau CA avant de fonctionner à nouveau normalement.
Cette vérification peut prendre jusqu'à 5 minutes.
Délai de
redémarrage
Rien. Une vérification du système est effectuée au lever du jour.
Cette vérification peut durer jusqu'à 15 secondes avant que le
Soladin commence à fonctionner normalement.
Pas de tension
réseau
Tension solaire trop
basse
Brancher la prise CA du Soladin dans la prise murale ; vérifier le
fusible dans l'armoire du compteur.
Conditions normales au lever du jour et au coucher du soleil.
Si le problème persiste, alors que la radiation des modules PV est
suffisante, consulter un installateur.
Erreur dans l'installation des modules PV. Les spécifications des
modules solaires sont-elles conformes au Soladin ?
Consulter un installateur. Erreur dans l'installation des modules PV.
Les spécifications des modules PV sont-elles conformes au Soladin ?
Tension CA réseau
trop élevée
Vérifier la connexion au réseau.
Tension CA réseau
trop basse
Vérifier la connexion au réseau.
Fréquence réseau
trop élevée ou trop
basse
Température
interne trop élevée
Vérifier la connexion au réseau.
Erreur CTN
La circulation d'air du Soladin ne doit pas être obstruée. Si le
problème persiste, éteindre le Soladin en retirant la prise CA de la
prise murale et consulter un installateur.
Consulter un installateur pour réparation d'un dispositif de sécurité
défectueux du Soladin.
MODE D’EMPLOI SOLADIN 600
Fonctionnement
Après
installation,
le
Soladin
s'allumera
automatiquement si la radiation solaire est
suffisante. Le Soladin fonctionne automatiquement :
il n'est pas nécessaire de le régler ou de le
déclencher.
Le Soladin n'est pas équipé d'un interrupteur
ON/OFF ; retirer la prise CA de la sortie CA pour
l'éteindre. Ne pas déconnecter les prises
MultiContact lors du fonctionnement du Soladin !
Aucun entretien particulier n'est nécessaire. Si
besoin est, utiliser un chiffon doux et propre pour le
nettoyer. Ne jamais utiliser de liquides, d'acides
et/ou de tampons à récurer.
Mise hors service
Avant de déconnecter les prises MultiContact,
retirer en premier la prise CA de la prise murale.
Le Soladin peut à présent être démonté de façon
sécurisée :
1. Pousser sur la languette inférieure du crochet
de montage pour dégager le verrou de montage.
2. Soulever le Soladin vers le haut à environ 1 cm.
3. Dégager le Soladin du mur.
FRANÇAIS
Conditions de garantie
Mastervolt garantit que l'appareil a été fabriqué
conformément aux normes et dispositions légales
en vigueur. Au cours de leur fabrication et avant leur
livraison, tous nos produits sont rigoureusement
testés et contrôlés. Si vous ne vous conformez pas
aux dispositions, directives et conditions du présent
manuel
utilisateur,
l'appareil
pourrait
être
endommagé et/ou ne pas répondre à ses
spécifications, ce qui annulerait la garantie.
La durée de la garantie est de cinq ans.
Responsabilité
Mastervolt ne peut être tenu pour responsable :
• D'erreurs éventuelles contenues dans ce manuel
et des conséquences pouvant en résulter.
• D'une utilisation non conforme à l'utilisation
première du produit.
Module PV
36 cellules
Uoc = 28V*
Umpp = 18V*
Puissance
75 Wp
100 Wp
125 Wp
150 Wp
Une chaîne
4 - 6 en série
4 - 6 en série
4 - 5 en série
4 (5) en série
Deux chaînes en parallèle**
4 en série
----
54 cellules
Uoc = 32V*
Umpp = 27V*
75 Wp
100 Wp
125 Wp
150 Wp
175 Wp
3 - 4 en série
3 - 4 en série
3 - 4 en série
3 - 4 en série
3 - 4 en série
3 - 4 en série
3 en série
----
72 cellules
Uoc = 43V*
Umpp = 36V*
75 Wp
100 Wp
125 Wp
150 Wp
175 Wp
2 - 3 en série
2 - 3 en série
2 - 3 en série
2 - 3 en série
2 - 3 en série
2 - 3 en série
2 - 3 en série
2 en série
2 en série
2 en série
* Valeur approximative ; se référer aux spécifications du fabricant.
** Configuration donnée pour une chaîne.
Tableau 3 : Configurations de chaînes types pour Soladin 600
21
ESPAÑOL
MANUAL DE UTILIZACION SOLADIN 600
Descripción del producto y aplicaciones
Felicidades por elegir el Soladin 600 de Mastervolt.
El Soladin 600, al cual nos referiremos en adelante
como “Soladin”, es un inversor solar de conexión a
red que se utiliza para la conversión y la
realimentación hacia la red de distribución eléctrica
de la energía generada por módulos fotovoltaicos.
El Soladin va equipado con amplias medidas de
seguridad para asegurar que se desactiva
inmediatamente en cuanto se extrae el enchufe de
CA de la toma de corriente o la red pública deja de
funcionar.
El Soladin sólo es adecuado para la realimentación
de energía solar hacia la red pública, no como
inversor independiente.
Desembalado
El paquete de entrega se compone de las partes
siguientes:
• El Soladin con su soporte
• Este manual del usuario
Una vez desembalado, compruebe que el Soladin
no ha sufrido ningún tipo de daño. No utilice el
Soladin si está estropeado. Si tiene alguna duda,
póngase en contacto con su proveedor.
Seguridad
• Instale el Soladin de acuerdo con
instrucciones contenidas en este manual.
las
• Asegúrese de que el Soladin está desconectado
de la red durante la instalación. Esto se puede
llevar a cabo extrayendo el enchufe de CA de la
toma de corriente.
• Las conexiones y las cuestiones de seguridad se
deben llevar a cabo de acuerdo con la normativa
local aplicable
• El Soladin se debe utilizar de acuerdo con las
especificaciones que se enuncian en la página
30
• Nunca abra la carcasa, ¡pueden existir altos
voltajes en su interior!
22
Módulos FV y cadenas
Un sistema solar se compone de varios módulos
fotovoltaicos (solares), a los cuales nos referiremos
en adelante como “módulos FV”. Los módulos FV
están conectados en serie para formar lo que se
denomina una “cadena”. Estas cadenas se
componen de una conexión positiva (+) y una
negativa (–) que se puede conectar directamente al
Soladin. Es peligroso entrar en contacto con la
tensión presente en estas cadenas, la cual además
no se puede desactivar
Por consiguiente, el sistema solar debe cumplir con
las especificaciones siguientes:
• Tensión máxima de la cadena en circuito abierto
a la temperatura más baja posible de los
módulos FV: 155 V CC. Consulte en la tabla 3
las configuraciones típicas para el Soladin.
• Cableado FV con aislamiento doble
• Todos los cables de la cadena deben tener
aislamiento doble y deben ir equipado de
conectores MultiContact (Ø4mm). Consulte a un
instalador acerca de la disponibilidad de dichos
ensamblaje de cables. No proceda a su
ensamblaje usted mismo.
• La utilización de un conmutador de CC adicional
puede ser obligatoria dependiendo de la
normativa local aplicable
Póngase en contacto con un instalador si el sistema
solar no cumple con las estipulaciones
mencionadas más arriba. Debido a los altos voltajes
que se pueden dar, la instalación y la modificación
sólo pueden ser llevadas a cabo por un electricista
cualificado familiarizado con los reglamentos y la
normativa aplicables.
Cosas que necesita para instalar el Soladin
Asegúrese de que cuenta con todas las piezas que
necesita para instalar el Soladin:
• El Soladin (que se incluye)
• Dos tornillos (con tacos) para montar el Soladin.
Diámetro máximo: 4,5 mm. Use materiales de
montaje adecuados para soportar el peso del
Soladin.
• Herramientas para fijar los tornillos o pernos con
tacos en la pared(destornillador, taladro, un
juego de brocas, un lápiz)
MANUAL DE UTILIZACION SOLADIN 600
Selección de la ubicación donde instalarlo
Observe las estipulaciones siguientes durante la
instalación:
• El Soladin es adecuado sólo para su uso en
interiores.
• Temperatura ambiental: -20 ... 50 °C; (reducción
de potencia por encima de los 40 °C), humedad:
0 - 90% sin condensación
• Instale el Soladin en las proximidades de la toma
de corriente
• No instale el Soladin en ambientes con gran
cantidad de polvo o humedad.
• Si el Soladin se instala en la proximidad
inmediata de zonas habitables, tenga en cuenta
que produce un ligero nivel de ruido cuando está
en funcionamiento.
• Monte el Soladin en posición vertical en una
pared sólida y que no produzca resonancias.
• Monte el Soladin de forma que se evite la
obstrucción del flujo de aire a través de las
aberturas de ventilación
• No se deben situar objetos a una distancia de 20
cm alrededor del Soladin.
• Se pueden montar varios Soladin uno junto al
otro, no uno encima del otro.
ESPAÑOL
Instrucciones de instalación
El Soladin va equipado con lo que se denomina
“dispositivo de seguridad para evitar la formación de
islas”. Asegura la desconexión inmediata en caso
de fallo de la red. Los países europeos poseen
diversas normativas respecto a los dispositivos para
evitar la formación de islas y el suministro de
energía de retorno hacia la red de distribución de
energía eléctrica en general. Compruebe el número
de pieza que figura en la placa que indica el número
de tipo para saber si la versión del Soladin es
adecuada para estar conectada a la red de
distribución de energía eléctrica local. Consulte la
tabla 1.
Nunca conecte el Soladin a una red de distribución
de energía eléctrica que no sea adecuada para el
uso del aparato.
En Holanda sólo se puede conectar un Soladin a un
circuito de bifurcación de alimentación eléctrica
existente que vaya equipado con fusibles de 16 A.
En otros países, serán de
aplicación otras
restricciones. Por favor, consulte la normativa local
en lo referente a este tema.
Durante la instalación, puede comprobar mediante
el indicador luminoso si se está procediendo
correctamente. Dicha comprobación sólo se puede
llevar a cabo cuando se está produciendo una
irradiación suficiente. Por consiguiente, la
instalación se debería realizar sólo durante el día.
A pesar de que el Soladin esté protegido contra la
conexión incorrecta de la polaridad, no se deben
intercambiar las conexiones positiva (+) y negativa
(–).
Instale el producto de acuerdo con las instrucciones
contenidas en las páginas 4 y 5.
Número de
pieza
130000600
130000630
130000650
130000660
Tabla 1
Descripción
Se puede utilizar en:
Soladin 600 230 V / 50 Hz QNS - UE
Europa, excepto Alemania y los países mencionados
más abajo
Italia
España
Inglaterra
Soladin 600 230 V / 50 Hz QNS - IT
Soladin 600 230 V / 50 Hz QNS - ES
Soladin 600 230 V / 50 Hz QNS - UK
23
ESPAÑOL
MANUAL DE UTILIZACION SOLADIN 600
Indicador luminoso
El modo de funcionamiento del Soladin se visualiza
por medio de un indicador luminoso situado en la
parte delantera de la carcasa. En funcionamiento
normal parpadea una luz amarilla: cuando la
iluminación amarilla del indicador luminoso es más
larga significa que se está convirtiendo más
energía.
Fallos
Mientras el indicador luminoso se ilumine en rojo no
se detecta ningún fallo: el Soladin se encuentra
funcionando con normalidad. Si se produce un
error, el propio aparato es capaz de detectarlo: se
ilumina el indicador luminoso en rojo. Consulte la
tabla 2.
Consulte a un instalador si no puede resolver el
problema mediante la tabla de más abajo.
Si la irradiación de los módulos FV es insuficiente,
por ejemplo durante la noche, el Soladin se
desactiva
automáticamente.
Cuando
está
desactivado, el indicador luminoso está apagado.
Indicación del
indicador luminoso
El indicador luminoso
está apagado
El indicador luminoso
está apagado
• • • • •
Parpadeo en amarilla
Significado
¿Qué hacer?
Irradiación
insuficiente
Nada. El Soladin funciona con normalidad, pero la irradiación de los
módulos FV es insuficiente (por ejemplo durante las horas nocturnas)
No llega energía
desde los módulos
FV
Consulte a un instalador si el indicador luminoso está apagado
durante las horas diurnas.El cableado entre los módulos FV y el
Soladin puede ser defectuoso. Compruebe que no existen
conexiones sueltas o polaridades incorrectas.
Nada. El Soladin se encuentra funcionando con normalidad. Cuanto
más rápido es el parpadeo del indicador significa que se está
convirtiendo más energía
Nada. Tras la (re)conexión del Soladin a la red de CA, éste
comprueba la calidad de la red antes de empezar a funcionar con
normalidad. Esto puede durar hasta 5 minutos
Nada. Se lleva a cabo una comprobación del sistema durante la
salida del sol. Esto puede durar hasta 15 segundos antes de que el
Soladin empiece a funcionar con normalidad.
Conecte el enchufe de CA del Soladin en la toma de corriente;
compruebe el fusible del armario de contadores.
Condición normal durante la salida y la puesta de sol
Consulte a un instalador si el problema continúa mientras la
irradiación de los módulos FV es suficiente.
Error de la instalación FV. ¿Las especificaciones de los módulos
solares se corresponden con el Soladin?
Consulte a un instalador. Error de la instalación FV. ¿Las
especificaciones de los módulos solares se corresponden con el
Soladin?
Compruebe la conexión con la red.
Funcionamiento
normal
▬
▬
▬
Impulsos de parpadeo
rojo lentos y largos
▬▬▬▬▬▬
Impulsos de parpadeo
rojo rápidos y largos
▬▬▬▬▬▬▬▬
Luz roja constante
• • • • •
La luz roja parpadea 1
vez
Tiempo de
reconexión
•• •• •• ••
La luz roja parpadea 2
veces
••• ••• •••
La luz roja parpadea 3
veces
•••• ••••
La luz roja parpadea 4
veces
••••• •••••
La luz roja parpadea 5
veces
••••••
La luz roja parpadea 6
veces
•••••••
La luz roja parpadea 7
veces
Tensión solar
demasiado alta
Tableau 2
24
NOTA: durante la salida o la puesta de sol,
el Soladin detecta una baja tensión solar, lo
cual se indica mediante un parpadeo rojo del
indicador luminoso. Se trata de una situación
normal
Intervalo de
rearranque
No existe tensión en
la red
Tensión solar
demasiado baja
Tensión de la red de
CA demasiado alta
Tensión de la red de
CA demasiado baja
Compruebe la conexión con la red.
Frecuencia de la red
demasiado elevada o
demasiado baja
Temperatura interna
demasiado elevada
Compruebe la conexión con la red.
Error de coeficiente
de temperatura
negativo (NTC),
No debe quedar obstruido el flujo de aire del Soladin. Si el problema
continúa, desconecte el Soladin extrayendo el enchufe de CA de la
toma de corriente y consulte a un instalador.
Consulte a un instalador para la reparación de un dispositivo de
seguridad defectuoso del Soladin.
MANUAL DE UTILIZACION SOLADIN 600
Funcionamiento
Tras la instalación, el Soladin se conecta
automáticamente si irradiación solar es suficiente.
El Soladin funciona automáticamente: no existe
necesidad de realizar ajustes o accionamientos.
El Soladin no cuenta con conmutador de conexión /
desconexión; extraiga el enchufe de CA de la toma
eléctrica de CA para desconectarlo. ¡No desconecte
los
conectores
MultiContact
durante
el
funcionamiento del Soladin!
No se requiere ningún mantenimiento específico. Si
fuera necesario, utilice un paño suave y limpio para
limpiar el Soladin. Nunca utilice líquidos, ácidos y/o
estropajos.
Fin de servicio
Extraiga primero el enchufe de CA de la toma de
corriente antes de desconectar los conectores
MultiContact.
Ahora se puede desmontar el Soladin de un modo
seguro:
1. Haga presión sobre la pestaña inferior del
soporte para liberar el bloqueo de montaje.
2. Levante el Soladin aproximadamente 1 cm.
3. Separe el Soladin de la pared en sentido recto
ESPAÑOL
Términos de la garantía
Mastervolt garantiza que este producto ha sido
fabricado de acuerdo con la normativa y las
cláusulas legalmente aplicables. Durante la
producción y antes de la entrega todos los
productos son puestos a prueba y controlados de
forma exhaustiva. Si usted no actúa de acuerdo con
la normativa, las instrucciones y las estipulaciones
de este manual del usuario, se pueden producir
daños y/o el producto no cumplirá con las
especificaciones. Esto puede significar que la
garantía quede nula y sin efectos.
El período de garantía es de 5 años.
Responsabilidad legal
Mastervolt no será responsable de:
• Los posibles errores de este manual y las
consecuencias de ellos.
• La utilización que no sea coherente con la
finalidad del producto.
Módulos FV
36 células
Uoc = 28 V*
Umpp = 18 V*
Potencia
75 Wp
100 Wp
125 Wp
150 Wp
Una cadena
4 - 6 en serie
4 - 6 en serie
4 - 5 en serie
4 (5) en serie
Dos cadena en paralelo**
4 en serie
----
54 células
Uoc = 32 V*
Umpp = 27 V*
75 Wp
100 Wp
125 Wp
150 Wp
175 Wp
3 - 4 en serie
3 - 4 en serie
3 - 4 en serie
3 - 4 en serie
3 - 4 en serie
3 - 4 en serie
3 en serie
----
72 células
Uoc = 43 V*
Umpp = 36 V*
75 Wp
100 Wp
125 Wp
150 Wp
175 Wp
2 - 3 en serie
2 - 3 en serie
2 - 3 en serie
2 - 3 en serie
2 - 3 en serie
2 - 3 en serie
2 - 3 en serie
2 en serie
2 en serie
2 en serie
* Valor aproximado; consulte las especificaciones del fabricante
** Se hace constar la configuración para una cadena.
Tabla 3: configuraciones típicas de cadenas para el Soladin 600
25
ITALIANO
Descrizione del prodotto e utilizzo
Congratulazioni per aver scelto Mastervolt Soladin
600. Soladin 600, da qui in poi chiamato “Soladin”, è
un invertitore solare collegato alla rete, usato per la
conversione e la diffusione nella rete di utility
dell’energia generata da moduli fotovoltaici.
Soladin dispone di varie misure di sicurezza in
modo da assicurare lo spegnimento immediato una
volta disinserita la spina CA dalla presa a muro o
quando si verifica un problema di funzionamento
alla rete pubblica.
Soladin è adatto solo per la diffusione dell’energia
solare nella rete pubblica, non come invertitore
indipendente.
Aprire l’imballaggio
L’imballaggio contiene i seguenti pezzi:
•
Soladin con supporto di montaggio
•
Il presente manuale per l’utente
Una volta aperto l’imballaggio, controllare che
Soladin non sia danneggiato. Non usare Soladin se
è danneggiato. In caso di dubbi, contattare il
rivenditore.
Sicurezza
• Installare Soladin seguendo le istruzioni incluse
nel presente manuale.
• Assicurarsi che Soladin sia scollegato dalla rete
durante l’installazione. A questo scopo,
disinserire la spina CA dalla presa a muro.
• I collegamenti e le funzioni di sicurezza devono
essere eseguite in conformità con le norme
locali.
• Soladin deve essere utilizzato secondo le
specifiche tecniche, come indicato a pagina 30.
• Non aprire il rivestimento in quanto all’interno
potrebbe esservi alta tensione!
26
INSTRUZIONI PER L’USO SOLADIN 600
Moduli PV e stringhe
Un impianto solare è costituito da vari moduli
fotovoltaici (solari), da qui in poi chiamati “moduli
PV”. I moduli PV sono collegati in serie a formare
una cosidetta “stringa”. Tali stringhe sono costituite
da un collegamento positivo (+) e da uno negativo
(–) in connessione diretta con Soladin. Le tensioni
presenti su queste stringhe non sono sicure da
toccare e non possono venire disattivate.
L’impianto solare deve quindi disporre delle
seguenti specifiche tecniche:
• Massima tensione a circuito aperto della stringa
con una temperatura dei moduli PV più bassa
possibile: 155 VCC. Consultare la tabella 3 per le
configurazioni tipiche di Soladin.
• Cavo PV doppio isolato
• Tutti i cavi della stringa devono disporre di
doppia isolazione e devono venire utilizzati con i
connettori MultiContact (Ø4mm) preassemblati.
Consultare un installatore per verificare la
disponibilità di tali cavi composti. Non assemblarli
da soli!
• A seconda delle norme locali vigenti, potrebbe
essere necessario utilizzare un contattore CC
supplementare.
Contattare un installatore nel caso in cui l’impianto
solare non fosse conforme alle condizioni
menzionate precedentemente. A causa di possibile
alta tensione, l’installazione e le modifiche devono
venire effettuate esclusivamente da un elettricista
qualificato che conosca le norme e gli standard da
applicare.
Pezzi necessarie per installare Soladin
Assicurarsi di disporre tutti i pezzi necessari per
installare Soladin:
• Soladin (incluso)
• Due viti (con tassello) per il montaggio di Soladin.
Diametro massimo: 4,5 mm. Usare materiali di
montaggio adatti a sostenere il peso di Soladin.
• Strumenti per fissare alla parete le viti/i bulloni
con tasselli (un cacciavite, un trapano, un set di
punte per trapano, una matita)
INSTRUZIONI PER L’USO SOLADIN 600
Scelta del luogo in cui eseguire l’installazione
Durante l’installazione osservare le seguenti
condizioni:
• Soladin può essere utilizzato in ambienti interni.
• Temperatura
ambientale:
-20
...
50°C;
(dissipazione di potenza sopra i 40°C), umidità:
0-90% senza condensa.
• Installare Soladin in prossimità di una presa a
muro.
• Non installare Soladin in ambienti in cui si
condensa eccessiva polvere o umidità.
• Se Soladin viene installato nelle immediate
vicinanze di zone abitate, tenere presente che
produce
un
lieve
rumore
durante
il
funzionamento.
• Montare Soladin in verticale su una parete solida,
priva di risonanza.
• Montare Soladin in modo da evitare di ostruire il
flusso dell’aria dai fori di ventilazione.
• Non collocare alcun oggetto entro una distanza
di 20 cm da Soladin.
• Bisogna montare vari Soladin vicini, non uno
sopra l’altro.
Numero di
parte
130000600
130000630
130000650
130000660
Tabella 1
ITALIANO
Indicazioni per l’installazione
Soladin è dotato di un cosidetto “dispositivo di
sicurezza per il controllo dell'isolamento”. Assicura
lo spegnimento immediato in caso di guasto della
rete. Le nazioni europee impongono condizioni
diverse per quanto riguarda i dispositivi per il
controllo dell'isolamento e l’erogazione di energia
alla rete di utility in generale. Controllare sul numero
di parte nell’etichetta del numero di omologazione
se la versione di Soladin può essere collegata alla
rete di utility locale. Consultare la tabella 1.
Non collegare Soladin ad una rete di utility non
adatta al presente apparecchio!
In Olanda è possibile collegare un solo Soladin al
circuito elettrico derivato esistente a 16 Amp. In
altre nazioni vengono applicate altre restrizioni.
Informarsi sulle norme locali.
Durante l’installazione è possibile controllare se è
stata portata a termine correttamente l’installazione
grazie al LED. È possibile eseguire tale verifica in
presenza di sufficienti irradiazioni. Eseguire quindi
l’installazione solo durante le ore diurne.
Sebbene Soladin sia protetto in caso di errori di
polarità, non si deve cambiare la polarità positiva (+)
e negativa (–) dei collegamenti solari.
Installare il prodotto secondo le istruzioni specificate
a pagina 4 e 5.
Descrizione
Uso consentito in:
Soladin 600 230V/50Hz QNS - EU
Europa, escluse la Germania e le nazioni citate di
seguito
Italia
Spagna
Inghilterra
Soladin 600 230V/50Hz QNS - IT
Soladin 600 230V/50Hz QNS - ES
Soladin 600 230V/50Hz QNS - UK
27
ITALIANO
INSTRUZIONI PER L’USO SOLADIN 600
LED
Il modo di funzionamento di Soladin viene
visualizzato grazie ad un LED situato nella parte
anteriore del rivestimento. In funzionamento
normale lampeggia in gialla: quanto più tempo il
LED rimane gialla, più potenza viene convertita.
Se l’irradiazione dei moduli PV non è sufficiente, per
esempio
di
notte,
Soladin
si
spegne
automaticamente. Quando si spegne, scompare
anche il LED.
Indicazione del LED
LED spento
Significato
Irradiazione non
sufficiente
Nei moduli PV non
passa la corrente
LED spento
• • • • •
Lampeggiamento
giallo
▬
▬
▬
Impulsi rossi lunghi e
lampeggiamento lento
▬▬▬▬▬▬
Impulsi rossi lunghi e
lampeggiamento
veloce
▬▬▬▬▬▬▬▬
Rosso continuo
• • • • •
1 lampeggiamento in
rosso
Funzionamento
normale
•• •• •• ••
2 lampeggiamenti in
rosso
••• ••• •••
3 lampeggiamenti in
rosso
•••• ••••
4 lampeggiamenti in
rosso
••••• •••••
5 lampeggiamenti in
rosso
••••••
6 lampeggiamenti in
rosso
•••••••
7 lampeggiamenti in
rosso
Tensione solare
troppo alta
Tabella 2
28
Orario di richiusura
Ritardo di riavvio
Nessuna tensione di
rete
Tensione solare
troppo bassa
Guasti
Finché il LED non si illumina di rosso, non viene
rilevato
alcun
guasto:
Soladin
funziona
normalmente. In caso di errore, questo viene
rilevato direttamente dall’apparecchio: il LED
diventa rosso. Consultare la tabella 2.
Se non si riesce a risolvere l’inconveniente
seguendo la tabella di seguito, consultare un
installatore.
NOTA: all’alba o al tramonto viene rilevata
una bassa tensione solare da Soladin,
indicata con un LED rosso lampeggiante. È
una situazione normale.
Cosa fare?
Niente. Soladin funziona normalmente, ma l’irradiazione dei moduli
PV non è sufficiente (per esempio durante le ore notturne).
Se il LED si trova spento nelle ore diurne, consultare un installatore.
I cavi tra i moduli PV e Soladin potrebbero essere difettosi.
Controllare che non vi siano collegamenti approssimativi o polarità
non corrette.
Niente. Soladin funziona normalmente. Quanto più veloce lampeggia
la spia, più potenza viene convertita.
Niente. Dopo aver (re)inserito Soladin alla rete CA, verifica la qualità
della rete CA prima di funzionare normalmente. Occorrono oltre 5
minuti.
Niente. All’alba viene eseguita una verifica dell’impianto. Occorrono
un massimo di 15 secondi prima che Soladin inizi a funzionare
normalmente.
Inserire la presa CA di Soladin alla rete a muro; controllare il fusibile
nel contatore.
Condizioni normali all’alba ed al tramonto.
Se l’inconveniente persiste nonostante l’irradiazione dei moduli PV
sia sufficiente, consultare un installatore.
Errore nell’installazione PV. Le specifiche tecniche dei moduli solari
sono conformi con Soladin?
Consultare un installatore. Errore nell’installazione PV. Le specifiche
tecniche dei moduli solari sono conformi con Soladin?
Tensione rete CA
troppo alta
Controllare il collegamento della rete.
Tensione rete CA
troppo bassa
Controllare il collegamento della rete.
Frequenza di rete
troppo alta o troppo
bassa
Temperatura interna
troppo alta
Controllare il collegamento della rete.
Errore NTC
Non ostruire il flusso d’aria in Soladin. Se il problema persiste,
spegnere Soladin disinserendo la spina CA dalla presa a muro e
consultare un installatore.
Consultare un installatore per riparare il dispositivo di sicurezza
difettoso di Soladin.
INSTRUZIONI PER L’USO SOLADIN 600
ITALIANO
Funzionamento
Dopo aver eseguito l’installazione, Soladin si
accende automaticamente se l’irradiazione solare è
sufficiente. Soladin funziona automaticamente: non
è necessario effettuare regolazioni né metterlo in
funzione.
Soladin non dispone di interruttore ON/OFF;
disinserire la spina CA dalla presa CA per
spegnerlo. Non disinserire le spine MultiContact
durante il funzionamento di Soladin!
Non è necessaria alcuna manutenzione specifica.
Se necessario, usare un panno morbido per pulire
Soladin. Non utilizzare liquidi, acidi e/o spugnette.
Termini di garanzia
Mastervolt garantisce che il seguente prodotto è
stato fabbricato in conformità con gli standard e con
le specifiche applicabili per legge. Durante la
produzione e prima della consegna tutti i prodotti
vengono sottoposti a prove accurate e poi
controllati. Se non si agisce in conformità con le
norme, le istruzioni e le condizioni incluse nel
presente manuale dell’utente, potrebbero verificarsi
dei danni e/o il prodotto potrebbe non soddisfare le
specifiche tecniche. In tal caso, la garanzia non
avrebbe valore legale.
Il periodo di garanzia è di 5 anni.
Messa fuori servizio
Disinserire dapprima la spina CA dalla presa a muro
prima di disinserire le prese MultiContact.
È quindi possibile smontare Soladin in modo sicuro.
1. Tirare la linguetta inferiore del supporto di
montaggio per aprire il blocco.
2. Sollevare Soladin di circa 1 cm.
3. Spostare Soladin in verticale rispetto alla parete.
Responsabilità
Mastervolt non si ritiene responsabile di:
• possibili errori nel manuale allegato ed eventuali
conseguenze derivanti.
• l’uso differente rispetto all’idea del prodotto.
Modulo PV
36 celle
Uoc = 28V*
Umpp = 18V*
Potenza
75 Wp
100 Wp
125 Wp
150 Wp
Una stringa
4 - 6 in serie
4 - 6 in serie
4 - 5 in serie
4 (5) in serie
Due stringhe in parallelo**
4 in serie
----
54 celle
Uoc = 32V*
Umpp = 27V*
75 Wp
100 Wp
125 Wp
150 Wp
175 Wp
3 - 4 in serie
3 - 4 in serie
3 - 4 in serie
3 - 4 in serie
3 - 4 in serie
3 - 4 in serie
3 in serie
----
72 celle
Uoc = 43V*
Umpp = 36V*
75 Wp
100 Wp
125 Wp
150 Wp
175 Wp
2 - 3 in serie
2 - 3 in serie
2 - 3 in serie
2 - 3 in serie
2 - 3 in serie
2 - 3 in serie
2 - 3 in serie
2 in serie
2 in serie
2 in serie
* Valore approssimato; consultare le specifiche tecniche del produttore
** Si specifica la configurazione di una stringa.
Tabella 3: Configurazione tipica di stringa per Soladin 600
29
SPECIFICATIONS
Model
Part number:
Manufacturer:
Operating temperature:
Storage temperature:
Relative humidity:
Protection degree:
Safety class:
Dimensions (H x W x D):
Weight:
Casing:
Input (DC)
Nominal power @25 °C:
PV power range:
MPP voltage range:
Maximum voltage:
MPP current:
MPP tracker:
Start-up power:
String connection:
Grid output (AC)
Voltage:
Nominal power:
Maximum current:
Fuse:
Frequency:
Cos phi:
Stand-by power:
Maximum efficiency:
EU efficiency:
AC connection:
Safety devices
Island protection:
Power limiting:
Temperature protection:
Reversed DC polarity:
Monitoring
Indicator:
Correct operation:
Grid or inverter fault:
Compliance
CE compliance:
EMC directive:
Emission:
Harmonics:
Immunity:
LV directive:
Electric safety:
30
Soladin 600 EU
130000600
Mastervolt, Amsterdam, the Netherlands
-20°C to 40°C
-20°C to 70°C
max. 95%, non condensing
IP23
Class II
365 x 143 x 75 mm.
Approx. 2 kg.
Flame retardant plastic
550W
160-700 Wp
45-125V DC
155V DC
8A
dynamic MPP tracker
1W DC @ 45V DC
MultiContact connectors
230V (207V-253V)
525W
2,25A in accordance with NL: NTA8493
3,15A -T
50 Hz (49,8-50,2 Hz)
0,99
< 0,05W AC
93%
91%
AC cable with plug, 1,80 meter
Voltage and frequency window monitoring; Maximum reaction time: 100 ms.
Automatic derating by increasing the operating voltage, depending on the
internal inverter temperature.
Power derating at higher internal temperature
DC connection fully protected
LED: yellow / red
Yellow, flashing. The longer the LED is lit, the more power is converted
Red, 10 different flashing codes
Yes
EMC 89/336/EEG
EN 50081-1
EN 61000-3-2
EN 50082-2
LV 73/23/EEC
EN 60950
DIMENSIONS
31
CE DECLARATION OF CONFIRMITY
Manufacturer: Mastervolt
Address:
Snijdersbergweg 93
1105 AN Amsterdam
The Netherlands
Herewith declares that:
Product:
Soladin 600
is CE-marked and complies with the following standards:
EMC directive
Environment:
89/336/EEC
residential, commercial and light industrial
Emission
Emission - class B:
harmonic current emission:
EN 55022: 1998
EN 61000-3-2: 2000
Immunity
Generic immunity standard:
Electrostatic discharge (ESD):
Radiated EMC:
Electrical fast transients (EFT) :
Surge transient :
Conducted RF disturbances :
Voltage dips and short interrupts :
Digital radio telephones :
EN 61000-6-2: 2001
EN 61000-4-2: 1995
EN 61000-4-3: 1996
EN 61000-4-4: 1995
EN 61000-4-5: 1995
EN 61000-4-6: 1996
EN 61000-4-11: 1994
ENV 50204: 1995
Safety
Low Voltage directive :
Electrical safety :
LV 73/23 EEC
EN 60950 : 2003
Amsterdam,
P. F. Kenninck,
General Manager MASTERVOLT
Snijdersbergweg 93, 1105 AN Amsterdam, Nederland
Tel : + 31-20-3422100 Fax : + 31-20-6971006
Email : [email protected]
32