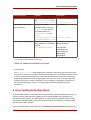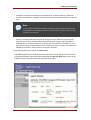
1
Red Hat Certificate System 7.3
System Agent Guide
7.3
ISBN: N/A
Publication date:
Red Hat Certificate System 7.3
This guide is for agents of Certificate System subsystems. It explains the different agent
services interfaces for the Certificate System subsystems and details the agent operations
which can be performed. This information is used to manage and maintain certificates and keys
for users in the PKI deployment.
Red Hat Certificate System 7.3: System Agent Guide
Copyright © 2008 Red Hat, Inc.
Copyright © 2008 Red Hat. This material may only be distributed subject to the terms and conditions set forth in the
Open Publication License, V1.0 or later with the restrictions noted below (the latest version of the OPL is presently
available at http://www.opencontent.org/openpub/).
Distribution of substantively modified versions of this document is prohibited without the explicit permission of the
copyright holder.
Distribution of the work or derivative of the work in any standard (paper) book form for commercial purposes is
prohibited unless prior permission is obtained from the copyright holder.
Red Hat and the Red Hat "Shadow Man" logo are registered trademarks of Red Hat, Inc. in the United States and other
countries.
All other trademarks referenced herein are the property of their respective owners.
The GPG fingerprint of the [email protected] key is:
CA 20 86 86 2B D6 9D FC 65 F6 EC C4 21 91 80 CD DB 42 A6 0E
1801 Varsity Drive
Raleigh, NC 27606-2072
USA
Phone: +1 919 754 3700
Phone: 888 733 4281
Fax: +1 919 754 3701
PO Box 13588
Research Triangle Park, NC 27709
USA
Red Hat Certificate System 7.3
1. About This Guide ................................................................................................... 1
1. Who Should Read This Guide ......................................................................... 1
2. Required Concepts ........................................................................................ 1
3. What is in This Guide ..................................................................................... 1
4. Document Conventions .................................................................................. 2
5. Documentation .............................................................................................. 4
2. Agent Services ...................................................................................................... 5
1. Overview of Certificate System ....................................................................... 5
1.1. Certificate System Sub-systems ........................................................... 5
1.2. Certificate System Users ..................................................................... 7
2. Agent Tasks .................................................................................................. 8
2.1. Certificate Manager Agent Services .....................................................10
2.2. Data Recovery Manager Agent Services ..............................................11
2.3. Online Certificate Status Manager Agent Services ................................12
2.4. Token Processing System Agent Services ...........................................13
3. Forms for Performing Agent Operations ..........................................................14
4. Accessing Agent Services .............................................................................18
3. CA: Working with Certificate Profiles ......................................................................21
1. About Certificate Profiles ...............................................................................21
1.1. Categories of Certificate Profiles .........................................................21
2. Profile Operations Performed by CA Agents ...................................................21
3. List of Certificate Profiles ...............................................................................22
3.1. Example Profile ..................................................................................25
4. How Certificate Profiles Work .........................................................................27
5. Enabling and Disabling Certificate Profiles ......................................................28
5.1. Getting Certificate Profile Information ..................................................28
5.2. End User Certificate Profile .................................................................29
5.3. Policy Information ...............................................................................29
5.4. Approving a Certificate Profile .............................................................29
5.5. Disapproving a Certificate Profile .........................................................30
4. CA: Handling Certificate Requests .........................................................................31
1. Managing Requests ......................................................................................31
2. Listing Certificate Requests ...........................................................................33
2.1. Selecting a Request ...........................................................................36
2.2. Searching Requests ...........................................................................37
3. Approving Requests ......................................................................................38
4. Sending an Issued Certificate to the Requester ...............................................40
5. CA: Finding and Revoking Certificates ....................................................................43
1. Basic Certificate Listing .................................................................................43
2. Advanced Certificate Search ..........................................................................44
3. Examining Certificates ...................................................................................48
4. Revoking Certificates ....................................................................................49
4.1. Searching for Certificates to Revoke ....................................................50
4.2. Revoking One or More Certificates ......................................................51
5. Managing the Certificate Revocation List ........................................................54
5.1. Viewing or Examining CRLs ................................................................54
v
Red Hat Certificate System 7.3
5.2. Updating the CRL ...............................................................................55
6. CA: Publishing to a Directory .................................................................................59
1. Automatic Directory Updates .........................................................................59
2. Manual Directory Updates .............................................................................59
7. DRM: Recovering Encrypted Data ..........................................................................61
1. List Requests ................................................................................................61
2. Finding and Recovering Keys ........................................................................62
2.1. Finding Archived Keys ........................................................................63
2.2. Recovering Keys ................................................................................66
8. OCSP: Agent Services ..........................................................................................71
1. Listing CAs Identified by the OCSP ................................................................71
2. Identifying a CA to the OCSP .........................................................................72
3. Adding a CRL to the OCSP ...........................................................................74
4. Checking the Revocation Status of a Certificate ..............................................75
9. TPS: Agent Services .............................................................................................77
1. Basic Operations for an Agent and Administrator ............................................77
2. Adding Tokens ..............................................................................................78
3. Managing Tokens .........................................................................................78
3.1. Changing Token Status ......................................................................81
3.2. Editing the Token ...............................................................................82
3.3. Listing Token Certificates ....................................................................83
3.4. Conflicting Token Certificate Status Information ...................................83
3.5. Showing Token Activities ....................................................................84
4. Listing and Searching Certificates ..................................................................84
5. Searching Token Activities .............................................................................85
6. Administrator Operations ...............................................................................85
6.1. Showing Token Activities ....................................................................85
6.2. Editing the Token ...............................................................................85
6.3. Deleting the Token .............................................................................85
Index .......................................................................................................................87
vi
Chapter 1.
About This Guide
This guide describes the agent services interfaces used by Red Hat Certificate System agents
to administer subsystem certificates and keys and other management operations.
1. Who Should Read This Guide
This guide is intended for Certificate System agents. Agents are privileged users designated by
the Certificate System administrator to manage requests from end entities for certificate-related
services. Each installed Certificate System subsystem; Certificate Manager (CM), Data
Recovery Manager (DRM), Online Certificate Status Manager, Token Key Service (TKS), and
Token Processing System (TPS), can have multiple agents.
2. Required Concepts
Before reading this guide, be familiar with the basic concepts of public-key cryptography and the
Secure Sockets Layer (SSL) protocol, including the following topics:
• Encryption and decryption
• Public keys, private keys, and symmetric keys
• Digital signatures
• The role of digital certificates in a public-key infrastructure (PKI)
• Certificate hierarchies
• SSL cipher suites
• The purpose of and major steps in the SSL handshake
3. What is in This Guide
This guide describes an agent's responsibilities for the different Certificate System subsystems,
and explains basic usage and tasks.
• Chapter 2, Agent Services Provides an overview of the product and identifies different kinds
of users, including agents. The chapter also summarizes the tasks of each subsystem agent,
lists the HTML forms used to perform agent tasks, and explains how to access the agent
services pages and forms.
• Chapter 3, CA: Working with Certificate Profiles Provides an overview of the profiles feature
and details how to enable and disable profiles.
• Chapter 4, CA: Handling Certificate Requests Describes the general procedures for handling
1
Chapter 1. About This Guide
requests and explains how to handle different aspects of certificate request management. A
CM agent is responsible for handling requests by end entities (end users, server
administrators, or other Certificate System subsystems) for certificates using manual
enrollment.
• Chapter 5, CA: Finding and Revoking Certificates Explains how to use the agent services
page to find and examine a specific certificate issued by Certificate System, how to retrieve a
list of certificates that match specified criteria, how to revoke certificates, and how to manage
the certificate revocation list.
• Chapter 6, CA: Publishing to a Directory Describes how a CM agent can update the LDAP
directory with the current status of certificates.
• Chapter 7, DRM: Recovering Encrypted Data Describes how to process key recovery
requests and how to recover stored encrypted data when the encryption key has been lost.
This service is only available when a Data Recovery Manager (DRM) is installed.
• Chapter 8, OCSP: Agent Services Describes how to handle tasks related to the Certificate
System OCSP responder, Online Certificate Status Manager. This service is only available
when the OCSP subsystem is installed.
• Chapter 9, TPS: Agent Services Describes how to perform tasks related to the Token
Processing System and how to manage tokens and certificates through this subsystem. This
service is only available when the TPS subsystem is installed.
4. Document Conventions
Certain words in this manual are represented in different fonts, styles, and weights. This
highlighting indicates that the word is part of a specific category. The categories include the
following:
Courier font
Courier font represents commands, file names and paths, and prompts .
When shown as below, it indicates computer output:
Desktop
Mail
about.html
backupfiles
logs
mail
paulwesterberg.png
reports
bold Courier font
Bold Courier font represents text that you are to type, such as: service jonas start
If you have to run a command as root, the root prompt (#) precedes the command:
# gconftool-2
2
Document Conventions
italic Courier font
Italic Courier font represents a variable, such as an installation directory:
install_dir/bin/
bold font
Bold font represents application programs and text found on a graphical interface.
When shown like this: OK , it indicates a button on a graphical application interface.
Additionally, the manual uses different strategies to draw your attention to pieces of information.
In order of how critical the information is to you, these items are marked as follows:
Note
A note is typically information that you need to understand the behavior of the
system.
Tip
A tip is typically an alternative way of performing a task.
Important
Important information is necessary, but possibly unexpected, such as a
configuration change that will not persist after a reboot.
Caution
A caution indicates an act that would violate your support agreement, such as
recompiling the kernel.
Warning
3
Chapter 1. About This Guide
A warning indicates potential data loss, as may happen when tuning hardware
for maximum performance.
5. Documentation
The Certificate System documentation also contains the following manuals:
• Certificate System Administrator's Guide explains all administrative functions for the
Certificate System, such as adding users, creating and renewing certificates, managing smart
cards, publishing CRLs, and modifying subsystem settings like port numbers.
• Certificate System Enterprise Security Client Guide explains how to install, configure, and use
the Enterprise Security Client, the user client application for managing smart cards, user
certificates, and user keys.
Additional Certificate System information is provided in the CS SDK, which contains an online
reference to HTTP interfaces, javadocs, samples, and tutorials related to the Certificate System.
A downloadable zip file of this material is available for user interaction with the tutorials.
For the latest information about the Certificate System, including current release notes,
complete product documentation, technical notes, and deployment information, visit the Red
Hat Certificate System documentation page at the following address:
http://www.redhat.com/docs/manuals/cert-system/
4
Chapter 2.
Agent Services
This chapter describes the role of the privileged users, agents, in managing Certificate System
subsystems. It also introduces the tools that agents use to administer service requests.
1. Overview of Certificate System
The Red Hat Certificate System is a highly configurable set of software components and tools
for creating, deploying, and managing certificates. The standards and services that facilitate the
use of public-key cryptography and X.509 version 3 certificates in a networked environment are
collectively called the public-key infrastructure (PKI) for that environment. In any PKI, a
certificate authority (CA) is a trusted entity that issues, renews, and revokes certificates. An end
entity is a person, server, or other entity that uses a certificate to identify itself.
To participate in a PKI, an end entity must enroll, or register, in the system. The end entity
typically initiates enrollment by giving the CA some form of identification and a newly generated
public key. The CA uses the information provided to authenticate, or confirm, the identity, then
issues the end entity a certificate that associates that identity with the public key and signs the
certificate with the CA's own private signing key.
End entities and CAs can exist in different geographic or organizational areas or in completely
different organizations. CAs may include third parties that provide services through the Internet
as well as the root CAs and subordinate CAs for individual organizations. Policies and certificate
content may vary from one organization to another. End-entity enrollment for some certificates
may require physical verification, such as an interview or notarized documents, while enrollment
for others may be fully automated.
1.1. Certificate System Sub-systems
To meet the widest possible range of configuration requirements, the Certificate System permits
independent installation of five separate subsystems, or managers, that play distinct roles:
Certificate Manager.
A Certificate Manager (CM) functions as a root or subordinate CA. This subsystem issues,
renews, and revokes certificates and generates certificate revocation lists (CRLs). It can also
publish certificates, files, and CRLs to an LDAP directory, to files, and to an Online Certificate
Status Protocol (OCSP) responder.
The CM can process requests manually (with agent action) or automatically (based on
customizable profiles). Publishing tasks can only be performed by the CM.
The CM also has a built-in OCSP service, enabling OCSP-compliant clients to query the CM
directly about the revocation status of a certificate that it has issued. In certain PKI
deployments, it might be convenient to use the CM's built-in OCSP service, instead of an
OCSM.
Because CAs can delegate some responsibilities to subordinate CAs, a CM might share its load
5
Chapter 2. Agent Services
among one or more levels of subordinate CMs.
Subsystems can also be cloned. All clones use the same keys and certificates as the master,
which means that the master and clones essentially all function as a single CA. Many complex
deployment scenarios are possible.
Data Recovery Manager.
A Data Recovery Manager (DRM) oversees the long-term archival and recovery of private
encryption keys for end entities. A CM or TPS can be configured to archive end entities' private
encryption keys with a DRM as part of the process of issuing new certificates.
The DRM is useful only if end entities are encrypting data, using applications such as S/MIME
email, that the organization may need to recover someday. It can be used only with client
software that supports dual key pairs; two separate key pairs, one for encryption and one for
digital signatures. It is also possible to perform server-side key generation using the TPS server
when enrolling smart cards.
Note
The DRM archives encryption keys. It does not archive signing keys, since
archiving signing keys would undermine the non-repudiation properties of
dual-key certificates.
Online Certificate Status Manager.
An Online Certificate Status Manager (OCSM) works as an online certificate validation authority
and allows OCSP-compliant clients to verify certificates' current status. The OCSM can receive
CRLs from multiple CMs; clients then query the OCSM for the revocation status of certificates
issued by all CMs. For example, in a PKI comprising multiple CAs (a root CA and many
subordinate CAs), each CA can be configured to publish its CRL to the OCSM, allowing all
clients in the PKI deployment to verify the revocation status of a certificate by querying a single
OCSM.
Note
An online certificate-validation authority is often referred to as an OCSP
responder.
Token Key Service.
The Token Key Service (TKS) manages the master and transport keys required to generate and
distribute keys for smart cards. The TKS provides security between tokens and the TPS
because it protects the integrity of the master key and token keys.
6
Certificate System Users
Token Processing System.
The Token Processing System (TPS) acts as a registration authority for authenticating and
processing smart card enrollment requests, PIN reset requests, and formatting requests from
the Enterprise Security Client.
1.2. Certificate System Users
Three kinds of users can access Certificate System subsystems: administrators, agents, and
end entities. Administrators are responsible for the initial setup and ongoing maintenance of the
subsystems. Administrators can also assign agent status to users. Agents manage day-to-day
interactions with end entities, which can be users or servers and clients, and other aspects of
the PKI. End entities must access a Certificate Manager (CM) subsystem to enroll for
certificates in a PKI deployment and for certificate maintenance, such as renewal or revocation.
Figure 2.1, “The Certificate System and Users” shows the ports used by administrators, agents,
and end entities. All agent and administrator interactions with Certificate System subsystems
occur over HTTPS. End-entity interactions can take place over HTTP or HTTPS.
7
Chapter 2. Agent Services
Figure 2.1. The Certificate System and Users
2. Agent Tasks
The designated agents for each subsystem are responsible for the everyday management of
end entity requests and other aspects of the PKI:
Certificate Manager Agent
Certificate Manager (CM) agents manage certificate requests received by the CM
subsystem, maintain and revoke certificates as necessary, and maintain global information
about certificates.
8
Certificate Manager Agent Services
Data Recovery Manager Agent
Data Recovery Manager (DRM) agents initiate the recovery of lost keys and can obtain
information about key service requests and archived keys.
Note
Recovering lost or archived key information is done automatically in smart card
deployments because the TPS server is a DRM agent. Smart cards are marked
as lost in the TPS agent page, and then another smart card is later used to
recover the old encryption keys automatically during certificate enrollment.
Online Certificate Status Manager Agent
Online Certificate Status Manager (OCSM) agents can perform tasks such as:
• Checking which CAs are currently configured to publish their CRLs to the OCSM.
• Identifying a CM to the OCSM.
• Adding CRLs directly to the OCSM.
• Viewing the status of OCSP service requests submitted by OCSP-compliant clients.
Token Processing System Agent
Token Processing System (TPS) agents can perform tasks such as:
• Viewing smart card enrollment and formatting activities.
• Listing tokens in the token database.
• Editing token information.
• Deleting tokens from the token database
• Marking tokens as permanently lost, temporarily lost, or damaged.
Token Key Service Agent
There is no direct interface for Token Key Service (TKS) agents to interact with the system.
However, TKS agents can provide the secure communications channel through the TPS
server required for smart card operations through the token management system. The
allowed smart card operations are similar to those for TPS agents.
The privileged operations of an agent are performed through the Certificate System agent
services pages. For a user to access these pages, the user must have a personal SSL client
certificate and have been identified as a privileged user in the user database by the Certificate
System administrator. For more information on creating privileged users, see the Certificate
System Administrator's Guide.
• Section 2.1, “Certificate Manager Agent Services”
• Section 2.2, “Data Recovery Manager Agent Services”
• Section 2.3, “Online Certificate Status Manager Agent Services”
• Section 2.4, “Token Processing System Agent Services”
9
Chapter 2. Agent Services
2.1. Certificate Manager Agent Services
The default entry page for (CM) agent services is shown in Figure 2.2, “Certificate Manager
Agent Services Page”. Only designated CM agents, with a valid certificate installed in their client
software, are authorized to access these pages.
Figure 2.2. Certificate Manager Agent Services Page
A CM agent performs the following tasks:
• Handles certificate requests.
An agent can list the certificate service requests received by the CM subsystem, assign
requests, reject or cancel requests, and approve requests for certificate enrollment. See
Chapter 4, CA: Handling Certificate Requests.
• Finds certificates.
Certificates can be searched for individually or searched and listed by different criteria. The
details for all returned certificates are then displayed. See Chapter 5, CA: Finding and
Revoking Certificates.
• Revokes certificates.
If a user's key is compromised, the certificate must be revoked to ensure that the key is not
misused. Certificates belonging to users who have left the organization may also need
revoked. CM agents can find and revoke a specific certificate or a set of certificates. Users
can also request that their own certificates be revoked. See Section 4, “Revoking
Certificates”.
10
Data Recovery Manager Agent Services
• Updates the CRL.
The CM maintains a public list of revoked certificates, called the Certificate Revocation List
(CRL). The list is usually maintained automatically, but, when necessary, the CM agent
services page can be used to update the list manually. See Section 5.2, “Updating the CRL”.
• Publishes certificates to a directory.
The Certificate System can be configured to publish certificates and CRLs to an LDAP
directory. This information is usually published automatically, but the CM agent services page
can be used to update the directory manually. See Section 2, “Manual Directory Updates”.
• Manages certificate profiles.
The agent can enable and disable certificate profiles. A profile must be temporarily disabled
before an administrator can make changes to the profile itself using the administrative
interface. After the changes have been made, the agent can re-enable the profile for regular
use. See Chapter 3, CA: Working with Certificate Profiles.
2.2. Data Recovery Manager Agent Services
The default entry page to the Data Recovery Manager (DRM) agent services is shown in
Figure 2.3, “Data Recovery Manager Agent Services Page”. Only designated DRM agents, with
a valid certificate in their client software, are authorized to access these pages.
Figure 2.3. Data Recovery Manager Agent Services Page
A DRM agent performs the following tasks:
11
Chapter 2. Agent Services
• Lists key recovery requests from end entities.
• Lists or searches for archived keys.
• Recovers private data-encryption keys.
• Authorizes and approves key recovery requests.
Key recovery requires the authorization of one or more recovery agents. The DRM
administrator designates recovery agents. Typically, several recovery agents are required to
approve key recovery requests in the DRM, so DRM administrators should designate more
than one agent.
For more information on these tasks, see Chapter 7, DRM: Recovering Encrypted Data.
2.3. Online Certificate Status Manager Agent Services
The default entry page to the Online Certificate Status Manager (OCSM) agent services is
shown in Figure 2.4, “Online Certificate Status Manager Agent Services Page”. Only designated
OCSM agents, with a valid certificate in their client software, are authorized to access these
pages.
Figure 2.4. Online Certificate Status Manager Agent Services Page
An OCSM agent performs the following tasks:
• Checks that CAs are currently configured to publish their CRLs to the OCSM.
12
Token Processing System Agent Services
• Identifies a CM to the OCSM.
• Manually adds CRLs to the OCSM.
• Submits requests for the revocation status of a certificate to the OCSM.
For more information on these tasks, see Chapter 8, OCSP: Agent Services.
2.4. Token Processing System Agent Services
The TPS agent services page allows operations by two types of users, both agents and
administrators.
The default entry page to the Token Processing System (TPS) agent services is shown in
Figure 2.5, “TPS Agent Services Page”. Only designated TPS agents, with a valid certificate in
their client software, are authorized to access these pages.
Figure 2.5. TPS Agent Services Page
A TPS agent performs the following tasks:
• Lists and searches enrolled tokens by user ID or token CUID.
• Lists and searches certificates associated with enrolled tokens.
• Searches token operations by CUID.
13
Chapter 2. Agent Services
• Edits token information.
• Sets the token status.
The TPS agent services page also has a tab to allow operations by TPS administrators.
Figure 2.6. TPS Administrator Operations Tab
A TPS administrator performs the following tasks:
• Lists and searches enrolled tokens by user ID or token CUID.
• Edits token information, including the token owner's user ID.
• Adds tokens.
• Deletes tokens.
For more information about TPS agent and administrator tasks, see Chapter 9, TPS: Agent
Services.
3. Forms for Performing Agent Operations
The agent services interfaces are form-based HTML pages that are part of the Certificate
System installation. The Certificate System administrator designates certain users as agents for
each installed subsystem (Certificate Manager, Data Recovery Manager, Online Certificate
Status Manager, and Token Processing System). Only a designated agent for a subsystem can
use that subsystem's agent services interface.
In addition, these designated agents must have personal client SSL certificates installed on their
client software to access the agent services interface.
14
Forms for Performing Agent Operations
A subsystem agent with the correct certificates can access agent services forms through the
agent services page to manage certificates. Table 2.1, “Forms Used for Agent Operations”,
describes each of these HTML forms.
Form name (Operation)
Subsystem
Description
List all Requests
CM
Examine, select, and process
requests for certificate
services. For instructions on
using this form, see
Section 2, “Listing Certificate
Requests”.
List all Certificates
CM
List certificates within a range
of serial numbers; the list of
returned certificates can be
limited to valid certificates.
For instructions on using this
form, see Section 1, “Basic
Certificate Listing”.
Search for Certificates
CM
Search for and list Certificate
System-issued certificates by
subject name, certificate type,
the state of the certificate
(such as expired or revoked),
and the dates when the
certificate was issued,
revoked, expired, or valid. For
instructions on using this
form, see Section 2,
“Advanced Certificate
Search”.
Revoke Certificates
CM
Search for and revoke
certificates issued by the
Certificate System. For
instructions on using this
form, see Section 4,
“Revoking Certificates”.
Update the Revocation List
CM
Perform manual updates of
the published CRL. For
instructions on using this
form, see Section 5.2,
“Updating the CRL”.
Update the Directory Server
CM
Update the LDAP publishing
directory with changes in
certificate information like
15
Chapter 2. Agent Services
Form name (Operation)
Subsystem
Description
newly issued certificates and
updated CRLs. For
instructions on using this
form, see Section 2, “Manual
Directory Updates”.
Search for Requests
CA and DRM
Search for requests filed by
end entities with the
Certificate System. Search
criteria include the request ID
range, request type, request
status, and request owner.
Searches are limited by two
factors: the total time allowed
for the search operation (in
seconds) and the maximum
number of results to display.
Display the Revocation List
CA
View the current CRL. The
display can be customized by
the issuing point and display
type. Click the CRL number to
display the time taken to
generate this CRL; this is
known as the CRL split time.
List all Requests
DRM
Find and examine requests
for key services. For
instructions on using this
form, see Section 1, “List
Requests”.
Search for Keys
DRM
Find and list specific archived
keys. For instructions on
using this form, see
Section 2, “Finding and
Recovering Keys”.
Recover Keys
DRM
Find and recover specific
archived keys. A key in the
list returned by a search is
selected and its recovery is
initiated; the recovery must be
authorized by designated key
recovery agents. For
instructions on using this
form, see Section 2.2,
“Recovering Keys”.
16
Forms for Performing Agent Operations
Form name (Operation)
Subsystem
Description
Authorize Recovery
DRM
Authorize a key recovery
request remotely that was
initiated by another DRM
agent. For instructions on
using this form, see
Section 2.2, “Recovering
Keys”.
List Certificate Authorities
OCSM
List CMs that are currently
configured to publish their
CRLs to the OCSM. For
instructions, see Section 1,
“Listing CAs Identified by the
OCSP”.
Add Certificate Authority
OCSM
Identify a CM to the OCSM.
For instructions, see
Section 2, “Identifying a CA to
the OCSP”.
Add Certificate Revocation
List
OCSM
Add a CRL to the OCSM's
internal database. For
instructions, see Section 3,
“Adding a CRL to the OCSP”.
Check Certificate Status
OCSM
Check the status of OCSP
service requests sent by
OCSP-compliant clients. For
instructions, see Section 4,
“Checking the Revocation
Status of a Certificate”.
Manage Certificate Profiles
CA
Enable and disable supported
certificate profiles. Once a
profile is disabled, the
administrator can make
changes to the profile by
editing the profile
configuration files or through
the Console.
OCSP Service
CA
Manage the operation of the
CA's internal OCSP service.
List all Tokens
TPS
List all the enrolled tokens,
which shows all of the tokens
enrolled by the TPS and basic
information about the token.
See Section 3, “Managing
Tokens”.
17
Chapter 2. Agent Services
Form name (Operation)
Subsystem
Description
Search for Tokens
TPS
Search for tokens using either
the user ID of the user to
whom the token was issued,
or by the contextually unique
ID (CUID) of the token. See
Section 3, “Managing
Tokens”.
List all Certificates
TPS
List all certificates on the
token. See Section 4, “Listing
and Searching Certificates”.
Search for Certificates
TPS
Search for certificates stored
on the tokens using either the
user ID of the user to whom
the certificate was issued, or
by the contextually unique ID
(CUID) of the token. See
Section 4, “Listing and
Searching Certificates”.
List all Activities
TPS
List all operations performed
through the TPS. See
Section 5, “Searching Token
Activities”.
Search for Activities
TPS
Search for operations
performed through the TPS.
The operations are only
searched by the contextually
unique ID (CUID) of the
token. See Section 5,
“Searching Token Activities”.
Table 2.1. Forms Used for Agent Operations
4. Accessing Agent Services
Access to the agent services forms requires certificate-based authentication. Only users who
authenticate with the correct certificate and who have been granted the appropriate access
privilege can access and use the forms. Operations are performed over SSL, so the server
connection uses HTTPS on the SSL agent port.
The agent services URLs use the following format:
https://<hostname:port/subsystem_type>/agent/<subsystem_type>
For example, if a CA is installed on a host named server.example.com and is listening to port
18
Accessing Agent Services
9443, use the following URL to access the agent services interface:
https://server.example.com:9443/ca/agent/ca
There is also a services page for each subsystem. The URL for the services page for the
previous example would be as follows: https://server.example.com:9443/ca/services
The services page has links to the all of the HTML pages for the subsystem, such as agent and
end entities, as well as the administration page if the subsystem has not yet been configured.
Figure 2.7. Certificate Manager Services Page
Note
The services pages are written in HTML and are intended to be customized. This
document describes the default pages. If an administrator has customized the
agent services pages, those pages may differ from those described here. Check
with the Certificate System administrator for information on the local installation.
19
20
Chapter 3.
CA: Working with Certificate Profiles
A Certificate Manager (CM) agent is responsible for approving certificate profiles that have been
configured by a Certificate System administrator. CM agents also manage and approve
certificate requests that come from profile-based enrollments.
1. About Certificate Profiles
Profile Definition.
A certificate profile defines everything associated with issuing a certificate, including the
authentication method, the certificate content (defaults), constraints for content values in the
requested certificate type, and the contents of the input and output forms associated with the
certificate profile.
1.1. Categories of Certificate Profiles
There are three categories of information that constitute a certificate profile:
• Profile inputs. Profile inputs are parameters and values that are submitted to the CA when a
certificate is requested. Profile inputs include public keys for the certificate request and the
certificate subject name requested by the end entity for the certificate.
• Profile policy sets. A certificate profile can have one or more policy sets, each of which is
defined by a set of defaults and constraints.
• Profile defaults. Profile defaults are parameters and values defined by the CA administrator.
Profile defaults include the authentication mechanism for the end entity, how long the
certificate is valid, and what certificate extensions appear for each type of certificate issued.
• Profile constraints. Profile constraints are parameters and values that form the rules or
policies for issuing certificates. Profile constraints include rules like requiring the certificate
subject name to have at least one CN component, setting the validity of a certificate to a
maximum of 360 days, or requiring that the subjectaltname extension always be set to
true.
• Profile outputs. Profile outputs are parameters and values that specify the format in which to
issue the certificate to the end entity. Profile outputs include base-64 encoded files, CMMF
responses, and PKCS #7 output, which also includes the CA chain.
2. Profile Operations Performed by CA Agents
Certificate Authority agents review profile requests and may consequently take any of the
following actions:
21
Chapter 3. CA: Working with Certificate Profiles
Approve the request.
The certificate is issued, and the end entity then retrieves and uses it.
Reject the request.
No certificate is issued. The end entity is notified that the request was rejected for the
reasons specified by the agent. The end entity can also view the request status using the
CA's end entities page.
Cancel the request.
No certificate is issued. The end entity is notified that the request was canceled for the
reasons specified by the agent. The end entity can also view the request status using the
CA's end entities page.
Update the request.
The agent has the authority to change the certificate request to ensure that the request
follows the policies that have been set. For example, the agent may change the values for
certificate extensions.
Validate the request.
This checks that the output of the request conforms to the constraints defined in the profile.
Assign the request.
The certificate request is transferred to another agent for approval.
Unassign the request.
This removes the certificate request from an agent's queue.
Enrollment requests are submitted to a certificate profile and are subject to the defaults and
constraints set up in that certificate profile, regardless of whether the request was created from
the input form associated with the certificate profile or the request was created elsewhere and
submitted preformatted.
3. List of Certificate Profiles
The following pre-defined certificate profiles are ready to use when the Certificate System is
installed. These certificate profiles have been designed for the most common types of
certificates, and they provide common defaults and constraints, authentication methods, and
inputs and outputs. You can edit these profiles or add more profiles as necessary. An
administrator can set up additional defaults and constraints using the CS SDK.
Profile ID
Profile Name
Description
caUserCert
Manual User Dual-Use
Certificate Enrollment
Used to enrol user
certificates.
caDualCert
Manual User Signing &
Encryption Certificates
Enrollment
Used to enrol dual user
certificates. It works only with
Netscape 7.0 or later.
22
List of Certificate Profiles
Profile ID
Profile Name
Description
caSignedLogCert
Manual Log Signing
Certificate Enrollment
Used to enrol audit log
signing certificates
caTPSCert
Manual TPS Server
Certificate Enrollment
Used to enrol TPS server
certificates.
caRARouterCert
RA Agent-Authenticated
Router Certificate Enrollment
Used to enrol router
certificates.
caRouterCert
One Time Pin Router
Certificate Enrollment
Used to enrol router
certificates.
caServerCert
Manual Server Certificate
Enrollment
Used to enrol server
certificates.
caOtherCert
Other Certificate Enrollment
Used to enrol other
certificates.
caCACert
Manual Certificate Manager
Signing Certificate Enrollment
Used to enrol Certificate
Authority certificates.
caInstallCACert
Manual Security Domain
Certificate Authority Signing
Certificate Enrollment
Used to enrol Security
Domain Certificate Authority
certificates.
caRACert
Manual Registration Manager
Signing Certificate Enrollment
Used to enrol Registration
Manager certificates.
caOCSPCert
Manual OCSP Manager
Signing Certificate Enrollment
Used to enrol OCSP Manager
certificates.
caTransportCert
Manual Data Recovery
Used to enrol Data Recovery
Manager Transport Certificate Manager transport
Enrollment
certificates.
caDirUserCert
Directory-Authenticated User
Dual-Use Certificate
Enrollment
Used to enrol user certificates
with directory-based
authentication.
caAgentServerCert
Agent-Authenticated Server
Certificate Enrollment
Used to enrol server
certificates with agent
authentication.
caAgentFileSigning
Agent-Authenticated File
Signing
This certificate profile is for
file signing with agent
authentication.
caCMCUserCert
Signed CMC-Authenticated
User Certificate Enrollment
Used to enrol user certificates
by using the CMC certificate
request with CMC Signature
authentication.
caFullCMCUserCert
Signed CMC-Authenticated
User Certificate Enrollment
Used to enrol user certificates
by using the CMC certificate
request with CMC Signature
23
Chapter 3. CA: Working with Certificate Profiles
Profile ID
Profile Name
Description
authentication.
caSimpleCMCUserCert
Simple CMC Enrollment
Request for User Certificate
Used to enrol user certificates
by using the CMC certificate
request with CMC Signature
authentication.
caTokenDeviceKeyEnrollment Token Device Key Enrollment
Used to enrol token device
keys
caTokenUserEncryptionKeyEnrollment
Token User Encryption
Certificate Enrollment
Used to enrol Token
Encryption key
caTokenUserSigningKeyEnrollment
Token User Signing
Certificate Enrollment
Used to enrol Token Signing
key
caTempTokenDeviceKeyEnrollment
Temporary Device Certificate
Enrollment
Used to enrol token device
keys
caTempTokenUserEncryptionKeyEnrollment
Temporary Token User
Encryption Certificate
Enrollment
Used to enrol Token
Encryption key
caTempTokenUserSigningKeyEnrollment
Temporary Token User
Signing Certificate Enrollment
Used to enrol Token Signing
key
caAdminCert
Security Domain
Administrator Certificate
Enrollment
Used to enrol Security
Domain Administrator's
certificates with LDAP
authentication against the
internal LDAP database.
caInternalAuthServerCert
Security Domain Server
Certificate Enrollment
Used to enrol Security
Domain server certificates.
caInternalAuthTransportCert
Security Domain Data
Recovery Manager Transport
Certificate Enrollment
Used to enrol Security
Domain Data Recovery
Manager transport
certificates.
caInternalAuthDRMstorageCert Security Domain DRM
storage Certificate Enrollment
Used to enrol Security
Domain DRM storage
certificates
caInternalAuthSubsystemCert Security Domain Subsysem
Certificate Enrollment
Used to enrol Security
Domain subsystem
certificates.
caInternalAuthOCSPCert
Security Domain OCSP
Manager Signing Certificate
Enrollment
Used to enrol Security
Domain OCSP Manager
certificates.
DomainController
Domain Controller
Used to enrol Domain
Controller Certificate
24
Example Profile
Profile ID
Profile Name
Description
caDualRAuserCert
RA Agent-Authenticated User
Certificate Enrollment
Used to enrol user certificates
with RA agent authentication.
caRAagentCert
RA Agent-Authenticated
Agent User Certificate
Enrollment
Used to enrol RA agent user
certificates with RA agent
authentication.
caRAserverCert
RA Agent-Authenticated
Server Certificate Enrollment
Used to enrol server
certificates with RA agent
authentication.
Table 3.1. List of Certificate Profiles
3.1. Example Profile
The following is a description of an example caUserCert profile, as shipped with the server. A
profile usually contains inputs, policy sets, and outputs. The default caUserCert certificate
profile contains the following:
• Profile description
This profile is for issuing user, or client, certificates.
• Profile inputs
• Key generation Specifies that the key pair generation during the request submission be
CRMF-based and 1024-bit. This is a read-only field.
• Subject name The subject name input is used when distinguished name (DN) parameters
need to be collected from the user; the user DN can be used to create the subject name in
the certificate. This input uses the following form fields:
• UID The user ID of the user in the LDAP directory.
• Email The email address of the user.
• Common name The name of the user.
• Organizational unit The organizational unit to which the user belongs.
• Organization The organization name.
• Country The country where the user is located.
• Requester This input uses the following form fields:
• Requester name The name of the certificate requester.
25
Chapter 3. CA: Working with Certificate Profiles
• Requester email The email address of the certificate requester.
• Requester phone The phone number of the certificate requester.
• Profile policy sets
The different policy sets that are set by default on caUserCert are listed in Table 3.2,
“caUserCert Profile Policy Sets”.
Profile Policy Set
Defaults
Constraints
userCertSet.1 (SubjectName)
No defaults
userCertSet.2 (Validity)
range = 180 days
userCertSet.3 (Key)
No defaults
userCertSet.4 (Authority Key
Identifier)
No defaults
userCertSet.5 (AIA extension)
No constraints
authinfoaccesscritical = false
authinfoaccessADMethod_0=
OID
authinfoaccessADLocationType_0=URIName
authinfoaccessADEnable_0=true
authinfoaccessADLocation_0=
userCertSet.6 (Key Usage)
Populates a Key Usage
extension (2.5.29.15) to the
request. The default values
are as follows:
The range is less than 365
days. The notbefore and
notafter date checks are
turned off.
keytype = RSAa
keyminLength = 512
keymaxLength = 4096b
No constraints
Accepts the Key Usage
extension, if present, only
when the default values are
set.
Criticality=true
Digital Signature=true
Non-Repudiation=true
Key Encipherment=true
Data Encipherment=false
Key Agreement=false
Key Certificate Sign=false
Key CRL Sign=false
Encipher Only=false
Decipher Only=false
userCertSet.7 - Extended Key Populates an Extended Key
Usage
Usage extension to the
26
No constraints
How Certificate Profiles Work
Profile Policy Set
Defaults
Constraints
request. The default values
are Criticality=false and
OIDs=1.3.6.1.5.5.7.3.2,1.3.6.1.5.5.7.3.4.
userCertSet.8 - Subject Alt
Name Constraint
Populates a Subject
Alternative Name extension
(2.5.29.17) to the request.
The default values are
Criticality=false and
No constraints
Record
#0{Pattern:$request.requester_email$,Pattern
Type:RFC822Name,Enable:true}.
userCertSet.9 - SigningAlg
Populates the certificate
signing algorithm. The default
value is
Algorithm=SHA1withRSA.
a
The keytype should be RSA.
b
The key length should be between 512 and 4096.
Accepts only the following
signing algorithms:
SHA1withRSA
SHA256withRSA
SHA512withRSA
MD5withRSA
MD2withRSA
Table 3.2. caUserCert Profile Policy Sets
• Profile outputs.
The Certificate Output output displays the certificate in pretty print format and cannot be
configured or changed. This output needs to be specified for any automated enrollment. Once
a user successfully authenticates using the automated enrollment method, the certificate is
automatically generated, and this output page is returned to the user. In an agent-approved
enrollment, the user can get the certificate, once it is issued, by providing the request ID in
the CA end entities page. (There is no output page associated with agent-approved
enrollment.)
4. How Certificate Profiles Work
An administrator sets up a certificate profile by associating an existing authentication plug-in, or
method, with the certificate profile; enabling and configuring defaults and constraints; and
defining inputs and outputs. The administrator can use the existing certificate profiles, modify
the existing certificate profiles, create new certificate profiles, and delete any certificate profile
that will not be used in the PKI.
Once a certificate profile is set, it appears on the Manage Certificate Profiles page, where an
27
Chapter 3. CA: Working with Certificate Profiles
agent can approve, and thus enable, a certificate profile. Once the certificate profile is enabled,
it appears on the Certificate Profile tab of the end entities page, so end entities can enroll for a
certificate using the certificate profile.
The certificate profile enrollment page contains links to each type of certificate profile enrollment
that has been enabled. When an end entity selects one of those links, an enrollment page
appears, containing the enrollment form specific to that certificate profile. The enrollment page
for the certificate profile in the end entities page is dynamically generated from the inputs
defined for the certificate profile. If an authentication plug-in is configured, additional fields may
be added that are needed to authenticate the user with that authentication method.
A manual enrollment is a request when no authentication plug-in is configured. When the end
entity submits a certificate profile request with a manual enrollment, the certificate profile is
queued in the agent services page as a certificate profile enrollment request. The agent can
change the request, reject it, change the status, or approve it. The agent can also update the
request without submitting it or validate that the request adheres to the profile's defaults and
constraints. Agents are bound by the constraints set in the profile; they cannot change the
request so that a constraint is violated. The signed approval is immediately processed, and a
certificate is issued.
When a certificate profile is associated with an authentication method, the request generates a
certificate automatically if the user successfully authenticates, all required information is
provided, and the request does not violate any of the constraints set for the certificate profile.
The issued certificate contains the default content for the certificate profile (like the extensions
and validity period) and follows the constraints set for each default. There can be more than one
policy set (pair of defaults and constraints); each set is distinguished by using the same value
for the policy set ID for the default and constraint in the set. The server evaluates each policy
set for each request it receives. When a single certificate is issued, one set is evaluated, and
any other sets are ignored. When dual key pairs are issued, the first policy set is evaluated with
the first certificate request, and the second set is evaluated with the second certificate request.
There is no need for more than one policy set when issuing single certificates or more than two
sets when issuing dual key pairs.
5. Enabling and Disabling Certificate Profiles
Any certificate profiles that have been configured by an administrator are listed in the Manage
Certificate Profiles page of the agent services page, which is accessed through the Manage
Certificate Profiles link in the left menu of the CA agent services page.
The Manage Certificate Profiles page contains all of the certificate profiles that have been set
up by an administrator. It shows the name of the certificate profile, a short description of the
certificate profile, whether this is an end user certificate profile, whether the certificate profile
has been approved and enabled, and, if approved, which agent under ID approved the request.
5.1. Getting Certificate Profile Information
Information about any certificate profile is available by clicking the name of the certificate profile,
28
End User Certificate Profile
which is linked to the Approve Certificate Profile page. This page lists information about the
certificate profile and allows an agent to approve a certificate profile or disable a
previously-approved certificate profile. An approved certificate profile can only be disabled by
the agent who originally approved it.
5.2. End User Certificate Profile
If the End User field of the certificate profile is marked true, then this certificate profile appears
as an enrollment form in the end entities page. If the End User field of the certificate profile is
marked false, then this certificate profile does not appear in the end entities page. This
parameter determines whether the certificate profile needs to be received from the end entities
page in order to be processed.
5.3. Policy Information
Each policy has a policy information section which shows a table for each policy set. A
certificate profile usually has one policy set. If the enrollment is for dual key pairs, then there are
two policy sets, one for the signing key and one for the encryption key. The policy set defines all
of the defaults and constraints that have been set for the requested certificate. For dual key
pairs, two certificates are requested, one for the signing key and one for the encryption key.
The policy set table in the policy information sections contains the following information for the
policy set:
• #. The ID number (#) for this set of defaults and constraints.
• Defaults [Extensions/Fields]. The defaults set to define certificate content, including
extensions.
• Constraints. The constraints placed on the certificate content. The certificate content in the
requested certificate must comply with these constraints in order to be issued.
5.4. Approving a Certificate Profile
To approve a certificate profile, do the following:
1. Go to the Manage Certificate Profiles page, and click on a certificate profile name.
2. Open the Approve Certificate Profile page for that certificate profile.
3. Click on the Approve button at the bottom of the page.
After a certificate profile is approved, it appears in the end entities page, which allows an end
entity to use that certificate profile to enroll for a certificate.
Once a certificate profile is enabled, administrators cannot change any aspect of the certificate
29
Chapter 3. CA: Working with Certificate Profiles
profile. The certificate profile must first be disabled before an administrator to modify the
certificate profile.
5.5. Disapproving a Certificate Profile
A certificate profile can only be disabled by the agent who approved the certificate profile.
To disable a certificate profile, do the following:
1. Open the Manage Certificate Profiles page, and click on a certificate profile name.
2. Open the certificate profile's Approve Certificate Profile page.
3. Click the Disapprove button at the bottom of the page.
NOTE
It is only possible to disable a certificate profile after it has been approved.
Once a certificate profile is disabled, it is no longer available in the end entities page for end
entities to use to enroll for certificates.
30
Chapter 4.
CA: Handling Certificate Requests
A Certificate Manager (CM) agent is responsible for handling both manual enrollment requests
made by end entities (end users, server administrators, and other Certificate System
subsystems) and automated enrollment requests that have been deferred. This chapter
describes the general procedure for handling requests and explains how to handle different
aspects of certificate request management.
1. Managing Requests
The procedure for handling certificate enrollment requests is as follows:
1. View the list of pending requests for the CM (refer to Section 2, “Listing Certificate
Requests”).
2. Select a request from the list (refer to Section 2.1, “Selecting a Request”).
3. Process the request (refer to Section 2.2, “Searching Requests” and Section 3, “Approving
Requests”).
Processing a certificate request for a certificate allows one of several actions:
• Approve the request. A request can be approved manually by an agent or automatically by
the certificate profile if the request has been authenticated and if the system has been
configured to allow automatic enrollment. After a request has been approved, the Certificate
System issues the requested certificate. The end user can be automatically notified that the
certificate was issued.
• Reject the request. A certificate request can be rejected manually or automatically by the
certificate profile if the request does not conform to the profile's defaults and constraints. If
automatic notification is configured, a notification is automatically sent to the requester when
the certificate request is rejected.
• Cancel the request. A request can be canceled manually, but requests can never be canceled
automatically. Users do not receive automatic notification of canceled requests. Cancellation
can be useful if the user has left the company since submitting the request or if the user has
already been contacted about a problem with the certificate request and, therefore, does not
need notified.
• Update the request. A pending certificate request can be updated by changing some of its
values, such as the subject name. The different default values associated with a certificate
profile changed by the agent only results in the certificate request values being changed but
does not change its state.
• Validate the request. A request that uses a certificate profile can be checked, or validated, to
see if the request complies with the defaults and constraints set by the certificate profile. This
31
Chapter 4. CA: Handling Certificate Requests
action only checks the request but does not submit or edit the request.
• Assign the request. A certificate request can be manually assigned by the agent processing
the request to himself. Requests cannot be assigned to another agent.
• Unassign the request. A request can be removed from an agent's queue if necessary, such
as when requests are assigned to an agent who has since left the company.
Approving, canceling, and rejecting certificate requests all alter the request status. Assigning,
unassigning, update, and validating certificate requests do not alter the request status. If the
form is closed without taking one of these actions, the request remains in the queue with the
same status.
Figure 4.1, “Certificate Request Management Process” illustrates the process for handling
requests and the different types of status for a request.
32
Listing Certificate Requests
Figure 4.1. Certificate Request Management Process
2. Listing Certificate Requests
The CM keeps a queue of all certificate service requests that have been submitted to it. The
queue records whether a request is pending, completed, canceled, or rejected. Three types of
requests can be in the queue:
33
Chapter 4. CA: Handling Certificate Requests
• Certificate enrollment requests
• Certificate renewal requests
• Certificate revocation requests
A CM agent must review and approve manual enrollment requests. Certificate requests that
require review have a status of pending.
To see a list of requests, do the following:
1. Go to the CM agent services page.
https://server.example.com:9443/ca/agent/ca
NOTE
An agent much have the proper client certificate to access this page.
2. Click List Requests to view the queue of certificates requests.
The List Requests form appears.
Figure 4.2. List Requests Form
34
Listing Certificate Requests
3.
View certificate requests request type by selecting one of the options from the Request type
menu.
• Show enrollment requests
• Show renewal requests
• Show revocation requests
• Show all requests
4. View requests by request status by selecting one of the options in the Request status menu.
• Show pending requests. These are enrollment requests that have not yet been processed
but are waiting for manual review.
• Show canceled requests. These are requests that have been manually canceled by an
agent. Users do not receive automatic notification of canceled requests. Cancellation can
be useful if the user has left the company since submitting the request or if the user has
already been contacted about a problem and does not need to be notified about the
request status.
• Show rejected requests. These are requests that have been either manually rejected or
rejected automatically during profile processing. If the system has been configured to
provide automatic notifications to users, a notice is sent to the requester when the request
is rejected.
• Show completed requests. These are requests that have been completed, including issued
certificates and completed revocation requests.
• Show all requests. This shows all requests of the selected type, regardless of status.
5. To start the list at a specific place in the queue, enter the starting request identifier in decimal
or hexadecimal form. Use 0x to indicate a hexadecimal number; for example, 0x2A.
6. Choose the number of matching requests to be returned. When a number is specified, the
system displays that number of certificate requests, beginning with the starting sequence
number that matches the specified criteria.
7. Click Find to display the list of requests that match the specified criteria.
35
Chapter 4. CA: Handling Certificate Requests
Figure 4.3. Request Queue
2.1. Selecting a Request
To select a request from the queue, do the following:
1. On the agent services page, click List Requests, specify search criteria, and click Find to
display a list of certificate signing requests.
2. Select a request to examine from the Request Queue form.
3. If a desired request not shown, scroll to the bottom of the list, specify an additional number of
requests to be listed, and click Find. That number of additional requests matching original
search criteria is shown.
4. When the request has been found, click Details.
5.
The Request Details form appears, showing detailed information about the selected request.
Use this form to approve or manage the request.
36
Searching Requests
Figure 4.4. Request Details
NOTE
If the system changes the state of the displayed request, using the browser's
Back or Forward buttons or history to navigate can cause the data display to
become out of date. To refresh the data, click the highlighted serial number at
the top of the page.
2.2. Searching Requests
The CM agent interface provides a method for agents to see the request queue based on
search criteria other than those described in the List Requests category. These criteria include
the following:
• Searching by Request ID Range. An agent can perform searches on the request queue. To
perform searches by request ID range, select the Show requests that fall within the
following range option, and enter the lowest and highest request ID.
• Searching by Request Status. To search by request status, select the Show requests that
are of status option, and select the desired request status:
• Pending
37
Chapter 4. CA: Handling Certificate Requests
• Completed
• Canceled
• Rejected
• Any
• Searching by Request Type. To search by the request type, select the Show requests that
are of type option, and select the type of certificate request:
• Enrollment
• Renewal
• Revocation
• Any
• Searching by Request Owner. There are to ways to search by the request owner:
• Search for requests assigned to self
• Search for requests assigned to a particular agent (based on UID attribute)
Both of the following search constraints apply to any of the search operations:
• Maximum number of entries to return.
• Maximum time to use to perform the search.
3. Approving Requests
There are two ways that a certificate request is approved, depending on the user authentication
method required by the profile. In automatic enrollment, the Certificate System automatically
receives and approves the request if it meets established criteria. In manual enrollment, an
agent must review and approve the request. Before approving a request, an agent can adjust
some of the parameters, such as the subject name and validity period.
To adjust and approve a certificate request, do the following:
1. Open the agent services page.
https://server.example.com:9443/ca/agent/ca
2. Click Find at the bottom of the List requests page to list pending certificate requests.
38
Approving Requests
3. Select the certificate request from the list.
4. The certificate request details page contains several tables with information about the
request:
• Request Information. Lists basic information about the request.
• Certificate Profile Information. Lists the certificate profile being used, along with basic
information about that certificate profile.
• Certificate Profile Inputs. Lists the inputs contained in the enrollment form for this certificate
profile as well as the values set by the requester.
• Policy Information. Lists the policies that apply to this certificate profile, including the
definition of the policy, the value placed in the certificate by this specific policy, and the
constraints placed on this policy.
To change any of the information contained in the certificate, such as the subject name or
validity period, change the settings in the policy information table in the certificate request.
Any policies that can be changed have either a drop-down list or an editable field.
For any changes, the values must be valid within the constraints placed on a policy. If a
change is made outside the constraint, the request will not validate. An invalid request must
be changed before a certificate is issued.
5. Choose an action from the menu at the bottom of the page:
• Approve Request. Approves the request and issues the certificate.
• Update Request. Updates the request with any modified information. The status of the
request does not change.
• Validate Request. Confirms that the request conforms to the constraints for issuing that
type of certificate. The request is confirmed as valid, or the system returns a list of fields
that need to be edited.
• Reject Request. Rejects the request.
• Cancel Request. Cancels the request without issuing a certificate or a rejection.
NOTE
For more information on how to adjust parameters associated with certificate
profiles, such as defaults and constraints, refer to Chapter 3, CA: Working with
Certificate Profiles.
After the agent sets the action to Approve Request and clicks Submit, the certificate is
39
Chapter 4. CA: Handling Certificate Requests
generated and available to the user through the end entities page. If notifications have been set,
then an email will be sent to the requester automatically.
4. Sending an Issued Certificate to the Requester
When the CM has issued a certificate in response to a request, the user who requested it must
receive a copy to install locally. Users install user certificates, such as agent certificates, in client
software. Server administrators install servers certificates in the servers that they manage.
Depending on how the Certificate System is configured, an end user who requests a certificate
might receive automatic email notification of the success of the request; this email message
contains either the certificate itself or a URL from which the user can get the certificate.
If the system is not configured for automatic notification or if the requester is a server
administrator, the issued certificate must be sent manually to the requester by the agent, or the
requester must be directed to retrieve it from the CM's end entities page.
Figure 4.5, “A Newly Issued Certificate Page” shows a web page containing a new certificate.
This is the page shown after the agent selects Approve this certificate request.
40
Sending an Issued Certificate to the
Figure 4.5. A Newly Issued Certificate Page
To copy and mail a new server certificate to the requester, do the following:
1. Create a new email addressed to the requester.
2. From the agent services window where the new certificate is displayed, copy only the
base-64 encoded certificate, including the marker lines -----BEGIN CERTIFICATE----- and
-----END CERTIFICATE-----.
3. Paste the base-64 encoded certificate into the email message body, and send the message.
To deliver a new client certificate to the requester, note the serial number of the approved
request, and do the following:
41
Chapter 4. CA: Handling Certificate Requests
1. Open to the agent services page, click List Requests in the left frame, enter the serial
number for the approved request, and click Find.
2. In the Request Queue form, click Details beside the relevant request. Right-click the
certificate serial number, and choose Open Frame in New Window from the pop-up menu.
3. In the new browser window containing the certificate, copy the URL from the location or
address field.
4. Create a new email message addressed to the requester.
5. Paste the URL into the body of the message, along with instructions to for the requester to go
to that URL and click the Import button at the bottom of the page to import the certificate.
Alternatively, include the URL for the agent services page in the email message along with the
certificate serial number, and instruct the user to do following:
1. Click the Retrieval tab. The List Certificates form should appear.
2. Enter the serial number of the certificate in both serial number fields.
3. Click Find.
4. When the Search Results form appears, click Details.
5. When the certificate appears, scroll down to the bottom of the form, and click Import
Certificate.
42
Chapter 5.
CA: Finding and Revoking
Certificates
A Certificate Manager (CM) agent can use the agent services page to find a specific certificate
issued by the Certificate System or to retrieve a list of certificates that match specified criteria.
The certificates which are retrieved can be examined or revoked by the agent. The CM agent
can also manage the certificate revocation list (CRL).
1. Basic Certificate Listing
It is possible to list certificates within a range of serial numbers. All certificates within the range
may be displayed or, if the agent selects, only those that are currently valid.
To find a specific certificate or to list certificates by serial number, do the following:
1. Open the CM agent services page.
2. Click List Certificates.
Figure 5.1. List Certificates
43
Chapter 5. CA: Finding and Revoking Certificates
• To find a certificate with a specific serial number, enter the serial number in both the upper
limit and lower limit fields of the List Certificates form, in either decimal or hexadecimal
form. Use 0x to indicate the beginning of a hexadecimal number; for example,
0x00000006. Serial numbers are displayed in hexadecimal form in the Search Results and
Details pages.
• To find all certificates within a range of serial numbers, enter the upper and lower limits of
the serial number range in decimal or hexadecimal form.
Leaving either the lower limit or upper limit field blank displays the certificate with the
specified number, plus all certificates before or after it in sequence.
3. To limit the returned list to valid certificates, select the check boxes labeled with filtering
methods. It is possible to include revoked certificates, to include expired certificates or
certificates that are not yet valid, or to display only valid certificates.
4. Enter the number of certificates matching the criteria that should be returned.
When any number is entered, the first certificates up to that number matching the criteria are
displayed.
5. Click Find.
The Certificate System displays a list of the certificates that match the search criteria. Select
a certificate in the list to examine it in more detail or perform various operations on it. For
more information, refer to Section 3, “Examining Certificates”.
2. Advanced Certificate Search
Search for certificates by more complex criteria than serial number using the advanced search
form. To perform an advanced search for certificates, do the following:
1. Open the CM agent services page. The agent must submit the proper client certificate to
access this page.
2. Click Search for Certificates to display the Search for Certificates form to specify search
criteria.
44
Advanced Certificate Search
Figure 5.2. Search Certificates
3. To search by particular criteria, use one or more of the sections of the Search for
Certificates form. To use a section, select the check box, then fill in any necessary
information.
• Serial Number Range. Finds a certificate with a specific serial number or lists all
certificates within a range of serial numbers.
• To find a certificate with a specific serial number, enter the serial number in both the
upper limit and lower limit fields in either decimal or hexadecimal. Use 0x to indicate the
beginning of a hexadecimal number, such as 0x2A. Serial numbers are displayed in
hexadecimal form in the Search Results and Details pages.
• To find all certificates within a range of serial numbers, enter the upper and lower limits
of the serial number range in decimal or hexadecimal. Leaving either the lower limit or
upper limit field blank returns all certificates before or after the number specified.
45
Chapter 5. CA: Finding and Revoking Certificates
• Status. Selects certificates by their status. A certificate has one of the following status
codes:
• Valid. A valid certificate has been issued, its validity period has begun but not ended,
and it has not been revoked.
• Invalid. An invalid certificate has been issued, but its validity period has not yet begun.
• Revoked. The certificate has been revoked.
• Expired. An expired certificate has passed the end of its validity period.
• Revoked and Expired. The certificate has passed its validity period and been revoked.
• Subject Name. Lists certificates belonging to a particular owner; it is possible to use
wildcards in this field.
• Revocation Information. Lists certificates that have been revoked during a particular period
or by a particular agent. For example, an agent can list all certificates revoked between
July 2005 and April 2006 or all certificates revoked by the agent with the username admin.
• To list certificates revoked within a time period, select the day, month, and year from the
drop-down lists to identify the beginning and end of the period.
• To list certificates revoked by a particular agent, enter the name of the agent; it is
possible to use wildcards in this field.
• Issuing Information. Lists certificates that have been issued during a particular period or by
a particular agent. For example, an agent can list all certificates issued between July 2005
and April 2006 or all certificates issued by the agent with the username betatest.
• To list certificates issued within a time period, select the day, month, and year from the
drop-down lists to identify the beginning and end of the period.
• To list certificates issued by a particular agent, enter the name of the agent; it is possible
to use wildcards in this field.
• Dates of Validity. List certificates that become effective or expire during a particular period.
For example, an agent can list all certificates that became valid on June 1, 2003, or that
expired between January 1, 2006, and June 1, 2006.
It is also possible to list certificates that have a validity period of a certain length of time,
such as all certificates that are valid for less than one month.
• To list certificates that become effective or expire within a time period, select the day,
month, and year from the drop-down lists to identify the beginning and end of the period.
• To list certificates that have a validity period of a certain length in time, select Not
greater than or Not less than from the drop-down list, enter a number, and select a
time unit from the drop-down list: days, weeks, months, or years.
46
Advanced Certificate Search
• Basic Constraints. Shows CA certificates that are based on the Basic Constraints
extension.
• Type. Lists certain types of certificates, such as all certificates for subordinate CAs. This
search works only for certificates containing the Netscape Certificate Type extension,
which stores type information. For each type, choose from the drop-down list to find
certificates where that type is On, Off, or Do Not Care.
4. To find a certificate with a specific subject name, use the Subject Name section. Select the
check box, then enter the subject name criteria. Enter values for the included search criteria
and leave the others blank.
The standard tags or components are as follows:
• Email address. Narrows the search by email address.
• Common name. Finds certificates associated with a specific person or server.
• UserID. Searches certificates by the user ID for the person to whom the certificate belongs.
• Organization unit. Narrows the search to a specific division, department, or unit within an
organization.
• Organization. Narrows the search by organization.
• Locality. Narrows the search by locality, such as the city.
• State. Narrows the search by state or province.
• Country. Narrows the search by country; use the two-letter country code, such as US.
5. After entering the field values for the server to match, specify the type of search to perform:
• Exact searches for certificate subject names match the exact components specified and
contain none of the components left blank. Wildcards cannot be used in this type of search.
• Partial searches for certificate subject names match the specified components, but the
returned certificates may also contain values in components that were left blank. Wildcard
patterns can be used in this type of search by using a question mark (?) to match an
arbitrary single character and an asterisk (*) to match an arbitrary string of characters.
NOTE
Placing a single asterisk in a search field means that the component must be in
the certificate's subject name but may have any value. Leave the field blank if it
does not matter if the field is present.
6. After entering the search criteria, scroll to the bottom of the form, and enter the number of
47
Chapter 5. CA: Finding and Revoking Certificates
certificates matching the specified criteria that should be returned.
Setting the number of certificates to be returned returns the first certificates found that match
the search criteria up to that number. It is also possible to put a time limit on the search in
seconds.
7. Click Find.
8. The Search Results form appears, showing a list of the certificates that match the search
criteria. Select a certificate in the list to examine it in more detail. For more information, refer
to Section 3, “Examining Certificates”.
Figure 5.3. Search Results Form
3. Examining Certificates
To examine the details of a certificate, do the following:
1. On the agent services page, click List Certificates or Search for Certificates, specify
search criteria, and click Find to display a list of certificates.
48
Revoking Certificates
2. On the Search Results form, select a certificate to examine.
If the desired certificate is not shown, scroll to the bottom of the list, specify an additional
number of certificates to be returned, and click Find. The system displays the next
certificates up to that number that match the original search criteria.
3. After selecting a certificate, click the Details button at the left side of its entry.
4. The Certificate page shows the detailed contents of the selected certificate and instructions
for installing the certificate in a server or in a web browser.
Figure 5.4. Certificate Details
5. The certificate is shown in base-64 encoded form at the bottom of the Certificate page,
under the heading Installing this certificate in a server.
4. Revoking Certificates
49
Chapter 5. CA: Finding and Revoking Certificates
Only CM agents can revoke certificates other than their own. A certificate must be revoked if
one of the following situations occurs:
• The owner of the certificate has changed status and no longer has the right to use the
certificate.
• The private key of a certificate owner has been compromised.
These two reasons are not the only ones why a certificate would need revoked; other reasons
are mentioned in Section 4.2, “Revoking One or More Certificates”.
To revoke one or more certificates, search for the certificates to revoke using the Revoke
Certificates button. While the search is similar to the one through the Search for Certificates
form, the Search Results form returned by this search offers the option of revoking one or all of
the returned certificates.
4.1. Searching for Certificates to Revoke
To search for one or more certificates to revoke, do the following:
1. Open the CM agent services page.
2. Click Revoke Certificates.
NOTE
The search form that appears has the same search criteria sections as the
Search for Certificates form.
3. Specify the search criteria by selecting the check boxes for the sections and filling in the
required information.
4. Scroll to the bottom of the form, and set the number of matching certificates to display.
5. Click Find.
6. The search returns a list of matching certificates. It is possible to revoke one or all certificates
in the list.
50
Revoking One or More Certificates
Figure 5.5. Revoke One or All Certificates
4.2. Revoking One or More Certificates
An entire list of certificates returned by a search can be revoked, or selected certificates from
the list can be revoked.
CAUTION
Whether revoking a single certificate or a list of certificates, be extremely careful
that the correct certificate has been selected or that the list contains only
certificates which should be revoked. Once a revocation operation has been
confirmed, there is no way to undo it.
4.2.1. Revoking One Certificate
To revoke a single certificate, do the following:
51
Chapter 5. CA: Finding and Revoking Certificates
1. On the CM's agent services page, click Revoke Certificates, specify search criteria, and
click Find to display a list of certificates.
2. On the Search Results form, select the certificate to revoke.
If a desired certificate is not shown, scroll to the bottom of the list, specify an additional
number of certificates to be returned, and click Find. The system displays the next
certificates up to that number that match the original search criteria.
3. Click the Revoke button next to the certificate to be revoked.
4. Confirm the certificate to be revoked in the revocation form.
4.2.2. Revoking Multiple Certificates
To revoke all of the certificates returned in a search, do the following:
1. On the CM's agent services page, click Revoke Certificates, specify search criteria, and
click Find to display a list of certificates.
2. On the Search Results page, scroll to the bottom to reach the Revoke ALL # Certificates
button. The number shown on the button is the total number of certificates returned by the
search. This is usually a larger number than the number of certificates displayed on the
current page.
3. Verify that all of the certificates returned by the search should be revoked, not only those
displayed on the current page.
4. Click Revoke ALL # Certificates at the bottom of the form.
5. Confirm the certificates to be revoked in the revocation form.
4.2.3. Confirming a Revocation
When one or more certificates has been selected for revocation, the Certificate Revocation
Confirmation form opens.
52
Revoking One or More Certificates
Figure 5.6. Confirm Certificate Revocation
To confirm the revocation, do the following:
1. Inspect the details of the certificate to verify that it is the one to be revoked. If more than one
certificate is being revoked, the form shows details for all the certificates.
2. Select an invalidity date. The invalidity date is the date which it is known or suspected that
the user's private key was compromised or that the certificate became invalid. A set of drop
down lists allows the agent to select the correct invalidity date.
3. Select a reason for the revocation. The reason applies to all the listed certificates. The
different reasons are as follows:
53
Chapter 5. CA: Finding and Revoking Certificates
• Key compromised
• CA key compromised
• Affiliation changed
• Certificate superseded
• Cessation of operation
• Certificate is on hold
4. Enter any additional comment. The comment is included in the revocation request.
When the revocation request is submitted, it is automatically approved, and the certificate is
revoked. Revocation requests are viewed by listing requests with a status of Completed; see
Section 2, “Listing Certificate Requests” for more information.
CAUTION
Whether a single certificate or a list of certificates is revoked, be extremely
careful that the correct certificate has been selected or that the list contains only
certificates which should be revoked. Once a revocation operation is confirmed,
there is no way to undo it.
5. Managing the Certificate Revocation List
Revoking a certificate notifies other users that the certificate is no longer valid. This notification
is done by publishing a list of the revoked certificates, called the certificate revocation list (CRL),
to an LDAP directory or to a flat file. This list is publicly available and ensures that revoked
certificates are not misused.
5.1. Viewing or Examining CRLs
It may be necessary to view or examine a CRL, such as before manually updating a directory
with the latest CRL. To view or display the CRL, do the following:
1. Go to the CM agent services page.
2. Click Display Certificate Revocation List to display the form for viewing the CRL.
3. Select the CRL to view. If the administrator has created multiple issuing points, these are
listed in the Issuing point drop-down list. Otherwise, only the master CRL is shown.
54
Updating the CRL
4. Choose how to display the CRL by selecting one of the options from the Display Type menu.
The choices on this menu are as follows:
• Cached CRL. Views the CRL from the cache rather than from the CRL itself. This option
displays results faster than viewing the entire CRL.
• Entire CRL. Retrieves and views the entire CRL.
• CRL header. Retrieves and views the CRL header only.
• Base 64 Encoded. Retrieves and views the CRL in base-64 encoded format.
5. To examine the selected CRL, click Display.
The CRL appears in the browser window. This allows the agent to check whether a particular
certificate (by its serial number) appears in the list and to note recent changes such as the
total number of certificates revoked since the last update, the total number of certificates
taken off hold since the last update, and the total number of certificates that expired since the
last update.
5.2. Updating the CRL
When a certificate is revoked, the CRL is automatically updated. If the Certificate System is
used with an LDAP directory server, the CRL in the directory is also updated automatically.
In some cases, the CRL may need updated manually, such as updating the list after the system
has been down or removing expired certificates to reduce the file size. (Expired certificates do
not need to be included in the CRL because they are already invalid because of the expiration
date.) Only a CM agent can manually update the CRL.
To update the CRL manually, do the following:
1. Open the CM agent services page.
2. Click Update Revocation List to display the form for updating the CRL.
55
Chapter 5. CA: Finding and Revoking Certificates
Figure 5.7. Update Certificate Revocation List
3. Select the algorithm to use to sign the new CRL. Before choosing an algorithm, make sure
that any system or network applications that need to read or view this CRL support the
algorithm.
• SHA-1 with RSA generates a 160-bit message digest.
• SHA-256 with RSA.
• SHA-512 with RSA.
• MD5 with RSA generates a 128-bit message digest. Most existing software applications
that handle certificates support only MD5. This is the default algorithm.
• MD2 with RSA generates a 128-bit message digest.
Before selecting an algorithm, make sure that the Certificate System has that algorithm
enabled. The Certificate System administrator will have that information.
4. To examine the CRL before updating it, click Display.
The CRL appears in the browser window, allowing the agent to check whether a particular
certificate appears in the list. Use the browser's Back button to return to the Update page.
56
Updating the CRL
5. To update the CRL with the latest certificate revocation information, click Update.
57
58
Chapter 6.
CA: Publishing to a Directory
A Red Hat Directory Server installation is required for the Certificate System subsystems to be
installed; this directory instance maintains user information and certificate and key information.
The Certificate System can be configured to publish certificates and CRLs to that directory, or
other LDAP directories, for other applications to access. Certificate information published to the
publishing directory must be periodically updated as certificates are issued and revoked.
Updates are usually published automatically but may also be published manually.
This chapter describes the procedures for updating an LDAP directory with the current status of
certificates. Only a Certificate Manager (CM) agent can publish certificates and CRLs to the
directory.
1. Automatic Directory Updates
Once the Certificate System administrator has configured the Certificate System to publish to
the publishing Directory Server, any changes to certificate information in Certificate System are
automatically updated in the publishing directory at specific times.
• The first time the Certificate System is started, it publishes the CM's CA certificate to the
LDAP publishing directory.
• When the Certificate System issues a new certificate, the certificate is published to the LDAP
publishing directory.
• When the Certificate System revokes a certificate, the certificate is removed from the
publishing directory.
• When the CRL is created or updated, the list is published to the LDAP publishing directory.
For more information on configuring the Certificate System to publish to the Directory Server,
see the Certificate System Administrator's Guide.
2. Manual Directory Updates
The LDAP publishing directory usually does not need certificate data updated manually
because most updates are automatic. However, it may be necessary to update the LDAP
publishing directory manually in the following situations:
• The publishing Directory Server is down for a period of time and unable to receive changes
from the Certificate System.
• Expired certificates need to be removed from the publishing directory since certificates are not
automatically removed from the publishing directory when they expire.
59
Chapter 6. CA: Publishing to a Directory
NOTE
Any client using a certificate is responsible for determining its validity by checking
the expiration date against the client's current date information.
To update the LDAP publishing directory with changes manually, do the following:
1. Open the CM agent services page.
2. Click Update Directory Server.
3. Select Skip certificates already marked as updated to ignore certificates in the internal
database that have already been published or removed, in the case of revoked certificates.
In some circumstances, updating the LDAP publishing directory can take considerable time.
During this period, any changes made through the Certificate System such as issuing or
revoking certificates may not be included in the update. If certificates have been issued or
revoked during that time, the publishing directory must be updated again to reflect those
changes. Use the Skip certificates already marked as updated option the second time to
update only certificates that been issued, revoked, or expired while the previous update was
running.
4. Select the type of update to perform.
• To publish the latest CRL, select Update certificate revocation list to the publishing
directory.
• To update information on valid certificates to the publishing directory, select Update valid
certificates to the directory.
To update a range of certificates, such as only the most recently issued certificates, specify
the range of the serial numbers of those certificates.
• To remove expired certificates from the publishing directory, select Remove expired
certificates from the directory.
To remove a range of certificates instead of all expired certificates, specify the range of the
serial numbers of those certificates.
• To remove revoked certificates from the publishing directory, select Remove revoked
certificates from the directory.
If you want to remove a range of certificates instead of all revoked certificates, specify the
range of the serial numbers of those certificates.
5. After specifying the changes to be updated, click Update Directory.
60
Chapter 7.
DRM: Recovering Encrypted Data
This chapter describes how authorized Data Recovery Manager (DRM) agents process key
recovery requests and recover stored encrypted data when the encryption key has been lost.
This service is available only when the DRM subsystem is installed.
1. List Requests
There are three kinds of key service requests:
• Key archival requests, made by CM agents
• Key recovery requests, made by DRM agents
• Token key requests for archiving smart card (token) keys in conjunction with server-side key
generation requests. This request can only be initiated through a TPS subsystem.
A DRM agent reviews these requests. An agent can search for and list key service requests
with a particular status, such as completed or rejected, select a key service request from the
returned list, and examine the request details. Key service requests are handled internally; it is
not necessary to take any action on them unless the Certificate System is specially configured.
To list key service requests, do the following:
1. Open the DRM agent services page.
2. Click List Requests to display the List Requests form. This page specifies which key
service requests to list.
3. Choose the type of requests to see from the Request type menu. There are three request
types:
• Show Key Archivals requests
• Show Key Recovery requests
• Show Token Key requests
• Show all requests
4. Select the status of requests from the Request status menu.
• Show canceled requests. Unless the system is specially configured to allow requests to be
canceled, there are no canceled requests.
• Show rejected requests. Rejected requests do not comply with the archival or recovery
policies. Unless the system is specially configured to allow requests to be rejected, there
are no rejected requests.
61
Chapter 7. DRM: Recovering Encrypted Data
• Show completed requests. Completed requests include archival requests for which proof of
archival has been sent and completed recovery requests.
• Show all requests. All requests stored in the system.
5. To start the list at a specific place in the queue, enter the starting request identifier in decimal
or hexadecimal form. Use 0x to indicate the beginning of a hexadecimal number; for
example, 0x2A. Key identifiers are displayed in hexadecimal form in the Search Results and
Details pages.
6. Choose the number of matching requests to be returned. The system displays that number of
requests, beginning with the starting request identifier.
7. Click Find.
The DRM displays a list of the key service requests that match the search criteria. Select a
request from the list to examine it in more detail.
8. On the Key Service Request Queue form, find a particular request. If the desired request is
not shown, scroll to the bottom of the list, and use the arrows to move to another page of
search results.
9. Clicking the ID number next to a request opens the Request Details form, which gives the
complete information for the request. The request cannot be modified in this page.
Note
If the system changes the state of the displayed request, using the browser's
Back or Forward buttons or the history to navigate through the pages can cause
the data shown to become out of date. To refresh the data, click the highlighted
key identifier at the top of the page.
2. Finding and Recovering Keys
If an end user loses a private encryption key or if a key's owner is unavailable, data encrypted
with that key cannot be read unless a copy of the private key was archived when the key was
created. The archived key can then be recovered and used to read the data.
A DRM agent manages key recovery through the DRM agent services page. Archived keys can
be searched to view the details or to initiate a key recovery. Once a key recovery is initiated, a
minimum number of designated DRM agents are required to authorize the recovery.
Version 7.1 of Red Hat Certificate System introduced a new m-of-n, ACL-based recovery
scheme to replace the old m-of-n, secret-splitting-based recovery scheme.
62
Finding Archived Keys
In the old scheme, the password for the storage token was split and protected by individual
recovery agent passwords. This made it hard to access the storage private, but it did not allow
CS to fully leverage the key protection facility provided by the underlying hardware token.
In the new scheme, CS uses its existing access control scheme to ensure recovery agents are
appropiately authenticated via SSL, and ensures that the agent belongs to the specific recovery
agent group. The recovery request is executed only when m-of-n recovery agents have granted
authorization to the request.
By default, the DRM sets up a 1-of-1 ACL-based recovery scheme, and the agent must belong
to the group "Data Recovery Manager Agents". You can change the scheme by modifying the
appropriate parameters in the CS.cfg file. Refer to Section 2.2, “Recovering Keys” for more
information on this topic.
Note
This section describes how to recover keys that are not stored on a smart card.
For smart card key recovery, see chapter 7, "Token Processing System," in the
Certificate System Administrator's Guide and Section 6, “Administrator
Operations”.
2.1. Finding Archived Keys
Archived keys can be searched to examine the key details or to initiate recovery. Selecting
search criteria and selecting a key from the search results is the same for both operations.
To search for and list archived keys, do the following:
1. Open the DRM agent services page.
2. Click Search for Keys or Recover Keys to display the search criteria form.
When selecting the Recover Keys operation, there is an additional option to initiate recovery
for any key that is found.
63
Chapter 7. DRM: Recovering Encrypted Data
Figure 7.1. Search for Keys Page
3. To search by particular criteria, use the different sections of the Search for Keys or Recover
Keys form. To use a section, select the check box for that section, then fill in any necessary
information.
• Owner name. Finds an archived key with a specific owner name. The owner name for a
key, like the subject name for a certificate, consists of a string that can be used in
searches.
• Key identifiers. Finds an archived key with a specific key identifier or to list all keys within a
range of key identifiers.
• To find a key with a specific key identifier, enter the key identifier in both the upper limit
and lower limit fields in decimal or hexadecimal form. Use 0xto indicate the beginning of
a hexadecimal number; for example, 0x2A. Key identifiers are displayed in hexadecimal
form in the Search Results and Details pages.
• To find all keys within a range of key identifiers, enter the upper and lower limits of the
key identifier range in decimal or hexadecimal form.
Leaving either the lower limit or upper limit field blank displays all keys before or after the
number specified.
64
Finding Archived Keys
• Certificate. Finds the archived key that corresponds to a specific public key. Select the
check box and paste the certificate containing the base-64 encoded public key into the text
area.
Note
The encryption certificate associated with the key pair must be found first. Use
the CM agent services page to find the certificate; for instructions, see Section 3,
“Examining Certificates”.
• Archiver. Finds keys that were archived by a specific server. Select the check box and
enter the user ID of the CM that submitted the key archival request. This information is
available only for archival requests from servers that are remote from the DRM. To put a
limit on the number of results returned, fill in a value for maximum results. To limit the time
allowed for the search, enter a value for time limit in seconds.
4. After entering the search criteria, click Show Key.
The DRM displays a list of the keys that match the search criteria. Select a key from the list
to examine its details. If the search was initiated with the Recover Keys button, there is the
additional option of recovering any key returned by the search.
65
Chapter 7. DRM: Recovering Encrypted Data
Figure 7.2. Search Results Page
5. In the Search Results form, select a key.
If a desired key is not shown, scroll to the bottom of the list and use the arrows to move to
another page of search results.
6. Click the ID number next to the selected key. The details of the selected key are shown in the
Key details page. It is not possible to modify the key through this page.
Figure 7.3. Key Details Page
2.2. Recovering Keys
If the search was initiated through the Recover Keys button, the Search Results page also
allows the agent to initiate the recovery of any key found.
66
Recovering Keys
To initiate key recovery, do the following:
1. On the DRM agent services page, click Recover Keys, specify search criteria, and click
Show Key to display a list of archived keys.
2. In the Search Results form, select a key.
If a desired key is not shown, scroll to the bottom of the list and select Next or Previous for
another page of search results.
3. Click Recover next to the selected key.
The key details are displayed in the Authorize Key Recovery form, where the agent submits
authorization information.
Figure 7.4. Key Detail Page for Recovering Keys
The number of key recovery agent authorizations required to recover a key is configured by
the DRM administrator by setting the following parameters in the CS.cfg file.
67
Chapter 7. DRM: Recovering Encrypted Data
kra.noOfRequiredRecoveryAgents=1
kra.recoveryAgentGroup=Data Recovery Manager Agents
4. Set the PKCS #12 token password that the requester uses to import the recovered
certificate/key pair package.
5. Optionally, set a certificate nickname for the archived key.
6. Paste the base-64 encoded certificate corresponding to the archived key into the text area.
The certificate can be searched and viewed through the CM agent services pages.
If the archived key was found through the corresponding public key, the certificate
information is automatically transferred to the form.
7. Click Recover to initiate the key recovery request.
Selecting this option notifies the key recovery agents that a recovery has been initiated and
gives them the recovery authorization reference number.
Note
Do not close the browser after initiating the key recovery. The agent must wait for
all other agents to authorize the key recovery request before the system returns
the hyperlink to download the PKCS #12 file containing the private key. This
page keeps refreshing to check if all other agents have authorized.
8. Every DRM agent must approve the key recovery once the agent receives the recovery
authorization number.
a. Open the DRM agent services page.
b. Select Authorize Recovery.
c. Enter the recovery authorization request number.
d. Select Examine to examine the key being recovered.
e. Select Grant to complete the key recovery.
9. Once all agents have authorized the recovery, then the agent who initiated the key recovery
request is given a link download (import) the PKCS #12 file.
10.When selecting the PKCS #12 file, a dialog box appears. Specify the path and filename to
save the encrypted file containing the recovered certificate and key pair.
68
Recovering Keys
11.Send the encrypted file to the requester.
12.Give the recovery password to the requester in a secure manner.
The requester must use this password to import the recovered certificate/key pair.
69
70
Chapter 8.
OCSP: Agent Services
This chapter describes how to perform Online Certificate Status Manager (OCSP) agent tasks,
such as identifying a CA to the OCSP and adding a CRL to the OCSP's internal database. This
service is available only when the OCSP subsystem is installed. The OCSP agent services
page allows authorized agents to accomplish these tasks.
NOTE
For this documentation, Online Certificate Status Manager is abbreviated OCSP.
1. Listing CAs Identified by the OCSP
The OCSP can be configured to receive CRLs from multiple CMs. Each CM that can publish
CRLs to the OCSP must have its CA signing certificate stored in the internal database of the
OCSP. For instructions, refer to Section 2, “Identifying a CA to the OCSP”.
The list of CMs currently recognized by the OCSP can be viewed at any time. To see the list of
CMs, do the following:
1. Open the OCSP agent services page.
2. In the left frame, click List Certificate Authorities.
71
Chapter 8. OCSP: Agent Services
Figure 8.1. OCSP List Certificate Authorities Page
2. Identifying a CA to the OCSP
The OCSP can be configured to receive CRLs from multiple CMs. Before configuring a CM to
publish CRLs to the OCSP, first identify the CM to the OCSP by storing the CM's CA signing
certificate in the internal database of the OCSP.
To store the CM's CA signing certificate in the internal database of the OCSP, do the following:
1. Open the CM's end entities page.
https://server.example.com:9443/ca/agent/ca
2. Select the Retrieval tab, and, in the left frame, click List Certificates.
3. When the page opens, click Find.
4. Locate the CM's CA signing certificate by looking at the subject name of the certificate.
Typically, the CA signing certificate is the first certificate the CM issues.
5. Click on the subject name.
6. In the certificate contents page, scroll to the Base 64 encoded certificate section, which
shows the CA signing certificate in its base-64 encoded format.
7. Copy the base-64-encoded certificate, including the -----BEGIN CERTIFICATE----- and
-----END CERTIFICATE----- marker lines, to the clipboard or a text file. The certificate
information looks similar to this example:
-----BEGIN CERTIFICATE----MIIB/DCCAaagAwIBAgIBATANBgkqhkiG9w0BAQUFADBRMRwwGgYDVQQKExNTZmJh
eSBSZWRoYXQgRG9tYWluMREwDwYDVQQLEwgxMDI3cm9vdDEeMBwGA1UEAxMVQ2Vy
dGlmaWNhdGUgQXV0aG9yaXR5MB4XDTA2MTAyNzE2MTkyM1oXDTA4MTAxNjE2MTky
M1owUTEcMBoGA1UEChMTU2ZiYXkgUmVkaGF0IERvbWFpbjERMA8GA1UECxMIMTAy
N3Jvb3QxHjAcBgNVBAMTFUNlcnRpZmljYXRlIEF1dGhvcml0eTBcMA0GCSqGSIb3
DQEBAQUAA0sAMEgCQQDXA7qzGv1LJNxEvlHkDKvLjr+OgHmhj4BaPAXTVw64szgT
McQh1aY0G4plpTdCwECEiMb3JRa8QzpfRwbB/kFpAgMBAAGjaTBnMA8GA1UdEwEB
/wQFMAMBAf8wDgYDVR0PAQH/BAQDAgHGMEQGCCsGAQUFBwEBBDgwNjA0BggrBgEF
BQcwAYYoaHR0cDovL3Bhdy5zZmJheS5yZWRoYXQuY29tOjkwODAvY2Evb2NzcDAN
BgkqhkiG9w0BAQUFAANBAIOhIcmHQ4HHSPQielUVx0EoiseeXL/t8VrAnK0i2uMn
7eZlvLIXrcQAcQTI4yxavKtOtkqrPR6uV5LhCqaX2hg=
-----END CERTIFICATE-----
8. Open the OCSP agent services page.
72
Identifying a CA to the OCSP
https://server.example.com:11443/ocsp/agent/ocsp
9. In the left frame, click Add Certificate Authority.
10.In the resulting form, paste the encoded CA signing certificate inside the Base 64 encoded
certificate (including header and footer) text area.
Figure 8.2. Add Certificate Authority Page
11.Click Add.
The certificate is added to the internal database of the OCSP.
NOTE
If the CA contains multiple CRL distribution points, always publish the master
CRL (the CRL that contains all revoked certificates from that CA) to the OCSP
responder.
12.To verify that the certificate is added successfully, click List Certificate Authorities in the
left frame.
73
Chapter 8. OCSP: Agent Services
The next page shows information about the CM that was added.
NOTE
If the deployment contains chained CAs, such as a root CA and then several
subordinate CAs, add each CA certificate separately to the OCSP responder.
3. Adding a CRL to the OCSP
If a situation arises when a CM is unable to publish its CRL to the OCSP, it is possible to add a
CRL manually to the OCSP internal database.
To add a CRL to the internal database, do the following:
1. Open the CM's agent services page.
https://server.example.com:9443/ca/agent/ca
2. Click on Display Revocation List.
3. In the results page, select the desired CRL issuing point, select the option to display the CRL
as base-64, and click Display.
4. In the CRL details page, scroll to the Certificate revocation list base64 encoded section,
which shows the CRL in base-64 format.
5. Copy the base-64 encoded CRL, including the -----BEGIN CERTIFICATE REVOCATION
LIST----- and -----END CERTIFICATE REVOCATION LIST----- marker lines, to the
clipboard or a text file.
The CRL looks similar to the example:
-----BEGIN CERTIFICATE REVOCATION LIST----MIHiMIGNAgEBMA0GCSqGSIb3DQEBBQUAMEsxGDAWBgNVBAoTD0RvbWFpbiBTcG9v
bmJveTEPMA0GA1UECxMGMTAyNnNiMR4wHAYDVQQDExVDZXJ0aWZpY2F0ZSBBdXRo
b3JpdHkXDTA2MTExMzE4MDM0MFoXDTA2MTExMzIyMDM0MFqgDjAMMAoGA1UdFAQD
AgFeMA0GCSqGSIb3DQEBBQUAA0EAlbdl7bPD5yLpBwKkSXeSA1fa8M2TiqNynRS1
B5zDGGAamOBdnKVMEBPEXFsTzk92rjbL0J0KjoMYicTEGO1wKA==
-----END CERTIFICATE REVOCATION LIST-----
6. Open the OCSP's agent services page.
74
Checking the Revocation Status of a
https://server.example.com:11443/ocsp/agent/ocsp
7. In the left frame, click Add Certificate Revocation List.
8. In the resulting form, paste the encoded CRL inside the Base 64 encoded certificate
revocation list (including the header and footer) text area.
9. Click Add.
The CRL is added to the internal database of the OCSP.
4. Checking the Revocation Status of a Certificate
The revocation status of a certificate is checked by submitting the certificate in its base-64
encoded format to the OCSP, as follows:
1. Copy the base-64-encoded certificate, including the -----BEGIN CERTIFICATE----- and
-----END CERTIFICATE----- marker lines, to the clipboard or a text file.
The certificate looks similar to this example:
-----BEGIN CERTIFICATE----MIICGDCCAcKgAwIBAgIBEzANBgkqhkiG9w0BAQUFADBLMRgwFgYDVQQKEw9Eb21
haW4gU3Bvb25ib3kxDzANBgNVBAsTBjEwMjZzYjEeMBwGA1UEAxMVQ2VydGlmaW
NhdGUgQXV0aG9yaXR5MB4XDTA2MTAyNjE1MjEzOVoXDTA4MTAxNTE0MTIxNVowL
jEXMBUGA1UEChMOVG9rZW4gS2V5IFVzZXIxEzARBgoJkiaJk/IsZAEBEwNjZnUw
gZ8wDQYJKoZIhvcNAQEBBQADgY0AMIGJAoGBAMDmhEvpHgHrPxVI+BMBE/N1mQ+
w2kEn9fw0w6ToMYZS3+RIQvxxUACPabb66Dgg8DcAFLpYK9HZ7ZPkd3l2YZn+X+
mVr/aCFZUOZkydySGE3zjLwhX5s5UgJ3YGcaLm3rbfsAXZxJNlHyLVqJ/p7Lrvq
pGfs80oVx4FWMCIu+udAgMBAAGjajBoMA4GA1UdDwEB/wQEAwIGwDALBgNVHREE
BDACgQAwHQYDVR0OBBYEFFE+jJZAWWvgEWblcn6gh2rW2kxdMB8GA1UdIwQYMBa
AFFpUxAabux1ebNbldVg4h+VWkYucMAkGA1UdEwQCMAAwDQYJKoZIhvcNAQEFBQ
ADQQBwyt/tiBd1TRrCWlxRds2zTRrFk1MyIYJWFzZLKRNkPB7+3fR3tT/1dD1NR
V6t1wfkqox0+Z/5bqchjMsQwXGZ
-----END CERTIFICATE-----
2. Open the OCSP agent services page.
3. In the left frame, click Check Certificate Status.
4. In the next form, paste the certificate inside the Base 64 encoded certificate text area.
5. Click Check.
The next page shows the status of the certificate that was submitted.
75
76
Chapter 9.
TPS: Agent Services
This chapter describes how to perform Token Processing System (TPS) agent tasks, such as
listing smart card tokens and resetting card PINs. Agents can manage the smart cards and the
certificates stored on the cards. The TPS agent services page allows authorized agents to
accomplish these tasks.
NOTE
Smart cards are also referred to as tokens in this chapter and in the TPS agent
and admin services pages.
1. Basic Operations for an Agent and Administrator
The TPS agent services page contains two tabs, one for agent operations and one for
administrator operations. The agent operations cover routine token management such as
setting the token status, searching and listing tokens and certificates, resetting token PINs, and
searching the TPS internal database. The administrator page has additional options to add and
delete tokens from the database.
An administrator user is created when the TPS instance is first configured. This user has both
administrator and agent privileges. The administrator can create additional agents by creating
new user entries in the LDAP database. For more information on creating users in the Red Hat
Directory Server, see the Directory Server Administration Guide.
NOTE
There is no HTML end entities page for TPS services since end entity tasks are
performed through the Enterprise Security Client.
The TPS agent tasks include the following:
• Listing tokens.
• Adding new tokens by token CUID.
• Editing token attribute token policies.
• Searching tokens by CUID or user ID.
• Listing certificates associated with tokens.
• Searching certificates by token CUID or user ID.
77
Chapter 9. TPS: Agent Services
• Listing activities associated with the tokens by the token CUID.
• Searching activities by the token CUID.
• Changing token status.
Administrators can perform all of the agent operations, as well as the following:
• Editing the token attributes, such as the user ID, and the reason for the token status.
• Deleting a token.
2. Adding Tokens
New tokens are added to the TPS subsystem through the Add tokens link in the Agent
Operations tab. This link opens a form to create a new token. The only required information is
the token ID, which is embedded in the token. Additional information about the token can be
added through the agent edit page.
Normally, it is not necessary for agents to create a token entry because the entry is created
automatically when the token connects to TPS, such as connecting through the Enterprise
Security Client. However, an agent may want to pre-populate the tokens with keys or other
custom information; this can be done by manually adding and editing the token in the TPS.
3. Managing Tokens
There are two links for managing tokens in the Agent Operations tab: List Tokens and Search
Tokens. Both of these options return lists of tokens; a token can be selected from the search
results and have further operations performed on it, such as changing the token status, editing
the token settings, reviewing the token's certificates, and showing the operations previously
performed on the token.
Selecting the List Tokens link in the Agent Operations tab does an automatic search for all
tokens configured through the TPS and lists them all in the returned search results.
To search for specific tokens, click on the Search Tokens link in the Agent Operations tab.
Then supply either the user ID of the token owner or the token ID.
The token associated with that ID will be listed with information such as the date it was created
and last modified, key information, and the token status.
78
Managing Tokens
Figure 9.1. Token Search Results
Click the link associated with the token to display its details.
79
Chapter 9. TPS: Agent Services
Figure 9.2. Token Details
Four operations can be performed on the token through this page:
• Changing the token status.
• Editing the token policy.
80
Changing Token Status
NOTE
Agents can only modify the policy in effect for the token and add a new token.
Administrators can also change the user ID of the owner and delete tokens.
• Listing the certificates stored on the token.
• Showing the operations performed on the token.
3.1. Changing Token Status
Agents can change the status of the token. Token status affects key recovery policies; the
status of the token impacts whether a key should be recovered from the DRM or reissued,
whether new tokens will be blocked because there are already active existing tokens, and
whether to issue or revoke temporary tokens.
The status is changed through the token details page, which is shown by listing or searching for
tokens and then selecting a token from the returned list.
Figure 9.3. Changing Status
81
Chapter 9. TPS: Agent Services
There are six possible token statuses:
• The token is physically damaged.
For this status, the TPS revokes the user certificates and marks the token lost.
• The token has been permanently lost.
For this status, the TPS revokes the user certificates and marks the token lost.
• The token is temporarily lost or unavailable.
For this status, the TPS puts the user certificates on hold and marks the token inactive.
• The lost token has been found.
For this status, the TPS takes the certificates off hold and marks the token active .
• The lost token cannot be found (permanently lost).
For this status, the TPS revokes the certificates and marks the token lost.
• This token has been terminated.
For this status, the TPS terminates the token and deems the token useless.
To change the status, select the menu item, and click Go.
3.2. Editing the Token
Agents can modify the policy that is applied to a token. The two supported token policies are
RE_ENROLL, which allows a user to re-enroll certificates with the same token, and PIN_RESET
which allows the token user to initiate a PIN reset operation.
Each of the supported token policies accept values of either YES or NO. You can set both policies
by separating them with a semi-colon.
To edit the policy applied to a token, click Edit on the Token Details page to display the Edit
Token page. This page displays the Token ID, User ID, Status, and Policy information. Enter the
required policy in the Policy field.
For example, to allow the user to reset his PIN but to disallow re-enrolling with the same token,
use the following policy definition:
RE_ENROLL=NO;PIN_RESET=YES
82
Listing Token Certificates
Note
If the PIN_RESET policy is not set, then user-initiated PIN resets are allowed by
default. If the policy is present and is changed from NO to YES, then a PIN reset
can be initiated by the user once; after the PIN is reset, the policy value
automatically changes back to NO.
More token information can be modified through the Administrator Operations tab.
3.3. Listing Token Certificates
Click Show Certificates in the token details page to display a list of all certificates stored on
that token, including information such as certificate ID, certificate type, and serial number.
3.4. Conflicting Token Certificate Status Information
The TPS stores the complete history of certificates' status, so that all changes in status can be
reviewed. However, the status shown on the token is that last status of the certificate at the time
the token was formatted. The status of the certificates on the token may not immediately reflect
the real status of the certificates. It is possible to have multiple tokens with the same certificate
information on them; it then is possible for the certificate status on these tokens to become out
of sync with the status information in the CA database. When viewing these tokens in the TPS
agents page, then, the certificate information can be inconsistent.
For example, Token #1 has two certificates stored on it, an encryption certificate (Encrypt #1)
and a signing certificate (Signing #1). If Token #1 is lost, then both of its certificates are
revoked, so both Encrypt #1 and Signing #1 are marked as revoked. When the user is issued a
new token, Token #2, then Encrypt #1 is recovered, and a new signing certificate, Signing #2, is
issued. The status for the three certificates, then, is as follows:
• Signing #1 - revoked
• Signing #2 - active
• Encrypt #1 - active
If Token #1 is found, then the the certificates for Token #2 are revoked and the certificates for
Token #1 are reactivated. The status for the three certificates, then, is as follows:
• Signing #1 - active
• Signing #2 - revoked
• Encrypt #1 - active
83
Chapter 9. TPS: Agent Services
Through the TPS agent's page, however, viewing Token #1 shows Signing #1 is active; viewing
Token #2 shows that Signing #1 is revoked. This is because that Signing #1 was still revoked
when Token #2 was formatted, and that information was not updated when Token #1 was
subsequently formatted.
To find the current status of certificates, view an active token, and list the certificates. Active
tokens always have the most current certificate status. For information on listing certificates
stored on tokens, see Section 3.3, “Listing Token Certificates”.
3.5. Showing Token Activities
Clicking the Show Activities button in the token details page returns a list of all operations
which have been performed on the token.
Figure 9.4. Showing Token Activities
4. Listing and Searching Certificates
There are two links for finding and viewing certificates stored in tokens in the Agent Operations
tab: List Certificates and Search Certificates. Both of these options return lists of certificates
for the token or user ID specified.
Clicking List Certificates automatically returns all stored certificates. Clicking Search
Certificates opens a search form to supply the specific token ID or user ID for which to list the
certificates.
This returns the certificates, the same as searching for the token and clicking Show
84
Searching Token Activities
Certificates.
5. Searching Token Activities
The token activities, such as enrollment, which are performed through the TPS subsystem can
be searched and listed for assistance with token management. There are two links for finding
and viewing certificates stored in tokens in the Agent Operations tab: List Activities and
Search Activities. Both of these options return lists of activities performed on the tokens
managed by the TPS.
Clicking List Activities automatically returns all token activities performed through the TPS on
all tokens. Clicking Search Activities opens a search form to supply the specific token ID for
which to list activities.
This will then return the activities performed on that token, the same as searching for the token
and clicking Show Activities.
6. Administrator Operations
TPS administrators can perform all of the agent tasks through the Agent Operations tab of the
TPS agent services page. Additionally, they can perform two tasks through the Administrator
Operations tab: listing and searching tokens (with different editing options) and deleting tokens.
Listing tokens automatically returns all enrolled tokens in the TPS; searching for a token returns
the specific token matching the search criteria (token or user ID).
Selecting a token from the complete list or from the search results will open the token's details
page.
The activities available through the administrator token details page are different than the ones
available through the agent token details page:
• Showing the activities performed on the token.
• Editing the token.
• Deleting the token.
6.1. Showing Token Activities
Clicking the Show Activities button in the token details page returns a list of all activities which
have been performed on the token, same as the agent operation.
6.2. Editing the Token
Administrators can edit the user ID associated with the token and the token policies. Refer to
Section 3.2, “Editing the Token” for information on editing tokens.
6.3. Deleting the Token
85
Chapter 9. TPS: Agent Services
Click Delete to remove the token, and all its associated certificates and user information, from
the TPS database.
86
Index
A
accessing end-entity gateways , 7
accessing forms, 18
agent services forms
accessing , 18
Certificate Manager , 10
Data Recovery Manager , 11
Online Certificate Status Manager , 12
summary , 14
TPS, 13
agents
requirements for , 9
responsibilities , 8
C
CA
built-in OCSP service , 6
certificate authorities (CAs) , 5
Certificate Manager
agent services forms , 10
built-in OCSP service , 6
overview , 5
certificate profile
approving , 29
certificate profile information , 28
disapproving , 30
end user certificate profile , 29
policy information , 29
processing requests , 38
certificate requests
approving , 38
examining , 36
handling process , 31
listing , 33
statuses , 35
types of , 33
certificate status, 83
Certificate System
directory server and , 59
overview , 5
subsystems , 5
certificates
conflicting status, 83
finding , 43
issuing to requester , 40
searching for , 44
cloning enrollment requests , 32
cryptography concepts , 1
D
Data Recovery Manager , 61
agent services forms , 11
overview , 6
Directory Server
Certificate System and , 59
E
end entities , 5
enrollment requests
approving , 38
cloning , 32
examining , 36
handling process , 31
listing , 33
statuses , 35
F
forms
accessing , 18
summary , 14
I
introduction , 5
issuing a certificate , 40
L
List Requests form , 34
M
managers, overview , 5
N
notification of issuance , 40
O
Online Certificate Status Manager , 71
agent services forms , 12
87
Index
overview , 6
online certificate validation authority
defined , 6
P
PKI (public-key infrastructure) , 5
prerequisites , 1
privileged operations and users , 9
profiles , 21
about , 21
approving and disapproving , 28
enabling and disabling , 28
how profiles work , 27
working with , 21
R
Request details form , 36
Request Queue form , 35
request status, on List Requests form , 35
requests, enrollment
approving , 38
cloning , 32
examining , 36
handling process , 31
listing , 33
statuses , 35
types of , 33
S
security concepts , 1
status of requests , 35
subsystems, overview , 5
T
Token Processing System, 77
TPS
agent services forms , 13
certificates
conflicting stat, 83
certificates and tokens, 77
changing token status, 81
deleting tokens, 85
editing tokens, 85
listing tokens, 78
searching activities, 85
searching tokens, 78, 84
88