1
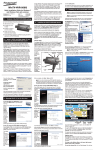
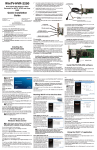
HDHomeRun® Installation Instructions
(20121008)
I. HDHomeRun Connections:
HDHomeRun 3G Dual Tuner
Back
Back
1. Power connector
4. Power/Network LED
2. Network connector
5. Tuner 0
3. Signal In
6. Tuner 1
Power/Network LED:
Green: the HDHomeRun is powered on and connected to the network.
Flashing Green: the HDHomeRun is working to acquire an IP address. If the HDHomeRun is
directly connected to a PC the LED will continue to flash until the PC makes contact with the
HDHomeRun.
Red: no network link.
Tuner LEDs:
Green: the tuner is in use, tuned to a channel, and streaming data.
Flashing: the tuner has been reserved by an application but is not actively streaming.
Original HDHomeRun - Dual Tuner
1
2 3 4
5
6
7
8
Original HDHomeRun - Single Tuner
1
2
3
Front
5
6
8
Back
1. Power LED
5. Power connector
2. Network LED
6. Network connector
3. Tuner0 LED
7. Tuner1
4. Tuner1 LED
8. Tuner0
Power LED:
Green: the HDHomeRun is powered on.
Network LED:
Green: the HDHomeRun is connected to the network.
Flashing: the HDHomeRun is working to acquire an IP address. If the HDHomeRun is directly
connected to a PC the LED will continue to flash until the PC makes contact with the HDHomeRun.
Tuner LED(s):
Green: the tuner is in use, tuned to a channel, and streaming data.
Flashing: the tuner has been reserved by an application but is not actively streaming.
II.Hardware Installation:
Quick Instructions:
Connect the HDHomeRun tuner(s) to your antenna or cable source. On dual input models, each
tuner should be connected.
Use the supplied network cable to connect the HDHomeRun to your home router or network.
Attach the power adapter.
Antenna users:
The typical antenna configuration is:
Antenna -> Amplifier -> Splitter -> TVs/Devices
For larger antenna based systems:
Antenna -> Amplifier -> 2-way Splitter -> 4-way Splitter -> TVs/Devices
-> 4-way Splitter -> TVs/Devices
It is generally a good idea to balance the splitter layout, as shown above. A balanced
configuration means all devices go through the same number of splitters back to the antenna,
resulting in similar signal levels at each device. Avoid cascading a 4-way splitter after another 4way splitter without careful design consideration as each cascaded splitter reduces the signal
level.
Antenna:
We recommend using a directional outdoor antenna for best performance.
Amplifier:
When splitting to multiple devices, a preamplifier or distribution amplifier may be required.
The amplifier should be placed before any splitters.
Digital Cable users:
Typical cable TV configuration:
Street -> 2-way Splitter -> 2/4-way Splitter -> TVs/Devices
-> 2/4-way Splitter -> TVs/Devices
It is generally a good idea to balance the splitter layout, as shown above. A balanced
configuration means all devices go through the same number of splitters back to the source;
balancing in this way will result in similar signal levels at each device.
Avoid cascading a 4-way splitter after another 4-way splitter without careful design consideration
as each cascaded splitter reduces the signal level.
Amplifier:
If a distribution amplifier is used it should be rated for bi-directional cable use and placed before
any splitters.
Original HDHomeRun Dual Tuner Models - Using both Antenna and Digital
Cable
The original HDHomeRun dual tuner models support mixed cable TV + antenna operation by
connecting an antenna feed to one tuner and a cable feed to the other tuner.
Mixed operation is supported by the following applications:
•
Windows Media Center (Windows 7)
•
Windows Media Center (TV Pack 2008)
•
SageTV (Windows/Linux/Mac)
•
BeyondTV (Windows)
•
EyeTV (Mac)
•
MythTV (Linux/Mac)
Mixed operation is not supported by Media Center 2005 or Vista Media Center.
Additional notes:
Splitters:
A splitter should be rated for 50-900MHz or 50-1000MHz operation. Splitters rated for 2GHz
operation should be avoided (even if rated for 50MHz to 2GHz operation) as these are intended for
satellite use and often do not perform as well at cable/antenna frequencies.
Terminators:
Add terminators to all unused splitter outputs; this is important for signal level and signal quality.
Cabling:
RG6 cable is recommended; RG6 cable has lower loss and better performance than RG59 cable.
For long cable runs or weak signals use quad-shielded RG6 cables.
Network connection:
Connect the HDHomeRun to your network or home router using the supplied network cable.
Alternatively the HDHomeRun can be connected directly to a PC or laptop using the supplied
network cable. A cross-over cable is not required.
III.Software Installation (Windows):
The following software installation instructions are for release 20101206 or newer.
Please download and install the latest HDHomeRun software from the Silicondust website:
http://www.silicondust.com/downloads
HDHomeRun Setup:
HDHomeRun detection:
•
HDHomeRun Setup will automatically detect the HDHomeRun device(s) on the network.
•
If the HDHomeRun is connected directly to the PC (rather than a switch or router) it may
take up to 3 minutes for the PC to be able to detect the HDHomeRun. This delay can be
eliminated by configuring PC's network interface to a static IP address in the 169.254.x.y
range, subnet mask 255.255.0.0. No default gateway is needed.
Location tab:
•
Set your location - country plus postal code.
Applications tab:
•
Choose the main PVR application you plan to use with the HDHomeRun.
•
HDHomeRun QuickTV is recommended for the preview application.
Tuners tab:
•
If using an antenna source set the source to “Digital Antenna” for each tuner connected to
the antenna source.
•
If using a cable TV source set the source to “Digital Cable” for each tuner connected to the
cable TV source.
•
If a tuner is not connected set the source to “Disabled”.
•
When using an HDHomeRun 3G, both tuners will receive the same signal - both tuners
should be set tot the same source.
Channels tab:
•
Click Scan to run a channel scan.
•
Review the channels received.
Complete:
•
Click OK/Finish to complete the HDHomeRun Setup process.
HDHomeRun configuration can be changed at a later date by running HDHomeRun Setup from the
Start Menu.
HDHomeRun QuickTV
HDHomeRun QuickTV is a fast and easy way to watch live TV.
Using HDHomeRun QuickTV:
•
Open HDHomeRun QuickTV from the Start menu
•
Channels will be displayed along the right side. Click on a channel to watch it.
•
Right-click on a channel name and select Favorite to set or unset the channel as a favorite.
Favorite channels appear at the top of the list.
•
Channel names and numbers can be adjusted/configured by running HDHomeRun Setup.
•
The channel list will automatically hide; place the mouse cursor over the right side of the
screen to show the channel list while playing.
•
Double-click the window to enter/exit fullscreen mode.
•
Use the volume slider to adjust the volume.
•
Click the speaker icon to mute/unmute the sound.
Windows PVR Applications:
The HDHomeRun will work most BDA based DVR applications including:
•
Windows Media Center (MCE 2005, Vista, TV Pack 2008, and Windows 7)
•
SageTV
•
BeyondTV
•
MediaPortal
•
GB-PVR
Windows 7, Vista Home Premium, and Vista Ultimate include Windows Media Center.
The most up to date instructions for each application can be found of the Silicondust website:
http://www.silicondust.com/hdhomerun/instructions
IV.Software Setup
Windows Media Center 7
Preparation:
•
•
Ensure that you have the latest drivers for your video card installed. Video card drivers can
be downloaded from the manufacturer's website:
•
nVidia: http://www.nvidia.com/Download/index.aspx
•
ATI: http://support.amd.com/us/gpudownload/Pages/index.aspx
•
Intel: http://downloadcenter.intel.com/default.aspx
Install the HDHomeRun software and follow the directions above to scan for channels
Configuration:
1. Open Windows Media Center
2. Click Tasks, then Settings, then TV, then TV Signal, then Set Up TV Signal
3. Confirm your region and click Next
4. Enter your ZIP/postal code and click Next
5. Read and agree to the Program Guide Terms of Service, and click Next
6. Agreeing to the PlayReady EULA is optional. Make your selection and click Next.
7. Choose Yes to download new data and click Next
8. Windows Media Center should find all tuners you have enabled. Select Yes, configure TV
with these results and click Next.
9. If prompted, select your cable provider or Digital Terrestrial Lineup as appropriate, and
click Next
10. Click Next
11. Select Download when connected and click Next
12. Windows Media Center will now scan for channels. If you are using digital cable, it may find
very few or no channels because it will only show channels that have program information;
this is normal, see the Digital Cable: Enabling Missing Channels section. Click Next. If it
prompts you to scan again or continue, click Continue.
13. Click Finish
Digital Cable: Enabling Missing Channels with HDHomeRun WMC Sync
The HDHomeRun software includes a program called HDHomeRun WMC Sync that updates
the Windows Media Center database to enable and configure guide listings for channels that
do not have identifying data from the cable provider.
1. Verify that all channels you wish to use are enabled in HDHomeRun Setup, and have the
correct name and channel number as shown on the Zap2it website
2. Verify that you have gone through the TV setup wizard in WMC, and that you see many
channels listed in the Tasks > Settings > TV > Guide > Edit Channels screen
3. Close WMC
4. Navigate to the location where the HDHomeRun software is installed, normally C:\Program
Files\Silicondust\HDHomeRun and double click on the hdhomerun_wmc_sync program
5. Allow the program to complete; the window with the progress bar will disappear when it is
finished
6. Open Windows Media Center and check the Guide to verify that your channels are now
available
Digital Cable: Enabling Missing Channels Manually
7. From the main screen, click Tasks, then Settings, then TV, then Guide
8. Click Edit Channels
9. Scroll through the list looking for channels that do not have a padlock icon. You may wish
to use the channel list in HDHomeRun Setup to find the channels.
10. Click on the channel name (e.g. C114.1)
11. Click Edit Listings
12. Type the first few letters of the channel name (e.g. ktvu)
13. Locate the channel in the list and click on it. Note that local broadcast HD channels (and
their associated subchannels) should use the callsign with DT in the name (e.g. KTVUDT,
KTVUDT2), while the separate standard-definition versions should use the callsigns without
DT in the same.(e.g. KTVU).
14. You may optionally change the channel listing here to match your cable provider or local
broadcast channel, e.g. KTVUDT on 2.1 or 702. To have a cable-style channel name
without the separator, enter 0 for the second portion of the channel name.
15. Click Save
16. Repeat steps 3-9 for each missing channel
17. Click Save
Using Windows Media Center:
To watch live TV: from the main screen, click TV, then Live TV.
To see the guide: from the main screen, click TV, then Guide.
To see a mini guide when watching TV: click the Guide button at the bottom.
To record a single program: Locate it in the guide, click on it, and click Record.
To record a series: Locate one airing in the series, click on it, and click Record Series.
To change where recordings are stored: from the main screen, click Tasks, then Settings, then
TV, then Recorder, then Recorder storage. Other drives can be selected using the +/- icons.
Advanced Configuration:
Changing the Video/Audio Decoders: The Media Center Decoder Utility can be used to change the
decoder Media Center uses, to allow for decoders with additional capabilities (such as hardware
decoding) to be used. More information and a link to download the Utility are available at
http://mediacenterexpert.blogspot.com/2009/04/announcing-mcdu-media-center-decoder.html
Vista Media Center
Preparation:
•
Ensure that you have the latest drivers for your video card installed. Video card drivers can
be downloaded from the manufacturer's website:
•
nVidia: http://www.nvidia.com/Download/index.aspx
•
ATI: http://support.amd.com/us/gpudownload/Pages/index.aspx
•
Intel: http://downloadcenter.intel.com/default.aspx
•
Install the HDHomeRun software and follow the directions above to scan for channels
•
Vista Media Center requires that all digital tuners be connected to the same signal source.
This means that digital antenna and digital cable can not be mixed.
•
All channels must be named in HDHomeRun Setup matching the name listed in Zap2it for
your area. If the channel name does not match, Windows Media Center will not find the
channel or have guide data.
Configuration:
1. Open Windows Media Center
2. Click Tasks, then Settings, then TV, then Set Up TV Signal
3. Click Next
4. Confirm your region and click Next
5. Downloading new options is optional; make your choice and click Next
6. Select I will manually configure my TV signal and click Next
7. Check the box(es) to match which HDHomeRun tuner(s) you plan to use and click Next
8. Select Set Up Guide listings and click Next
9. Click Next
10. Select Yes and click Next
11. Read and agree to the Guide Terms of Service, and click Next
12. Select Download when connected and click Next
13. Enter your ZIP/postal code and click Next
14. When the download completes, click Next
15. Click Next
16. Channel selection:
◦
Digital antenna: Digital Antenna users should uncheck all channels with no signal.
◦
Digital cable: Digital cable users should uncheck all channels below 1800, ignoring the
signal strength readings.
17. Click Next
18. Click Finish
Adding/Correcting Missing Guide Data (Digital Cable):
1. Close Windows Media Center
2. Open your web browser and go to Zap2it at http://www.zap2it.com/
3. Enter your ZIP code in the FIND IT FAST box and click TV Listings
4. Click the appropriate cable provider for your area. If you are not taken to a page to select
your cable provider, click Change My Location.
5. Note the lineup ID listed in the address bar of your browser. See the example below, with
the lineup ID highlighted.
6. Open HDHomeRun Setup
7. Click the Applications tab
8. Enter the lineup ID from Zap2it in the Set Lineup ID box and click Set
9. Click Apply, then OK
10. Open Windows Media Center
11. Click Tasks, then Settings, then TV, then Guide
12. Click Get Latest Guide Listings
13. Click Yes
14. Allow the download to complete; it may take 5-15 minutes.
15. When the download completes, click OK
16. Click Edit Channels
17. Uncheck all channels below 2800
18. Click Save
Using Windows Media Center:
To watch live TV: from the main screen, click TV + Movies, then live tv.
To see the guide: from the main screen, click TV + Movies, then guide.
To record a single program: Locate it in the guide, click on it, and click Record.
To record a series: Locate one airing in the series, click on it, and click Record Series.
To change where recordings are stored: from the main screen, click Tasks, then Settings, then
TV, then Recorder, then Recorder Storage. Other drives can be selected using the +/- icons.
Advanced Configuration:
Changing the Video/Audio Decoders: The Media Center Decoder Utility can be used to change the
decoder Media Center uses, to allow for decoders with additional capabilities (such as hardware
decoding) to be used. More information and a link to download the Utility are available at
http://mediacenterexpert.blogspot.com/2009/04/announcing-mcdu-media-center-decoder.html
SageTV (Windows)
Preparation:
•
Ensure that you have the latest drivers for your video card installed. Video card drivers can
be downloaded from the manufacturer's website:
•
nVidia: http://www.nvidia.com/Download/index.aspx
•
ATI: http://support.amd.com/us/gpudownload/Pages/index.aspx
•
Intel: http://downloadcenter.intel.com/default.aspx
•
Install the HDHomeRun software and follow the directions above to scan for channels.
•
If you're using digital cable, all channels must be named in HDHomeRun Setup matching
the name listed in Zap2it for your area. If the channel name does not match, SageTV will
not find guide data for your channels. You may also enter the cable channel inside
HDHomeRun Setup (e.g. KTVUDT on 702). Do not use an OTA-style number (e.g. 2.1).
Configuration:
1. Open SageTV
2. From the main menu, click Setup, then Setup Video Sources
3. Click Add New Source
4. Click on one of your HDHomeRun tuners
5. Click Digital TV Tuner
6. Select the appropriate channel source
7. Click Use US, Canada, or XMLTV Guide Data with this Source
8. Select your signal source. If you're using digital cable, enter your Zip code
9. Select the appropriate digital cable or local digital broadcast for your area
10. When prompted, click Yes – Scan for all channels now
11. When the scan completes, verify that all channels are correctly mapped, clicking Remap to
change any that are not. Click Done with Channel Setup when you're finished.
Dual Tuner Models
12. To add another tuner, click Add New Source
13. Click Digital TV Tuner
14. Select your input source
15. If the tuner is plugged into the same source as the previous tuner, click Use or Copy and
Existing Channel Lineup for this Source, then click the lineup, then Use the same channel
lineup. If the tuner is plugged into a different source, follow the previous steps to configure
it and set the channel lineup.
16. Repeat as needed to add all tuners you wish to use
17. Click Finish Source Setup
Using SageTV:
To watch live TV: from the main screen, click Watch Live TV.
To see the guide: from the main screen, click Program Guide; from the live TV screen, right click
and select Program Guide
To record program you're currently watching: right click and select Record this show
To record a different program: Locate what you want to record in the Program Guide, click on it,
and click Record this show.
To record a series: click on one airing in the Program Guide, then Record Options, then Add
this show as a Favorite. Adjust the recording settings as desired.
To switch in and out of full-screen mode: right click and select Toggle Full Screen
FCC Notice (US models):
This device complies with part 15 of the FCC Rules. Operation is subject to the condition that this
device does not cause harmful interference.
Note: This equipment has been tested and found to comply with the limits for a Class B digital
device, pursuant to part 15 of the FCC Rules. These limits are designed to provide reasonable
protection against harmful interference in a residential installation. This equipment generates,
uses and can radiate radio frequency energy and, if not installed and used in accordance with the
instructions, may cause harmful interference to radio communications. However, there is no
guarantee that interference will not occur in a particular installation. If this equipment does cause
harmful interference to radio or television reception, which can be determined by turning the
equipment off and on, the user is encouraged to try to correct the interference by one or more of
the following measures:
—Reorient or relocate the receiving antenna.
—Increase the separation between the equipment and receiver.
—Connect the equipment into an outlet on a circuit different from that to which the receiver is
connected.
—Consult the dealer or an experienced radio/TV technician for help.
Trademarks:
HDHomeRun is a registered trademark of Silicondust USA Inc.