1
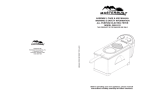
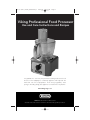
Use & Care (food processor)3
8/25/04
9:29 AM
Page 1
Viking Professional Food Processor
Use and Care Instructions and Recipes
Congratulations! You have just purchased a Viking Professional Food
Processor. This multipurpose countertop appliance will help take the
hard work out of food preparation. From slicing vegetables, citrus
juicing, to kneading dough, this appliance is a must have for any kitchen.
www.vikingrange.com
®
VFP12 Professional Food Processor
Available in the wide selection of finishes offered for Viking Culinary Products.
Use & Care (food processor)3
8/25/04
9:29 AM
Page 2
IMPORTANT SAFEGUARDS
When using this electric appliance basic safety precautions should apply
including the following:
• Always read and follow all instructions.
• Handle blades and discs with care. Note these are very sharp.
Always hold the knife blade by the finger grip away from the cutting
edge, both when handling and cleaning.
• Always remove the knife blade before pouring contents from the bowl
• Do not place cord, plugs, or electrical parts in water or any other liquid.
• This machine is not intended for use by young children without
supervision.
• Unplug from outlet before cleaning.
• Do not operate the food processor with a damaged cord or plug or
after the Food processor malfunctions, or has been damaged in any
manner. Please call 1-800-216-5775 to speak with the Viking Range
Corporation Service Center.
• The use of an accessory not evaluated for use with this food processor
may cause fire, electric shock, or possible injury.
• Do not use outdoors.
• Do not let cord hang over edge of table or counter, or touch hot
surfaces.
• This food processor is for residential use only. Not intended for
commercial use.
• Do not use food processor for other than its intended use.
• Never use your fingers to push food into the tube. Always use tube
supplied.
• Before removing the bowl, turn power off and allow blade to stop.
• Keep hands and utensils away from moving blades or discs while
processing food to reduce the risk of severe injury to persons or
damage to the food processor. A scraper may be used only when the
food processor is not running.
• Avoid moving parts.
SAVE THESE INSTRUCTIONS
BEFORE USING THE FIRST TIME
• Before using the machine for the first time, remove all attachments
from their packaging.
• Wash all attachments including the bowls. Dry with a clean dry towel.
2
Use & Care (food processor)3
8/25/04
9:29 AM
Page 3
USING YOUR VIKING PROFESSIONAL FOOD PROCESSOR
Please use these setup instructions before attempting to use this food
processor. Failure to follow the instructions may result in injury or voiding of
warranty.
Instructions for use:
1. Place unit on a solid, level countertop near an electrical outlet the same
as that indicated on the rating plate.
2. Fit the detachable shaft over the power unit fixed shaft.
3. Place bowl onto shaft and turn clockwise until the bowl is locked in place.
4. Place knife blade or other attachment over the drive shaft.
• Always fit the bowl and attachment onto the machine before adding
any ingredients.
5. Place lid on top of bowl, ensuring the top of the detachable shaft fits into
the center of the lid.
6. Press the On button.
• Note the processor will not work if bowl and attachments are not
fitted together properly
7. The use of the Pulse switch may be used for short bursts of power.
8. Reverse the above procedure to remove the lid, attachments, and bowl.
• Always switch off before removing lid.
• The motor will automatically shut off if machine is over loaded or run
too long. If this occurs allow the machine to cool for approximately 30
minutes.
ACCESSORY USE:
KNIFE BLADE
•The knife blade is the most versatile of all attachments. It may be used for
cake and pastry making, chopping raw and cooked
meat, vegetables, nuts, pate, dips, pureeing soups,
and to also make crumbs from biscuits and bread.
• Foods such as meat, bread, and vegetables must
be cut into 1” cubes before processing.
• Biscuits should be broken into several pieces and
added down the feed tube while machine is
running.
• When making pastry use fat straight from the fridge
cut into cubes.
3
Use & Care (food processor)3
8/25/04
9:29 AM
Page 4
DOUGH BLADE
• When making dough, place all dry ingredients in
the bowl and add the liquid down the feed tube
while machine is running. Process until a smooth
elastic ball is formed. This usually takes 60-90
seconds.
• Re-knead by hand only. Re-kneading in the bowl
is not recommended as it may cause the
processor to become unstable.
Using the Knife blade/Dough blade
1. Fit the drive shaft and bowl onto the power unit.
2. Push either attachment onto the drive shaft.
3. Fit the lid. Ensure the end of the shaft locates in the center of the lid.
4. Switch unit on.
5. Add ingredients into the tube.
MINI PROCESSOR BOWL
• Use the mini processor bowl and blade to
chop herbs and process small quantities of
ingredients.
Using the Mini Processor Bowl
1. Fit the detachable shaft over the power
unit fixed shaft.
2. Next place the work bowl.
3. Fit the mini processor bowl – ensuring that the ribs on the inside of the
mini bowl chimney align with the slots in the main bowl chimney.
4. Place the knife blade over the drive shaft.
5. Add the ingredients to be processed.
6. Fit the lid on and switch on.
HELPFUL HINTS
• Never process hard spices as they may damage the plastic.
• Herbs are best chopped when clean and dry.
• Always add a small portion of liquid when blending cooked
ingredients to make baby food.
• When making mayonnaise, add the oil down the feed tube while
the processor is running.
4
Use & Care (food processor)3
8/25/04
9:29 AM
Page 5
SLICER/SHREDDER DISCS
Reversible slicer/shredder discs – thick and thin
• Use the shredder side for cheese, carrots,
potatoes, and foods of a similar texture.
• Use the slicer side for cheese, carrots,
potatoes, cabbage, cucumber, and onions.
Julienne disc
• Use the disc to cut potatoes for Julienne style
fries, firm ingredients for salads, garnishes,
casseroles, and stir-fry.
Extra coarse shredder disc
• Use the disc to shred cheese and carrots.
Parmesan / Ice disc
• Grates Parmesan cheese and also potatoes.
May also be used to crush ice.
Thick French Fry disc
• Use the disc for potatoes for French fries and
firm ingredients for salads and dips.
Using the discs
1. Fit the detachable drive shaft and work bowl onto the power unit.
2. Holding in the center, place the disc onto the detachable drive shaft
with the appropriate side facing up.
3. Place and lock lid on top of bowl.
4. Place either feed tube for processing. To use the small feed tube –
first put the large pusher inside the feed tube. To use the large feed
tube – use both pushers together.
5. Put food into the feed tube.
6. Switch processor on and push down evenly with the pusher.
Hints
• Use fresh ingredients.
• Do not cut food too small. Fill the width of the large feed tube fairly
full. This prevents the food from slipping sideways during
processing. Alternatively use the small feed tube.
• When using the french fry disc, place ingredients horizontally.
• When slicing or shredding, food placed upright comes out shorter
than food placed horizontally.
• There will always be a small amount of waste on the plate or in the
bowl after processing.
5
Use & Care (food processor)3
8/25/04
9:29 AM
Page 6
DOUBLE PUSHER
This attachment is used for adding both large
and small items into feed tube.
•The small inner tube may also be used to
small amounts of liquid into feed tube.
STAINLESS STEEL WHIP
• This attachment is used for light mixtures such as
egg whites, cream, evaporated milk, and for
whipping eggs and sugar for sponges. Heavier
mixtures containing fat and flour will damage the
whip.
Using the Stainless Steel Whip
1. Fit the detachable drive shaft and work bowl
onto the power unit.
2. Push each beater securely into the drive head.
3. Fit the whip by carefully turning it until it drops
over the drive shaft.
4. Add the ingredients.
5. Fit the lid. Ensuring the end of the shaft locates
into the center of the lid.
6. Switch on.
7. Best results are obtained when the eggs are at room temperature.
Also ensure that the bowl and whip are clean and free from grease
before whipping.
CITRUS JUICER
• Use the citrus juicer to squeeze the juice
from the citrus fruits (oranges, limes,
lemons, and grapefruits).
Using the citrus juicer
1. Place the detachable drive shaft and
work bowl onto the power unit.
2. Fit the sieve into the bowl – ensuring the
sieve handle is locked into position directly over the bowl handle.
3. Place the cone over the drive shaft turning until it drops all the way
down.
4. Cut the fruit in half. Switch the machine on and press the fruit
onto the cone.
5. The citrus juicer will not operate if the sieve is not locked correctly.
6
Use & Care (food processor)3
8/25/04
9:29 AM
Page 7
TROUBLESHOOTING
• The motor will automatically shut off if machine is over loaded or
run too long. If this occurs allow the machine to cool for
approximately 30 minutes.
• All accessories must be locked in correctly for appliance to be
switched on. If appliance does not come on, remove lid and bowl
and relock into place.
CLEANING AND SERVICE
• Always switch off and unplug before cleaning.
• Handle blades and discs with extreme care, as they are extremely
sharp.
• Store the discs in the storage box provided with the food processor.
• Some foods may discolor the plastic. This is perfectly normal and will
not harm the plastic nor affect the flavor of the food. Rub with a
cloth dipped in vegetable oil to remove discoloration.
Power Unit
• Wipe with a damp cloth and dry. Make sure the interlock area is clear
of food debris.
• Store cord in the storage area provided.
Stainless Steel Whip
• Detach the beaters from the drive head by gently pulling them free.
Wash in warm soapy water.
• Wipe the drive head with a damp cloth then dry. Do not immerse
the drive head in water.
All other parts
• Wash by hand, and then dry.
• Alternatively they may be washed on the top rack of your dishwasher.
7
Use & Care (food processor)3
8/25/04
9:29 AM
Page 8
VIKING PROFESSIONAL FOOD PROCESSOR
ONE-YEAR FULL WARRANTY
Viking Professional Food Processors/attachments/accessories except as detailed
below* are warranted to be free from defective materials or workmanship in normal
household use for a period of twelve (12) months from the date of original retail purchase. Viking Range Corporation, warrantor, agrees to repair or replace, at its
option, any food processor which fails or is found to be defective during the warranty period.
* Painted and decorative items are warranted to be free from defective materials or
workmanship for a period of ninety (90) days from the date of original retail purchase. Any defects must be reported to Viking Range Corporation (1-800-216-5775)
within ninety (90) days from date of or original purchase. Viking Range Corporation
uses the most-up-to-date processes and best materials available to produce all color
finishes. However, slight color variation between units may be noticed because of
differences in kitchen lighting, product locations, and other factors.
The motor contained in the Viking Professional Food Processor is warranted to be
free of defects in material or workmanship under normal household use during the
second (2) through the tenth (10) year from the date of the original retail purchase.
The motor warranty covers only the motor and excludes all other parts in the motor
base assembly area including the upper and lower housings, work bowl and lid,
blades, and all electrical components and vertical protecting motor shaft and sheath.
Viking Range Corporation, warrantor, agrees to repair or replace, at its option any
part which fails or is found to be defective during the warranty period.
This warranty shall apply to products purchased and located in the United States
and Canada. Products must be purchased in the country where service is requested.
Warranty labor shall be performed by an authorized Viking Range Corporation service agency or representative. Warranty shall not apply to damage resulting from
abuse, accident, natural disaster, and loss of electrical power to the product for any
reason, alteration, outdoor use, improper operation or repair or service of the product by anyone other than an authorized Viking Range Corporation service agency or
representative. This warranty does not apply to commercial usage. Warrantor is not
responsible for consequential or incidental damage whether arising out of breach of
warranty, breach of contract, or otherwise. Some jurisdictions do not allow the
exclusion or limitation of incidental or consequential damages, so the above limitation or exclusion may not apply to you.
The return of the Owner Registration Card is not a condition of warranty coverage.
You should, however, return the Owner Registration Card so that Viking Range
Corporation may contact you should any question of safety arise which should affect
you.
To arrange for (warranty) service, simply contact Viking Range Corporation by calling
1-800-216-5775, 8:00 A.M. to 5:00 P.M. (Central Standard Time) Monday thru Friday.
If you prefer, you may write: Viking Range Corporation, P.O. Box 956, Greenwood,
Mississippi (MS) 38930. The following information will be required: date of original
purchase (a copy of sale receipt), model and serial numbers (located on bottom of
unit), and a brief description of what has occurred with the product.
8
Use & Care (food processor)3
8/25/04
9:29 AM
Page 9
RECIPES
Chicken Salad
2 1/2 to 3 cups of cooked chicken
5 strips of cooked bacon
1/2 cup of almonds
2 ribs of celery cut into inch pieces
1/2 cup of mayonnaise
1 tablespoon of parsley
2 green onions
1 teaspoon of lemon juice
Dash of Worcestershire sauce
Salt and pepper to taste
Combine chicken, bacon, celery, parsley, and green onions in work
bowl. Using the knife blade allow chicken and other ingredients to
chop and mix well. While continuing to run the food processor add
remaining ingredients through the feed tube. Chill and stir again
before serving.
May serve on crackers or over slices of ripe avocado and lettuce leaves.
Chicken Puffs
11/2 cups of cooked chicken cut into chunks
1/2 cup parsley sprigs
1-cup chicken broth
1/2 cup vegetable oil
1 tablespoon of Worcestershire sauce
1/2 teaspoon of salt
1/2 teaspoon of celery seed
1/2 teaspoon of dry mustard
1/2 teaspoon of onion powder
1-cup flour
4 eggs
Place chicken and parsley in work bowl with knife blade and pulse until
finely chopped. Remove chicken mix and set aside. In a large saucepan
over high heat, mix broth, oil, and Worcestershire sauce. Bring to a
boil. Stir the seasonings into the flour. When broth reaches a boil, add
flour all at once. Stir until the dough forms a ball. Place dough into the
mixing bowl. Add eggs one at a time, mixing well after each egg. Stir
in chicken and parsley. Drop by spoonfuls onto baking sheet
Bake at 450 degrees for 12-15 minutes
9
Use & Care (food processor)3
8/25/04
9:29 AM
Page 10
White Chocolate Chunk Cookies
2 cups of flour
2 teaspoons baking powder
1/2 teaspoon of salt
1/2 cup of softened butter
1-1/2 cups of firmly packed brown sugar
2 eggs
1 teaspoon of vanilla
1 package of white chocolate chunks
Combine butter and brown sugar in work bowl and process until smooth.
Add eggs and vanilla, mix well. Gradually add sugar, flour, salt, and baking powder. Mix well and add chocolate chunks. Remove cookie dough
from work bowl and spoon onto baking sheet by heaping tablespoonfuls.
Bake at 350º 11 to 12 at minutes or until done. Cool on sheets for 1
minute and then remove to wire racks for continuation of cooling.
Olive and Sun-Dried Tomato Focaccia Bread
1 cup of warm water
2 teaspoons of active dry yeast
1 teaspoon of sugar
2 packets (5.5 ounce) of pizza dough mix
Sliced black olives
Sun dried tomatoes
Olive oil
In a small bowl combine the warm water, yeast and sugar and leave for
15 minutes until frothy. Oil an 11x7 inch shallow baking tin,
Place the dough blade in the work bowl of food processor. Add the
pizza dough packets. While machine is running add the yeast mixture
down the feed tube and mix until a soft dough forms. Knead for 2-3
minutes until dough is a smooth texture.
Remove the dough from the work bowl and place into the prepared
baking tin, pushing the dough into the corners. Cover with oiled cling
film and leave to rise in a warm place for about 30 minutes or until
doubled in height.
Preheat oven to 425 degrees. Make dimples all over the surface of the
risen dough. Sprinkle with olives and sun-dried tomatoes and drizzle
with olive oil.
Bake for 10-15 minutes or until golden brown.
10
Use & Care (food processor)3
8/25/04
9:29 AM
Page 11
Mississippi Smoked Catfish Pate
1/2 cup of Smoked catfish fillets
1 package (8 oz.) cream cheese
1 stick (1/2 cup) of softened butter
1 small clove of garlic
2 Tbsp lemon juice
2 Tbsp white wine
Dash of cayenne pepper
Fit the knife blade into the food processor.
Add all ingredients into processor and mix until smooth.
Chill for several hours
Mayonnaise
2 large eggs or 4 yolks
2 tablespoons of lemon juice
2 teaspoons of Dijon mustard
2 1/2 cups of oil
Fit the knife blade into the food processor. Place the eggs, lemon juice,
mustard, salt and 2 tablespoons of oil into the work bowl. Process for
6 seconds. While the machine is running pour 1/2 cup of oil into the
mixture. Gradually add the remaining oil while the machine continues
to run. The mayonnaise will thicken as the oil is added.
Makes approximately 3 cups.
Basic White Bread
4 cups of all purpose flour
2 teaspoons of salt
2 tbsp. of softened butter
2 teaspoons of active dry yeast
1 cup of warm water
Fit the knife blade into the food processor. Add flour, salt, and butter
and process for approximately 30 seconds.
Add the dry yeast and pulse to combine. While still running processor,
gradually add the water until the mixture forms a soft dough.
11
Use & Care (food processor)3
8/25/04
9:29 AM
Page 12
Remove the dough from the processor and put into a bowl and cover
with an oiled piece of cling film. Leave in a warm place to rise for
approximately 45 minutes or until doubled in size.
Divide the dough into two and knead lightly by hand. Shape into
rounds and place on an oiled baking tray. Cut a shallow “X” in the top
of each loaf. Leave to rise for a further 30 minutes and preheat oven to
425 degrees. Bake the bread for 25-30 minutes until golden brown.
Leave to cool on racks before serving.
Peanut Butter and Chocolate Cheesecake
Crust
16 2-1/2 inch square graham crackers, broken in half
2 tablespoons of sugar
3 tablespoons of softened butte
Filling
1-cup sugar
1 thin yellow peel from a medium lemon cut into strips
2 packages (8 oz.) of cream cheese
4 eggs
1/2 cup of lemon juice
2 tablespoons of all-purpose flour
1 cup of mixed peanut butter and chocolate chips
Fit the knife blade into work bowl. Add graham crackers and sugar.
Process until fine.
With processor running, add butter through feed tube. Process until
blended. Press mixture firmly into bottom and _ inch up sides of a 9inch spring form pan. Chill.
Add 1 cup of sugar and lemon peel to work bowl. Process until peel is
finely chopped. Add cream cheese. Process until blended about 1015 seconds. Add eggs, lemon juice, peanut butter/chocolate chips,
and flour. Process until smooth, about 15-20 seconds.
Pour into pan. Bake at 350º for 45-55 minutes, until edges are set and
center is soft-set. Cool 1 to 2 hours on rack. Refrigerate at least 4
hours. Remove pan and serve.
12
Use & Care (food processor)3
8/25/04
9:29 AM
Page 13
Stuffed Jumbo Mushrooms
1 slice of white bread broken into pieces
2 green onions
1 clove of garlic
14 ounces of jumbo mushrooms cleaned
6 ounces of ground sausage
1/2 teaspoon dry mustard
1 teaspoon Worcestershire sauce
1-2 tablespoons butter
Parmesan cheese wedge
1/2 cup shredded cheddar cheese
Fit the knife blade into bowl. Add bread pieces. Process until finely
crumbled. Set aside. With processor running, add green onions and
garlic. Process until finely chopped.
Remove stems from mushrooms. Add stems to work bowl. Process
until finely chopped.
In large saucepan over medium heat, cook sausage until no longer
pink. Drain well. Add green onions, garlic, and mushroom stems.
Cook vegetables until slightly tender.
Add sausage mixture to work bowl. Add breadcrumbs, dry mustard,
cheddar cheese and Worcestershire sauce to work bowl. Process until
mixed approximately 5 seconds. Remove mixture from bowl and set
aside.
Position the parmesan/ice disc into the processor. Using the disc, grate
1/2 cup of Parmesan cheese.
Melt butter in skillet over medium heat. Add mushroom caps. Cook
for 1 – 2 minutes on each side until slightly soft.
Place on ungreased cookie sheets. Fill with sausage mixture. Sprinkle
with grated Parmesan cheese. Bake at 350 degrees for 10 minutes or
until hot and bubbly.
13
Use & Care (food processor)3
8/25/04
9:29 AM
Page 14
Cookies and Cream Ice Cream
4 egg yolks
1 cup of sugar
1 cup of half and half
3 teaspoons of vanilla
10-12 Oreos or other chocolate biscuits
1 cup of whipping cream
Fit the stainless steel whip into the processor work bowl. Blend the
yolks and sugar together until thick and pale.
Add the vanilla and half and half in sauce pan and heat. When the
cream is just below boiling point, and with machine running, pour the
cream in a constant stream into the egg mixture through the feed tube.
Blend for a few seconds.
Transfer the custard into a clean saucepan and heat gently stirring constantly until sauce begins to thicken. This will take about 10 minutes.
Leave to cool.
Using the knife blade chop the Oreos or biscuits in the processor. Stir
into the custard mixture.
Whip the double cream in the food processor using the stainless steel
whip until it forms soft peaks. Fold the cream into the custard.
Pour into a freezer container with a lid and freeze for one hour.
Remove and stir well, then freeze again, for at least 2 hours or until
hard.
Remove the ice cream from the freezer 30 minutes before you want to
serve it to allow it to soften slightly.
14
Use & Care (food processor)3
8/25/04
9:29 AM
Page 15
Flaky Pie Dough
1 2/3 cups-all purpose flour
1/2 teaspoon of salt
5 ounces unsalted butter, cut into cubes and well chilled
6-8 tablespoons of ice water
Makes two 8” or 9” pie crusts
Fit the detachable shaft, work bowl, and knife blade onto the power
base.
Add the flour and salt and pulse two or three times to “sift” the dry
ingredients together.
Add the cold butter cubes and pulse again 8-10 times to cut in the
butter, until the butter bits are about the size of peas.
Add the ice water one tablespoon at a time, pulsing once after each
spoonful. After six tablespoons of water, remove the work bowl lid. Using
a spoon, scoop out some of the dough mixture, squeeze in your hand. If
this does not hold together, add more ice water, pulsing after each addition.
Remove the knife blade, turn the mixture onto the counter, and shape
into a disc. Wrap the dough in plastic wrap and refrigerate at least one
hour before rolling out.
For longer storage the dough may be frozen.
Mimosa Cocktail
1 cups freshly squeezed orange juice
1 bottle chilled sparkling wine or champagne
Serves 6
Cut well chilled oranges in half to prepare for pressing.
Fit the detachable drive shaft and work bowl onto power base, place
the citrus sieve over the bowl and lock into place. Place the citrus cone
over the shaft until it fits properly.
Turn the power unit on, then press the orange halves down onto the
rotating cone to extract juice.
Pour one sixth of the juice into each of six wine glasses. top each glass
with sparkling wine or champagne. The usual portion of orange juice to
sparkling wine is three to one, but may vary according to taste.
15
Use & Care (food processor)3
8/25/04
9:29 AM
Page 16
LOW CARBOHYDRATE RECIPES
Creamy Crab Dip
1/2 cup of mayonnaise ( note recipe on page 11)
1/2 cup of sour cream
1 teaspoon Old Bay seasoning
1 teaspoon on lemon juice
1 can of white crab meat, drained
2 green onions
2 tablespoons of chopped yellow bell pepper
Salt
Freshly ground pepper
In the mini processor bowl, chop green onions and bell pepper, set
aside. Position knife blade in work bowl. Add all ingredients and mix
until smooth. May serve with celery.
Low Carb Fiesta Cornbread
1/2 cup of low carbohydrate baking mix
1/2 cup of wheat gluten
3 eggs
1 cup of milk
4 ounces of jalapeno jack cheese
2 banana peppers
1/3 cup vegetable oil
Preheat oven to 450 degrees. With shredding disc, shred the cheese
and set aside. In mini work bowl, process banana peppers until finely
chopped. Set aside.
Position knife blade into work bowl. Add bake mix, gluten, eggs and
milk. Process together. Add cheese and peppers.
Pour oil into an 8-inch square baking pan and place on middle rack of
oven. Heat for 10 minutes until very hot. Pour batter in, bake 15 minutes. Lower temperature to 350 degrees; cook additional 20 minutes
until top is brown.
Cool on wire rack
16
Use & Care (food processor)3
8/25/04
9:29 AM
Page 17
UL approved
© 2004, Viking Range Corporation
Specifications subject to change without notice.
Viking Range Corporation
111 Front Street
Greenwood, Mississippi (MS) 38930 USA
(662) 455-1200
For product information: 1-888-VIKING1 (845-4641)or visit the Viking web site at
www.vikingrange.com
C
17
F20310