1
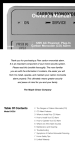
110-729C
10/3/00
2:08 PM
Page 1
Owner’s Manual
COQ3 — 120V AC Direct Wire
COQ6 — 120V AC Direct Wire
with 9V Battery Backup
110-729C
Thank you for purchasing a Firex carbon monoxide alarm.
It is an important component of your home security system.
Please read this booklet thoroughly. The more familiar
you are with the information it contains, the easier you will
find it to install, operate, and maintain your carbon monoxide
alarm properly. This ultimately means greater security
and peace of mind for you and your family.
The Maple Chase Company
Table Of Contents
2 The Dangers of Carbon Monoxide (CO)
Models COQ3 and COQ6
2 CO Alarm Features
3 Where to Install Your CO Alarm
4 How to Install Your CO Alarm
5 How to Operate Your CO Alarm
6 What to Do if the Alarm Sounds
6 Maintenance and Cleaning
6 Replacing the Battery (Model COQ6 only)
7 Troubleshooting
7 Symptoms of Carbon Monoxide Poisoning
8 Home Safety Tips
8 Limited Warranty
110-729C
10/3/00
2:08 PM
Page 2
The Dangers of Carbon Monoxide
Carbon Monoxide (CO) is a toxic gas. It cannot be seen, felt, tasted, or smelled. The
effects of CO poisoning can cause household members to become extremely ill or
even cause death. Due to damage, poor maintenance, or defects, many
appliances like furnaces, ovens, fireplaces, kerosene heaters, and grills may silently
emit CO. Advance warning of CO poisoning is only possible if you install and maintain a CO detection device.
The amount of CO in the air is measured in parts per million (ppm). Carbon
monoxide occurs when fuel burns without sufficient oxygen (incomplete
combustion). This type of malfunction can happen to any fuel-burning appliance at
any time. Many fireplace chimneys, for example, can become filled with leaves during
the fall season. If enough leaves, dirt, and soot are accumulated in the chimney,
proper ventilation will be interrupted. This can cause a backdraft of CO into the
home. The result can be fatal. With proper maintenance and cleaning, however, the
potential for CO build up can be reduced.
Carbon monoxide poisoning is a serious issue. Many families suffer daily, and over
one thousand lives are lost each year because of this deadly household gas. With
proper maintenance and care, this CO alarm can give family members advance
warning to CO emissions. Please read this manual thoroughly to learn how to properly install, operate, clean, and repair your CO alarm, and for important safety tips to
safeguard your family from deadly CO poisoning.
The following symbols identify the most important safety messages in this manual.
! DANGER
When you see this symbol, be aware! that if the message is ignored, the hazard WILL
result in SEVERE bodily injury or death.
!
! WARNING
When you see this symbol, be aware!that if the message is ignored, the hazard CAN
cause SEVERE bodily injury or death.!
! CAUTION
When you see this symbol, be aware! that if the message is ignored, the hazard CAN
or WILL cause MINOR bodily injury.
! WARNING
BE AWARE OF COMMON SOURCES OF CARBON MONOXIDE. Common
sources of carbon monoxide are furnaces,
heating devices, water heaters, gas
!
stoves, kerosene heaters, fireplaces, barbecues used indoors, running motors
or engines in attached garages, and gasoline powered devices, such as generators or pumps used in emergency situations. Be aware of the proper uses for
each device. Have these devices serviced and cleaned regularly. Use common
! instructions carefully whenever using any
sense, and follow safety and hazard
of these devices.
! WARNING
Individuals with medical problems may consider using warning devices
that provide audible and visual signals
for carbon monoxide concentra!
tions under 30ppm.
CO Alarm Features
• 9V battery backup (Model COQ6 only).
• Quick connect wiring harness for fast, easy installation.
• Square shape, easily distinguishes from smoke alarm.
• Large TEST/RESET button—easy to use.
• Three level light and sound alarm system—you always know if:
1. AC power is applied to the unit.
2. Your alarm requires immediate replacement.
3. CO levels are dangerous.
• Electrical Rating: 120V AC, 60Hz, 0.05 amp
2
110-729C
10/3/00
2:08 PM
Page 3
!
CO Alarm Features cont.
! WARNING
This CO alarm is designed to detect carbon monoxide gas from any
source of combustion. It is NOT designed to detect smoke, fire, or any
!
other type of gas. If this CO alarm sounds its alarm horn, DO NOT
! alarm horn requires your immediate
assume that it is a false alarm. The
action.
! WARNING
This product is intended for use in ordinary indoor locations of family living
units. It is not designed to measure compliance with Occupational Safety
!
and Health Administration (OSHA) commercial or industrial standards.
!
Where to Install Your CO Alarm
! WARNING
Carbon monoxide gas can be anywhere and everywhere. CO gas is equal
to or slightly lighter than air, and disperses evenly with the air in a room.
!
Therefore, install this CO alarm where air circulation is best. DO NOT
mount the CO alarm within 1 foot of the ceiling/wall or wall/wall intersection, or other dead air spaces.
Since most CO fatalities occur while families are sleeping, we recommend that you install
at least one CO alarm in the hallway outside each separate sleeping area and one inside
each bedroom or sleeping area.
!
We also recommend that you install a CO alarm on every separate living level of the home
where household members frequently spend
! time, as well as in the basement.
See figures 1, 2, and 3 for typical CO alarm locations within the home.
! CAUTION
This alarm will only indicate the presence of carbon monoxide gas at the sensor.
Carbon monoxide gas may be present in other areas.
LIVED-IN ATTIC
BEDROOM
BATH
BEDROOM
BEDROOM
BATH
BEDROOM
FAMILY / GREAT ROOM
BEDROOM
BEDROOM
KITCHEN
LIVING
ROOM
BASEMENT
KITCHEN
FURNACE
ROOM
FURNACE
ROOM
BASEMENT
single story
FIGURE 1
BATH
BATH
LIVING
ROOM
BASEMENT
UTILITY
ROOM
two story
FIGURE 2
!
FIGURE 3
split level
Key
CO alarm locations
! WARNING
DO NOT install CO alarms:
• Near bathrooms or in shower areas.
Steam and aerosol sprays can
!
disable the alarm.
• In closets, crawlspaces, unused attics, or unheated areas
where surrounding air temperatures may go below 40° F (4.4° C) or above
100° F (37.8° C).
• Within five feet of any fuel-burning appliance (stove, kerosene heater,
furnace, fireplace, etc.).
• Within one foot of any wall, corner, or other dead air spaces.
• In rooms where chemicals or cleaning supplies are frequently used
(paint, hair spray, thinner, etc.). Allow plenty of ventilation in rooms where chemicals
are used.
• Directly above a sink, bathtub or basin.
• Directly above or below air exchange or heating vents.
• Behind drapes, furniture, or appliances that could block air flow to the
CO alarm.
3
110-729C
10/3/00
2:08 PM
Page 4
!
! WARNING
This unit cannot be used in recreational vehicle applications.
! Alarm
How to Install Your CO
!
! WARNING
ELECTRICAL SHOCK HAZARD. Turn off power at the main fuse box or cir!
cuit breaker by removing the fuse
! or switching the circuit breaker to the
OFF position.
! CAUTION
Check local codes for specific mounting requirements in your area.
Once you have decided the best place to install the CO
alarm(s), follow these steps:
1. From back of CO alarm, slide mounting plate and lift from
base. See Figure 1.
2. For Model COQ6 only: Connect new 9-volt battery to battery
connector inside compartment and slide door closed snapping it into place. New 9V battery comes from the factory installed
backwards inside the battery compartment. Replace battery with
Eveready 216, 522, 1222 or equivalent from your local retailer.
FIGURE 1
3. Align mounting plate with junction box mounting holes.
4. Gently pull household wires through center hole of mounting plate.
5. Secure mounting plate to junction box.
6. With a small wire connector, connect white wire from the CO alarm to white household wire.
7. Connect black wire from the CO alarm to
the black household wire.
8. For interconnecting CO alarms only:
• Use #18 AWG minimum solid or
stranded wire. When interconnecting,
maximum wire length between any two
units is 1,500 feet for #18 AWG or
4,000 feet for #14 AWG (20 OHMS
loop resistance.) See Figure 2.
WHITE
BLUE
BLACK
WHITE
BLUE
BLACK
WHITE
TO NEUTRAL
BLACK
TO 120 VAC (HOT)
FIGURE 2
• This CO alarm may be interconnected
with as many as 11 other Firex CO alarms of the same model. DO NOT connect
to any other type or model CO alarm or other device.
• Connect CO alarms to a single AC branch circuit. If local codes do not permit
connection to a single AC branch circuit, be sure the neutral wire is common to all
circuits used.
9. Plug wiring harness clip onto pins on the back
of the unit.
10. Align tabs on back of base with slots on side
of mounting plate. Slide base down to lock
into position. See Figure 3.
11. Turn power on at the main fuse box or circuit
breaker. The CO alarm will flash the red LED
and emit a short beep during its power-up
cycle. The green POWER light will stay on as
long as the CO alarm is receiving AC power.
4
FIGURE 3
110-729C
10/3/00
2:08 PM
Page 5
How to Install Your CO Alarm cont.
11. Firmly PRESS AND RELEASE THE
RESET/TEST button. See Figure 4. The
alarm should sound a short tone. The amber
SERVICE light will turn on, and the CO alarm
will go through its test cycle. The red LED will
flash, and the alarm will beep four times followed by 5 seconds of silence and then
repeat the cycle. After the test cycle, amber
SERVICE light will turn off, and the green
POWER light will remain lighted which means
that the CO alarm is operating properly.
PRESS
IN, HOLD,
AND
RELEASE
TO
RESET
AND/OR
TEST.
FIGURE 4
12. If the alarm is interconnected to other CO alarms, press and hold the
RESET/TEST button until the red light turns on. Other interconnected alarms will
also beep four times followed by 5 seconds of silence. The red ALARM light on
other alarms will not light during this test.
13. Two self-adhesive labels have been provided with instructions indicating what to
do if the alarm sounds. Add the phone numbers of your emergency services
provider and a qualified technician to each label. Place one of the labels in a visible area next to the alarm, and place the other label near a source of fresh air
which will be used as a gathering place if the alarm sounds.
How to Operate Your CO Alarm
This carbon monoxide alarm has been evaluated by UL and meets the applicable UL
standards and requirements.
This CO alarm has a three light and sound
alarm system:
CARBON MONOXIDE ALARM
ON
SERVICE
ALARM:
MOVE TO FRESH AIR
On
Green indicator constantly ON indicates unit is receiving AC
power.
Service
Amber indicator flashing and alarm horn beeping every thirty
seconds indicates “Unit Fault.” Press and release the TEST/RESET
button. If the alarm returns to displaying the fault signal, the CO alarm
is not operating properly. REPLACE THE CO ALARM IMMEDIATELY. SEE
THE WARRANTY INFORMATION AT THE END OF THIS MANUAL.
Alarm
Red indicator flashes and alarm horn sounds four fast beeps
and then is quiet for 5 seconds.
(Power on/operating)
(Problem with Alarm)
(Dangerous CO levels)
Low Battery The unit will emit a chirp once every 30 seconds when the battery is low
(For COQ6 only)
and needs to be replaced.
When the CO concentration builds to a level that is equal to 70 ppm or greater for
the duration identified within the standard, the following will occur:
• The ALARM light and sound signals will activate. See the “What To Do If Your Alarm
Sounds” section of this manual for important action steps to be taken.
• If you wish to press the TEST/RESET button during this time, the alarm will become
quiet for approximately four minutes. The ALARM signals will be reenergized within 4
minutes from the time the reset button is pressed if the concentration of carbon
monoxide surrounding the alarm remains at 70 ppm or greater.
• The alarm will remain silent if the CO concentration has decreased below the alarm
level of the standard. See the “What To Do If Your Alarm Sounds” section of this
manual for important action steps to be taken.
• The alarm will continue for as long as the condition exists.
The alarm will not permanently end its ALARM mode until the concentration of CO
has been reduced to a safe level.
5
110-729C
10/3/00
2:08 PM
Page 6
Test Your CO Alarm Weekly
Momentarily press the TEST/RESET button and note the alarm sound. Also note that
the LED indicators flash the proper test sequence as described in “How to Install Your
CO Alarm.” If the alarm does not beep after depressing the TEST/RESET button or
exhibit the correct LED test sequence, immediately return the CO alarm to Maple
Chase for repair or replacement. See the warranty information at the end of this manual.
Do not attempt to repair the unit yourself as this will potentially cause damage and
void the warranty.
!
What to Do if the Alarm Sounds
!! WARNING
Carbon Monoxide cannot be seen, felt, tasted, or smelled – but it can be
FATAL.
!
! WARNING
IF THE RED ALARM LED INDICATOR IS FLASHING AND THE ALARM IS
SOUNDING APPROXIMATELY EVERY FIVE SECONDS, IT INDICATES THE
PRESENCE OF CO WHICH CAN!BE FATAL. YOU MUST QUICKLY DO THE
FOLLOWING:
1. Operate TEST/RESET button;
2. Call your emergency services [fire department or 911];
3. Immediately move to fresh air — outdoors or by an open door/window. Do a head
count to check that all persons are accounted for. Do not reenter the premises nor
move away from the open door/window until the emergency services responders
have arrived, the premises have been aired out, and your alarm remains in its normal condition.
4. After following steps 1 – 3, if your alarm reactivates within a 24 hour period, repeat
steps 1 – 3 and call a qualified appliance technician (_________________) to
investigate for sources of CO from fuel burning equipment and appliances, and
inspect for proper operation of this equipment. If problems are identified during this
inspection have the equipment serviced immediately. Note any combustion equipment not inspected by the technicians and consult the manufacturer’s instructions,
or contact the manufacturer directly for more information about CO safety and this
!
equipment. Make sure that motor vehicles
are not, and have not been, operating
in an attached garage or adjacent to the residence.
! WARNING
If the CO alarm sounds its alarm horn again, it has sensed CO.
This is not a false alarm.
!
Maintenance and Cleaning
This CO alarm does not require any maintenance, except occasional dusting or
cleaning. If necessary, occasionally vacuum the case of the CO alarm. To clean the
CO alarm, unplug each CO alarm from its wiring harness and use a damp cloth to
clean the OUTSIDE of CO alarm case. DO NOT remove cover or attempt to clean
inside the CO alarm. Dry the cover completely and plug each CO alarm back onto
!
the wire harness and replace on the mounting
bracket. Press in, hold, and release
TEST/RESET button on each CO alarm to test after cleaning.
! WARNING
Do not use abrasive cleansers, or spray the CO alarm with cleaning agents
or waxes, especially cleaners containing
ammonia. These liquids may impair
!
the performance of sensors. Do not submerge the CO alarm in water.
Replacing the Battery (for Model COQ6 only)
1.
2.
3.
4.
5.
Turn off power at main fuse box or circuit breaker.
Slide alarm in direction of arrow on side of unit to remove from bracket.
Disconnect wire harness from back of unit.
Open battery compartment and replace battery.
Reattach wire harness to unit and replace on mounting bracket.
6
110-729C
10/3/00
2:08 PM
Page 7
Troubleshooting
Problem: The alarm is properly connected to AC power, but the green LEDs do not light.
Solution: Return alarm to Maple Chase Company for service (see warranty).
Problem: Amber Fault light flashes every 30 seconds
Solution: Press the Test/Reset button to allow the alarm to re-check itself
internally. If the AMBER LED continues to flash, the alarm must be returned to Maple
Chase Company for service (see warranty).
Problem: The alarm makes a chirping sound (Model COQ6 only).
Solution: The battery needs to be replaced (see “How to Operate Your CO Alarm”).
Symptoms of Carbon Monoxide Poisoning
Carbon monoxide poisoning has many symptoms. However, some symptoms are
very similar to flu symptoms, the effects of intoxication, or drug usage. In many CO
cases, people feel ill and stay home to rest. This only compounds the CO poisoning
because they stay in the home where CO is present.
As CO levels rise, the symptoms become more extreme. At low levels people will suffer headaches and mild nausea. At higher levels unconsciousness, heart failure, and
even death can occur.
The following symptoms are related to CARBON MONOXIDE POISONING and
should be discussed with ALL members of the household:
Mild Exposure: Slight headache, nausea, vomiting, fatigue (often described as flu
symptoms).
Medium Exposure: Severe throbbing headache, drowsiness, confusion,
fast heart rate.
Extreme Exposure: Unconsciousness, convulsions, cardio-respiratory failure, death.
Many cases of reported CARBON MONOXIDE POISONING indicate that while victims
are aware they are not well, they become so disoriented they are unable to save
themselves by either exiting the building or calling for assistance. Also, young children, the
elderly, and household pets may be the first affected by CO poisoning.
The important factor with any CO poisoning, however, is time. At high levels, CO can
cause death in just minutes. At lower levels, it could take from hours to days of constant CO exposure to have the same life-threatening effect.
The chart below illustrates the symptoms of CO poisoning by concentration of CO
and its effect over time.
Slight headache within 2-3 hours.
Frontal headache within 1-2 hours.
Dizziness, nausea, and convulsions within 45 minutes.
Insensible within 2 hours.
Headache,dizziness and nausea within 20 minutes.
Death within 2 hours.
Headache,dizziness and nausea within 5-10 minutes.
Death within 30 minutes.
Headache,dizziness 1-2 minutes.
Death in less than 15 minutes.
Death in less than 3 minutes.
|
0
|
|
|
|
|
100 200 300 400 500
|
|
|
|
|
|
|
600 700 800 900 1000 1100 1200
Concentration of co in air (ppm)
Conditions That Can Cause CO Levels To Change
The following conditions can result in transient CO situations in the home.
1. Excessive spillage or reverse venting of fuel burning appliances caused by outdoor ambient conditions, such as:
a. Wind direction and/or velocity, including high gusts of wind. Heavy air in the
vent pipes (cold/humid air) with extended periods between cycles.
b. Negative pressure differential resulting from the use of exhaust fans.
c. Simultaneous operation of several fuel burning appliances competing for limited
internal air.
d. Vent pipe connections vibrating loose from clothes dryer, furnaces, or water
heaters.
e. Obstruction in or unconventional vent pipe designs which can amplify the
above situations.
2. Extended operation of unvented fuel burning devices (range, oven, fireplace, etc.)
3. Temperature inversions which can trap exhaust gasses near the ground.
4. Car idling in an open or closed attached garage, or near a home.
7
110-729C
10/3/00
2:08 PM
Page 8
Home Safety Tips
Many CO poisonings are caused by equipment failures due to poor maintenance,
product defects, and damaged parts. The following is a list of safety tips to help prevent CO poisoning within your home:
1. Have all fuel-burning appliances inspected and cleaned yearly by a qualified
service technician. The furnace, water heater, and stove are some of the leading
sources of CO in homes.
2. Clean fireplace vents and chimney regularly. A blocked chimney could cause a
backdraft of CO into the home. Do not cap chimney. This will cause a backdraft of
CO into the home.
3. Do not cap or cover a drafthood or exhaust vent to any appliance. This will trap
dangerous CO inside the house.
4. Do not close off or confine your fuel-burning appliances in a closed area. They
need plenty of ventilation to operate properly.
5. Do not use liquid propane (LP) or charcoal grills indoors.
6. Do not operate any gasoline-powered equipment indoors.
7. Allow for plenty of ventilation when using a kerosene heater. Do not use in small
areas.
Preventive maintenance, common sense, and a CO detection device are some of the
best solutions to preventing CO poisoning. However, a dangerous situation can happen to anyone at any time.
The following list illustrates some danger signs of CO presence.
1. Soot and dirt build-up seeping out of chimney or other exhaust vents.
2. A mostly yellow, rather than clear blue, burner flame or pilot flame in gas
appliances.
3. A draft of air coming from appliances, chimneys, or vents.
IF YOU HAVE FLU-LIKE SYMPTOMS OR SUSPECT CO POISONING,
SEEK MEDICAL ASSISTANCE IMMEDIATELY.
WARRANTY INFORMATION
5-YEAR CARBON MONOXIDE ALARM WARRANTY
Maple Chase Company warrants to the original consumer purchaser each new
carbon monoxide alarm to be free from defects in material and workmanship under
normal use and service for a period of five (5) years from date of purchase. Maple
Chase Company agrees to repair or replace, at its option, any defective carbon
monoxide alarm, provided that it is returned with postage prepaid and with proof of
purchase date to Maple Chase. This warranty does not cover damage resulting
from accident, misuse, or abuse or lack of reasonable care of the product. This
warranty is in lieu of all other express warranties, obligations, or liabilities. THE
IMPLIED WARRANTIES OF MERCHANTABILITY AND FITNESS FOR A PARTICULAR
PURPOSE ARE LIMITED TO A PERIOD OF FIVE (5) YEARS FOR THE CARBON
MONOXIDE ALARM FROM PURCHASE DATE. Some states do not allow limitations
on how long an implied warranty lasts, so the above limitations may not apply to
you. IN NO CASE SHALL MAPLE CHASE BE LIABLE FOR ANY INCIDENTAL OR
CONSEQUENTIAL DAMAGES FOR BREACH OF THIS OR ANY OTHER WARRANTY,
EXPRESS OR IMPLIED, WHATSOEVER, EVEN IF THE LOSS OR DAMAGE IS
CAUSED BY ITS NEGLIGENCE OR FAULT. Some states do not allow the exclusion
or limitation of incidental or consequential damages, so the above limitation or
exclusion may not apply to you. This warranty gives you specific legal rights, and
you may also have other legal rights which vary from state to state.
This product meets all the requirements of U.L. Standard 2034.
WHERE TO SEND YOUR CARBON MONOXIDE ALARM
FOR SERVICE
To return carbon monoxide alarms under warranty, send the CO alarm plus postage
prepaid, a note describing the nature of the difficulty, and proof of date of purchase to:
Maple Chase Company
Product Service Department
2820 Thatcher Road
Downers Grove, IL 60515, United States of America
Technical Service: (800) 779-1719
M-F 7:30 - 5:30 CST
8