1
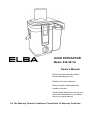
JUICE EXTRACTOR Model: EJE-9811A Owner’s Manual Please read this manual carefully before operating your set. Retain it for future reference. Record model number and serial number of the set. See the label attached on the set and quote this information to your dealer when you require service. For The Warranty Terms & Conditions, Please Refer To Warranty Certificate. IMPORTANT SAFEGUARDS When using this appliance, basic precautions should always be followed, including the following: 1. 2. 3. 4. 5. 6. 7. 8. 9. 10. 11. 12. 13. 14. 15. 16. 17. 18. 19. 20. 21. 22. 23. Read all instructions before use. Do not use the appliance if the stainless steel grater and filter assembly is damaged. Do not contact the plug or power cord with wet hands. Do not let the plug remains plugged when not in use. Do not immerse the power cord, plug or motor base into water or any other liquids. Do not use this appliance when the plug or power cord is damaged or the plug is not properly inserted. Never bend or bind the power cord or apply by excessive force, otherwise it may cause damage. If the power cord is damaged, return the appliance to the nearest authorized dealer or after-sales service center for examination, repair, electrical or mechanical adjustment. Keep the power cord out of children. Do not let the power cord hang over the edge or the table or worktop on which the appliance stands. Always use the appliance on a flat, stable and heat resistant surface. Do not carry the appliance during operation. Do not operate the appliance continuously for more than 3 minutes. Let the appliance to cool down for 10 minutes before continuing the next juicing. Never put any fruits and vegetables inside the pulp chute until the appliance is power on. Only use the food pusher as supplied. Never put your fingers or any other sharp objects into the pulp chute. Beware when handling the stainless steel grater and filter. Do not touch the small sharp blades inside the filter! Always make sure the appliance is properly and completely assembled before operating. The unit will not turn on unless it is properly assembled. Before disassembling the appliance, switch off the power and wait for the filter to stop operating. Before cleaning the appliance, make sure the control switch have turn to “0” position. Switch off the power and unplug the plug from wall outlet then slowly remove the parts. This appliance is not intended for use by persons (including children) with reduced physical, sensory or mental capabilities, or lack of experience and knowledge, unless they have been given supervision or instruction concerning use of the appliance by a person responsible for their safety. Children should be supervised to ensure that they do not play with the appliance. Do not use the appliance outdoors. Use this appliance for its intended use only. This product has been designed for domestic and household use only. Any commercial use, inappropriate use or failure to comply with the instructions, the manufacturer accepts no responsibility and the warranty will not apply. Save this instructions for future reference. 1 DESCRIPTION OF PARTS No 1 Parts Food pusher 2 Pulp chute 3 4 5 6 7 8 9 Juicer cover Stainless steel grater and filter Spout cover Juice outlet spout Motor base Pulp container Safety locking arms 10 Control switch 11 12 Jug container Cleaning brush Descriptions For safety pushing the whole fruits and vegetables into the pulp chute. Dishwasher safe. Fits whole apple, carrots, tomatoes and peeled oranges. Makes juicing of fruits and vegetables fast and easy. Dishwasher safe, durable and clean cover. Dishwasher safe. Dishwasher safe. To juice out fruits and vegetables. Do not immerse this part in water or any other liquids. To store the pulp while juicing. The appliance will not operate without the juicer cover locked in place by the safety locking arms. 0- Stop/ no power 1- Low speed 2- High speed To store the juice while juicing. For easy cleaning after using the juicer. 2 ASSEMBLE THE APPLIANCE Place the motor base on a flat, stable and heat resistant surface. Ensure that the control switch is turned to speed “0” position. Fit the spout cover on the motor base with the juice outlet spout at the left hand side (refer to figure 1). (Figure 1) Hold the stainless steel grater and filter assembly as per figure 2. Install the stainless steel grater and filter assembly into the motor base. Twist the filter assembly and gently push down until it is seated on the motor base. NOTE: The top edge of the grater should not be higher than the edge of the spout cover when properly installed. WARNING: Beware when handling the stainless steel grater and filter. Do not touch the small sharp blades inside the filter! (Figure 2) (Figure 3) 3 Place the juicer cover on top of the spout cover so that the facing of the pulp chute is on the opposite side of the juice outlet spout. Pivot the safety locking arms upwards until the top of the arms lock hook into the rectangular openings in the juicer cover. Press the bottom of the safety locking arms inwards to lock them in place. If the arms do not fit into place easily, do not force to lock. Check again and make sure the juicer cover is fitted correctly. Tilt the pulp container slightly and place it underneath the pulp outlet side of the juicer cover. (Figure 4) (Figure 5) (Figure 6) 4 Swing the pulp container downwards. The pulp container has a round protrusion on the bottom which will fit into the round opening in the pulp container support tray on the motor base when it is correctly fitted. Slide the food pusher into the pulp chute. The food pusher has a groove in it which must be lined up with the protrusion inside the pulp chute. Place a glass or jug container under the juice outlet spout. (Figure 7) (Figure 8) NOTE: Never put any fruits and vegetables inside the pulp chute until the appliance is power on. (Figure 9) 5 OPERATING THE APPLIANCE (Figure 1) (Figure 2) (Figure 3) (Figure 4) 1. Wash the fruits and vegetables that need to be juiced (figure 1). 2. Make sure that the appliance is correctly assembled and that the stainless steel grater and filter assembly is thoroughly cleaned before each use (refer to cleaning and maintenance). Place the jug container (or a glass) under the juice outlet spout before starting to juice (figure 2). 3. After assembling the appliance, connect the plug into the wall outlet. 4. Power on the appliance. WARNING: Before power on the appliance, make sure the control switch is turned to speed “0” position (no power). 5. Turn the switch either to speed ‘1’ or ‘2’ depending on the type of fruits or vegetables to be juiced (figure 3). WARNING: Never put any fruits or vegetables in the pulp chute until the appliance is power on. 6. Insert the fruits or vegetables into the pulp chute. Use the food pusher, gently guide the food down to the pulp chute. To extract the maximum amount of juice, always push the food pusher down slowly (figure 4). IMPORTANT: DO NOT PLACE HANDS OR FOREIGN OBJECTS INTO THE PULP CHUTE. ALWAYS USE THE FOOD PUSHER. 7. If the pulp container is full it can be emptied during juicing. Turn the switch to speed ‘0’ and tilt the pulp container from the juicer cover. 8. Insert the jug container cover to separate froth being poured from the fresh juice extracted. If you prefer to have juice with froth, remove the juice container cover for direct fresh juice pouring. 6 PREPARATION OF FRUITS AND VEGETABLES 1. Wash the fruits and vegetables that need to be juiced. 2. Peel fruits that have inedible skins such as citrus fruits, pineapples, melons, papayas, etc. 3. Pit all fruits with seeds such as peaches, nectarines, cherries, etc. HELPFUL HINTS 1. A small amount of lemon juice can be added into the apple juice to prevent the juice from turning into brown color. 2. Do not use bananas or avocados as they do not contain juice and will clog the juicer. 3. Allow the juicer to run for one minute before turning ‘0’ speed to allow any excess juice to be extracted from the pulp. 4. Plastic bag can be put in the pulp container for easy clean-up. 5. Do not allow the pulp container to overfill as this may cause damage or prevent the correct operation. 6. The pulp container can be cleared during juicing by power off the appliance. Carefully remove the pulp inside the pulp container, empty it then replace it before continuing the next juicing. Food type Apples Beetroot Carrots Celery Fennel Oranges Pears Pineapple Apricots (de-stoned) Blueberries Broccoli Cabbage Cauliflower Speed setting 2 2 2 1 1 1 1 1 1 1 2 2 2 Food type Cucumber Grapes (seedless) Kiwi Mangoes Melons Nectarines (de-stoned) Peaches (de-stoned) Pears (hard) Plums (de-stoned) Raspberries Tomatoes Watermelon Strawberries 7 Speed setting 1 1 1 2 1 1 1 2 1 1 1 1 1 JUICING TIPS 1. Although the juice drinks contained in this manual were developed with flavor, texture and aroma at the forefront, the health benefits certainly add to the pleasurable taste experience. 2. 95% of the nutrient content of fruits and vegetables are found in the juice. Liquids extracted from fresh fruits and vegetables foam an important part of a well-balanced healthy diet. Fresh fruits and vegetables juices are an easy way to introduce a source of vitamins and minerals to your diet. Juices are rapidly absorbed into the stream therefore being the quickest way in which the body can digest nutrients. 3. When you make your own juices, you have complete control over what you include in them. You select the ingredients and decide if you need to use sugar, salt or other flavoring agents. 4. Freshly extracted should be consumed just after they have been made to avoid a loss of vitamin content. (THE RIGHT TECHNIQUE) 1. When juicing a variety of ingredients with varying textures, start with the softer textured ingredients on a low speed then change to high speed for the harder textures ingredients. 2. If you are juicing herbs, spouts or leafy green vegetables either wrap them together to form a bundle or juice them in the middle of a combination of ingredients on low speed to obtain the best extraction. 3. If juicing herbs or leafy green vegetables on its own, the juice yield will be low due to the nature of centrifugal juicing. It is best to juice them with a combination of other fruits and vegetables. 4. All fruits and vegetables produce different amount of liquids. This varies within the same group for example one batch of tomatoes can produce more juice than another batch. Since juice recipes are not extracted, the precise quantities of any juice are not crucial to the success of the recipe. 5. To extract the maximum amount of juice, always push the food pusher down slowly. (GETTING THE RIGHT BLEND) 1. It is easy to create great tasting juice. If you have been making your own fruits and vegetables juices, then you know how simple it is to invent new combinations. Taste, color, texture and ingredients preference is a personal thing. Just think of your favorite flavors and foods would work well together or would they crash? Some strong flavors could overpower more subtle flavors. A good rule of thumb is to combine starchy, pulpy ingredients with those high in moisture. (USING THE PULP) 1. The remaining pulp left after juicing fruits and vegetables are mostly fiber and cellulose which, like the juice that contains vital nutrients necessary for the daily diet. Pulp can be used in many ways, however, like the juice, pulp should be used the same day to avoid the loss of vitamins. 2. Pulp can be used to bulk out casseroles or soups. Fruit pulp can be simply placed in a bowl, topped with meringue and baked a simple desserts. 3. Pulp is also greatly used in garden for compost. 4. When using the pulp, there are may pieces of fruits and vegetables remaining. These should be removed before using the pulp in any recipes. 8 RECIPES Health Boosters Raspberry, Pear and Strawberry The large number of seeds in raspberries makes them a rich source of dietary fiber. They are also rich in Vitamin C. 1 cup frozen raspberries (allow to thaw until just soft) 1 punnet strawberries, hulled 1 pear Process all the ingredients through the juicer and serve immediately. Grapefruit, Ginger and Fennel Booster This booster promotes digestion while providing a healthy dose of Vitamin C. 340g peeled grapefruit ½ apple 1 small fennel bulb 2cm piece of ginger, peeled Process all the ingredients through the juicer and serve immediately. Taste Sensation Watermelon, Apricot and Strawberry 2 cups roughly chopped watermelon, seeded 6 apricots, stoned 1 punnet strawberries, hulled Process all the ingredients through the juicer and serve immediately. Passion Juice 3 ruby oranges ½ lime 1 passion fruit Process the oranges and the lime through the juicer. Scoop out the passion fruit flesh with a spoon and stir into the prepared juice. Serve immediately. Apple, Carrot and Celery Juice –serves 2 4 small Granny Smith apples 3 medium sized carrots, trimmed 4 sticks celery Process apples, carrots and celery. Mix well and serve immediately. 9 Tomato, Carrot, Celery and Lime Juice –serves 2 2 medium tomatoes 1 large carrot, trimmed 2 celery sticks 1 lime, peeled Process tomatoes, carrot, celery and lime. Serve immediately. Carrot, Beetroot and Orange Juice–serves 2 2 medium carrots, trimmed 3 medium beetroot, trimmed 4 oranges, peeled Process carrots, beetroots and oranges. Serve immediately. Apple, Peach and Grapefruits Juice–serves 2 1 small apple 2 large peaches, halved and stone removed 2 grapefruits, peeled Process apple, peaches and grapefruit. Serve immediately. Pineapple, Peach and Pear Juice–serves 3 ½ small pineapple 2 peaches, halved and stone removed 2 small ripe pears Process pineapple, peaches and pears. Serve immediately. Apple, Peach and Strawberry Juice–serves 3 1 small Granny Smith apple 3 small ripe pears 150g strawberries, trimmed Process apple, pears and strawberries. Serve immediately. Melons, Mint and Mango Juice–serves 3 ½ small cantaloupe melon, peeled, seeded and halved 3 springs of mint leaves 1 mango, halved, stoned and peeled Process melon, mint and mango. Serve immediately. 10 Tomato, Carrot and Red Pepper Juice –serves 3 3 medium tomatoes 3 carrots, trimmed 2 small red peppers Trim base of peppers and remove seeds. Process tomatoes, carrots and peppers. Serve immediately. Blackberry, Pear and Grapefruit Juice–serves 3 250g blackberries 3 ripe pears 2 grapefruits, pleaded Process blackberries, pears and grapefruits. Serve immediately. Beetroot, Apple and Celery Juice–serves 2 4 medium sized beetroot, trimmed 2 medium Granny Smith apples 4 sticks celery Process beetroot, apples and celery. Serve immediately. Blueberry, Blackberry, Strawberry and Lime Juice–serves 3 500g blackberries 500g blueberries 500g strawberries 1 lime, peeled Process all the berries and lime. Serve immediately. Sparkling Pear and Apricot Drink–serves 4 3 large pears 4 large apricots, halved and stoned 250ml mineral water Process apricots and pears. Divide juice between glasses. Top with mineral water then stir well to blend. Tropical Blend–serves 4 2 mangoes, halved, stoned and peeled 3 kiwi fruits , peeled ½ pineapple, peeled and halved 10g fresh mint leaves Process mangoes, kiwi, pineapple and mint. Stir well to blend. 11 Cucumber, Pineapple and Coriander–serves 4 ½ small pineapple, peeled and halved 2 cucumbers 10g fresh coriander Process pineapple, cucumber and coriander. Stir well to blend. Pear, Radish and Celery–serves 4 3 medium pears 4 radishes, trimmed 3 sticks celery Process pears, radishes and celery. Stir well to blend. Grape, Kiwi and Berry Booster–serves 6 500g green seed-less grapes 2 kiwi fruits, peeled 250g strawberries, hulled 500ml skimmed milk Process grapes, kiwis and strawberries. Mix in milk and serve immediately. Kiwi, Cucumber and Pomegranate–serves 2 250g kiwi fruits, peeled 125g cucumber 1 tablespoon pomegranate seeds Slices of lime, for decoration Process the kiwis and cucumber. Stir in the pomegranate seeds and serve immediately. Grapefruit Cooler–serves 6 2 grapefruits, peeled 750g cucumber, plus slices to decorate 1 lemon, plus slice to decorate Sparkling mineral water Mint leaves Ice cubes Process the grapefruits, cucumber and lemon. Pour into a jug container ice and top up with sparkling mineral water. Decorate with mint leaves, cucumber and lemon slices. 12 Go Green!–serves 2 2 celery sticks 1 crisp apple 100g green grapes, seedless Ice cubes Process celery, apple and grapes. Serve with ice. Very Berry–serves 2 125g cranberries (or 70ml unsweetened cranberry juice) 125g strawberries, hulled 100g red grapes, seedless Process the cranberries, strawberries and grapes. Stir and serve immediately. Tropical Delight–serves 4 1 small pineapple, peeled and halved 4 medium apples 2 medium oranges Process the pineapples, apples and oranges. Stir and serve immediately. Fresh and Fruity–serves 2 200g watermelon 200g strawberries Process the watermelon and strawberries. Stir and serve immediately. DISASSEMBLE THE APPLIANCE IMPORTANT: Before disassembling the appliance, make sure that the control switch is turned to speed ‘0’ position, the plug has been removed from the wall outlet and the motor has completely stopped operating (The stainless steel filter has very sharp teeth and so should be handled with care). 1. 2. 3. 4. 5. 6. Remove the food pusher from the pulp chute. Remove the juice container and pulp container. Hold the juicer cover and lift up the safety locking arms from the grooves on the side of the juicer cover. Lift up to remove the juicer cover. Remove the stainless steel grater and filter assembly by placing one hand under the spout and another hand holding under the spout cover edge (opposite the spout) and lift it upwards. WARNING: Beware when handling the stainless steel grater and filter. Do not touch the small sharp blades inside the filter! Remove the spout cover. 13 CLEANING AND MAINTENANCE 1. 2. 3. 4. 5. 6. 7. 8. 9. Turn the control switch to the speed ‘0’ position and wait for the motor to stop operating. Unplug the plug from the wall outlet. Disassemble the juicer (refer to Disassemble the Appliance on page 13) (figure 1). Clean the following parts with soapy water. A mild detergent is recommended to clean the parts. Rinse the parts well and dry thoroughly. food pusher juicer cover spout cover pulp container jug container Rinse the stainless steel grater and filter assembly/cutting blades with clean water. Use the cleaning brush gently brush from the inside of the basket to the outer rim to clean away pulp from the filter and cutting blades. After cleaning the filter, hold it up towards a light to ensure the fine mesh holes are not blocked. If the holes of the filter are blocked with pulp, soak the filter assembly into hot water with lemon juice for 10 minutes to loosen the blocked holes and clean with the cleaning brush again. Allow to dry on a cloth or paper towel before reassembling the juicer (figure 2 and 3). Wipe the motor base and safety locking arms with a soft dry cloth. To assist with cleaning, soak the stainless steel filter in hot soapy water for approximately 10 minutes immediately after juicing is completed. Do not soak the stainless steel filter in bleach. Always treat the filter with care as it can be easily damaged. (Figure 1) (Figure 2) 14 (Figure 3) 15